StarWind Virtual SAN Virtual Tape Library on Amazon Web Services with Microsoft System Center Data Protection Manager 2016
- June 20, 2017
- 15 min read
INTRODUCTION
To date, many companies are still using a Tape Library to store backups in their IT infrastructure, since this is a fairly cheap and simple way to store data. Nevertheless, it also has certain drawbacks, such as increased data access time, potential media issues, management complexity, etc.
Over recent years, the price trends for HDDs have decreased significantly. Thus, it’s no wonder that HDDs keep garnering more interest as a means for storing backups.
StarWind Virtual Tape Library (VTL) is a software solution that allows you to emulate physical Tape Libraries while storing data on the hard disk drives. The solution targets companies that want to completely quit using the physical Tape Library, as well as simplify and accelerate the process of data backup and recovery.
This guide is intended for IT professionals and experienced StarWind users who want to integrate StarWind Virtual Tape Library in their infrastructure. The guide provides a step-bystep guidance on how to configure the StarWind Virtual Tape Library, deploy it in Amazon Web Services, integrate it with the Microsoft System Center Data Protection Manager 2016 and use it further as the storage solution for backups and recovery in the Amazon cloud storage.
A full set of up-to-date technical documentation can always be found here, or by pressing the Help button in the StarWind Management Console.
For any technical inquiries, please visit our online community, Frequently Asked Questions page, or use the support form to contact our technical support department.
What is Virtual Tape Library
Virtual Tape Library is a data storage virtualization technology, usually used as a backup storage device. The solution allows to present various storage devices (usually hard disks) to the system as tape drives or tape libraries and thereby make them compatible with the existing backup systems.
What is Microsoft System Center Data Protection Manager
2016
Microsoft System Center Data Protection Manager 2016 (SCDPM) is a Microsoft software product designed to manage the enterprise backup and recovery system. You can find more information on the SCDPM capabilities following the link.
Prerequisites
Before you start the deployment process, make sure your infrastructure meets the following requirements:
• An Amazon Web Service (AWS) subscription;
• Ability to set up a VPN connection between a VM with StarWind VTL deployed in AWS and a SCDPM VM deployed in your infrastructure.
Use the following procedures to set up the VPN connection in the AWS.
Pre-Configuring the Servers
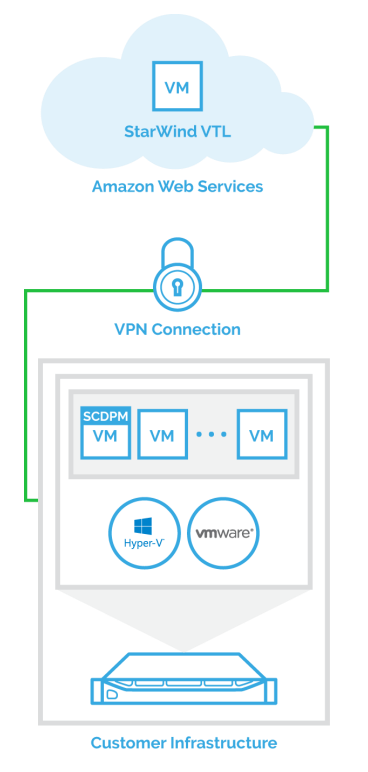
The diagram below illustrates how StarWind VTL integrates with Microsoft System Center Data Protection Manager 2016.
Installing System Center Data Protection Manager 2016
You can install SCDPM in different ways. The below articles provide references to different deployment scenarios you can come across when dealing with Microsoft System Center Data Protection Manager 2016:
• How to install SCDPM 2016 on Windows Server 2016 and SQL Server 2016
• How to Automate the installation of SCDPM 2016 on Windows Server 2016
• How to Deploy SCDPM 2016 using SCVMM 2016 on Windows Server 2016
Please choose the one that suits your environment and install Microsoft System Center Data Protection Manager 2016.
Deploying StarWind VTL on AWS
1. To deploy StarWind VTL on AWS, follow the link and look through the information provided. Click the “Continue” button once you have finished.
Please note: StarWind provides a 5 day- trial for StarWind VTL.

2. If needed, enter your credentials to log into AWS.
3. Next, select the necessary options, such as: Region, EC2 Instance Type, VPC Settings, Security Group and Key Pair.
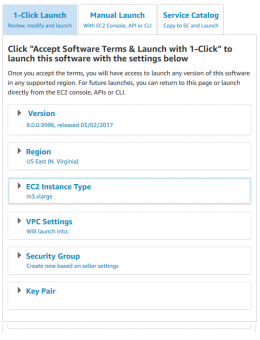
4. Press “Accept Software Terms & Launch with 1-Click” and go to EC2 Management Console.
5. Open Instances tab and wait until the VM is deployed.
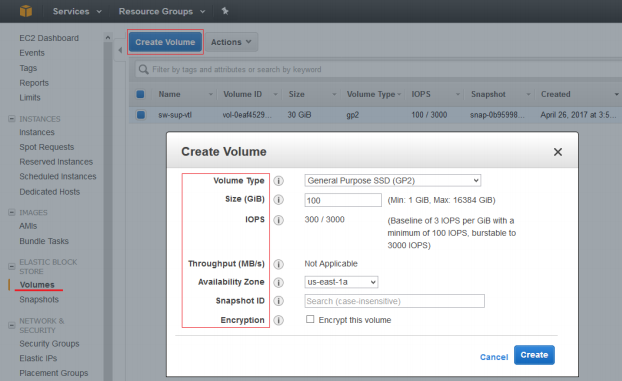
6. Next, let’s create a volume for this VM where the backups will be stored. To do this, go to the Volumes tab and click the Create Volumes button. Fill in all the required fields and click “Create“. To see the pricing for Amazon EBS volumes, please, follow the link.
7. To add the newly created volume to the StarWind VTL VM, right-click on it and select “Attach Volume“.
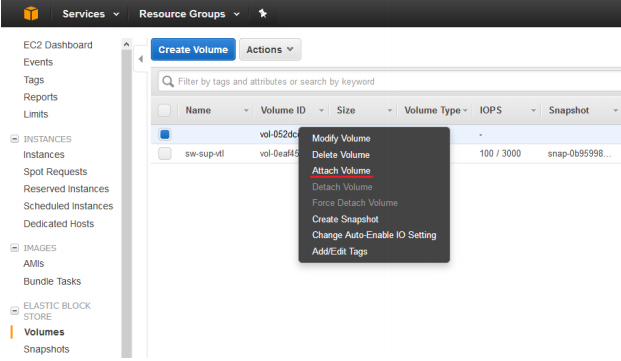
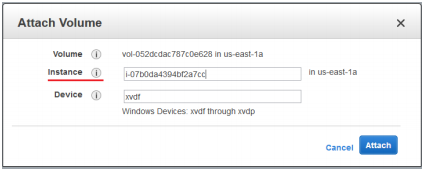
8. Select the instance needed and click “Attach”.
9. Now, let’s make sure the newly created Volume has been attached to the VM. To do this, open the VM Disk Management and check that the system sees the disk.
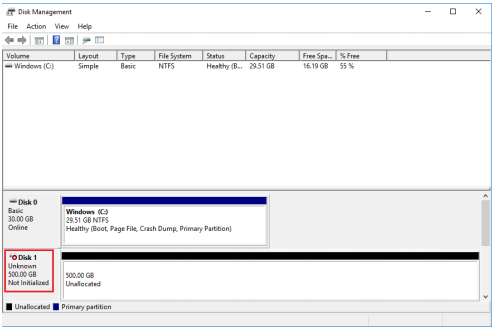
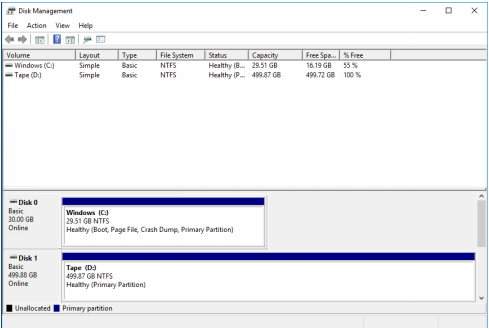
10. Bring the disk online, initialize it and create a new simple volume.
Configuring Virtual Tape
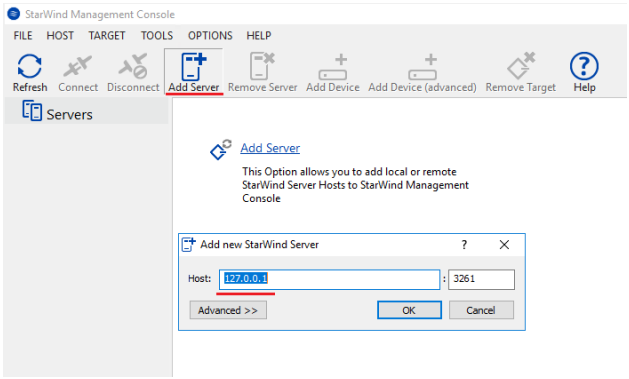
11. Now we can proceed with setting up the StarWind. To do this, launch the StarWind Management Console, click on the “Add server” icon, enter the ip address “127.0.0.1” and press “OK”.
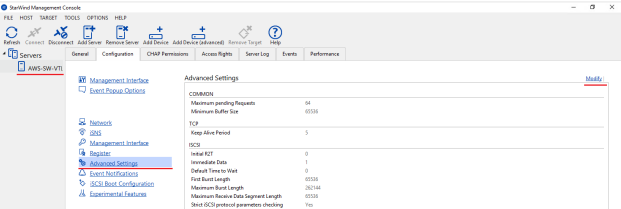
12. Left-click the server you want your backups to be stored on, then go to the
“Configuration -> Advanced Settings” tab and click “Modify”.
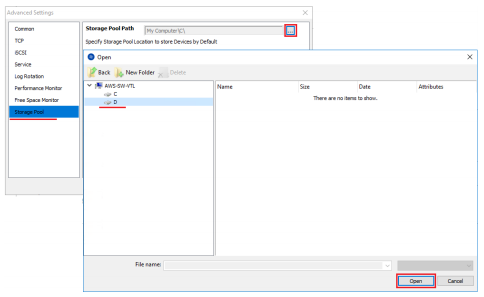
13. Go to the “Storage Pool” and select the drive you want to store your tapes on:
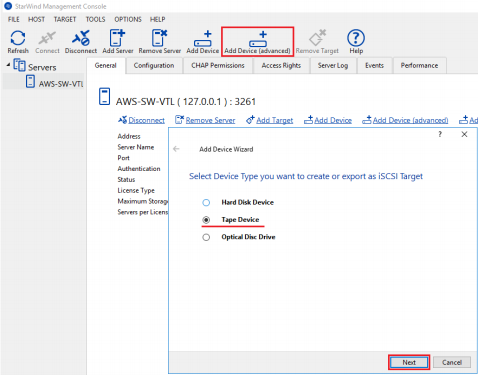
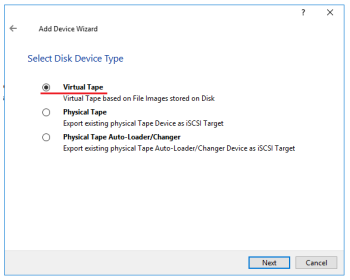
14. Let’s start creating the VTL device. Click on the “Add Device (advanced)” icon, choose Tape Device type and click “Next”.
15. Choose a device type – Virtual Tape and click “Next”.
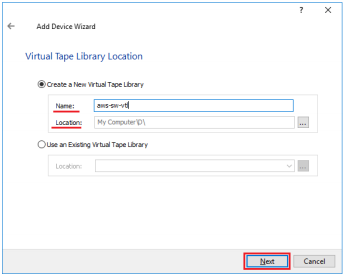
16. Enter the VTL Name, specify the Location and click “Next”.
17. Select the Device Model to emulate a tape drive and click “Next“. SCDPM supports HP MSL2024 and HP MSL8086 tape libraries. In this example, we will use HP MSL8086.
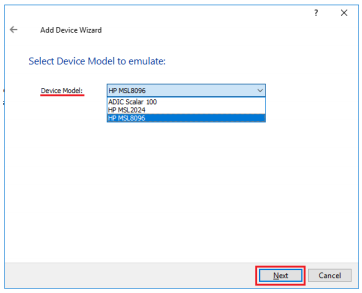
NOTE: ADIC is not supported by DPM.
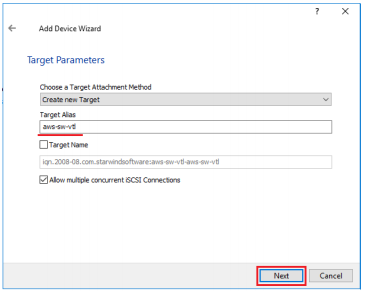
18. Enter the Target Alias, which will be used later to connect VTL to SCDPM and click “Next“.
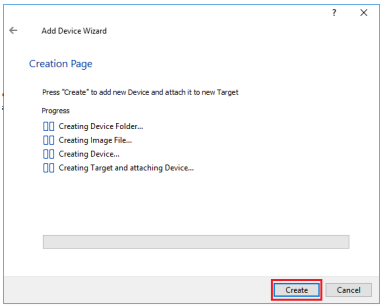
19. Press the “Create” button to complete the process.
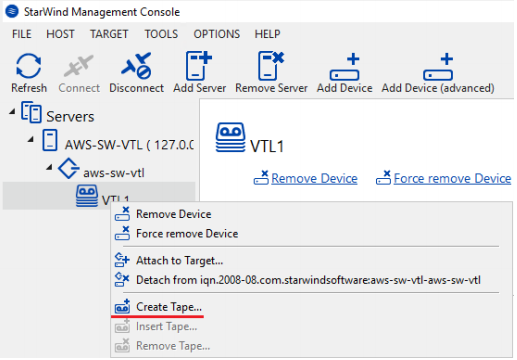
20. Right-click the created VTL and choose “Create Tape” to add the Tape to the previously created VTL.
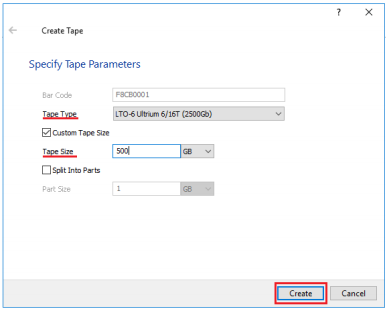
21. Select the Tape Type and, if necessary, specify the desired Tape Size (you cannot set the value higher than the maximum capacity your tape type supports). The Tape Types recommended are LTO-5 and LTO-6. As a best practice, we would suggest creating more tapes with smaller numbers instead of larger sizes. Once that is done, click the “Create” button.
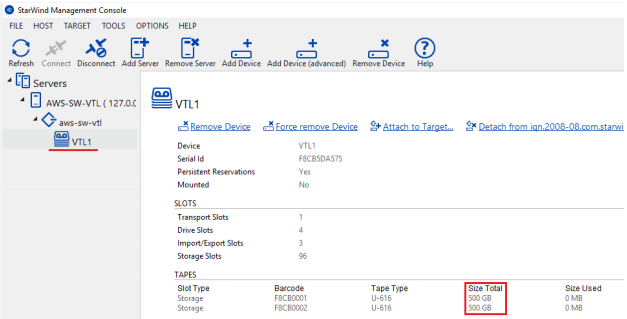
22. If necessary, repeat the previous step to create as many tapes as you need. In our case, we have created one more Tape.
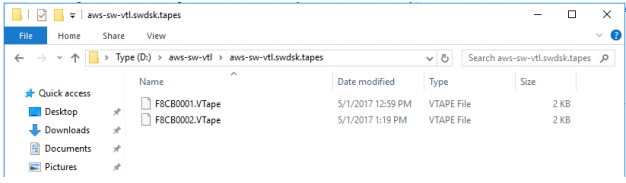
23. Once the tape is created, you can see the general information about it either in the Windows Explorer or in the StarWind Management Console.
Integrating VTL with SCDPM
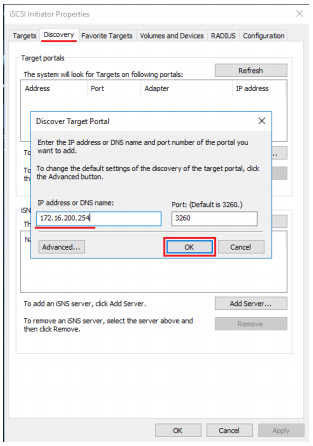
24. To connect the created VTL to SCDPM, go to the VM, which has the SCDPM installed, and launch the iSCSI Initiator. Next, press on the “Discovery” tab and click “Discover Portal …”. Enter the ip address of the StarWind VTL VM and click “OK”.
NOTE: Make sure that port 3260 is enabled in the Firewall settings on both the StarWind VM and on the SCDPM VM.
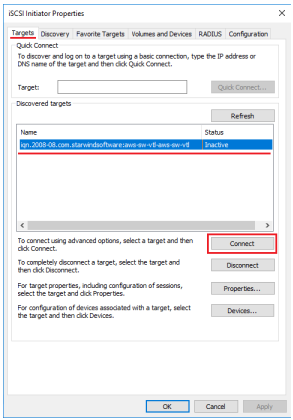
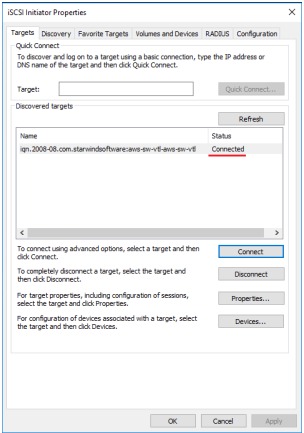
25. Next, navigate to the “Targets” tab, select the Target we’ve created and click the “Connect” button.
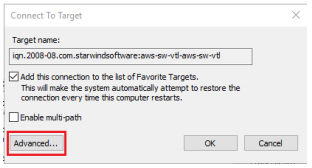
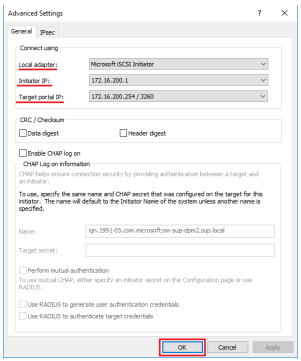
26. Click “Advanced…” button.
27. Open the “General” tab, specify the required settings, and click “OK”.
28. Now the Target status will change to “Connected”.
29. After you have completed the previous step, the Tape Library components must become visible in Device Manager.
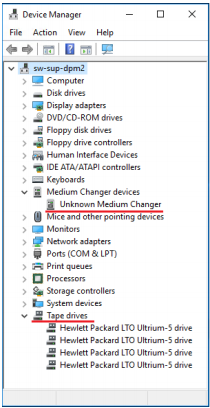
30. If necessary, install the driver for the VTL you have selected, in our case it’s HP MSL8096. To download the drivers, follow this link.
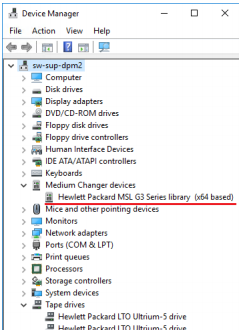
31. Once the drivers are installed, the VTL components should look like on the screenshot:
Adding VTL to SCDPM
32. Launch the Microsoft System Center 2016 Data Protection Manager. In case SCDPM has not automatically discovered VTL, go to the “Management -> Libraries” and click on the “Rescan” icon.
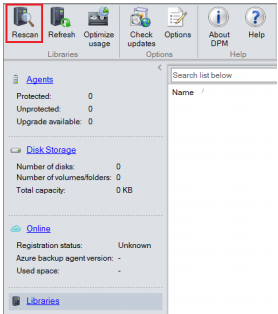
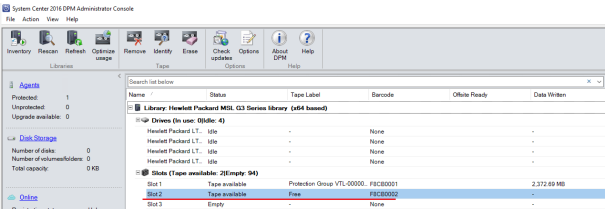
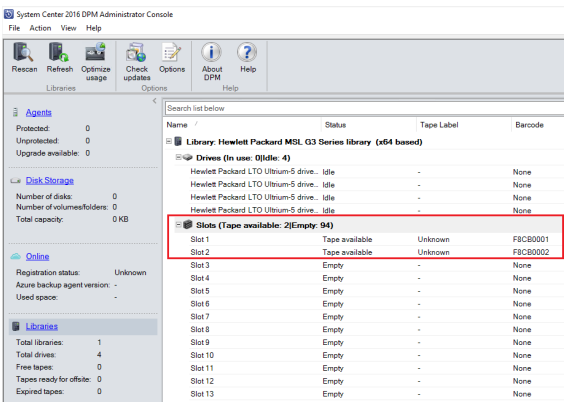
33. Now our VTL must appear in the SCDPM Administrator Console.
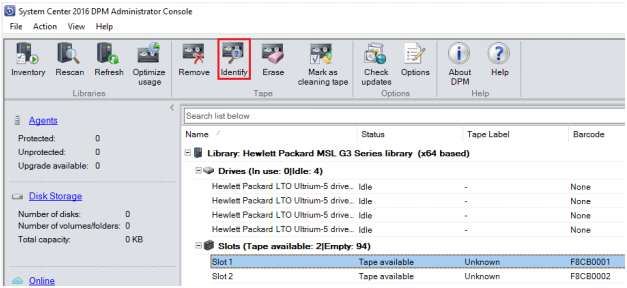
34. To use the available Tapes, identify them at first. Select the required Tapes and click the “Identify” icon.
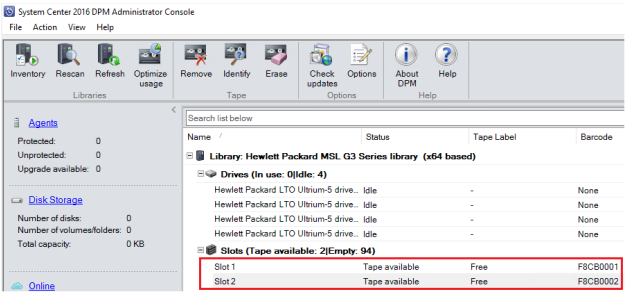
35. Once the identification process is completed, the “Tape Label” will be changed to “Free”.
Creating Protection Group
36. Now we have everything set up to create a Protection Group. To do this, go to the “Protection” section and click the “New” button, then click “Next”.
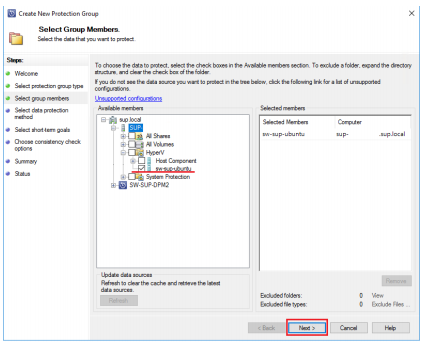
37. Select the clients or servers you want to protect and click “Next”.
NOTE: To access the servers that you want to protect, you must have the SCDPM Agent installed on them.
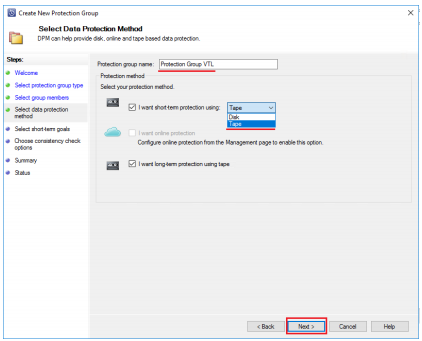
38. Enter the Protection group name and select “Tape” type for short-term protection.
Click “Next”.
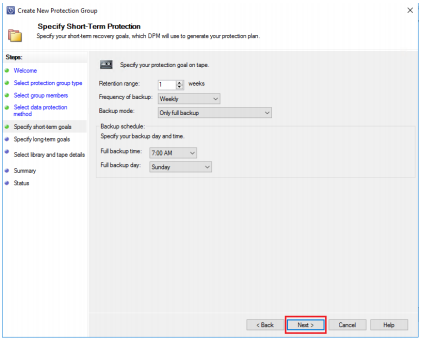
39. Specify the parameters you need for Short-Term Protection, such as Retention range, Frequency of backup and Backup mode. Also, make sure you have configured the backup schedule (s) and click “Next”.
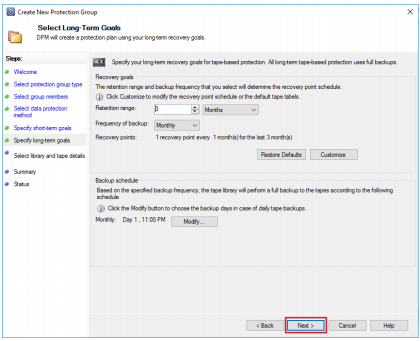
40. Specify the parameters necessary for Long-Term Protection and click “Next”.
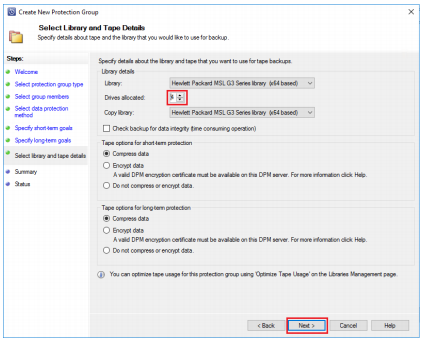
41. Specify the number of allocated drives, in our case we have 4 of them since HP MSL8096 supports 4 drives. Select the necessary tape options for short-term and long-term protection and click “Next”.
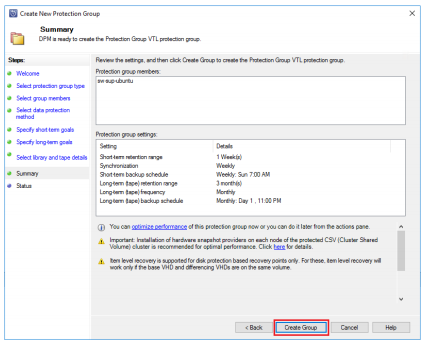
42. Next, click “Create Group” to complete the process.
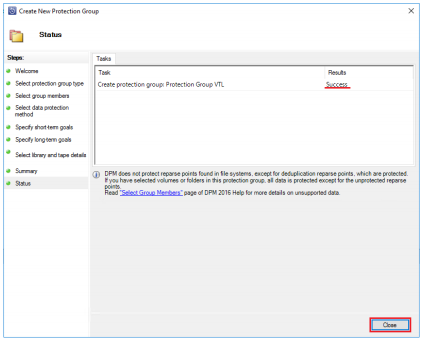
43. Upon completion, you will see that the Protection Group is successfully created. Click “Close”.
44. Go to the “Protection” section to see information about the created Protection Group.
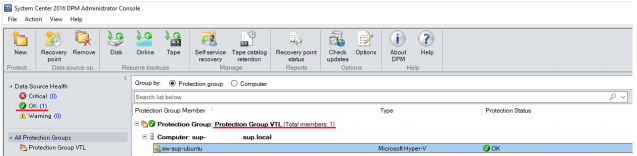
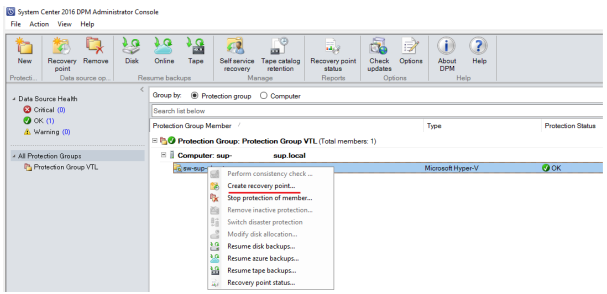
45. In case you want to run a backup without waiting for the automatic execution of this operation, right-click on the required Protection Group element and select “Create recovery point …” option.
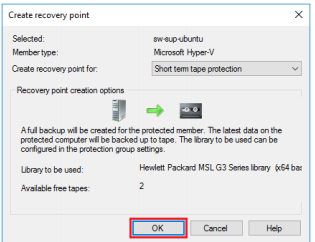
46. Specify “Short term tape protection” for recovery point and click “OK”.
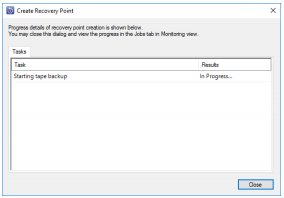
47. The backup process starts. The time it will take depends on the network bandwidth and the speed of the disk the backup is being made to.
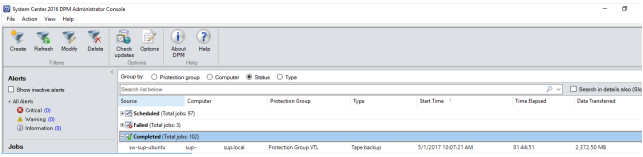
48. Once the process is completed, you can see in the “Monitoring” section that the backup creation was successful.
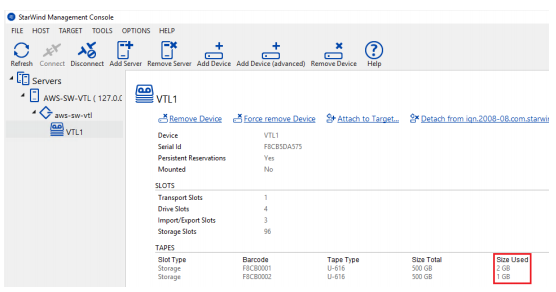
49. You can also see information on the backup size in the StarWind Management Console.
Restoring data from the VTL
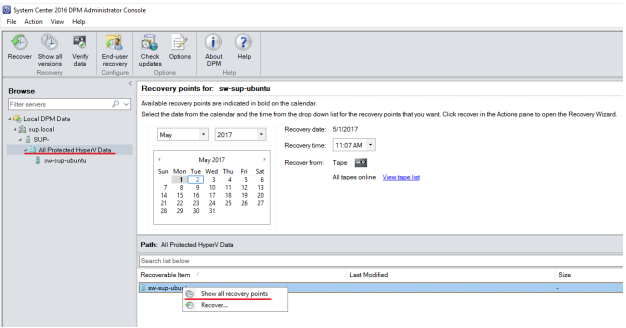
50. We have successfully created the backup. Now, let’s see how to restore backed up data from the VTL. To do this, go to the “Recovery” section, select the item to be restored, right-click on it and click “Show all recovery points”.
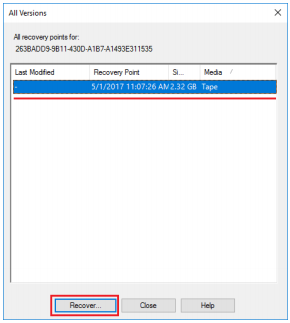
51. Select the required Recovery Point and click “Recover …”.
52. Check the recovery information and click “Next”.

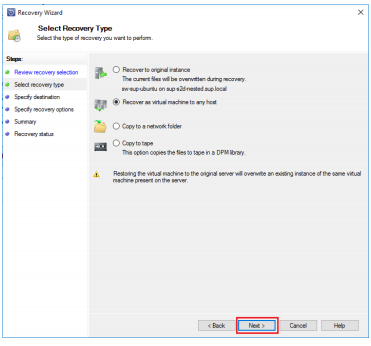
53. Select the required Recovery Type and click “Next”. In our case, we will use the second option.
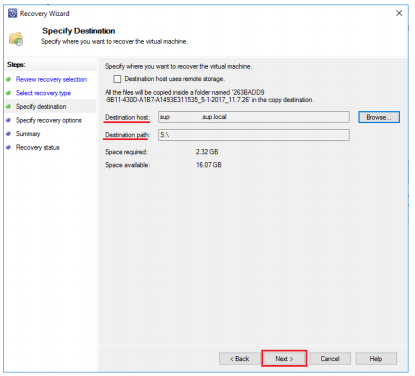
54. Specify the destination host where you want to recover the data and the destination path, click “Next”.
55. Select the required Tape Library, in our case it is “Hewlett Packard MSL G3 Series library” and click “Next”.

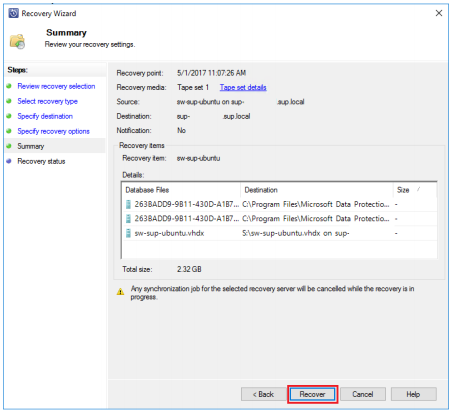
56. Next, review the summary information. If everything is correct, click the “Recover” button.
NOTE: When restoring data from a tape, DPM uses a scratch space before it delivers the data to the selected data source. It is very important that your DPM %systemdrive% server has more than 10 GB of free disk space. DPM supports Item-Level Recovery (ILR), which allows you to perform a specific recovery of files, folders, volumes and virtual hard disks from a host-level backup of HyperV virtual machines to a network share or a volume on a DPM protected server. However, ILR is not supported when you restore from tapes, and you can only restore an entire VM or a single virtual hard disk.
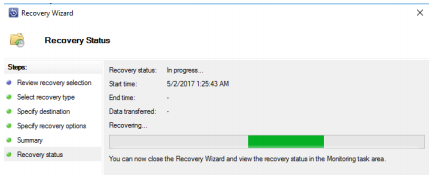
57. The recovery from the backup begins.
58. After the process is finished, we should see that the recovery was successful.

59. Now we can go to the Hyper-V Manager of the server we have restored data to and verify that the VM has been restored correctly.

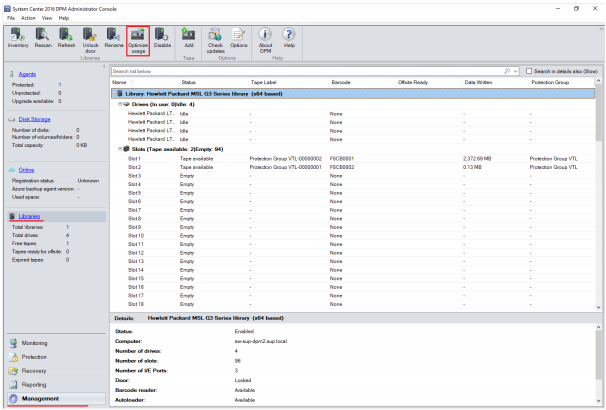
Configuring tape optimization for DPM
60. To enable multiple Protection Groups to share a backup tape, use the tape optimization feature. To do this, go to the “Management -> Libraries” tab in the SCDPM Administrator Console and click on the “Optimize usage” icon.
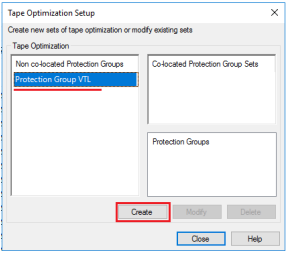
61. Next, select the required Protection Group and click “Create”.
62. Enter a name for optimization setup, check or uncheck the box “Do not allow backups of the different retention periods to co-locate on the same tape” and click “OK”.

Configuring DPM for the short erase tape feature
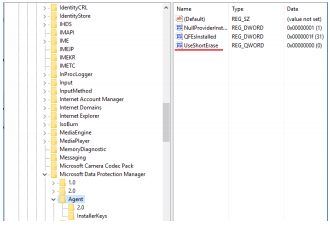
63. When you need to erase the Tape, the SCDPM will by default perform a long erase and usually the process can take a long time. To speed up this process, you can use a short erase. The short erase runs faster, but does NOT erase data from the tape.
If you still decide to perform a short erase, open Registry Editor, go to the “HKEY_LOCAL_MACHINE \ SOFTWARE \ Microsoft \ Microsoft Data Protection Manager \ Agent” branch and create a new DWORD value named UseShortErase with the value 0000000. Once that is done, reboot the server.
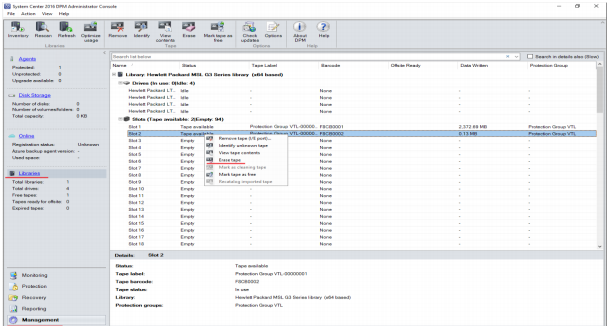
64. To erase Tape, open the SCDPM Administration Console, go to “Management -> Libraries”. Right-click on the required Tape and select “Erase tape”.
65. The results of Tape erase can be seen on the screenshot below. The “Tape Label” value should be changed to “Free”.