

VHD Set feature in Microsoft Windows Server 2016
- October 19, 2016
- 8 min read
INTRODUCTION
This document is about VHD Set, which is a feature introduced in Windows Server 2016 Technical Preview 2. It was developed to share virtual disks between virtual machines.
A full set of up-to-date technical documentation can always be found here, or by pressing the Help button in the StarWind Management Console.
For any technical inquiries, please visit our online community, Frequently Asked Questions page, or use the support form to contact our technical support department.
VHD Set
VHD Set feature has been introduced in Windows Server 2016 Technical Preview 2. VHD Set is a further development and improvement of well-known Shared VHDX feature, thus it does not have any significant differences and shares the same logic and architecture. Nevertheless, Microsoft has made a couple of useful improvements in comparison to Shared VHDX, such as ability to:
• perform a host-based backup or replication of VHD Set
• resize the VHD Set on-fly
• migrate VHD Set
• create .vhdx snapshots (not confirmed)
VHD Set consists of two files: .vhds and .avhdx
• .vhds is a configuration file that contains metadata, and is used for maintaining simultaneous access to the disk from multiple cluster nodes.
• .avhdx (“automatic .vhdx”) is an actual virtual disk where the data resides. It can be fixed or dynamic.
The main purpose of VHD Set feature is to share the virtual disk between multiple virtual machines. VHD Set becomes useful in deployment of guest clusters for SQL Server FCI, File Servers and other services where the shared storage is required.
Problem
Like most of the cluster-oriented solutions, the major requirement of the VHD Set feature is shared storage.
Microsoft has released its already well-known software defined solution called Storage Spaces Direct that can be deployed to configure a highly-available storage pool shared between the multiple hosts.
Storage Spaces Direct is a great solution for achieving the desired goal. However, Storage Spaces Direct requires all servers to be deployed with Windows Server 2016 Datacenter Edition licenses, which may turn into concern for small-businesses or enthusiasts who are just starting their
hyper-converged journey.
Solution
In this article we would like to introduce you an optimal and cost-efficient approach of deploying the guest Failover Cluster using VHD Set as a shared storage.
We will use StarWind Virtual SAN to create a highly-available shared storage pool using 2 physical servers.
Pre-requirements:
2x Windows Server 2016 hosts
The steps below assume that you have already deployed and configured Failover Cluster on top of StarWind Virtual SAN storage according to this guidance:
VHD Set deployment process
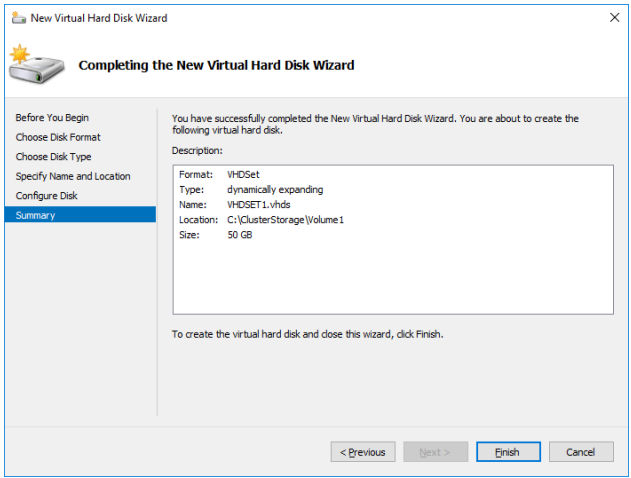
Step 1: Creating the VHD Set virtual disks
VHD Set can be created using Windows Server 2016 GUI or PowerShell cmdlets.
In order to deploy the guest Failover Cluster, we will need 2 VHD Sets:
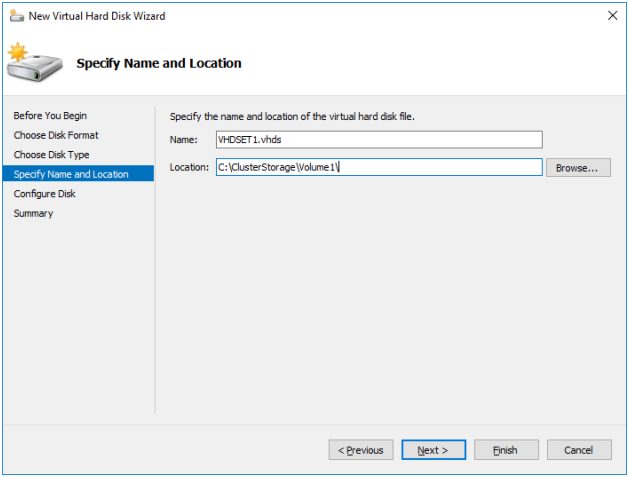
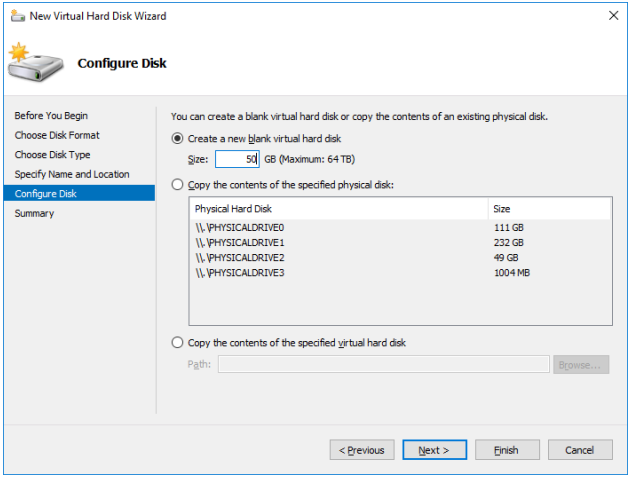
• 49GB dynamic “VHDSET1” will be used as CSV
• 1GB fixed “VHDSET2” will be used as a disk witness in quorum
a. Open the Hyper-V Manager.
b. Select “New” and choose “Hard Disk”.
c. Select “VHD Set”.
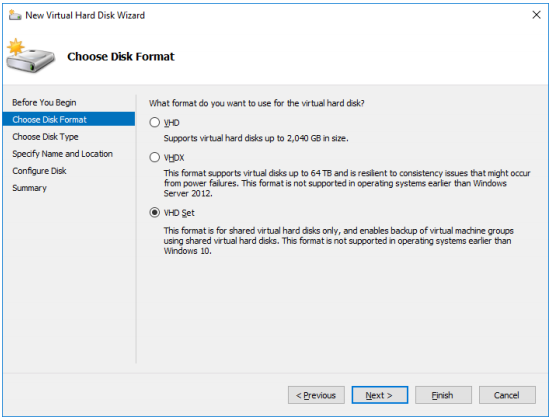
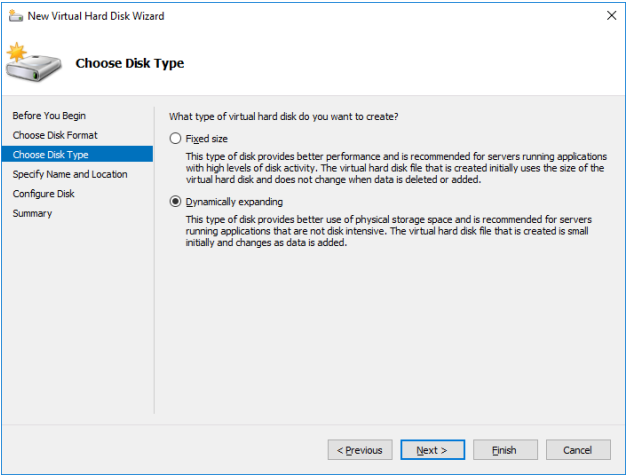
d. Select the type of disk provisioning: fixed or dynamic.
e. Specify the disk name and location. The location should point to your host Failover Cluster’s CSV folder.
f. Choose the “Create a new blank virtual hard disk” option and specify the size of the disk.
g. Press “Finish” button.
Alternatively, you can run the PowerShell cmdlet listed below to achieve the same result:
New-VHD -Path C:\ClusterStorage\Volume1\VHDSET1.vhds -SizeBytes 50GB -Dynamic
New-VHD -Path C:\ClusterStorage\Volume1\VHDSET2.vhds -SizeBytes 1GB –Fixed
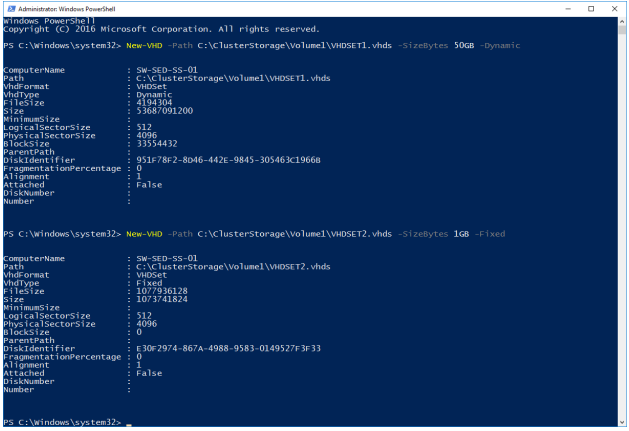
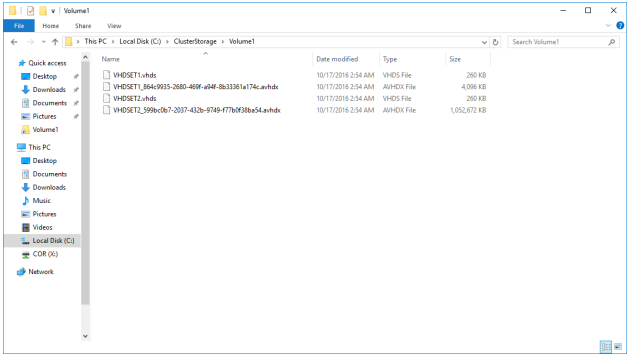
The result of above mentioned steps should look as following:
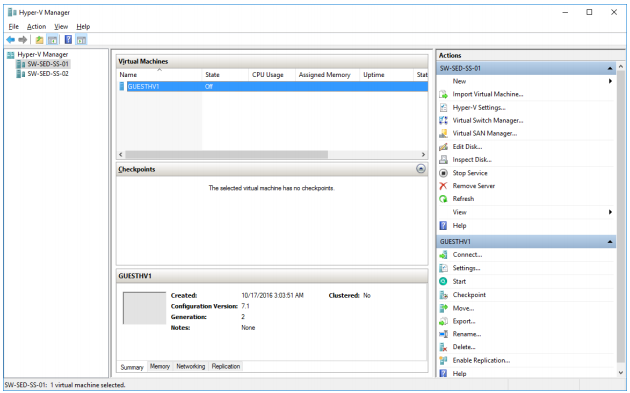
Step 2: Creating guest virtual machines
a. Using Hyper-V Manager, deploy 2 identical Windows Server 2016 VMs, one per each physical host. You can configure basic VM settings (CPU, RAM, OS drive size) according to your preferences.
GUESTVM1:
GUESTVM2:
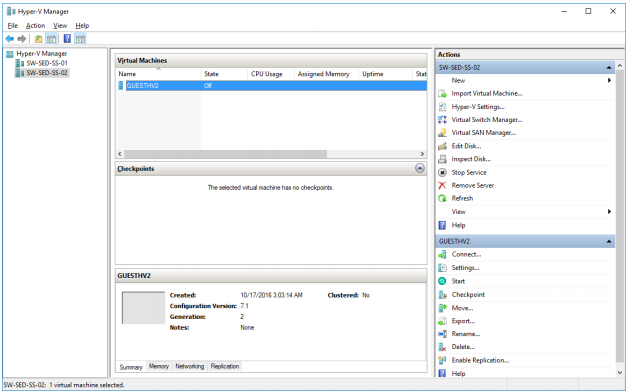
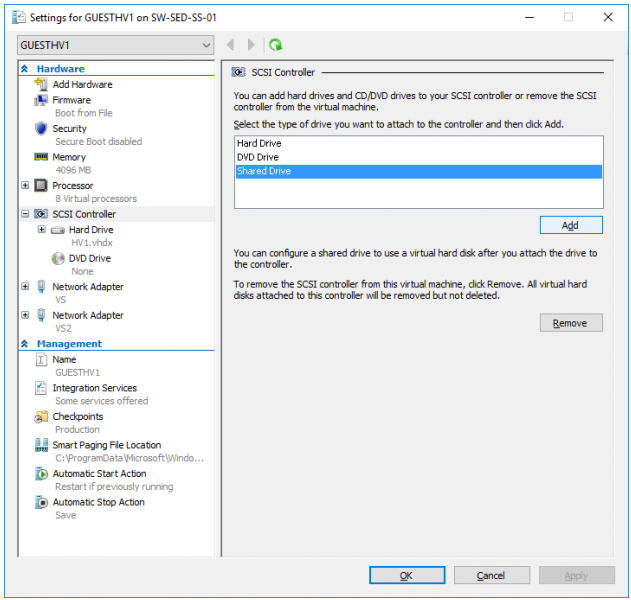
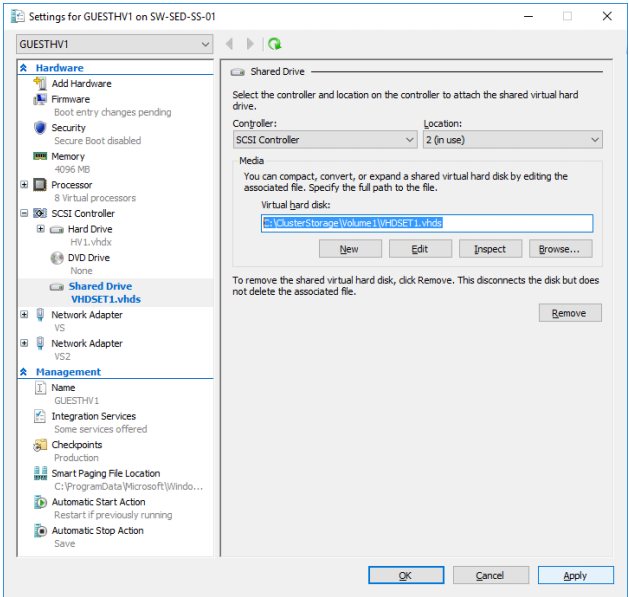
Now we need to connect VHD Sets to each VM (“GUESTHV1” and “GUESTHV2”). Repeat the steps below for each VM:
b. Select “Edit” to enter VM properties and navigate to a “SCSI Controller”.
c. Select Shared drive and press “Add” button.
d. Specify the location of the VHDS file and save the configuration.
Alternatively, you can run the PowerShell cmdlets listed below to achieve the same result.
Run the commands below from Server 1:
Add-VMHardDiskDrive -VMName GUESTHV1 -Path
“c:\ClusterStorage\Volume1\VHDSET1.vhds” -SupportPersistentReservations
Add-VMHardDiskDrive -VMName GUESTHV1 -Path
“c:\ClusterStorage\Volume1\VHDSET2.vhds” -SupportPersistentReservations
Run the commands below from Server 2:
Add-VMHardDiskDrive -VMName GUESTHV2 -Path
“c:\ClusterStorage\Volume1\VHDSET1.vhds” -SupportPersistentReservations
Add-VMHardDiskDrive -VMName GUESTHV2 -Path
“c:\ClusterStorage\Volume1\VHDSET2.vhds” -SupportPersistentReservations
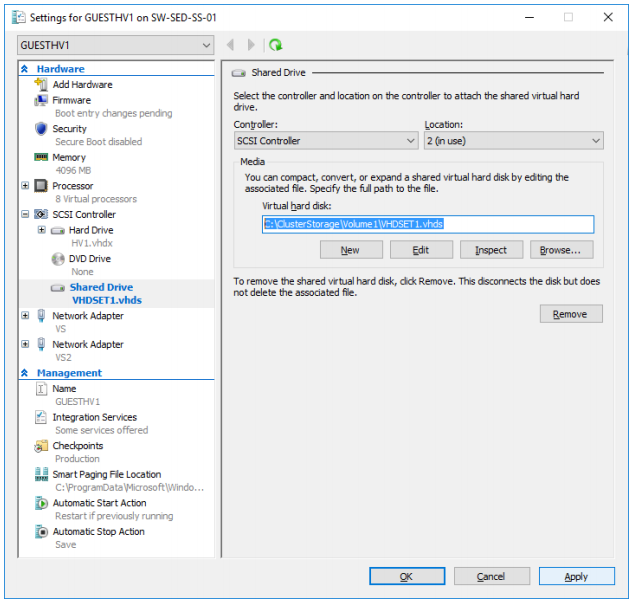
The result should look as follows:
Now, as both VMs are connected to VHD Sets, we can proceed to deploying the guest cluster.
Step 3: Deploying the guest Failover Cluster
Complete the initial Windows Server setup, install Failover Cluster feature, and configure the cluster network.
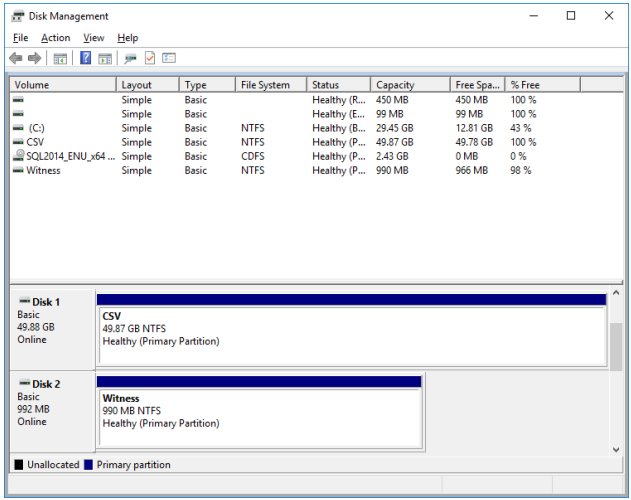
a. Open Disk Management on the guest VM (GUESTHV1 in our example).
b. Bring VHD Set disks online.
c. Initialize both disks as GPT.
d. Create new simple volume on each disk. You can use the default settings.
The result should look as follows:
You can deploy the Failover Cluster using GUI or PowerShell.
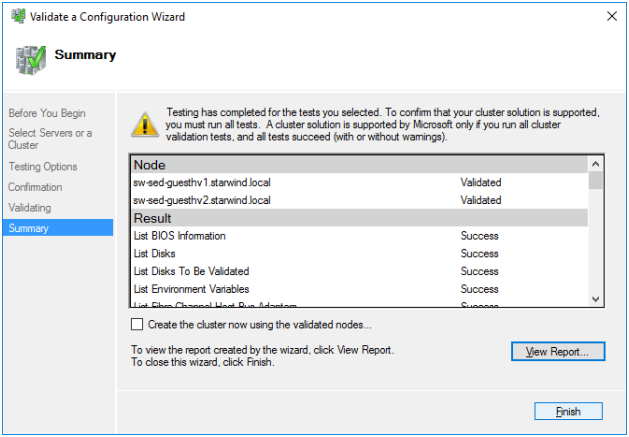
e. Open the Failover Cluster Manager and run all validation tests using “Validate Configuration” wizard.
f. You should notice the following message if the validation was successful:
g. Tick the “Create the cluster now” option and press finish.
h. In the “Create Cluster” wizard, specify the name of new cluster and press “Finish”.
Your new guest Failover Cluster has been created successfully.
Step 4: Configuring storage for the guest Failover Cluster
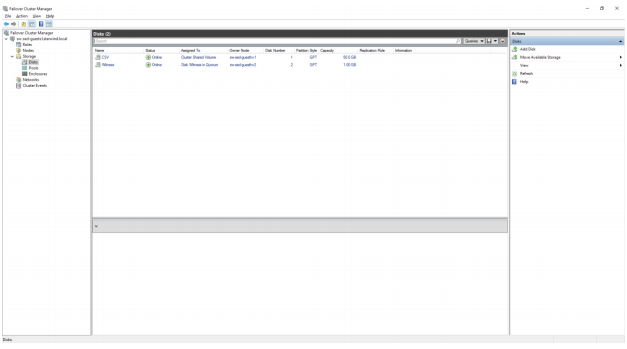
a. In the Failover Cluster Manager, navigate to “Disks” subfolder.
b. Using “Add Disk” wizard, add both VHD Set disks to the cluster.
c. Add the disk that corresponds to “VHDSET1” as CSV.
d. Configure the disk that corresponds to “VHDSET2” as Quorum witness.
The result should look as follows:
Step 5: Testing VHD Set
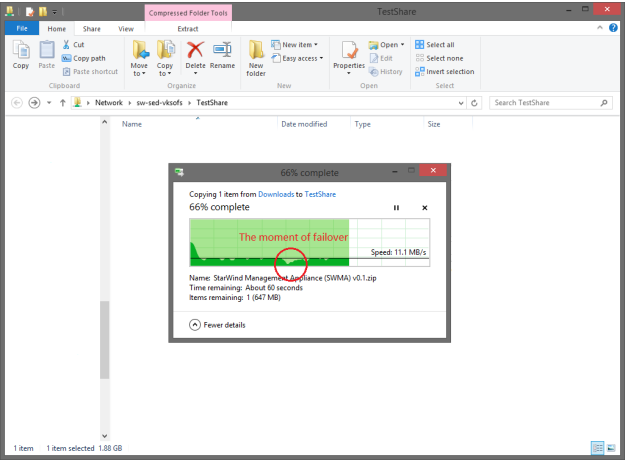
We have deployed SOFS on top of CSV and created the “TestShare” HA fileshare. Then we migrated all resources to the first node (GUESTHV1) and started copying the test file from the remote host to the “TestShare”.
During the copying process we have restarted the first node and achieved a smooth failover to the partner server:
CONCLUSION
We have successfully deployed and tested Microsoft VHD Set feature using StarWind Virtual SAN as a shared storage provider. This is an alternative solution for those who do not want to pay extra for Windows Server Datacenter licenses and proprietary hardware.
