

StarWind Cloud VTL for AWS and Veeam Installation and Configuration Guidance
- May 11, 2017
- 16 min read
INTRODUCTION
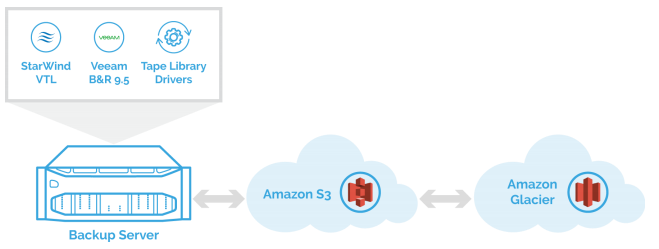
This technical paper provides information on how to deploy StarWind Cloud VTL and configure the integration with Amazon Simple Storage Service (Amazon S3).
StarWind Virtual Tape Library (VTL) is a feature of StarWind Virtual SAN that eliminates the need for the physical tape by emulating industry-standard tape hardware and keeping all data on inexpensive, fast and high-capacity spinning disks. It is designed for SMB and Enterprise that either look to get rid of physical tapes completely or are willing to accelerate the backup process and add an extra level of protection. Even with explosive data growth, StarWind VTL fits the backup job into reasonable time-frame by accelerating it, so the
process does not overlap with production time.
This guide is intended for experienced StarWind users, Windows system administrators and IT professionals who would like to configure StarWind Virtual SAN® solution. It provides stepby-step guidance on how to create the VTL device and configure replication with Amazon Web Services.
A full set of up-to-date technical documentation can always be found here, or by pressing the Help button in the StarWind Management Console.
For any technical inquiries, please visit our online community, Frequently Asked Questions page, or use the support form to contact our technical support department.
Pre-Configuration
In this guidance, we describe the configuration process using the simplest setup as an example. All components are deployed on the single standalone server.
The main components (StarWind Cloud VTL and Veeam Backup & Replication Server) can be also deployed in a different manner, according to your specific infrastructure requirements.
Downloading, Installing, and Registering the Software
1. Launch the downloaded setup file on the server where you wish to install StarWind Cloud VTL. The Setup wizard will appear:
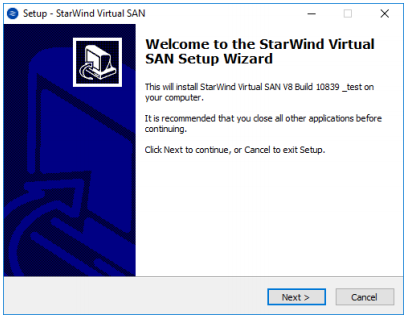
Click Next to continue.
2. Read and accept the License Agreement.
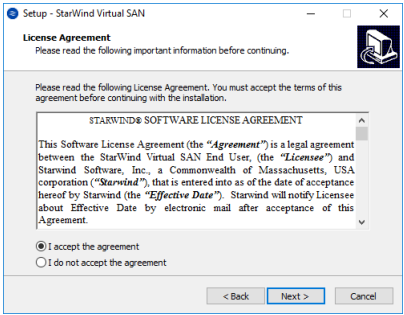
Click Next to continue.
3. Carefully read the information about new features and improvements. Note that the text in red indicates warnings for users who are updating existing software installations.
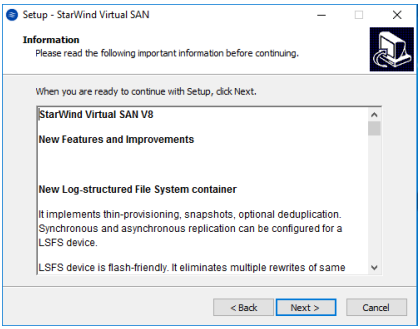
Click Next to continue.
4. Click Browse to modify the installation path if necessary
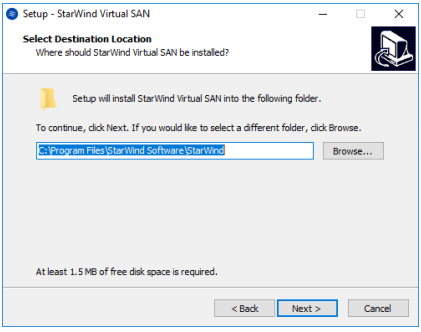
Click Next to continue.
5. To install StarWind Cloud VTL Service along with StarWind Virtual SAN Service, enable the checkboxes as on the image below.

Click Next to continue.
6. Specify the Start Menu folder.
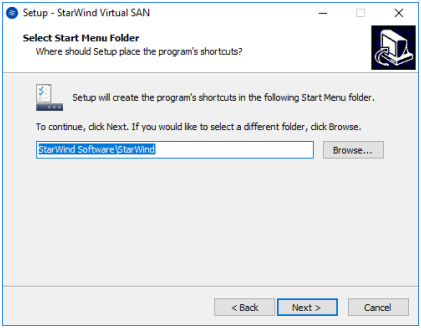
Click Next to continue.
7. Enable the following checkbox if you want to create a desktop icon.
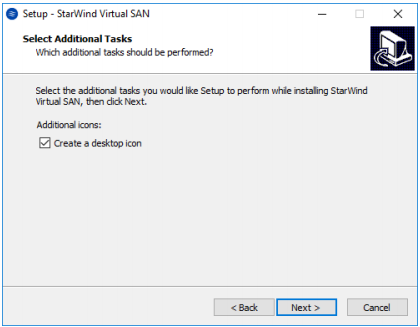
Click Next to continue.
8. You will be prompted to request a time-limited fully functional evaluation key, or a FREE version key. You can also apply a commercial license key sent to you with the purchase of StarWind Virtual SAN. Select the appropriate option.
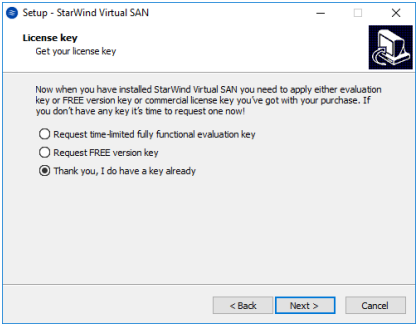
Click Next to continue.
9. Review the licensing information.
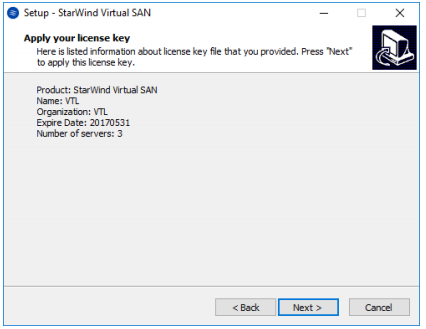
Click Next to apply the license key.
10. Verify the installation settings. Click Back to make any changes.
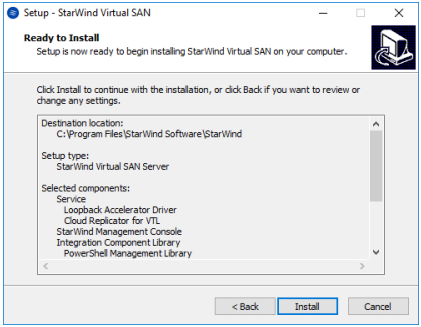
Click Install to continue.
Enable the appropriate checkbox to launch the StarWind Management Console immediately after setup wizard is closed.
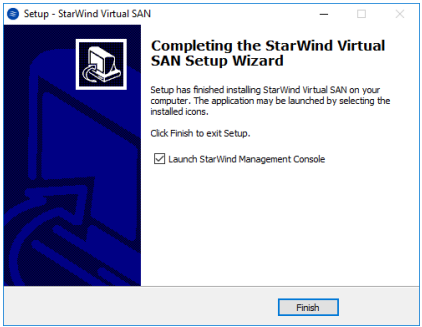
Click Finish to close the wizard.
Configuring Virtual Tape Library
1. Launch the StarWind Management Console: double-click the StarWind tray icon.
NOTE: If StarWind Service and Management Console are installed on the same server, the Management Console will automatically add the local StarWind instance to the Console tree after the first launch. Then, the Management Console automatically connects to it using the default credentials. To add remote StarWind servers to the console, use the Add
Server button on the control panel.
2. StarWind Management console will ask you to specify the default storage pool on the server you are connecting to for the first time. Please, configure the default storage pool to use one of the volumes you have prepared as StarWind storage earlier. All the devices created through the Add Device wizard will be stored on that storage pull by default. Should you decide to use an alternative storage path for your StarWind virtual disks, please use the Add Device (advanced) menu item.
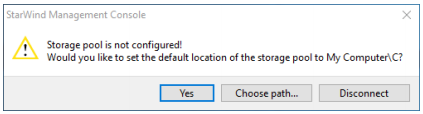
3. Press Yes button to configure the storage pool. Should you require to change the storage pool destination, press Choose path… and point the browser to the necessary disk.
4. Select the StarWind server where you wish to create the device.
5. Press the Add VTL Device button on the toolbar.
6. Add Device Wizard will appear.
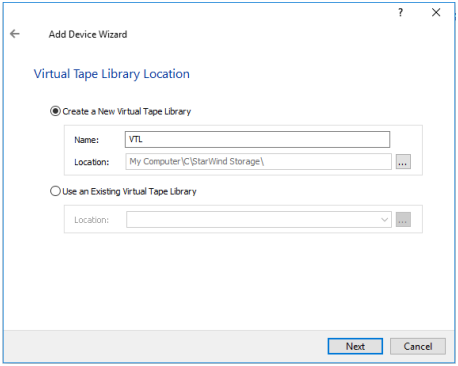
7. Specify the Virtual Tape Library location
8. Select the Device Model from a drop-down list. You can also fill all slots in the newly created Tape Library with empty tapes.
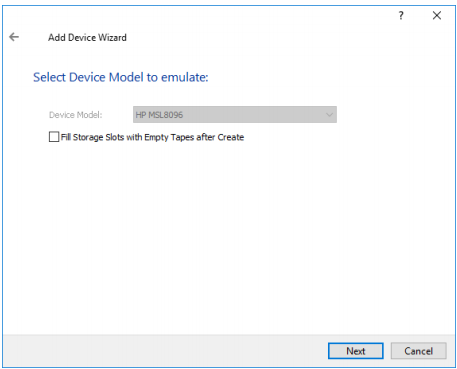
Click Next to continue.
9. Then provide Target Alias or choose the default one.
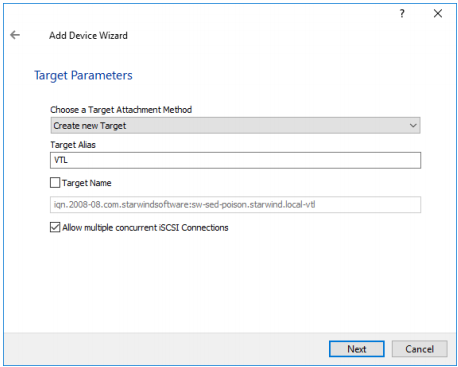
Click Next to continue.
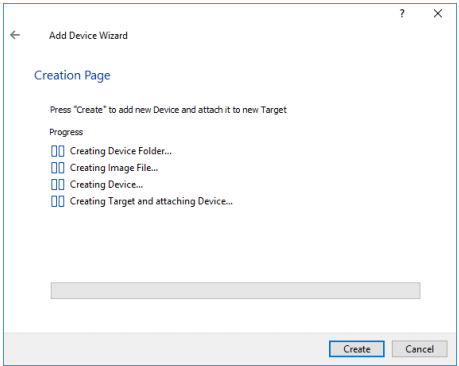
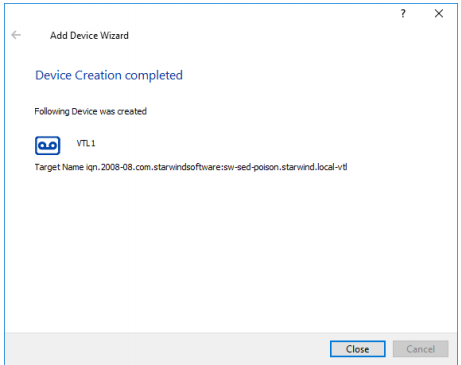
10. Click Create button and view the creation progress.
11. Once creation is completed, click Close.
12. Next, create the tape. To do this, select the VTL device and click Create Tape button located in Tapes section. The Create Tape Wizard will appear. Optionally, specify the custom path where tape files must be stored.
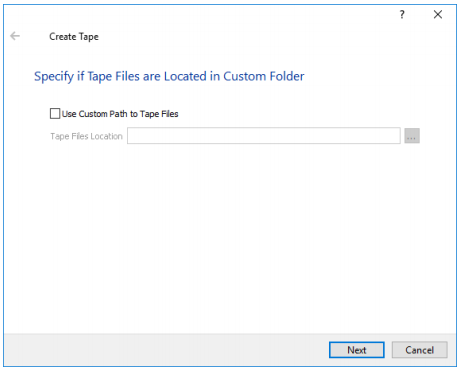
Click Next to continue.
13. Specify the Number of Tapes, Tape Type and other parameters.
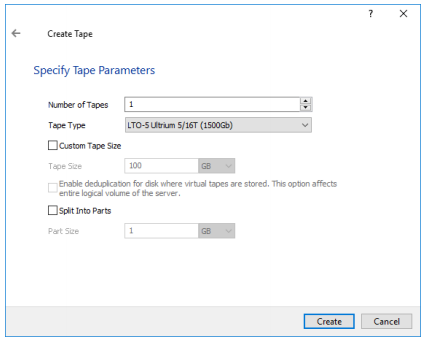
Click Create button.
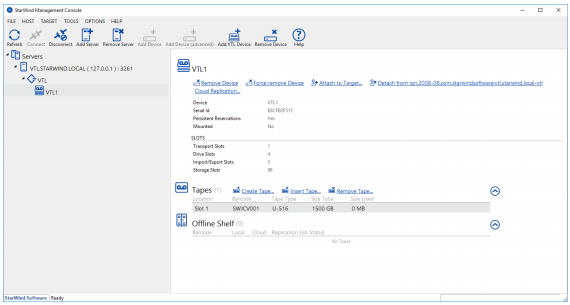
14. The created tape appears in the first slot of the VTL device in the StarWind Management Console.
Getting Access key ID and Secret access key in AWS
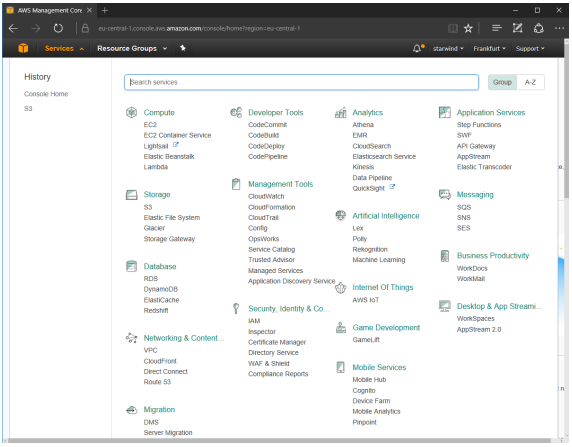
15. To get the Access key ID and Secret access key, launch the AWS Management Console.
NOTE: This and all of the below steps assume that Amazon Web Services Account is already registered.
16. Then click Services -> Security, Identity & Compliance -> IAM
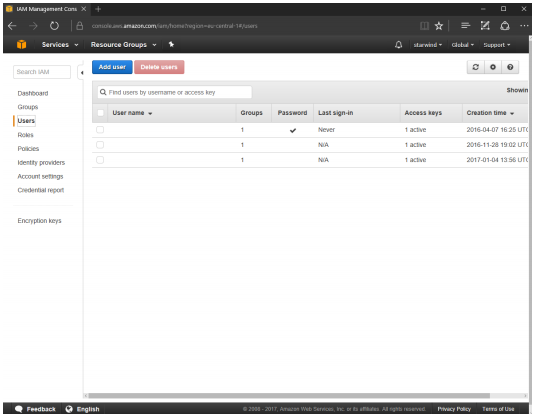
17. Click Users, select the existing User or create the new one.
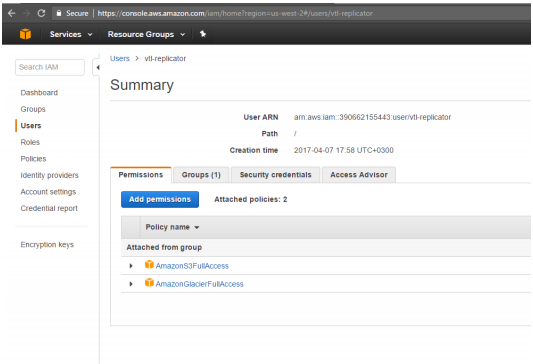
18. Make sure to assign necessary permissions to the corresponding User.
19. In the User’s profile, click the Security Credentials and press Create access key button.

20. Click Show in the Secret access key field.
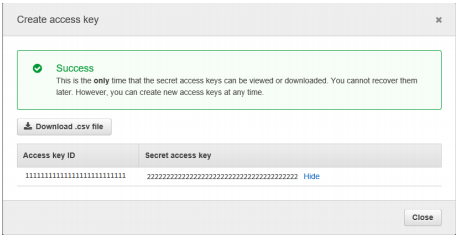
NOTE: Save the Access key ID and Secret access key as this information will be used later during the configuration process.
You can also download and save the Access key ID and Secret access key by clicking «Download .csv file».
NOTE: you can open “User’s” tab following the next link:
https://console.aws.amazon.com/iam/home?#/users
Creating Amazon S3 Bucket
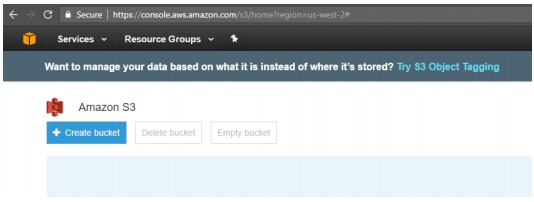
21. To create Amazon S3 Bucket, select Storage and S3.

22. Click Create Bucket button.
23. Enter an appropriate Bucket Name, choose the Region in a drop-down menu and click Create.
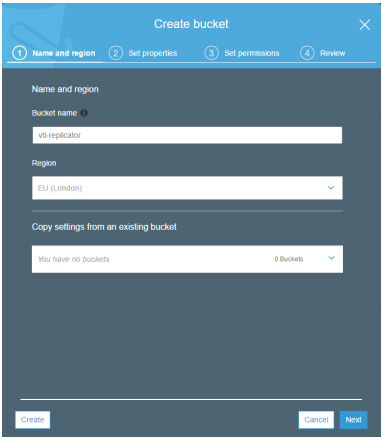
24. New bucket is created.

Configuring Replication
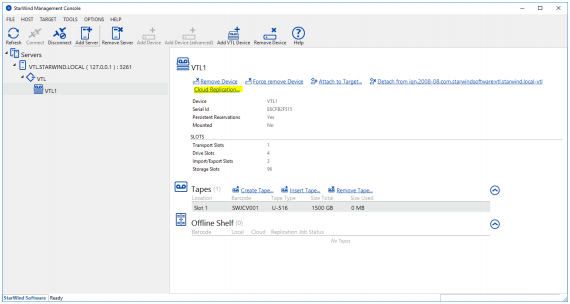
25. To enable replication between StarWind and AWS, navigate to the VTL device and click Cloud Replication.
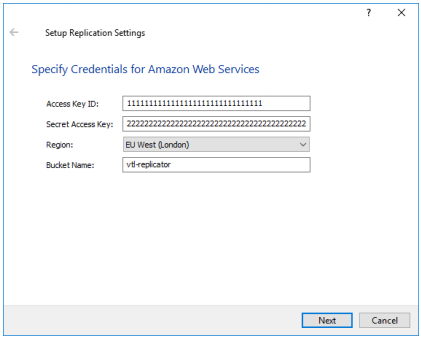
26. In the Replication Settings, specify Access Key ID, Secret access key, Region, Bucket Name and press “Next” button.
IMPORTANT: Please make sure that selected Region corresponds to the one, specified during the S3 bucket creation.
27. Choose Tape File Retention Settings and click “Apply”. You can also choose to create new empty tapes automatically when existing tape is exported for replication.
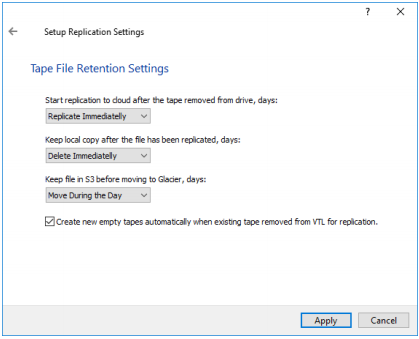
Now, the automatic tape replication to Amazon S3 with offload to Glacier is successfully configured according to the retention policy specified above.
NOTE: “Move During the Day” option issues the request to Amazon S3 API for transfering the data from Amazon S3 to Glacier. Amazon object storage technology does not assume the immidiate data transfer to Glacier and vice-versa. StarWind Cloud VTL Service sends the request and Amazon shedules the data transfer to be performed during the day.
IMPORTANT: You should configure the Retention Settings according to your corporate RTO and RPO targets.
Mounting VTL on the backup host
To pass-through the VTL device to the Veeam Backup and Replication Server, we need to mount the corresponding VTL iSCSI target first. Since all components (Veeam B&R Server and StarWind VTL) are deployed and configured within a single standalone server, the tape library iSCSI target, in
this example, will be mounted locally as well.
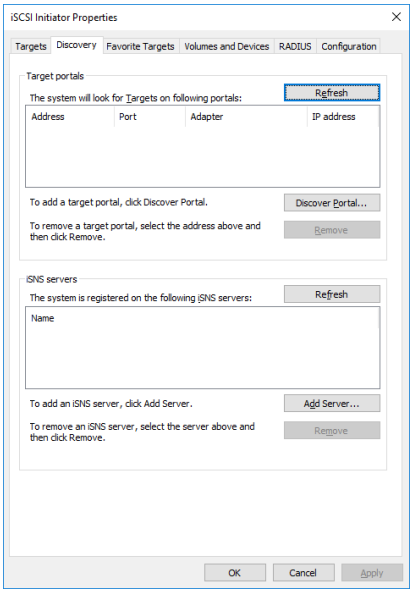
28. Open Microsoft iSCSI Initiator, navigate to “Discovery” tab and press ”Discover Portal” button.
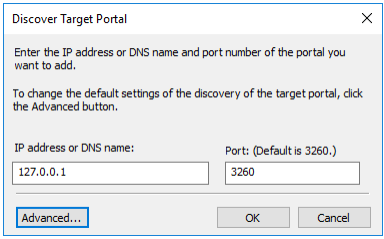
29. Enter the localhost address (127.0.0.1) and press “Advanced” button.
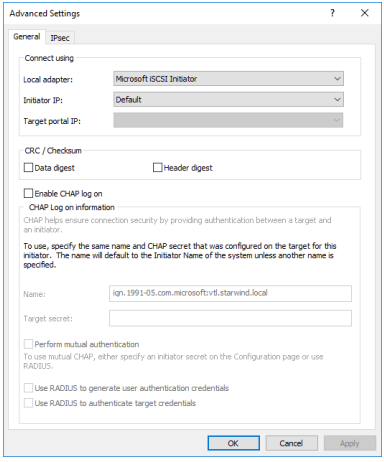
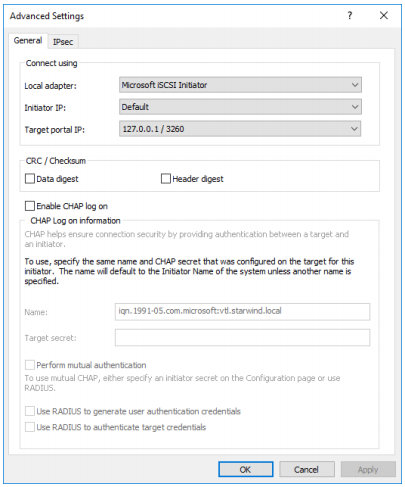
30. Select “Microsoft iSCSI Initiator” from the “Local Adapter” drop down list and press “OK” button.
31. You should notice the newly added Discovery Portal in the list.
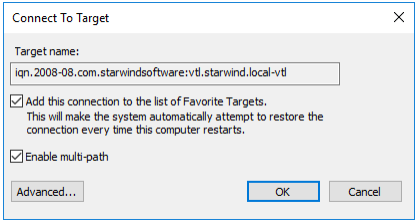
32. Navigate to “Targets” tab, find the iSCSI target, which corresponds to StarWind VTL device, and press “Connect” button.
33. Select “Enable Multipath” option and press “Advanced” button.
34. Set “Local adapter” as “Microsoft iSCSI Initiator”, specify “127.0.0.1 / 3260” as “Target portal IP“ and press “OK” button.
You should notice that VTL iSCSI target is shown as “Connected” in the list.
Installing tape library drivers
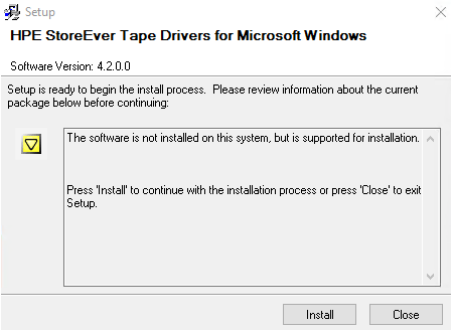
It’s recommended to install the latest update driver from HP. The driver for HP MSL8096 can be downloaded here HPE StoreEver Tape Drivers for Microsoft Windows. The current version that supports Windows Server 2016 is 4.2.0.0. HP drivers must be installed on the host where StarWind VTL device is mounted via iSCSI, in our example, this is a localhost.
35. Extract the driver downloaded in Step 4 and launch cpqsetup.exe
36. Select All and click Install.
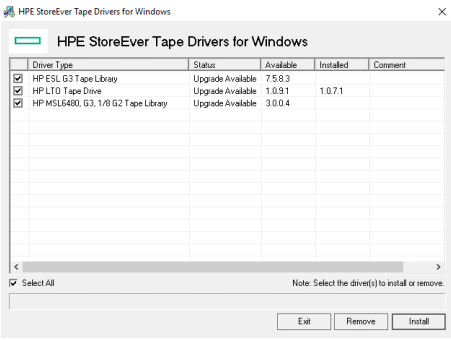
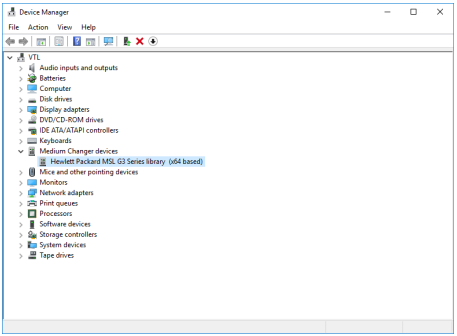
37. Once the drivers are installed. You can see the Medium Changer devices is shown as “Hewlett Packard MSL G3 Series library (x64 based)”
Now, everything is ready for adding the tape library to Veeam B&R.
Adding StarWind VTL device to Veeam B&R Tape Infrastructure
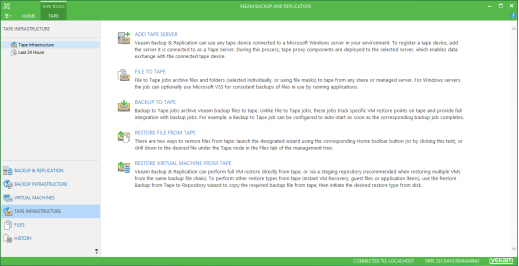
38. Open Veeam Backup & Replication. Open Tape Infrastructure tab.
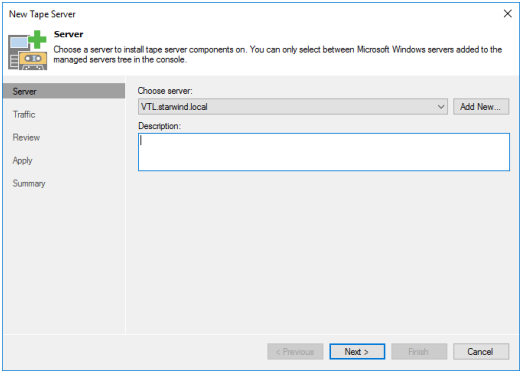
39. Open “Add Tape Server“ wizard. Choose the local server and press “Next”.
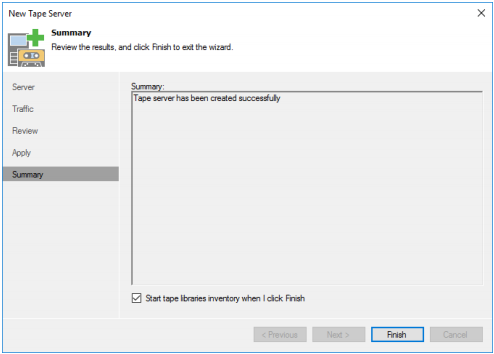
40. Complete the wizard and press “Finish” button.
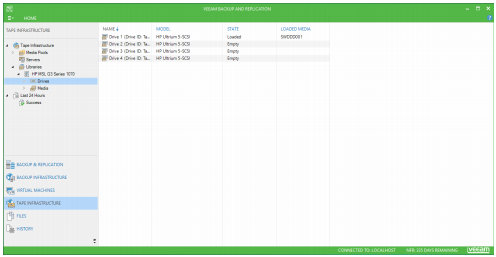
41. After Tape Inventory job is finished, you will notice the newly added tape library device with 1 tape drive already loaded.
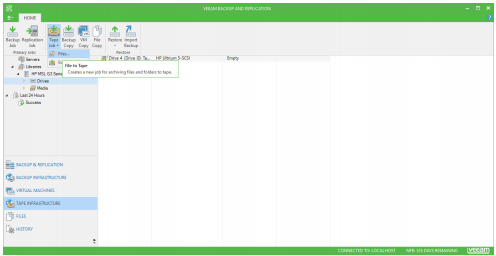
Configuring “File to Tape” job with automatic offload to Amazon S3
42. Navigate to “Home” tab, press “Tape Job” and choose “Files” option.
43. Specify the job name / description and press “Next”.
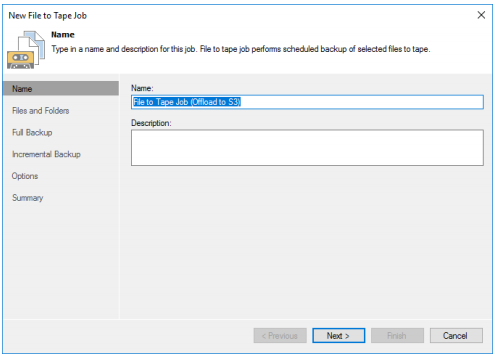
Press “Next”.
44. Choose files to backup and press “Next”.
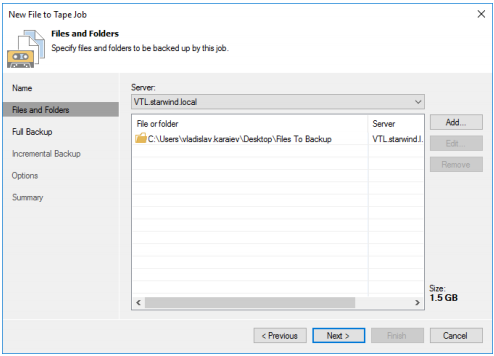
Press “Next”.
45. Press “Add New” to add the new Media Pool.
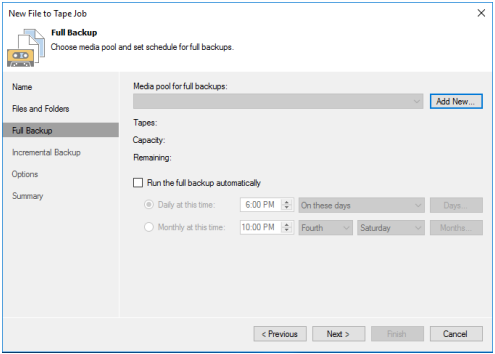
Press “Next”.
46. The “New Media Pool” wizard will appear. Specify the name / description of new Media Pool.
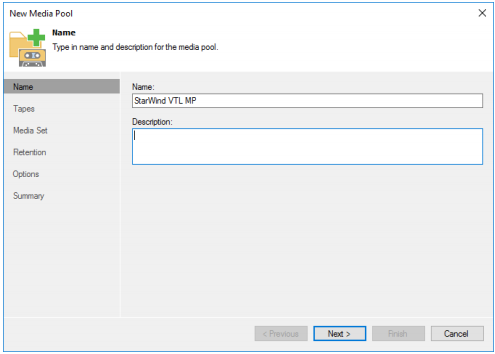
Press “Next”.
47. Add existing tape(s) to Media Pool and press “Next”.
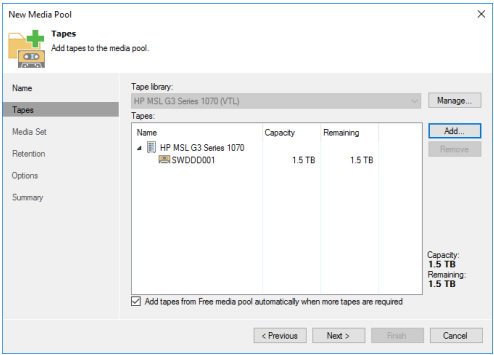
Press “Next”.
48. Specify the Media Set name and configure additional settings if necessary.
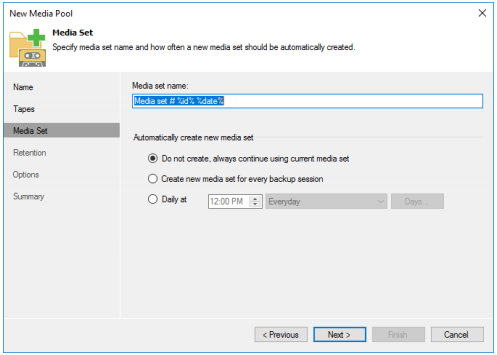
Press “Next”.
49. Specify the preferred retention settings if necessary.
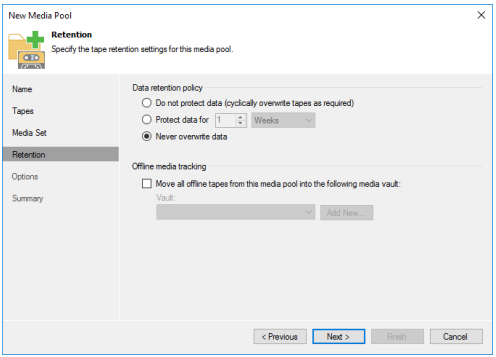
Press “Next”.
50. Specify the additional options if necessary.
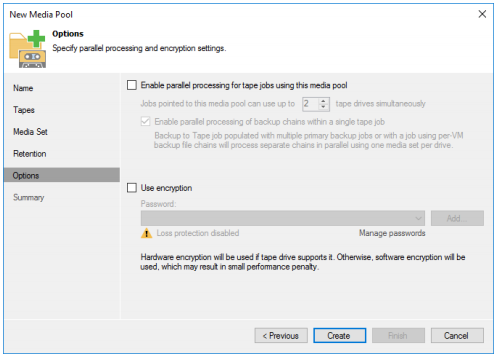
Press “Create”.
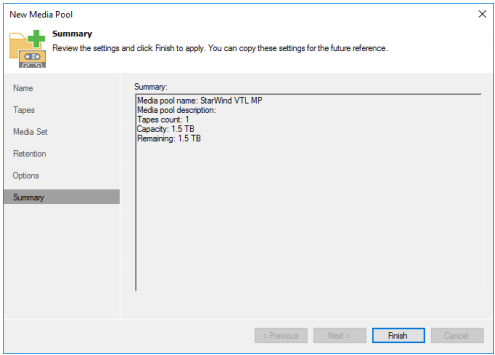
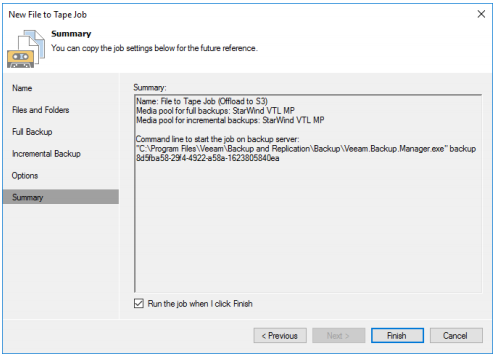
51. Review the summary and press “Finish”.
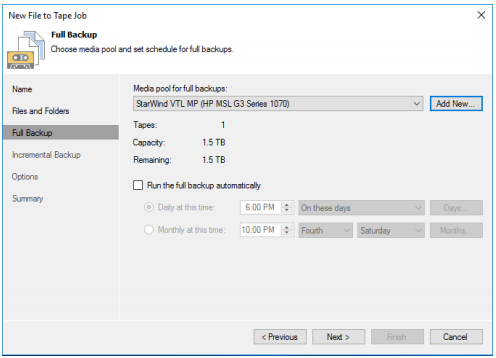
52. Moving back to “New File to Tape Job” wizard, press “Next” to continue.
53. Configure the Incremental Backup schedule if necessary. Choose the same Media Pool or add new Media Pool for incremental backups.
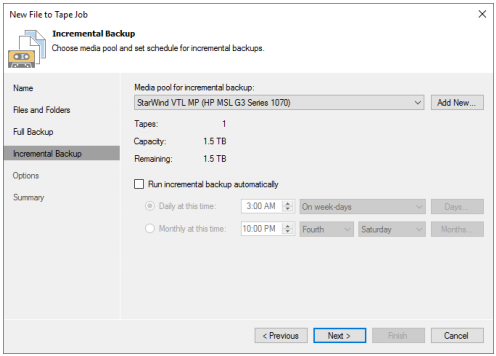
Press “Next”.
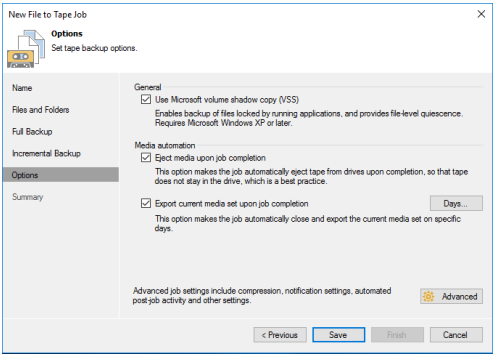
54. Specify the additional settings and check the “Export current media set upon job completion” to allow automatic tape offload to Amazon S3 after backup job is completed. It is also recommended to eject media upon job completion.
55. Enable “Run the job when I click Finish” option if you would like to run the backup job right away.
56. You can view the job progress using the “Running” jobs navigator.

57. After the job is finished, you will notice that tape was automatically ejected, exported and marked as “Offline” according to job settings configured in step 13.
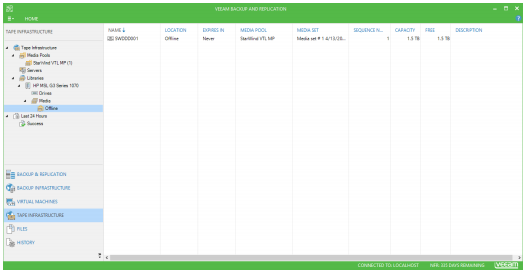
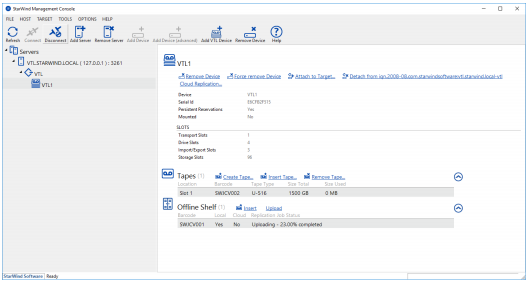
58. Since the tape was automatically exported upon job completion and StarWind Cloud VTL Replication policy was set to “Replicate Immediately”, the process of replication to Amazon S3 has started automatically. You can check the progress in StarWind Management Console using the Offline Shelf overview.
NOTE: You can also keep the tape in its tape library slot upon backup job completion and offload it to Amazon S3 later. In order to achieve this, disable “Export current media set upon job completion” and “Eject media upon job completion” options in “File to Tape Job” settings using Veeam B&R Console. After the backup job has been finished, in Veeam B&R Console navigate to “Tape Infrastructure” – “Libraries” – “Media” – “Online” – choose the tape
to upload, right-click it and press “Export”. After this, the tape will be automatically offloaded to Amazon S3 according to the specified Retention Settings of StarWind Cloud VTL.
59. When the tape is successfully uploaded to cloud, you should notice the tape location status in Offline Shelf overview was changed to “Local = No” “Cloud = Yes” .
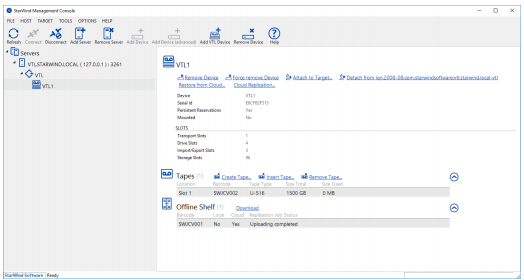
The tape is now located in Amazon S3 object storage and was automatically removed from the local storage according to StarWind Cloud VTL Retention Settings.
Restoring previously backed up tapes from Amazon S3
1. Open StarWind Management Console and choose the VTL device.
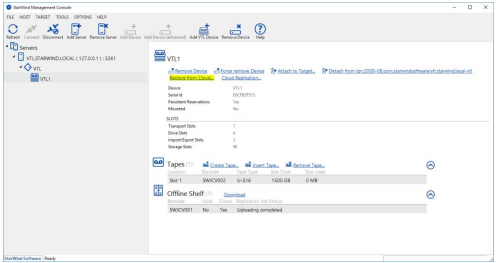
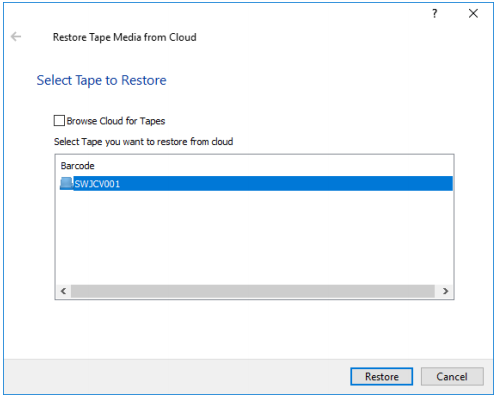
2. Click on “Restore from Cloud” option and the corresponding wizard will appear. Identify the tape using its barcode. Click on the tape and press “Restore”.
3. You can check the download progress from the Offline Shelf overview. When the download is complete, tape location status in Offline Shelf overview will change to “Local = Yes”/“Cloud = Yes”.
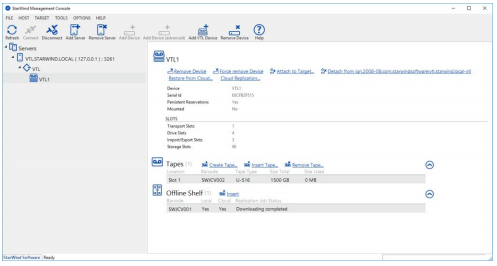
4. Select the downloaded tape in Offline Shelf section and press the “Insert” button to insert tape into the tape library.
5. You will notice that tape is now located in the tape library.

6. In Veeam B&R Console navigate to “Tape Infrastructure” and right click the tape library device.
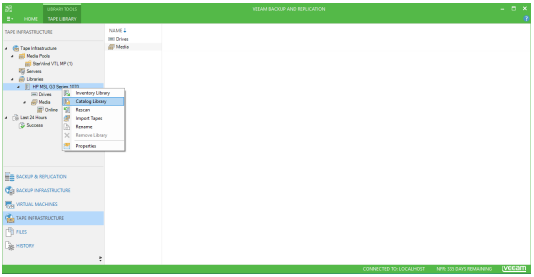
Choose “Catalog Library” option.
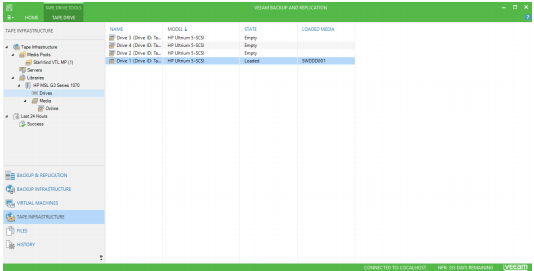
7. After Cataloging is finished, you will notice that tape is now inserted into free drive slot.
8. Now you can use “Restore File” wizard to restore data from the tape.
CONCLUSION
Implementing disk to cloud backups offers an additional level of protection and availability for your backup sets. StarWind Cloud VTL moves backup sets to Amazon Cloud Storage and thereby makes them available offsite. Thus, it ensures quick and easy transportation of your backups and provides your company with a resilient disaster recovery strategy.
