StarPort iSCSI and ATA-over-Ethernet Initiator: Using Mirror (RAID-1) disk device
Introduction
StarPort Mirror device is a virtual RAID-1 array based on 2 independent disks(mirrors), the data is written simultaneously on both mirrors what makes the device fault tolerant and protected from data loss in cases of hardware or software fault, network faults and power loss.
Using StarPort you can build a mirror (RAID-1) device based on a wide variety of devices and sources. Targets can be Local, iSCSI and FC (FCoE and AoE in upcoming version) in any combination. In the event of the failure of the Primary mirror the duplicate copy of all data maintained on the secondary mirror and can be used without any downtime. If needed, the broken mirror can be hot swapped without downtime.
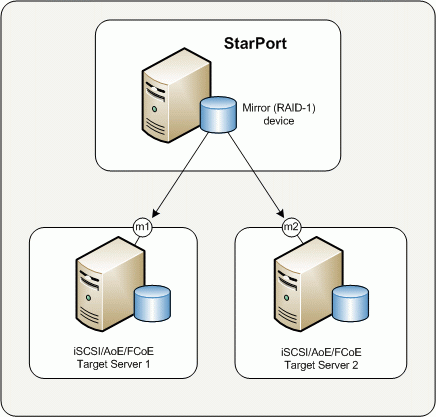
Diagram 1. illustrates the RAID-1 based on 2 remote targets.
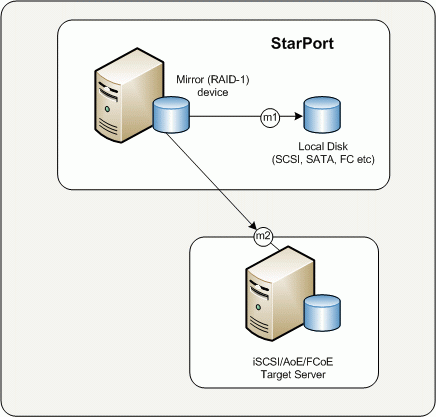
Diagram 2. Illustrates a RAID-1 built using one local image file device and a remote target.
Installation and configuration
Open StarPort console by double clicking the StarPort icon in the system tray.
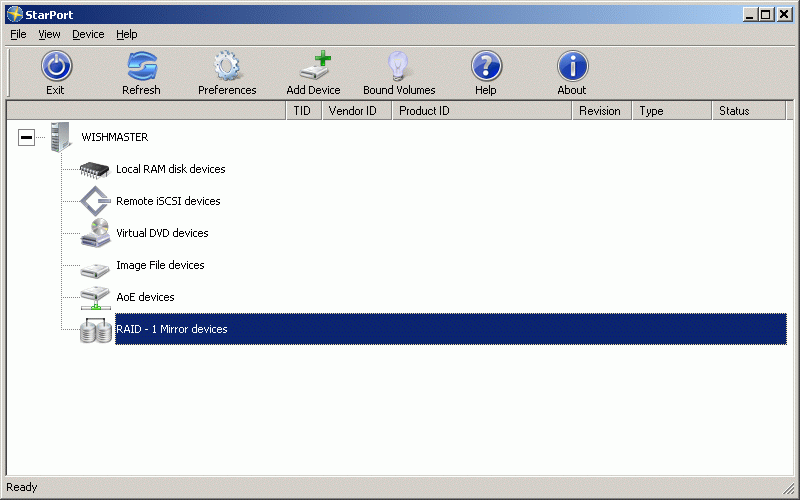
Press the Add Device button to continue.
The installation wizard window will appear.
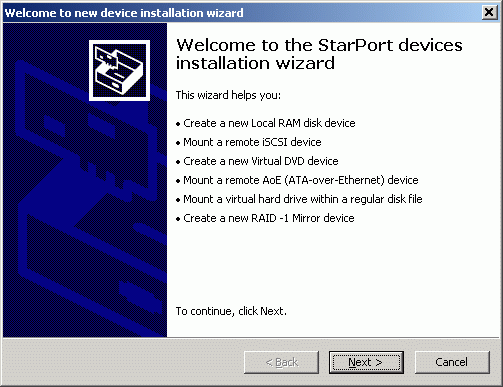
Press the Next button to continue.
Select RAID-1 device option.
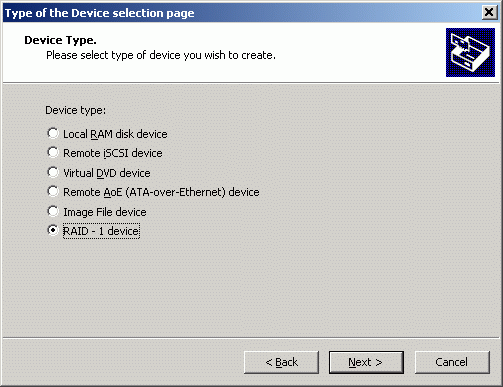
Press the Next button to continue.
Select Create new device option or Mount existing device to mount the device you have created before.
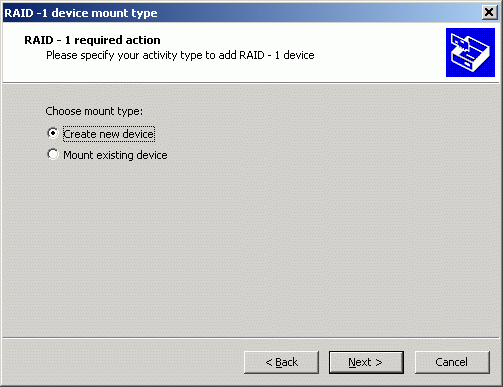
Press the Next button to continue.
Specify a meaningful device name and its size in megabytes.
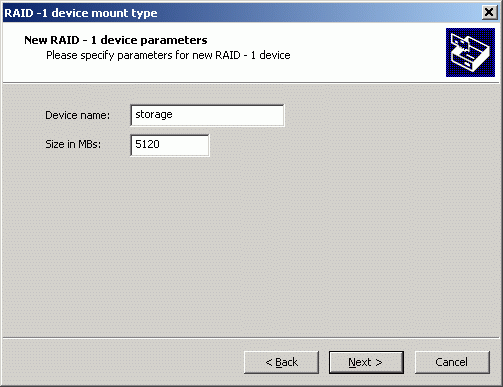
Press the Next button to continue.
Specify first mirror options, the mirror can be any local virtual disk of sufficient size. In case the mirror is a remote iSCSI device you have to specify target server's IP address and then select the virtual disk from the list. If the desired disk is not appearing in the list click the Refresh button.
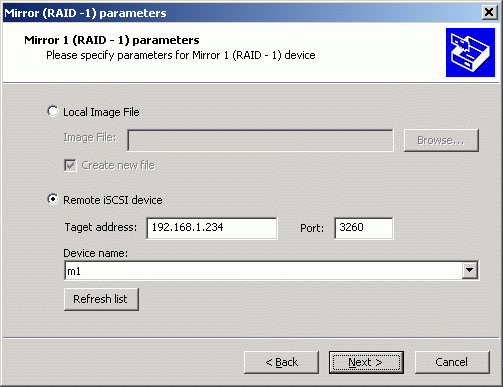
Press the Next button to continue.
Specify the second mirror disk location the same way as the first mirror.
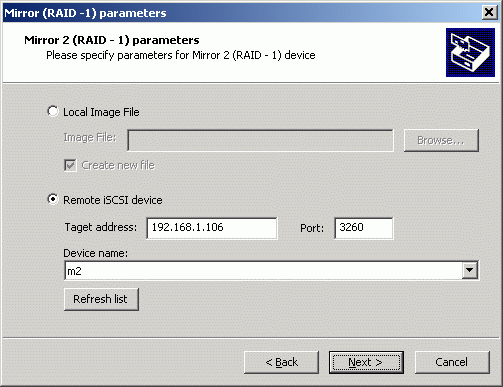
Press the Next button to continue.
Select the initialization method for your RAID -1 device
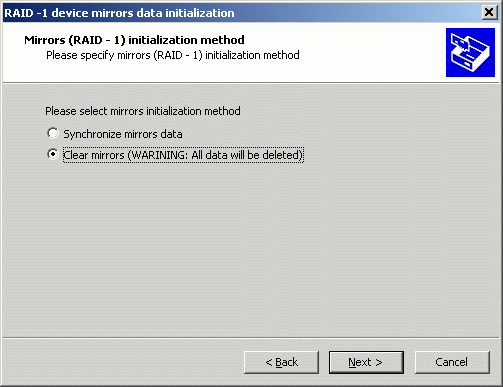
Press the Next button to continue.
You have successfully installed the RAID -1 device.
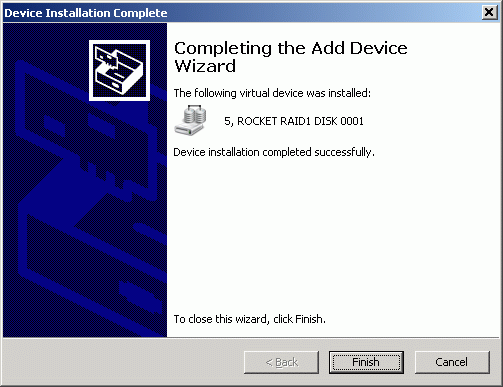
Press the Finish button to close the wizard window.
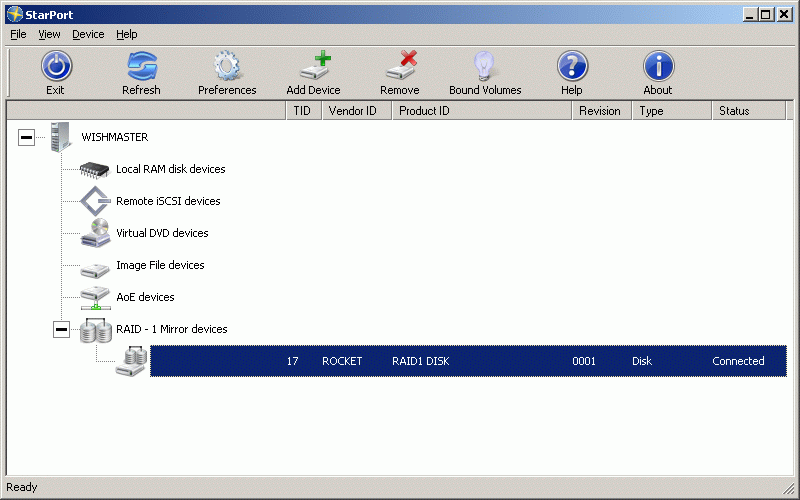
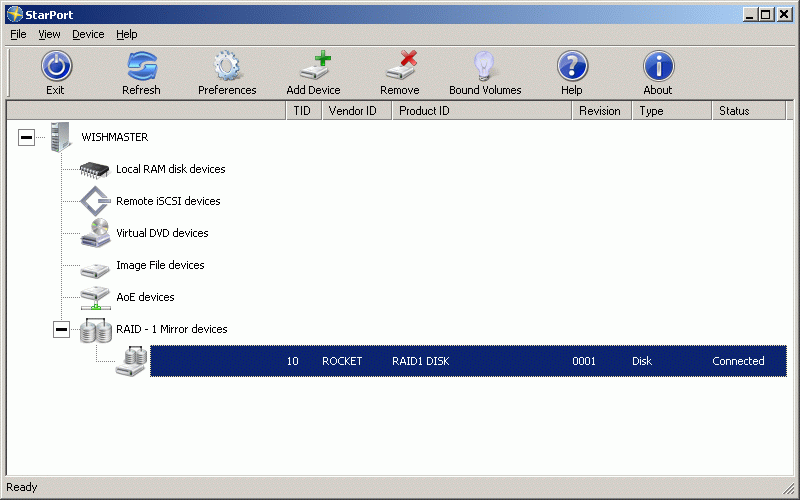
After closing the wizard window the StarPort console will look similar to the screenshot below.
Close the StarPort console.
Open computer management by going Start -> Administrative Tools -> Computer Management.
In the Computer management window select Storage -> Disk Management
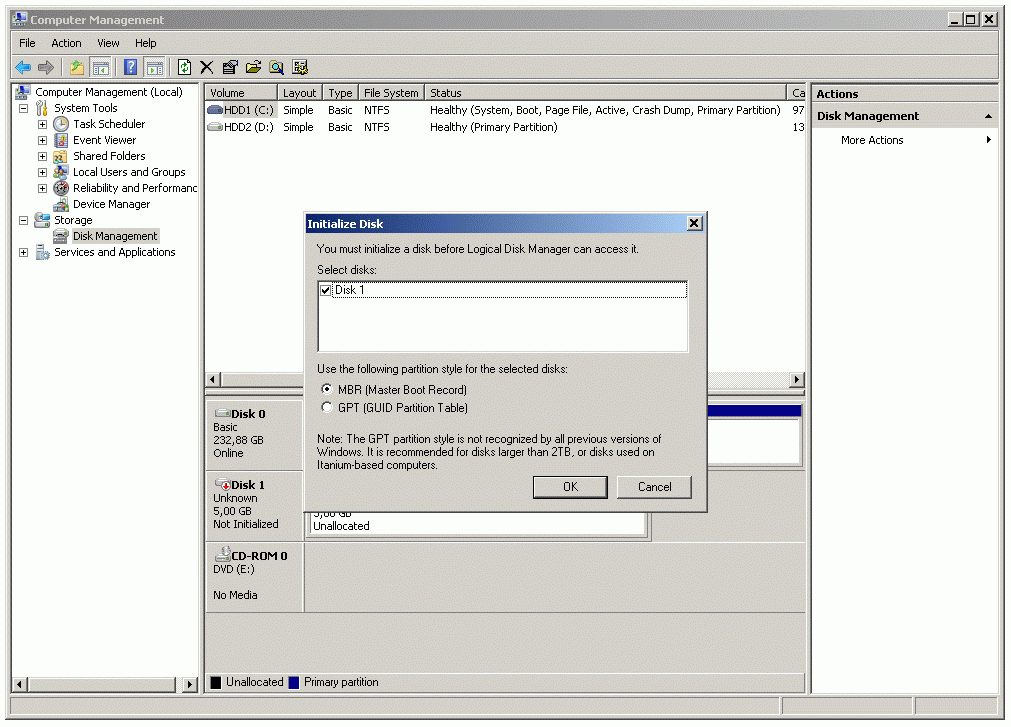
An Initialize Disk Window will appear.
 Click to enlarge
Press the OK button to continue
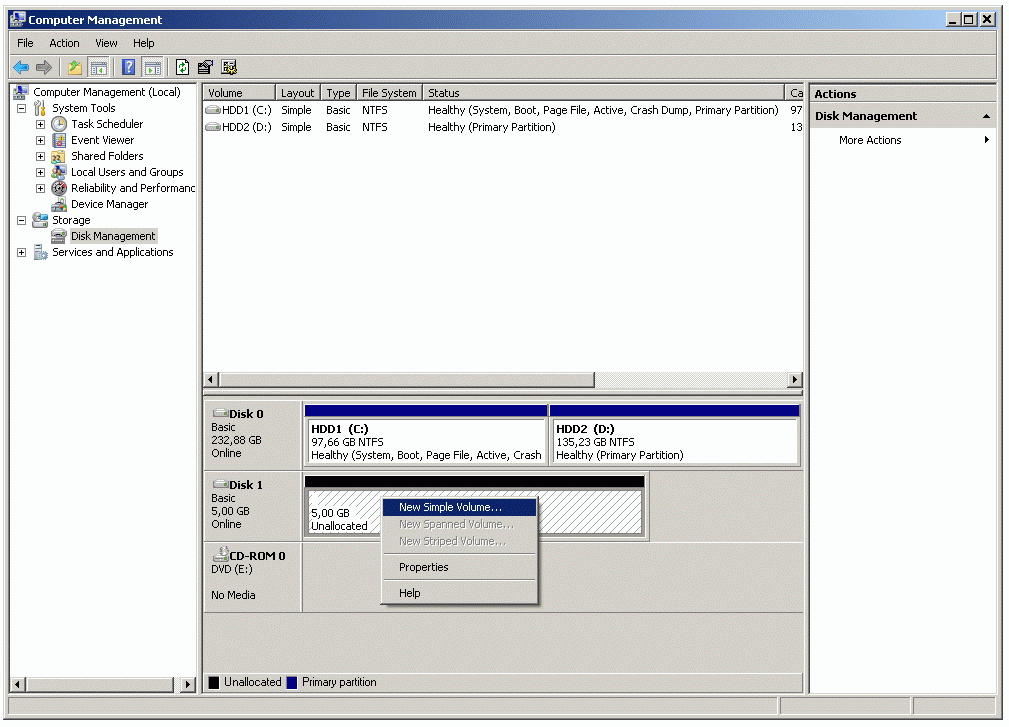
Right click on the new volume and select the New Simple Volume... option.
 Click to enlarge
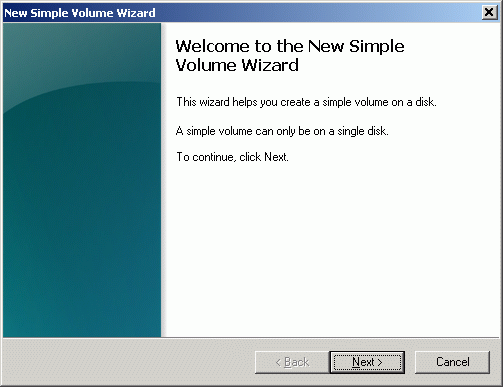
A New Simple Volume Wizard will appear.
Press the Next button to continue.
Specify the Volume size in megabytes.
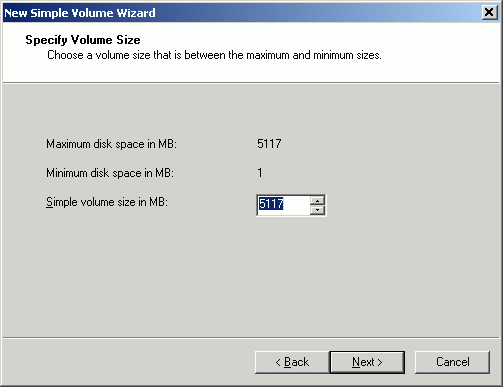
Press the Next button to continue.
Assign a drive letter or path to the new volume.
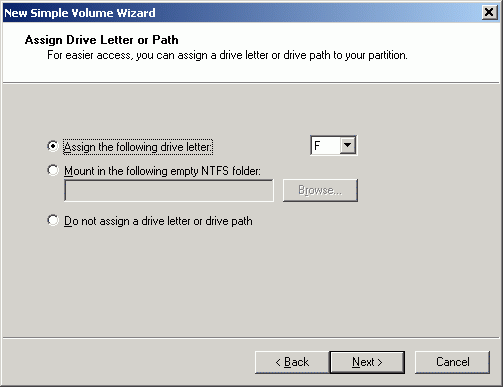
Press the Next button to continue.
Specify the format options for the new volume.
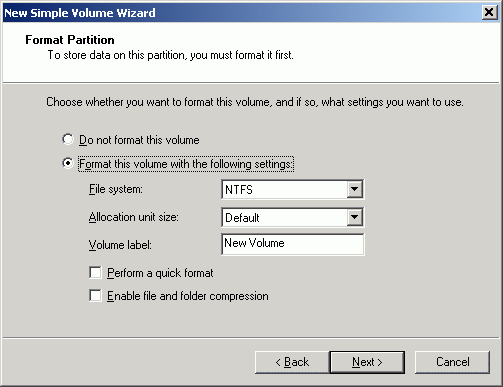
Press the Next button to continue.
Review the settings you have selected for the new volume, Press the back button if need to make any changes.
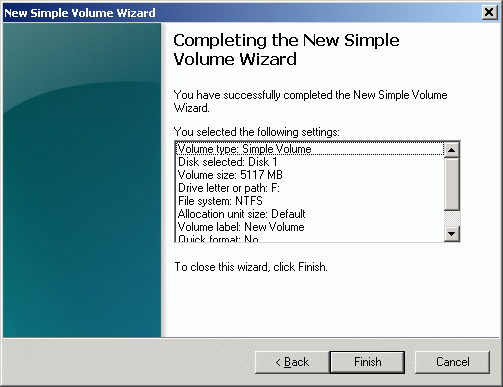
Press the Finish button to close the wizard.
After Closing the New Simple Volume wizard you will see that the new volume is formatted and ready to use.
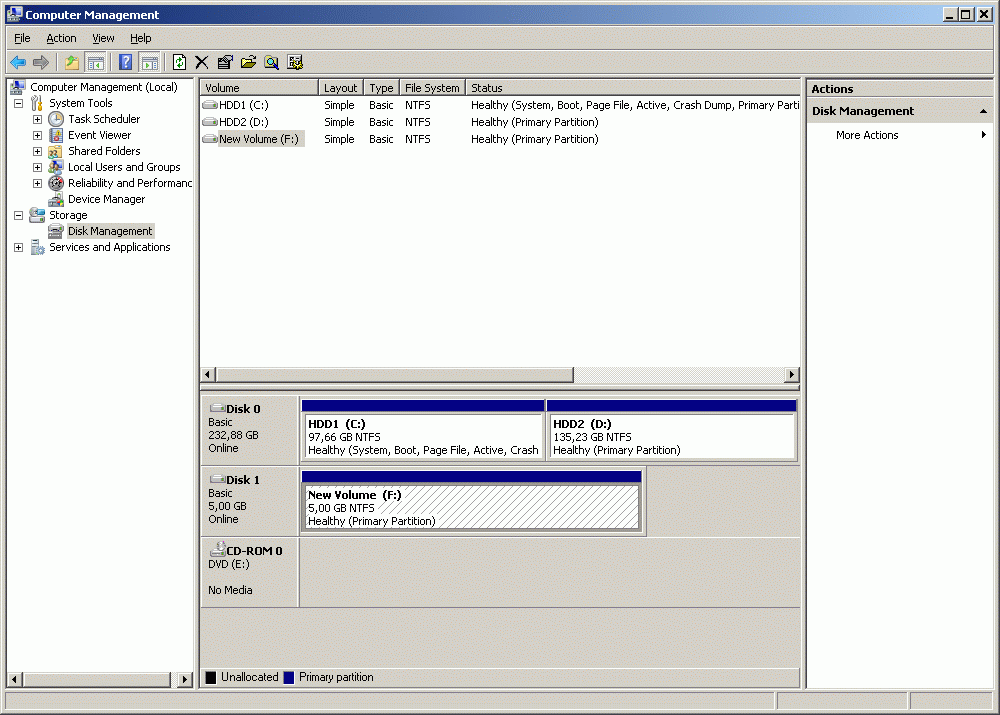 Click to enlarge
Replacing failed mirror
Right click on the device and select Properties, go to the Device status tab.
The device properties window shows that the both mirrors are valid and synchronized.
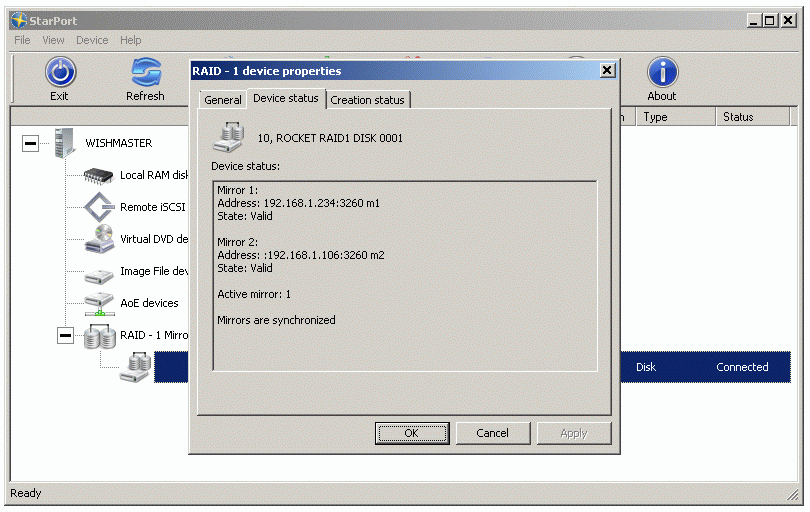
Press the OK button to close the window.
If active mirror fails, StarPort automatically switches to the second one. As a result - no system downtime.
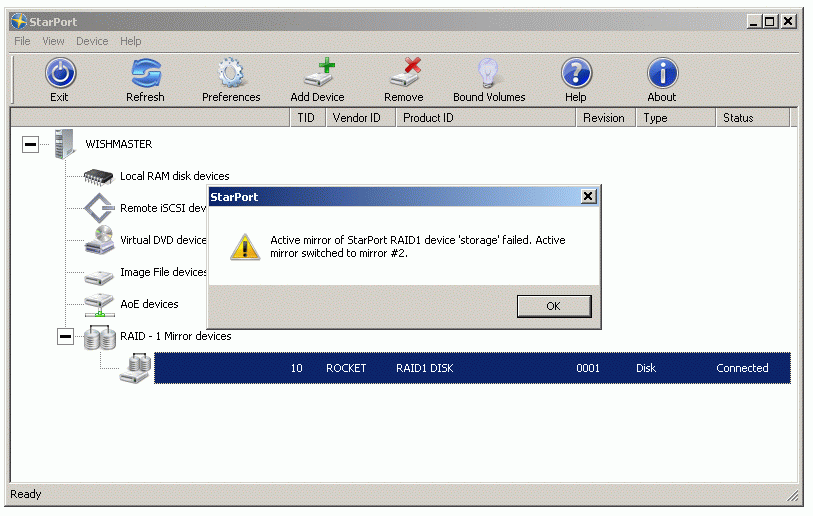
Press the OK button to close the window.
When one of the mirrors fails the device icon looks like on the screenshot below.
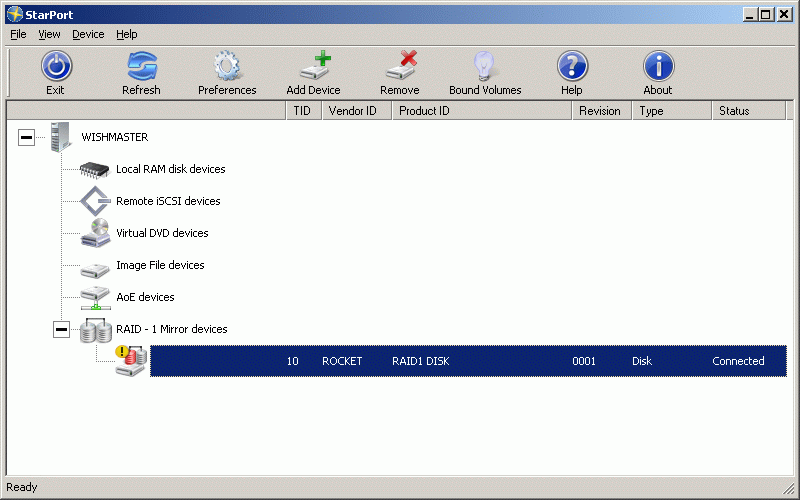
Device status shows the detailed information about which mirror has failed and the synchronization status.
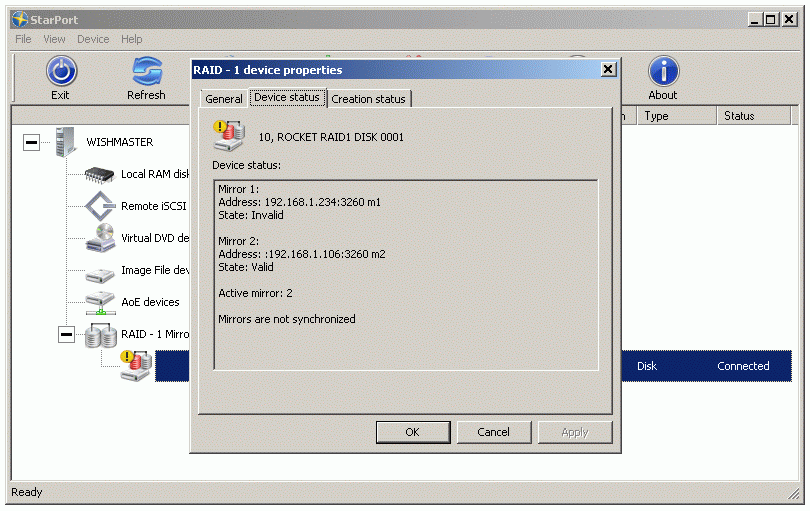
The failed mirror can be replaced with a healthy one in this way:
Right click on the device.
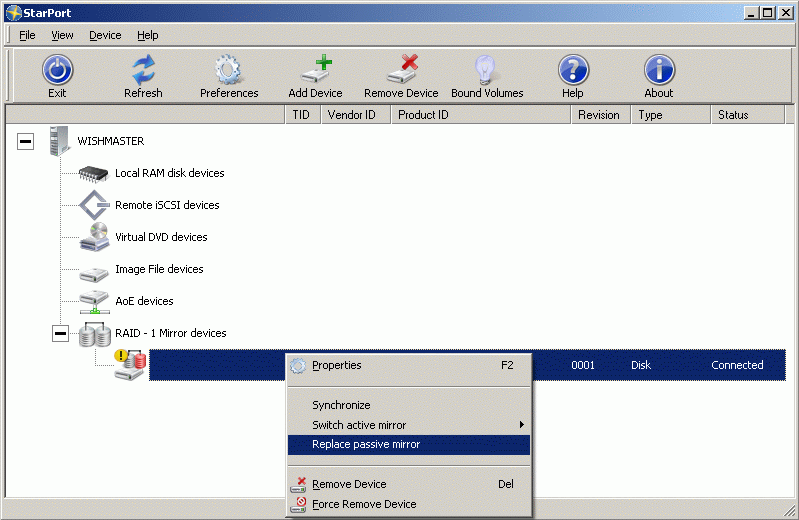
Select Change passive mirror option.
Mirror replacement wizard window appears.
Specify the address where the replacement mirror is stored or create a local image file of a sufficient size.
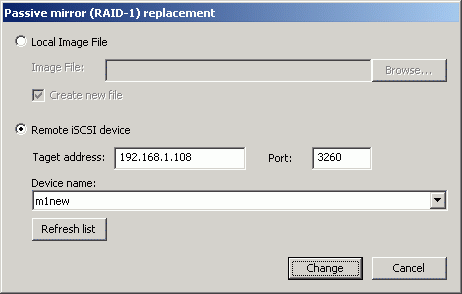
Press the Change button to continue.
StarPort informs that the passive mirror is replaced and needs to be synchronized.
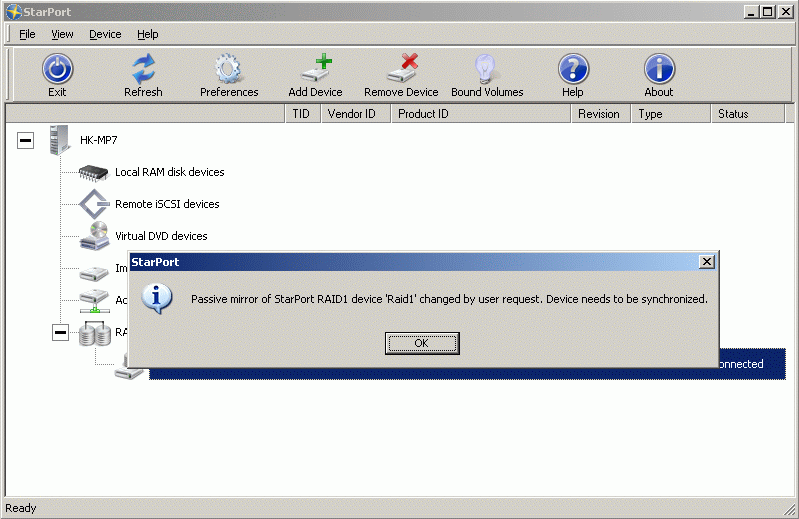
Press the OK button.
You will be prompted if you wish to start synchronization process. During the synchronization the disk will be accessible and functional.
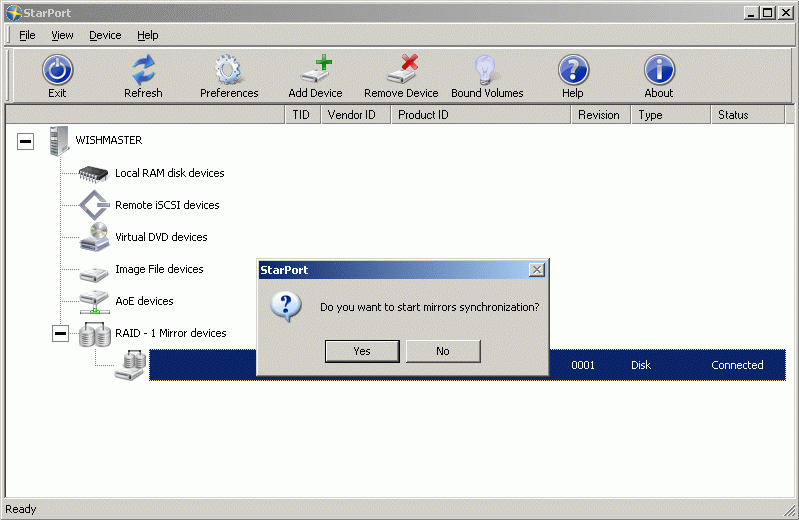
Press the OK button to start synchronization.
StarPort will inform you that the synchronization process has finished.
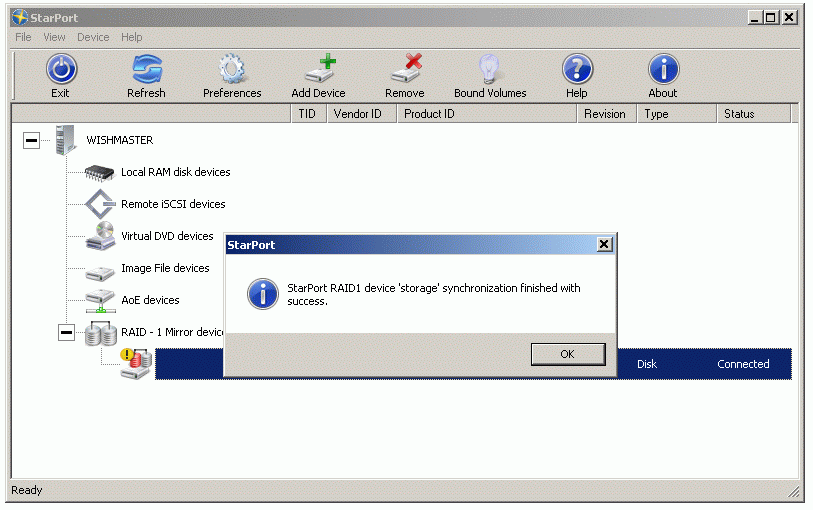
Press the OK button.
The device is now shown as synchronized.
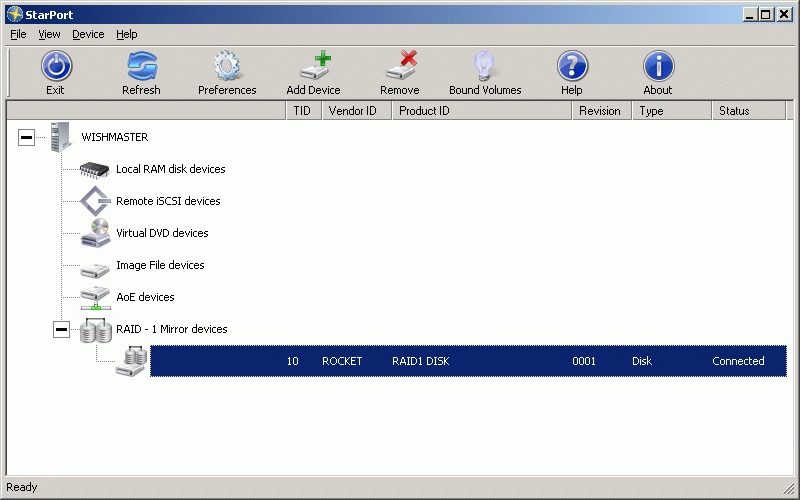
Manually switch active mirror and perform synchronization
In case the remote server storing the active mirror needs to be rebooted or disconnected from the network you can manually switch the active mirror to prevent the data loss and mirror desynchronizing.
In the StarPort console right click on the mirror device.
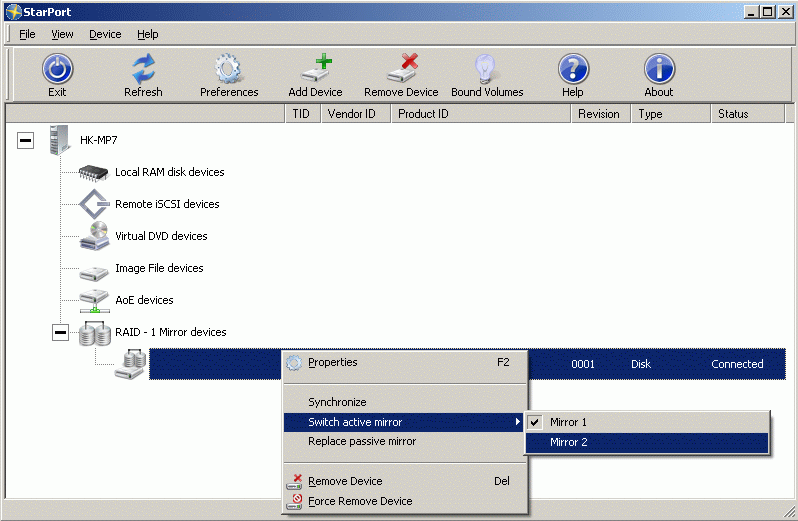
Select Switch active mirror menu item and choose the second mirror as active.
StarPort console will inform that active mirror has been changed.
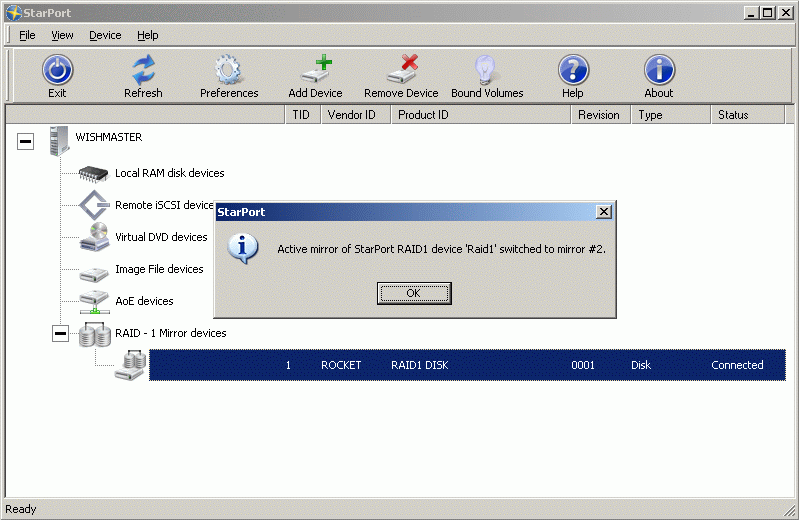
Optionally select Synchronize popup menu item. Passive mirror will be synchronized with the active one.
Remember that on previous step we have switched active mirror to the second one. So by selecting Synchronize popup menu item first mirror with be synchronized with the second one that is active.
Right click on the device.
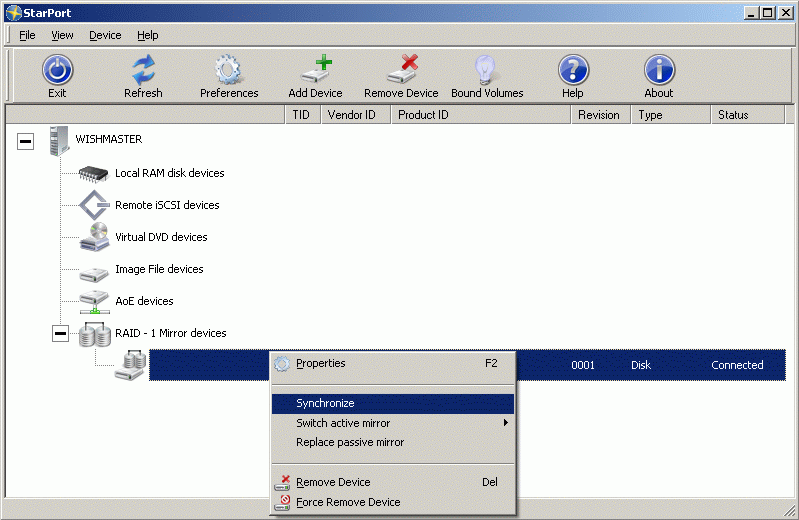
Select the Synchronize menu item.
You will be informed about the synchronization status.
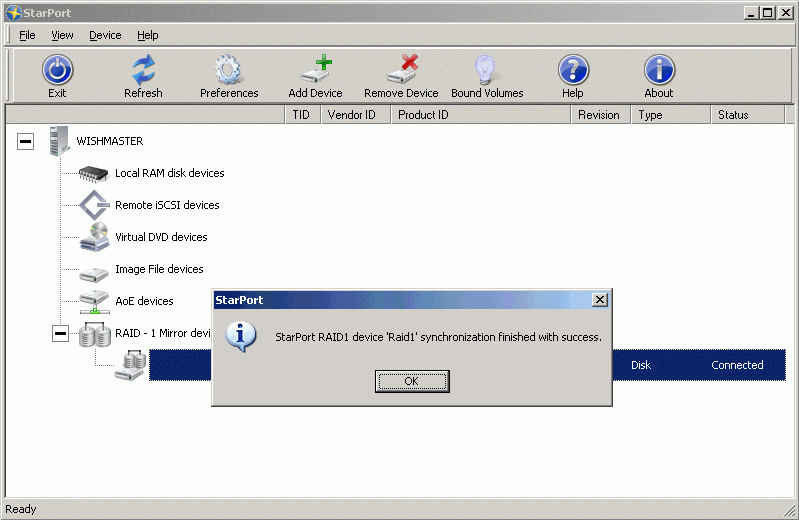
Recreate RAID-1 device with 1 existing mirror
Open the New device installation wizard.

Press the Next button to continue.
Select RAID-1 device from the list.

Press the Next button to continue.
Select Create new device menu item.

Press the Next button to continue.
Specify the device name and size in megabytes.
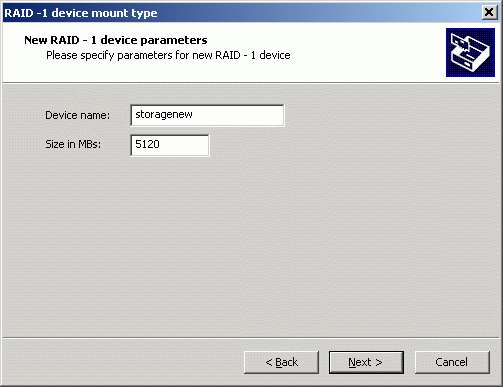
Press the Next button to continue.
Specify existing mirror as the first one. By default first mirror is active.
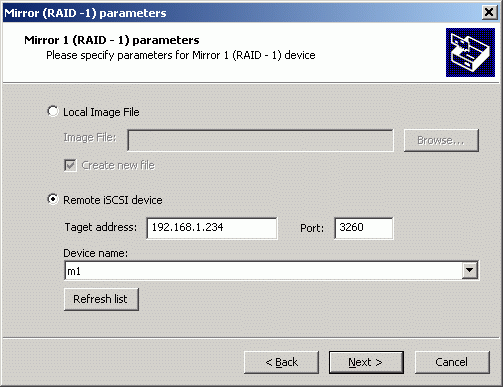
Press the Next button to continue.
Specify new mirror as the second one. By default second mirror is passive.
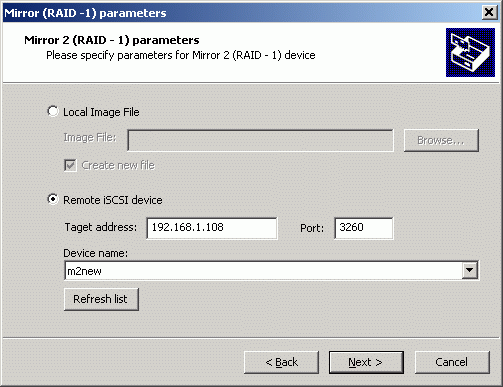
Press the Next button to continue.
Choose Synchronize mirrors data. Passive mirror will be synchronized with the active one.
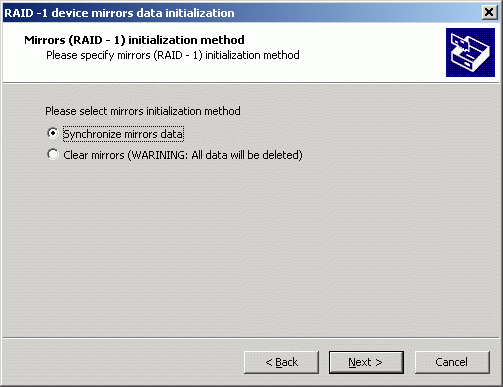
Press the Next button to continue.
Wizard informs that the device has been successfully created.
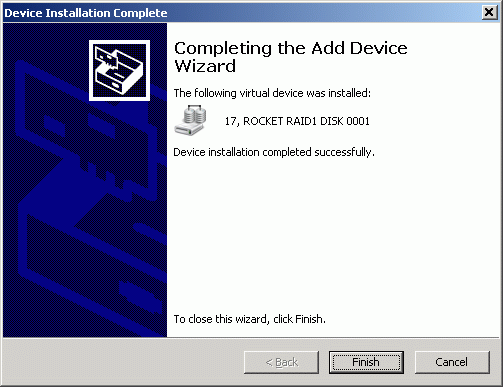
Press the Finish button to close the wizard.
You will see the new disk in the StarPort console.
