

StarWind Virtual SAN ODX (Off-loaded Data Transfer) Configuration and Performance Tuning Guide
- February 14, 2018
- 5 min read
INTRODUCTION
This document is intended for experienced StarWind users and Microsoft administrators, who want to decrease the network workload by using Offloaded Data Transfers (ODX). The guide describes how to check ODX proper functioning and its productivity.
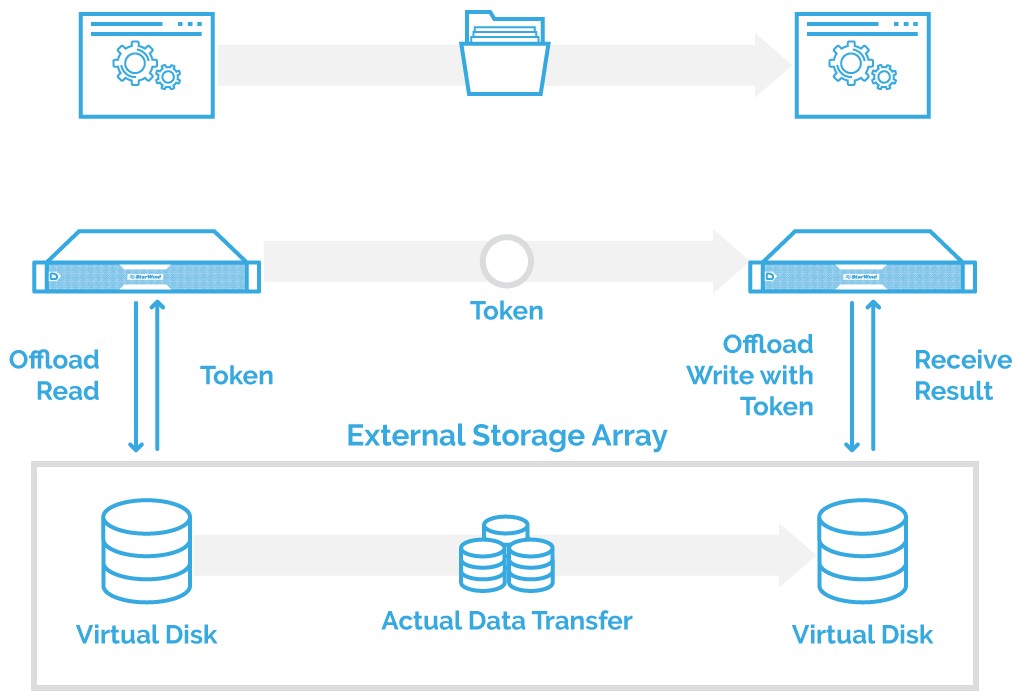
ODX is a feature that allows speeding up certain “copy and move” operations by allowing them to be performed on the storage, instead of running them between the client and storage through the network. The servers only exchange the corresponding commands and service info, while data transferring is performed on the storage layer. As a result, the creation and copying of data takes less time without overloading the channel. ODX is supported on Windows 8/2012 and later versions.
A full set of up-to-date technical documentation can always be found here, or by pressing the Help button in the StarWind Management Console.
For any technical inquiries please visit our online community, Frequently Asked Questions page, or use the support form to contact our technical support department.
Enabling ODX support inside StarWind VSAN
By default, ODX is turned off in StarWind configuration file. To turn on the ODX support we need to modify StarWind configuration file by following the steps below.
NOTE: StarWind service must be stopped before editing the configuration file.
1. Stop StarWind service.
2. Navigate to StarWind root directory and locate the StarWind.cfg file.
3. The default location is “C:\Program Files\StarWind Software\StarWind\StarWind.cfg”.
4. Make a backup of the StarWind.cfg file.
Open the file with text editor, find the ODX string <OdxEnabled value=”no”/> under the <hardwareacceleration> section and change “no” to “yes”. Finally, the string must be like <OdxEnabled value=”yes”/> .
5. Save the changes and close the text editor.
6. Restart the host where StarWind VSAN is installed.
Checking the ODX proper functioning
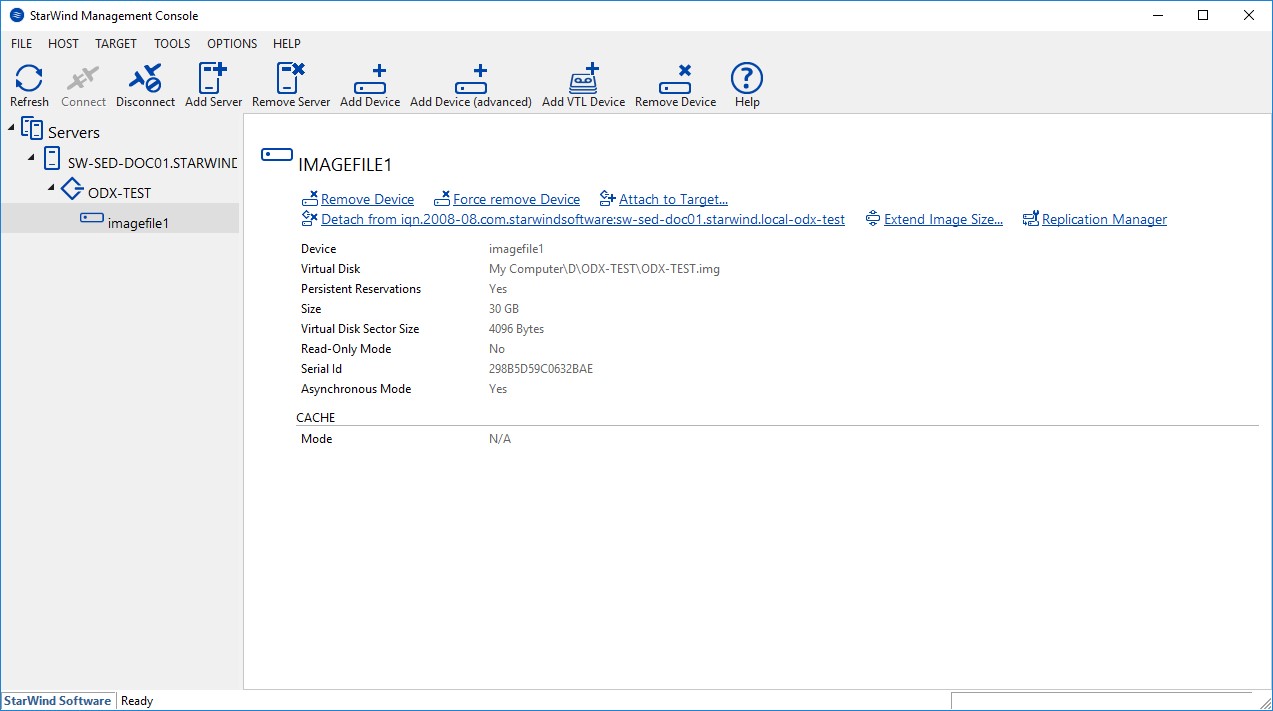
7. Create the device in StarWind Management Console.
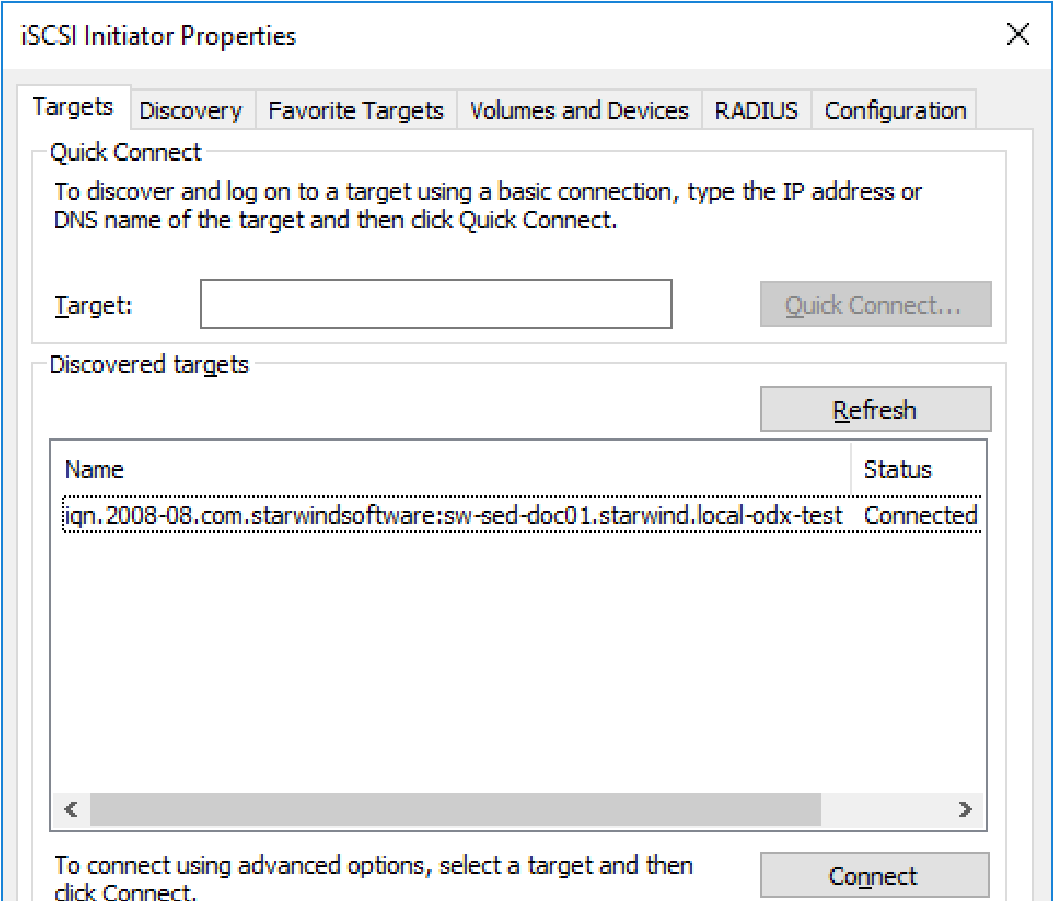
8. Connect the device on the client through iSCSI Initiator
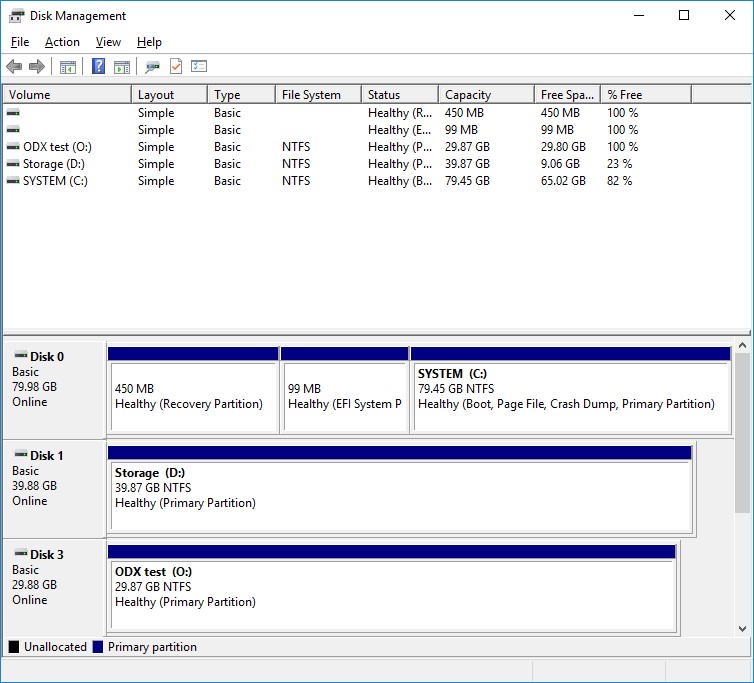
9. Initialize and format the disk using Disk Management.
10. ODX support settings can be changed by editing the registry key. It can be done via PowerShell using the commands below.
To turn on the ODX support on Microsoft level, use the command:
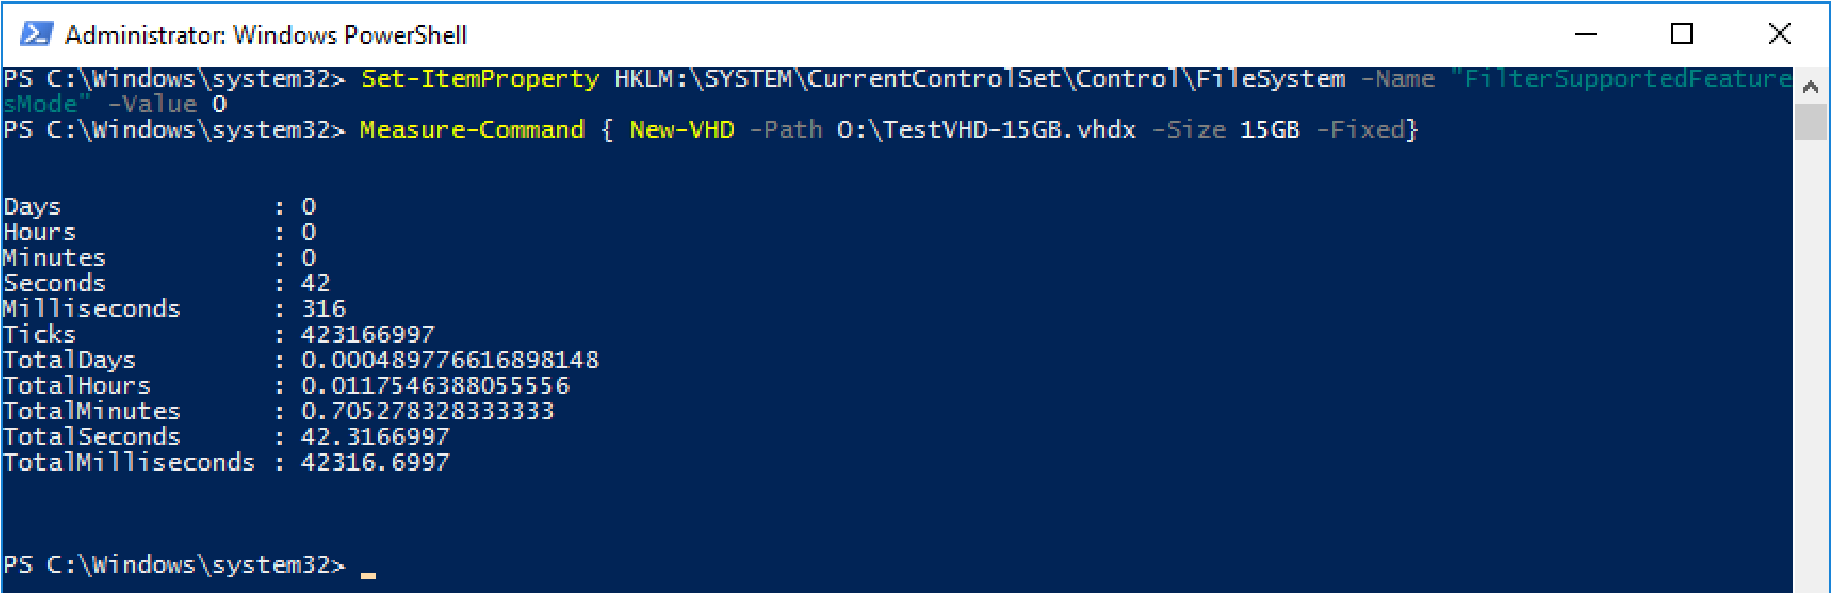
Set-ItemProperty HKLM:\SYSTEM\CurrentControlSet\Control\FileSystem -Name “FilterSupportedFeaturesMode” -Value 0
To turn off the ODX support, run the command:
Set-ItemProperty HKLM:\SYSTEM\CurrentControlSet\Control\FileSystem -Name “FilterSupportedFeaturesMode” -Value 1
This part further describes how to check ODX functioning, by comparing the speed of the .vhdx file creation in two ways: ODX support is enabled in the StarWind configuration file and disabled / enabled on the Windows level.
11. Turn off the ODX support on the Microsoft level:

The .vhdx file can be created on the disk (in this case, disk O:) using GUI. Alternatively, it can be done via PowerShell.
Creation:
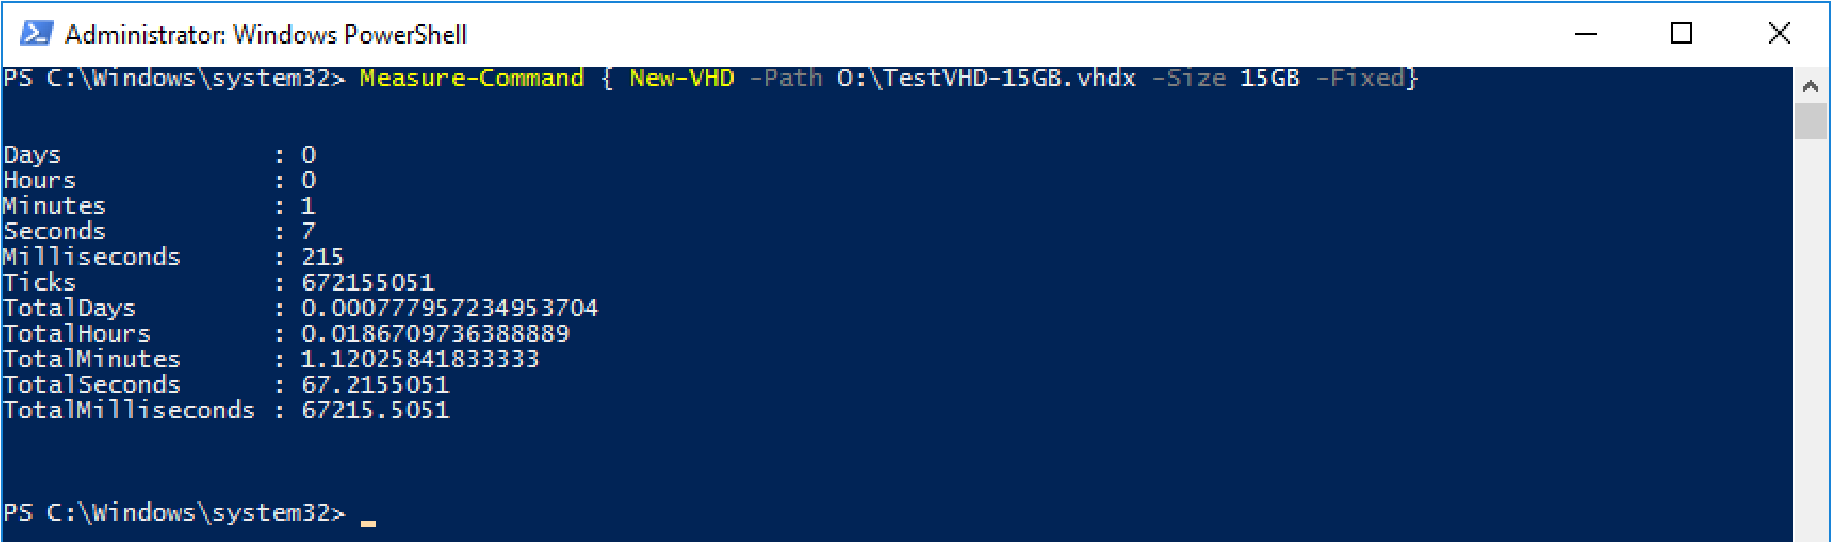
Measure-Command { New-VHD -Path E:\TestVHD-15GB.vhdx -Size 15GB -Fixed}
Copying:
Measure-Command { Copy-Item E:\TestVHD-15GB.vhdx E:\CopiedTestVHD.vhdx}
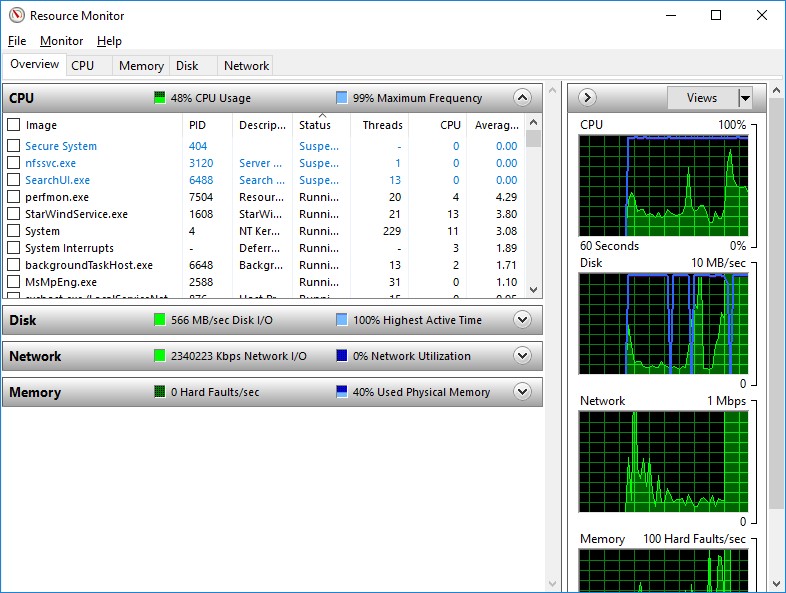
The workload on the network between the client and the server is the main parameter for checking the ODX functioning.
Without the ODX it took around 1 minute and 7 seconds to create the test .vhdx file.
The workload during the creation process was significant:
12. With ODX support enabled on Microsoft level, the time for .vhdx file creation is 47 seconds:
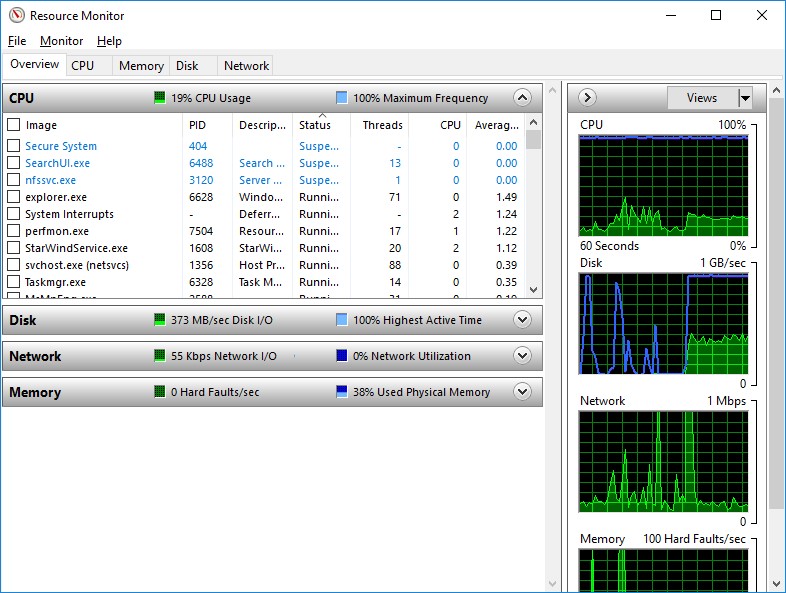
The network workload is minimized, since only a small amount of data is transferred:
Copying files or VMs between server storages may be also used for testing ODX. In case there is a cluster, it is possible to create, copy, and move files between CSV volumes or migrate VMs.
SUMMARY
ODX support allows StarWind to offload multiple storage operations from the Hyper-V hosts to the storage array itself. Thus, these operations are carried out much faster and with no impact on the hypervisor’s performance.
