

StarWind iSCSI SAN & NAS: ESX Storage Migration
- July 16, 2011
- 9 min read

Introduction
This technical paper describes how to provide Virtual Machine migration from existing storage to the StarWind Datastore.
This process requires a customized network infrastructure, where DNS service is running, as well as a computer with the already installed vCenter.
Configuring StarWind Server
This section describes StarWind configuration in details. Before you start, please ensure that the StarWind software is installed on the host that provides storage services to VMware ESX Server.
Storage Information
Image File device
The Image File device creates a virtual iSCSI disk using the space of a physical hard disk on the machine where it is created. The resulting iSCSI storage will have the same structure as a physical hard disk.
When the Image File device is mounted (using an iSCSI Initiator), it appears as standard hard disk to the computer on which it is mounted. All standard disk operations such as formatting using a custom file system, copying data to/ from it and installation of applications, etc. are fully supported.
There are some limitations for the Image File device usage:
As a virtual hard disk uses the space of your physical hard disk, the available volume is limited by the free space on that hard drive. If the size of an image file is close to the remaining free space of the hard disk on which it is stored, you will not be able to store additional files on that disk
You cannot change the volume of the image file while it is online and users are connected to it. However, you can extend the volume.
Preparing Storage
1. Launch the StarWind console by clicking Start -> All Programs -> StarWind Software -> StarWind -> StarWind. Whenever the StarWind Console is running, its icon appears in the system tray.
2. Access the StarWind Console by either double-clicking the icon using the left mouse button or single-click with the right mouse button and selecting the Start Management menu item from the pop-up menu.
3. From the Connections tree select the server you want to provision the iSCSI target device on.
4. Click the Connect button to continue. You will be prompted to enter the login and password. Use the default login and password – “root” and ” starwind” respectively. You can always change them later.
5. Click the Add Target button to continue.
6. In the Add Target Wizard that appears, specify a unique target name. By this name the device will be declared to the iSCSI initiators connecting to StarWind over an IP network.
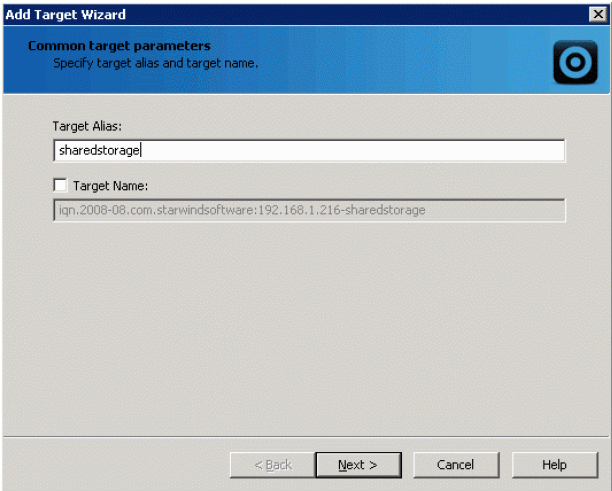
7. Click the Next button to continue.
8. Under Device Type, click the Basic Virtual option button.

9. Click the Next button to continue.
10. Click Image File device.
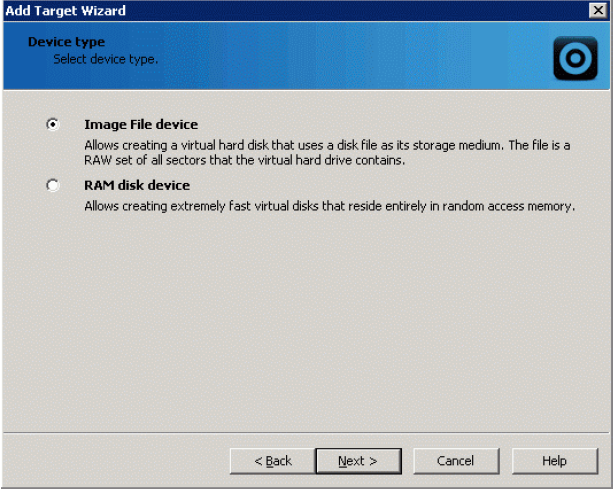
11. Click the Next button to continue.
12. Use one of the options: Create new virtual disk creates a new hard disk image, while Mount existing virtual disk mounts an existing image that you created before.

13. Click the Next button to continue.
14. If you decided to create a new virtual disk, specify its location and name.
15. Define the virtual disk size in megabytes.
Refer to the StarWind Online Help for details regarding additional parameters
(Fill with zeroes, Compressed and Encrypted).
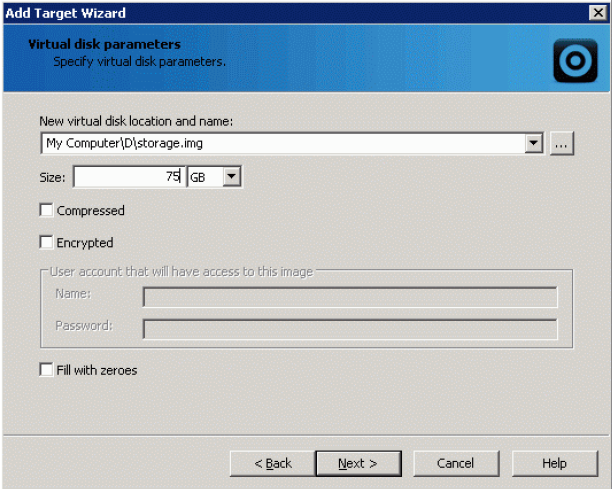
16. Click the Next button to continue.
17. Specify Image File device parameters. Refer to the StarWind Online Help for details regarding the following parameters: Asynchronous mode, Allow multiple connections (clustering), Read-only mode, and Specify advanced options).
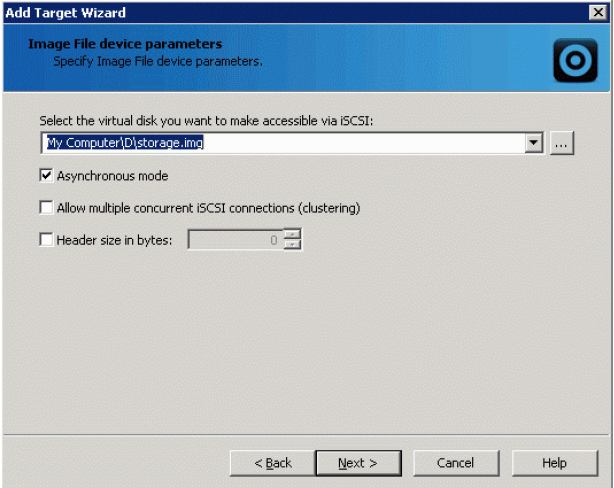
18. Click the Next button to continue.
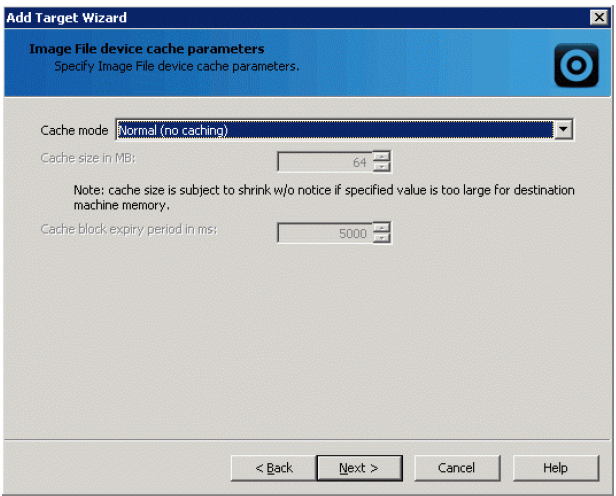
19. From the Cache mode list choose the necessary option.
20. Click the Next button to continue.
21. Make sure you have specified correct device parameters. Click the Back button should any changes be required.
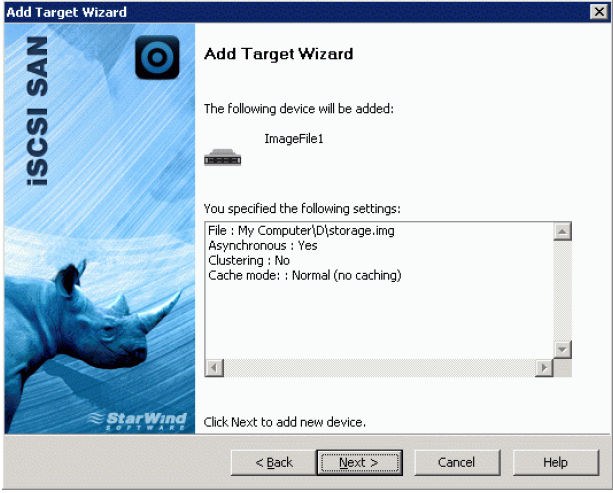
22. Click the Next button to continue.
A summary of the created device is displayed on the last wizard page.
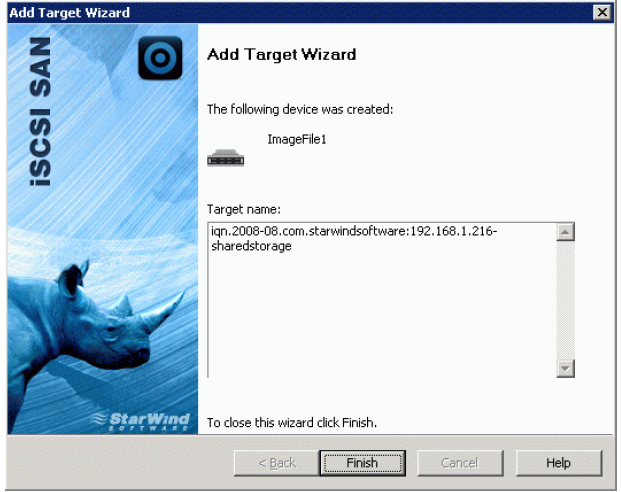
23. Click the Finish button to close the wizard.
Configuring ESX Server
This section gives the detailed description of the ESX configuration.
Configuring the iSCSI Software Initiator
1. Click the Configuration tab.
2. In the Hardware section, click Storage Adapters. The list of available storage adapters appears. Select iSCSI Software Adapter.
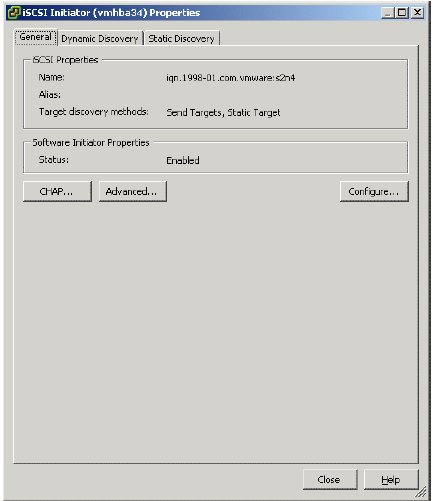
3. In the Details section below, click Properties. iSCSI Initiator Properties dialog appears.
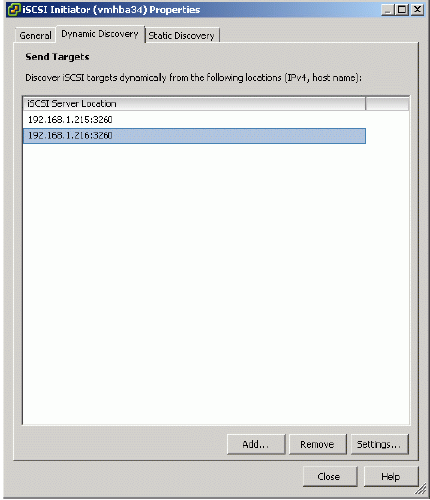
4. Click the Dynamic Discovery tab.
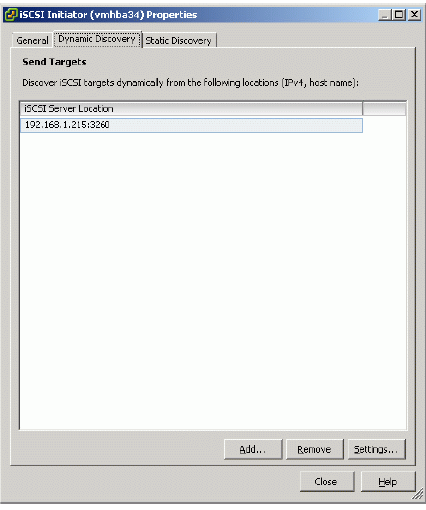
5. Click the Add… button.
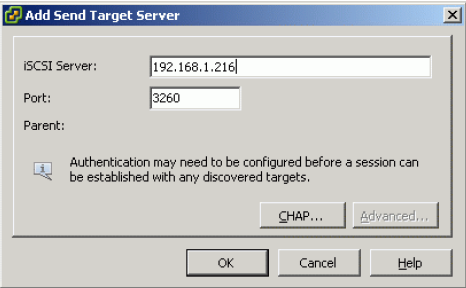
6. In the Add Send Targets Server dialog, specify the IP address of the StarWind iSCSI target server.
7. Click OK. You will be returned to the iSCSI Initiator properties dialog.
8. Click the Close button.
vSphere client will prompt you to rescan the host bus adapter for New Storage
Devices and New VMFS volumes.
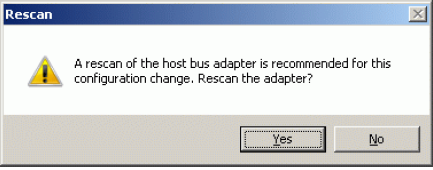
9. Click Yes to rescan the host bus adapter.
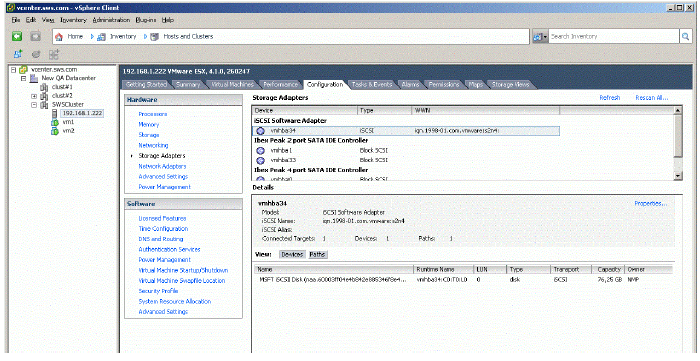
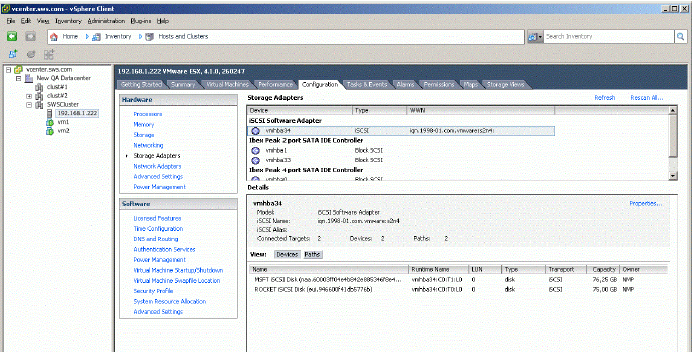
After the iSCSI software initiator has been successfully configured, the vSphere Client window should look like the sample picture below.
Setting Up the Datastore
1. Switch to the Configuration tab.
2. In the Hardware section, click Storage.

3. Click the Add Storage… link on the right. Add Storage dialog appears.
4. In the Storage Type section, click the Disk/LUN storage type.
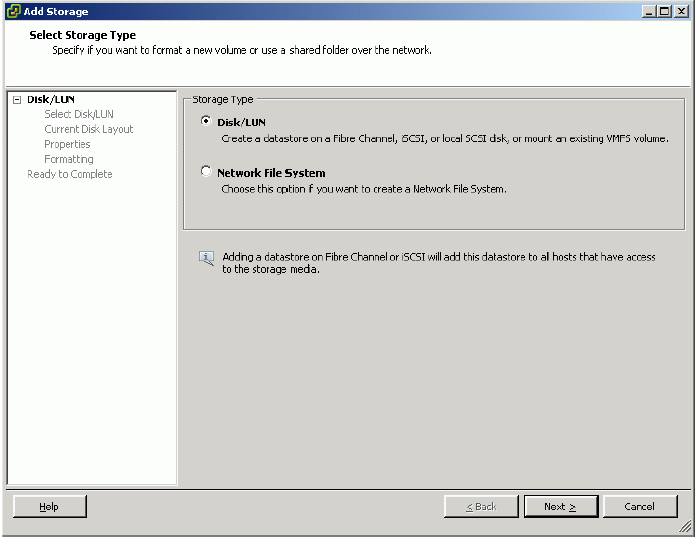
5. Click the Next button to continue.
6. Select the device in the section to the right.
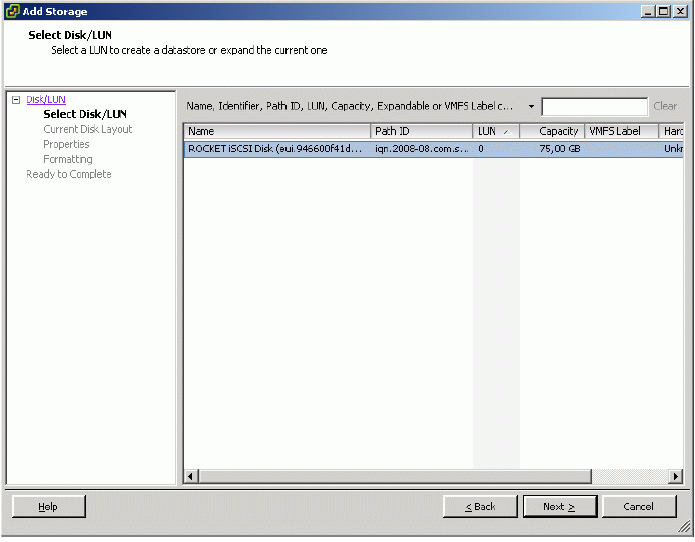
7. Click Next to continue.
8. Review the current disk layout.
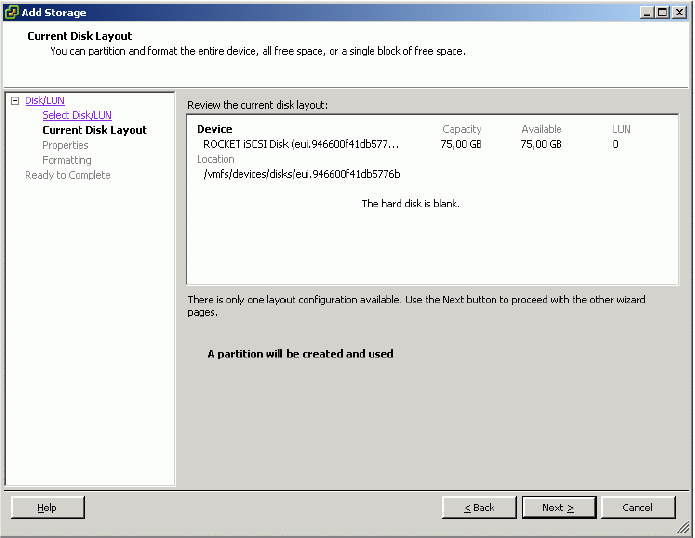
9. Click the Next button to continue.
10. Specify the datastore name in the corresponding text field.
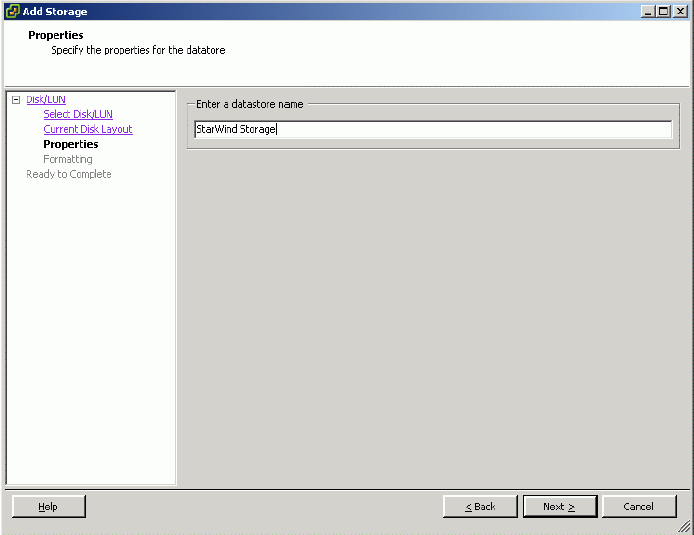
11. Click the Next button to continue.
12. Specify the Disk/LUN formatting options.
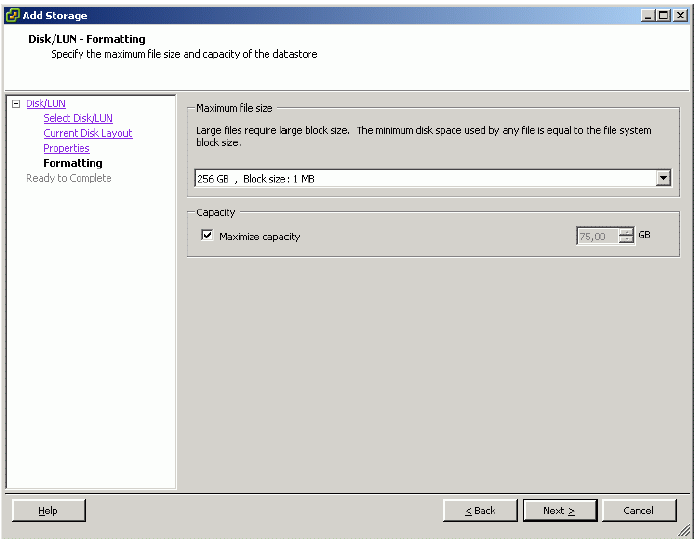
13. Click the Next button to continue.
14. Make sure that the device parameters are correct. Click Back should any changes be required.
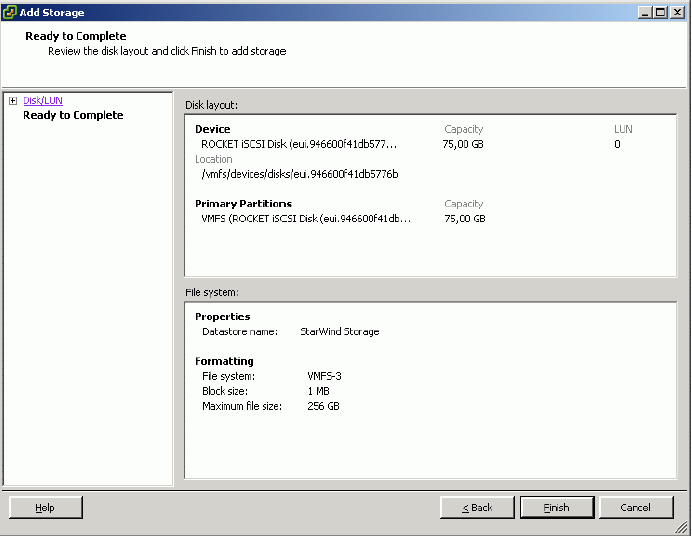
15. Click the Finish button to close the wizard.
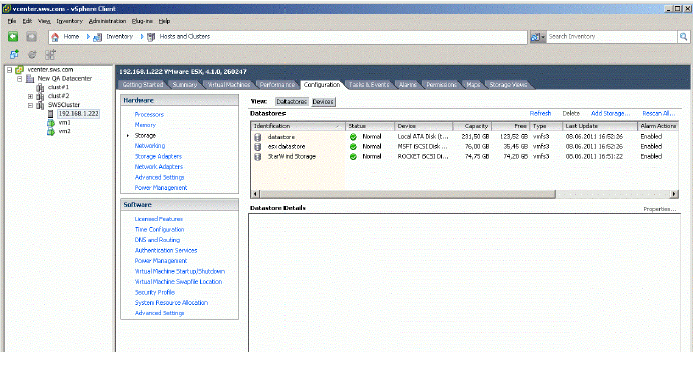
After the datastore has been setup, the vSphere Client window should look like the sample picture below.
Migrating Virtual Machine from MS iSCSI target Datastore to the StarWind Datastore
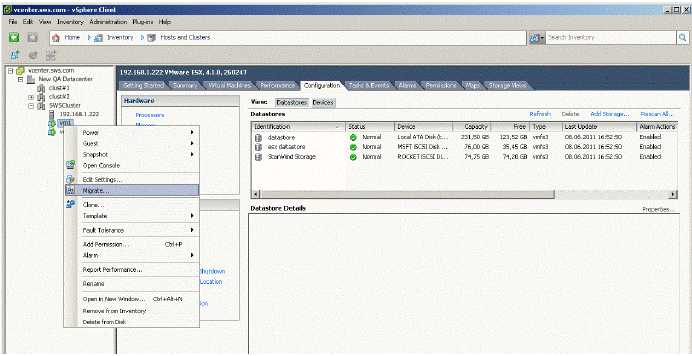
1. To migrate virtual machine, right-click on it and click “Migrate…“.
2. In the Migrate Virtual Machine wizard that appears, click Select Migration Type.
3. Click the Change datastore option button to move the desired virtual machine storage to StarWind Datastore.
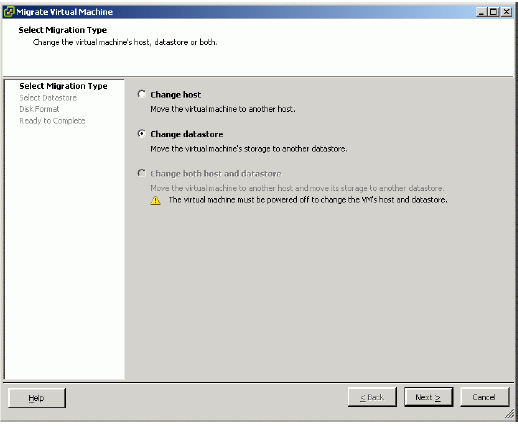
4. Click the Next button to continue.
5. In the Select Datastore section, click StarWind Storage to define it as the destination datastore for this virtual machine migration. If it is possible to migrate, the message “Validation succeeded” will appear in the Compatibility section.
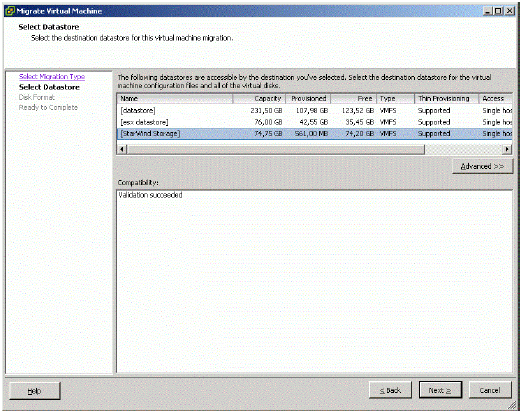
6. Click the Next button to continue.
7. In the Disk Format section, click one of the option buttons to define the format in which the virtual machine’s virtual disks will be stored.
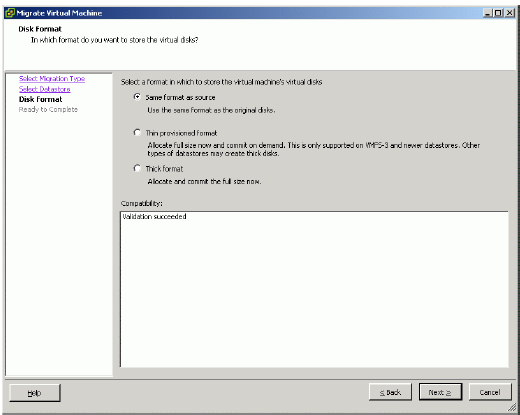
8. Click the Next button to continue.
9. Review the summary before finishing the wizard. Click the Back button should any changes be required
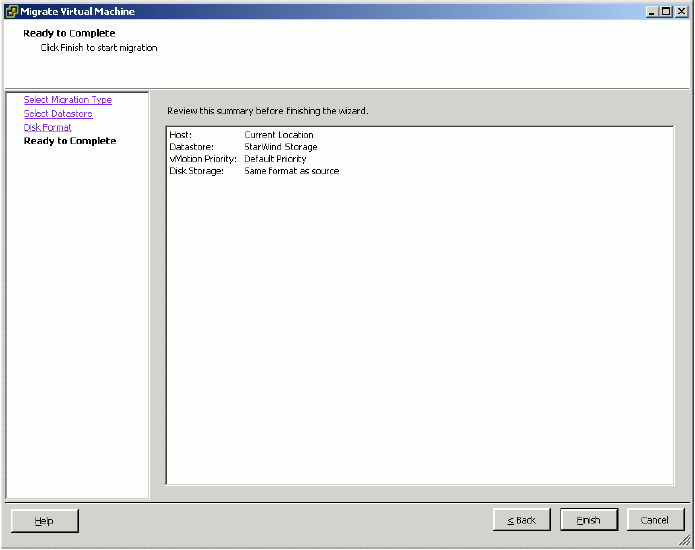
10. Click the Finish button to close wizard and to start migration.
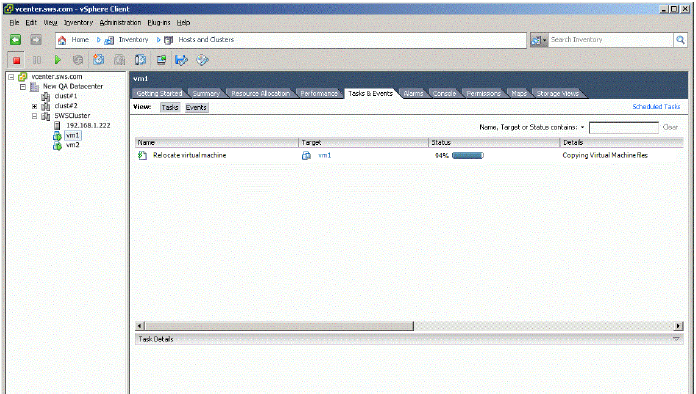
11. Switch to the Task & Events tab to monitor the migration process.
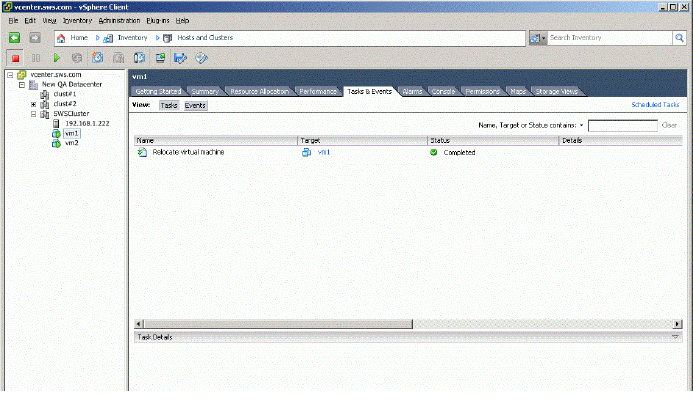
The status Completed shows that the migration has been successful.
12. To make sure that the migration has been successfully completed, open the Virtual Machine Properties dialog. To do so, choose the virtual machine you need, right-click on it, click Edit settings, and choose Hard disk 1. If migration has been successful, the Virtual Machine Properties window should look like the sample picture below.

