

OVF Deployment Guide
- July 16, 2015
- 4 min read
INTRODUCTION
StarWind Virtual SAN® is entirely software-based, hypervisor-centric virtual machine storage. It creates a fully fault-tolerant and high-performing storage pool that is built for the virtualization workload “from scratch”. StarWind Virtual SAN basically “mirrors” inexpensive internal storage between hosts. Virtual SAN completely eliminates any need for an expensive SAN or NAS or
other physical shared storage.
OVF Template is designed to make your StarWind Virtual SAN configuration in Hyper-Converged scenario easier, since you do not need to set any settings manually or install any additional software.
Due to Microsoft licensing policy we, unfortunately, cannot provide you with a Virtual Machine in vmdk format, but that is not an issue since StarWind has free V2V converter. Thus, you just take our vhdx file, convert it into vmdk file and deploy as an OVF template in your ESXi box.
Therefore, here is a brief step-by-step description of the process:
1. Launch V2V converter
2. Convert vhdx to vmdk
3. Place vmdk and OVF in the same folder
4. Deploy OVF in ESXi box
5. Fill in the IP addresses field to assign your networks per certain NICs
6. Wait for Virtual Machine creation and configuration Please refer to the further document content for the detailed step-by-step instructions.
For any technical inquiries, please visit our online community, Frequently Asked Questions page, or use the support form to contact our technical support department.
Pre-Configuring the Servers
This document assumes you have:
1. 2 Physical Hosts with ESXi hypervisor installed on them
2. vCenter configured
3. 2 additional vSwitch for StarWind iSCSI-Data and StarWind Synchronization data configured
4. Downloaded files for creating OVF package: link is provided in the email
5. Original VHD packed in RAR archive (Windows Server 2012 R2.exe)
6. V2V Converter (StarwindConverter.exe)
7. OVF template without virtual hard drive file (Starwind Virtual SAN.ovf)
Convert VHDX to VMDK using V2V Converter:
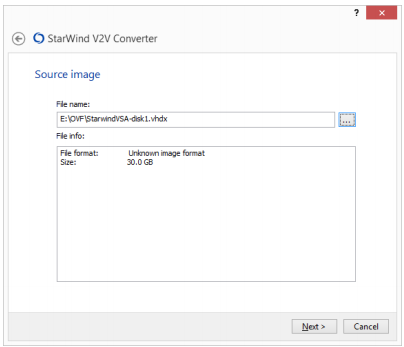
1. Run V2V Converter and click Next
2. Choose path to VHDX file and click Next
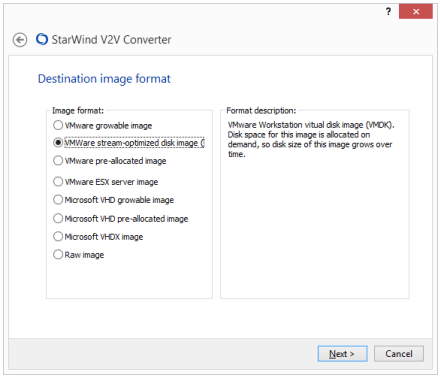
3. Choose VMWare stream-optimized disk image and click Next
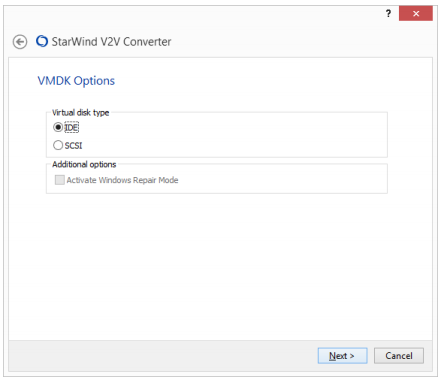
4. Choose disk type and click Next
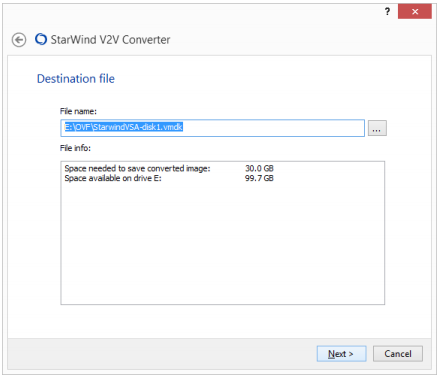
5. Enter a file name and click Next
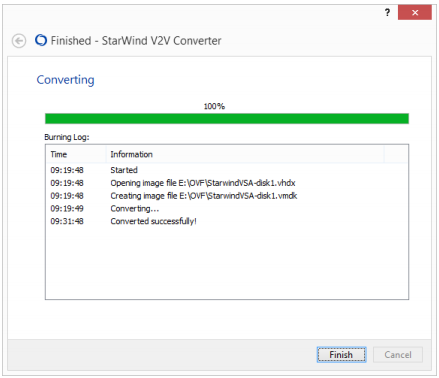
6. Wait until converter finishes the conversion and click Finish
Deploy OVF Template to ESXi host
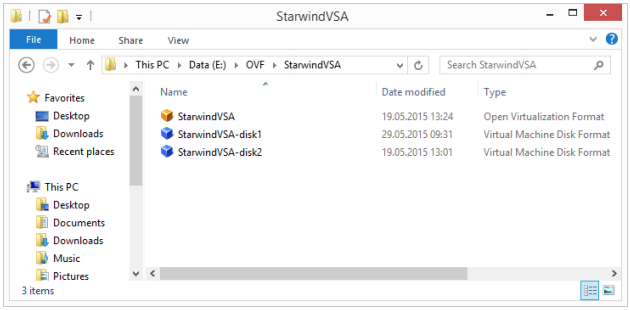
1. Put OVF and VMDK files in the same folder
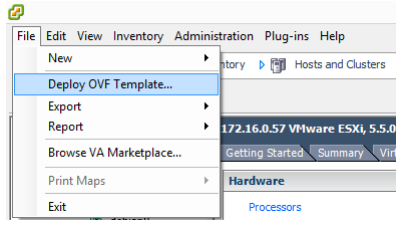
2. Run Deploy OVF Template wizard. Choose File > Deploy OVF Template in vSphere client
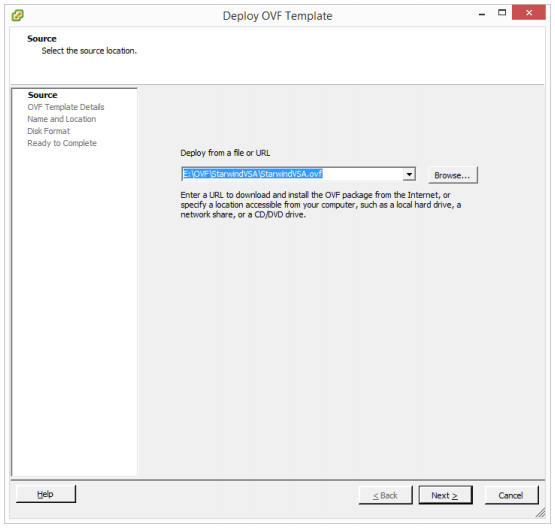
3. Сlick Browse, set a path to your *.ovf file and click Next
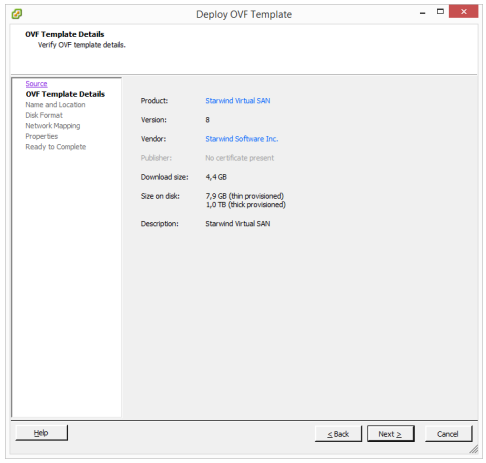
4. Read OVF Template Specification and click Next
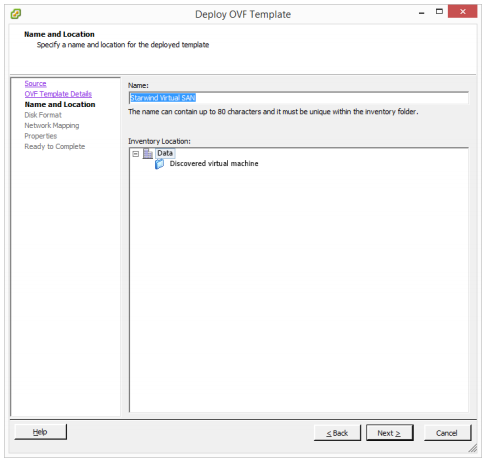
5. Enter a name for VM and click Next
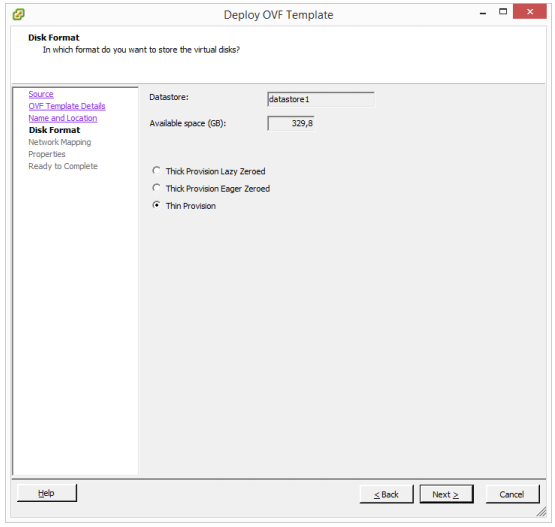
6. Set name and size of datastore. Then choose «Thin Provision» and click Next
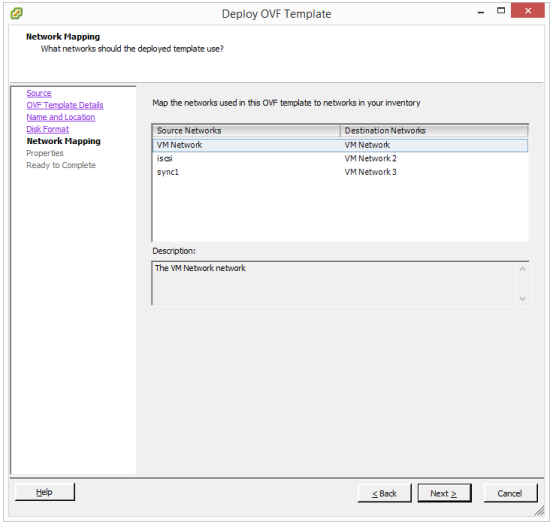
7. Choose VM networks according to their purpose and click Next
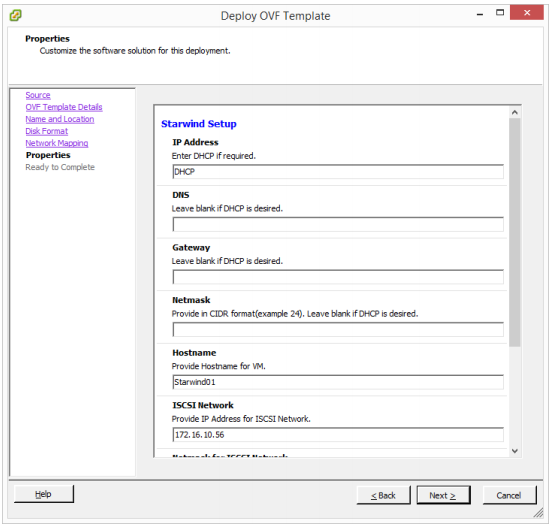
8. Enter required information and click Next
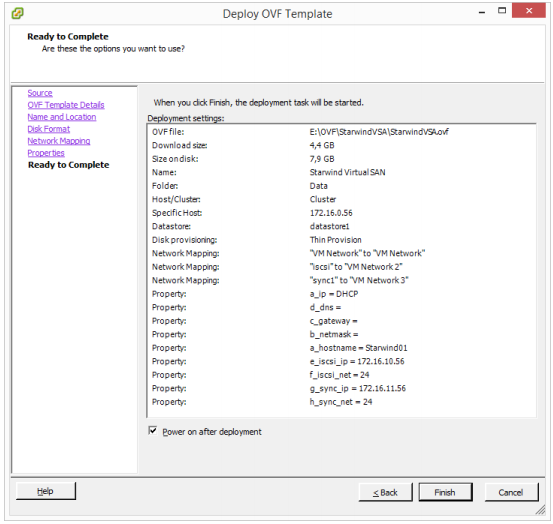
9. Tick Power on after deployment on the last step, click Finish and wait until VM is deployed.
10. Install VMware Tools.
11. Restart VM.
SUMMARY
By following this document, you will make your StarWind Virtual SAN Deployment much easier. Since now, it is all about using pre-configured template that eliminates tremendous amount of time spent on a Virtual Machine configuration as well as possible misconfiguration issues.
