StarWind Virtual SAN®
Benchmarking Best Practices
INTRODUCTION
The basic principle of building any highly available (HA) environment constitutes eliminating any single points of failure in the hardware and software configurations. Since a single hardware failure can lead to downtime for the whole system, it is vital to achieve the redundancy of all the elements in the system in order to eliminate or minimize the downtime caused by failures.
StarWind Virtual SAN® solution makes it possible for the customers to minimize or avoid downtime of storage or host associated failures. StarWind also enables virtualization environment maintenance with zero downtime. This is achieved by clustering multiple StarWind servers into a fault-tolerant storage cluster to guarantee seamless storage failover in the event of hardware/software failures and power outages.
StarWind HA environment relies on redundant network links between the StarWind hosts to ensure storage resilience. This allows maintaining a fully fault-tolerant storage cluster with the hosts only. On the contrary, a major part of the storage solutions available on the market requires some sort of the 3rd entity in the storage cluster to maintain its resilience and stability in case of a hardware failure.
To ensure storage resilience, network throughput and disk speed performance need to be tested before the deployment of StarWind Virtual SAN. The steps provided in this document can be used to test the particular environment before proceeding further with the deployment of StarWind Virtual SAN.
Network Performance Testing
During the network performance testing, the network channels are benchmarked before the utilization within the HA environment (iSCSI Data and Sync). iPerf will be used in order to make sure that the channels operate at their advertised speeds.
It is necessary to measure the network performance and tune the network to get the maximum throughput for the StarWind Virtual SAN environment. These tests are to be performed before deploying StarWind Virtual SAN in a live production environment. This will ensure that you get exact test results and avoid any interference within the existing environment configuration.
StarWind has no strict requirements regarding the particular network benchmarking tools to be used, however, the most commonly applied tools are iPerf and NTttcp (according to StarWind customers). The most popular and versatile disk benchmarking tools are Diskspd, Iometer, and FIO.
The diagram below shows optimal and recommended configurations for StarWind Virtual SAN (comprising 2 nodes).
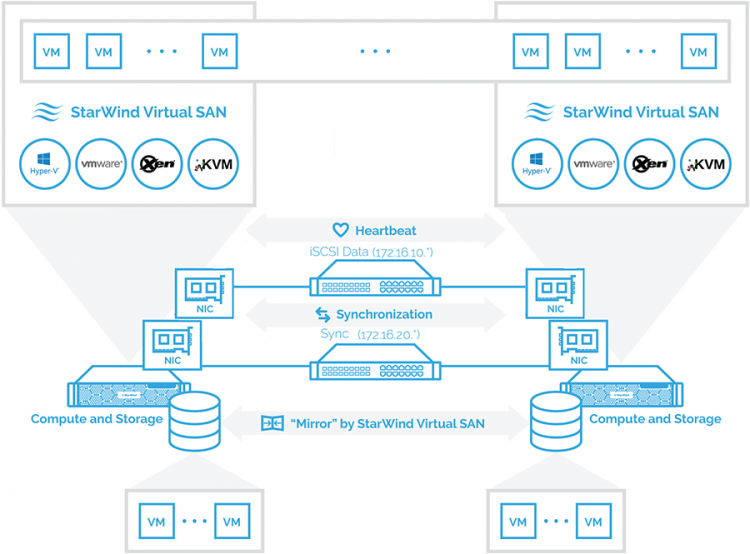
Diagram 1: Hyperconverged scenario setup. Configuration:
a two-node hypervisor cluster converged with StarWind Virtual SAN.
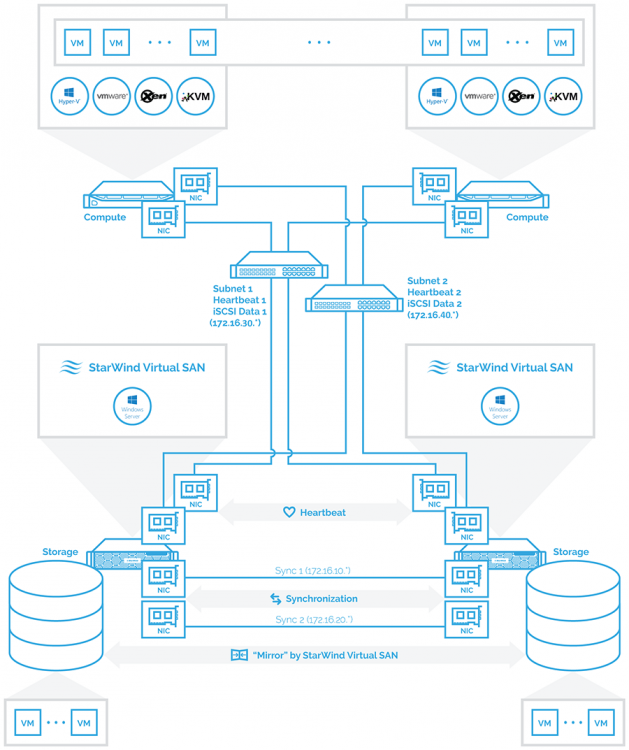
Diagram 2: Compute and Storage Separated scenario setup.
Configuration: a two-node hypervisor cluster connected to a two-node StarWind Virtual SAN.
NOTE: The diagrams above show StarWind Virtual SAN connections only. LAN connections, internal cluster communication, and auxiliary connections must be configured using separate network equipment. The cluster network should be configured according to the particular hypervisor guidelines and best practice guidance.
It is necessary to check:
- Each synchronization link between the StarWind servers;
- Each link between StarWind 1 and Hypervisor 1;
- Each link between StarWind 1 and Hypervisor 2;
- Each link between StarWind 2 and Hypervisor 1;
- Each link between StarWind 2 and Hypervisor 2.
iSCSI data links on each StarWind node should have similar performance rates, otherwise, StarWind Virtual SAN will run at the performance rate of the slowest node. Please, refer to the “Synchronization Channel Recommendations” chapter of the StarWind High Availability Best Practices guide.
If the test results show less than 80% of the link saturation (even on one link), then the network is not suitable for the HA device implementation/installation. In case of low network test results, it is necessary to fix the link performance issue. Furthermore, “send and receive” tests must be executed. Please, refer to the appropriate technical documentation when using the network benchmarking tools.
iPerf examples:
- Server: iperf.exe -s
- Client 1-10Gb – networks: iperf.exe -c 172.16.10.12 -t 150 -i 15 > c:\iscsi-11-2-net.txt
- Client 40Gb – networks: iperf.exe -c 172.16.10.12 -t 150 -i 15 -P 12 -w 16M > c:\iscsi-11-2-net.txt
iSCSI Commands Throughput Testing
Once the configuration of the network and all tests mentioned above is completed, testing iSCSI commands throughput could be performed. RAM disk is required to execute this test appropriately as it is based on the server’s local RAM so that its performance exceeds the network speed. As a result, a user can easily determine the peak performance of the iSCSI throughput for the link.
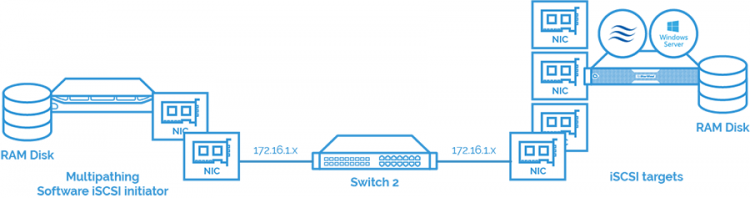
Diagram 3: RAM Disk connected via a single path.
Steps to test iSCSI commands throughput:
1. Create a StarWind RAM Disk device on one of the HA storage nodes.
2. Right-click on one of the servers and select Add Device (advanced).
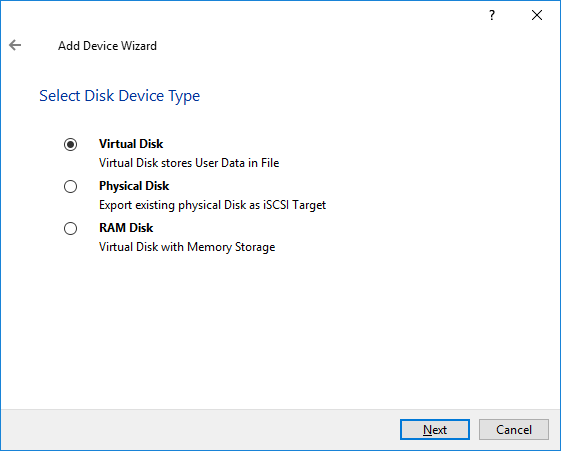
3. Select the Hard Disk Device option. Click Next
4. Select the RAM Disk option. Click Next.
5. In the Size field, indicate the capacity of the RAM Disk in the Size field and select 4096 bytes sector size. Click Next.
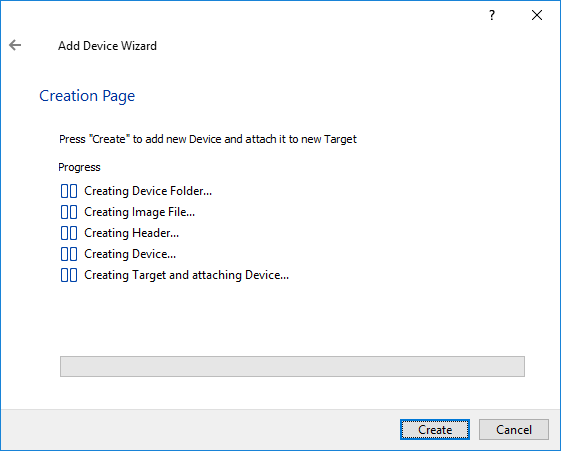
6. Press Create to continue.
7. Connect the RAM Disk device created to a client over a link to be benchmarked (for example, 172.16.10.x).
8. Open iSCSI Initiator Properties in the client host. In the Discovery tab, click the Discovery Portal button.
9. Insert the IP address in the appropriate field and then click Advanced.
10. In the Advanced Settings window, select “Microsoft iSCSI Initiator” from the drop-down list for the Local adapter and select the client IP address for the Initiator IP. Click OK.
11. Go to the Targets tab and connect the RAM disk using the IP as shown below.
12. Measuring device performance:
13. In the Disk management on the client-server, bring the new iSCSI disk online, initialize it as GPT and create a volume.
14. Download Diskspd on the client side. Open CMD (as administrator), navigate to the folder with diskspd.exe (example: cd C:\Diskspd-v2.0.17\amd64fre). The following commands can be used:
|
1 |
diskspd.exe -c100G -t8 -si -b4K -d30 -L -o16 -w100 -D -h H:\testfile.dat > 4K_Sequential_Write_8Threads_16OutstandingIO.txt |
|
1 |
diskspd.exe -c100G -t8 -si -b64K -d30 -L -o16 -w100 -D -h H:\testfile.dat > 64KB_Sequential_Write_8Threads_16OutstandingIO.txt |
|
1 |
diskspd.exe -c100G -r -t8 -b4K -d30 -L -o16 -w0 -D -h H:\testfile.dat > 4KB_Random_Read_8Threads_16OutstandingIO.txt |
|
1 |
diskspd.exe -c100G -r -t8 -b64K -d30 -L -o16 -w0 -D -h H:\testfile.dat > 64KB_Random_Read_8Threads_16OutstandingIO.txt |
NOTE: Different applications (e.g. OLTP, Backup) operate with various block sizes and have multiple I/O demands. Thus, the parameters of Diskspd used in the benchmark may vary in order to confirm that storage subsystems fulfill the requirements of applications by using the particular storage.
15. Connect the RAM Disk via another network channel (172.16.2.x). Multipath will add two connected sessions to the same disk.
16. Set up the Least Queue Depth MPIO policy.

Diagram 4: RAM Disk connected via two paths.
17. Test the RAM Disk using Diskspd.
18. Perform the same tests on all storage nodes and hypervisors.
NOTE: If there is a significant deviation between the results on different channels and RAM disk using the channels, it should be identified which of the following is a critical cause:
- Firewalls;
- Jumbo frames;
- Antivirus.
Local Storage, Image File, and HA Device Testing
Once the Network and RAM disk tests are executed, proceed to the local disk (the storage for creating HA virtual disks), Image File, and HA device testing.
Step A. Test the local disk subsystem on every StarWind node using Diskspd with the same parameters as mentioned earlier.
Step B. Test the performance of an Image File device. To do this, create an Image File with the following steps.
19. Right-click one of the servers and select Add Device (advanced).
20. Select the Hard Disk Device option. Click Next.
21. Select the Virtual Disk option. Click Next.
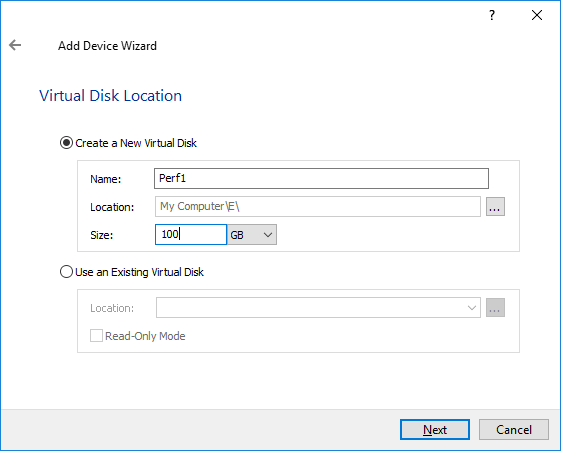
22. To create a new virtual disk, type “Perf 1” in the Name field, indicate the capacity in the Size field as shown below. Click Next.
NOTE: Image File device used for testing must be at least 100GB.
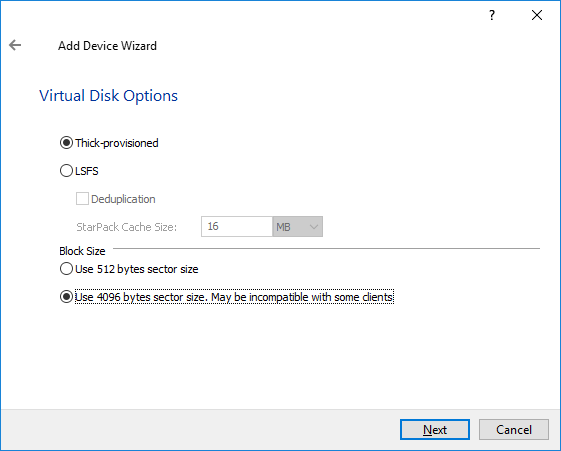
23. Select the Thick-provisioned option and choose 4096 bytes sector size. Click Next.
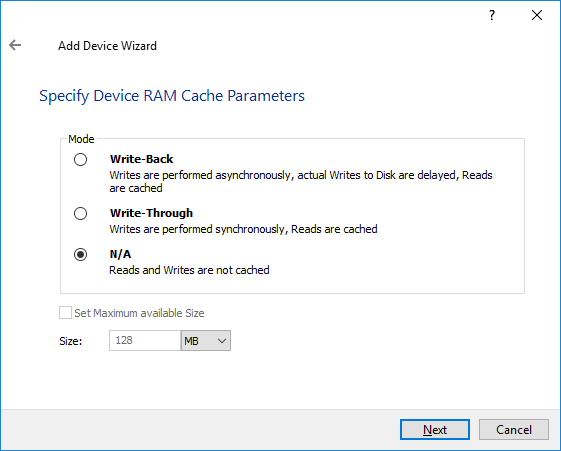
24. Select N/A in the RAM Cache Parameters window. Click Next.
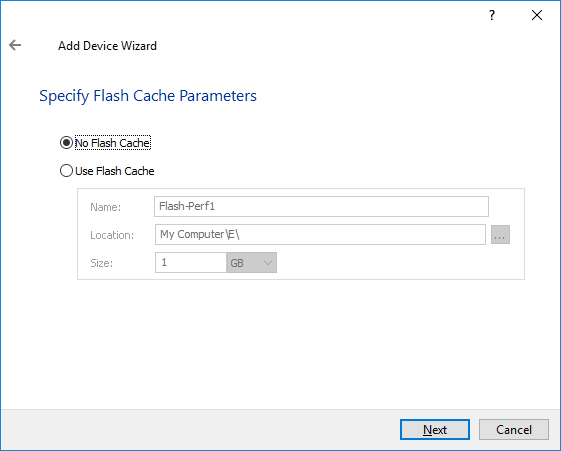
25. Select No Flash Cache. Click Next.
26. Click Create and close the wizard.
Measure the performance in the same way as described in the iSCSI Commands Throughput Testing section. Use an Image File device instead of a RAM Disk device.
NOTE: It is highly recommended to perform the same tests on all storage nodes and hypervisors.
Step C. Test the performance of an HA device. The overall performance is determined by the particular network and disks, which is not exceeding any of their performance levels. Create an HA device by locating virtual disks on the previously measured storages of each node and replicating them to a partner node. Proceed with the following steps:
27. Select the Image File created before, right-click on it and select Replication Manager.
28. Click Add Replica, select synchronous replication and click Next.
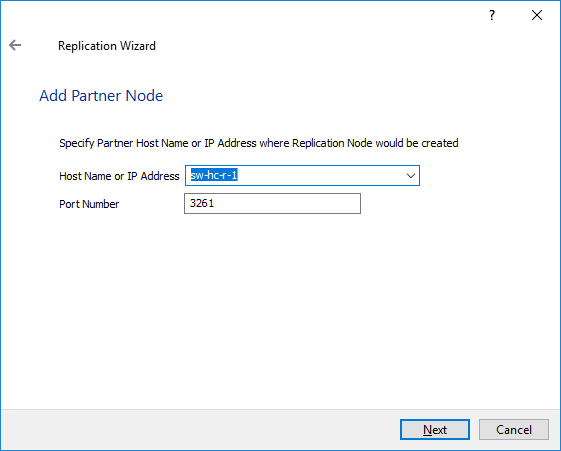
29. Type the name of the partner host in the appropriate field. Click Next.
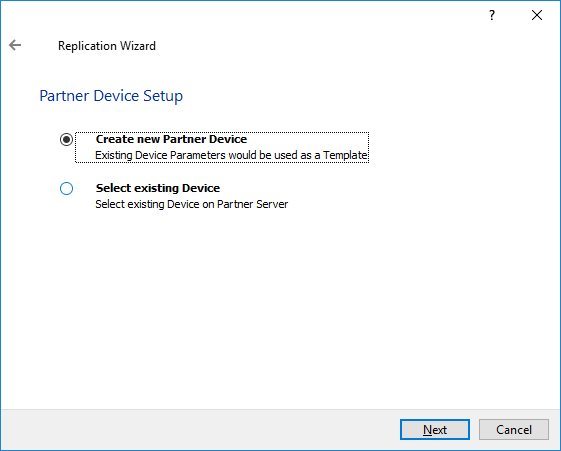
30. In the Partner Device Setup window, choose Create new Partner device and click Next.
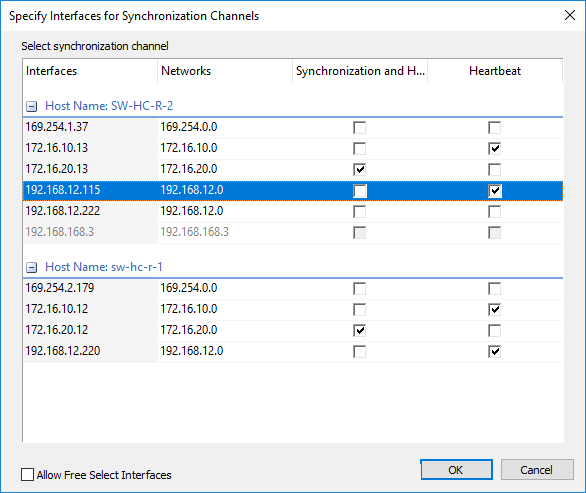
31. In the Network Options for Replication window, click Change Network Settings.
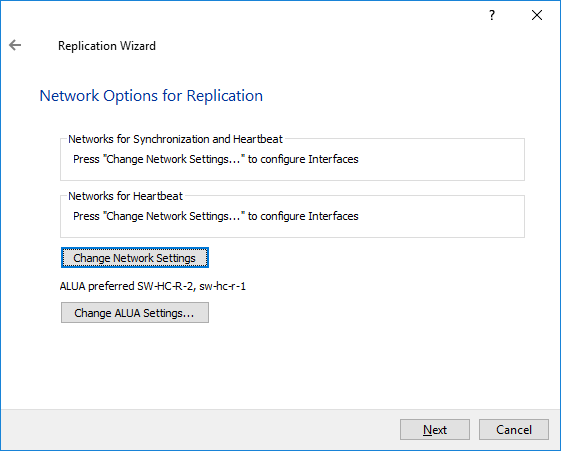
32. Select the channels for Sync and iSCSI/Heartbeat. Click OK and Next.
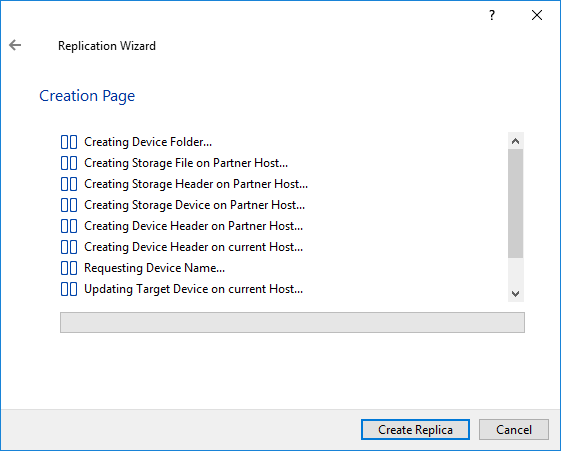
33. Click Create Replica.
Once the HA device is created, the targets can be connected in the iSCSI initiator as described in the last section. Set MPIO policy to the Least Queue Depth. Test performance using Diskspd with the same parameters as before.
NOTE: MPIO policy directly affects the HA device performance so that Least Queue Depth provides better results.
Step D. Compare the obtained results for local storages (Step A) with the results received during Step B and Step C.
RAID Recommendations
StarWind recommends RAID10 (HDD) and RAID5 or RAID10 (SSD) for implementing the HA environment.
The performance of a RAID array depends on the stripe size and disks utilized, however, there are no exact recommendations for the stripe size to be used. In some cases, small stripe size such as 4k or 8k will result in better performance, while in other cases, 64k, 128k or even 256k values will be more applicable. For RAID settings, please refer to the KB Recommended RAID settings for HDD and SSD disks.
The decision must be based on the test results. Initially, the size can be set as recommended by the vendor and further, the tests can be executed. Next, perform the tests with both higher and lower values (Step B). The appropriate results from those tests will allow setting the optimal stripe size.
The performance of the HA device depends on the performance of the RAID array applied.
Troubleshooting
For troubleshooting in case of low performance:
- Antivirus can be the reason for low performance. Make sure that the StarWind folder and all virtual disk files are added to Antivirus exclusions.
- In most cases, Jumbo Frames can be efficient, however, sometimes they can cause performance decline. It is recommended to test performance with Jumbo Frames of different sizes and without them. Jumbo Frames (if used) must be enabled on all NICs, switches, and all applicable network equipment items in the SAN. Check with your hardware vendor to make sure that your networking hardware supports Jumbo Frames.
- Hardware issues can also be the reason for low performance. In some cases, low performance in CPU can cause saturation of its resources.
CONCLUSION
Following the concepts of StarWind Virtual SAN Benchmarking Best Practices allows configuring highly available storage for production environments and minimize or avoid downtime associated with the storage or host failures. Also, it allows achieving the HA device performance similar to the underlying storage performance, which is vital for cluster environments that are running highly intensive production and require storage failover in case of hardware/software failures.