Basic Configuration Walk-through
VCHA overview
High Availability for vCenter Server has never been as important as today when there are so many products dependent on vCenter, e.g. VMware NSX, vSAN, Horizon View, etc.
VMware tried different approaches to bring HA to the vCenter.
There has been vSphere HA for a long time. Although it can protect vCenter Server from hardware failure it doesn’t provide protection on the Guest OS level. So, if Postgres DB in vCenter Server Appliance gets corrupted you would have to restore vCSA from a backup copy or rebuild it from the scratch.
There used to be vCenter Heartbeat product, which was covering Guest OS level protection, but you had to buy it separately and it wasn’t easy to deploy and it was hard to manage. The product went End of Availability in 2014.
VMware also tried to make vCenter more resilient using Microsoft Failover Clustering. It is still a supported solution for Windows vCenter Server, but it’s pretty complex, it depends on Microsoft Windows services and requires RDM disks which are not supported in some environments. Also, it cannot be used with vCSA which makes this option even less attractive.
In vSphere 6 VMware enhanced FT capabilities to allow 4 vCPUs in protected VMs. That would allow vSphere admin to ensure the higher level of availability for vCenter, but it doesn’t protect against application errors.
In vSphere 6.5 VMware finally brought native High Availability for vCenter Server Appliance. Provided that vCSA in vSphere 6.5 has plenty of exclusive features I suspect it is a signal to all customers that we won’t see Windows vCenter Server in the next release of vSphere.
vCenter HA (VCHA) is a 3-node cluster. Each node plays one of the following roles: Active, Passive or Witness. Witness appliance is used as a tie-break in case there is a network partitioning between Active and Passive nodes and it never becomes an Active node.
Active and Passive nodes are configured with two interfaces – Management and High Availability. The management interface is used to own publically facing IP address. In case of the failure of the Active node the management IP address will be transferred to Passive node.
Both nodes use HA interface to exchange heartbeats and to continuously replicate PostgreSQL database and appliance configuration.
Witness Appliance is connected to HA interface only to detect the availability status of Active and Passive nodes.
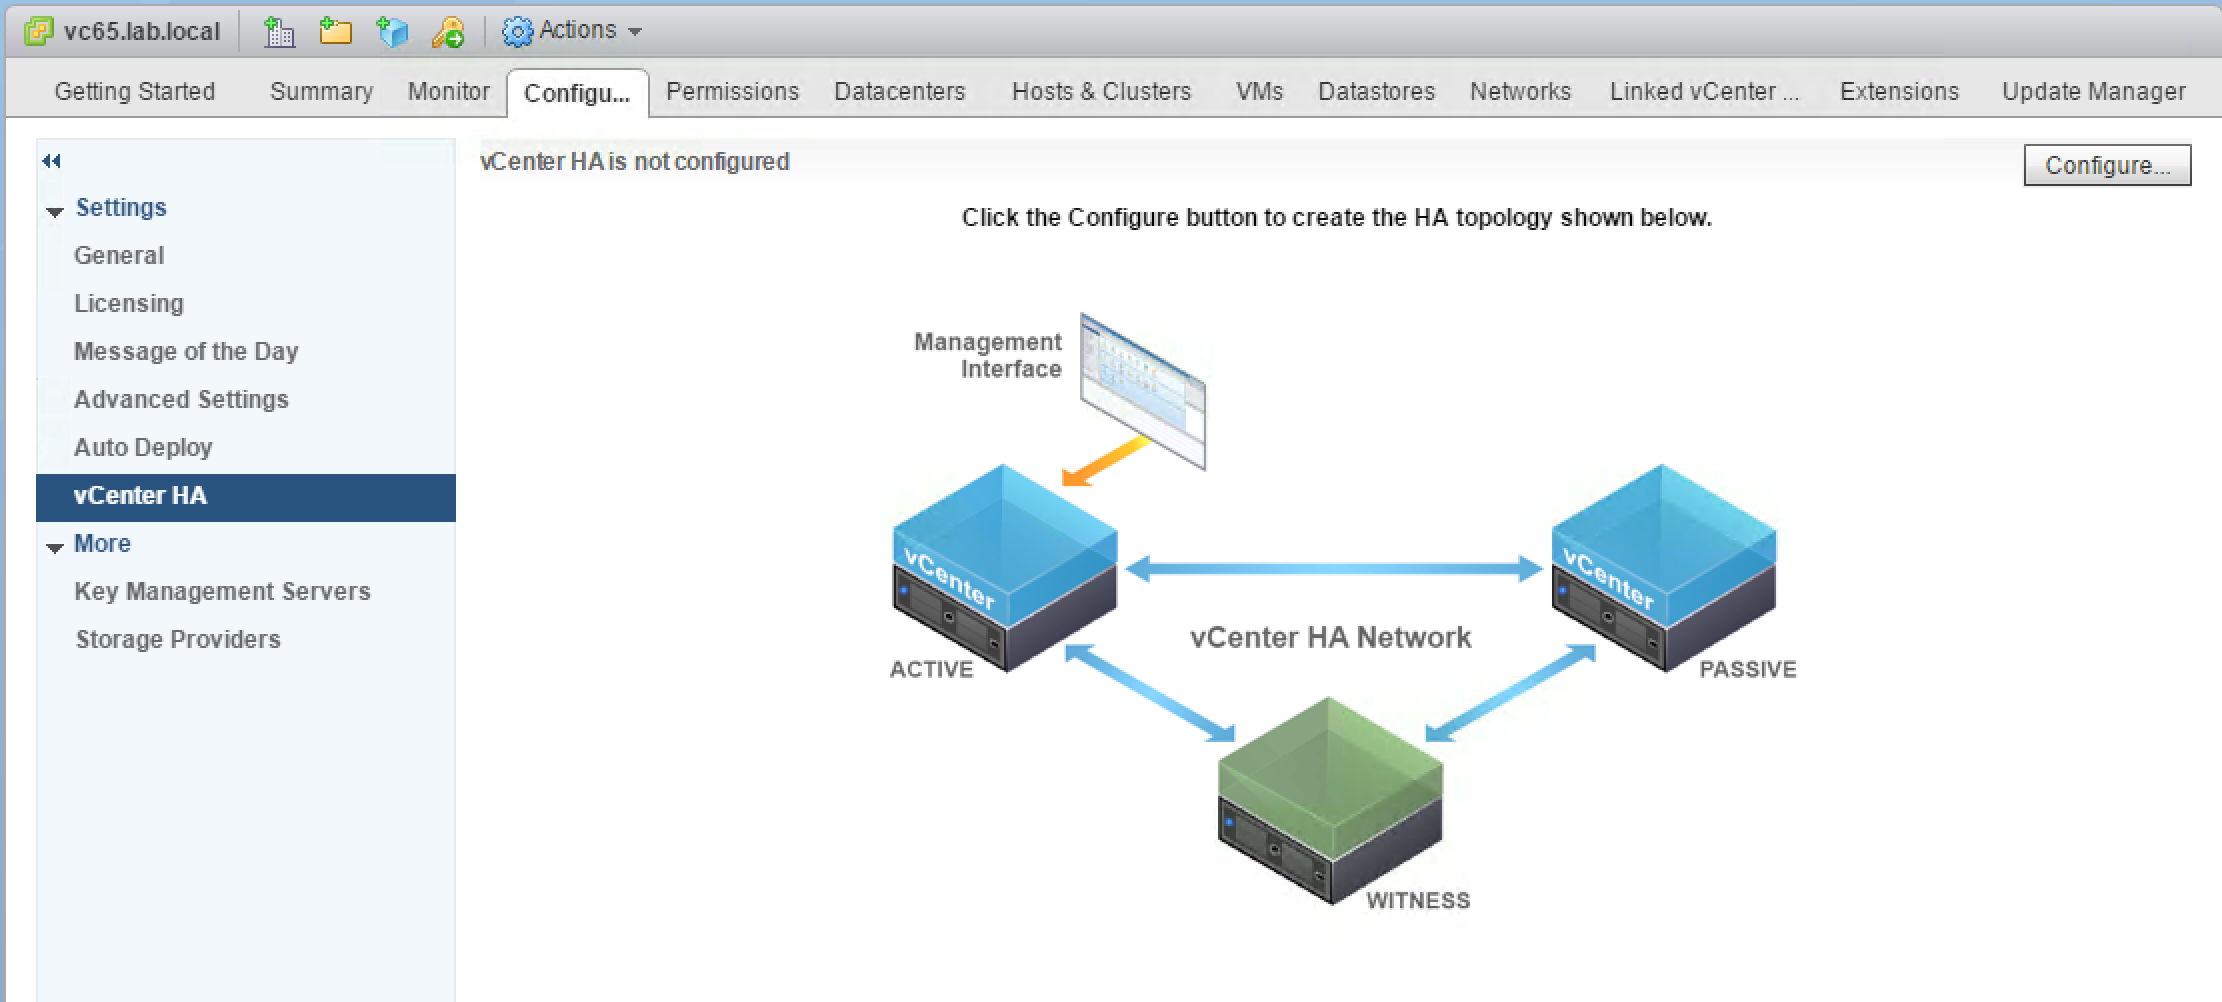
This simple diagram depicts the standard topology of VCHA

A couple of words on VCHA networking. Management and HA networks must be on the different subnets. While both nodes – Active and Passive – must be connected to the same management subnet, the HA interfaces of all three nodes can be on different subnets. Unfortunately, this scenario is not covered in the VMware Availability guide, but I was told it would require a single step of configuring static routes on Active and Passive nodes. I will cover this step in the vCenter Server High Availability Review – Part 2.
Please don’t try to configure the default gateway on the HA interface to enable routing for HA traffic. vCSA doesn’t support having two default gateways. When second NIC is configured with default gateway it will effectively disable the gateway on the management interface which will most likely result in lost connection to the vCenter Server.
The official documentation doesn’t mention bandwidth requirements, but the latency between all nodes must be under 10 ms.
The failover process is very straightforward. When Passive node detects the Active vCenter is down it will take an ownership of the management IP address.
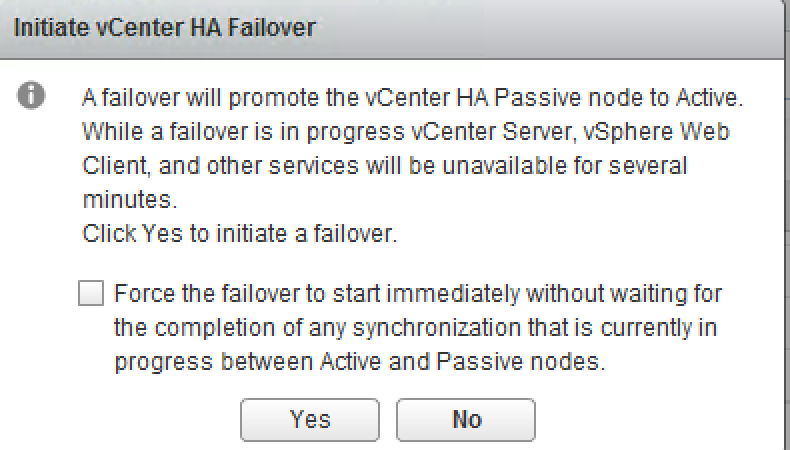
You may also want to run Manual Failover for maintenance purposes, for instance.
There have to be at least two of three nodes available for vCenter Server to function. If both Witness and Passive nodes fail, the Active vCenter Server will stop its services as well. Bringing back online either Witness or Passive node will be automatically trigger vCenter services to start up on the active node.
There might be situations where you would like to keep Active node running while taking two other nodes down. This can be achieved by switching VCHA cluster to maintenance mode or by temporarily disabling HA.

Unfortunately, it isn’t stateful failover so you will need to reconnect to the web client after vCenter management IP address is moved to another node. The failover process normally takes about 5 minutes, but I reckon the final number will depend on the size of the vCenter, its inventory and database.
There is another component in the vCenter HA equation which we haven’t talked about yet – Platform Services Controller.
VCHA is fully supported with embedded PSC so you get 2-in-1 HA solution; and for external deployment of PSC, you still have 2 options:
- Complex one which involves load balancers and PSCs are deployed behind them. This method provides automatic failover of PSC.
- This option is very straight forward to implement, but it requires an administrator to run on command on the vCenter to repoint it to a second PSC should the first one fail.
As you can see there is not much difference between PSC HA in vSphere 6 U2 and vSphere 6.5.
The main difference though is that Enhanced Linked Mode between vCenter Servers with embedded PSCs is deprecated now. In vSphere 6 U2 this type of topology was still supported, but was frowned upon.
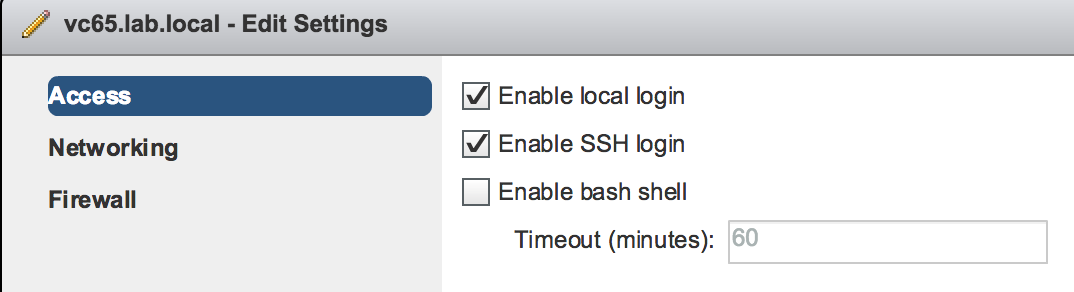
Requirements are pretty loose for VCHA and I already covered most of them when I talked about VCHA networking. Apart from that you will only have to temporarily enable SSH on the VCSA, but it can be disabled once the VCHA configuration is finished.
It is also recommended host each of the nodes on separate ESXi server and on separate datastores.
Configuration workflows
vCenter Server has two techniques to implement VCHA – Basic and Advanced configuration wizards.
Basic configuration automates almost all steps of the VCHA. It should be used in so called –self-managed vCenter Server environments. In other words, it will work when vCenter Server can manage its own virtual machine. This is true for Enhanced Linked Mode as well because all vCenter servers are in the same SSO domain.

Here are Basic Configuration steps:
- The first vCSA is deployed
- Administrator adds the second NIC and attaches it to the HA network
- Using Basic Configuration VCHA wizard administrator provides information on IP addresses for Passive and Witness nodes, and the names of the compute resources and datastore for each node.
- vCenter uses this information to prepare itself for a cloning.
- vCenter clones the Passive node first
- vCenter clones the Witness node using smaller disk footprint. In my home lab the Witness appliance size was about 15GB only, whereas Active vCenter was taking about 34GB.
- vCenter completes the VCHA configuration by configuring the replication and heartbeats between all nodes.
Advanced Configuration gives an administrator more flexibility. The system prepares the vCenter for cloning, but administrator needs to clone and customize nodes before VCHA wizard can complete the configuration.
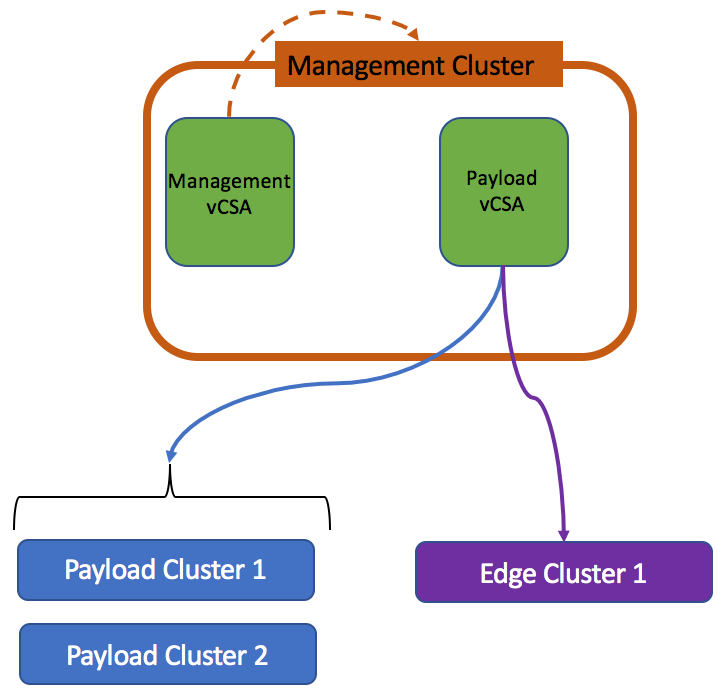
I see one of the most common use case for Advanced Configuration when Payload vCenter instance is hosted in management cluster under management vCenter instance.
In this case, Payload vCenter can’t access its own virtual machine in the inventory and thus cannot create clones.
Advanced Configuration workflow is not very different to Basic, but some of the steps will be need to be completed manually:
- The first vCSA is deployed
- Administrator adds the second NIC and attach it to the HA network
- Using Advanced Configuration VCHA wizard administrator provides information on IP addresses for Passive and Witness nodes
- vCenter uses this information to prepare itself for a cloning.
- Administrator clones vCSA into the Passive node first and use Customization Specifications to configure the hostname and the IP addresses on both interfaces
- Administrator clones vCSA into the Witness node using. Customization specifications are used to configure HA interface.
- Administrator returns to the VCHA wizard to complete the VCHA configuration. At this step, VCHA will proceed with the configuration of the replication and heartbeats between all nodes.
Basic Configuration walk-through
I already deployed vCSA and I have a single host in my lab, but that won’t change much in the deployment procedure.
First, ensure HA network is created and configured on the ESXi host

Enable SSH access on vCSA
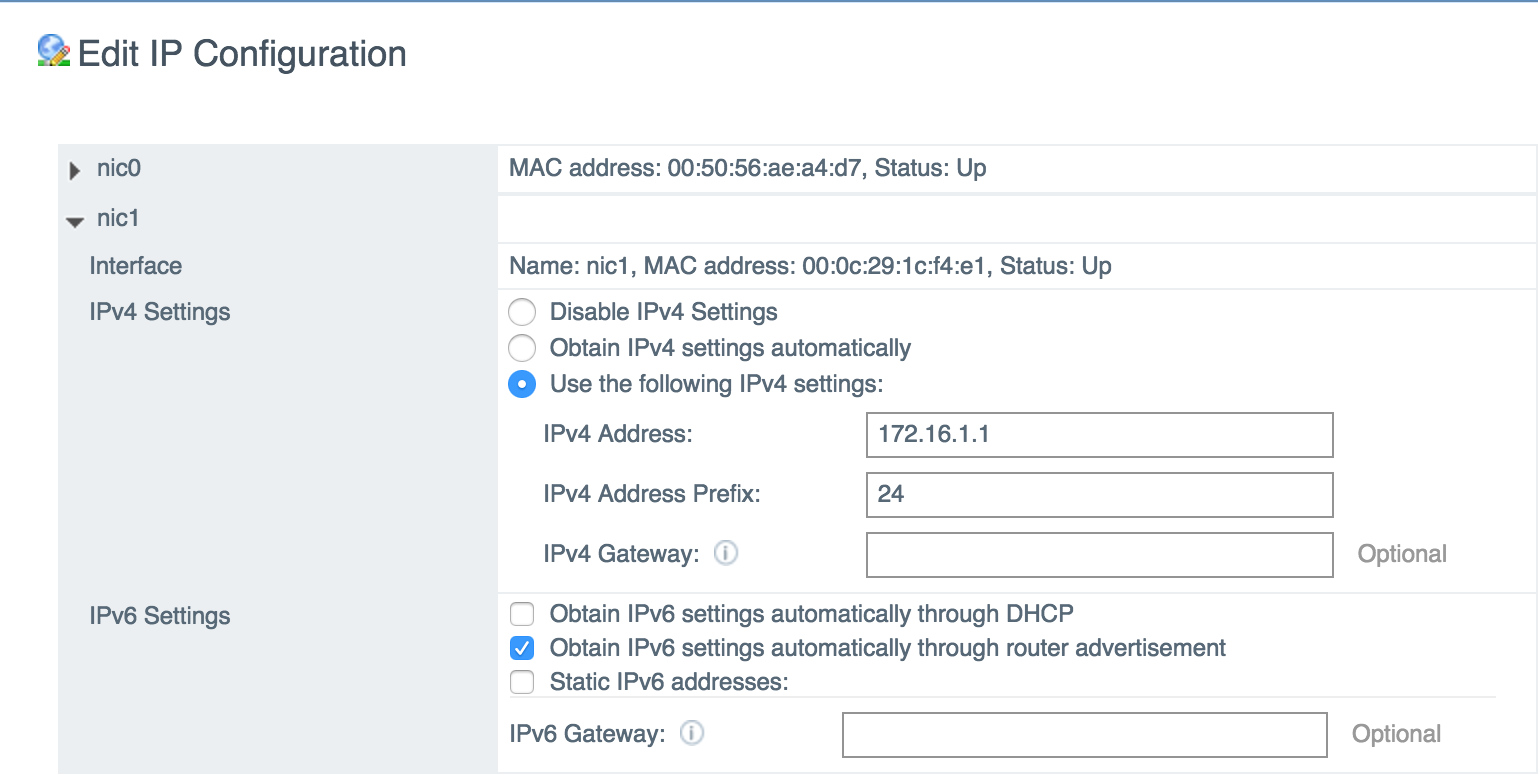
The next step is to add and configure HA interface. Like I said before – if you use different subnets for HA interfaces on each node DO NOT configure default gateway on HA interface. You will need to use static routes instead.
Go to VCHA Configure menu
Select Basic configuration

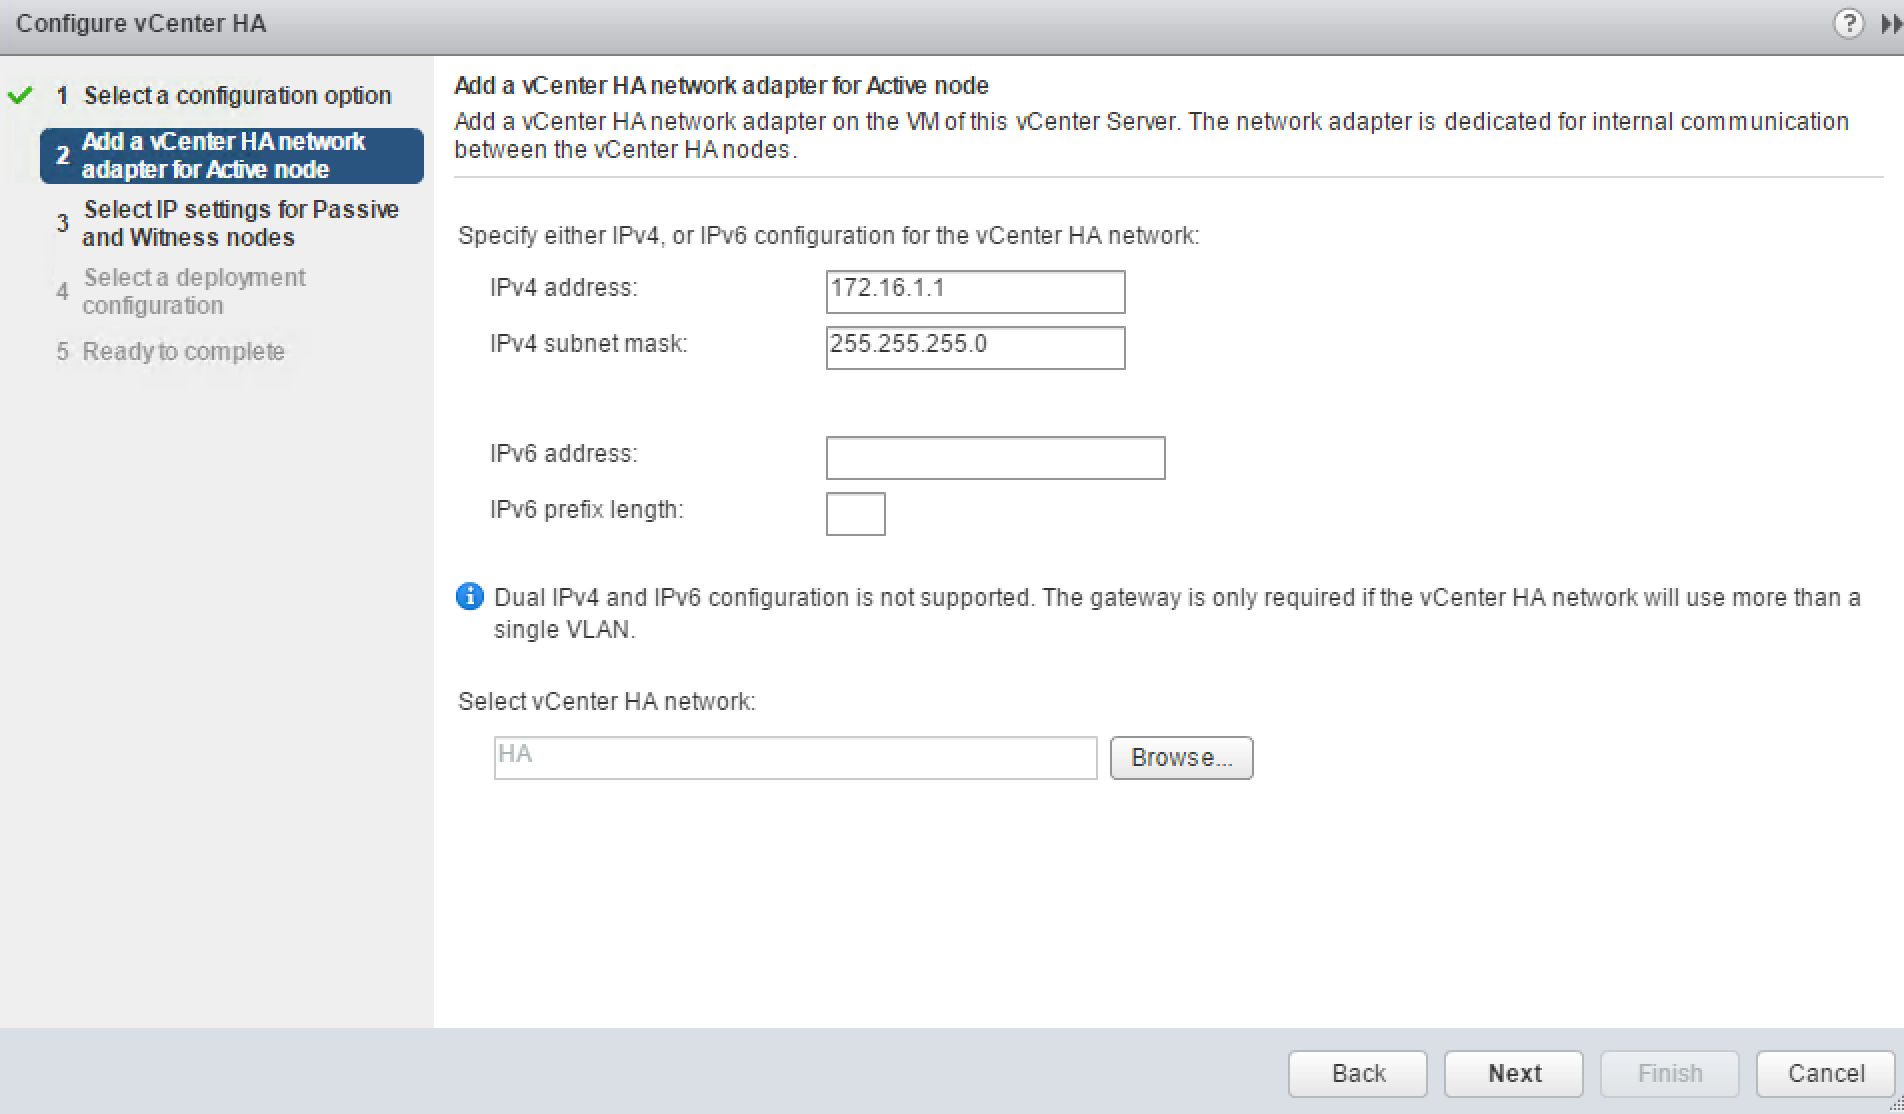
Specify the IP Address and HA portgroup you configured for HA interface of the Active node
Specify the IP Addresses for the HA interfaces of Passive and Witness Nodes. Configuration Wizard will use this information to prepare vCSA for cloning. As you can see this step doesn’t ask for a portgroup name, so it will use the same one you specified for the Active node.

If you click Advanced button you will be able to override the management interface configuration during the failover. If I understand correctly, the new IP Address still must be in the same subnet and DNS records have to be updated accordingly.

The next window gives summary of the compute, network and storage resources to be used for VCHA nodes
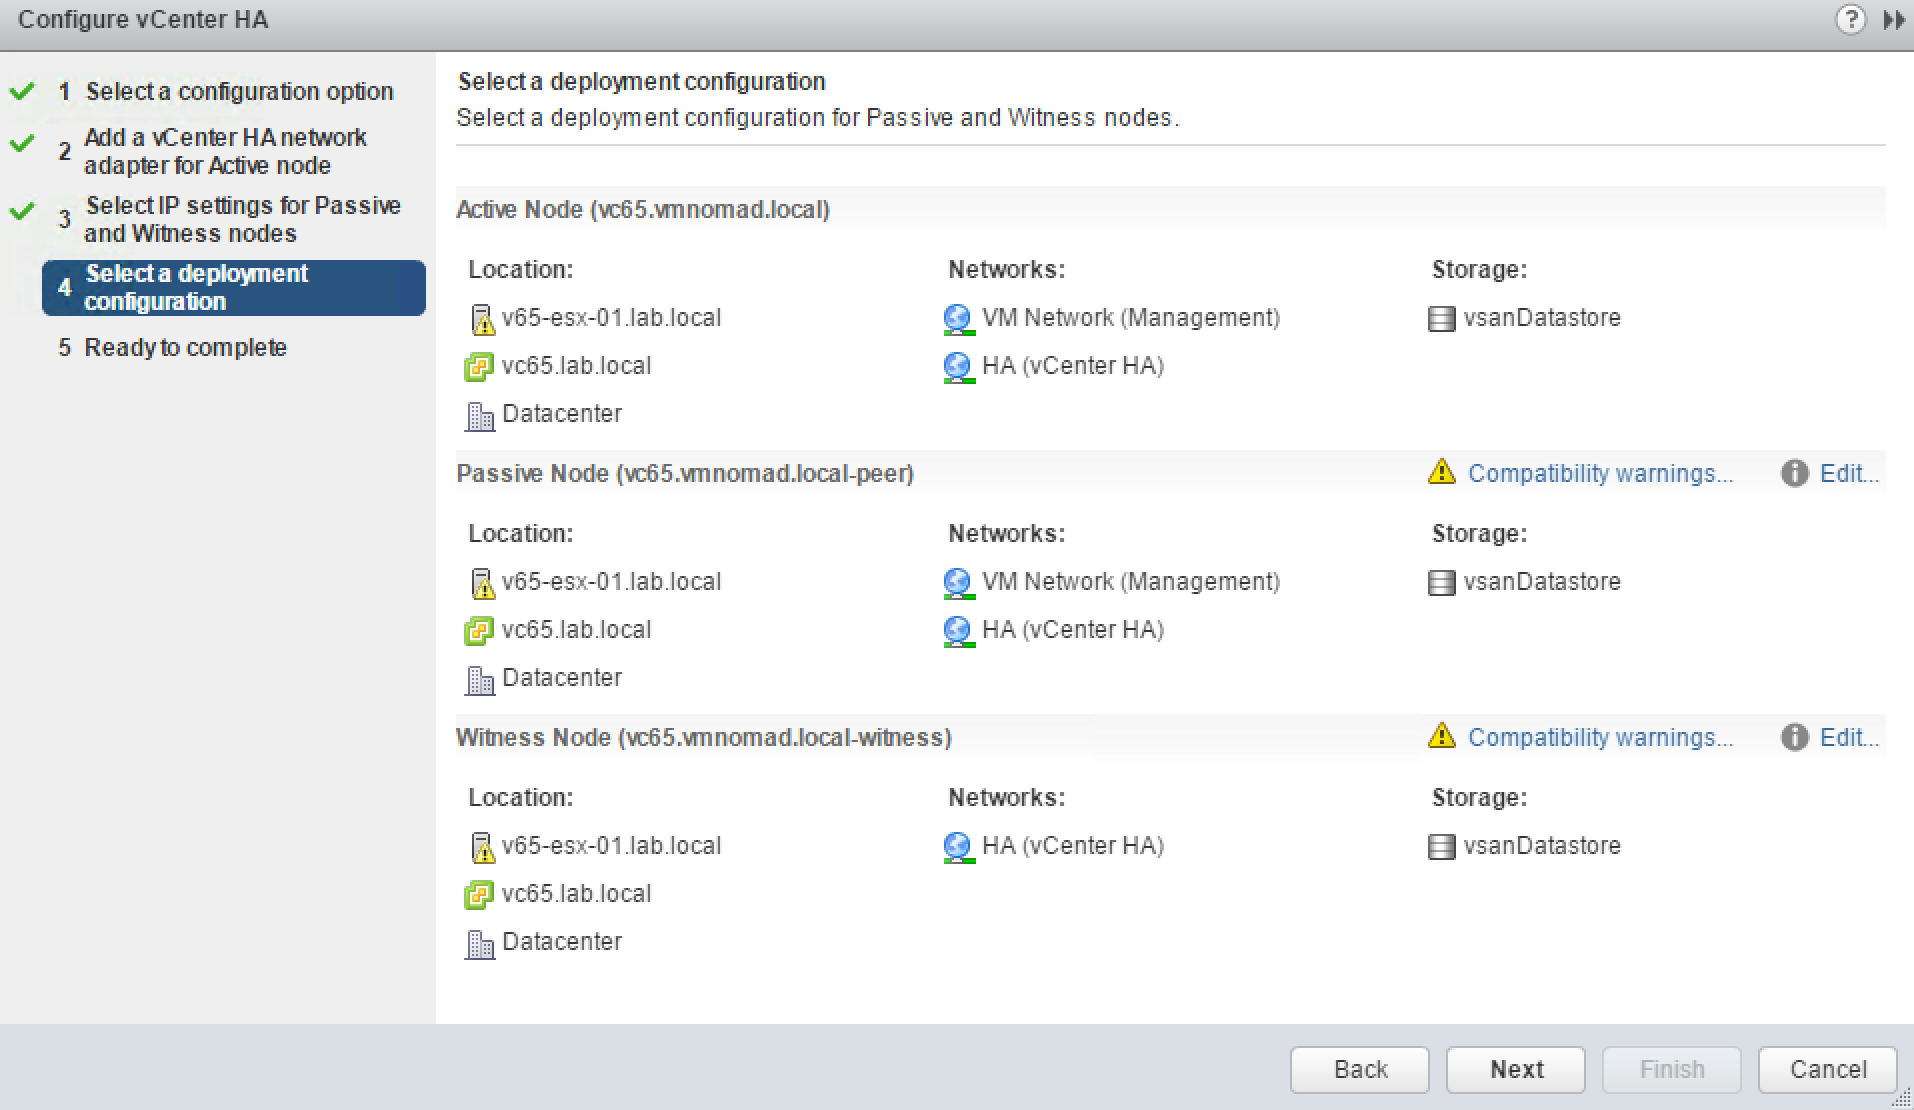
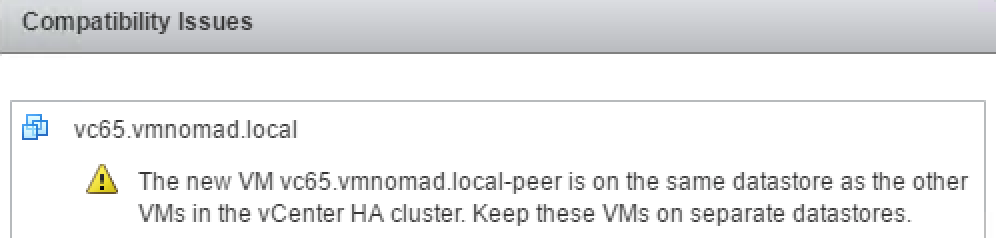
Since I am running everything on one ESXI host and one vSAN datastore I am given the following warning.
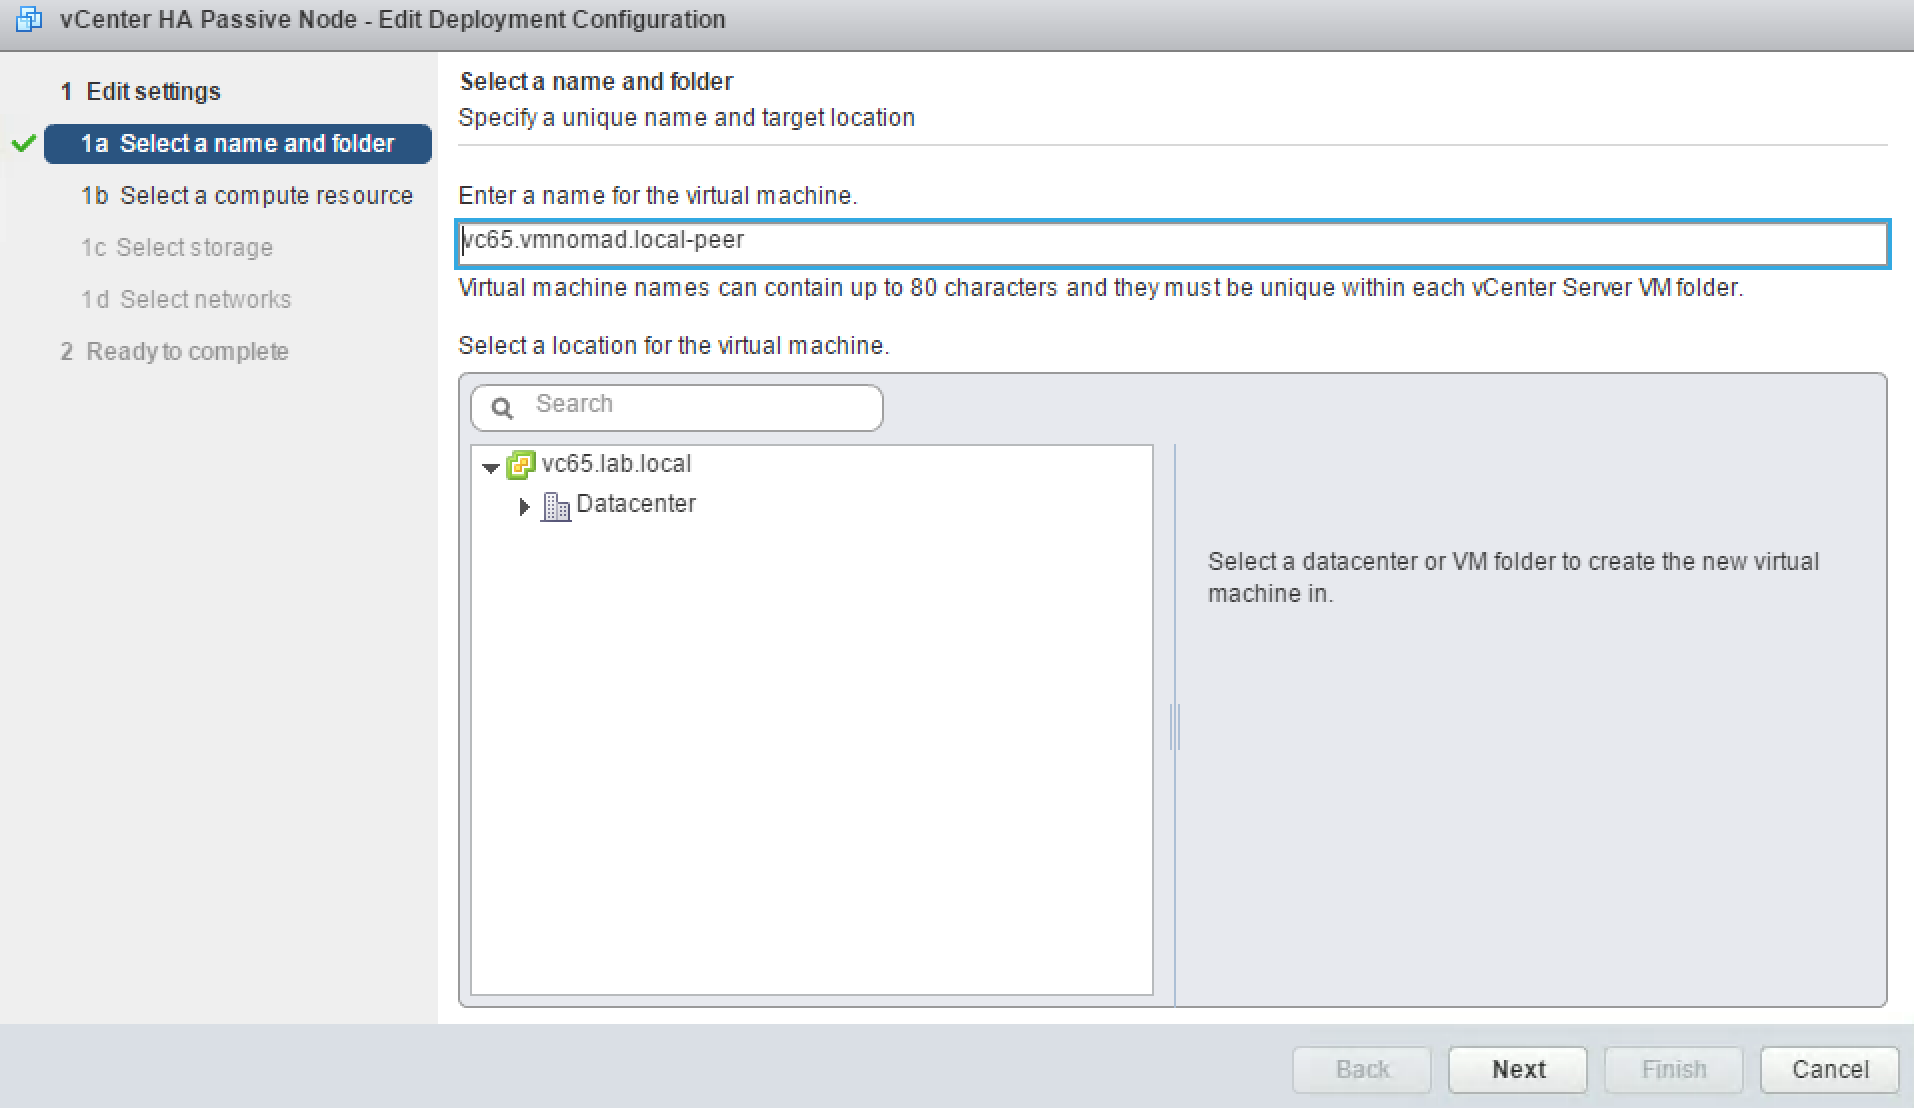
Clicking on Edit button will bring up new wizard that will allow you to customize the VM inventory name, compute resource, datastore and network for each of the clones.
Confirm the settings and click Finish.

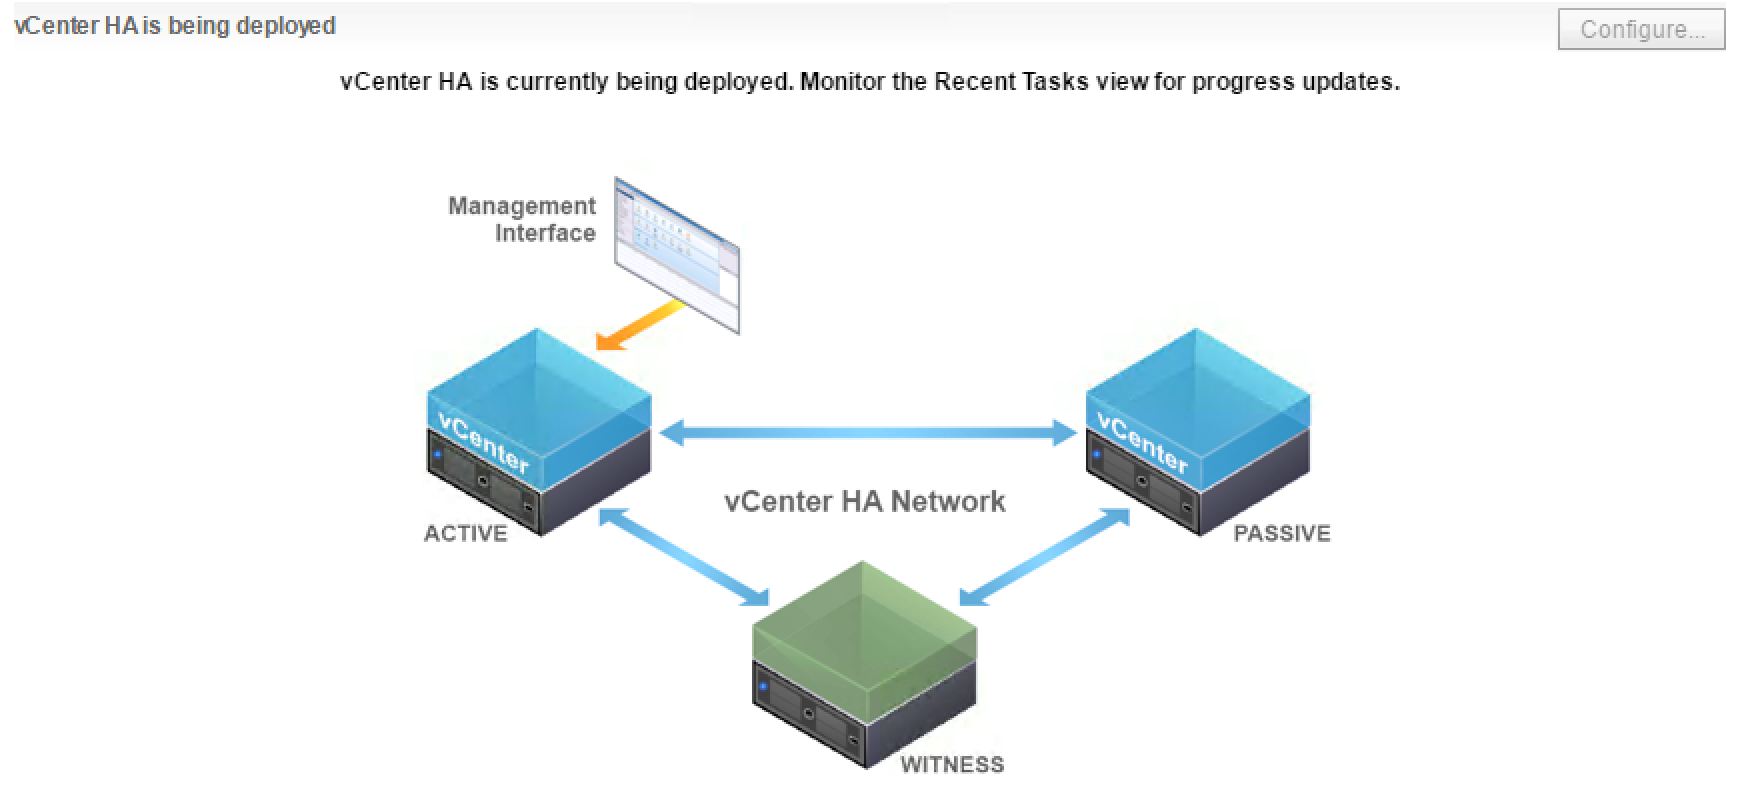
The web client will inform you that VCHA configuration is underway.
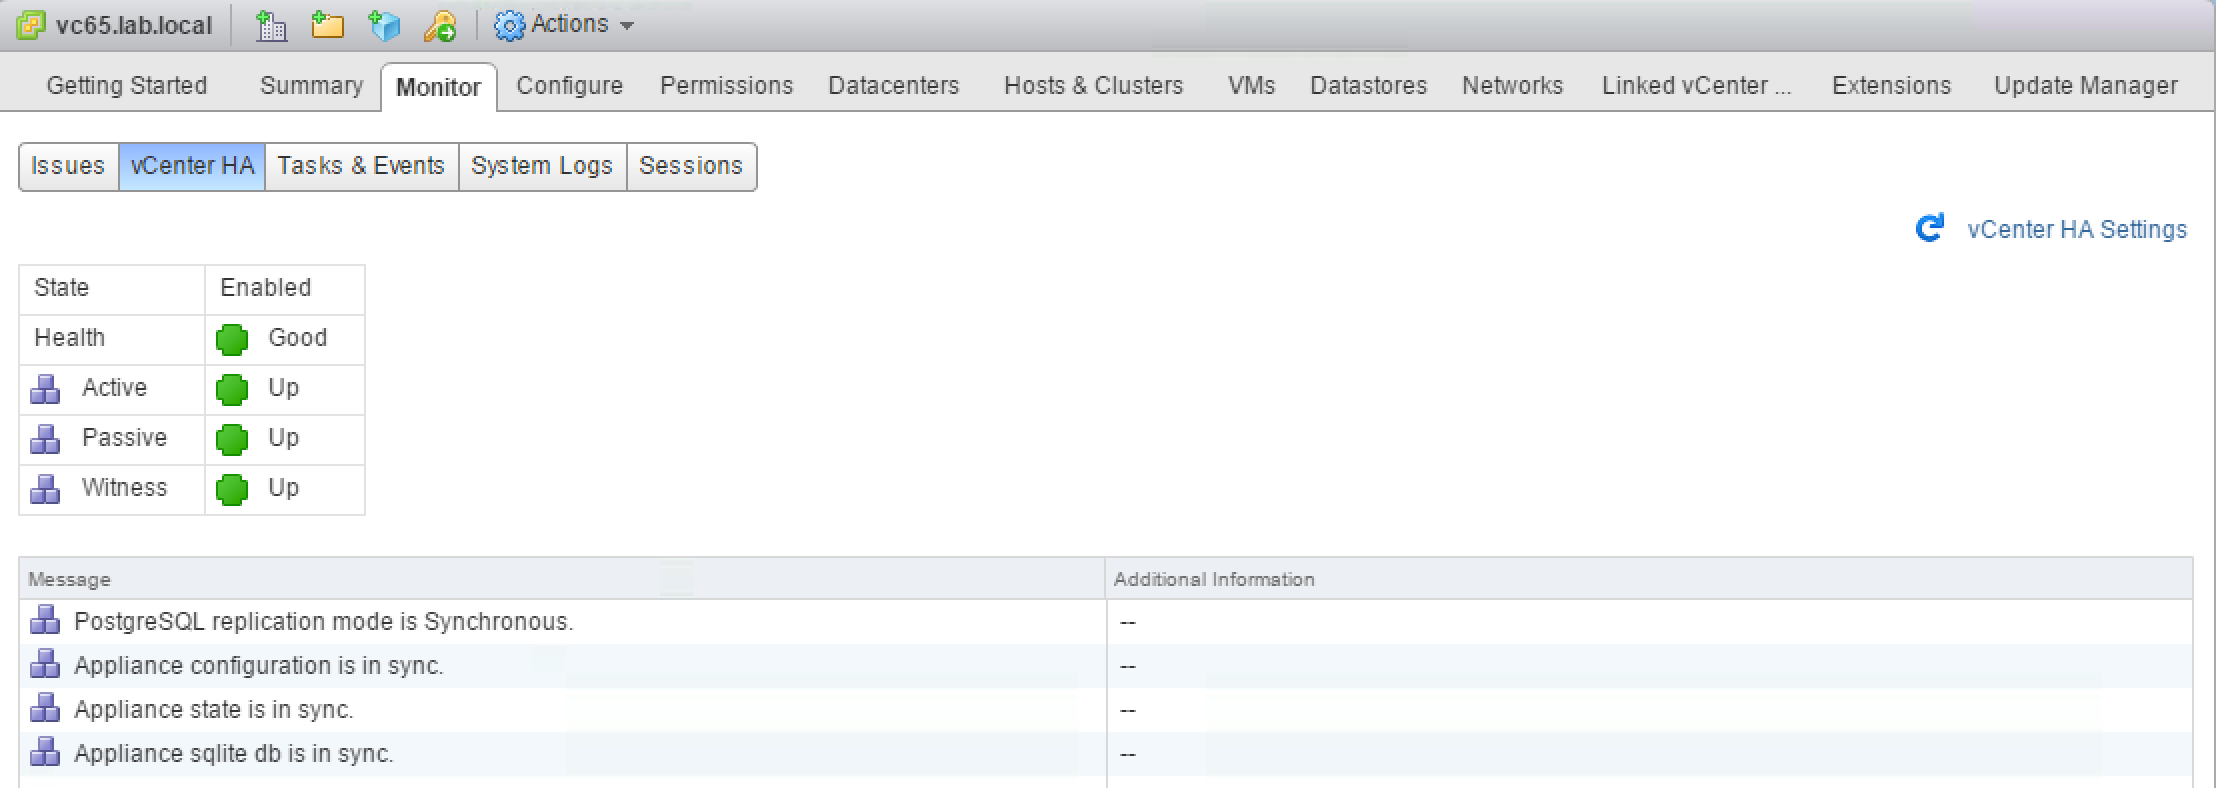
If you configured everything correctly 5-10 minutes later, you should see the following “All green” status of VCHA.