

In this second part of VCHA review I will be covering some ‘gotchas’ and configuration steps that are not covered in the VMware availability guide We will also go through all steps of Advanced Configuration.
Let’s first talk about VMware documentation.
On page 63 of VMware Availability guide you may find the following requirement for VCHA:
“The vCenter HA network IP addresses for the Active, Passive, and Witness nodes must be static and map to FQDNs”.
The part of this sentence that confused me was a requirement for FQDN for HA interface IP address. I have run multiple VCHA test deployment and have had not a single issue without DNS records that would map HA network IP Addresses to FQDN. So, I believe it is a typo or bad wording here.
On the same page of VMware Availability guide you see that different subnets for HA networks are supported:
“The vCenter HA network must be on a different subnet than the management network. The three nodes can be on the same subnet or on different subnets.”
However, the document doesn’t have instructions on how to configure routing correctly on vCSA. At first I tried to use the default gateway on HA interface hoping that vCSA has something similar like Network stacks in ESXi. However, setting Default Gateway on HA interface effectively disabled DG of the management interface. After checking a couple of links in Google search I found the way to configure static routes on vCSA that will persist across reboots, but unless VMware updates the official documentation or provides a KB consider my method unsupported and don’t try it on the production environment.
There are two network files under /etc/systemd/network directory.

Eth0 network is the management one, you can double check it by checking the IP address in the file.
So, you will need to adjust eth1 file with static routes.
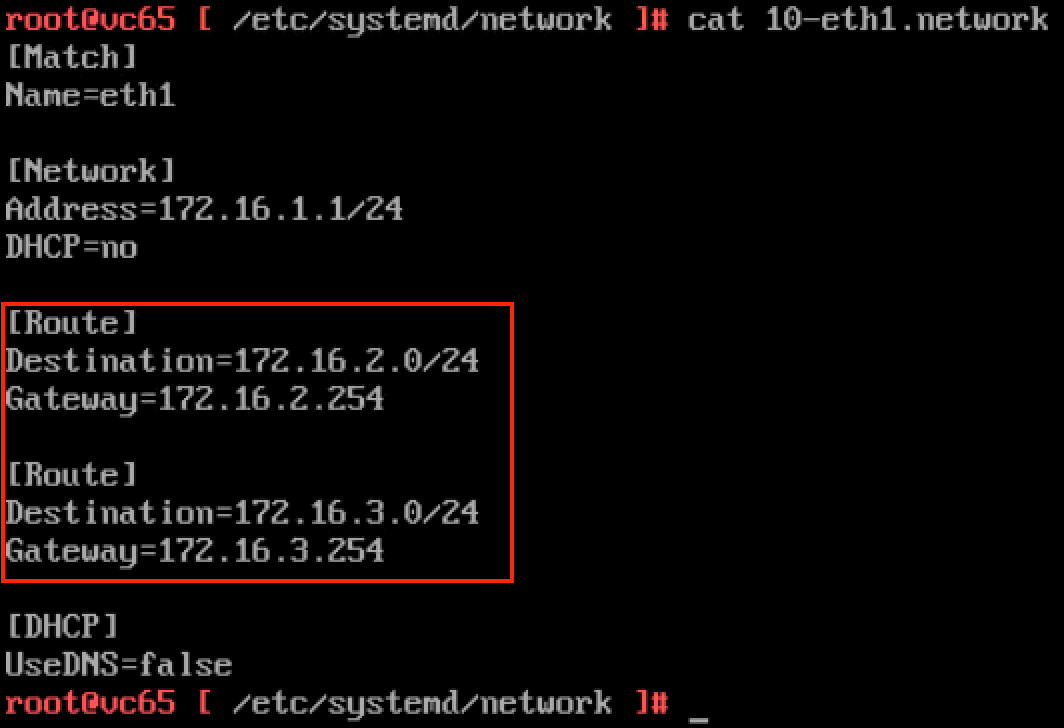
As you can see in this screenshot there are two [Route] sections added on the HA interface of the Active node. The first route is for the HA subnet of Passive Node and the second route is for Witness HA interface. The same change must be done on the Passive node.
Witness appliance doesn’t require any static routes as it has a single interface on HA network.
Again, I would like to emphasize that it is not supported method yet as it is not covered in the official VMware documentation.
Next issue I had with documentation is a very vague description on how to customize vCSA Passive and Witness nodes during cloning operation. To explain the problem let’s have a look at the Advanced Configuration workflow
- The first vCSA is deployed
- Administrator adds the second NIC and attaches it to the HA network
- Using Advanced Configuration VCHA wizard administrator provides information on IP addresses for Passive and Witness nodes
- vCenter uses this information to prepare for a cloning.
- Administrator clones vCSA into the Passive node first and use Customization Specifications to configure the hostname and the IP addresses on both interfaces
- Administrator clones vCSA into the Witness node using. Customization specifications are used to configure HA interface.
- Administrator returns to the VCHA wizard to complete the VCHA configuration. At this step, VCHA will proceed with a configuration of the replication and heartbeats between all nodes.
At steps 5 and 6 we need to clone Passive and Witness appliance and using the customization specification we will be configuring interfaces of the nodes. The VMware guide is not very specific in this part and doesn’t provide precise information on what settings to apply to NICs.
I will explain these settings in the Advanced Configuration Walkthrough.
Finally, there was also one bug spotted with VCHA configuration. That’s what it looks like

The root cause of the bug is the use of Upper Case letters in the name of the vCSA server.
At step 4 of Advanced Configuration the vCSA runs some scripts to prepare its own VM for a cloning. Part of this script is configuration validation. One of the steps of this validation runs ip2fqdn script which queries DNS reverse zone and returns the FQDN mapped to the management IP Address. This response must be identical to a hostname or probably PNID of vCSA. The problem is that the ip2fqdn script always returns results in lower case. So, when the vCSA hostname is in Upper Case, e.g VCSA65.LAB.LOCAL the validation will fail as it won’t match the results of ip2fqdn script – vcsa65.lab.local.
I left my feedback on all the above-mentioned issues to vCSA Product Management Team and I hope they will be resolved very soon.
Now let’s go over Advanced Configuration steps.
Quick note – My vCenter HA cluster was deployed on a single host, which is more than enough for a test. However, for a production deployment you will need to place every node of the vCenter HA cluster on a different ESXi server and on a separate datastore.
The following diagram shows the current topology in my home lab.
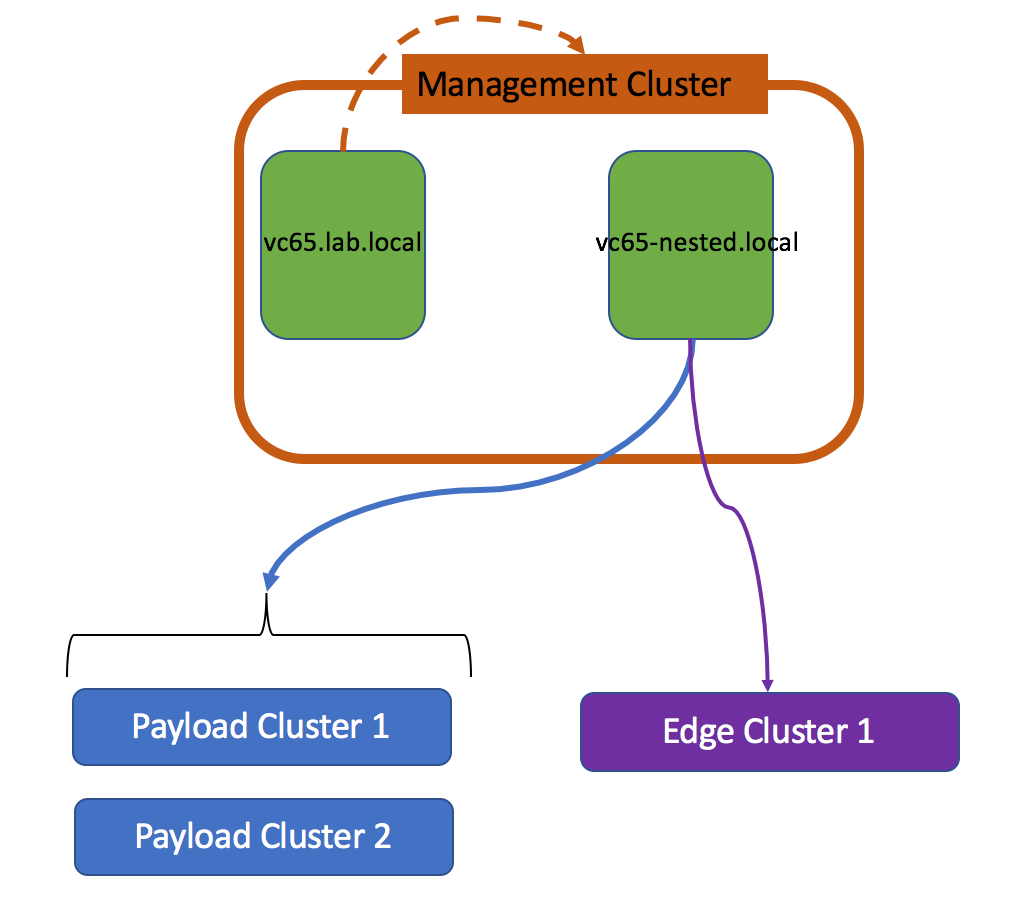
We will be enabling VCHA for the vc65-nested.lab.local vCenter Server. As you can see it is hosted under another vCenter Server and therefore it won’t be able to replicate its own virtual machine. So, the Advanced Configuration is the only method to enable VCHA for vc65-nested.lab.local.
The prerequisites are very simple:
- Ensure the management network stretches across hosts where you expect Active and Passive nodes to reside
- HA network must be stretched across all ESXi servers where all 3 nodes will be hosted
- SSH must be enabled on vCSA
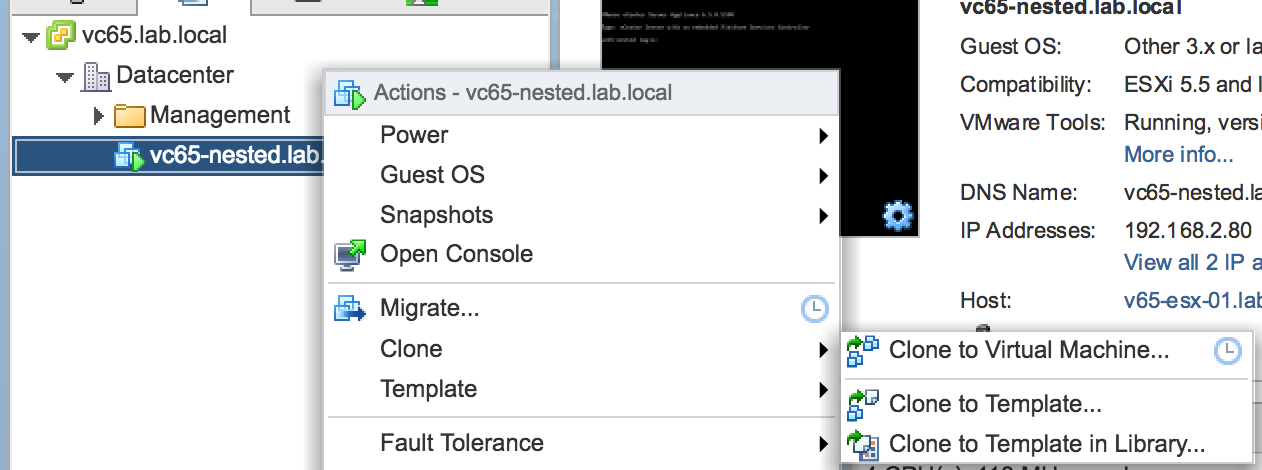
Add and configure second NIC. Make sure it is connected to the HA portgroup

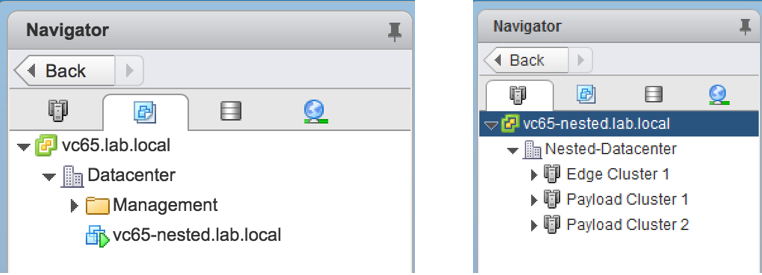
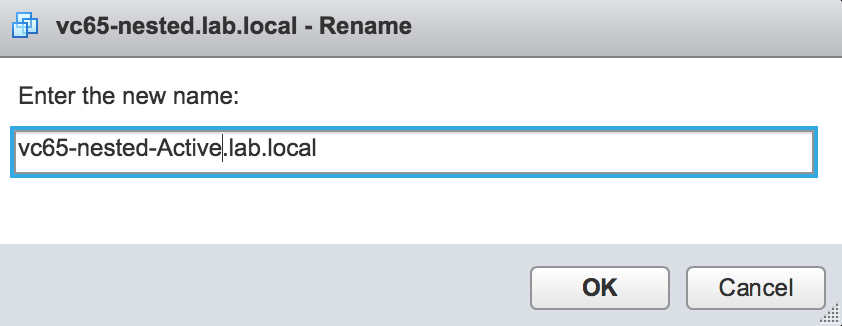
Consider renaming the vCSA’s inventory name.
Select Advanced in the VCHA configuration wizard

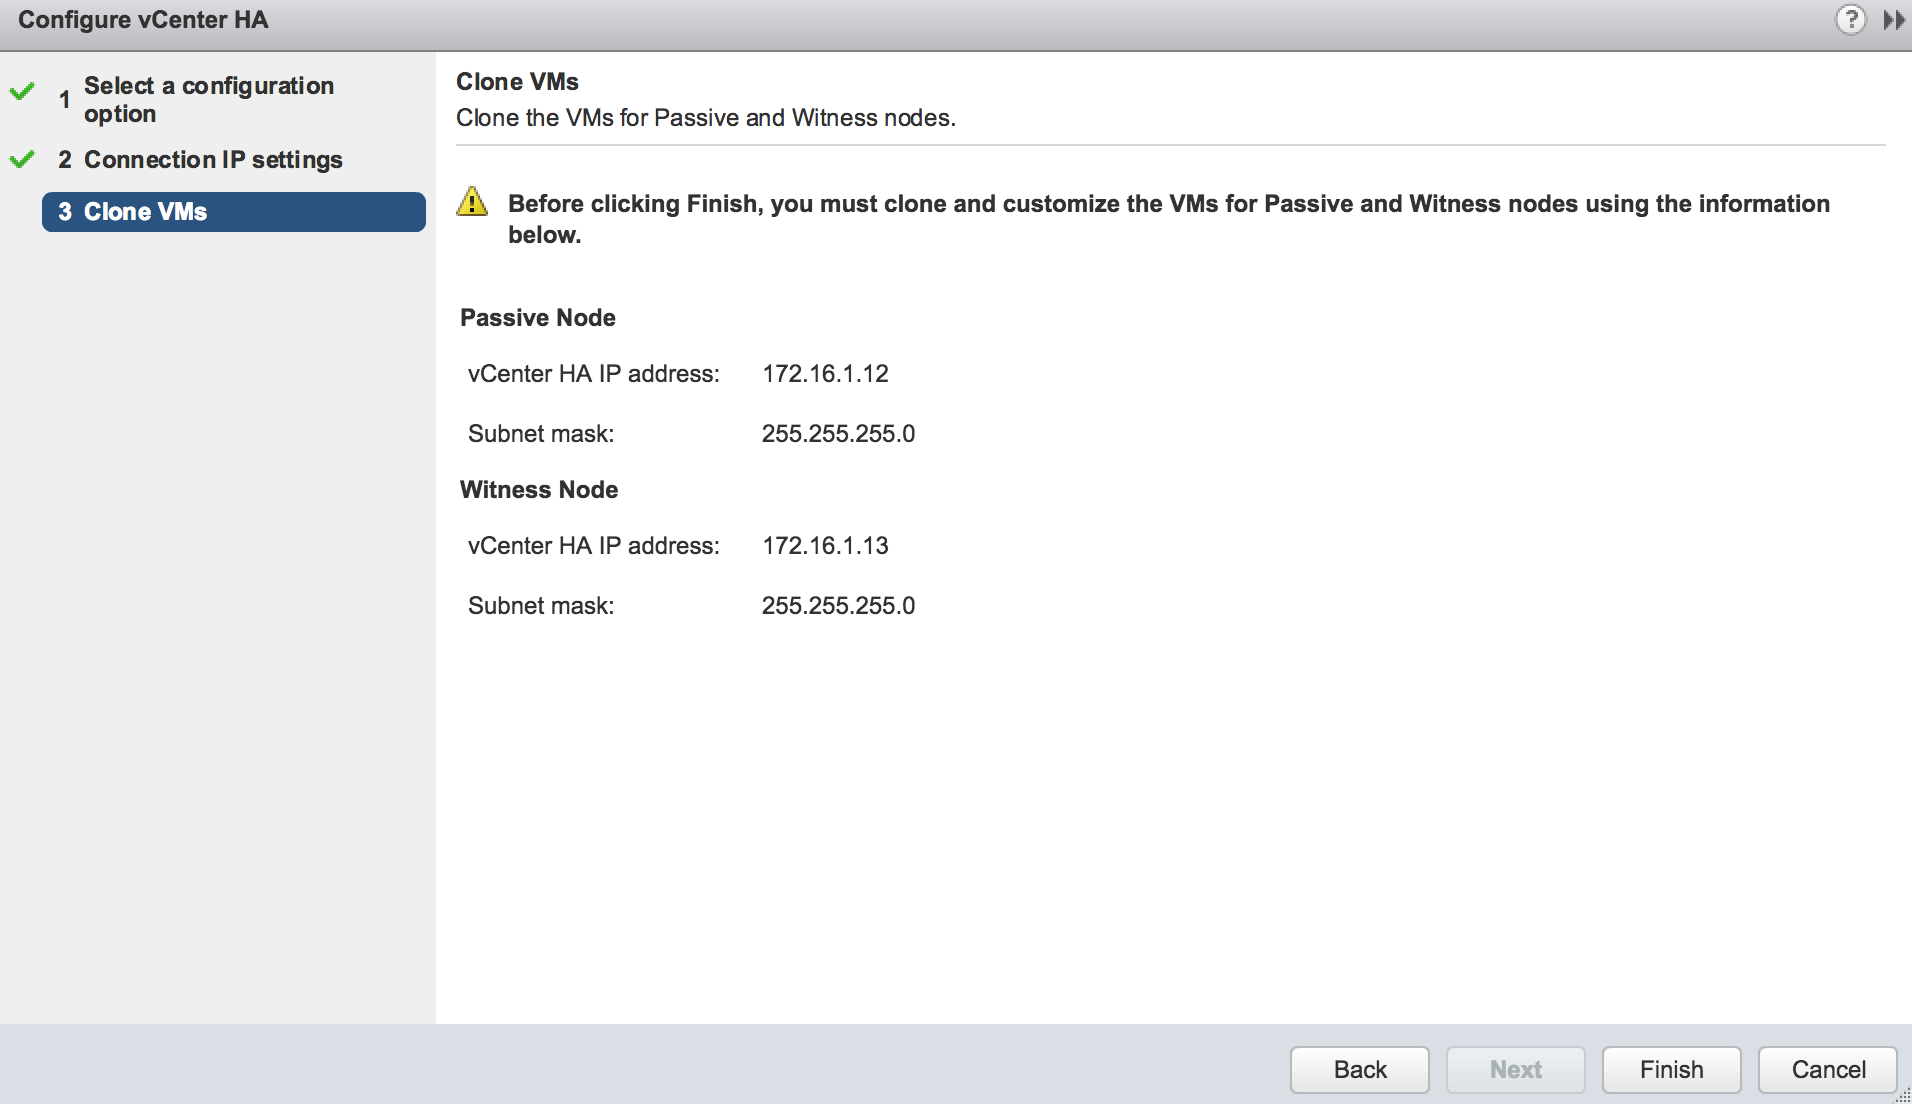
Provide the IP addresses of the HA interfaces for Passive and Witness nodes.

Did you notice this warning saying ‘you can no longer change the IP addresses after you click Next’? That’s because right after you click Next vCSA will run some scripts to prepare itself for a successful cloning.
As far as I understood from multiple tests during that preparation phase the vCenter creates SSH keys and updates known hosts file with these keys. I believe SSH is used by Active vCSA establish connections with Passive and Witness appliances in order to finalize the configuration of VCHA.
Also, the networking configuration is updated so that management interface on the clones won’t come up automatically after it is cloned. So, if at this point you will restart your current vCSA by accident its management interface won’t come up after reboot.
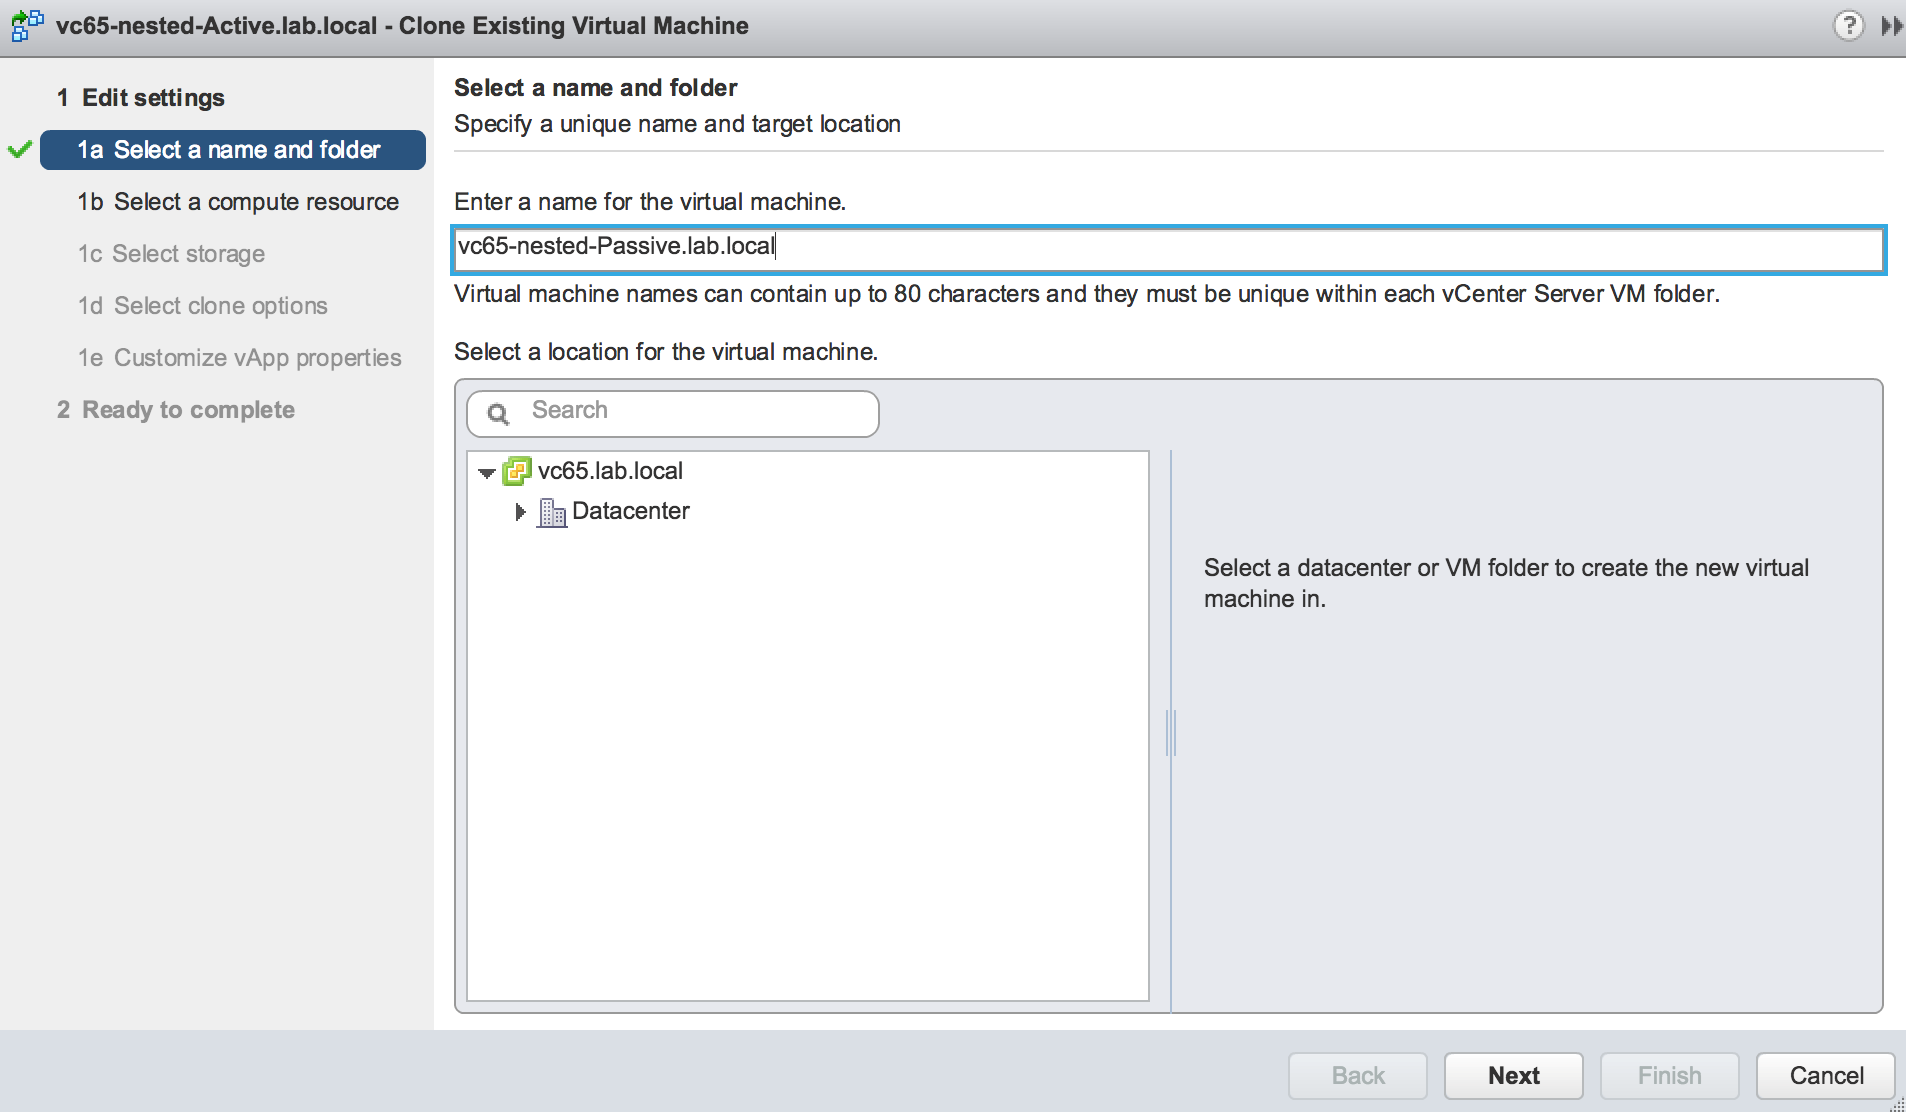
First, we will create a Passive node
Enter the name of the Passive Node. This is inventory name only and you are free to choose whatever you prefer.
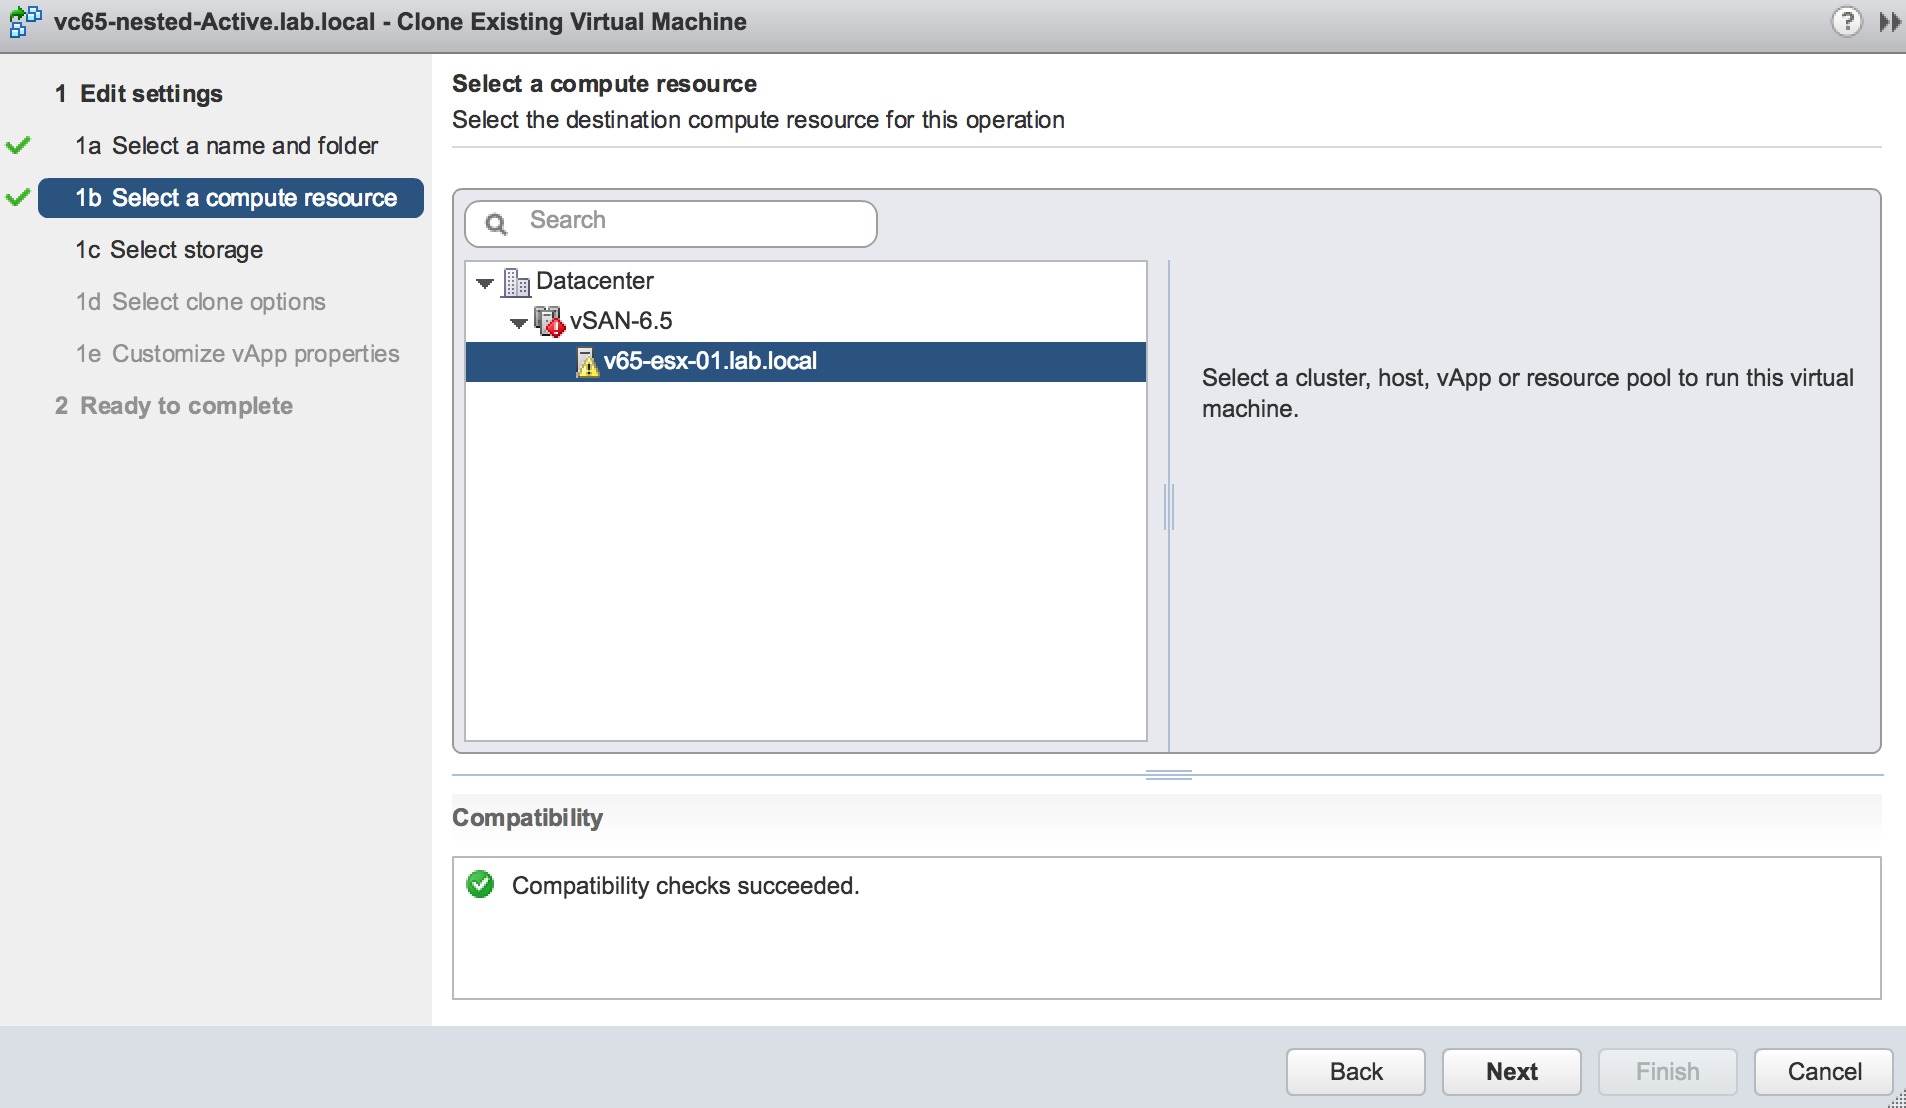
If running VCHA cluster nodes will be hosted in a single Management cluster you will need to ensure that DRS anti-affinity rule configured to keep nodes on different ESXi hosts.
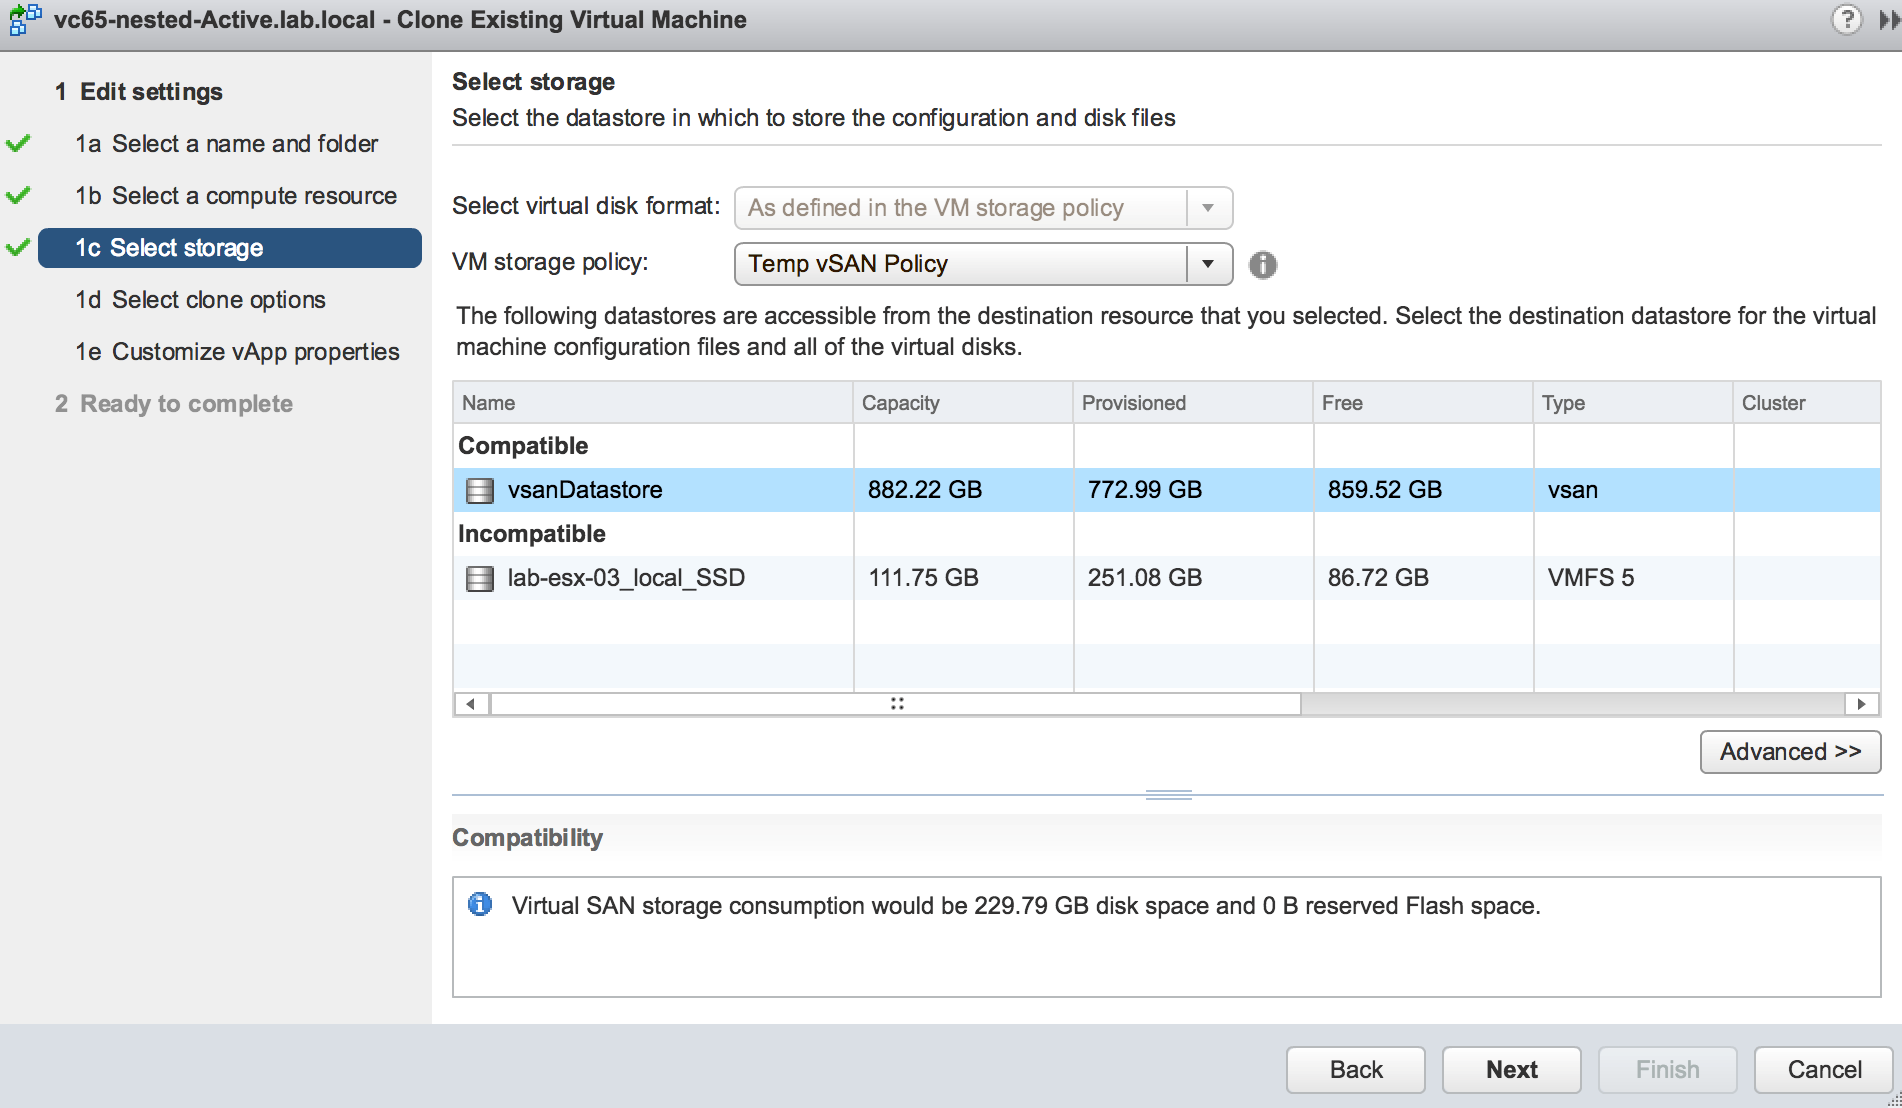
Select Storage for the clone. The best practice is not to use the same datastore for all nodes.
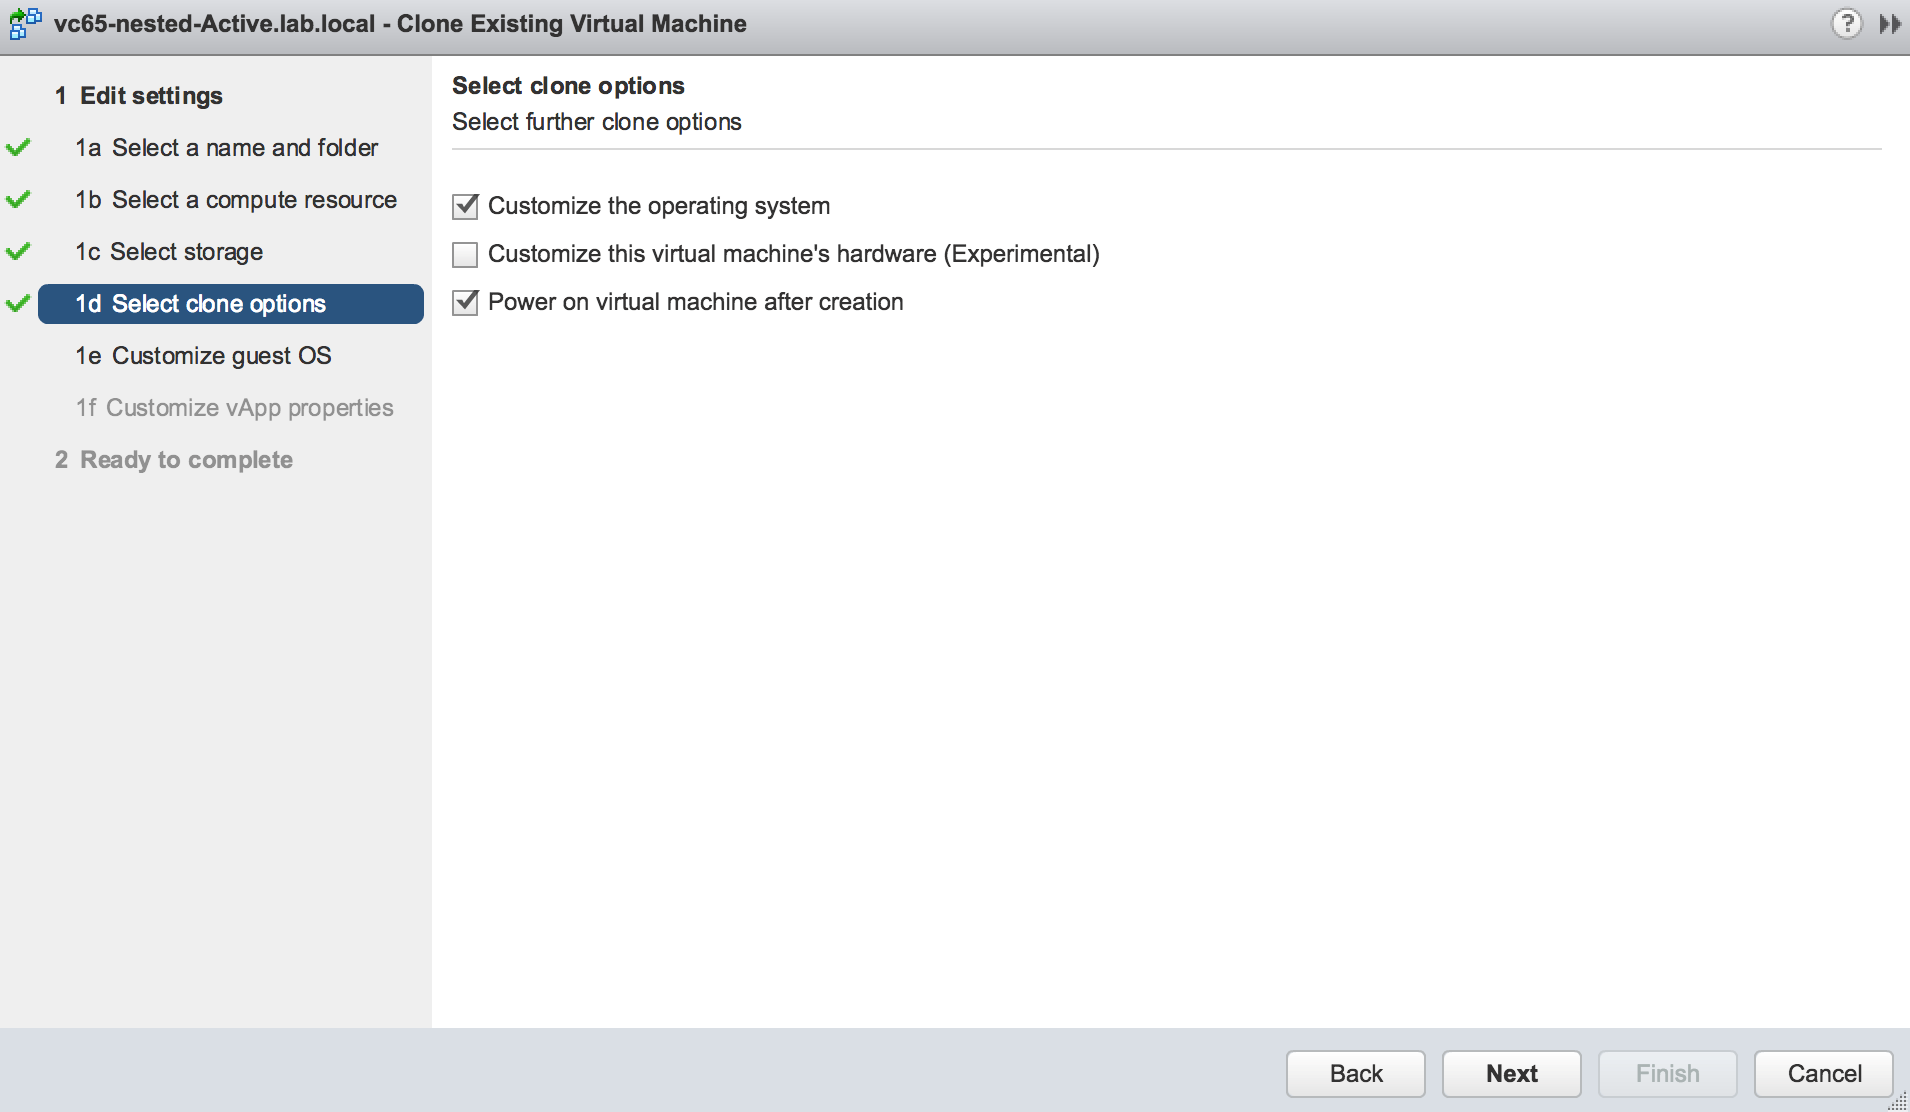
Select Customize the operating and Power on a virtual machine after creation options.
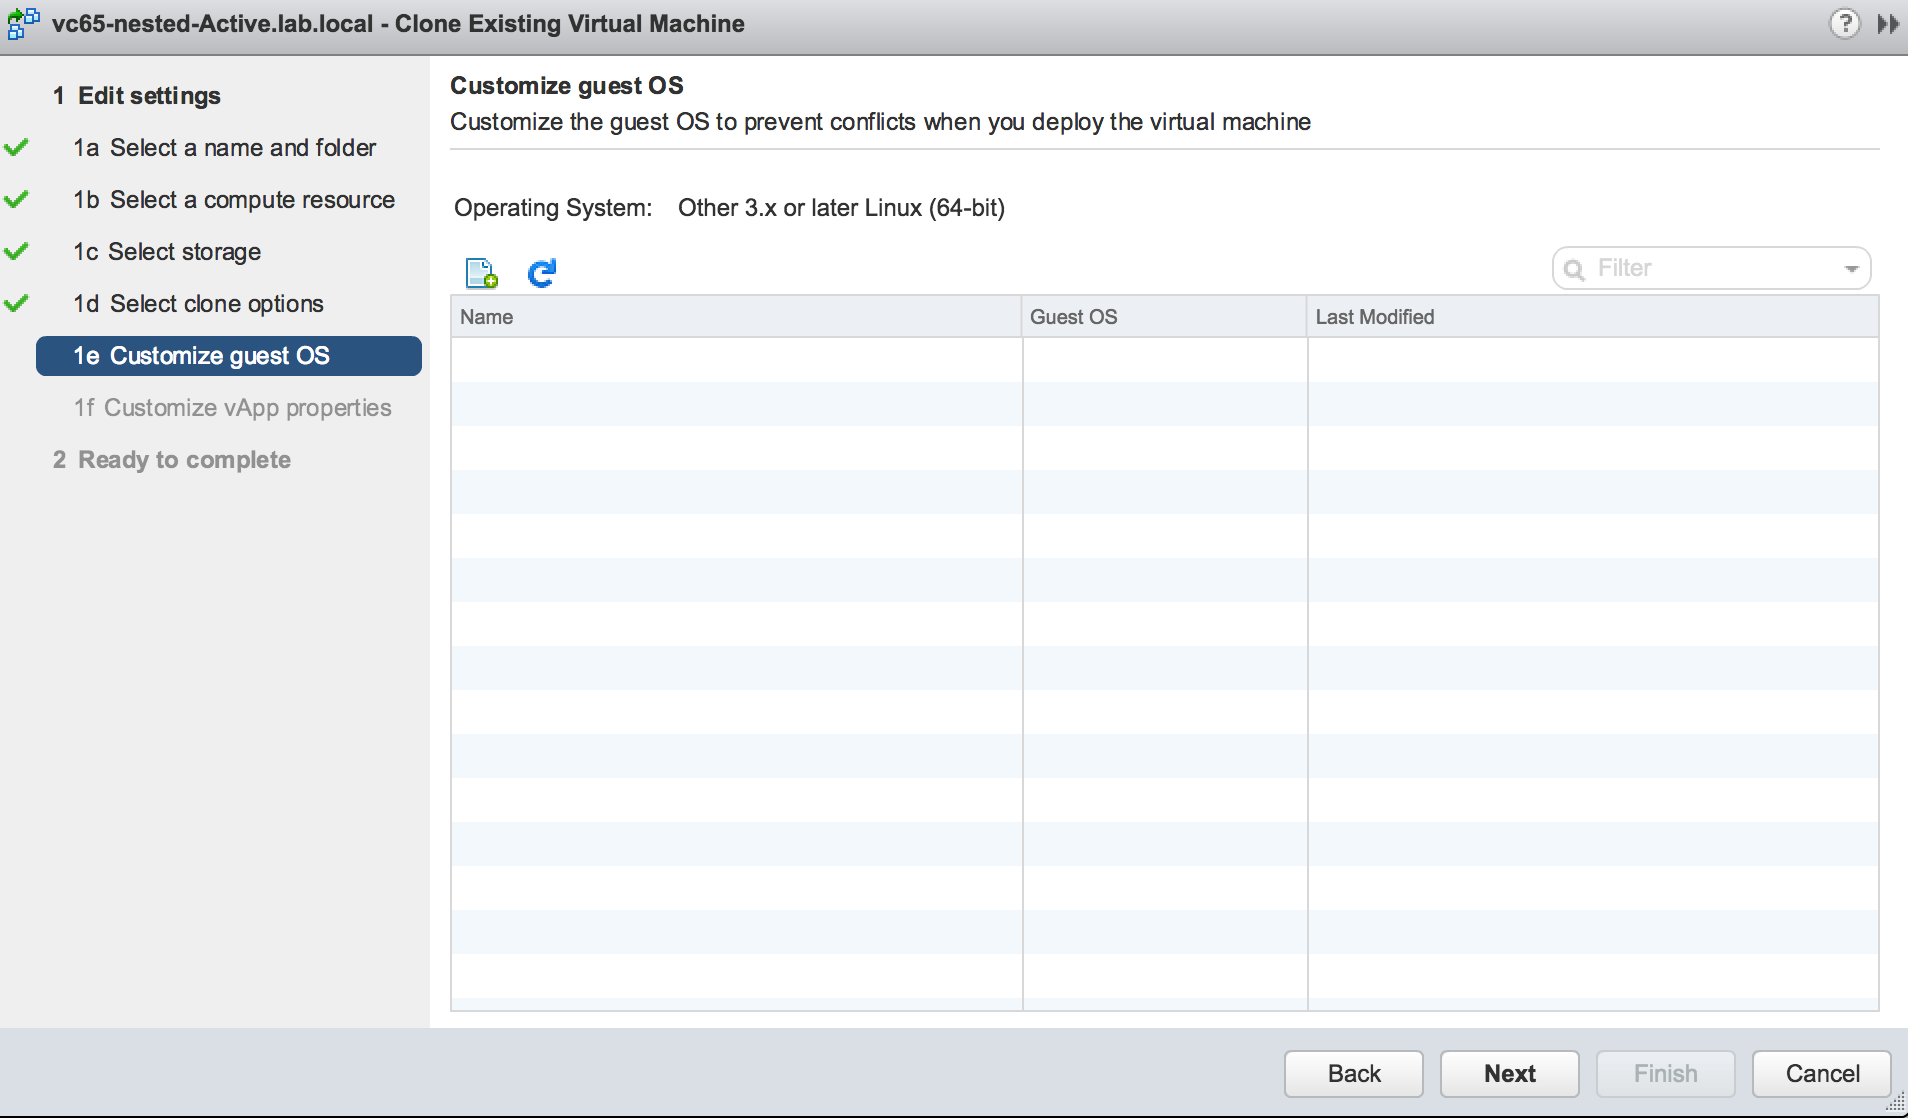
Click the button to create new customization specification.
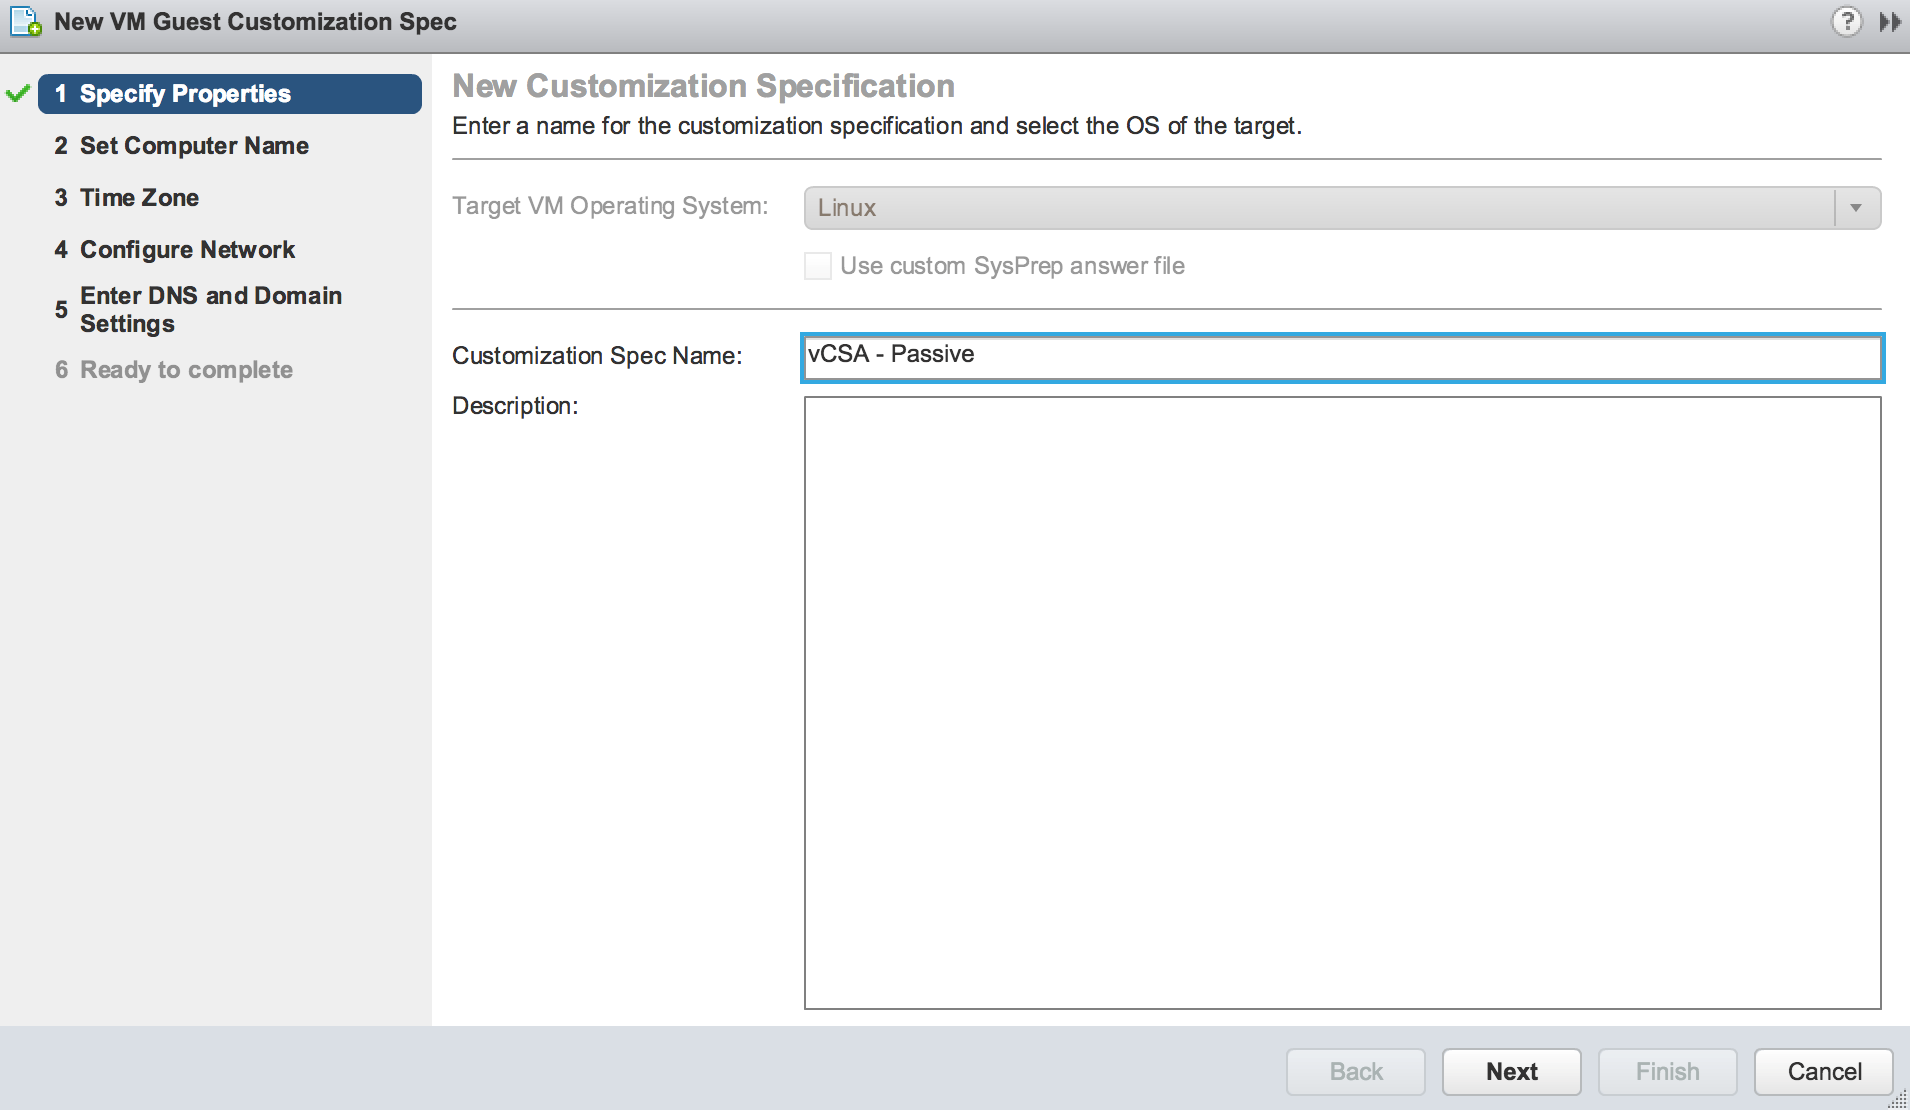
Name the customization specification
Enter the hostname for the clone. The name must be identical to the vCSA hostname.
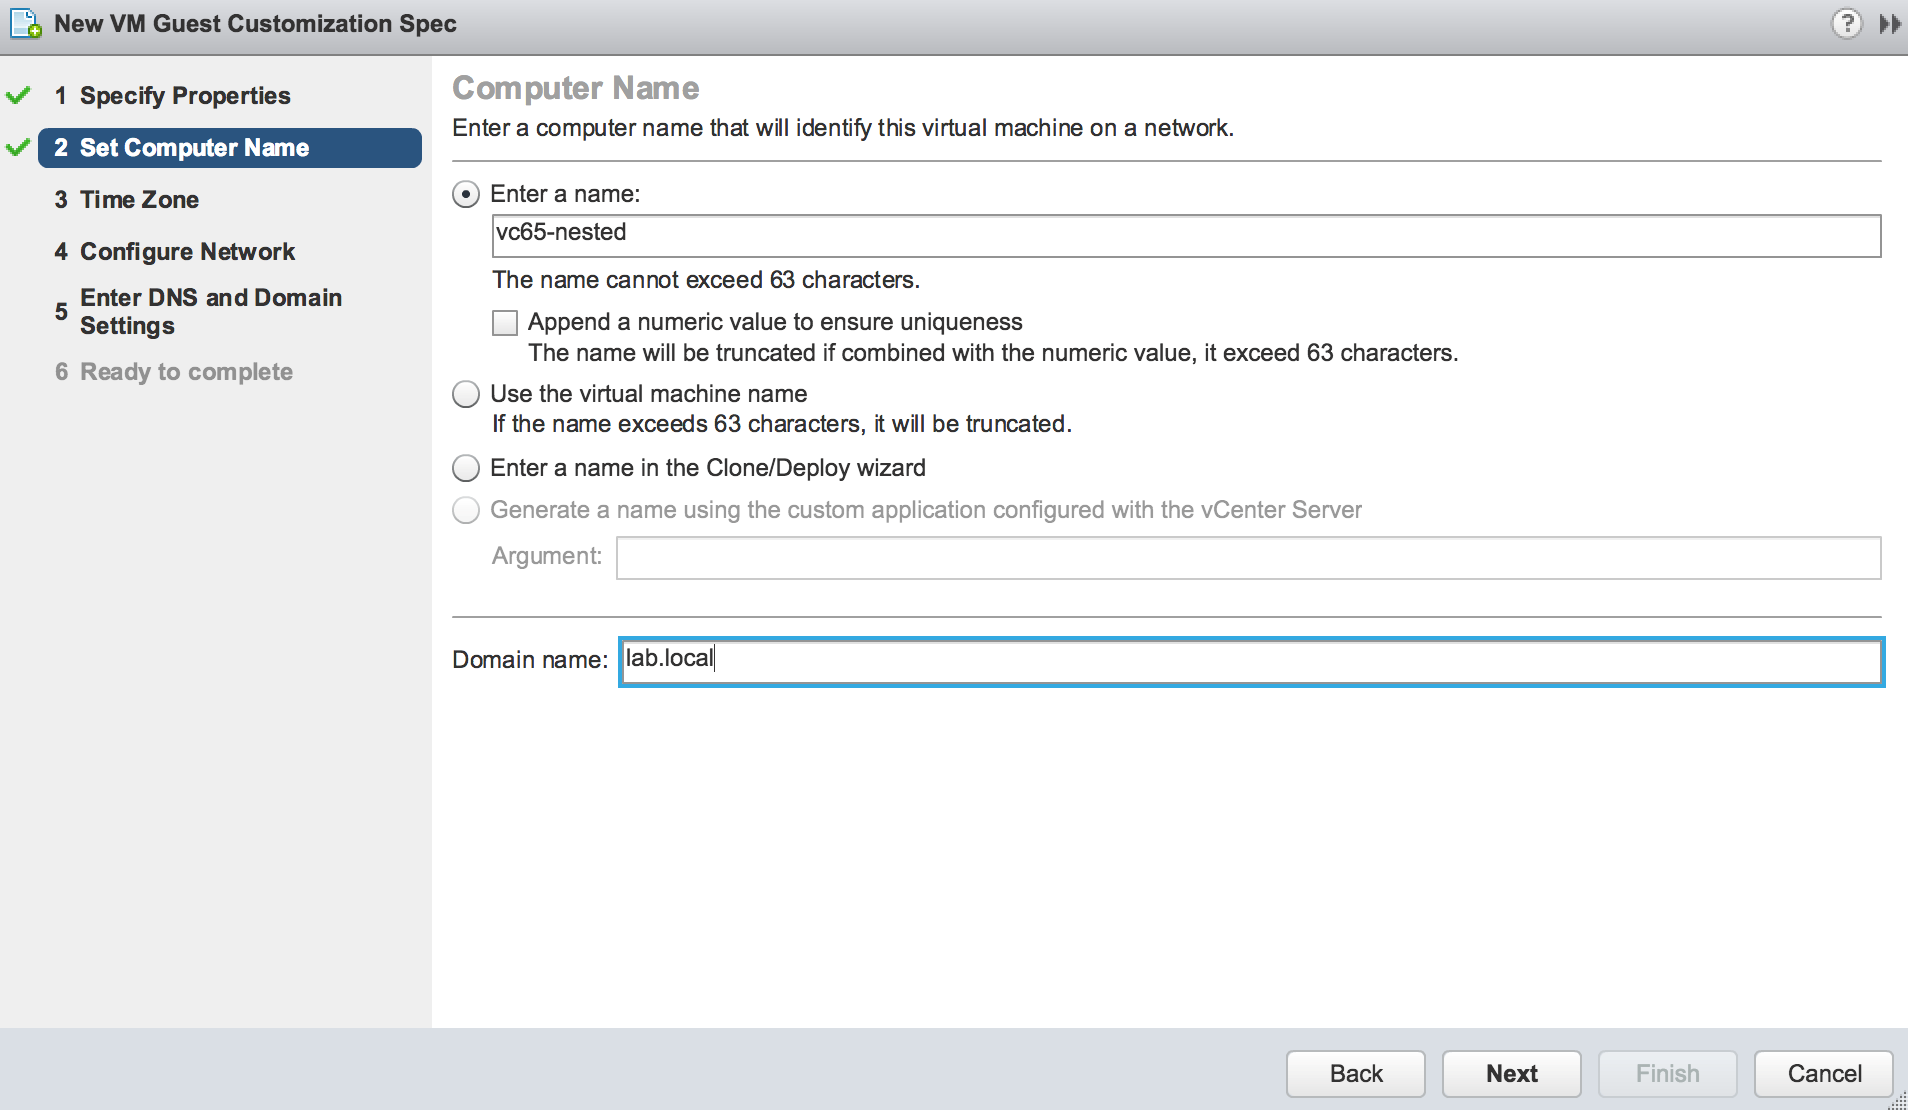
The interesting part of this cloning is that the DNS suffix will be dropped from the hostname.
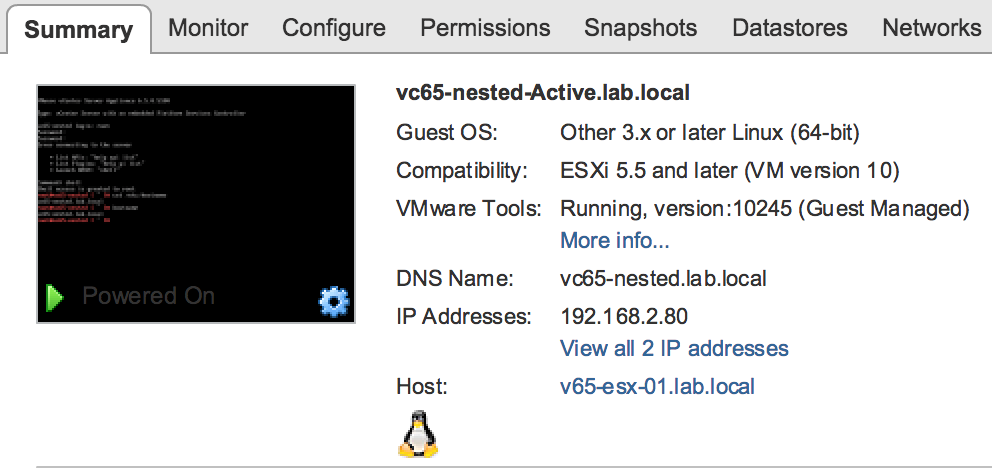
You can see that the DNS names on the Active and Passive nodes are different.
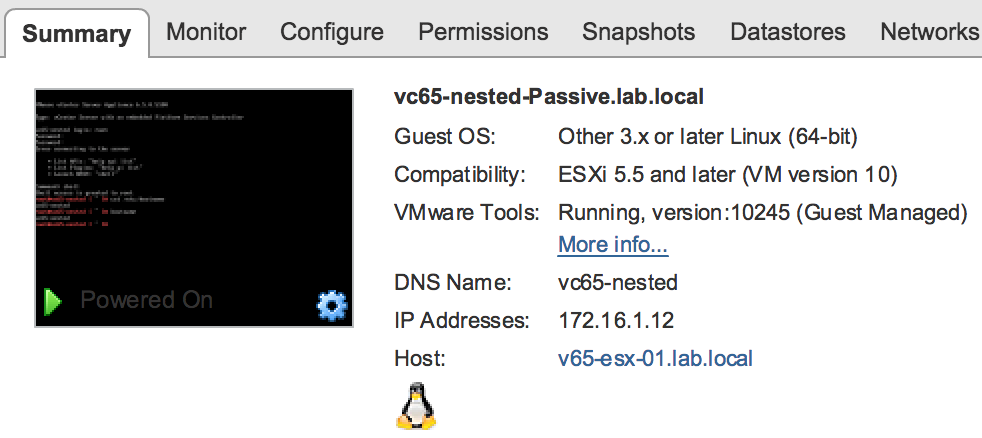
It doesn’t impact any functionality but still was a bit unexpected.
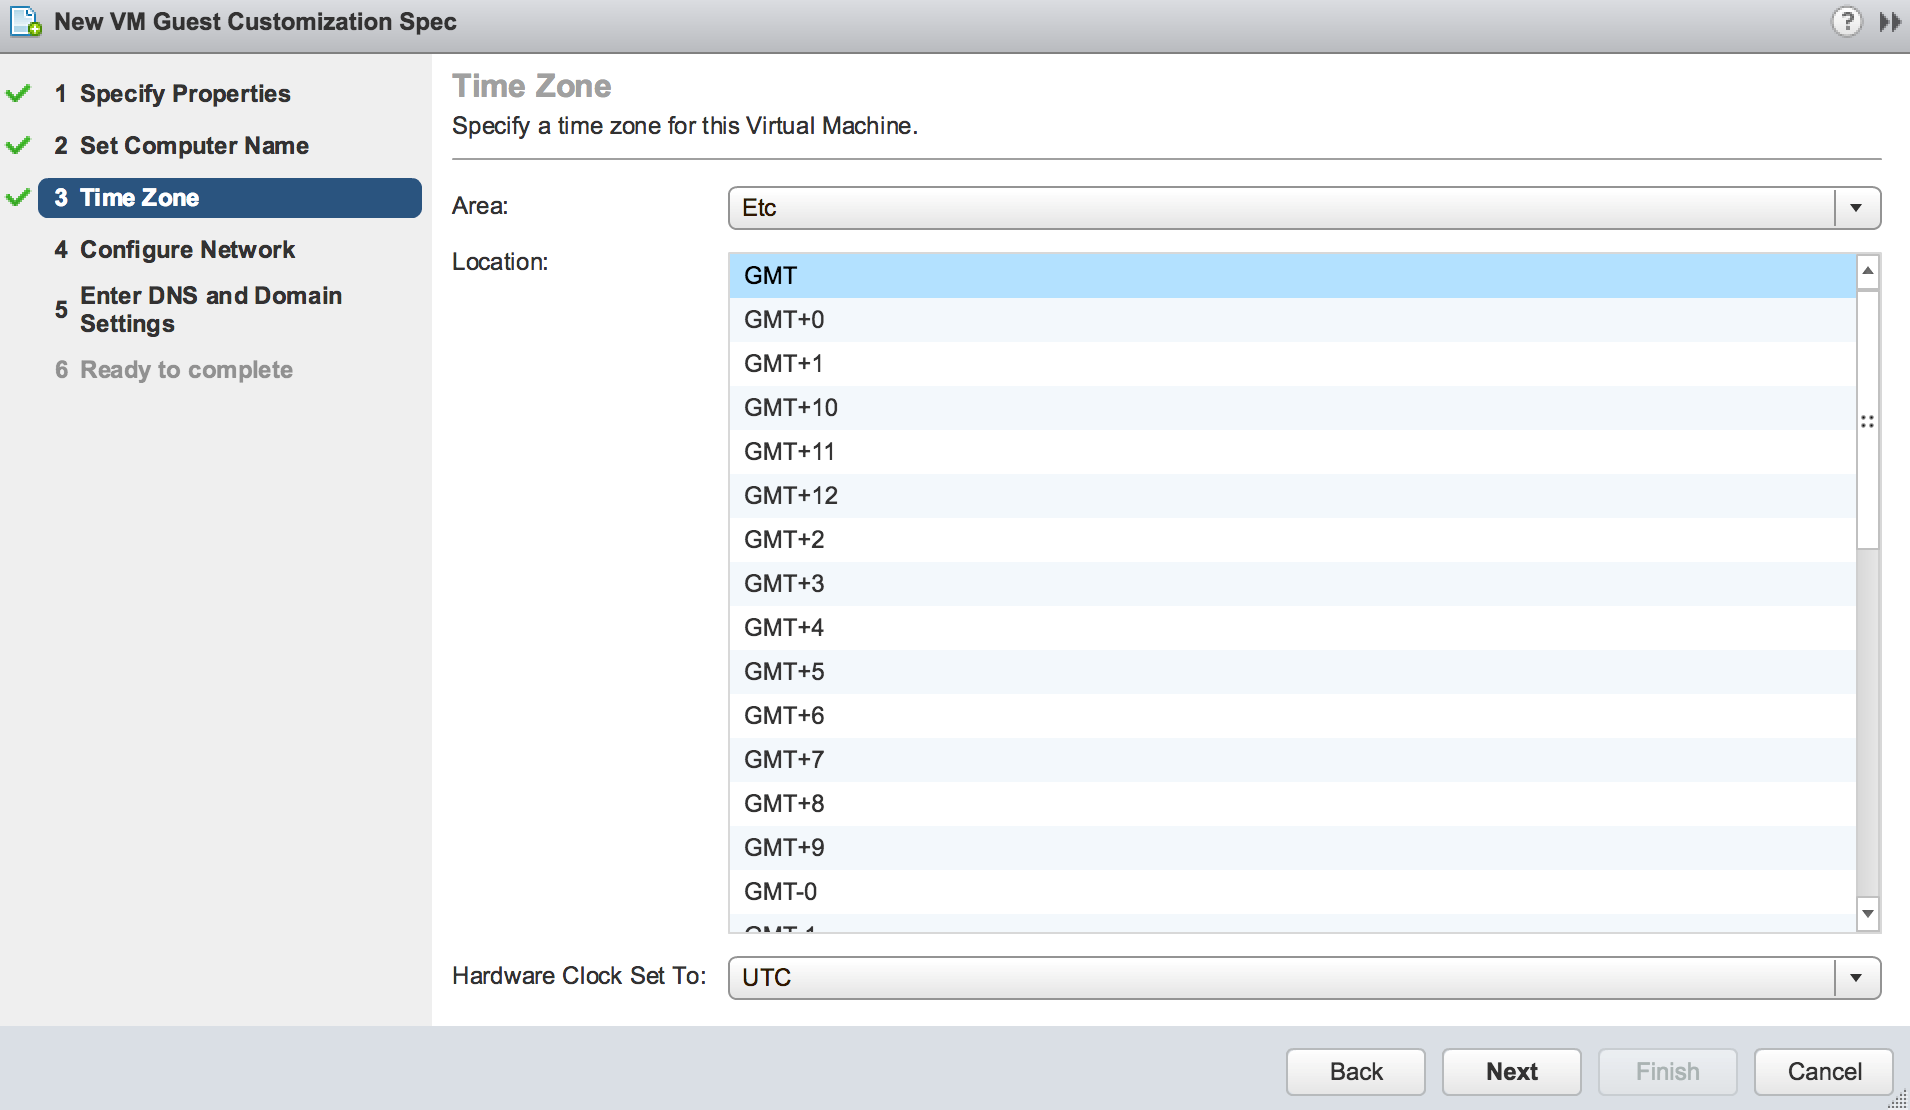
Ensure the time zone is the same as it is configured on the Active vCSA
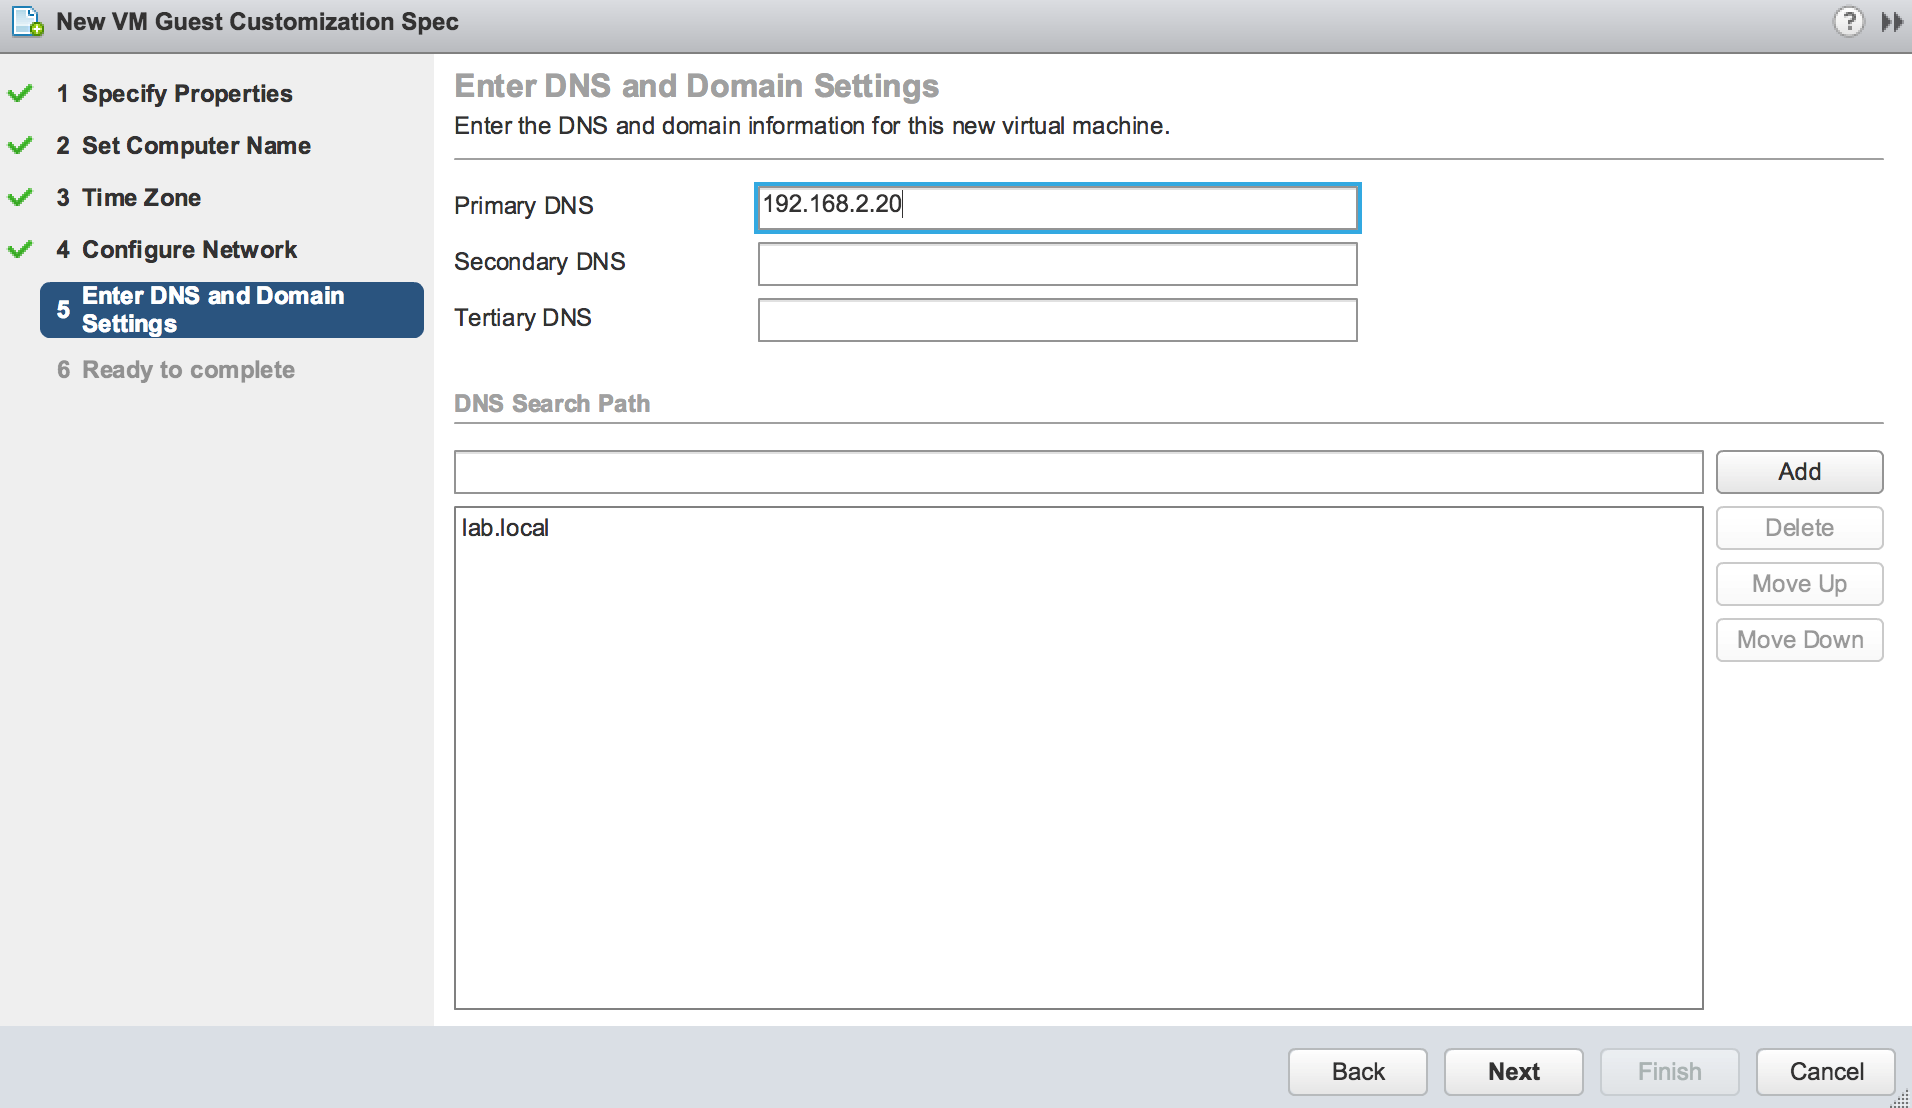
Configure the Network
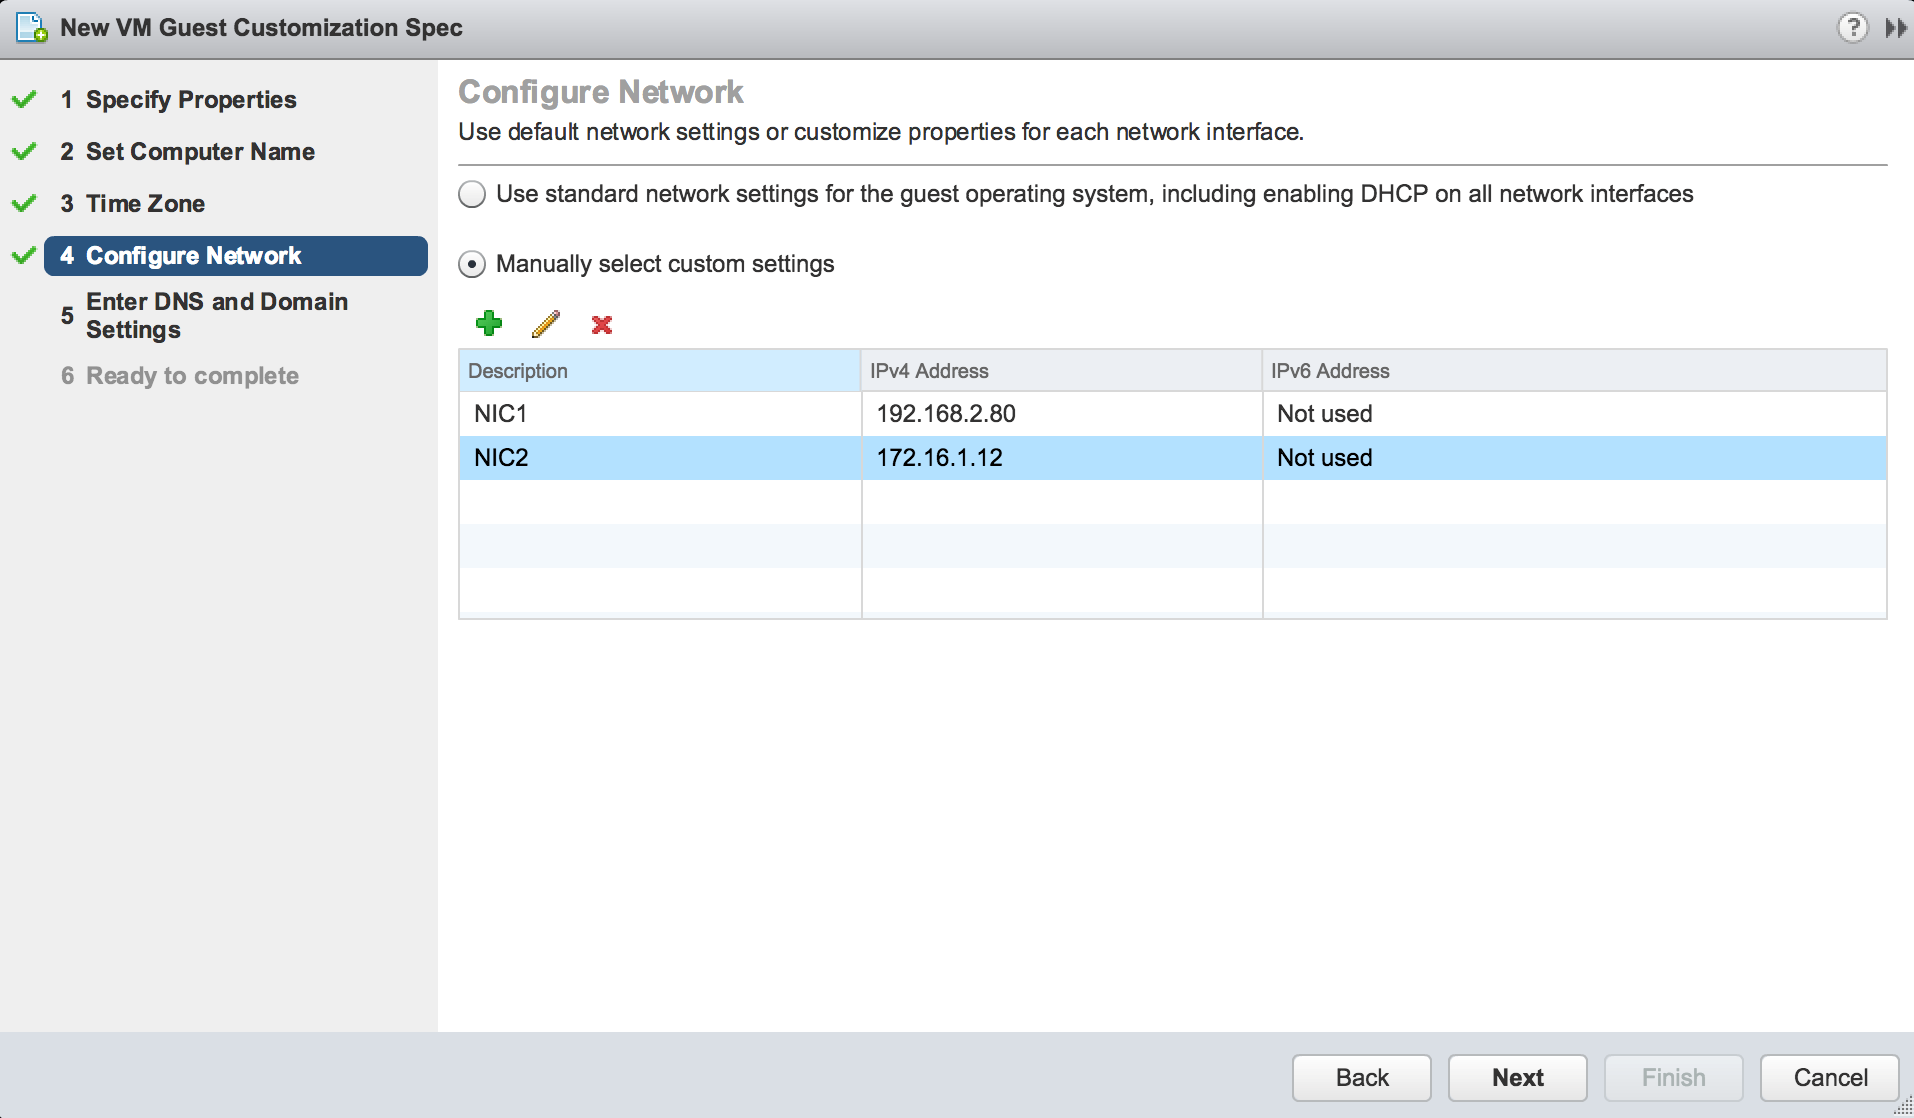
For the management interface use the same IP address you have configured on the Active vCSA. That is not well explained in the VMware Availability guide.
At my first attempt, I tried to use different IP address, but the VCHA configuration wizard failed with the following error:
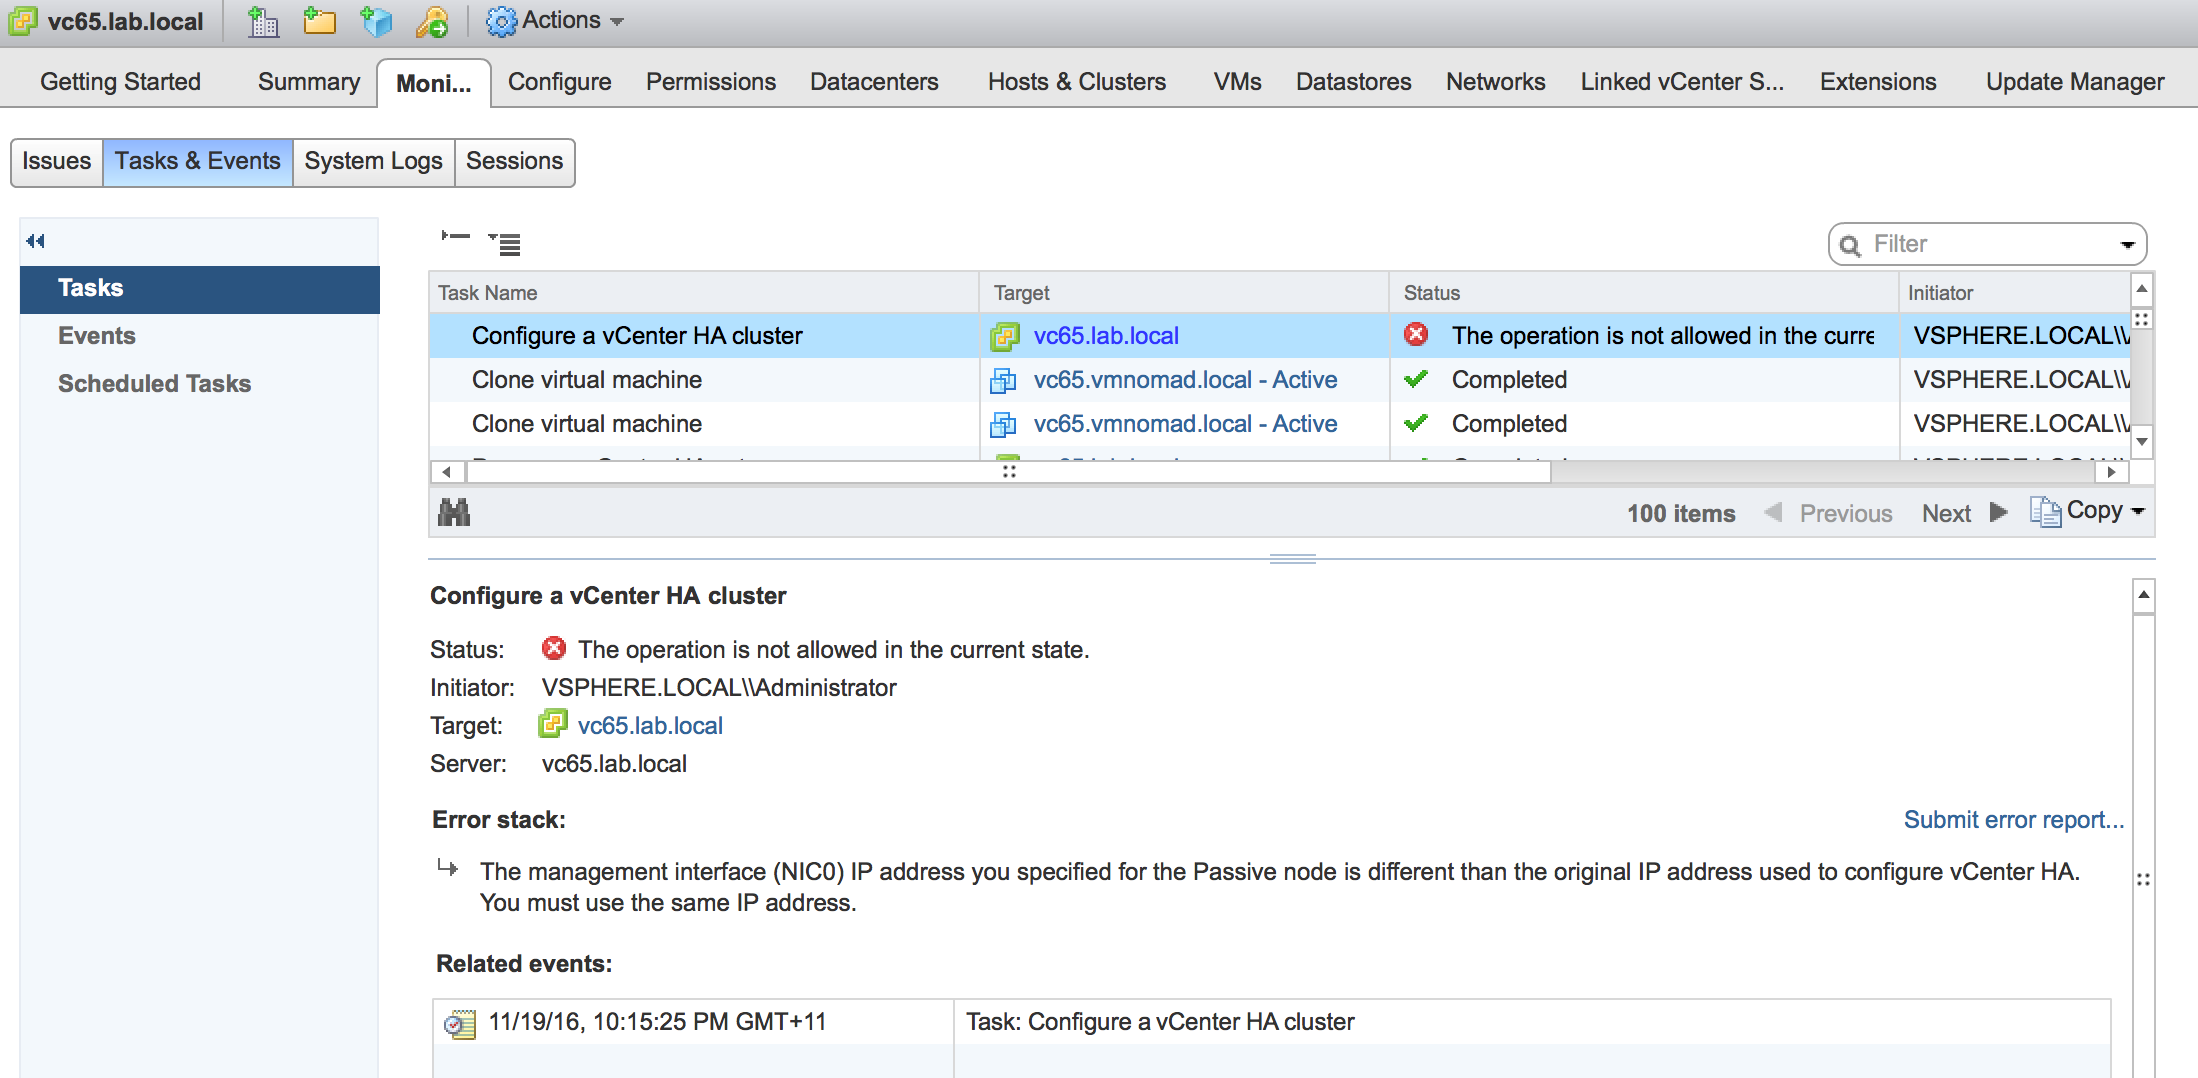
Please ensure you don’t configure the default gateway for NIC2 which is an HA interface. Doing so will disable the default gateway on the NIC1 (Management) interface. vCSA does not allow having two default gateways.
Confirm the settings on the summary page and click Finish.

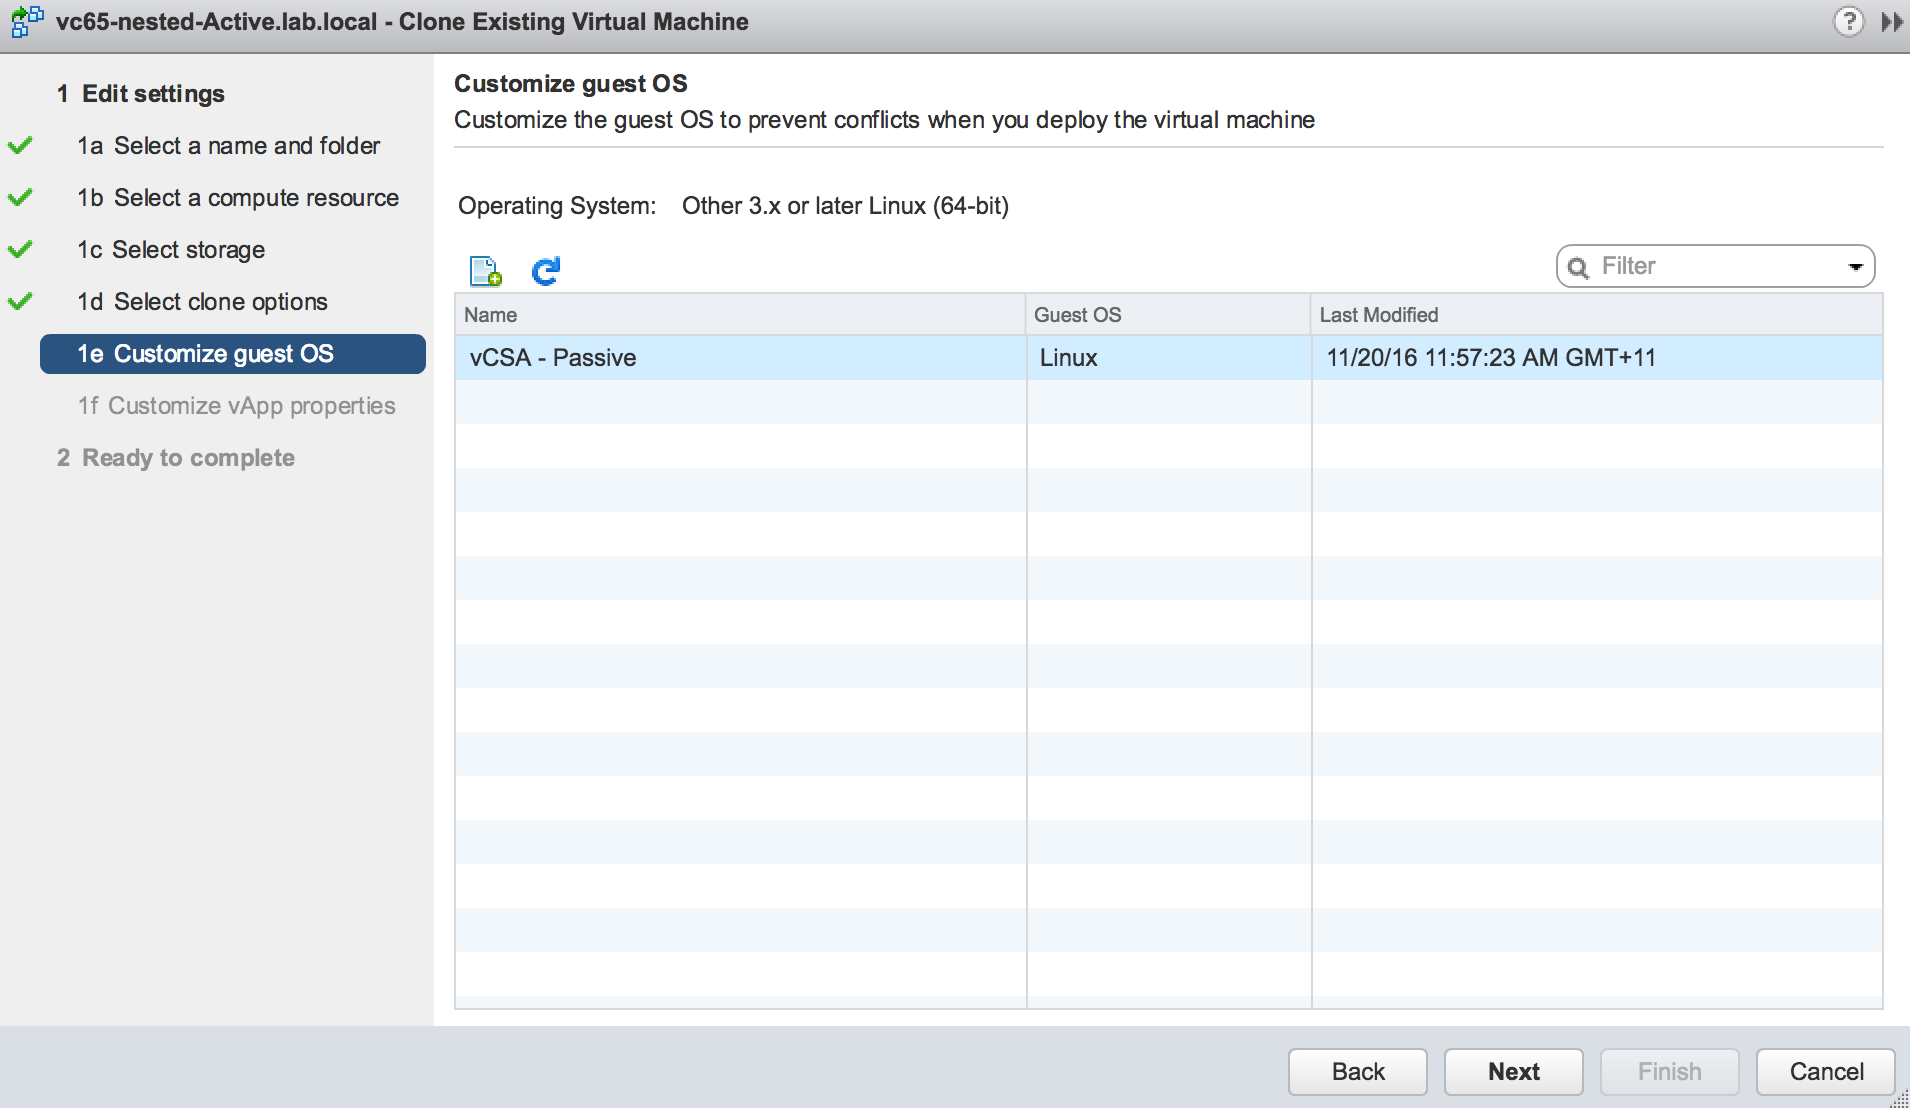
Select the customization you just created.
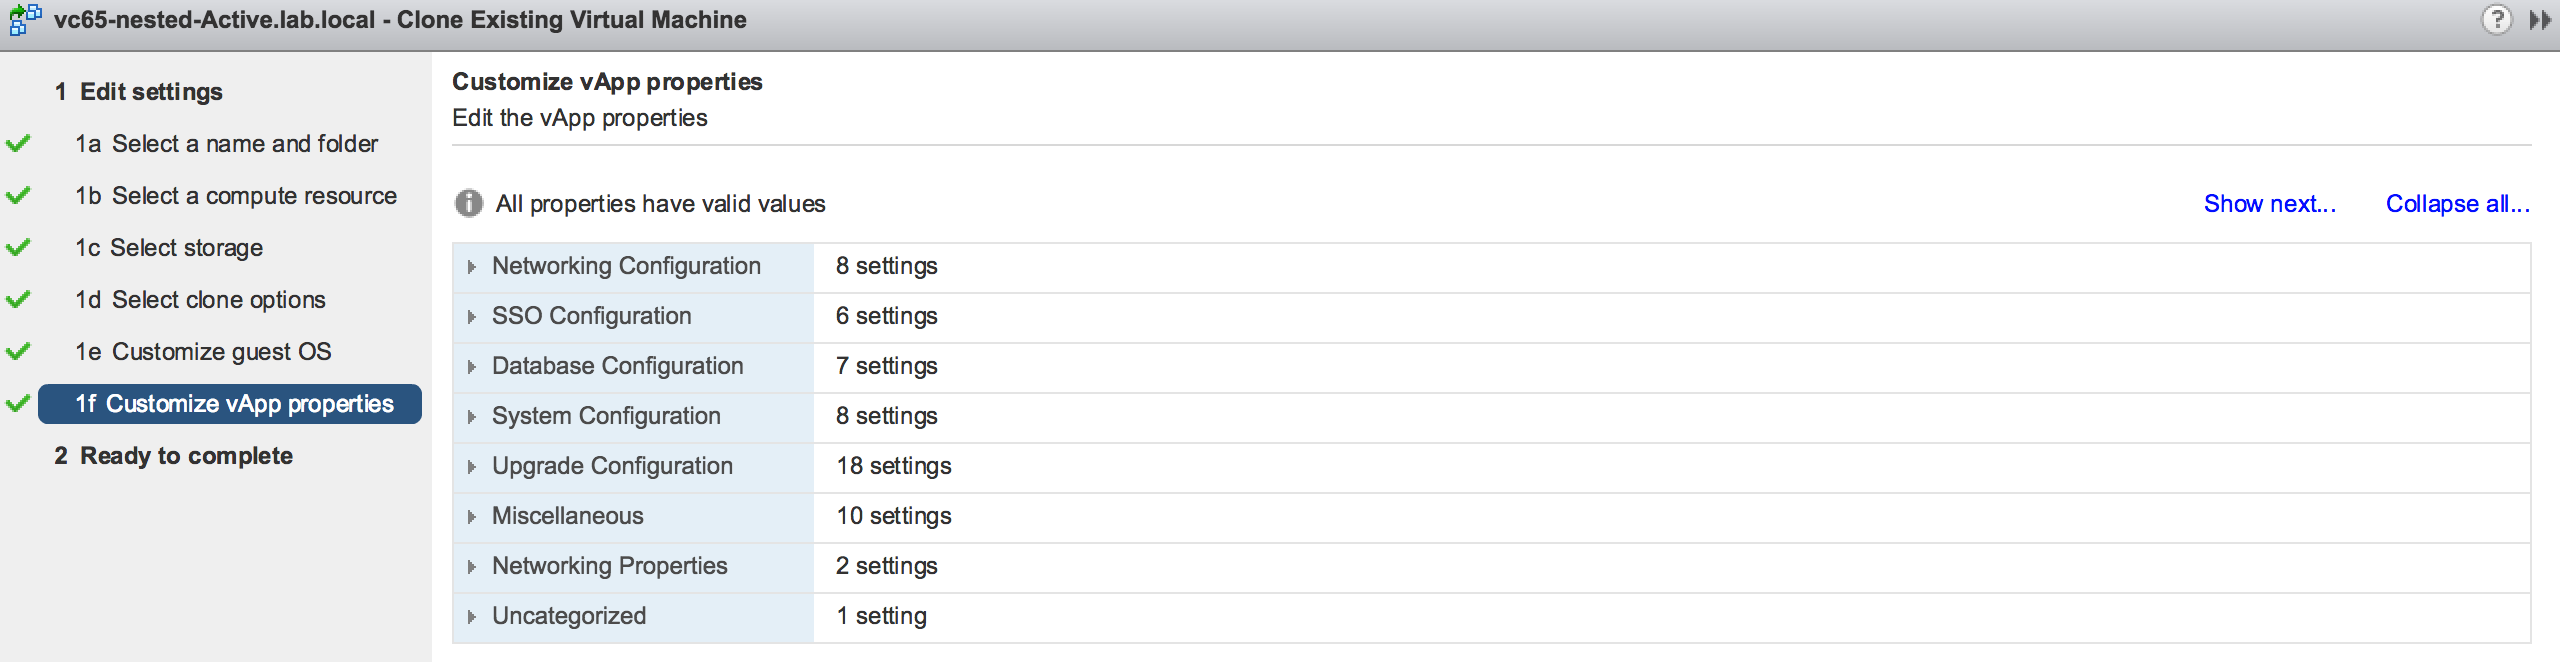
You won’t see the following screen if the vCenter was deployed directly to ESXi hosts. Only when vCSA is deployed through another vCenter Server it will be recognized as a virtual appliance and all its vApp properties will be exposed. Don’t make any changes to them.
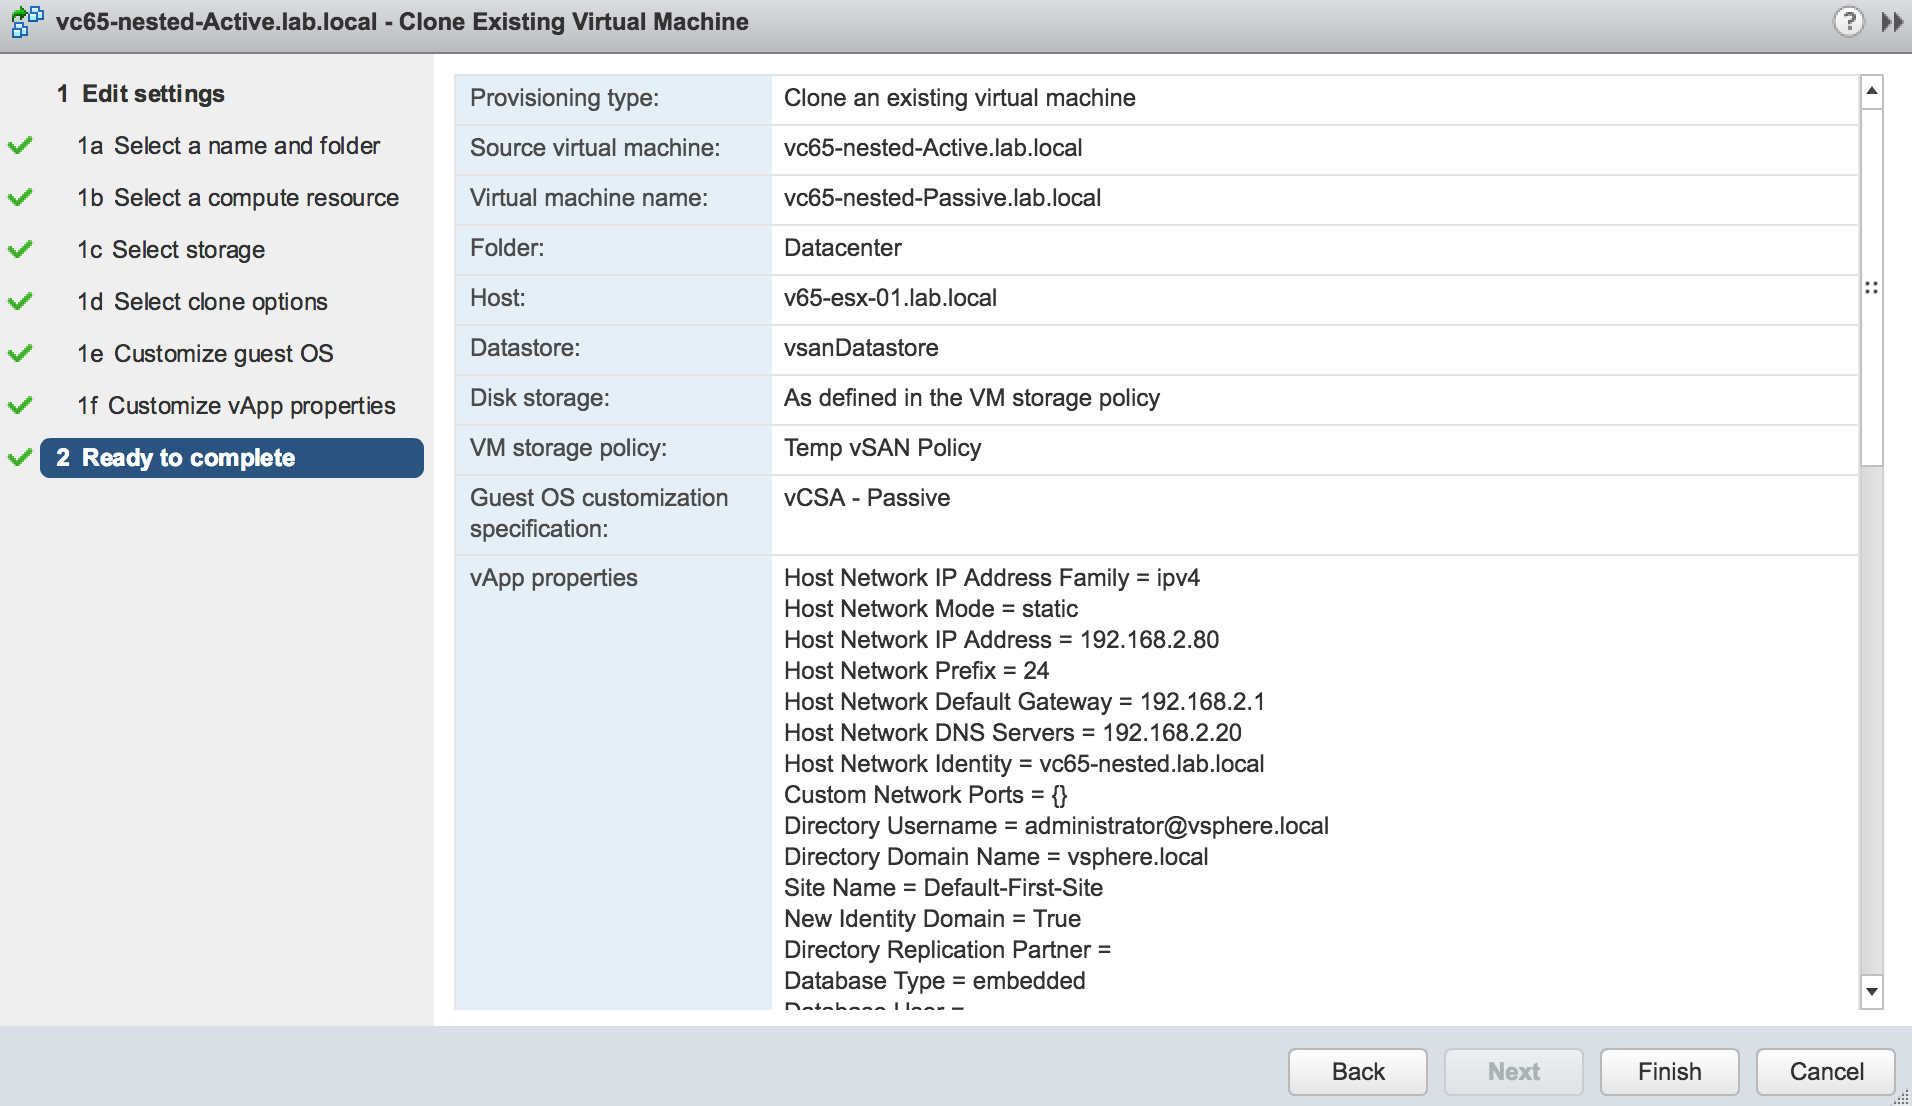
Confirm the configured settings on the summary page, click Finish and you are done with Passive node.
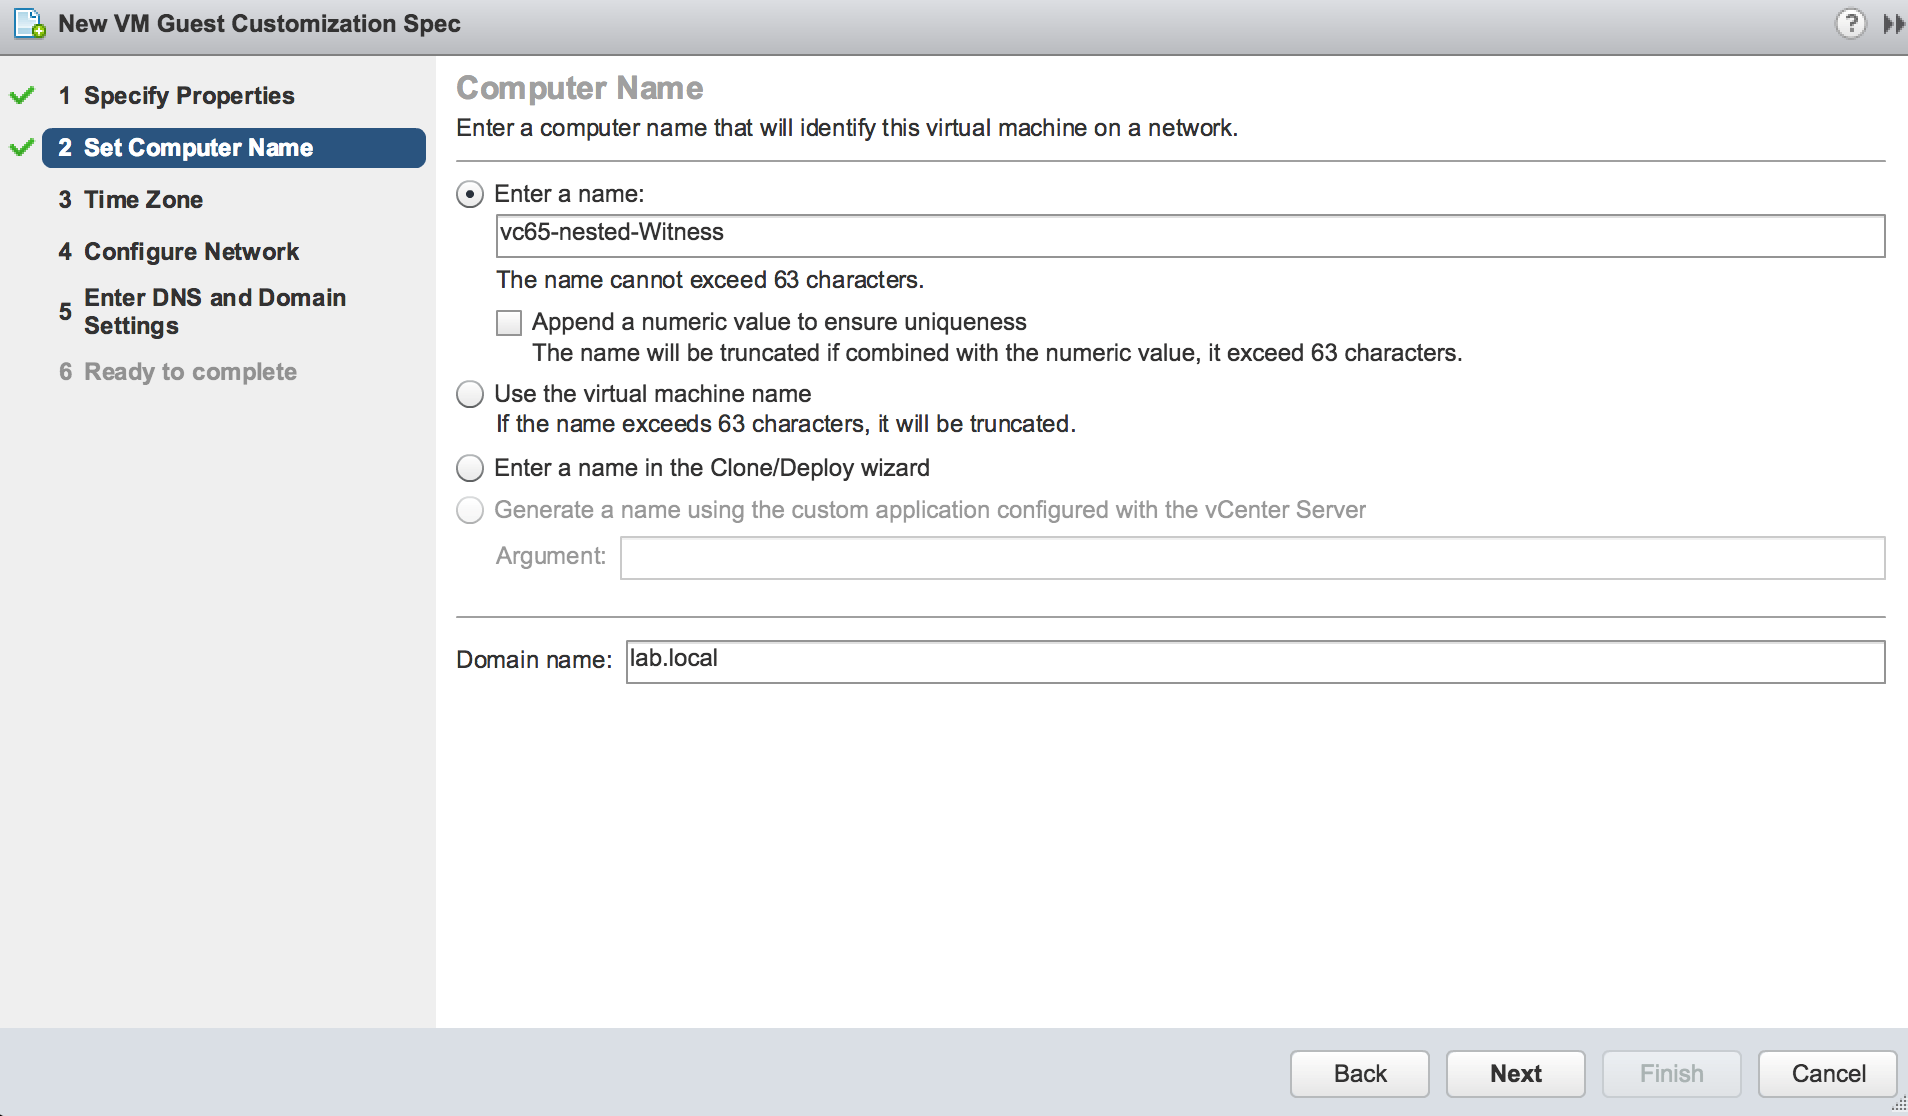
The steps to clone Witness are pretty much the same, but there are two things in the Customization Specification that will be configured differently.
First, the hostname of the VM can be different from the Active vCSA node. Choose whatever you like here.
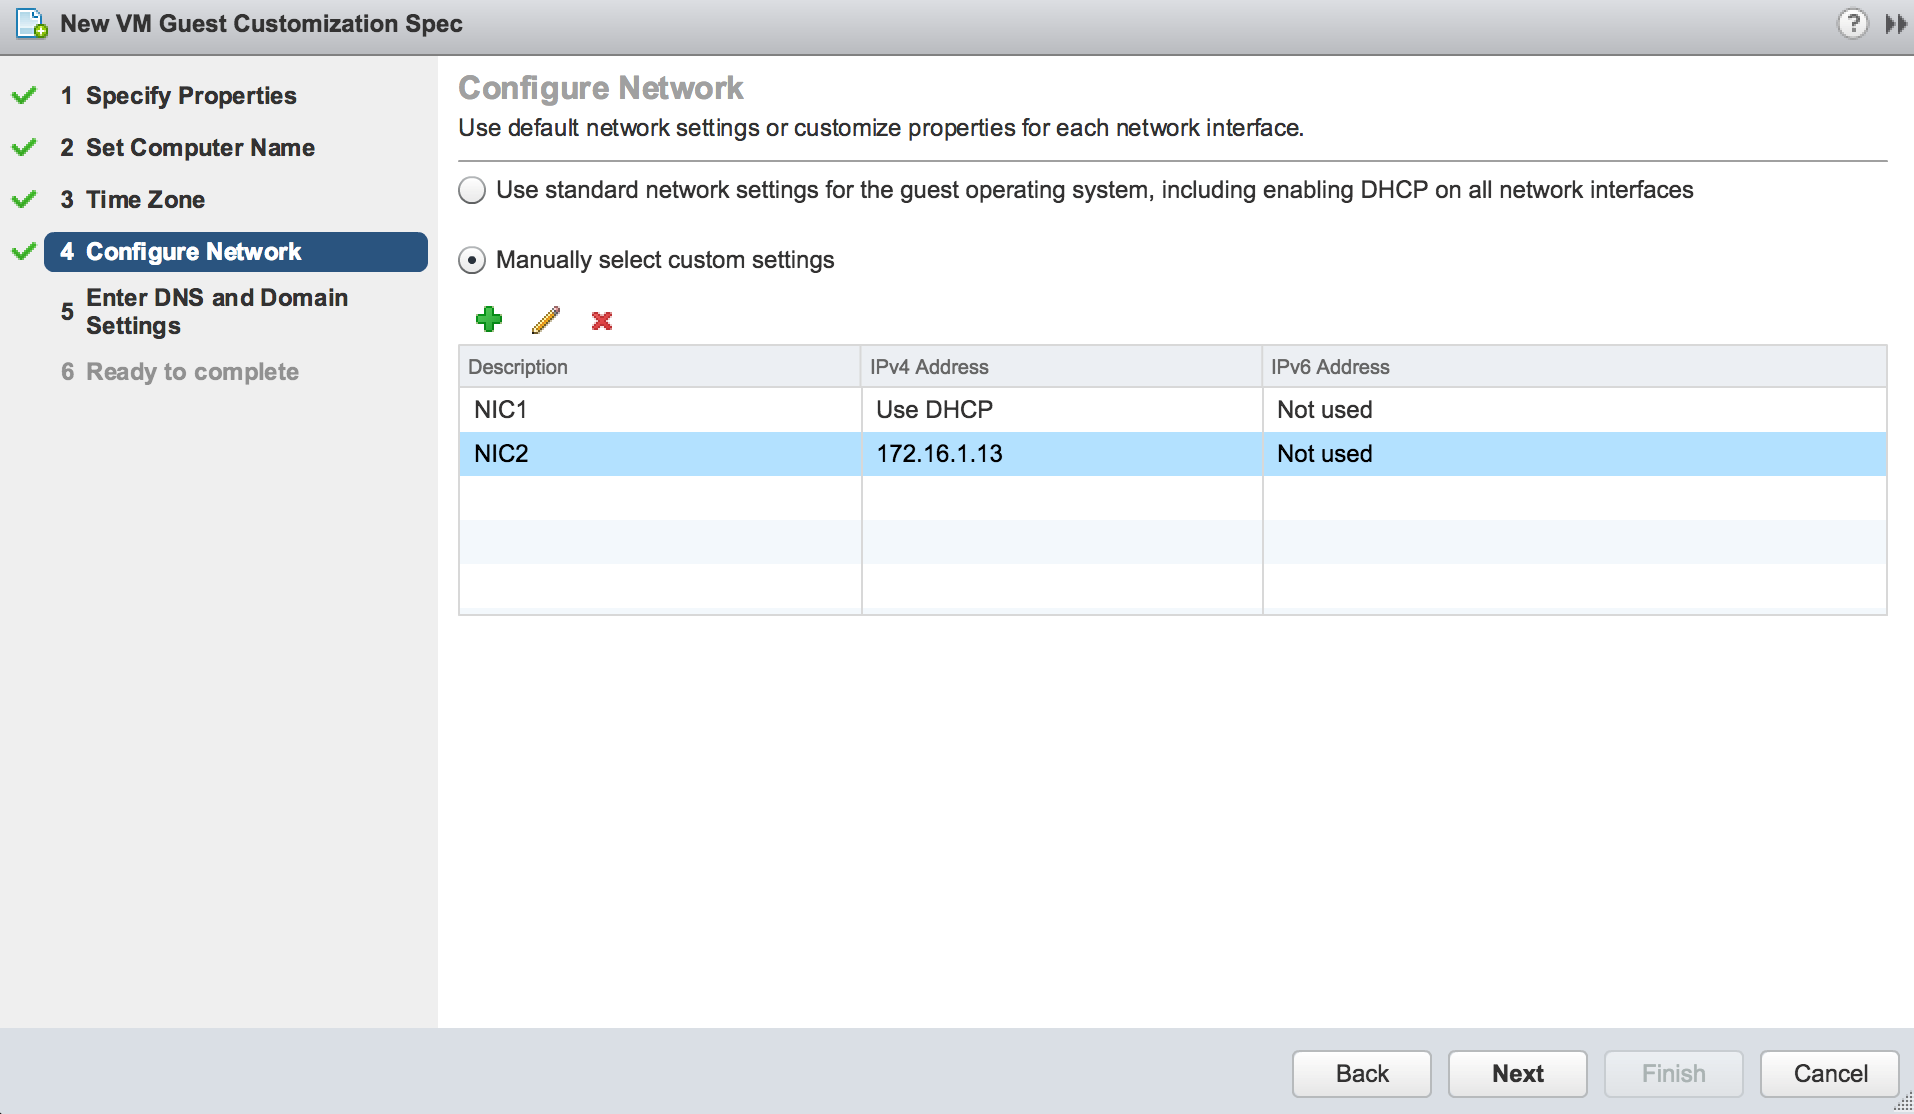
Second, the NIC 1 shouldn’t have static IP address. Again, the documentation doesn’t specify what IP address to use, but setting it to DHCP proved to be just fine.
The rest of the steps are identical to the ones I described for the Passive node.
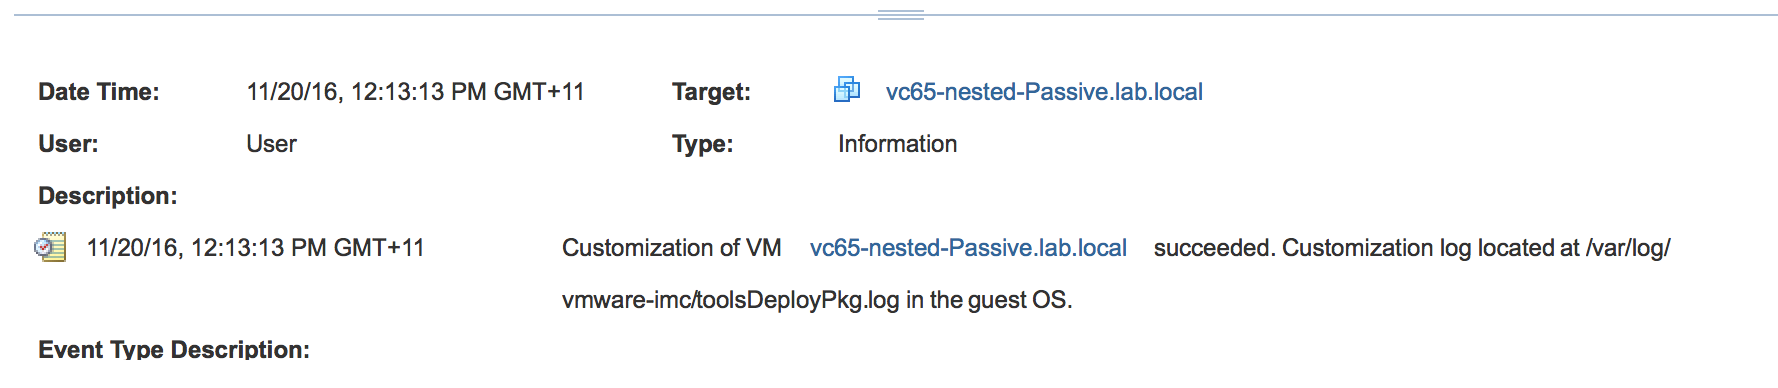
Before completing the last step make sure that cloning and customization tasks were completed successfully for Passive and Witness appliances. Check the Events for both nodes.
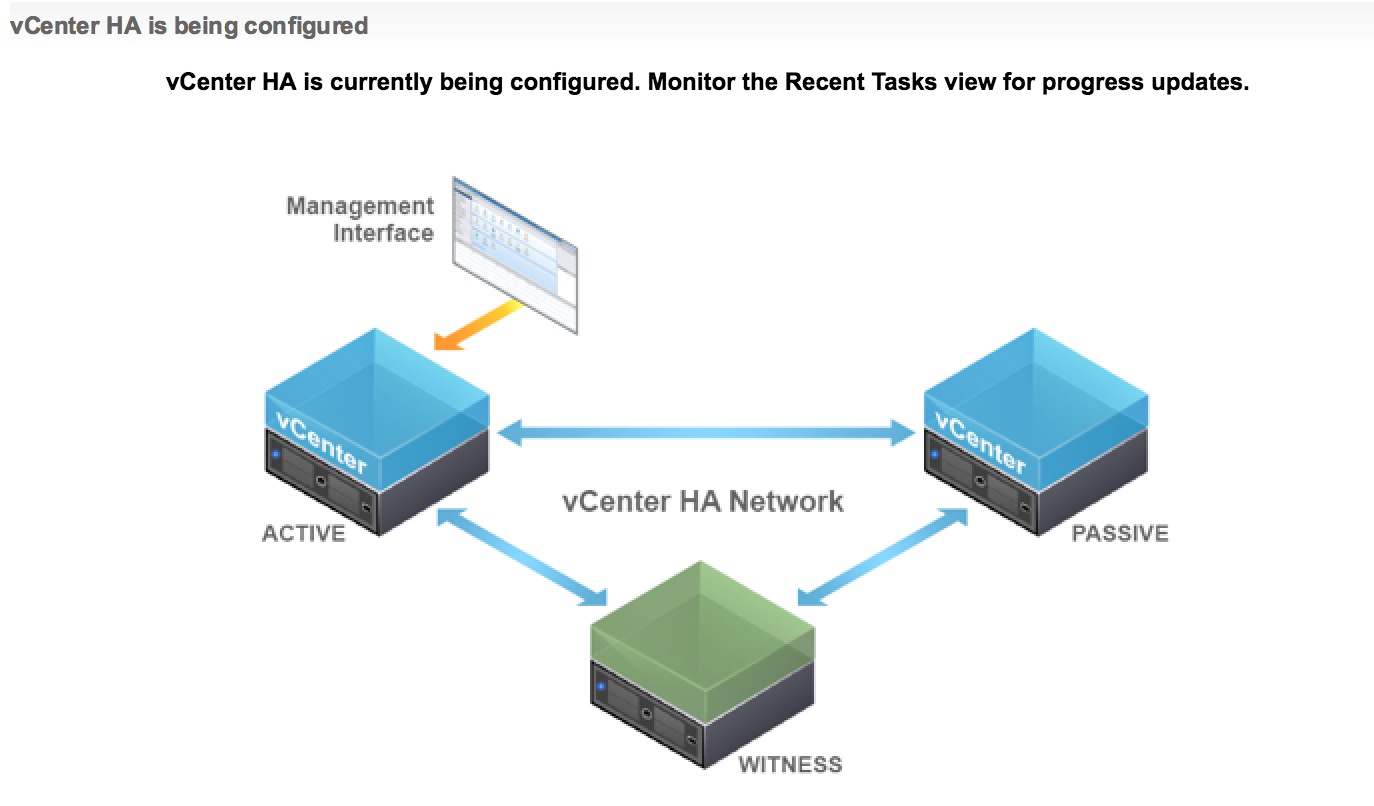
Now you can go to the VCHA Configuration Wizard and click Finish.

vCSA Web Client will advise you to monitor the recent tasks view for the progress update.
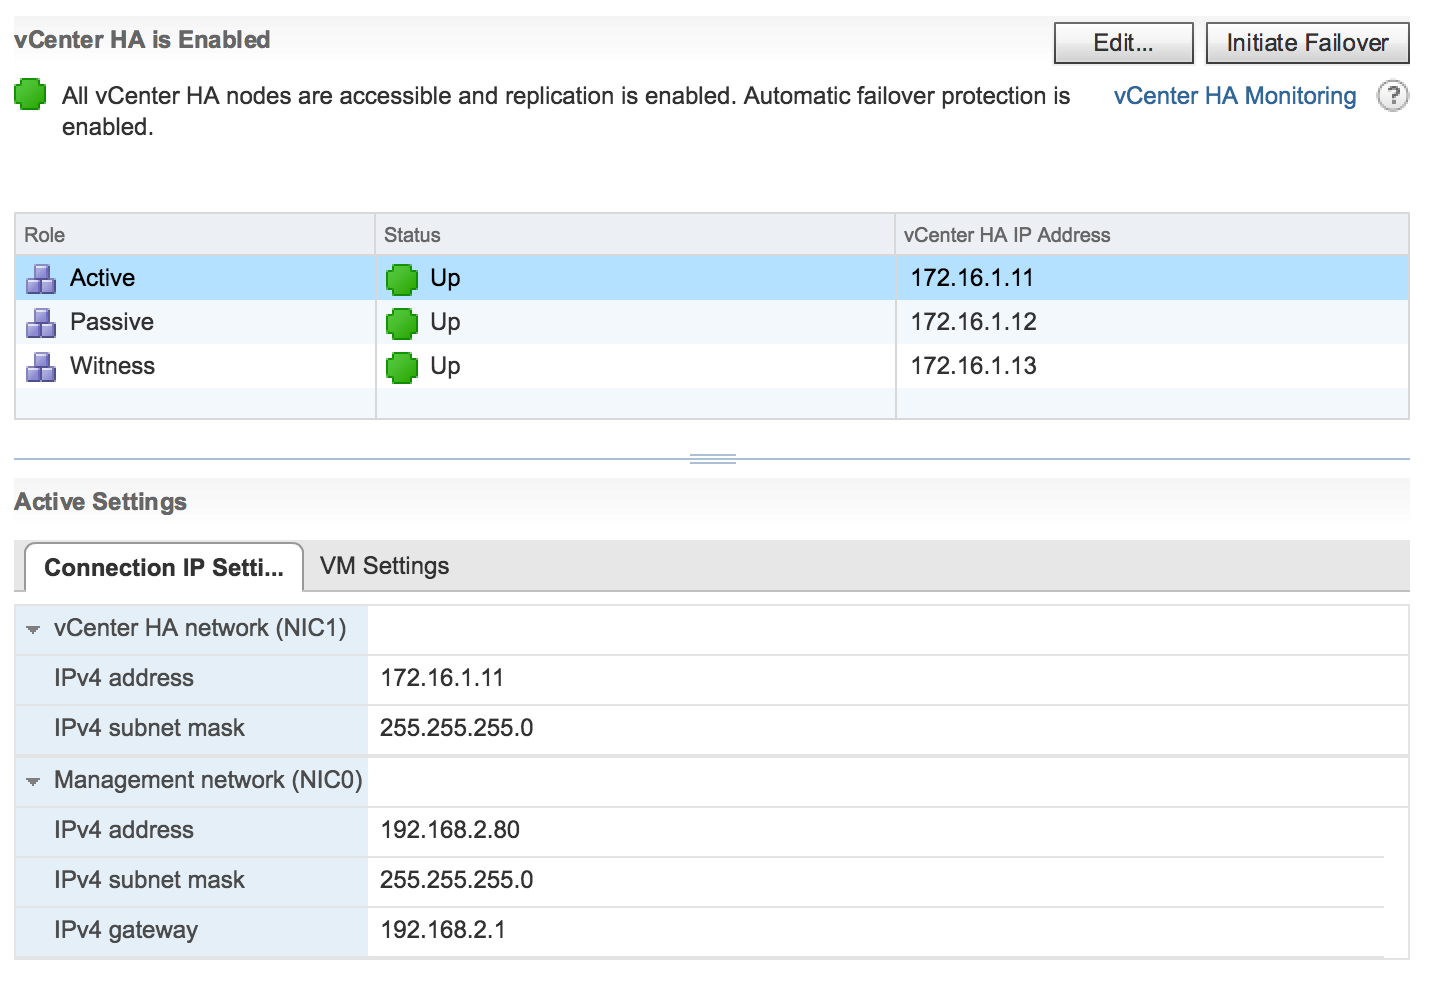
Once the configuration task is complete the vCenter HA Configuration will display the current cluster status.
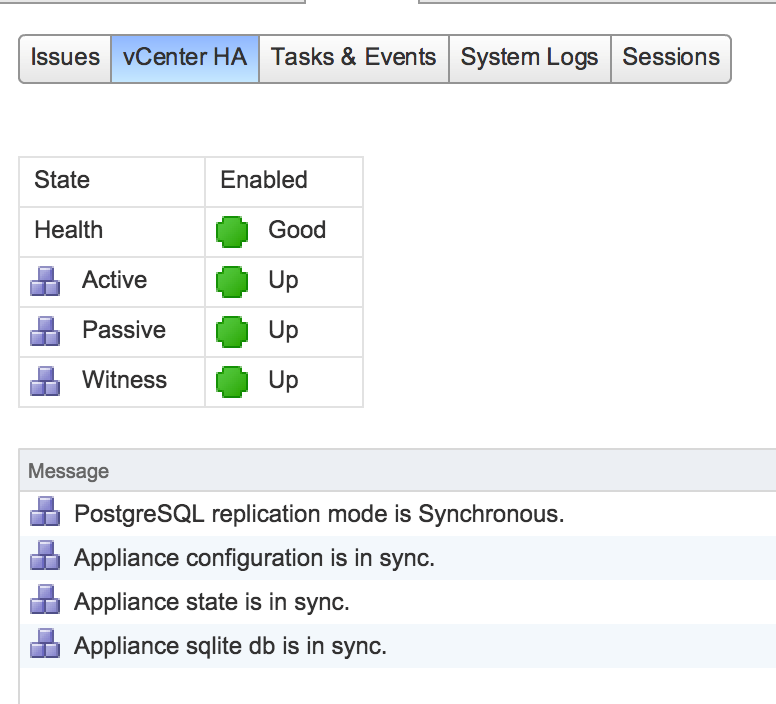
In vCenter HA Monitoring you will be able to verify the status of replication of the vCenter services and PostgreSQL database.
If you decide to remove VCHA the system will delete the current passive and witness nodes. However, the Active vCSA will keep its HA interface.
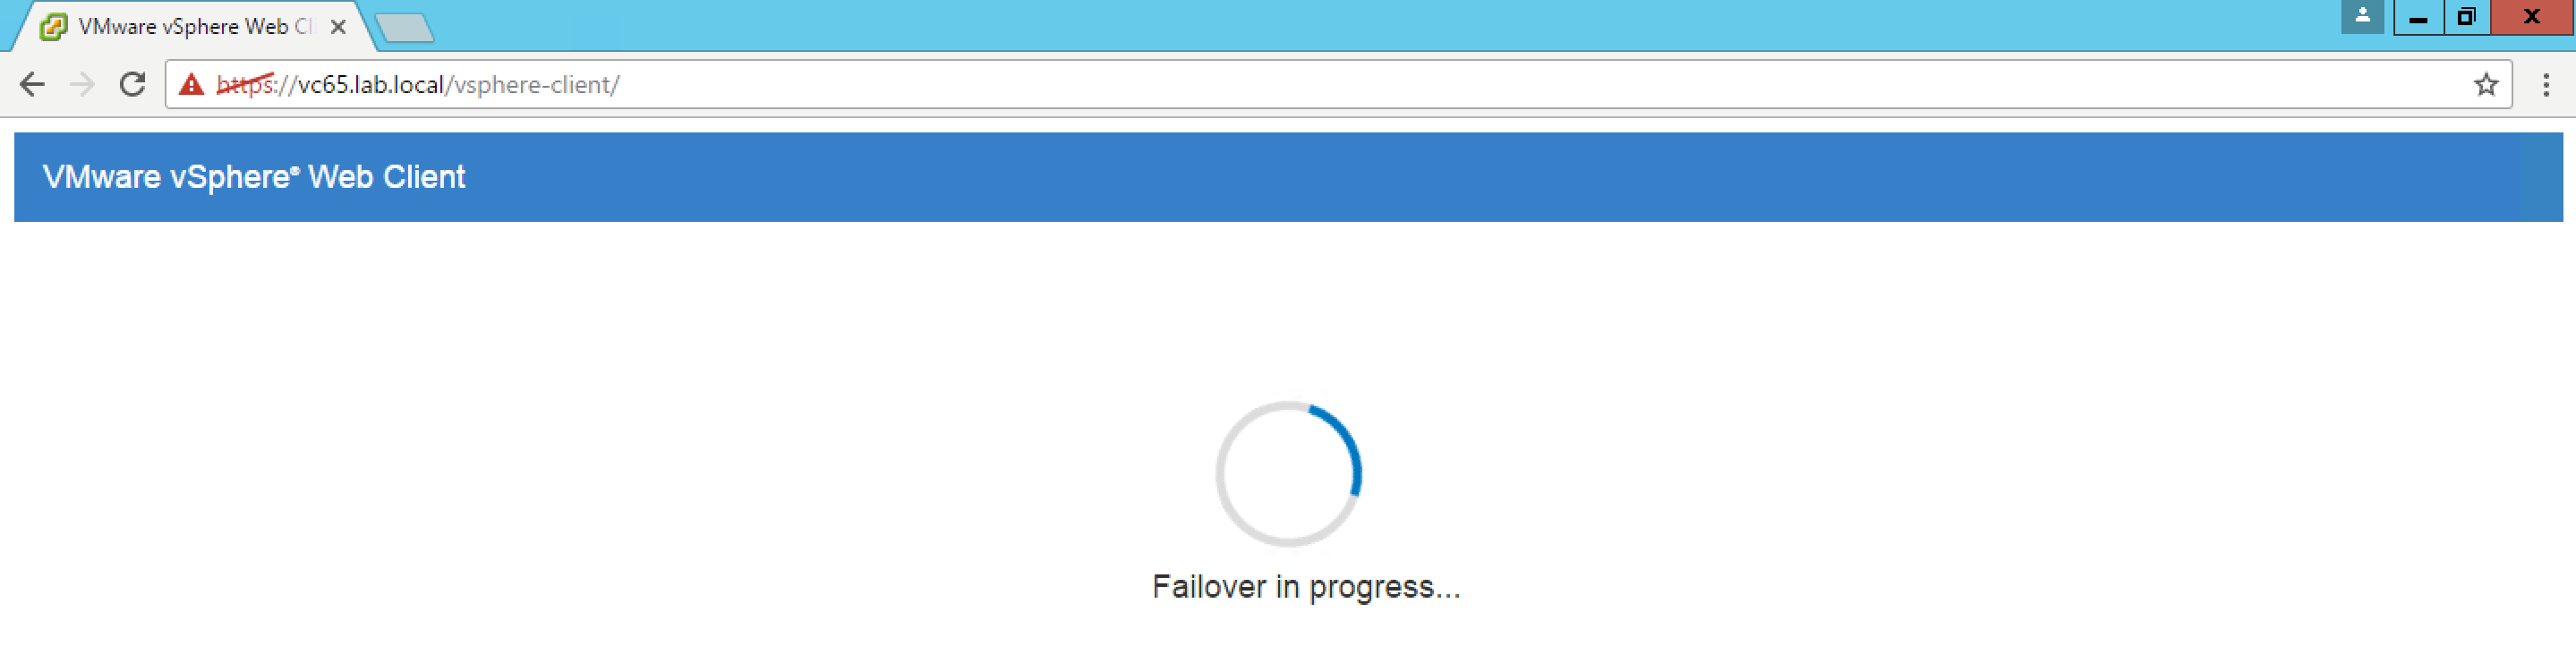
The failover process is quick and straight forward. Once you initiate failover you will see the following screen when trying to access Web Client.

A couple minutes later it becomes more informative
Another 2 minutes and you will see the familiar notification that Web client is starting.

As you can see there is a couple of minor hiccups in the first release of VCHA, but still leaves an impression of very solid and reliable product. This is a feature we all have been waiting for a long time and I am glad it has been finally delivered.
Please share in the comments any thoughts on the documentation or bugs you find and I will make sure they will be communicated to the Product Management team of vCSA.
