

This series of articles will guide you through the basic deployment of Microsoft Windows Server 2016 Core version, covering all the steps from an initial installation to the deployment of Hyper-V role and Failover Cluster configuration.
The first and the main thing you need to double-check before installing the Windows Server 2016 Core is whether your hardware meets the system requirements of WS 2016. This also is very important in the process of planning your environment, in order to be sure that you have enough amount of compute resources for running your production workload.
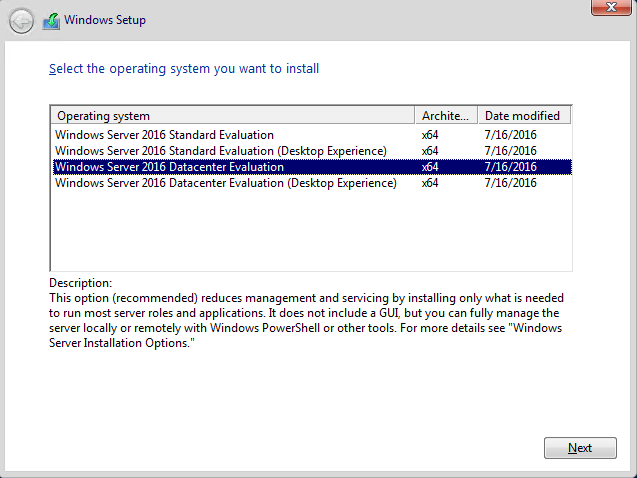
After booting the server installation from an ISO file, you will need to choose the installation language and type. From the list of options, the one you need is a Windows Server 2016 version without Desktop Experience.
Windows Server installation
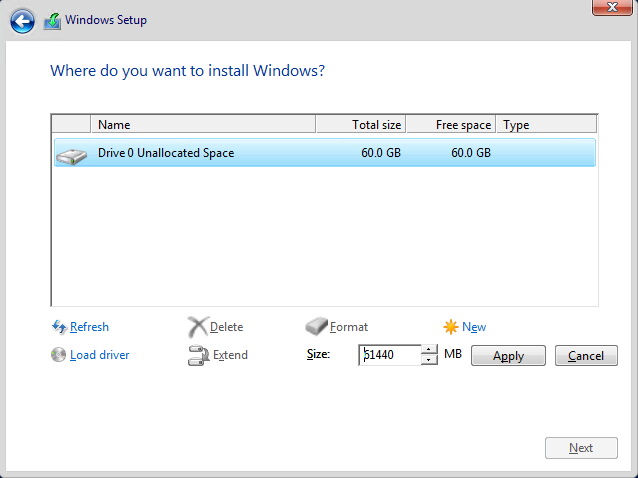
The next step is to specify the disk where the Windows Core must be installed. Please take into consideration that the disk will be used only for the OS and applications and will not act as a production storage. After selecting the disk you need, it must be partitioned.
Selecting installation disk
After finishing the installation process and automatic reboot, you will have an option to create an administrator password.

Creating login credentials
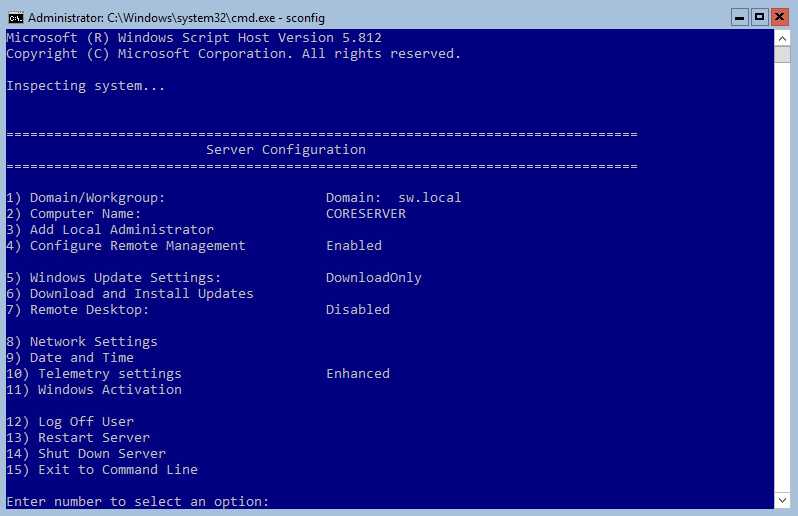
The main feature of Windows Server Core version is that all you can see after the boot is the command line window. It’s the main tool to configure and manage the Core server. To begin the server configuration, we need to enter the “Sconfig” command.

Core server configuration command
Do not forget to change the Computer name (restart of the server is required) and specify the desired IP addresses. Next, the server can be joined to the domain.
Configuration options
Set the networks by changing the IP addresses in Server Configuration menu. One of the networks will be used for management while the second one will act as an iSCSI connection to the shared storage.
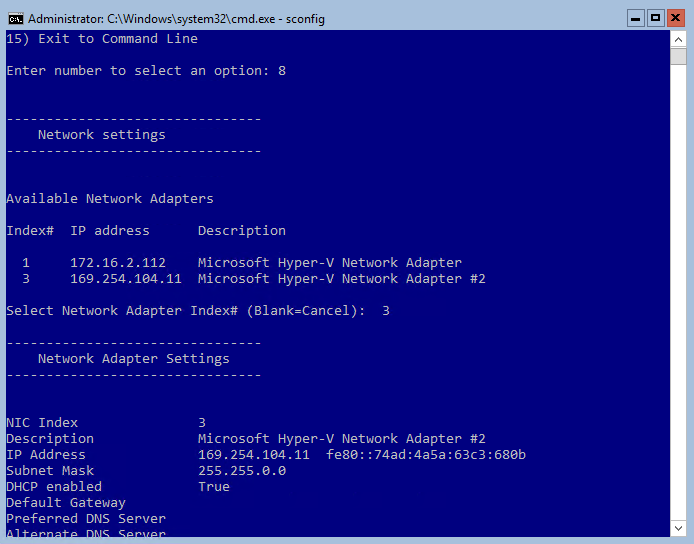
Modifying networks
You can modify other settings at your discretion. Make sure the Windows license is activated.
Before installing Hyper-V role on the server, you need to connect an iSCSI shared storage to your Core server. In order to do that, open Microsoft iSCSI Initiator by entering “iscsicpl” into the command line, and connect your storage via the iSCSI IP address.
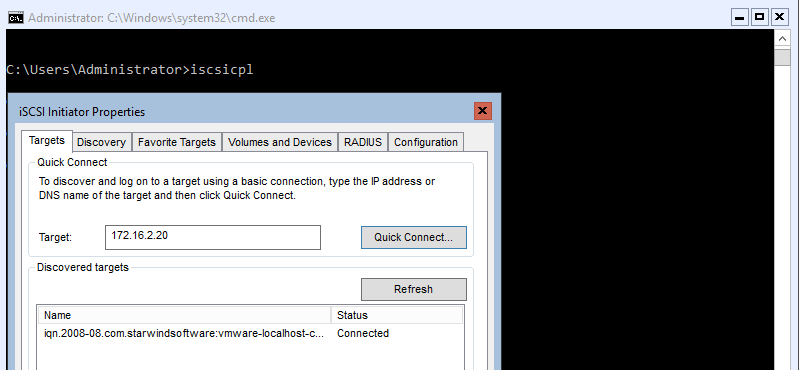
Connecting storage via iSCSI Initiator
The last step before Hyper-V part of the configuration will be to add the storage to the server and create a disk drive.
There are several commands that need to be performed to prepare the storage for your needs. “diskpart” will come in handy in this case. Use “list disk” to see all the disks available on the server, “online disk” and “attributes disk clear” commands to bring the disk online and check if the partition is writable.
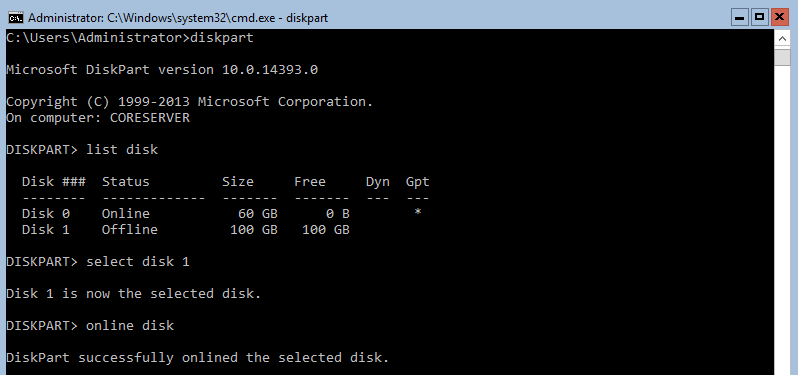
Preparing the storage with “diskpart” command
Next command is “list partition” to see available disk partitions. Choose the partition you need with the “select partition 1”. The only few things left to do are to format the partition with “format fs=NTFS”, and assign a letter on the partition by entering “assign letter=S” command.
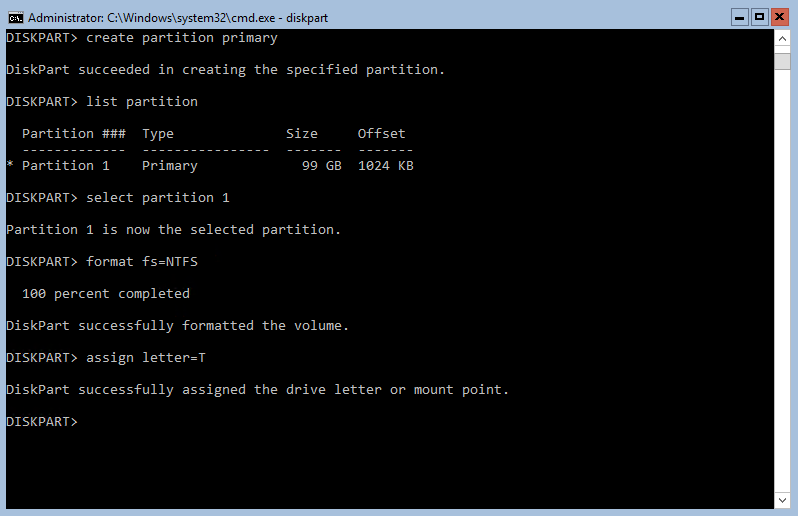
Creating and formatting the partition
As a result, you have the storage connected to your Windows Server 2016 Core and ready for the deployment of Hyper-V role that will be described in my next article.
