

Windows Server 2016 – Storage Spaces Direct Hyper-converged [image credit: Microsoft]
Introduction
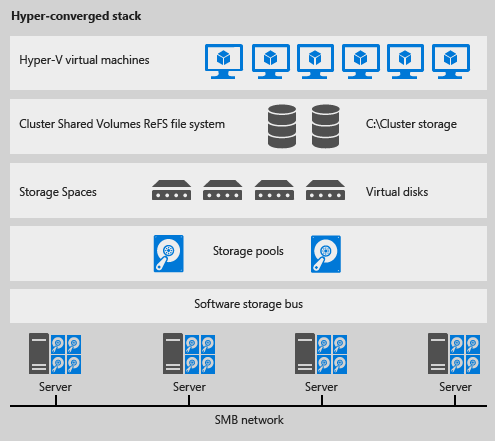
With the release of Windows Server 2016, Microsoft is introducing Storage Spaces Direct (S2D), which enables building highly available Software-Defined Storage systems with local attached storage. This storage can be leveraged by VMs running on the same cluster (in hyper-converged mode) or the storage can be presented as a File Share (in disaggregated mode). The hyper-converged deployment scenario has the Hyper-V (compute) and Storage Spaces Direct (storage) components on the same cluster. Virtual machine’s files are stored on local CSVs. Once Storage Spaces Direct is configured and the CSV volumes are available, configuring and provisioning Hyper-V is the same process and uses the same tools that you would use with any other Hyper-V deployment on a failover cluster.
For more details on Storage Spaces Direct and Hyper-Converged solution can be found in the whitepaper that I wrote with my fellow MVP Romain Serre, which can be downloaded from TechNet gallery here.
Storage Spaces Direct and VMM 2016
With the next release of System Center Virtual Machine Manager 2016, VMM will start supporting Storage Spaces Direct for all the nodes that have Windows Server 2016 Datacenter edition installed only.
As of this writing, VMM 2016 Technical Preview 5 with Cumulative Update (CU3) have been released.
Starting with VMM 2016 Technical Preview 5, you can use Virtual Machine Manager to deploy Spaces Direct, both in Hyper-converged and Disaggregated topologies.
In this blog post, we will show you how build a Hyper-converged topology with Storage Spaces Direct using Virtual Machine Manager 2016.
Prerequisites
Before deploying Storage Spaces Direct using VMM, you need to:
- Deploy Windows Server 2016 Operating System.
- Set up Networking on all nodes that will form part of the cluster where Storage Spaces Direct is enabled.
In this example, I am leveraging Hyper-V nested virtualization in order to deploy Storage Spaces Direct in virtual machines.
Infrastructure Overview
We have the following servers installed in our demo environment:
- Domain controller, DNS.
- System Center Virtual Machine Manager 2016 TP5 with cumulative update 2.
- SQL Server 2014 holding SCVMM database.
- Windows Server 2016 TP5 Hyper-V host.
- 4 Gen 2 virtual machines (Windows Server 2016 TP5 Hyper-V enabled) with the following configuration:
- 2 vCPUs
- 4GB Static RAM
- 4 X SSD = 800GB
- 12 X HDD = 4TB
- Storage Net1 = 10.0.0.X/24
- Storage Net2 = 10.0.0.X/24
- Management Net = 172.16.20.X/24
VMM Logical Network Overview
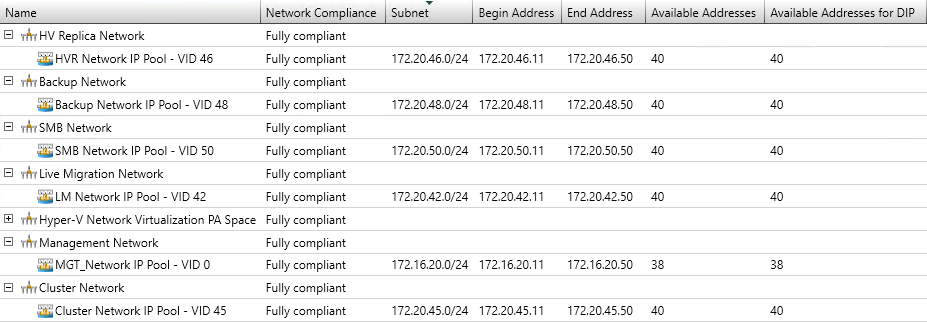
We have the following logical network created in our demo environment:
- Host Management: 172.16.20.0/24, VID=0
- Cluster: 172.20.45.0/24, VID=45
- Live Migration: 172.20.42.0/24, VID=42
- SMB: 172.20.50.0/24, VID=50
- Replica: 172.20.46.0/24, VID=46
- Backup: 172.20.48.0/24, VID=48
Deploy Storage Spaces Direct Cluster using VMM
Assuming you have all the infrastructure in place including the logical network, VM network, uplink port profile and the IP address pool defined in VMM.
Open VMM console and navigate to the Fabric workspace, click on Add Resources and select Hyper-V Hosts and Clusters.
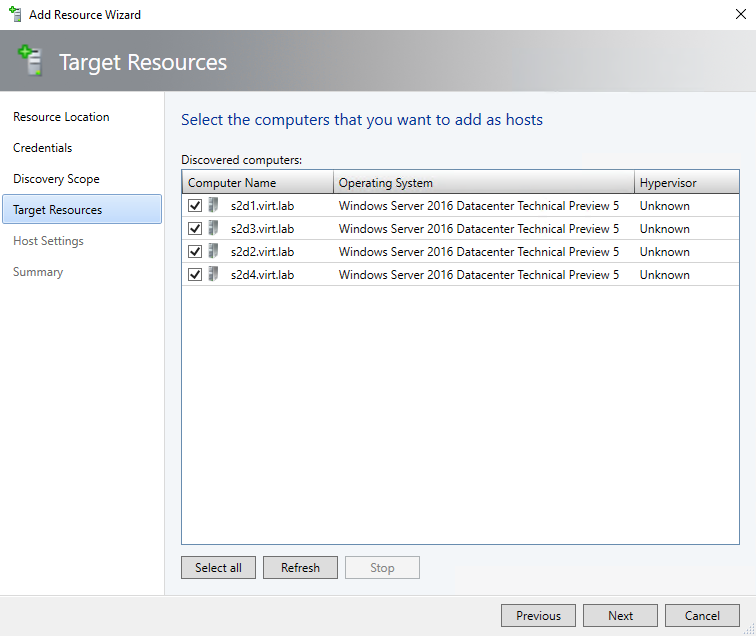
Next, add the nodes that will be part of the S2D cluster, click Next twice and then hit Finish.
Once the nodes are added into VMM, Open VMM console and navigate to the Fabric workspace, click on Create and select Hyper-V Cluster.

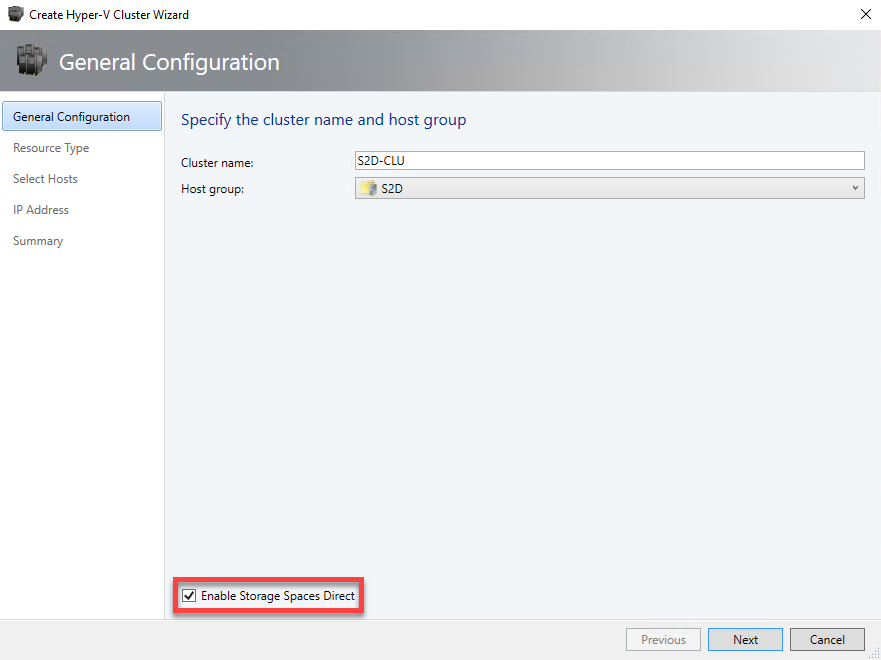
Next, at the General Configuration page, specify the Cluster name, select Host group and make sure to select Enable Storage Spaces Direct as shown in the following screenshot:
At the Resource Type page, select the Run as account in order to create the cluster.
Next, choose Existing servers running a Windows Server operating system, since the hosts are already added into VMM. Click Next.
As part of the cluster creation wizard, cluster validation is obligatory as part of Storage Spaces Direct cluster creation as shown in the next screenshot.

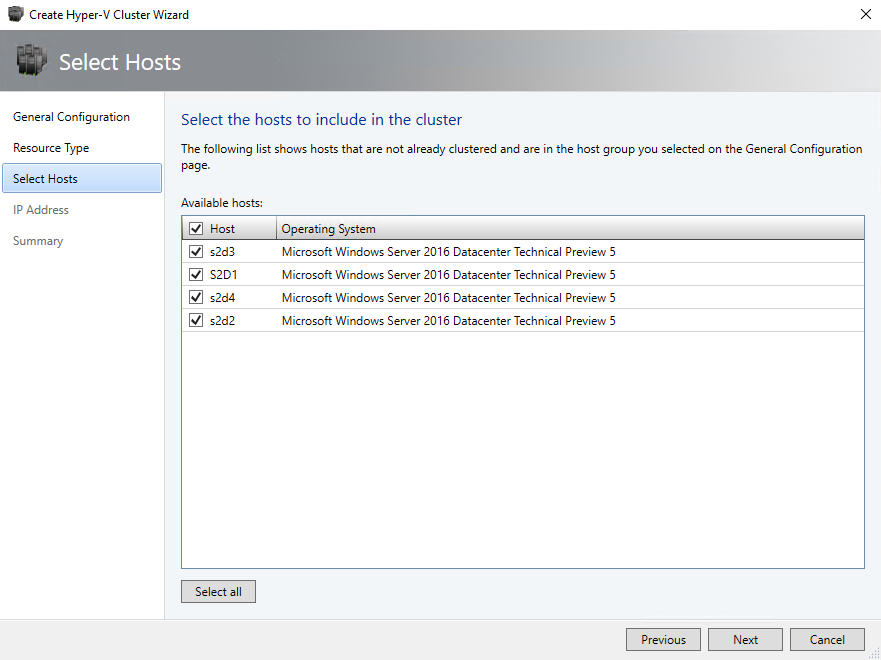
Select all the hosts that will be part of the S2D Cluster. Click Next.
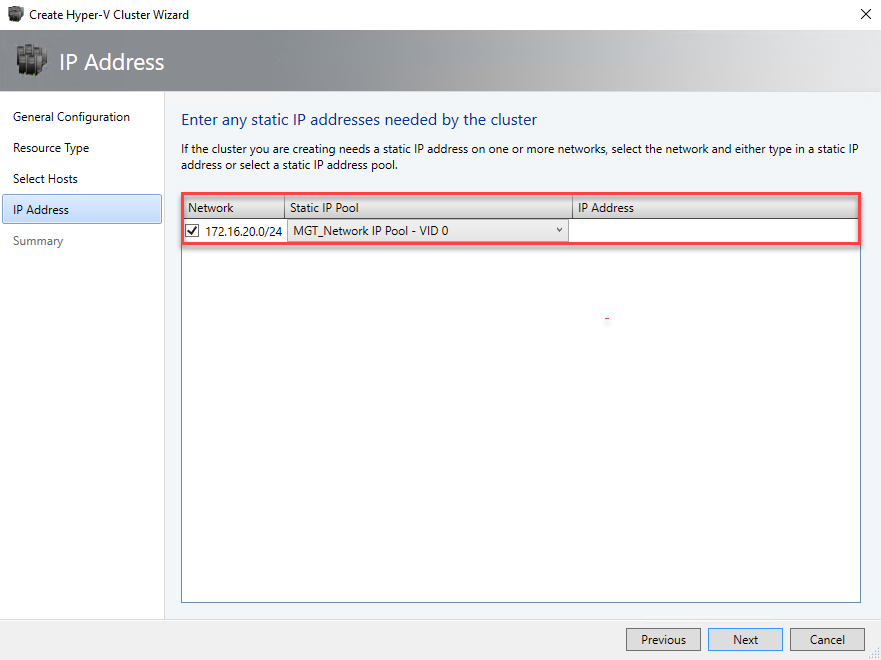
At the IP Address page, enter any static IP address needed by the cluster or specify the Static IP Pool to be used as shown in the next screenshot. Click Next.
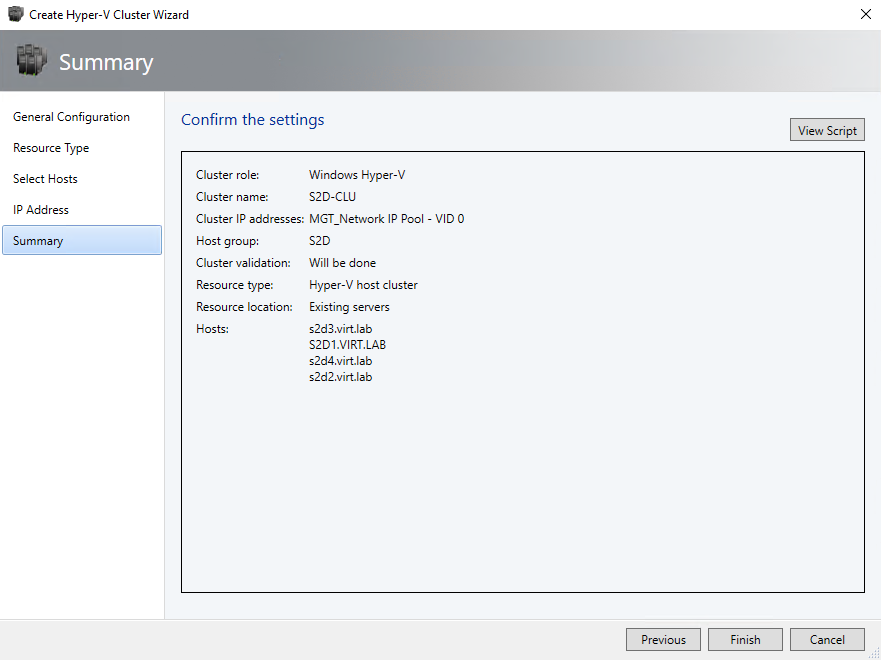
At the Summary page, confirm the settings and click Finish.
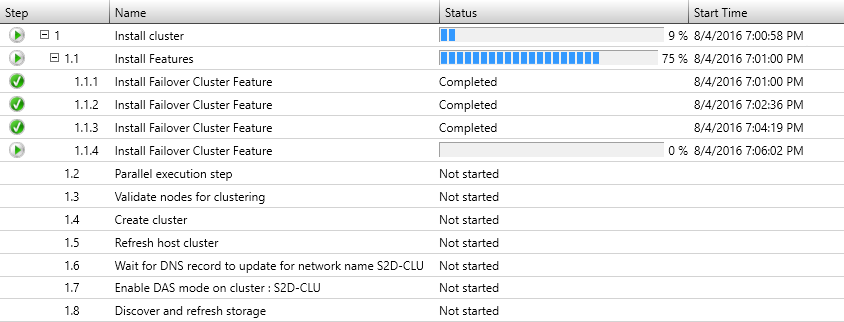
Switch to the Jobs pane, as part of creating the S2D cluster, VMM performs the following steps:
Since we are simulating S2D cluster in VMs instead of physical machines, the cluster creation will fail in VMM with the following error:
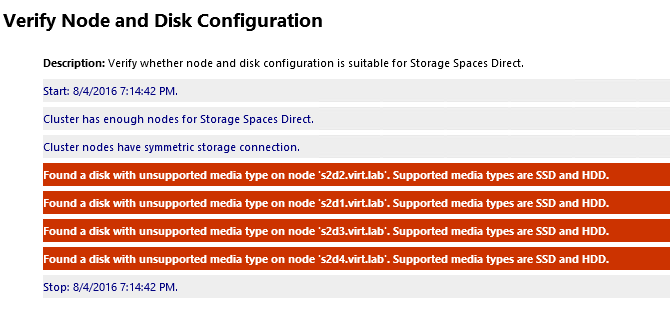
In Hyper-V virtual machines, the media type is reported as unspecified. As of this writing and in order to work around this, please run the following PowerShell cmdlets on one of the TP5 node:
|
1 2 3 4 5 6 7 8 9 10 11 |
$nodes = ("S2D1", "S2D2", "S2D3", "S2D4") Invoke-Command $nodes {Install-WindowsFeature Failover-Clustering -IncludeAllSubFeature -IncludeManagementTools} New-Cluster -Name S2D-CLU -Node $nodes –NoStorage –StaticAddress 172.16.20.96 Enable-ClusterS2D -CacheMode Disabled -AutoConfig:0 -SkipEligibilityChecks New-StoragePool -StorageSubSystemFriendlyName *Cluster* -FriendlyName S2D -ProvisioningTypeDefault Fixed -PhysicalDisk (Get-PhysicalDisk | ? CanPool -eq $true) Get-StorageSubsystem *cluster* | Get-PhysicalDisk | Where MediaType -eq "UnSpecified" | Set-PhysicalDisk -MediaType HDD |
Once the S2D cluster is created manually, you can see that the created Spaces Direct cluster is reported automatically under VMM. Once that is reported, the Storage Provider for Spaces Direct needs to be added.
Open VMM console and navigate to the Fabric workspace, select Add Resources | Storage Devices
Select Windows-based File Server as shown in the following screenshot. Click Next.
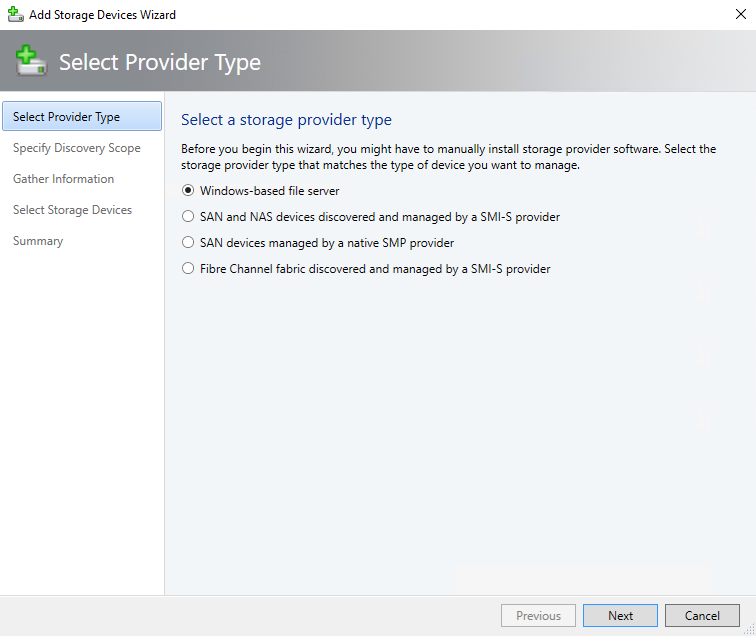
Provide the IP address or the Cluster FQDN and check the checkbox if the cluster is in other domain. Provide the Run As Account and click Next.
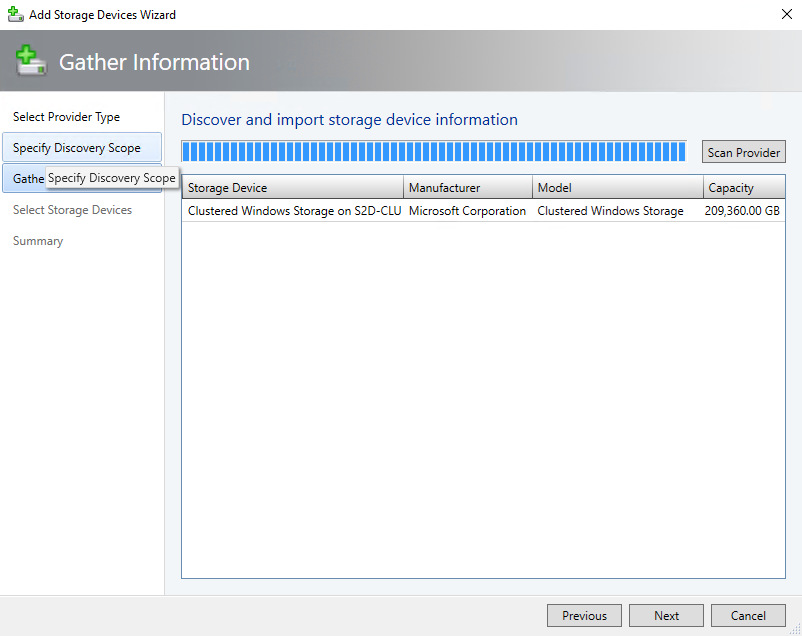
Select the Storage Device and click Next.

This adds the Storage Provider into VMM.
Create Storage Resources on a Storage Spaces Direct Cluster
Once the Storage Spaces Direct is enabled and reported in VMM, the next step is to create a pool, create Virtual Disks and Clustered Shared Volumes and then deploy VMs on the cluster.
Since the storage pool was already created using PowerShell earlier, we will move into specifying a classification for the created pool, then we will create a Virtual Disk, CSV and lastly deploy VMs on the cluster.
Open VMM console, go to Fabric | Storage | Arrays, right-click the Storage Spaces Direct Cluster created, and then click Manage Pools.
Select the storage pool and click Edit.
Click New… enter Name for the pool, click Add and then click OK.

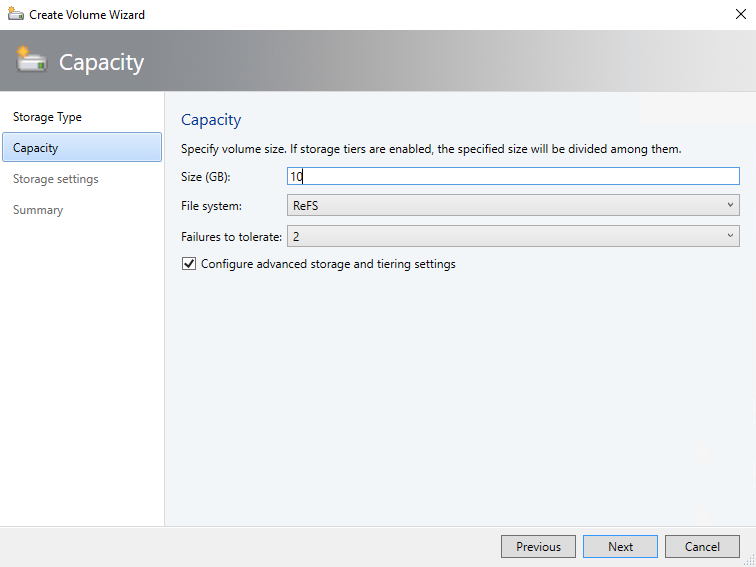
To create a Cluster Shared Volume, right-click on the cluster that has been created, click Properties, select the Shared Volumes option, Click Add and then follow the steps to create the volume.
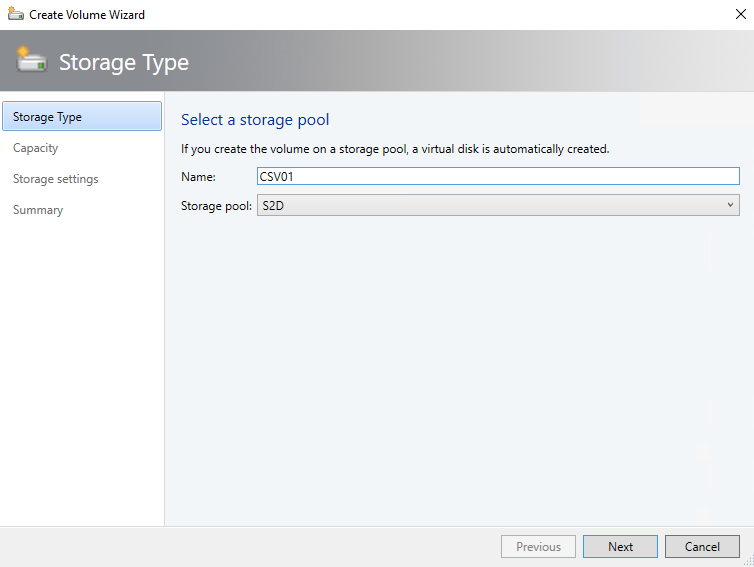
During the volume wizard creation, you can specify the capacity, File System type (ReFS / NTFS), resiliency (in terms of Failures to tolerate).
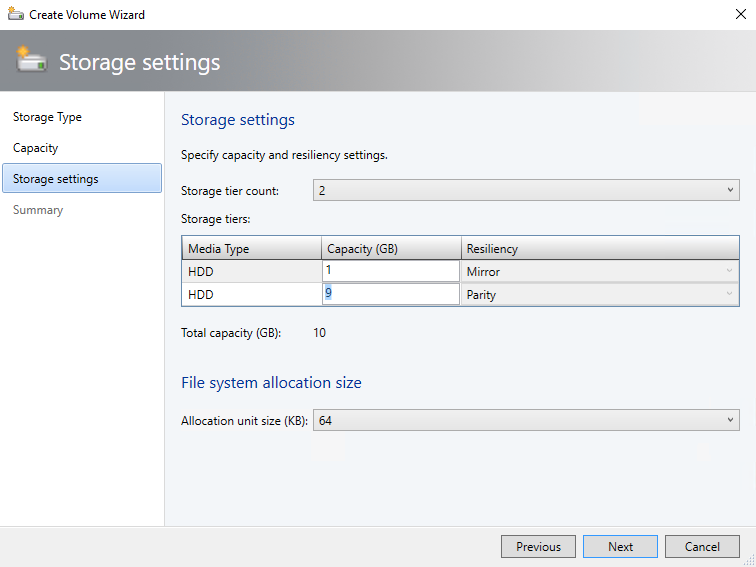
In the Storage settings, the Storage Tiering can be configured as shown in the following screenshot.
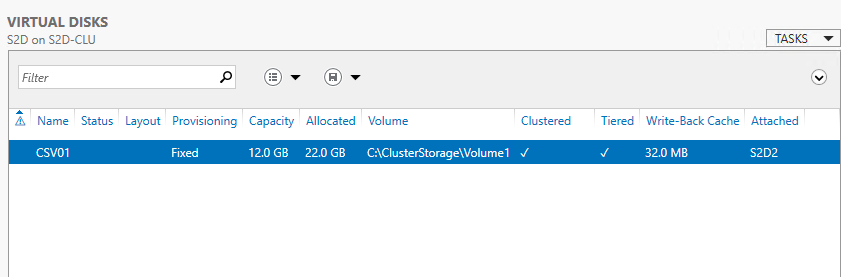
The virtual disk is created automatically as part of creating the Cluster Shared Volume as shown in the following screenshot:
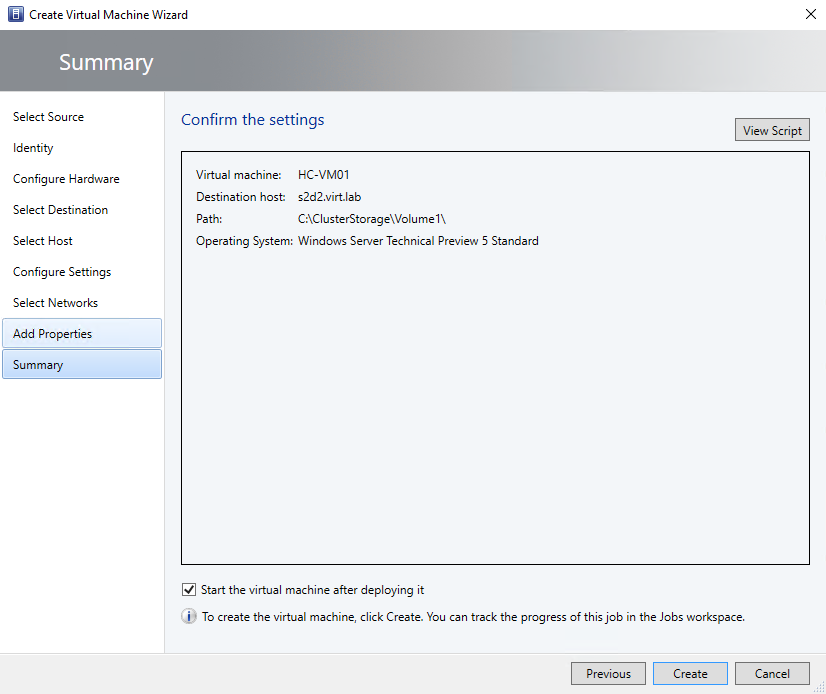
Once the CSV is created, the VMs can be directly deployed on this cluster with their VHD(X) placed on the volumes created using the Storage Spaces Direct.
Congratulations! you have successfully deployed and managed Storage Spaces Direct (S2D) Cluster in Hyper-converged mode using VMM 2016.
Until next time…
Thanks for reading!
