

Warning: This article is written with information related to Windows Server 2016 Technical Preview 4.
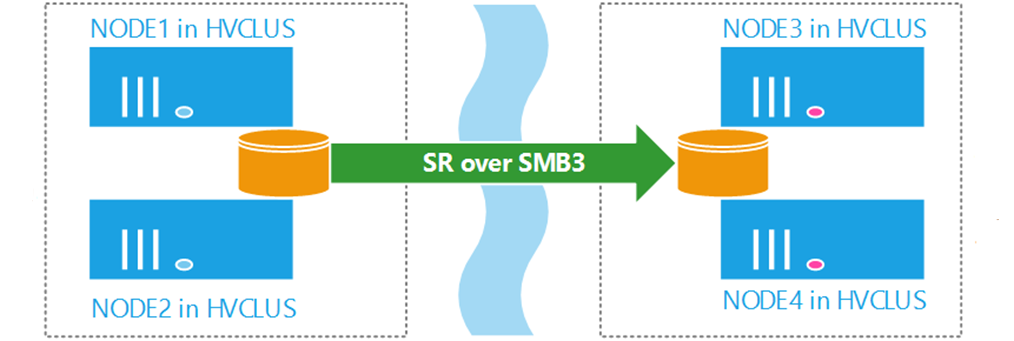
In part one of this multi part blog on How to Configure Storage Replication in Windows Server 2016, we covered an introduction into Storage Replica which is a new feature introduced in Windows Server 2016, and we covered step by step the implementation of Windows Volume Replication (Server-to-server). In this follow up post, we are going to cover the implementation of volume replication with stretch cluster. This type of cluster features uses Asymmetric storage, two sites, two sets of shared storage and uses volume replication to ensure that data is available to all nodes in the cluster.
Stretch clusters are typically used to provide high availability across sites, however delivering business continuity involves more than just high availability, not just disaster recovery – think disaster preparedness.
If you missed Part I, please make sure to check it here How to Configure Storage Replication using Windows Server 2016? – Part 1.
Implementing Stretch Cluster with Volume Replication
At the time of writing this article, Stretch Clusters deployment with Storage Replica supports the following:
- Synchronous only replication.
- Asymmetric storage (Two sites, two sets of shared storage as showing in above diagram).
- Managed with Failover Cluster Manager or Windows PowerShell.
- Hyper-V and General Use File Server are the main use cases as for now.
In this post, we will deploy Stretch Cluster with Volume Replication by implementing the following steps:
- Step 1: Install failover clustering, create a cluster and configure a quorum.
- Step 2: Add available storage to the cluster.
- Step 3: Configure storage volume replication.
- Step 4: Create and populate a file share.
- Step 5: Perform a Resource Failover to the Replicated Storage
Step 1: Install failover clustering, create a cluster and configure a quorum.
Install failover clustering and create a cluster
In this step, we will install failover clustering and create a new cluster. It is important to note that in this demo, storage has been configured and pre-attached to each cluster node (each cluster node has access to two different iSCSI LUNs as showing in below screenshot).
SRV01: SRV02:
There is no shared storage in this cluster configuration. Each cluster has dedicated, private storage. The cluster will be configured to replicate all data between connected storage, allowing failover of services to the other node and other storage.
Open Windows PowerShell on one of the node.
In Windows PowerShell, type the following command and then press ENTER:
Invoke-Command SRV01, SRV02 {Get-WindowsFeature *cluster* | Install-WindowsFeature;Restart-Computer –force}
Please make sure to wait for the computers to restart before proceeding to the next step.
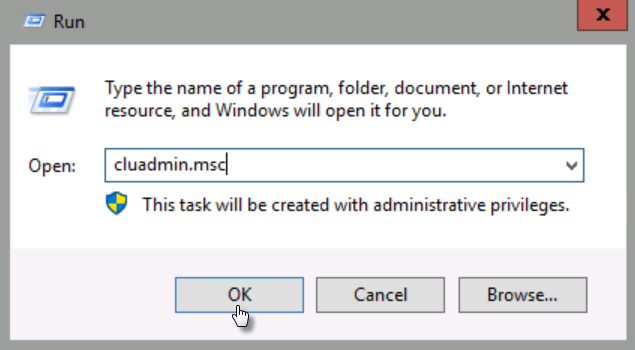
Login to SRV01 and launch Failover Cluster Manager by typing cluadmin.msc
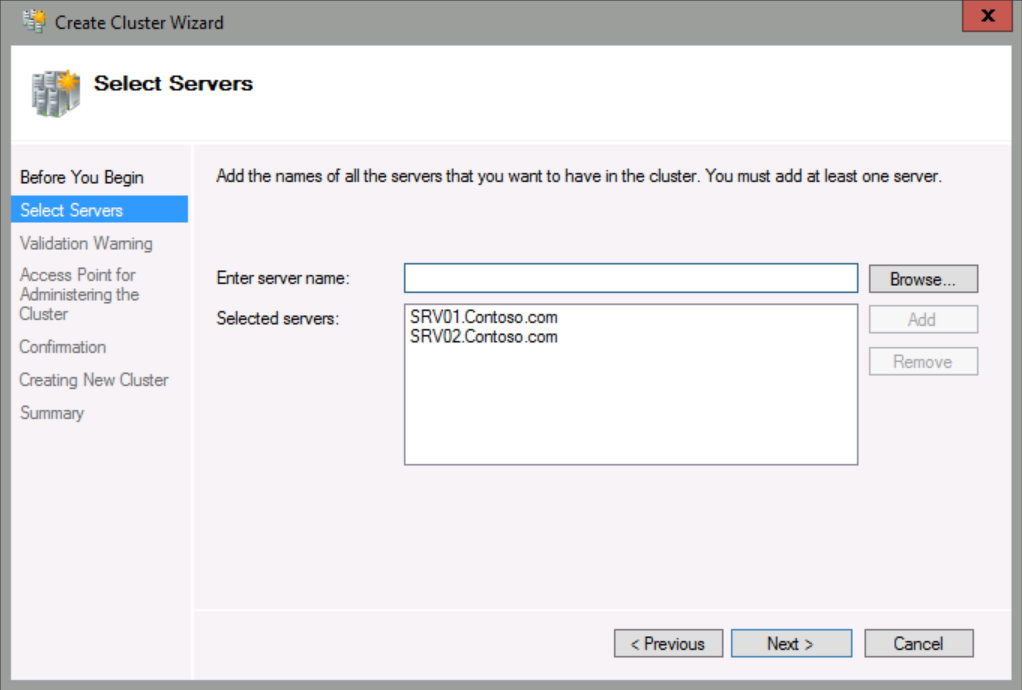
In the Actions pane, click Create Cluster. In the Create Cluster Wizard, click Next.
In Enter server name, type SRV01;SRV02, click Add, and then click Next.
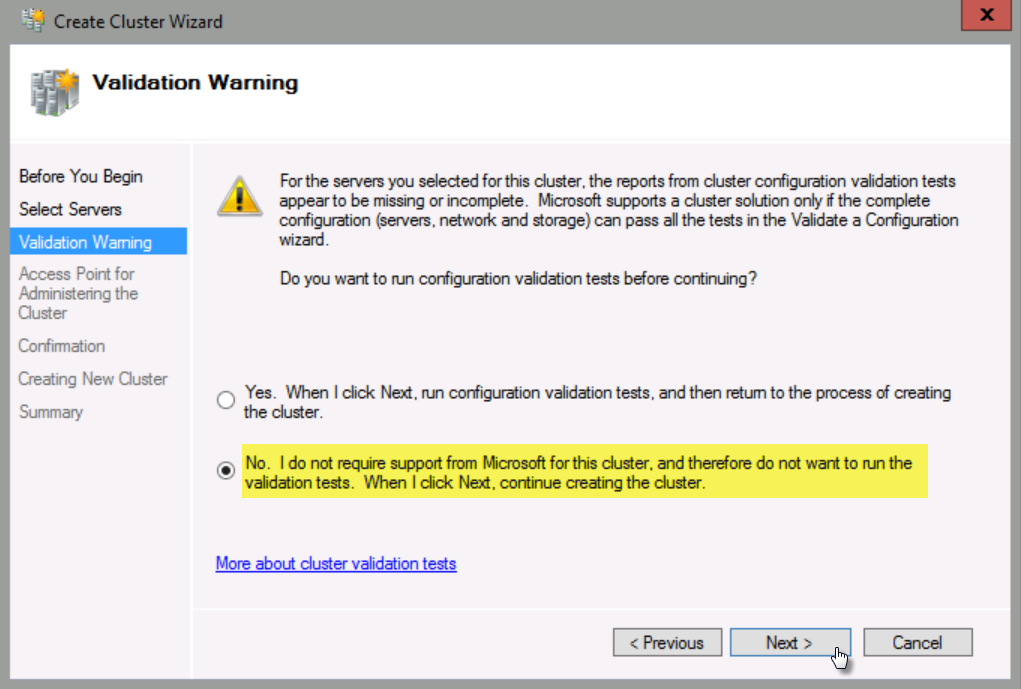
Please ensure that you click No to indicate that you do not wish to run the validation tests.
For the purpose of this demo, I will skip the cluster validation. However, in production this step is extremely important.
In Cluster Name, type StretchCluster, and then under Address, type 192.168.10.201 in the last octet, and then click Next.

Uncheck Add all eligible storage to the cluster, and then click Next. (Please ensure that you uncheck the box to add eligible storage).
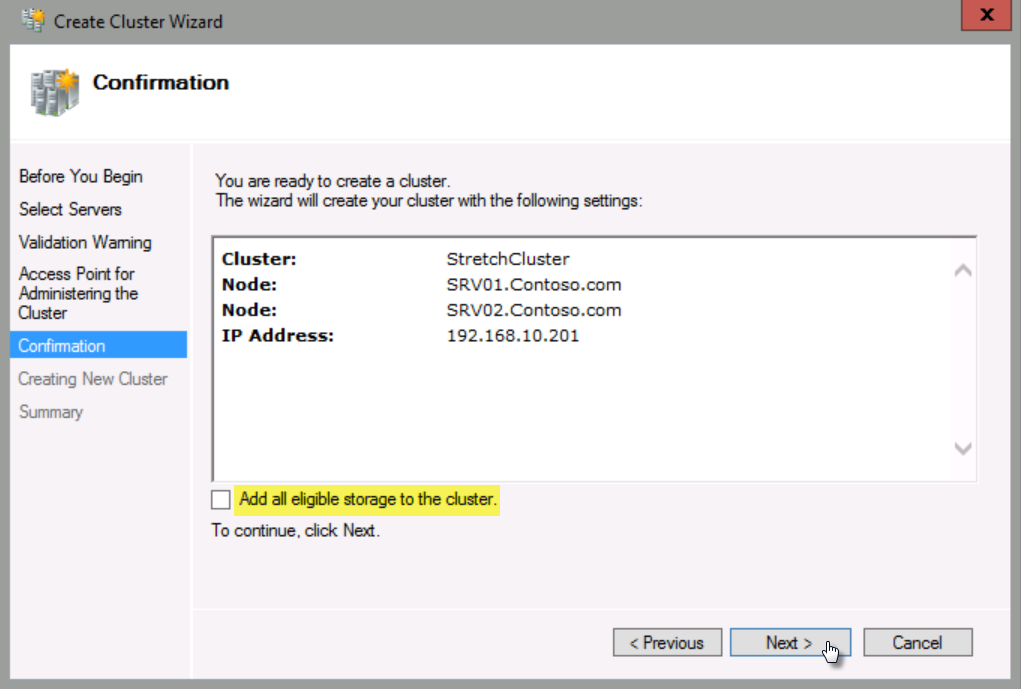
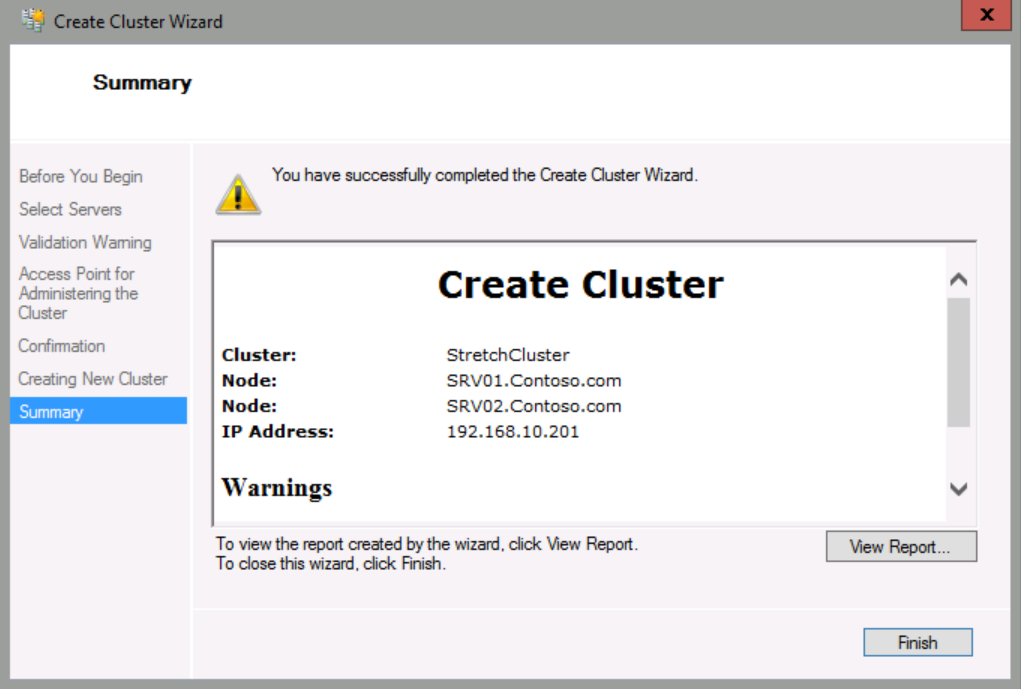
When the cluster is created, click Finish.
Configure a quorum
In Failover Cluster Manager, click StretchCluster.contoso.com, and then in the Actions pane, click More Actions/Configure Cluster Quorum Settings.
In the Configure Cluster Quorum Settings Wizard, click Next.
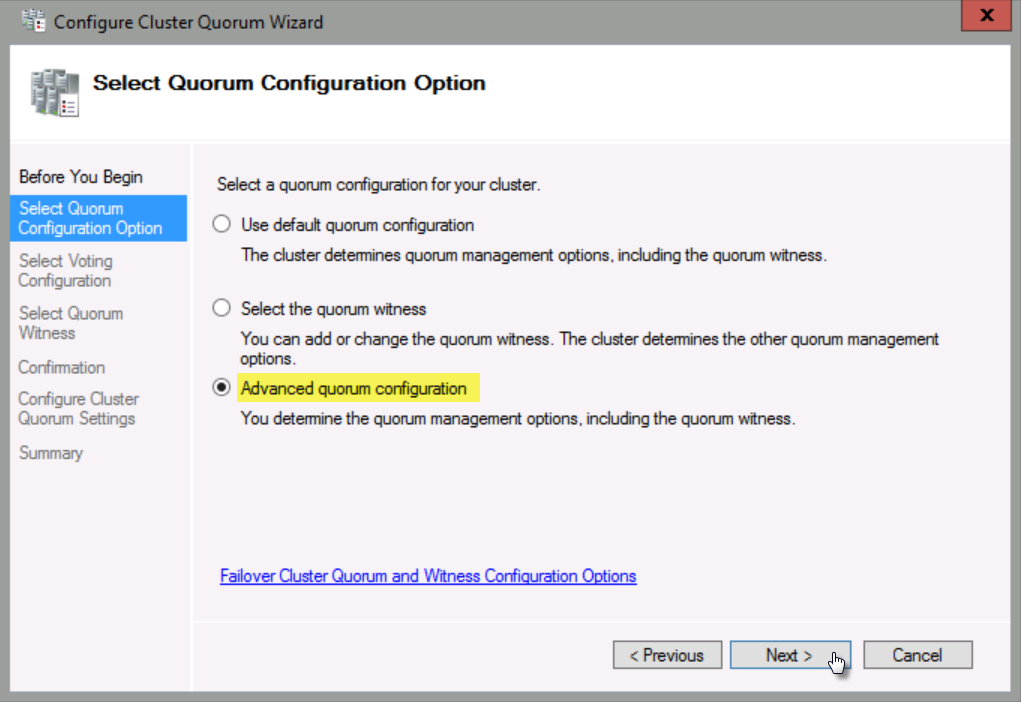
Select Advanced quorum configuration, and then click Next.
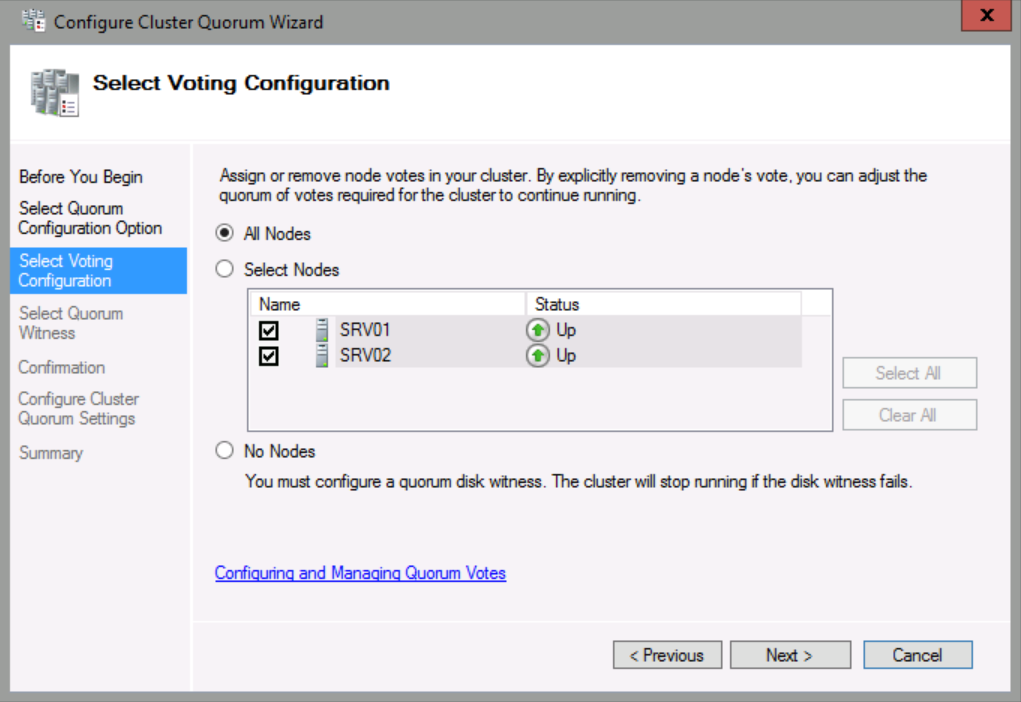
Select All Nodes, and then click Next.
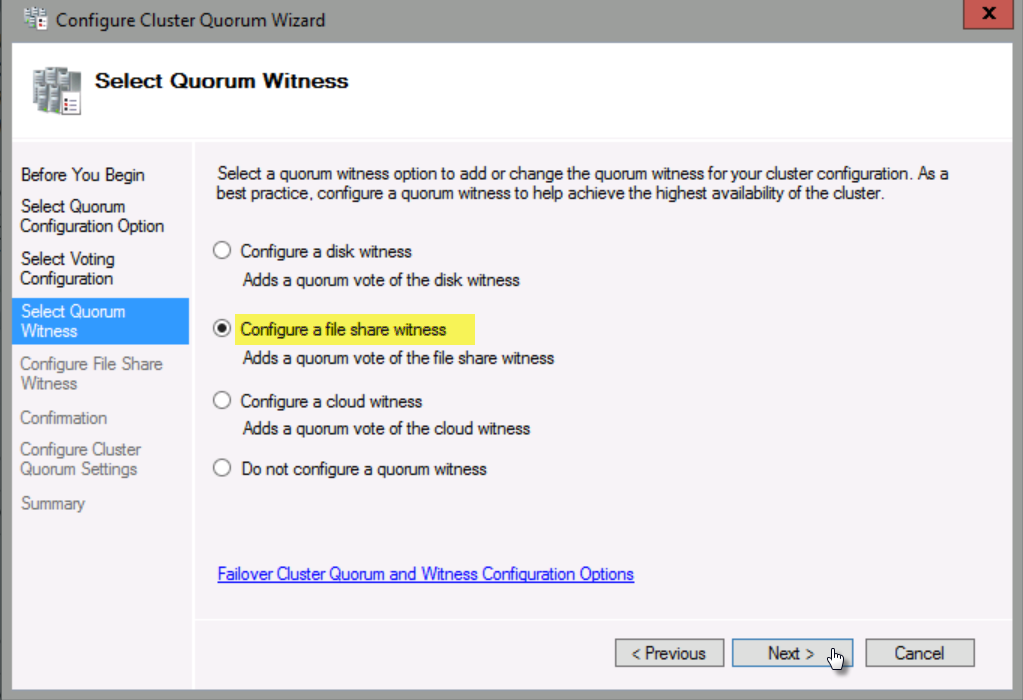
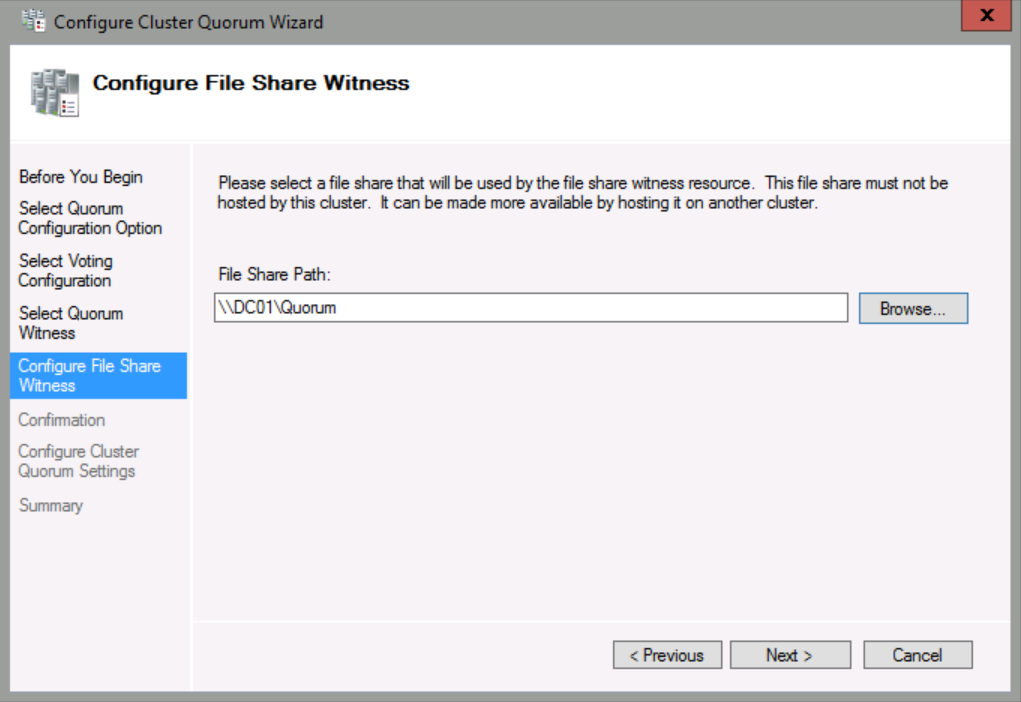
Select Configure a file share witness, and then click Next.
In File Share Path, click Browse.
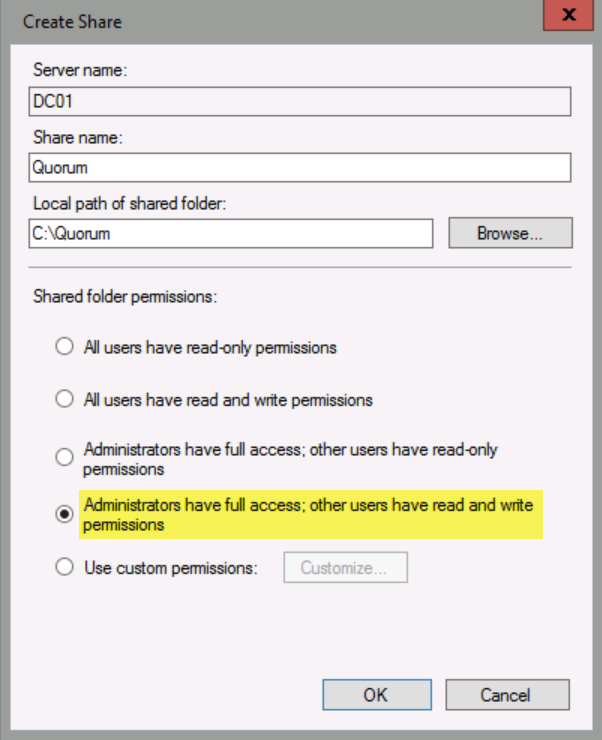
In Server, type DC01, and then click New Shared Folder.
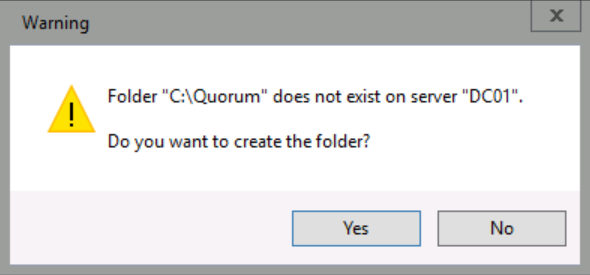
In Share name, type Quorum. In Local path of shared folder, type: C:\Quorum. In Shared folder permissions, select Administrators have full access; other users have read and write permissions, and then click OK.
In the Warning dialog box, click Yes, and then click OK.
Click Next until you reach the end of the wizard, and then click Finish.
Step 2: Add available storage to the cluster
In this step, you will add the available storage for the cluster. In this configuration, there are two disks presented to each node. No disks are shared by the two nodes.
Add disks to the cluster
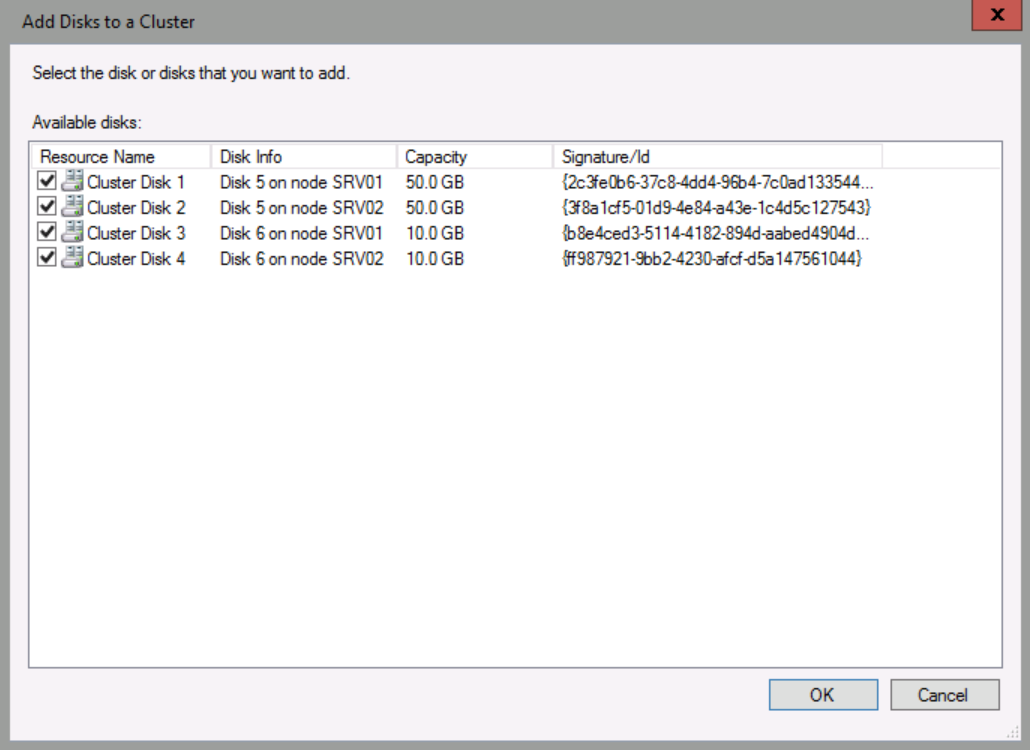
In Failover Cluster Manager, navigate to Storage/Disks, and then in the Actions pane, click Add Disk.
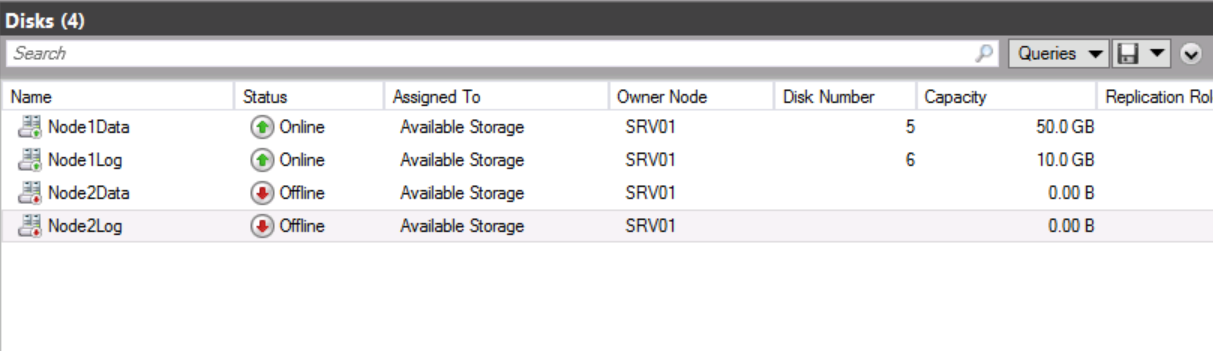
Please note which disks are 50 GB and which disks are 10 GB, and note whether the disks are attached to SRV01 or SRV02.
Ensure that disks 1 through 4 are selected, and then click OK.
Right-click Cluster Disk1, and then click Properties.
In the Cluster Disk1 Properties dialog box, in Name, replace Cluster Disk 1 with: Node1Data, and then click OK.
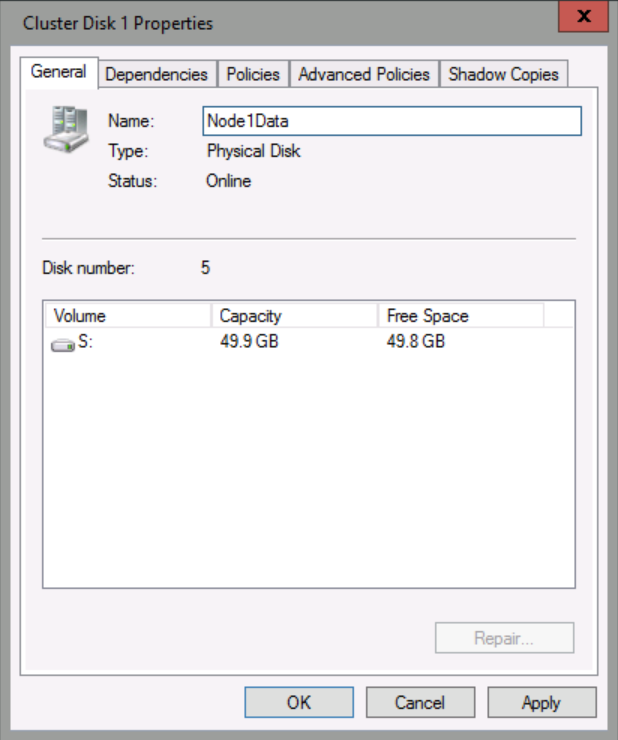
Repeat above steps to rename disks as shown below. Note that you will not be able to see the size of the offline disks.
- Cluster Disk 1: Node1Data
- Cluster Disk 2: Node2Data
- Cluster Disk 3: Node1Log
- Cluster Disk 4: Node2Log
Please ensure that disks attached to SRV01 are labeled Node1 and that disks attached to SRV02 are labeled Node2. The data disks are 50 GB and the log disks are 10 GB in size.
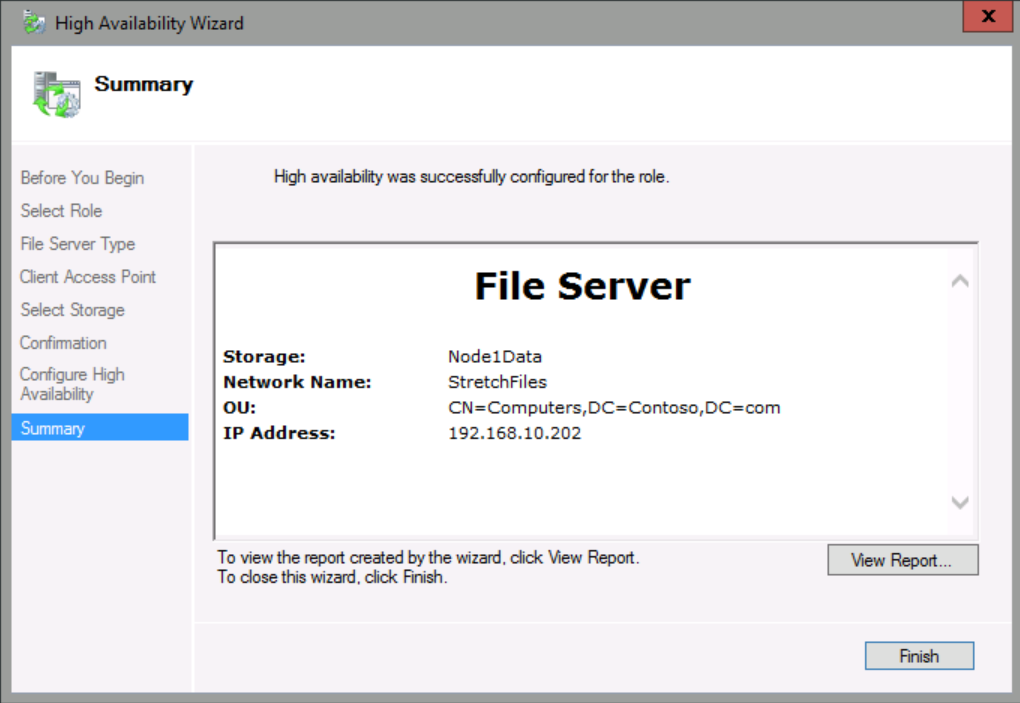
Configure File Server role as Highly Available
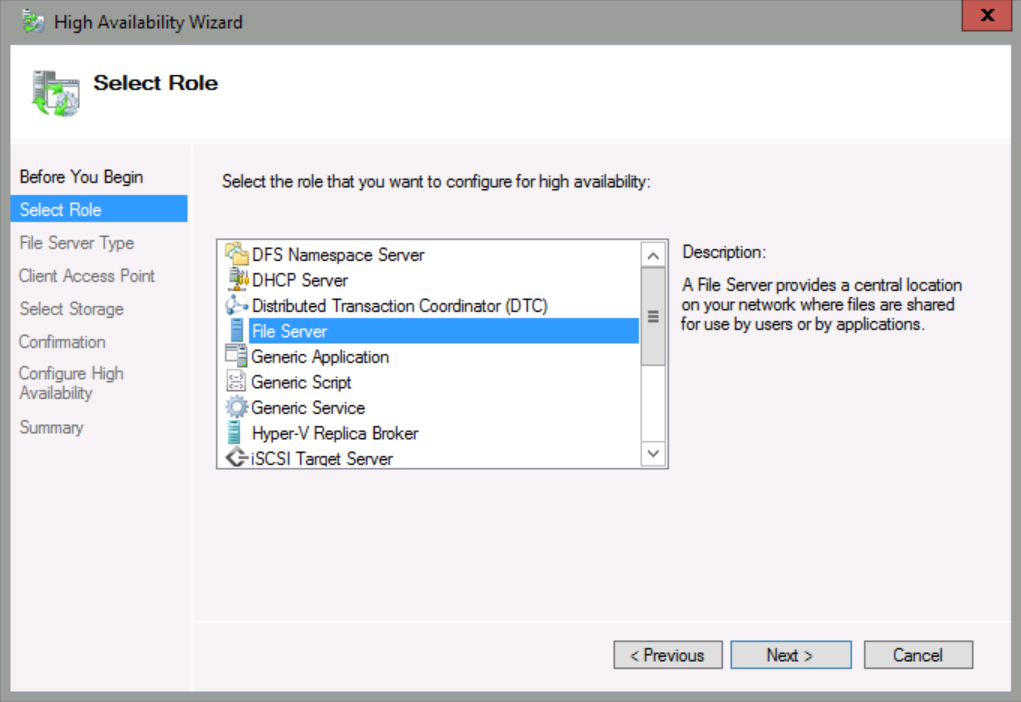
In Failover Cluster Manager, click Roles, and then in the Actions pane, click Configure Roles.
On the Before You Begin page, click Next.
In Select Role, click File Server, and then click Next.
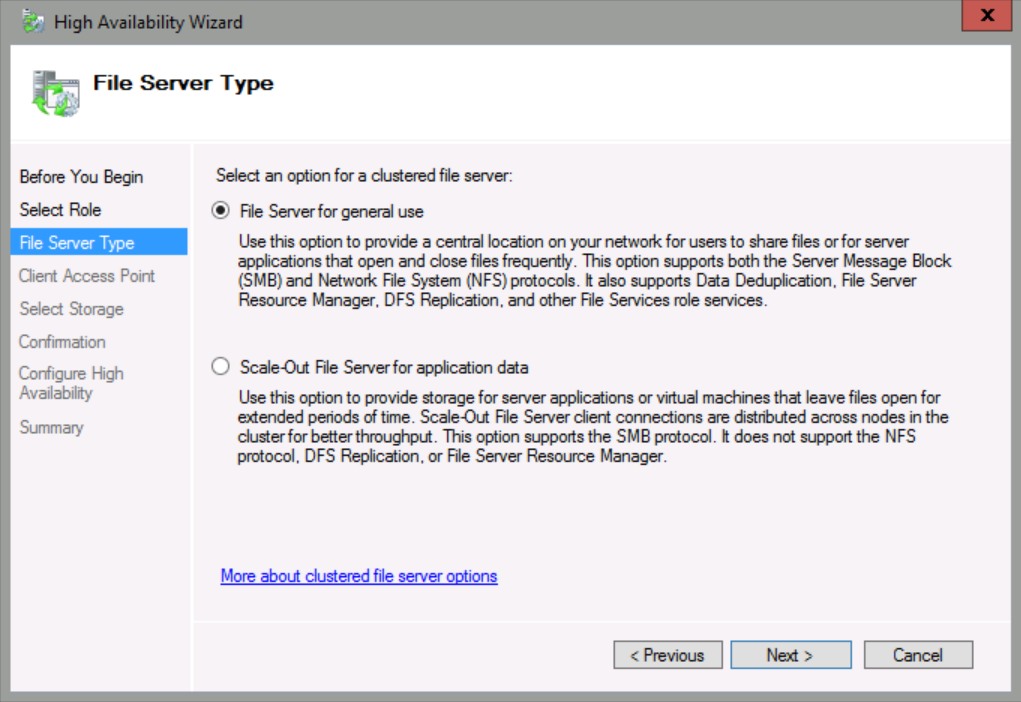
Select File Server for general use, and then click Next.
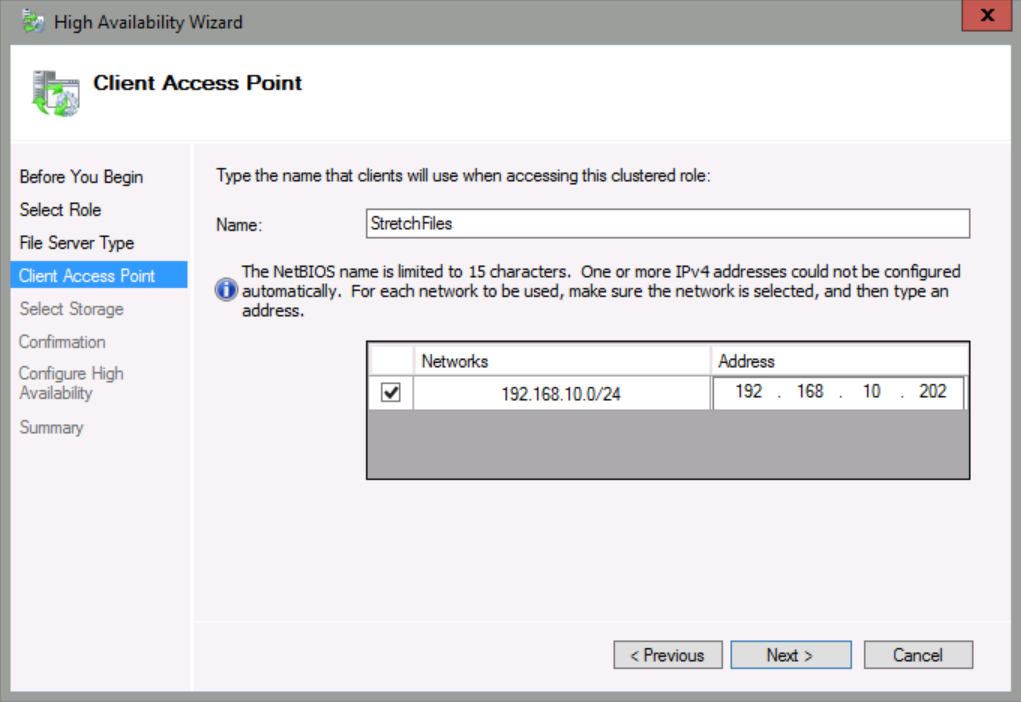
On the Client Access Point page, in Name, type StretchFiles, and then under address, type 192.168.10.202, and then click Next.
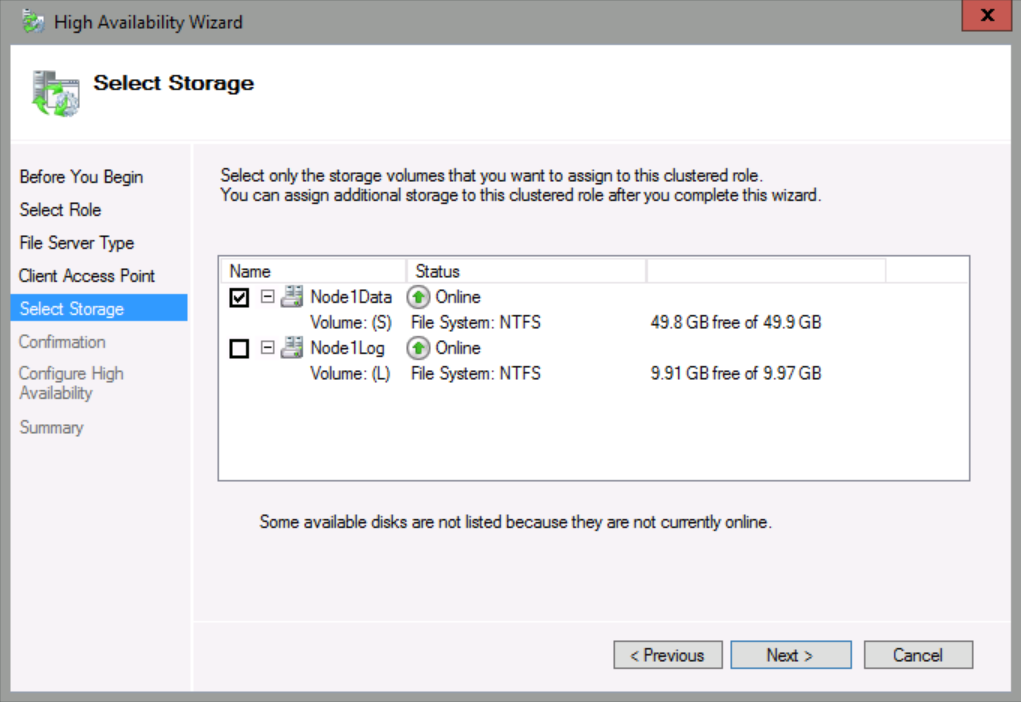
On the Select Storage page, check Node1Data, and then click Next.
Click Next until you reach the end of the wizard, and then click Finish.
Step 3: Configure storage volume replication
In this step, you will examine the disk implementation and implement Windows Volume Replication to replicate a designated data volume. In this demo, the designated data volume is a 50 GB volume, and the designated log volume is a 10 GB volume.
The disks will be represented as seen in the screen shot below. Note that two offline disks are listed as offline because they are not accessible to the current owner node.
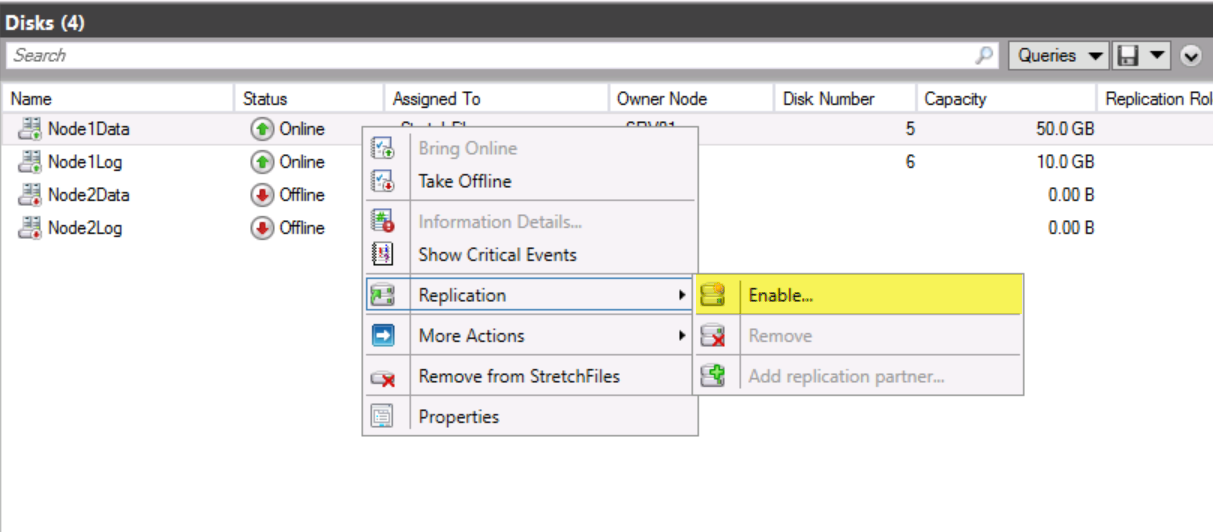
In Failover Cluster Manager, ensure that you are in the Disks node. Right-click Node1Data, point to Replication, and then click Enable.
 In the Configure Storage Replica Wizard, click Next.
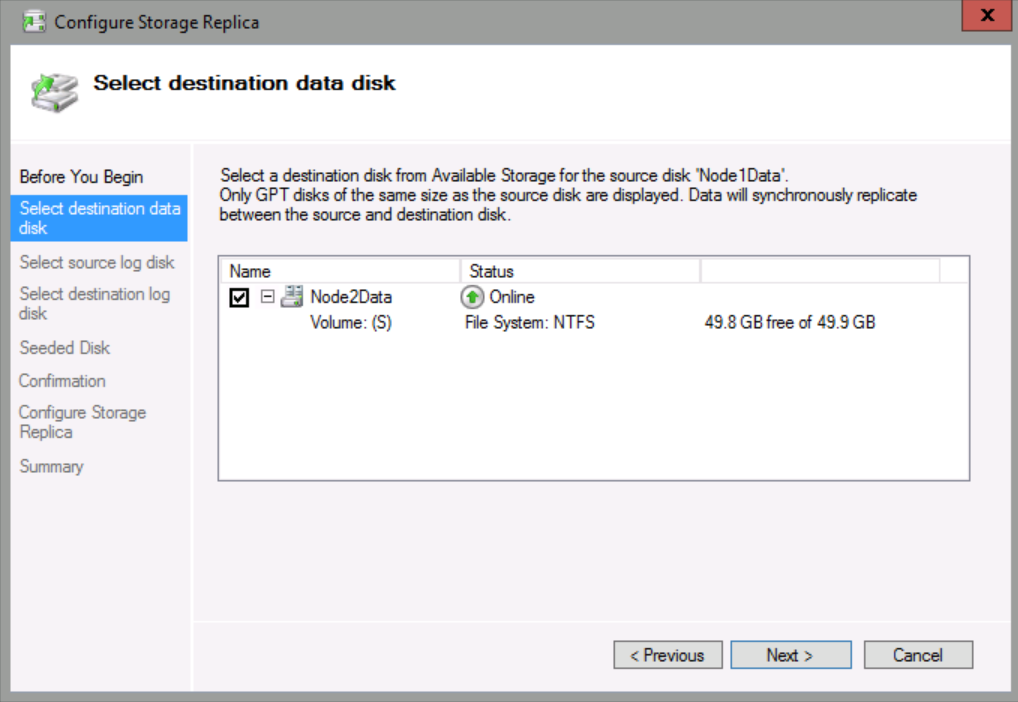
On the Select destination data disk page, check Node2Data, and then click Next.
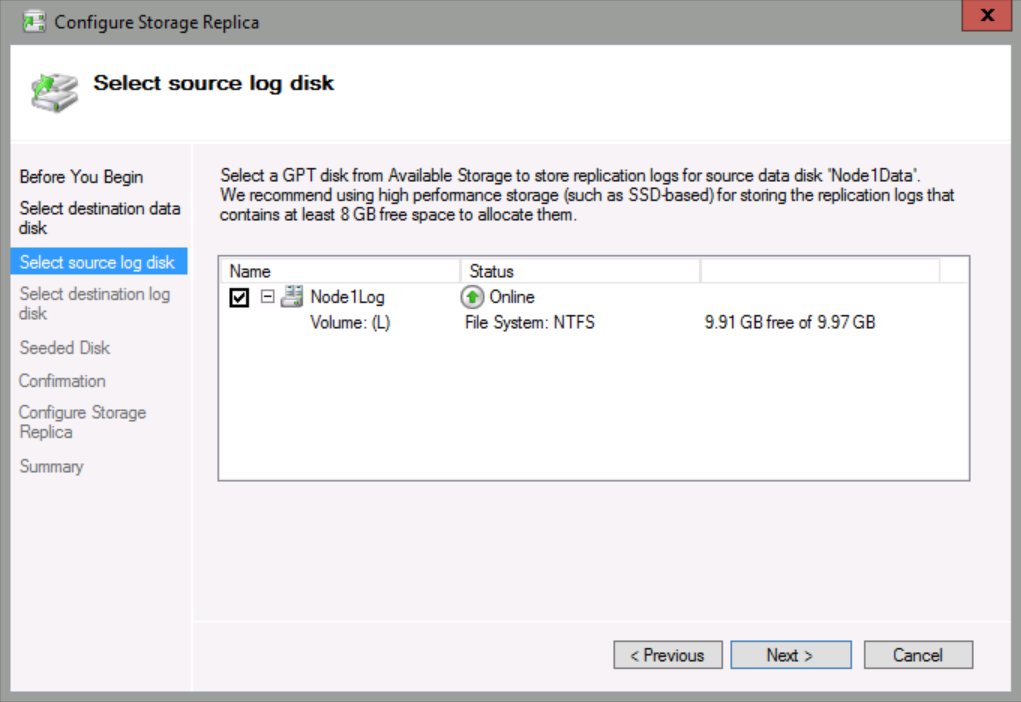
On the Select source log disk page, check Node1Log, and then click Next.
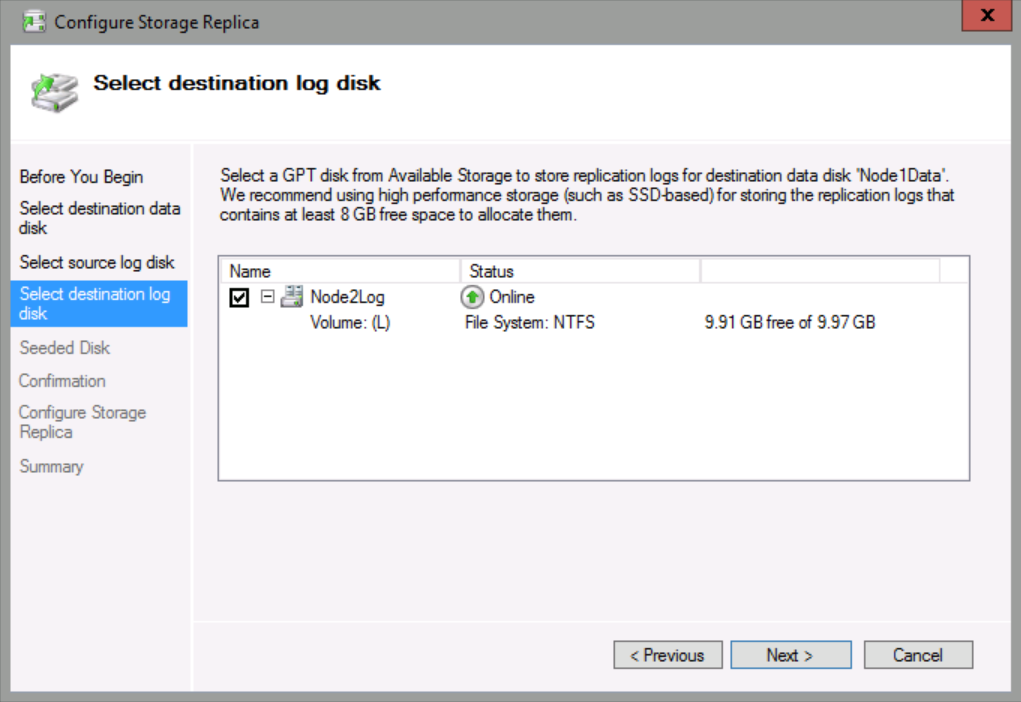
On the Select destination log disk page, check Node2Log, and then click Next.
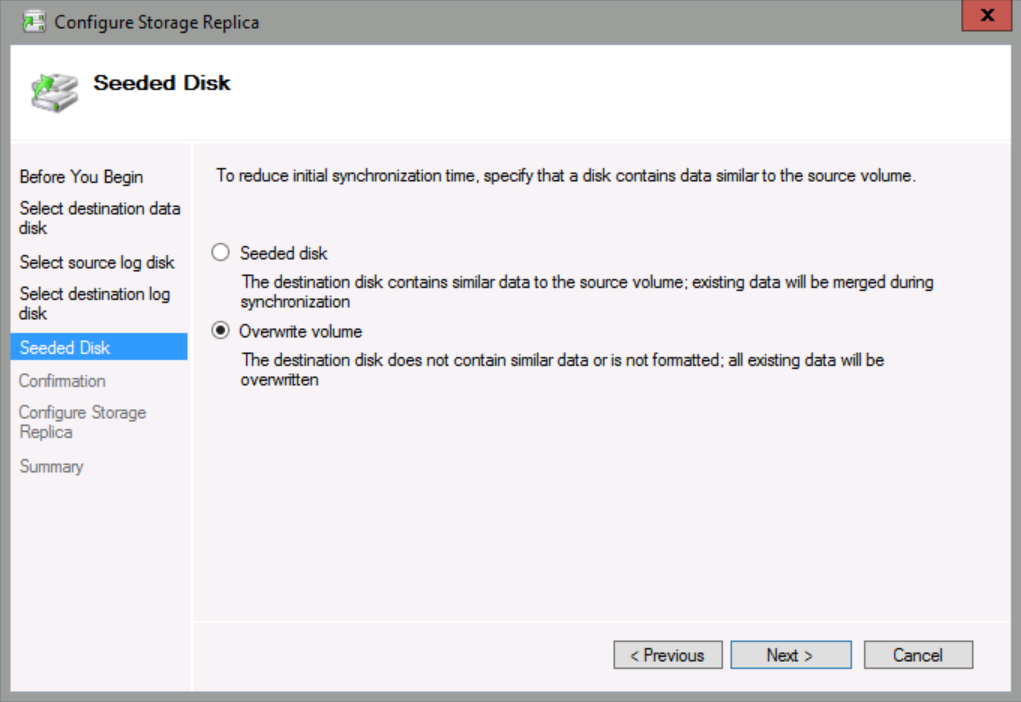
On the Seeded Disk page, ensure that Overwrite Volume is selected, and then click Next.
If you have a large volume to replicate, you could select a Seeded volume by choosing a destination disk that contains similar data to the source volume which will help on minimizing the initial Synch.
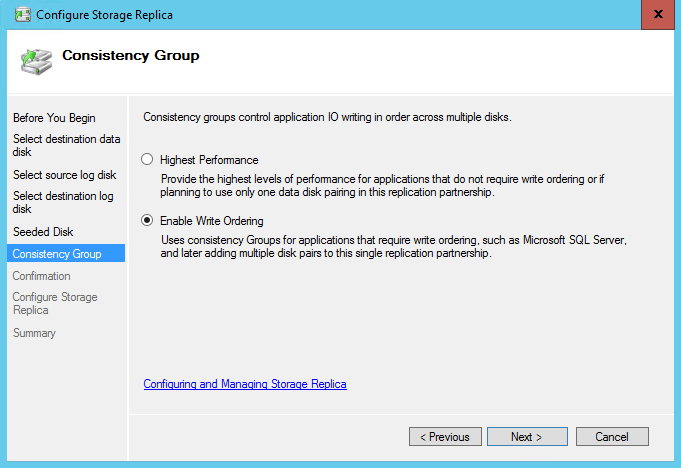
On the Consistency Group page, ensure that Enable Write Ordering is selected which is required for applications that require write ordering such as SQL Server, then click Next.
Click Next twice, and then click Finish.
Note: If you receive an error message showing the replication did not create successfully, run the command ipconfig –flushDNS in command prompt or in PowerShell Clear-DnsClientCache and try again.
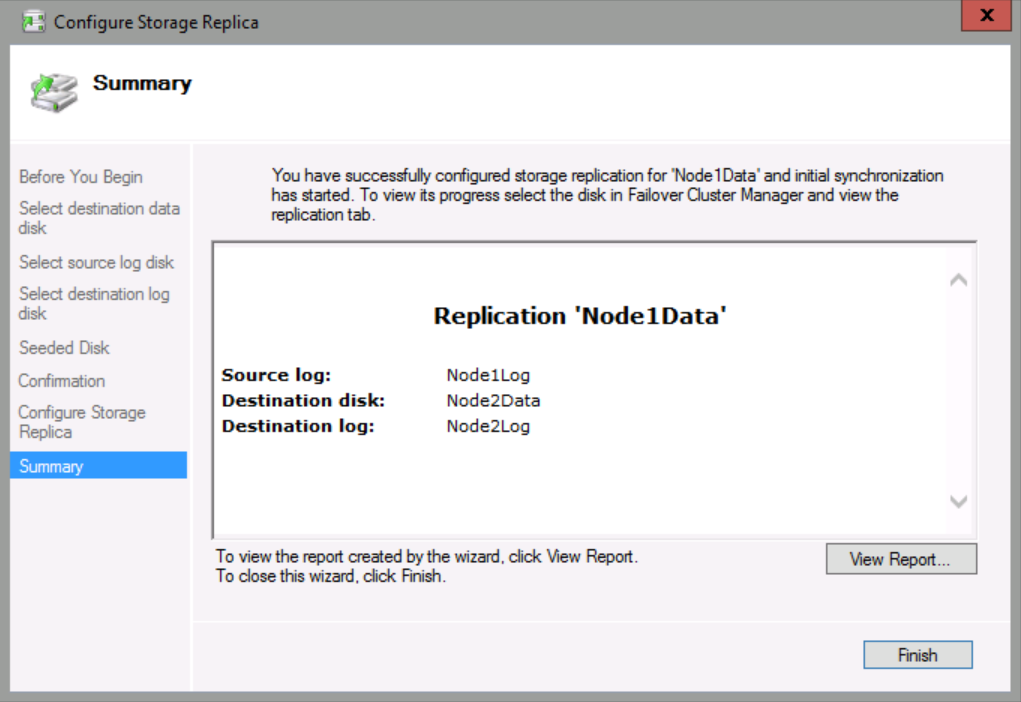
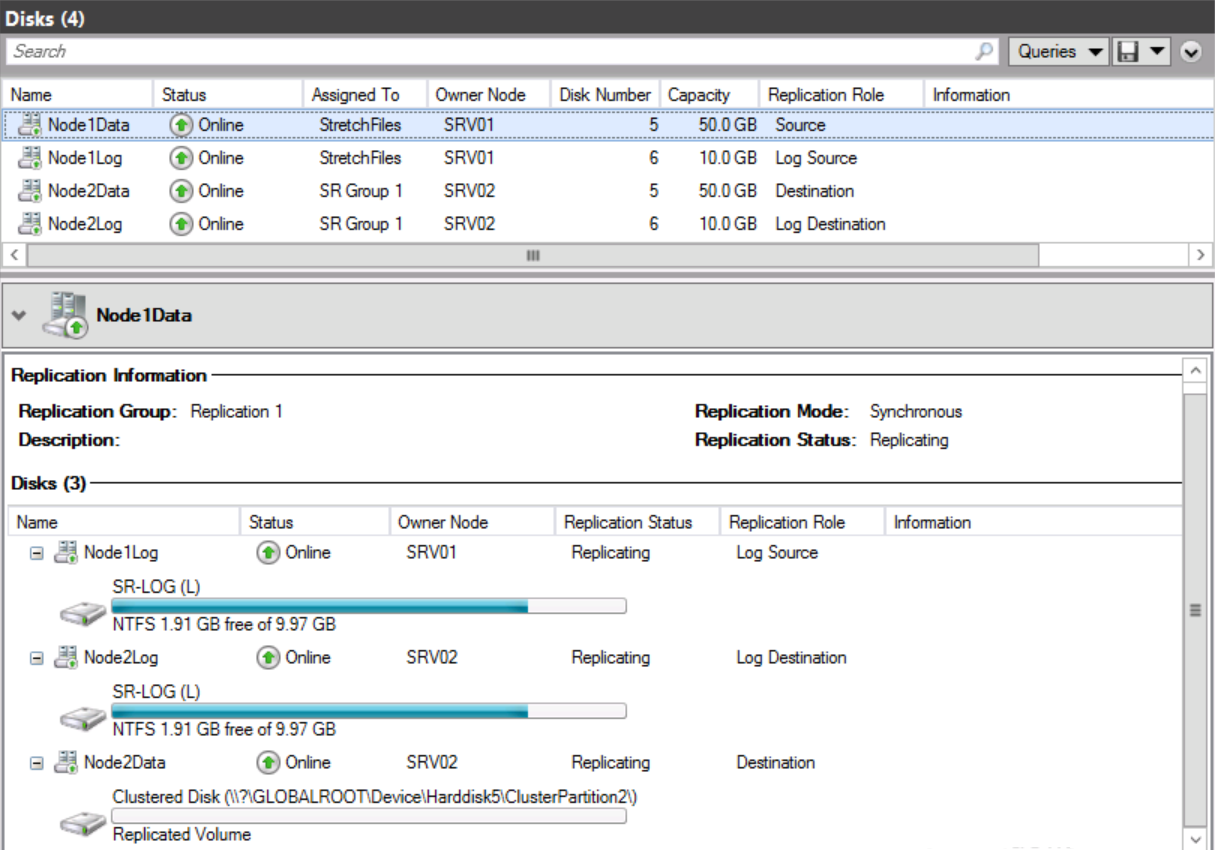
The disks will be represented as seen in the screen shot below. Note that the previous two offline disks are listed as online now, because the replication is taking place from the source node SRV01 to Destination node SRV02.

Step 4: Create and populate a file share
In this step, you will create a new file share.
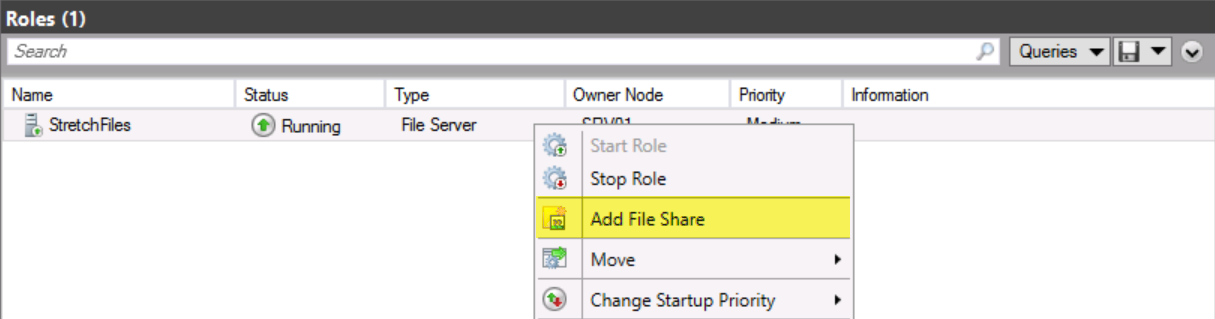
In Failover Cluster Manager, click Roles, click StretchFiles, and then in the Actions pane, click Add File Share.
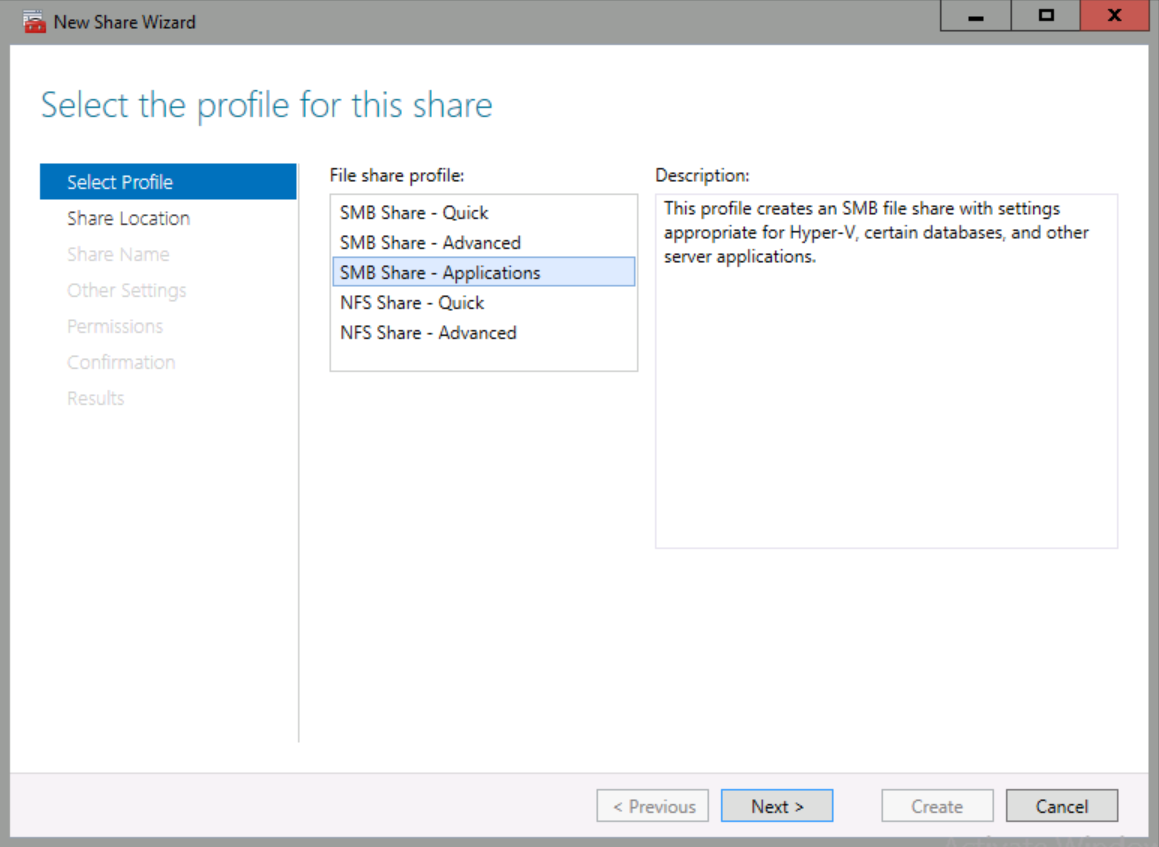
In File share profile, select SMB Share – Applications, and then click Next.
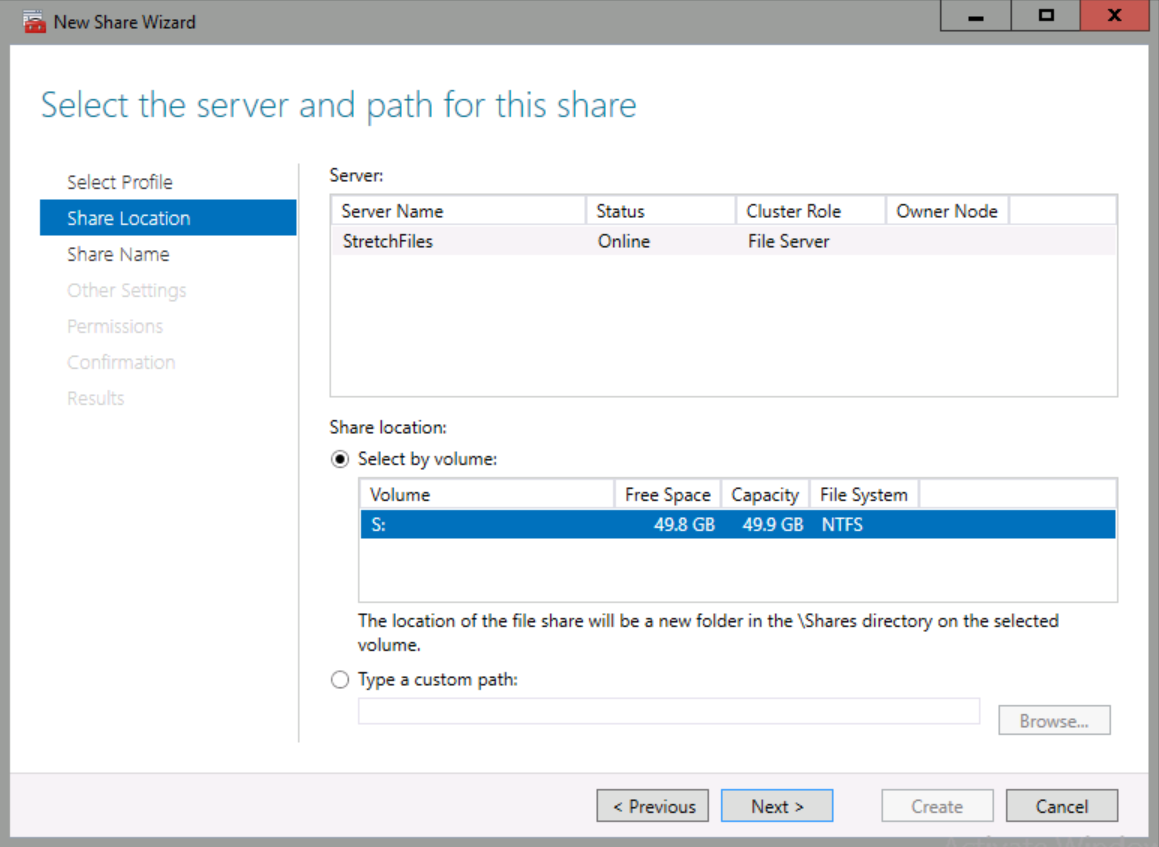
In the Select the server and path for this server page, ensure that S: is selected, and then click Next.
In Share name, type AppShare, and then click Next.
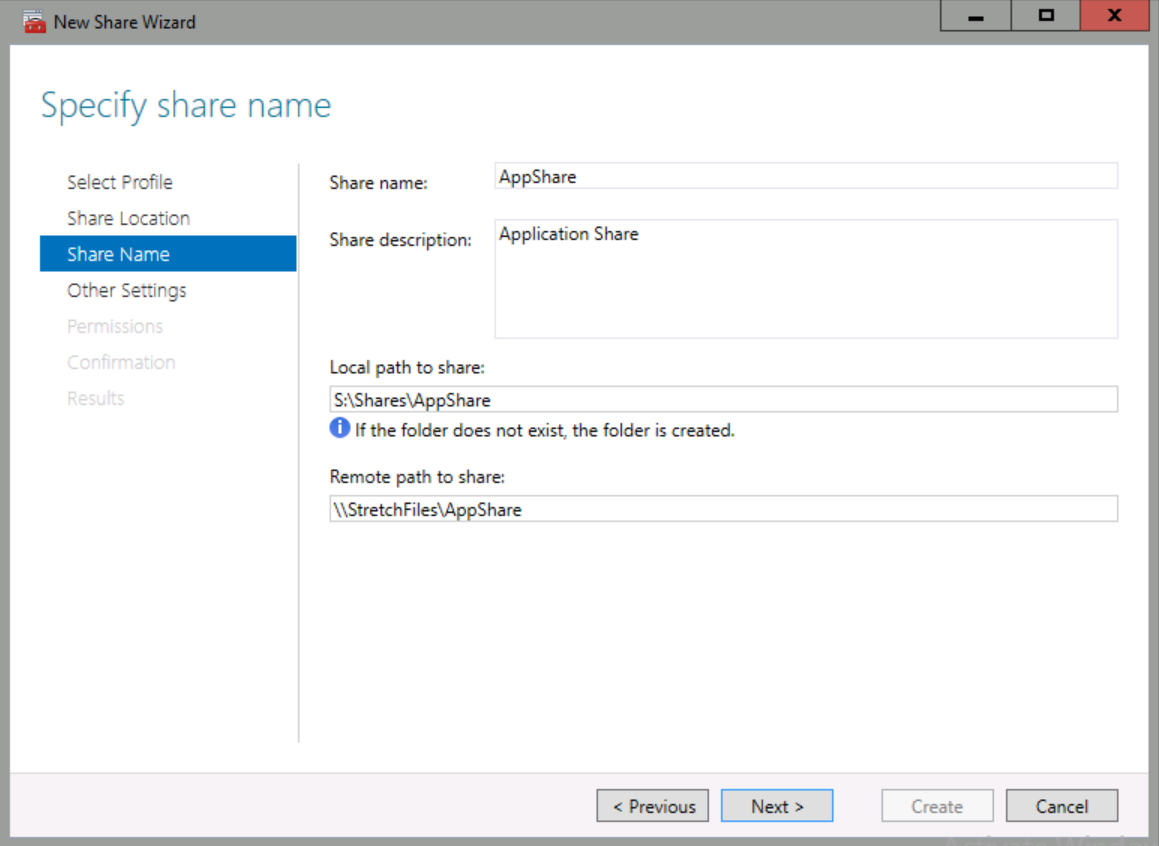
Click Next on each remaining page until you reach the end of the wizard, and then click Create.
Open Windows PowerShell on any of the nodes. Type the following command, and then press ENTER. After a brief time, you can stop the copy by pressing CTRL+C. We only need some files to copy to the share:
Copy-Item C:\Windows\System32\Drivers \\stretchfiles\appshare\ –Recurse –verbose
Step 5: Perform a Resource Failover to the Replicated Storage
In this step, we will simulate a datacenter-to-datacenter failover, failing the cluster resource to another node and also reversing the replication.
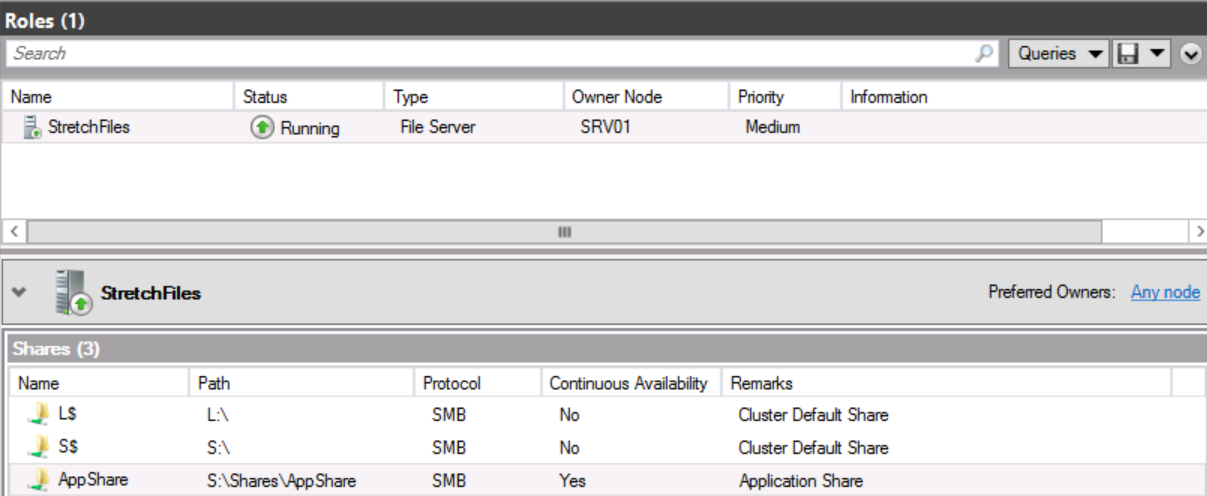
After we created the storage replication between cluster node SRV01 and the cluster node SRV02, we copied some files, here is what it looks like the current status in Failover Cluster Manager:
As you can see in above screenshot, SRV01 is the source node replicating synchronously to node SRV02 destination.
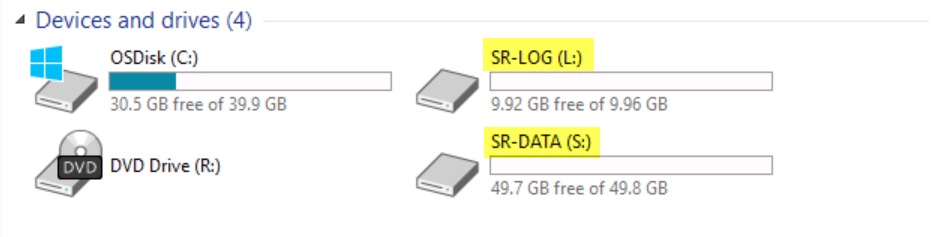
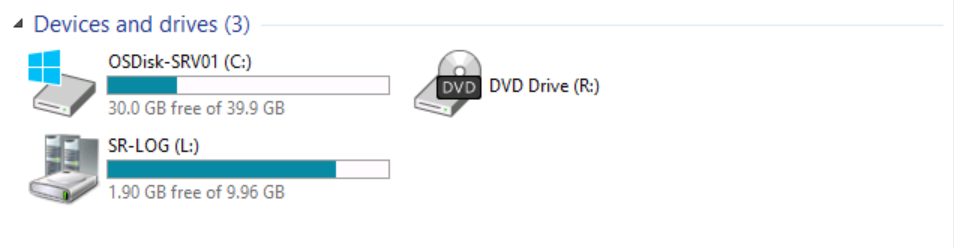
If we switch to SRV01 (source node) and explore the existing devices and drives.
You can see the presence of the Volume (S:) SR-DATA.

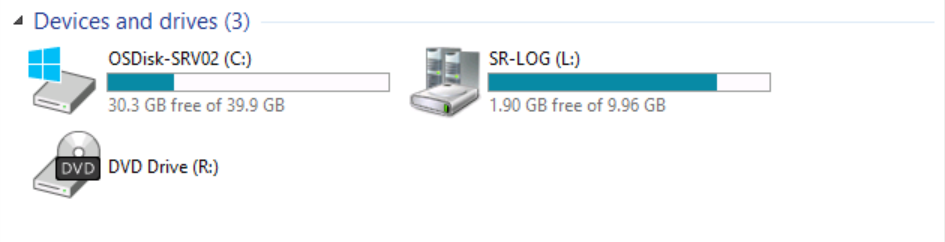
However, if we switch to SRV02 and explore the existing devices and drives.
You can observe that volume (S:) SR-DATA is no longer available. This is expected on the replica node.
Now, we will perform a resource failover (File Server) from SRV01 to the replicated storage SRV02.
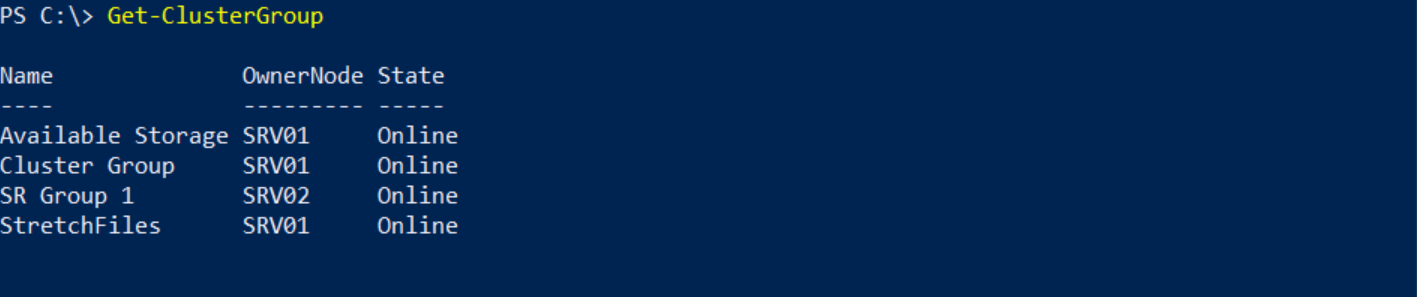
We will simulate a cluster service failure on SRV01, but before doing that, we will query the owner node of the resource group.
As you can see, SRV01 is the owner node.
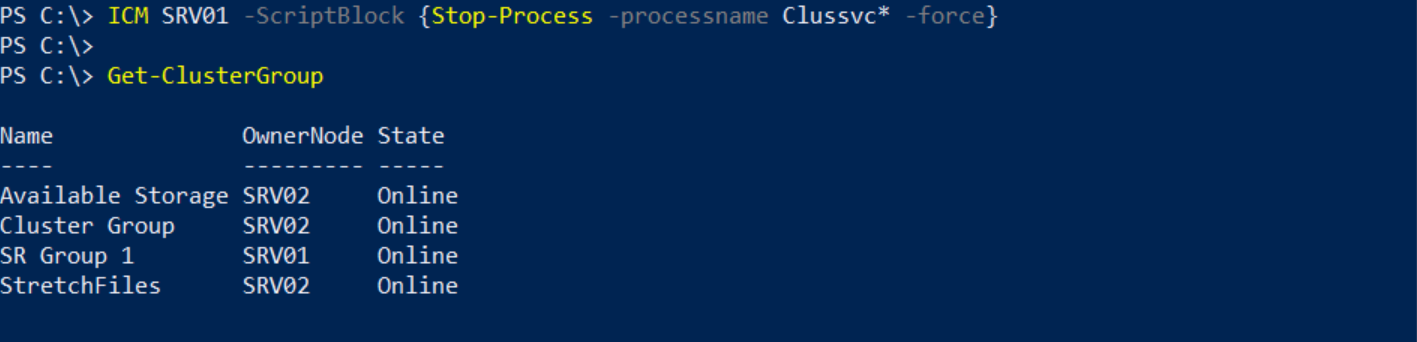
We will stop the cluster service on SRV01 and test the failover.
As you can see, SRV02 is the owner node now.
If we bring Failover Cluster Manager, we can observe the failover is completed successfully and the replication is reversed automatically as well.
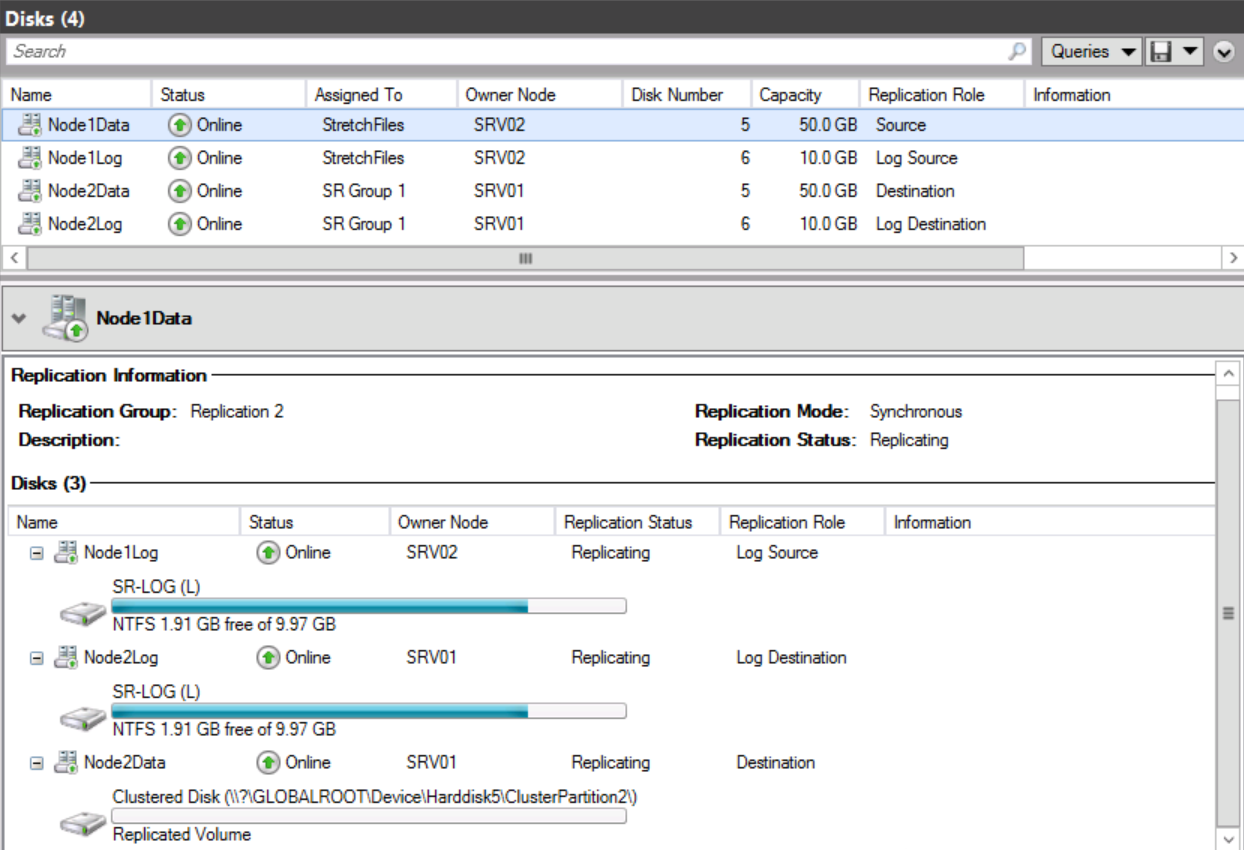
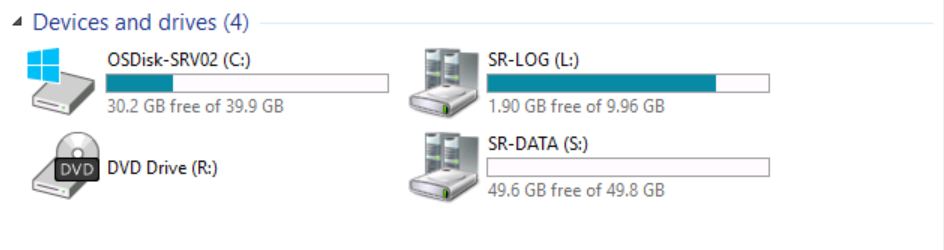
If we switch to SRV02 (source node after failover) and explore the existing devices and drives.
You can see the presence of the Volume (S:) SR-DATA.
 However, if we switch to SRV01 and explore the existing devices and drives.
You can observe that volume (S:) SR-DATA is no longer available.
 Now the replication is taking place from node SRV02 to node SRV01.
Congratulations! In Part II we have successfully:
- Installed failover clustering, created a cluster and configured a quorum.
- Added available storage to the cluster.
- Configured storage replication.
- Created and populated a file share.
- Performed a Resource Failover to the replicated storage.
Thanks for reading.
- Snapshots VS Replication Choose the Right Data Protection Strategy
- Microsoft Windows Server 2012 R2: Deduplication, Backup & Primary VM Storage
