

VMware OS Optimization Tool (OSOT) is a free tool provided by VMware Labs website. A website which is well known for the “Flings”, which are free utilities which help IT admins in their day-to-day administration tasks.
The utility uses templates which provides an easy way to disable windows services which aren’t mostly necessary. By disabling unnecessary services you’re basically make the system run more “light” so you’re saving resources which can be used for other programs.
Most Windows services are enabled by default and this optimization tool can disable unnecessary services. The system also provides a Roll-back feature allowing you to revert your changes and leave the system as it was in the beginning, before any optimization.
While you might think that this tool is only capable and usable for VMware Horizon View desktops, this is not correct. In fact, VMware OSOT is universal and can act on any (physical or virtual) systems supported optimizations can be applied also to RDSH servers.
Note: The OSOT does not support optimizing Windows Server 2008 or 2012 when those operating systems are used as single-session desktops.
The supported systems are:
You can optimize those systems below:
- Windows 7
- Windows 8/8.1
- Windows Server 2008 (and R2)
- Windows Server 2012 (and R2)
- Windows 10
- Windows Server 2016
Caution:
Please note that before using and downloading you must first accept the Technical preview license which makes you understand that this tool is experimental and should not be run on production systems.
What are the Requirements to Install and use the Tool?
Windows 7/8/10, Windows Server 2008 R2/2012/2016
NET Framework 3.5, SP1.
VMware OSOT – The Features
- Analyze – You analyze all registry entries, services and scheduled tasks of the system that you’re trying to optimize.
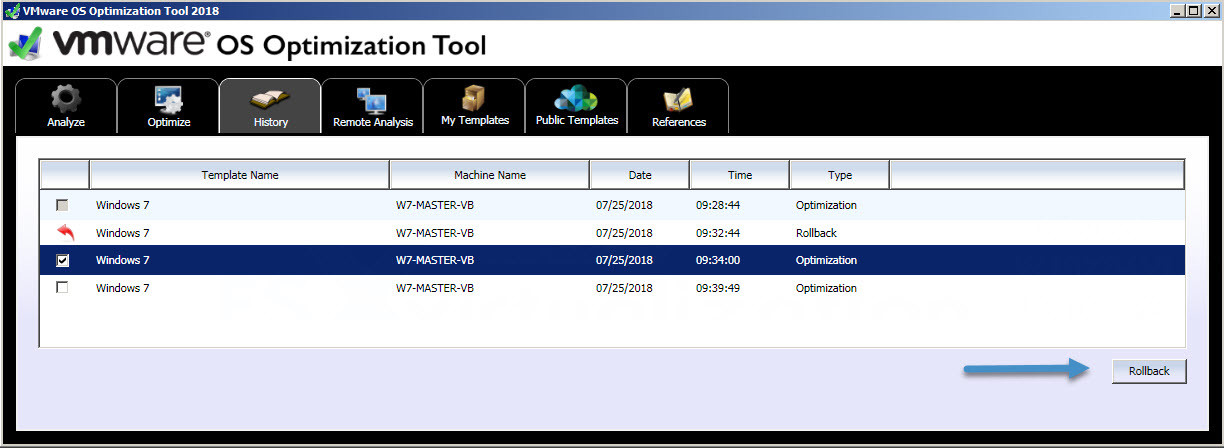
- History – Checks the optimization history and allows you to roll-back to a state before the optimization. You can have several history points-in-time to where you can roll-back.
- Remote Analysis – possibility to browse a list of remote systems or VMs and do the analysis.
- Templates – Easy to use OSOT pre-built templates, make changes and save as your own templates.
Getting Started
In fact, you don’t need to install this tool as there is only executable package, not installation package. So, after executing the first time, it detects the underlying system automatically and analyzes the system.
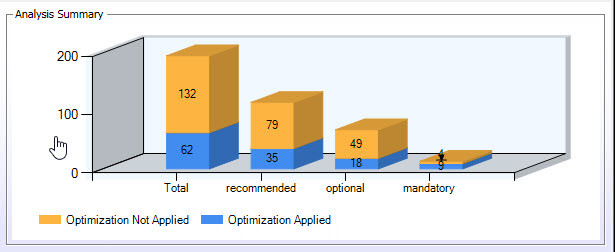
You are presented with an overview screen which is divided into few parts. The top part shows the Analysis summary allowing you to check which optimization choose.
Here is the overall view.
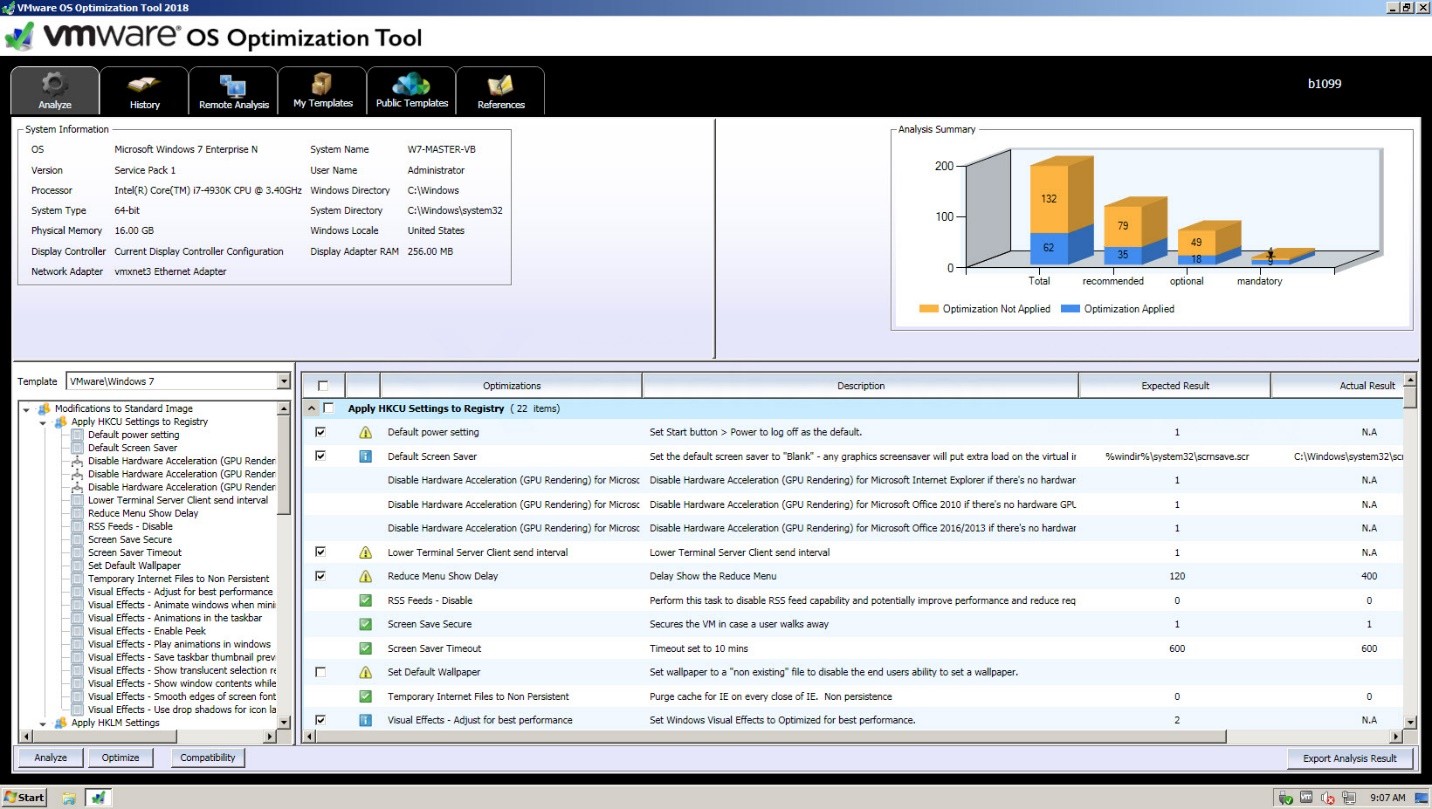
The details of the optimization vs non-optimized system show the benefits on the close-up image below.
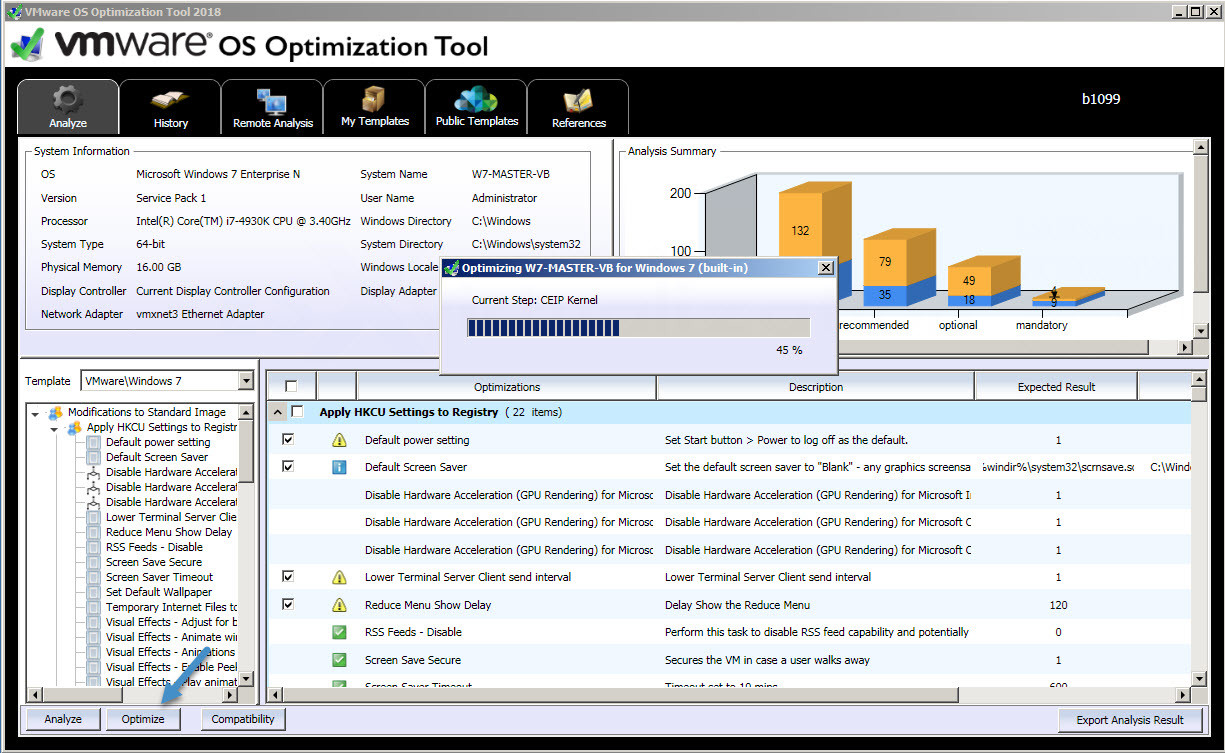
So, as I said, after executing for the first time, the system does the analyze. The next step would be the optimization phase.
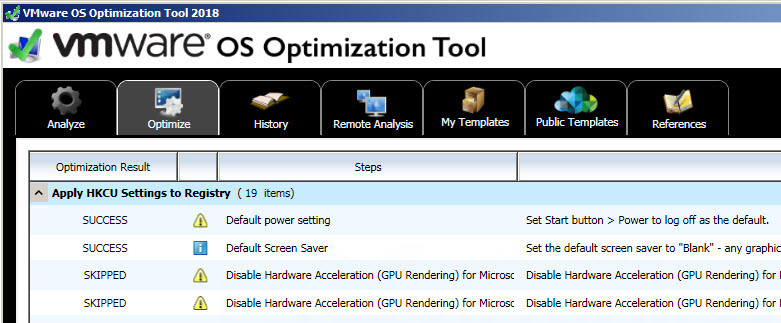
When you first click the Optimize Button, there will appear a new TAB right after the Analyze Tab.
This new tab is called simply Optimize and provides a recapitulation of what’s been done. You can browse the results and see in details if every optimization was successful or not.
This prevents of false optimization (you think that you have done an optimization, but in reality the system did not apply a tweak for some reason).
The Revert back can be done from the History TAB. You’ll nee to select a roll-back checkpoint and then click the Rollback button. Very easy.
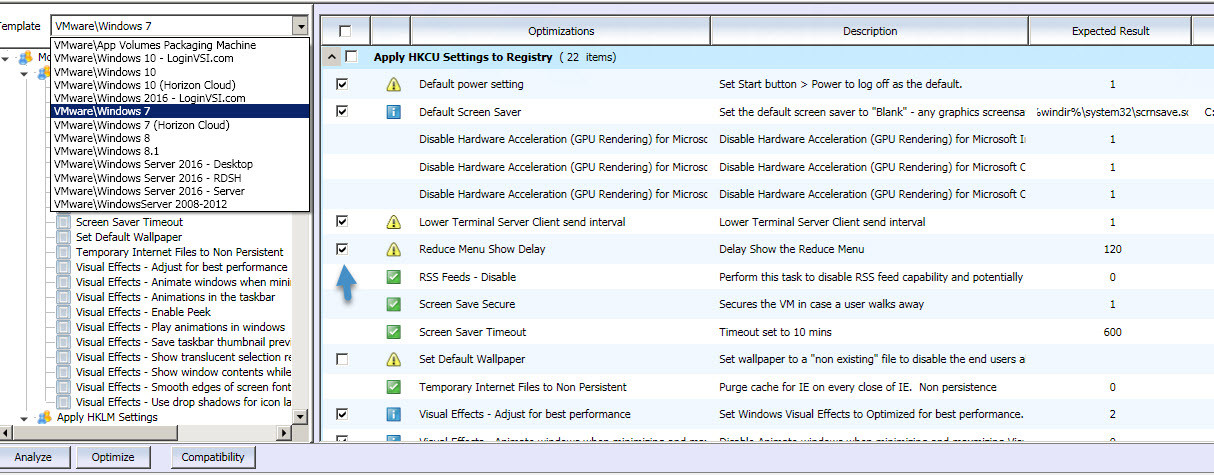
When you look closely you’ll notice that you can check/uncheck individual optimizations as well. So when you don’t want a special tweak to be applied you simply uncheck it. And this works the other way around.
Then you can save it as a personalized (your own) OSOT template.
The templates are accessible through a drop-down menu on the left. You have many predefined templates prepared by VMware. Some of them are dedicated for VDI as those were prepared with collaboration with LoginVSI, but others are more general and not targeting VDI infrastructures only.
This gives you an opportunity to chose your system from the template and apply it to your system without it being a VDI desktop.
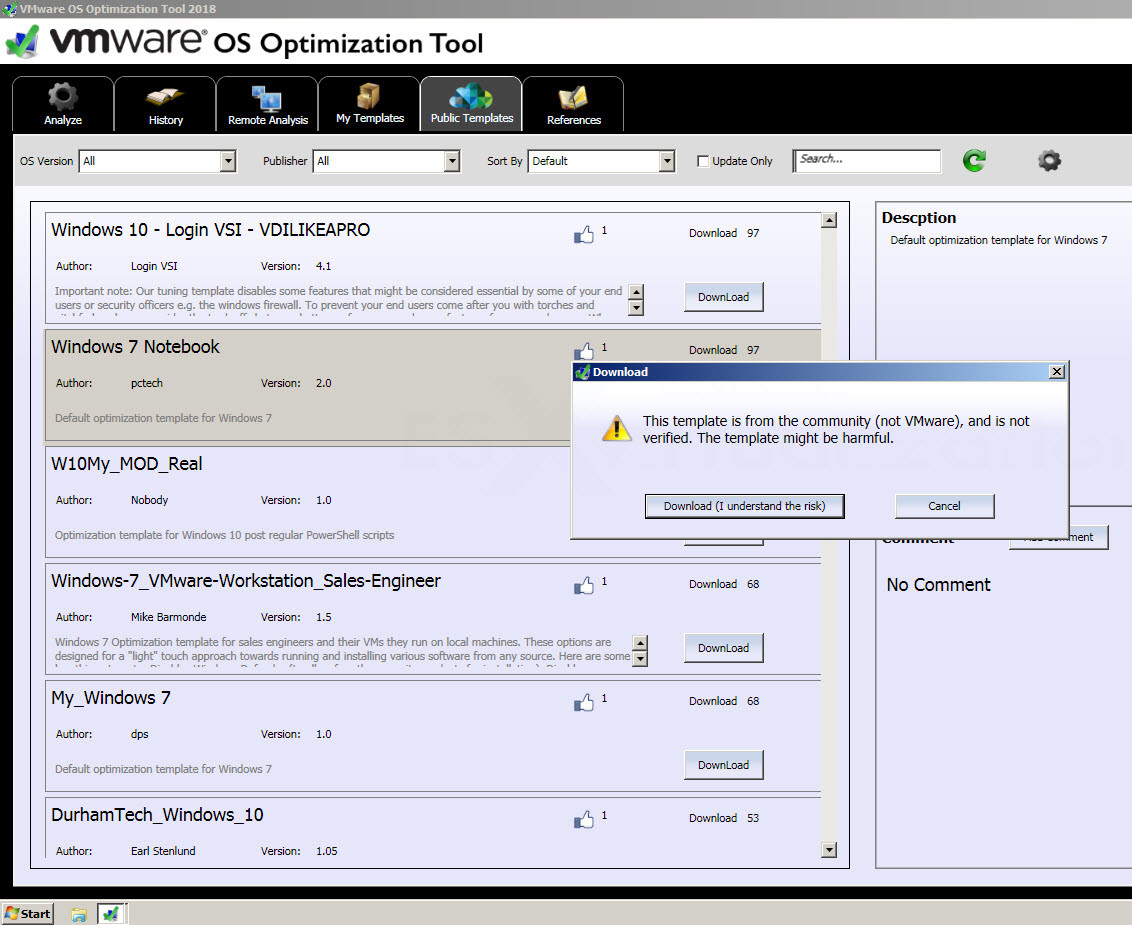
Community templates
You can download templates from the community by clicking a button on each template. You’ll notice a small disclaimer informing you that this is a community template. Not from VMware. So it’s up to you to take some cautions.
The tool has few public repositories registered, but you can add more repositories via the gear icon.
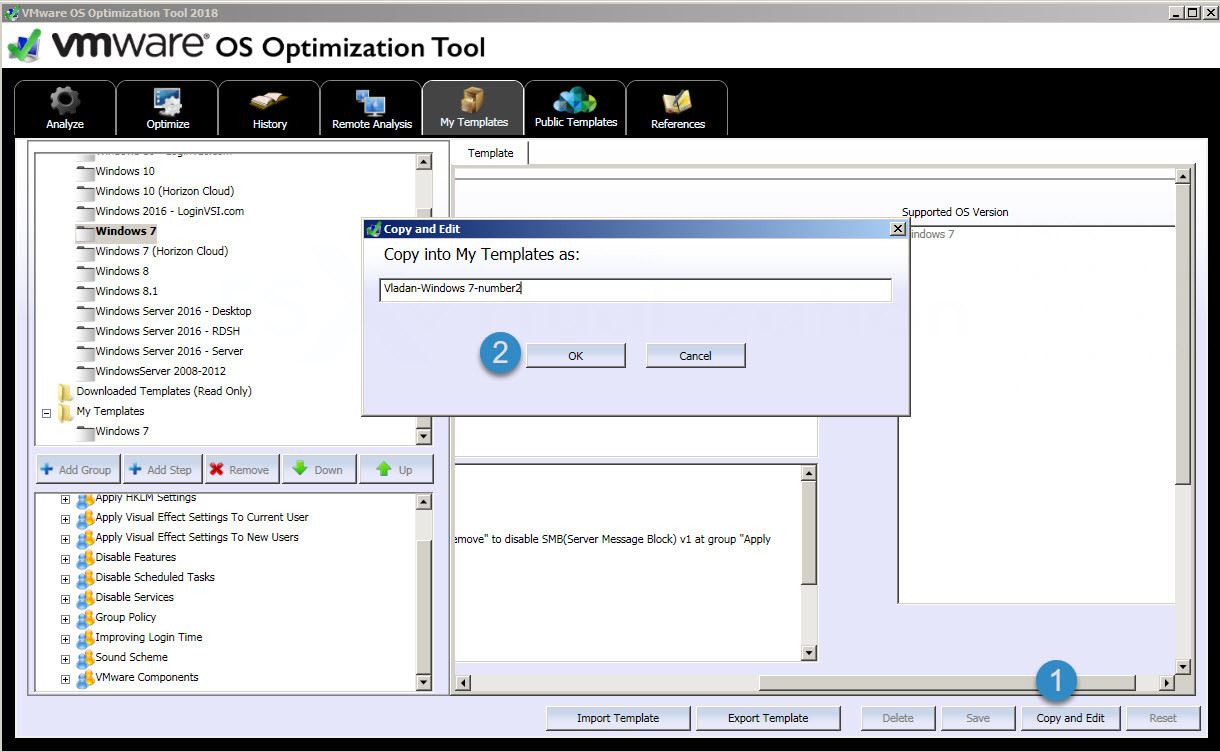
How do I create my own template?
The best way is to make a copy of the existing template. Click the Copy and Edit button to do so.
You can also export your template as an XML file which allows your tweaks to become even more transportable.
First, chose the template and click the Export Template button. This will export the existing template as XML. Chose some folder (My documents or USB key, etc)
Then on another system, go and click Import template button to Import this template, which will now appear in the “My Templates” folder.
Link: VMware Labs OSOT page
Wrap Up:
Small tool with some enormous possibilities, but providing top notch revert back option which I really like. Again, this is a “Fling” and so you should always take a backup of your production system. Other then that I can only recommend as it can make you VDI or RDSH systems only more responsive and your users happier.
