


Microsoft released a new feature some month ago that allow you to create a service catalog, for your team, directly in Azure. With this feature, you can prebuild templates, control parameters, and give the possibility to your teams to deploy applications, without doing mistakes or select big VM size that are expensive.
The documentation is available here: https://docs.microsoft.com/en-us/azure/managed-applications/
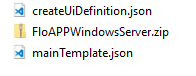
The template is composed of 2 files:
- mainTemplate.json
- createUiDefinition.json
The first one is the ARM template that you can deploy in Azure, without UI. The second one is the user interface with parameters. In the example of today, we will deploy a new virtual machine, in a new network. Create a new file named mainTemplate.json (case sensitive) and insert the following code:
|
1 2 3 4 5 6 7 8 9 10 11 12 13 14 15 16 17 18 19 20 21 22 23 24 25 26 27 28 29 30 31 32 33 34 35 36 37 38 39 40 41 42 43 44 45 46 47 48 49 50 51 52 53 54 55 56 57 58 59 60 61 62 63 64 65 66 67 68 69 70 71 72 73 74 75 76 77 78 79 80 81 82 83 84 85 86 87 88 89 90 91 92 93 94 95 96 97 98 99 100 101 102 103 104 105 106 107 108 109 110 111 112 113 114 115 116 117 118 119 120 121 122 123 124 125 126 127 128 129 130 131 132 133 134 135 136 137 138 139 140 141 142 143 144 145 146 147 148 149 150 151 152 153 154 155 156 157 158 159 160 161 162 163 164 165 166 167 168 169 170 171 172 173 174 175 176 177 178 179 180 181 182 183 184 185 186 187 188 189 190 |
{ "$schema": "https://schema.management.azure.com/schemas/2015-01-01/deploymentTemplate.json#", "contentVersion": "1.0.0.0", "parameters": { "userName": { "type": "string", "metadata": { "description": "Username for the Virtual Machine." } }, "pwd": { "type": "securestring", "metadata": { "description": "Password for the Virtual Machine." } }, "vmName": { "type": "string", "metadata": { "description": "Virtual Machine name." } }, "dnsName": { "type": "string", "metadata": { "description": "Unique DNS Name for the Public IP used to access the Virtual Machine." } }, "publicIPAddressName": { "type": "string", "metadata": { "description": "Name of the public IP address for the Virtual Machine." } }, "vmSize": { "type": "string", "defaultValue": "Standard_D2s_v3", "allowedValues": [ "Standard_D2s_v3", "Standard_D4s_v3", "Standard_D8s_v3" ], "metadata": { "description": "Size of the VM" } }, "location": { "type": "string", "defaultValue": "[resourceGroup().location]", "allowedValues": [ "westeurope", "northeurope" ], "metadata": { "description": "Location for all resources." } } }, "variables": { "storageAccountName": "[concat(uniquestring(resourceGroup().id), 'sawinvm')]", "nicName": "FloAppVMNic", "addressPrefix": "10.0.0.0/16", "subnetName": "FloAppSubnet", "subnetPrefix": "10.0.0.0/24", "virtualNetworkName": "FloAPP-MyVNET", "subnetRef": "[resourceId('Microsoft.Network/virtualNetworks/subnets', variables('virtualNetworkName'), variables('subnetName'))]" }, "resources": [ { "type": "Microsoft.Storage/storageAccounts", "name": "[variables('storageAccountName')]", "apiVersion": "2016-01-01", "location": "[parameters('location')]", "sku": { "name": "Standard_LRS" }, "kind": "Storage", "properties": {} }, { "apiVersion": "2016-03-30", "type": "Microsoft.Network/publicIPAddresses", "name": "[parameters('publicIPAddressName')]", "location": "[parameters('location')]", "properties": { "publicIPAllocationMethod": "Dynamic", "dnsSettings": { "domainNameLabel": "[parameters('dnsName')]" } } }, { "apiVersion": "2016-03-30", "type": "Microsoft.Network/virtualNetworks", "name": "[variables('virtualNetworkName')]", "location": "[parameters('location')]", "properties": { "addressSpace": { "addressPrefixes": [ "[variables('addressPrefix')]" ] }, "subnets": [ { "name": "[variables('subnetName')]", "properties": { "addressPrefix": "[variables('subnetPrefix')]" } } ] } }, { "apiVersion": "2016-03-30", "type": "Microsoft.Network/networkInterfaces", "name": "[variables('nicName')]", "location": "[parameters('location')]", "dependsOn": [ "[resourceId('Microsoft.Network/publicIPAddresses/', parameters('publicIPAddressName'))]", "[resourceId('Microsoft.Network/virtualNetworks/', variables('virtualNetworkName'))]" ], "properties": { "ipConfigurations": [ { "name": "ipconfig1", "properties": { "privateIPAllocationMethod": "Dynamic", "publicIPAddress": { "id": "[resourceId('Microsoft.Network/publicIPAddresses',parameters('publicIPAddressName'))]" }, "subnet": { "id": "[variables('subnetRef')]" } } } ] } }, { "apiVersion": "2017-03-30", "type": "Microsoft.Compute/virtualMachines", "name": "[parameters('vmName')]", "location": "[parameters('location')]", "dependsOn": [ "[resourceId('Microsoft.Storage/storageAccounts/', variables('storageAccountName'))]", "[resourceId('Microsoft.Network/networkInterfaces/', variables('nicName'))]" ], "properties": { "hardwareProfile": { "vmSize": "[parameters('vmSize')]" }, "osProfile": { "computerName": "[parameters('vmName')]", "adminUsername": "[parameters('userName')]", "adminPassword": "[parameters('pwd')]" }, "storageProfile": { "imageReference": { "publisher": "MicrosoftWindowsServer", "offer": "WindowsServer", "sku": "2016-Datacenter", "version": "latest" }, "osDisk": { "createOption": "FromImage" } }, "networkProfile": { "networkInterfaces": [ { "id": "[resourceId('Microsoft.Network/networkInterfaces',variables('nicName'))]" } ] }, "diagnosticsProfile": { "bootDiagnostics": { "enabled": true, "storageUri": "[reference(resourceId('Microsoft.Storage/storageAccounts/', variables('storageAccountName'))).primaryEndpoints.blob]" } } } } ], "outputs": { "hostname": { "type": "string", "value": "[reference(parameters('publicIPAddressName')).dnsSettings.fqdn]" } } } |
You can adapt this template with your values. Now, create a second file named createUiDefinition.json and paste the following code:
|
1 2 3 4 5 6 7 8 9 10 11 12 13 14 15 16 17 18 19 20 21 22 23 24 25 26 27 28 29 30 31 32 33 34 35 36 37 38 39 40 41 42 43 44 45 46 47 48 49 50 51 52 53 54 55 56 57 58 59 60 61 62 63 64 65 66 67 68 69 70 71 72 73 74 75 76 77 78 79 80 81 82 83 84 85 86 87 88 89 90 91 92 93 94 95 96 97 98 99 100 101 102 103 104 105 106 107 108 109 110 111 112 113 114 115 116 117 118 119 120 |
{ "handler": "Microsoft.Compute.MultiVm", "version": "0.1.2-preview", "parameters": { "basics": [ {} ], "steps": [ { "name": "credentialsConfig", "label": "VM Credential", "subLabel": { "preValidation": "Configure the VM credentials", "postValidation": "Done" }, "bladeTitle": "Credential", "elements": [ { "name": "adminUsername", "type": "Microsoft.Compute.UserNameTextBox", "label": "User name", "toolTip": "Admin username for the virtual machine", "osPlatform": "Windows", "constraints": { "required": true } }, { "name": "adminPassword", "type": "Microsoft.Compute.CredentialsCombo", "label": { "password": "Password", "confirmPassword": "Confirm password" }, "toolTip": { "password": "Admin password for the virtual machine" }, "osPlatform": "Windows", "constraints": { "required": true } } ] }, { "name": "vmConfig", "label": "Virtual Machine settings", "subLabel": { "preValidation": "Configure the virtual machine settings", "postValidation": "Done" }, "bladeTitle": "VM Settings", "elements": [ { "name": "vmNamePrefix", "type": "Microsoft.Common.TextBox", "label": "Virtual Machine Name", "toolTip": "VM Name", "defaultValue": "", "constraints": { "required": true, "regex": "[a-z][a-z0-9-]{5,15}[a-z0-9]$", "validationMessage": "Must be 5-15 characters." } }, { "name": "vmSize", "type": "Microsoft.Compute.SizeSelector", "label": "Virtual machine size", "toolTip": "The size of the virtual machine", "recommendedSizes": [ "Standard_D2s_v3" ], "constraints": { "allowedSizes": [ "Standard_D2s_v3", "Standard_D4s_v3", "Standard_D8s_v3" ] }, "osPlatform": "Windows", "count": 1 }, { "name": "dnsAndPublicIP", "type": "Microsoft.Network.PublicIpAddressCombo", "label": { "publicIpAddress": "Public IP address", "domainNameLabel": "DNS label" }, "toolTip": { "domainNameLabel": "DNS endpoint" }, "defaultValue": { "publicIpAddressName": "ip01" }, "options": { "hideNone": true, "hideDomainNameLabel": false }, "constraints": { "required": { "domainNameLabel": true } } } ] } ], "outputs": { "location": "[location()]", "userName": "[steps('credentialsConfig').adminUsername]", "pwd": "[steps('credentialsConfig').adminPassword.password]", "vmSize": "[steps('vmConfig').vmSize]", "vmName": "[steps('vmConfig').vmNamePrefix]", "dnsName": "[steps('vmConfig').dnsAndPublicIP.domainNameLabel]", "publicIPAddressName": "[steps('vmConfig').dnsAndPublicIP.name]" } } } |
On outputs, the variable must be the same as in your template, otherwise, it will fail. When it’s done, zip your 2 files, on the root level:

We’ll now create a new resource group in Azure, that will host the storage account that will contain our template (the zip file). Execute the following PowerShell script to do that, by adapting your Subscription ID, the Resource Group name and the location. Adapt the path where the file is located and the name of the zip file:
|
1 2 3 4 5 6 7 8 9 10 11 12 |
Login-AzureRmAccount Select-AzureRmSubscription -SubscriptionId Your Subscription Id $rgName = "FloAPPServiceCatalog" $location = "westeurope" New-AzureRmResourceGroup -Name $rgName -Location $location $storageAccount = New-AzureRmStorageAccount -ResourceGroupName $rgName -Name "floappservicecatalog" -Location $location -SkuName Standard_LRS -Kind Storage $ctx = $storageAccount.Context New-AzureStorageContainer -Name appcontainer -Context $ctx -Permission blob Set-AzureStorageBlobContent -File "C:\Users\florent.appointaire\Downloads\managedvm\FloAPPWindowsServer.zip" -Container appcontainer -Blob "FloAPPWindowsServer.zip" -Context $ctx |

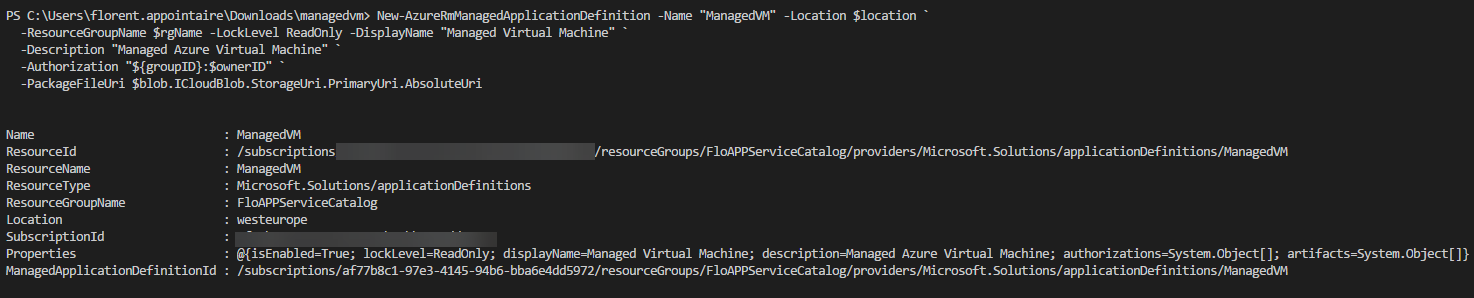
We will now create the managed application that will be available for your team. You can assign permissions to a group, and choose which RBAC role you want to give, Contributor in my case. Give a name to your application. This application will be shown in your resource group. You can change the display name for your teams, and the description:
|
1 2 3 4 5 6 7 8 9 10 |
$groupID = (Get-AzureRmADGroup -SearchString "ServiceCatalog").Id $ownerID = (Get-AzureRmRoleDefinition -Name "Contributor").Id $blob = Get-AzureStorageBlob -Container appcontainer -Blob "FloAPPWindowsServer.zip" -Context $ctx New-AzureRmManagedApplicationDefinition -Name "ManagedVM" -Location $location ` -ResourceGroupName $rgName -LockLevel ReadOnly -DisplayName "Managed Virtual Machine" ` -Description "Managed Azure Virtual Machine" ` -Authorization "${groupID}:$ownerID" ` -PackageFileUri $blob.ICloudBlob.StorageUri.PrimaryUri.AbsoluteUri |
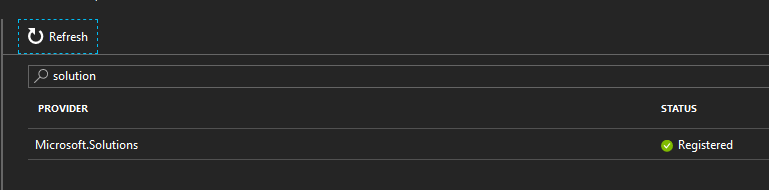
If you’ve the following error when trying to deploy the managed application:

It’s because you don’t register the Microsoft.Solutions provider. Go to your subscription in Resource Providers, and register Microsoft.Solutions:

The application has been deployed successfully:
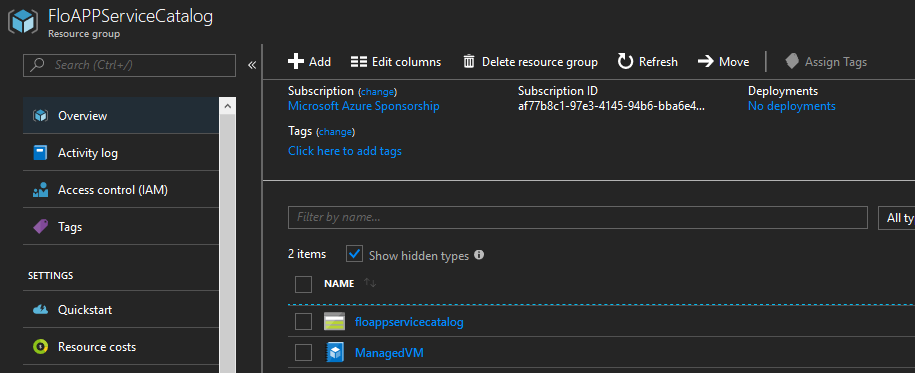
You’ve now the application, with your storage account:
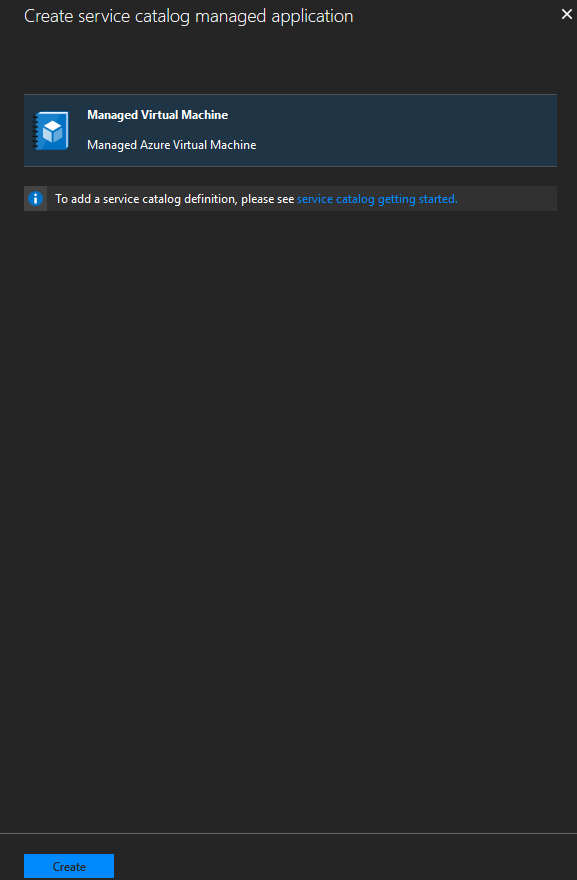
Go to the + button in Azure, with an account that has the right to deploy (in the group that you provided earlier) and search for Service Catalog. Choose Service Catalog Managed Application and click on Create. You’ll be able to see the application that you deployed (the following steps can be done in PowerShell). Select on it and click on Create :
Choose the resource group where you want to deploy this, and the location. On the next screen, you will have your first step (that is in the createUIdefinition) who is the asking of credentials:

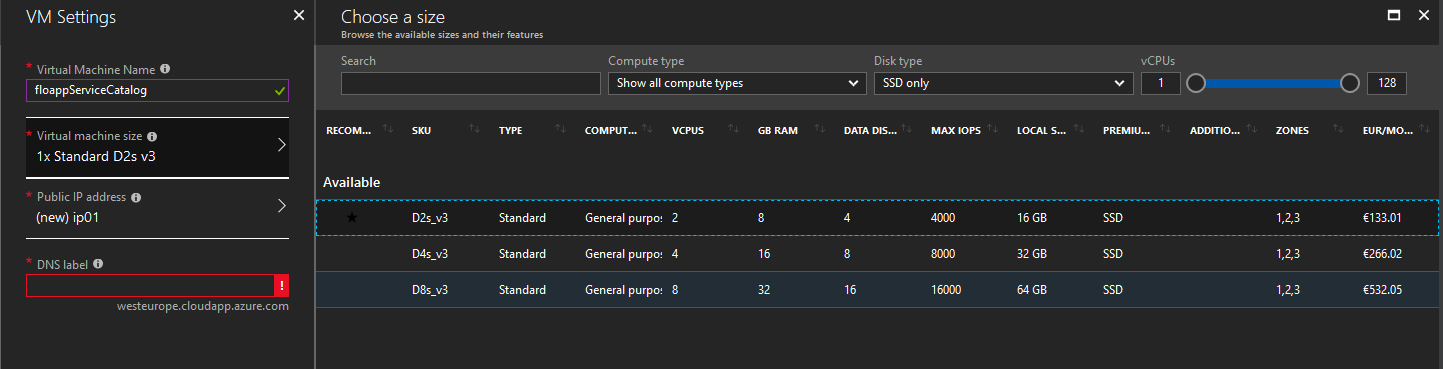
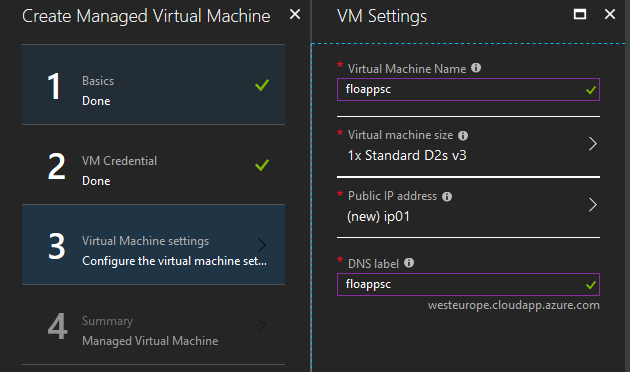
In the step after, give a name to your VM, choose a size (that we limit to 3 in our template) and choose a public ip or create a new one. Provide a unique DNS name too:
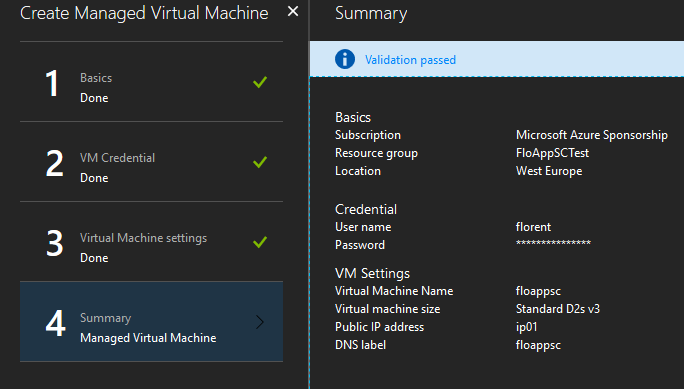
Validation passed, you can deploy your VM 😊
The deployment started:
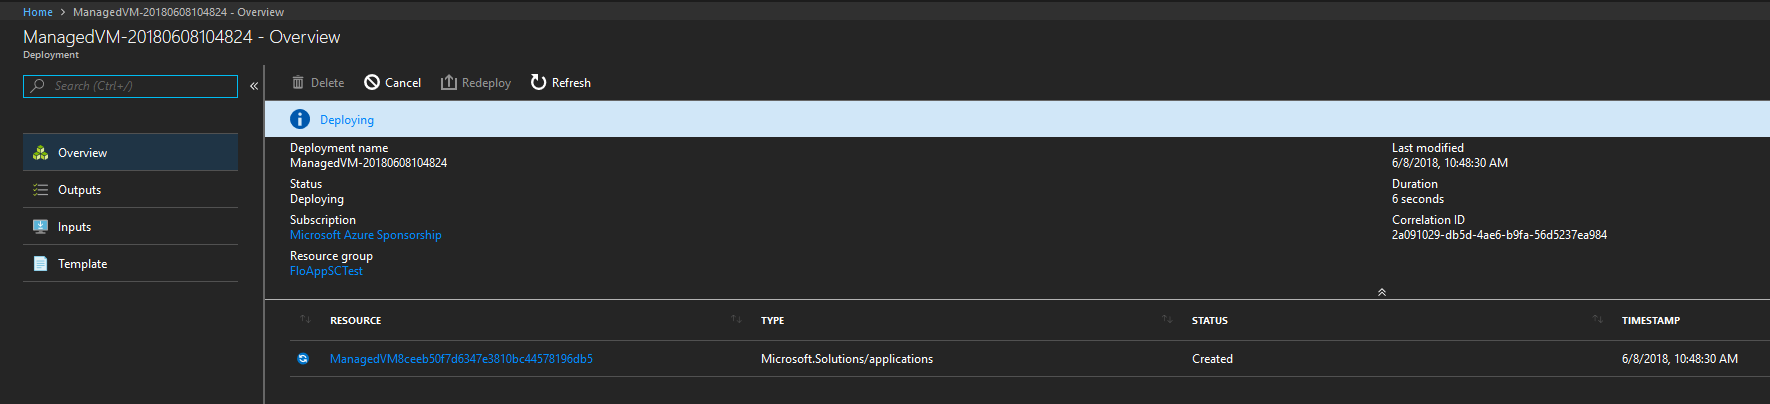
And, after 5 minutes, the deployment finished correctly:

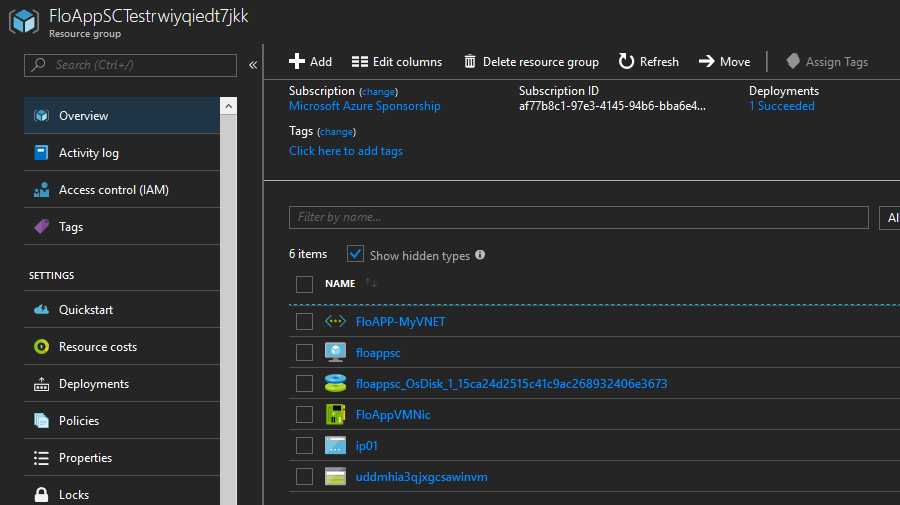
If you look resources in the RG that has been created, you see the VNet, the VM, etc:
And in the parent RG that you chose, you’ll see the application:
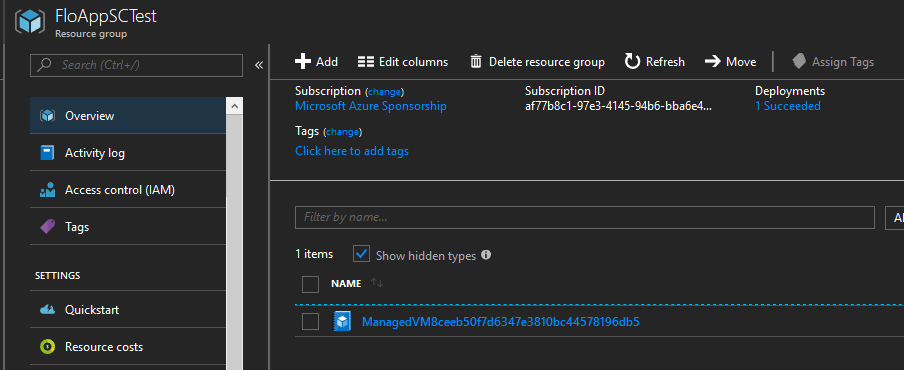
If you click on it, you’ll be redirected to your RG with the name of the parent RG and some random characters.
You can now connect to the VM, with the DNS that you provided before:

This new feature is very interesting to provide the possibility to deploy web app, vm, etc, by limiting the sizing and so, the cost 😊
