StarWind Virtual SAN:
Configuration Guide for Proxmox Virtual Environment [KVM], VSAN Deployed as a Controller Virtual Machine (CVM) using Web UI
- October 15, 2023
- 18 min read
- Download as PDF
Annotation
Relevant products
This guide applies to StarWind Virtual SAN, StarWind Virtual SAN Free (starting from version 1.2xxx – Oct. 2023).
Purpose
This document outlines how to configure a Proxmox Cluster using StarWind Virtual SAN (VSAN), with VSAN running as a Controller Virtual Machine (CVM). The guide includes steps to prepare Proxmox hosts for clustering, configure physical and virtual networking, and set up the Virtual SAN Controller Virtual Machine.
For more information about StarWind VSAN architecture and available installation options, please refer to the StarWind Virtual (vSAN) Getting Started Guide.
Audience
This technical guide is intended for storage and virtualization architects, system administrators, and partners designing virtualized environments using StarWind Virtual SAN (VSAN).
Expected result
The end result of following this guide will be a fully configured high-availability Proxmox Cluster that includes virtual machine shared storage provided by StarWind VSAN.
Prerequisites
StarWind Virtual SAN system requirements
Prior to installing StarWind Virtual SAN, please make sure that the system meets the requirements, which are available via the following link:
https://www.starwindsoftware.com/system-requirements
Recommended RAID settings for HDD and SSD disks:
https://knowledgebase.starwindsoftware.com/guidance/recommended-raid-settings-for-hdd-and-ssd-disks/
Please read StarWind Virtual SAN Best Practices document for additional information:
https://www.starwindsoftware.com/resource-library/starwind-virtual-san-best-practices
Solution diagram
The diagrams below illustrate the network and storage configuration of the solution: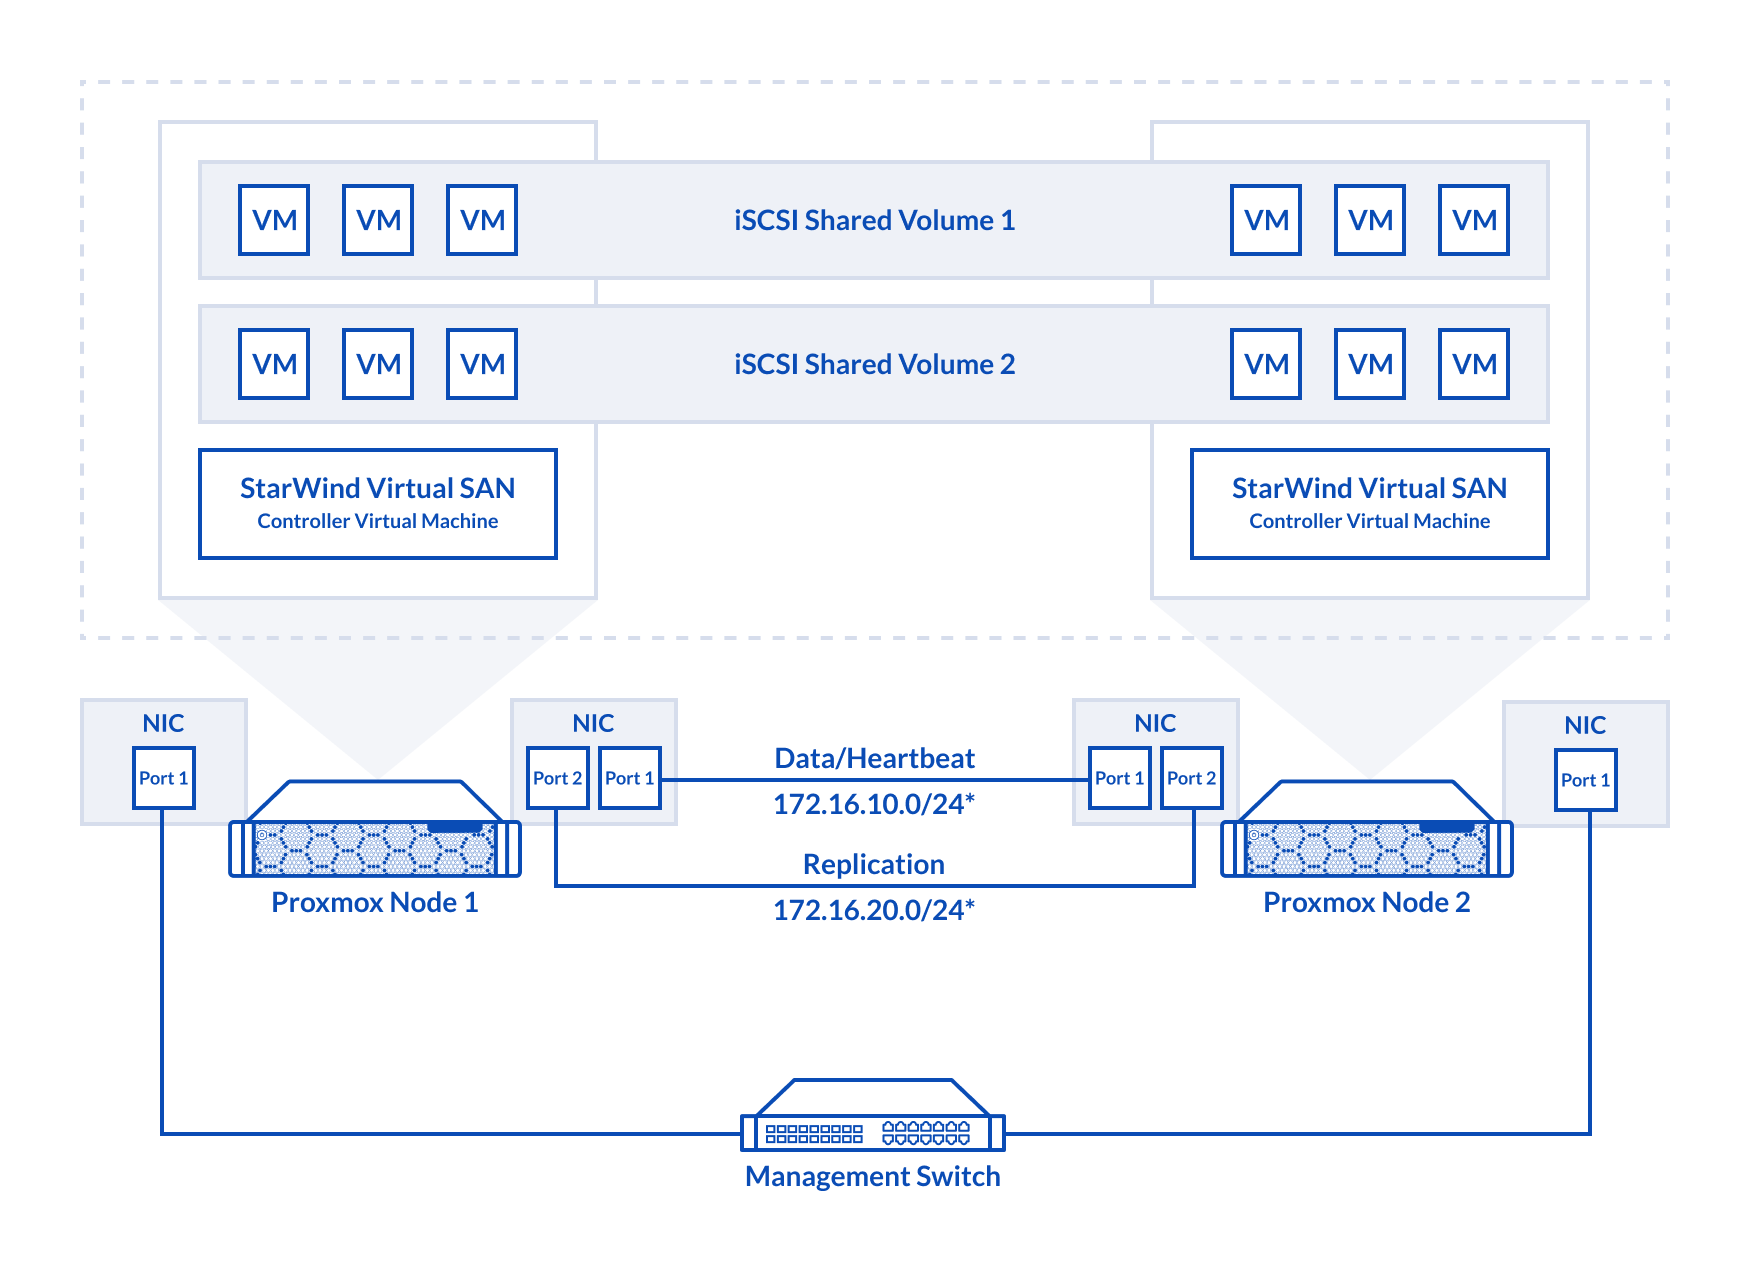
2-node cluster
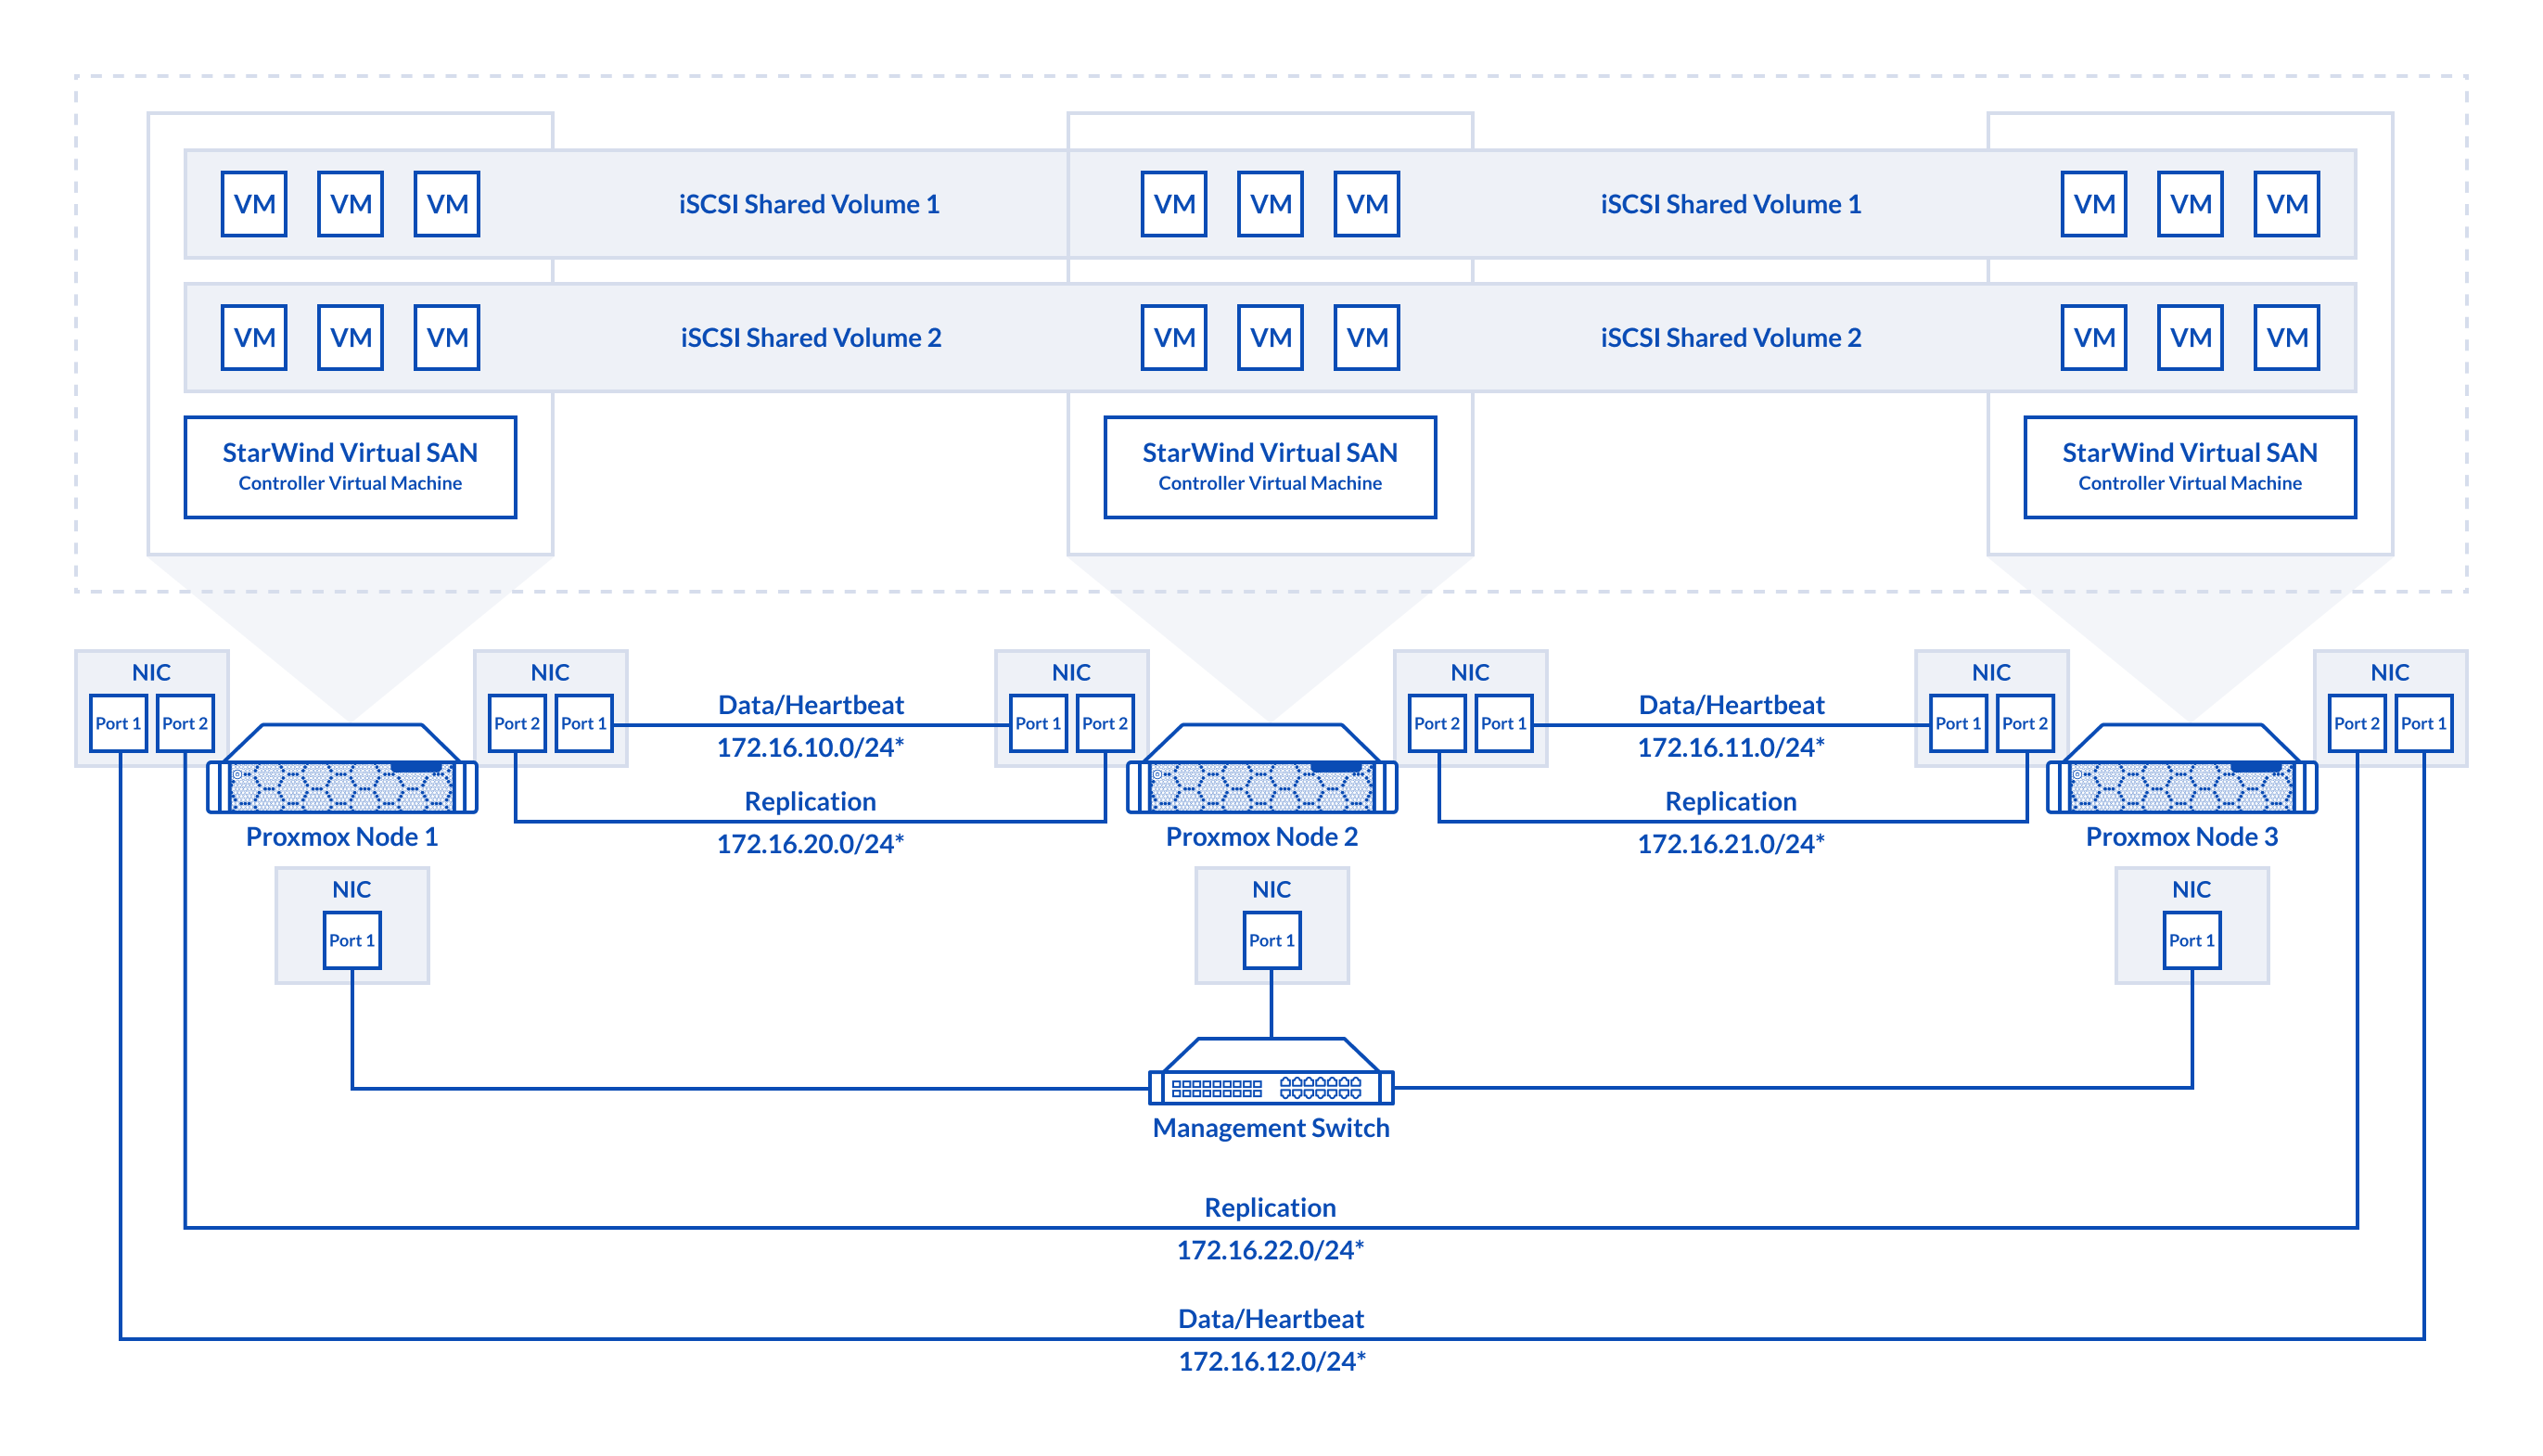
3-node cluster
Preconfiguring cluster nodes
1. ProxMox cluster should be created before deploying any virtual machines.
2. 2-nodes cluster requires quorum. iSCSI/SMB/NFS cannot be used for this purposes. QDevice-Net package must be installed on 3rd Linux server, which will act as a witness.
https://pve.proxmox.com/wiki/Cluster_Manager#_corosync_external_vote_support
3. Install qdevice on witness server:
|
1 |
ubuntu# apt install corosync-qnetd |
4. Install qdevice on both cluster nodes:
|
1 |
pve# apt install corosync-qdevice |
5. Configure quorum running the following command on one of the ProxMox node (change IP address)
|
1 |
pve# pvecm qdevice setup %IP_Address_Of_Qdevice% |
6. Configure network interfaces on each node to make sure that Synchronization and iSCSI/StarWind heartbeat interfaces are in different subnets and connected according to the network diagram above. In this document, 172.16.10.x subnet is used for iSCSI/StarWind heartbeat traffic, while 172.16.20.x subnet is used for the Synchronization traffic. Choose node and open System -> Network page.

7. Click Create. Choose Linux Bridge.
 8. Create Linux Bridge and set IP address. Set MTU to 9000. Click Create.
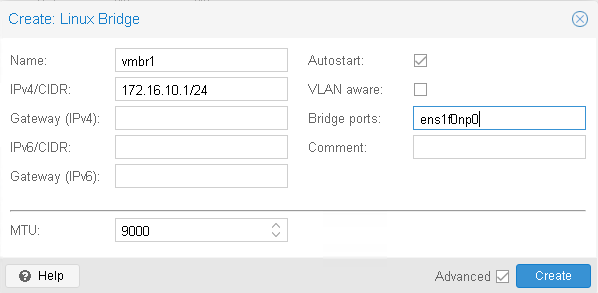
9. Repeat step 8 for all network adapters, which will be used for Synchronization and iSCSI/StarWind heartbeat traffic.
10. Verify network configuration in /etc/network/interfaces file. Login to the node via SSH and check the contents of the file.
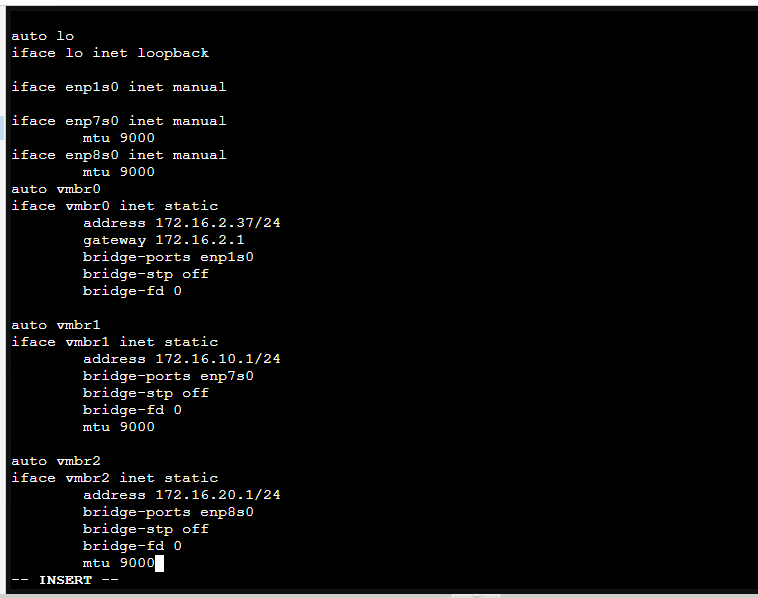
11. Enable IOMMU support in kernel, if PCIe passthourgh will be used to pass RAID Controller, HBA or NVMe drives to the VM. Update grub configuration file.
For Intel CPU:
Add “intel_iommu=on iommu=pt” to GRUB_CMDLINE_LINUX_DEFAULT line in /etc/default/grub file.
For AMD CPU:
Add “iommu=pt” to GRUB_CMDLINE_LINUX_DEFAULT line in /etc/default/grub file. 
12. Reboot the host.
13. Repeat steps 6-12 an all nodes.
Deploying Starwind Virtual SAN CVM
1. Download StarWind VSAN CVM KVM: VSAN by StarWind: Overview
2. Extract the VM StarWindAppliance.qcow2 file from the downloaded archive.
3. Upload StarWindAppliance.qcow2 file to the Proxmox Host via any SFTP client (e.g. WinSCP) to /root/ directory.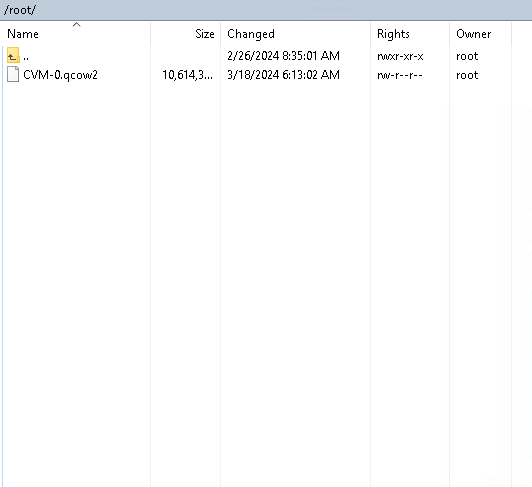
4. Create a VM without OS. Login to Proxmox host via Web GUI. Click Create VM.
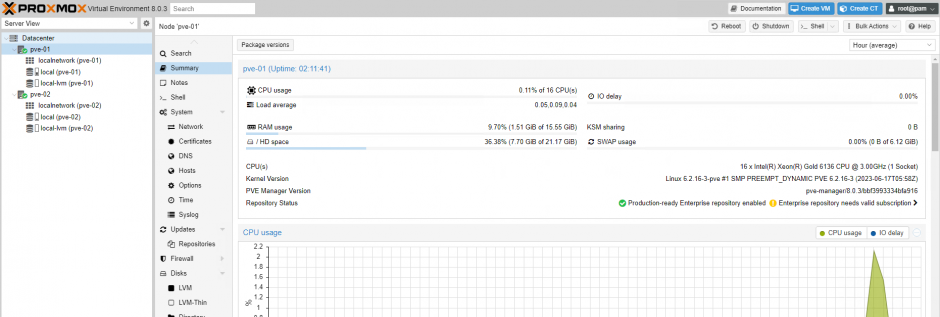
5. Choose node to create VM. Enable Start at boot checkbox and set Start/Shutdown order to 1. Click Next. 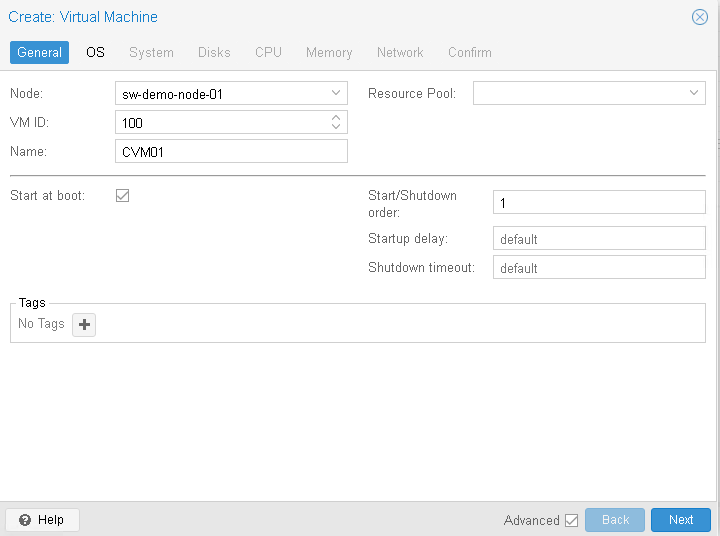
6. Choose Do not use any media and choose Guest OS Linux. Click Next. 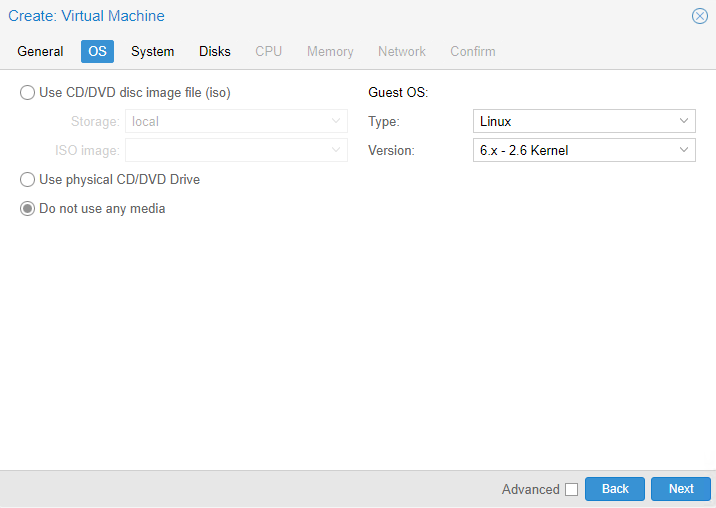
6. Specify system options. Choose Machine type q35 and check the Qemu Agent box. Click Next. 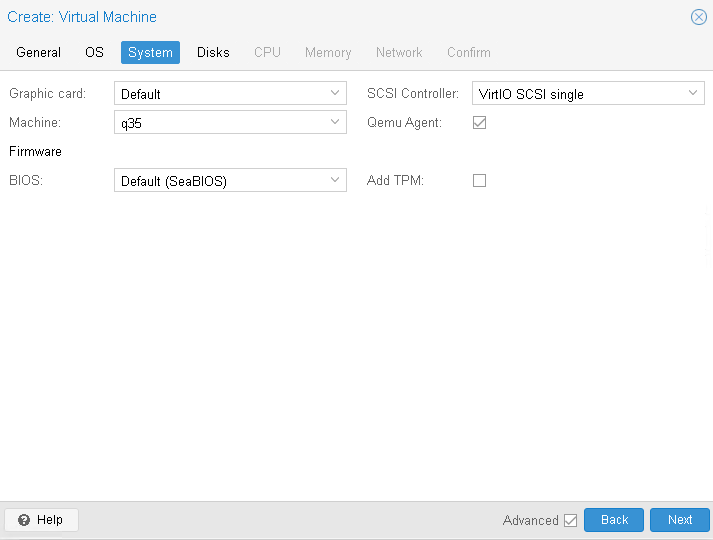
7. Remove all disks from the VM. Click Next.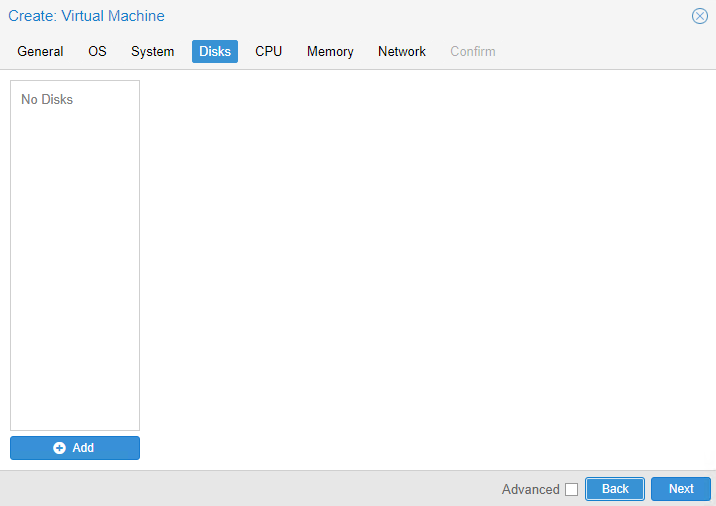
8. Assign 8 cores to the VM and choose Host CPU type. Click Next.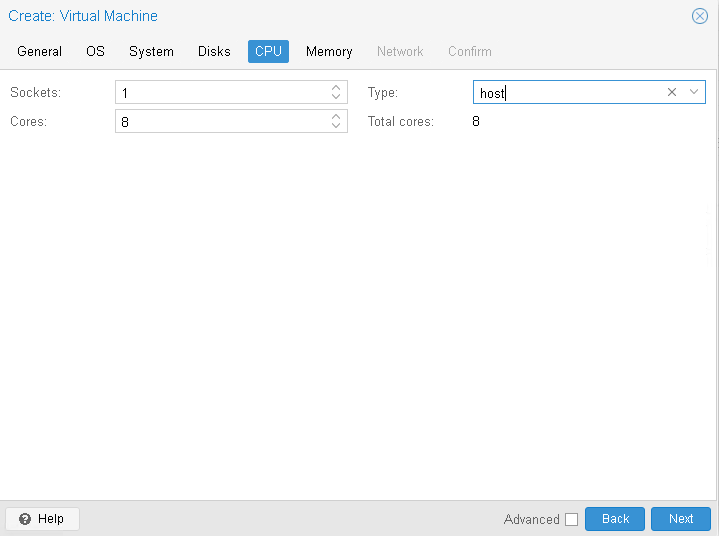
9. Assign at least 8GB of RAM to the VM. Click Next. 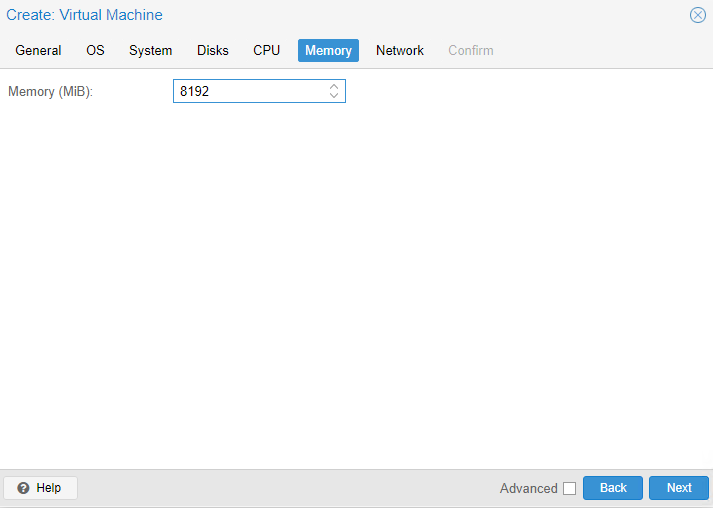
10. Configure Management network for the VM. Click Next. 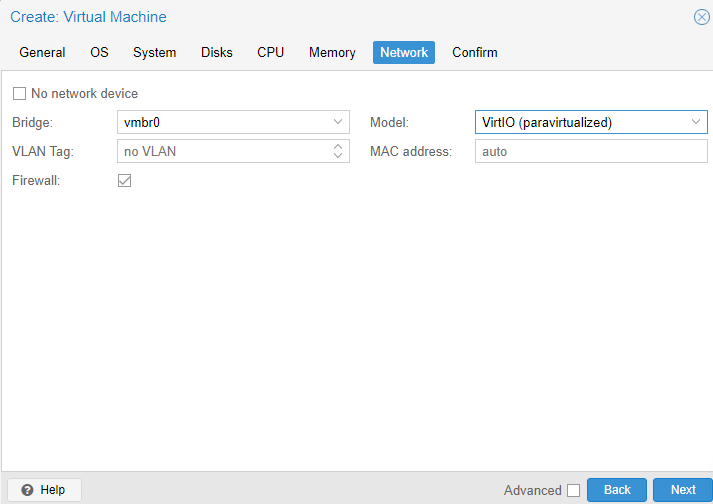
11. Confirm settings. Click Finish. 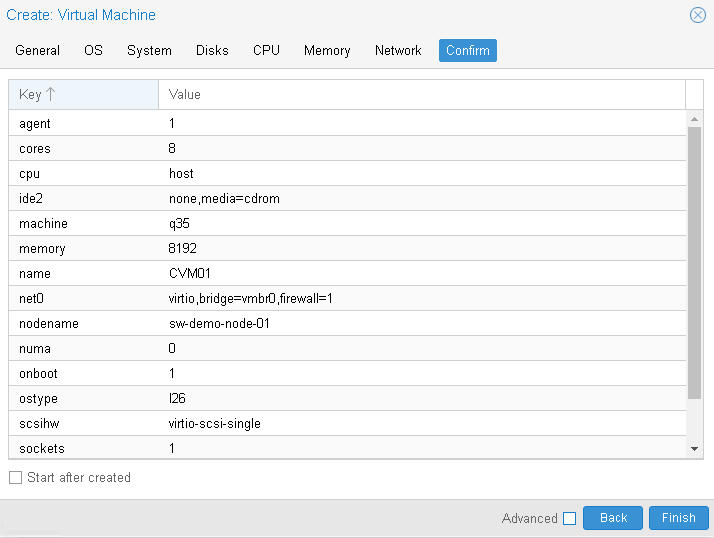
12. Connect to Proxmox host via SSH. Attach StarWindAppliance.qcow2 file to the VM.
|
1 |
qm importdisk 100 /root/StarWindAppliance.qcow2 local-lvm |
13. Open VM and go to Hardware page. Add unused SCSI disk to the VM.
14. Attach Network interfaces for Synchronization and iSCSI/Heartbeat traffic. 
15. Open Options page of the VM. Select Boot Order and click Edit.
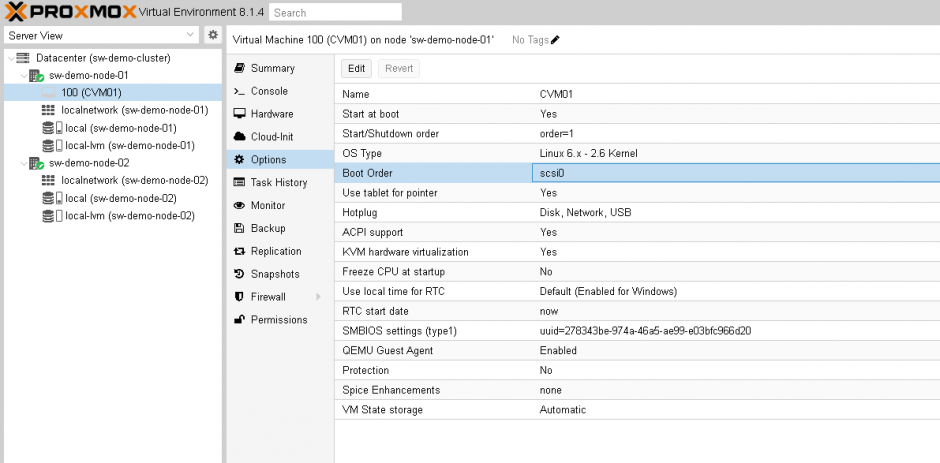
16. Move scsi0 device as #1 to boot from.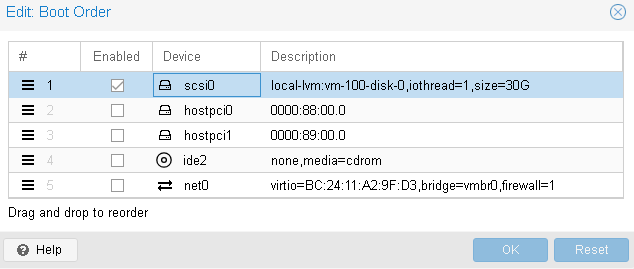
17. Repeat all the steps from this section on other Proxmox hosts.
Attaching storage to StarWind Virtual SAN CVM
Please follow the steps below to attach desired storage type to the CVM
Attaching Virtual disk to StarWind Virtual SAN CVM
1. Open VM Hardware page in Proxmox and add drive to the VM, which going to be used by StarWind service. Specify size of the Virtual disk and click OK.
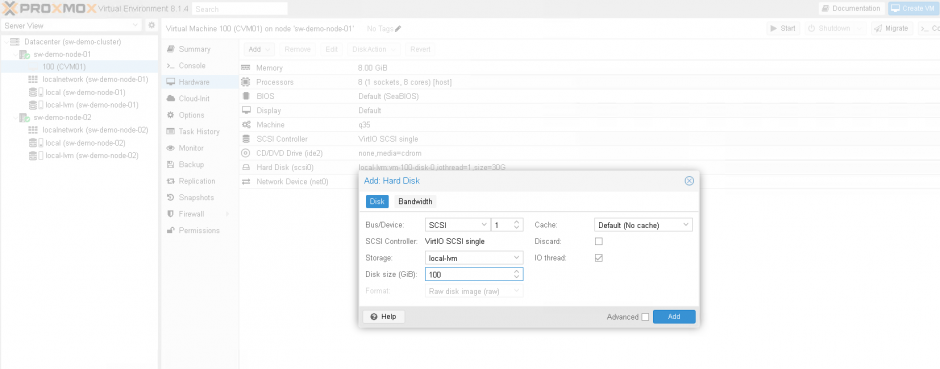
Note. It is recommended to use VirtIO SCSI single controller for better performance. If multiple virtual disks are needed to be used in a software RAID inside of the CVM, VirtIO SCSI controller should be used.
2. Repeat step 1 to attach additional Virtual Disks.
3. Start VM.
4. Repeat steps 1-2 on all nodes.
Attaching PCIe device to StarWind Virtual SAN CVM
1. Shutdown StarWind VSAN CVM.
2. Open VM Hardware page in Proxmox and click Add -> PCI Device.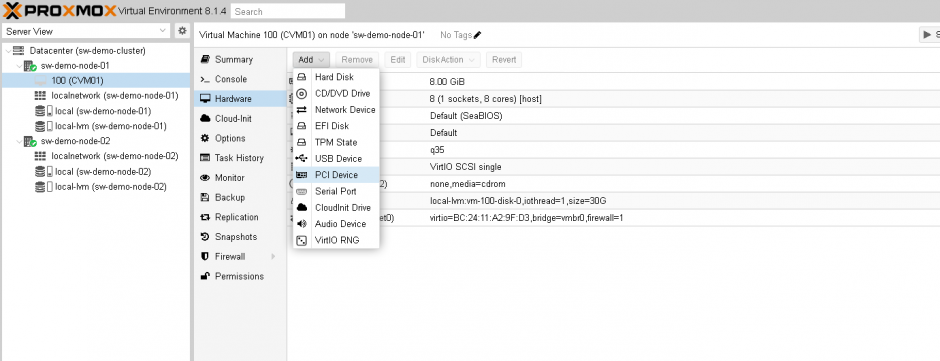 3. Choose PCIe Device from drop-down list.
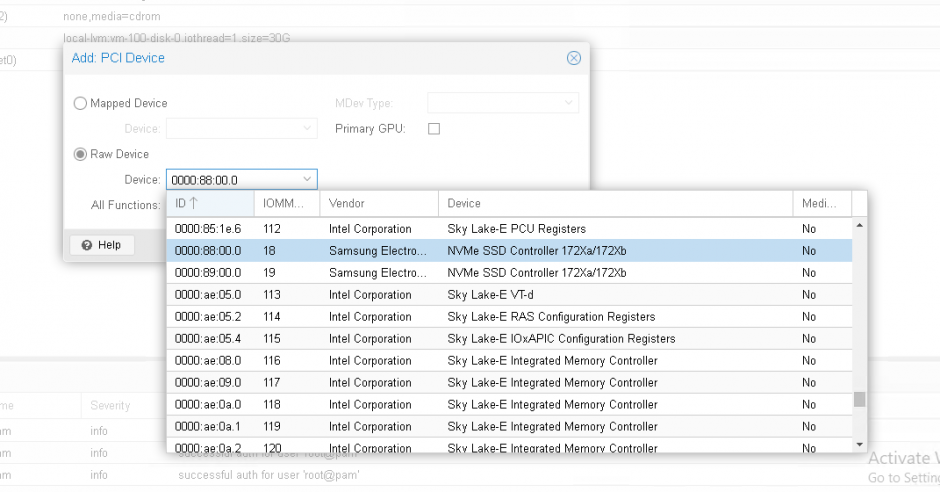
4. Click Add.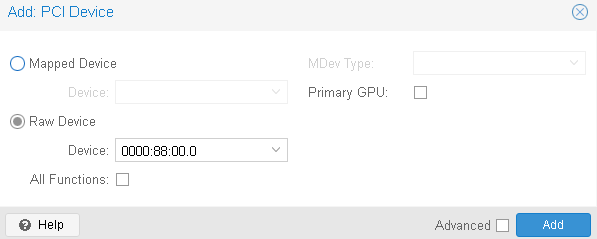
5. Edit Memory. Uncheck Ballooning Device. Click OK.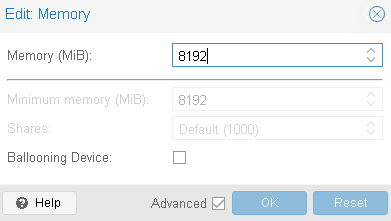
6. Start VM.
7. Repeat steps 1-6 on all nodes.
Initial Configuration Wizard
1. Start StarWind Virtual SAN CVM.
2. Launch VM console to see the VM boot process and get the IPv4 address of the Management network interface.
NOTE: in case VM has no IPv4 address obtained from a DHCP server, use the Text-based User Interface (TUI) to set up a Management network.
3. Using the web browser, open a new tab and enter the VM IPv4 address to open StarWind VSAN Web Interface. Click “Advanced” and then “Continue to…”

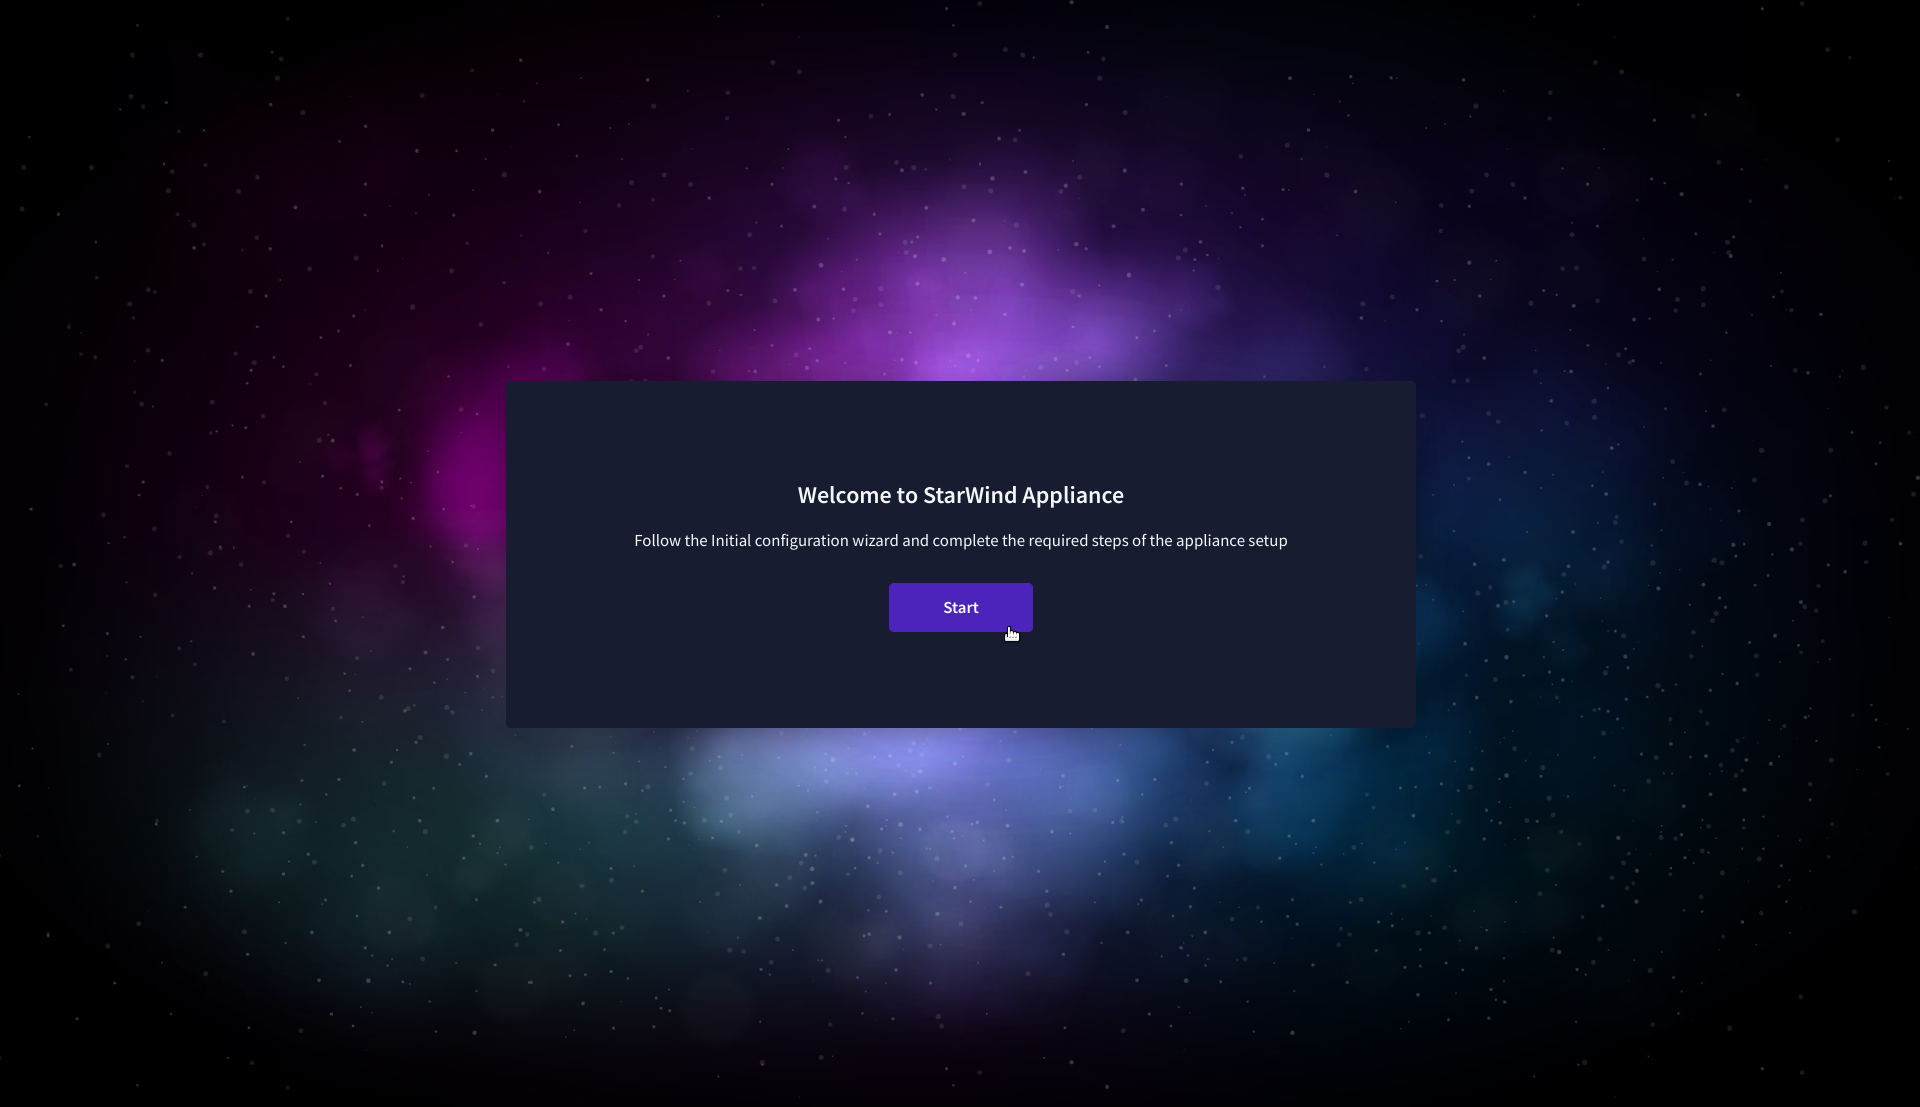
4. StarWind VSAN web UI welcomes you, and the “Initial Configuration” wizard will guide you through the deployment process.
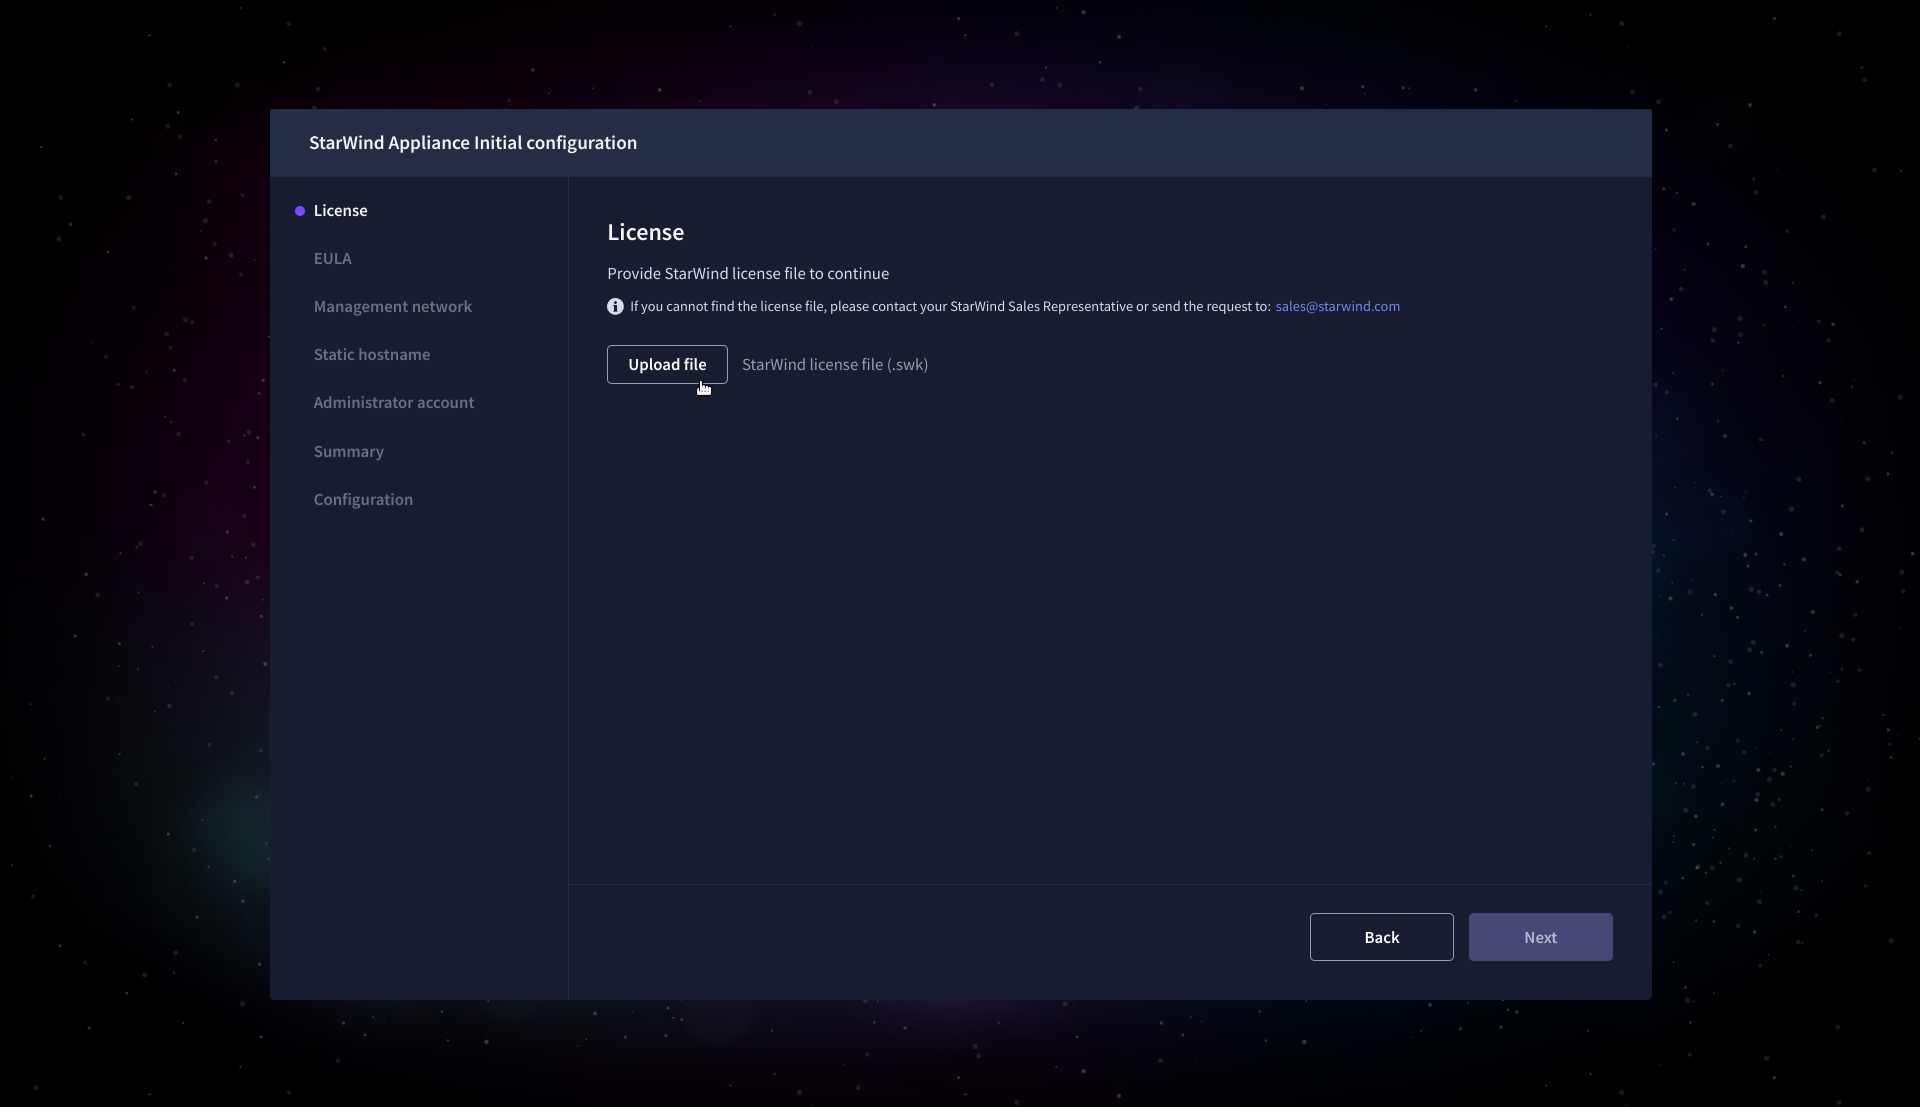
5. In the following step, upload the license file.
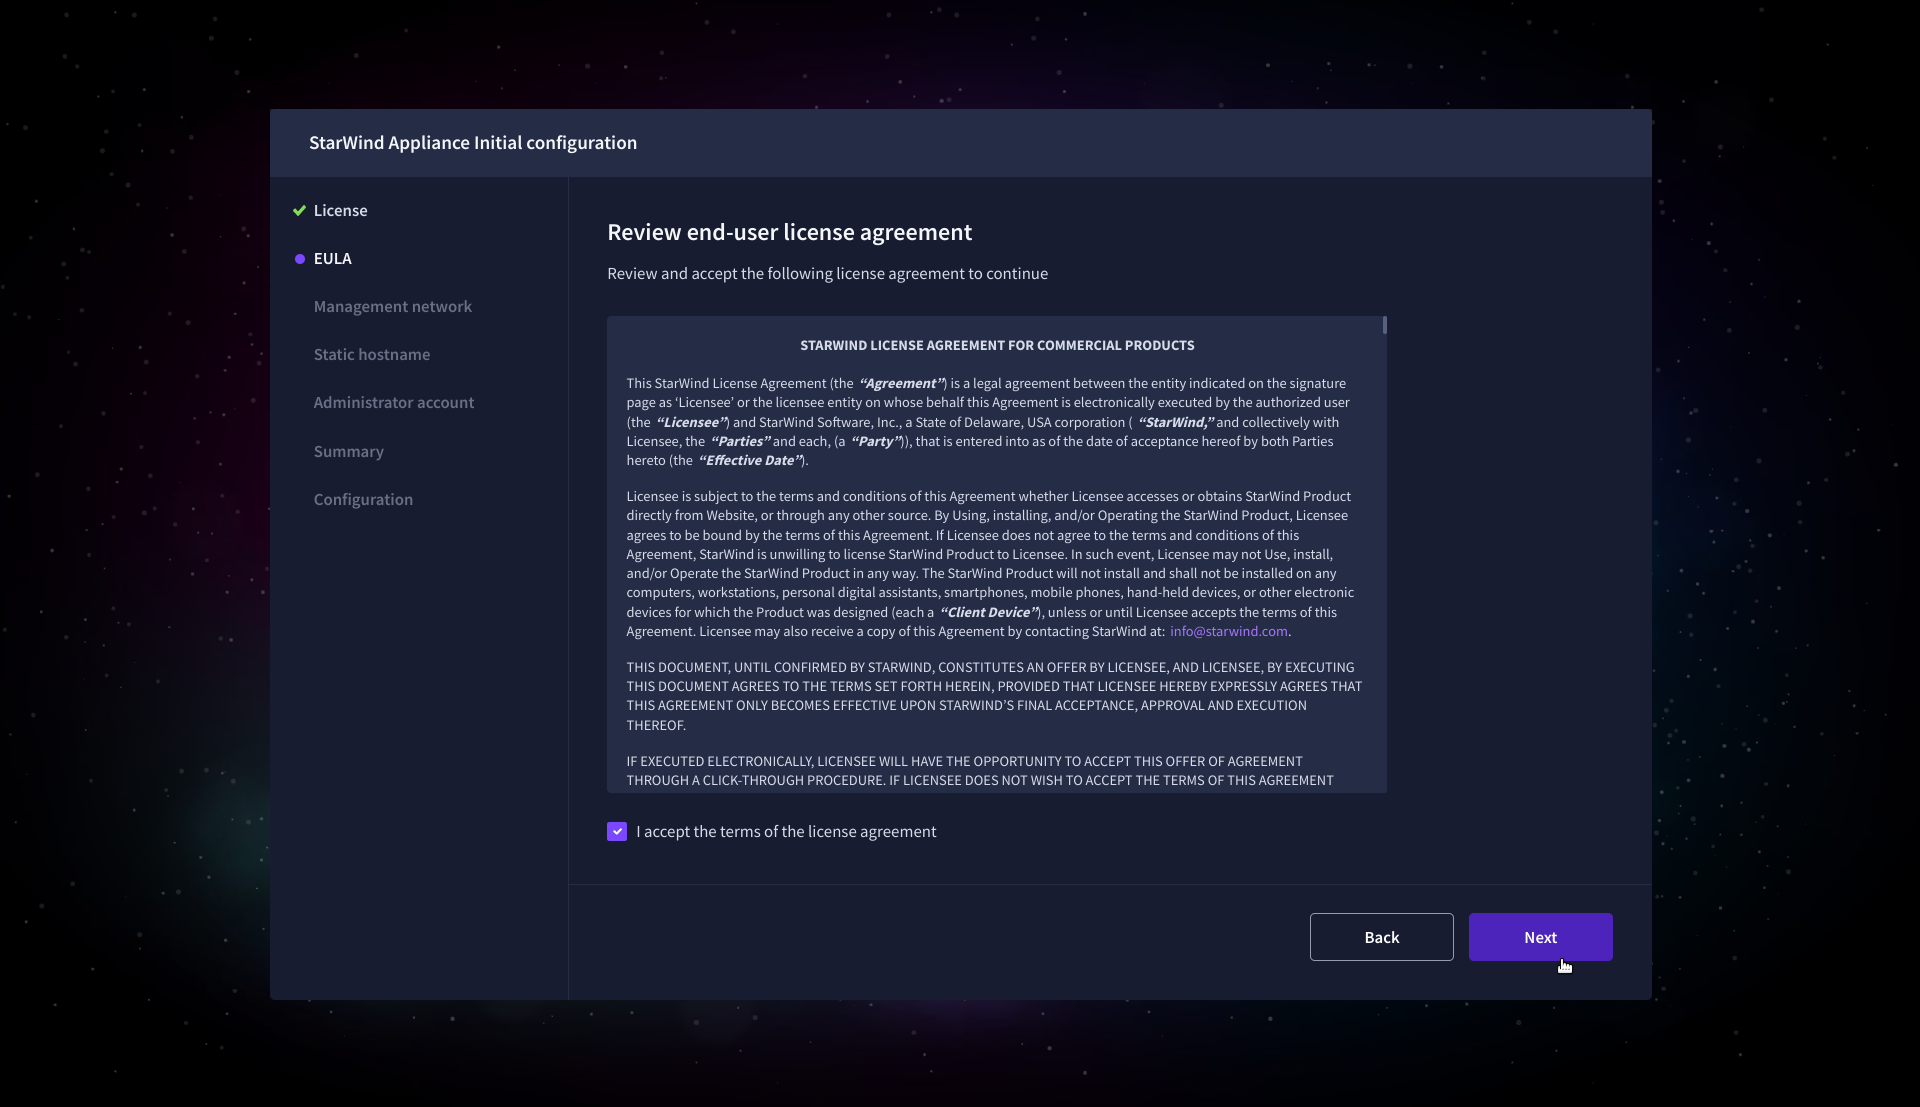
6. Read and accept the End User License Agreement to proceed.
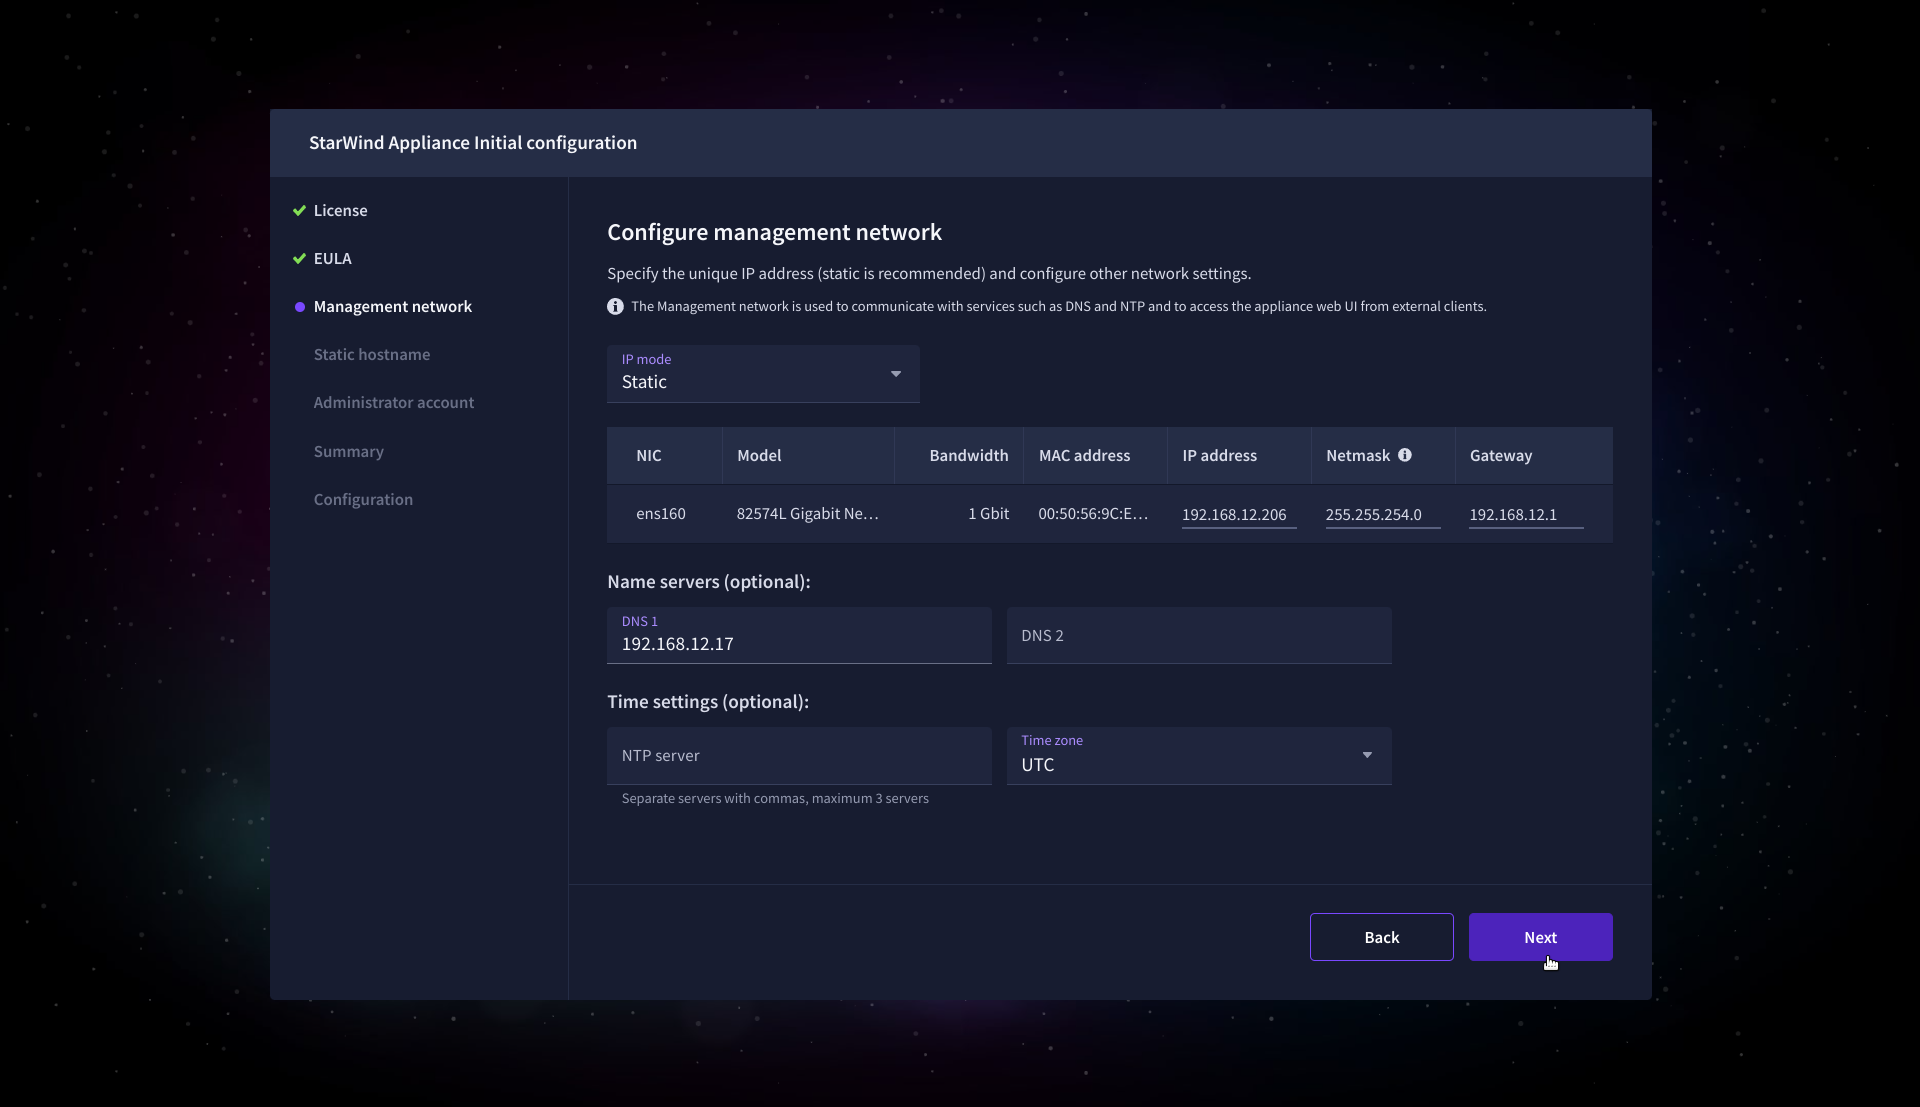
7. Review or edit the Network settings and click Next.
NOTE: Static network settings are recommended for the configuration.
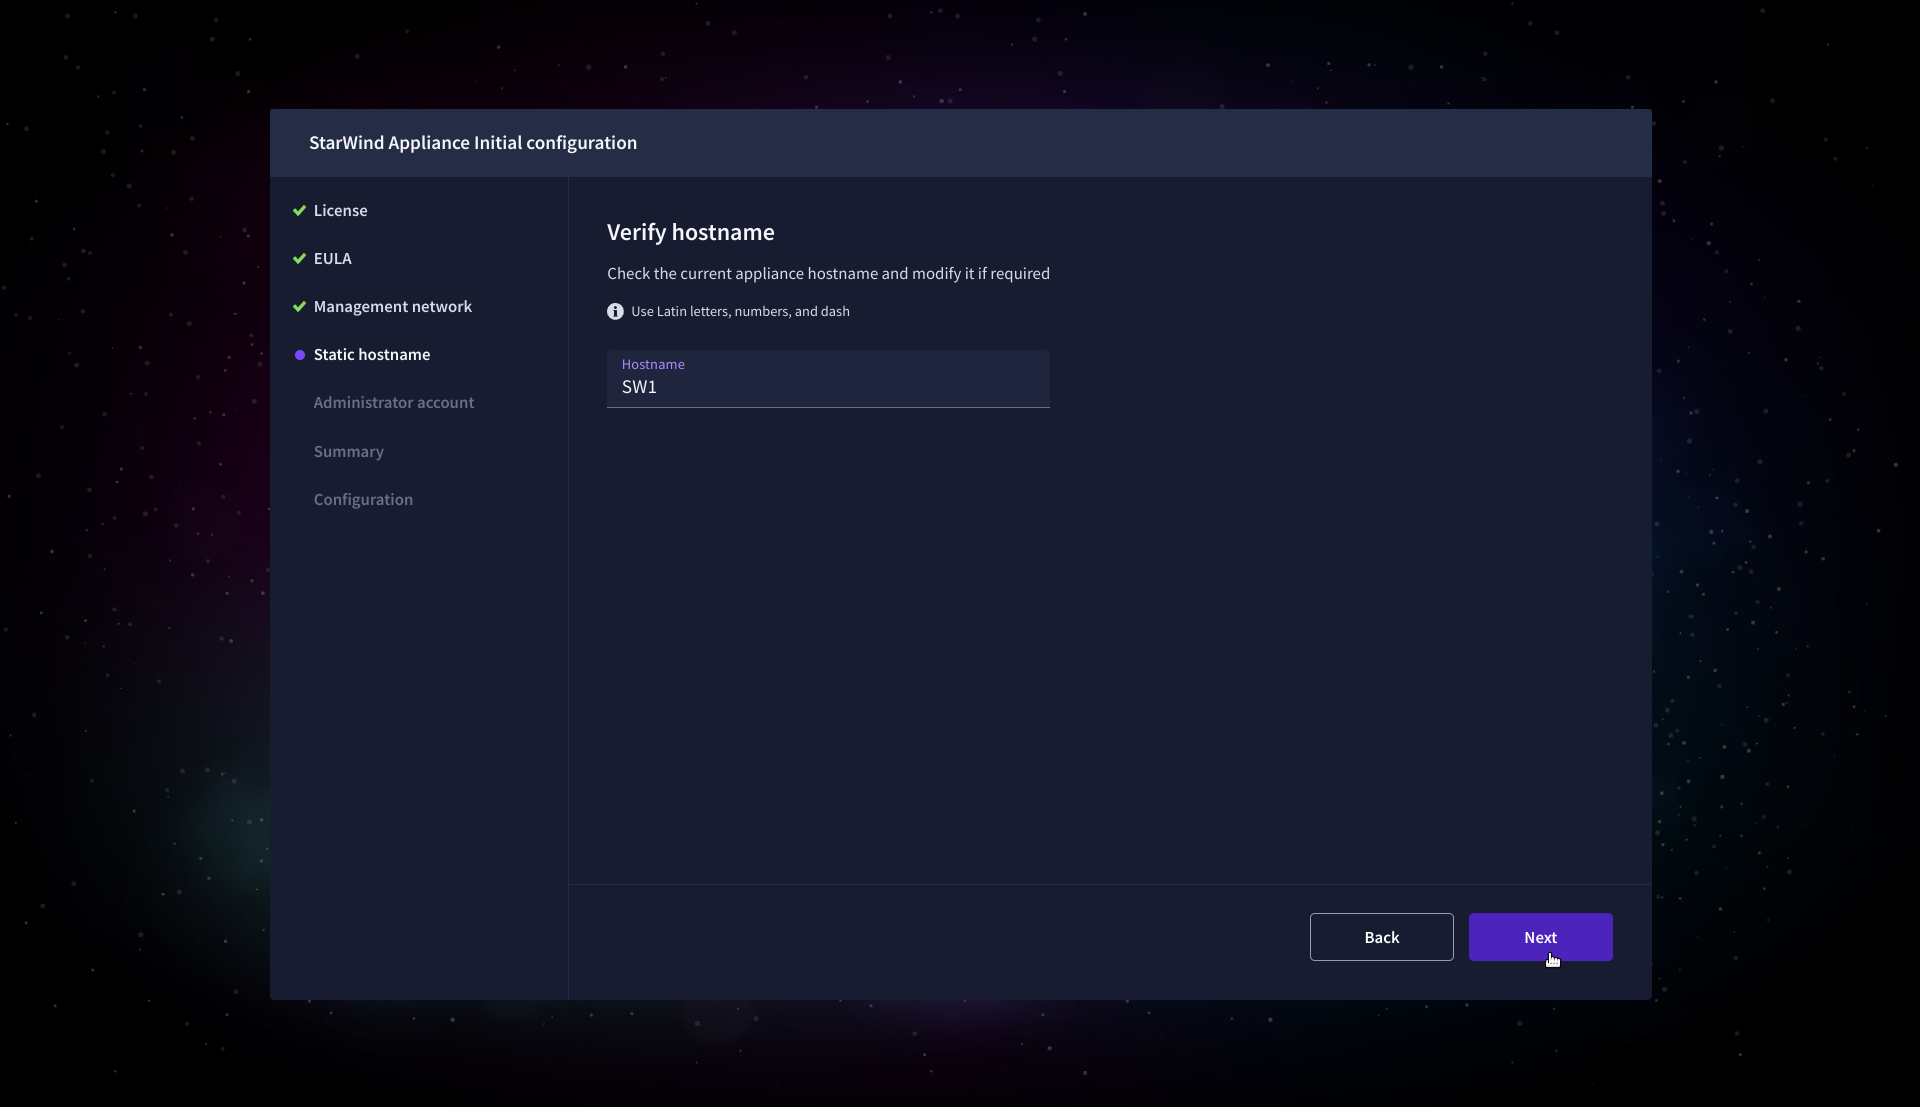
8. Specify the hostname for the virtual machine and click Next.
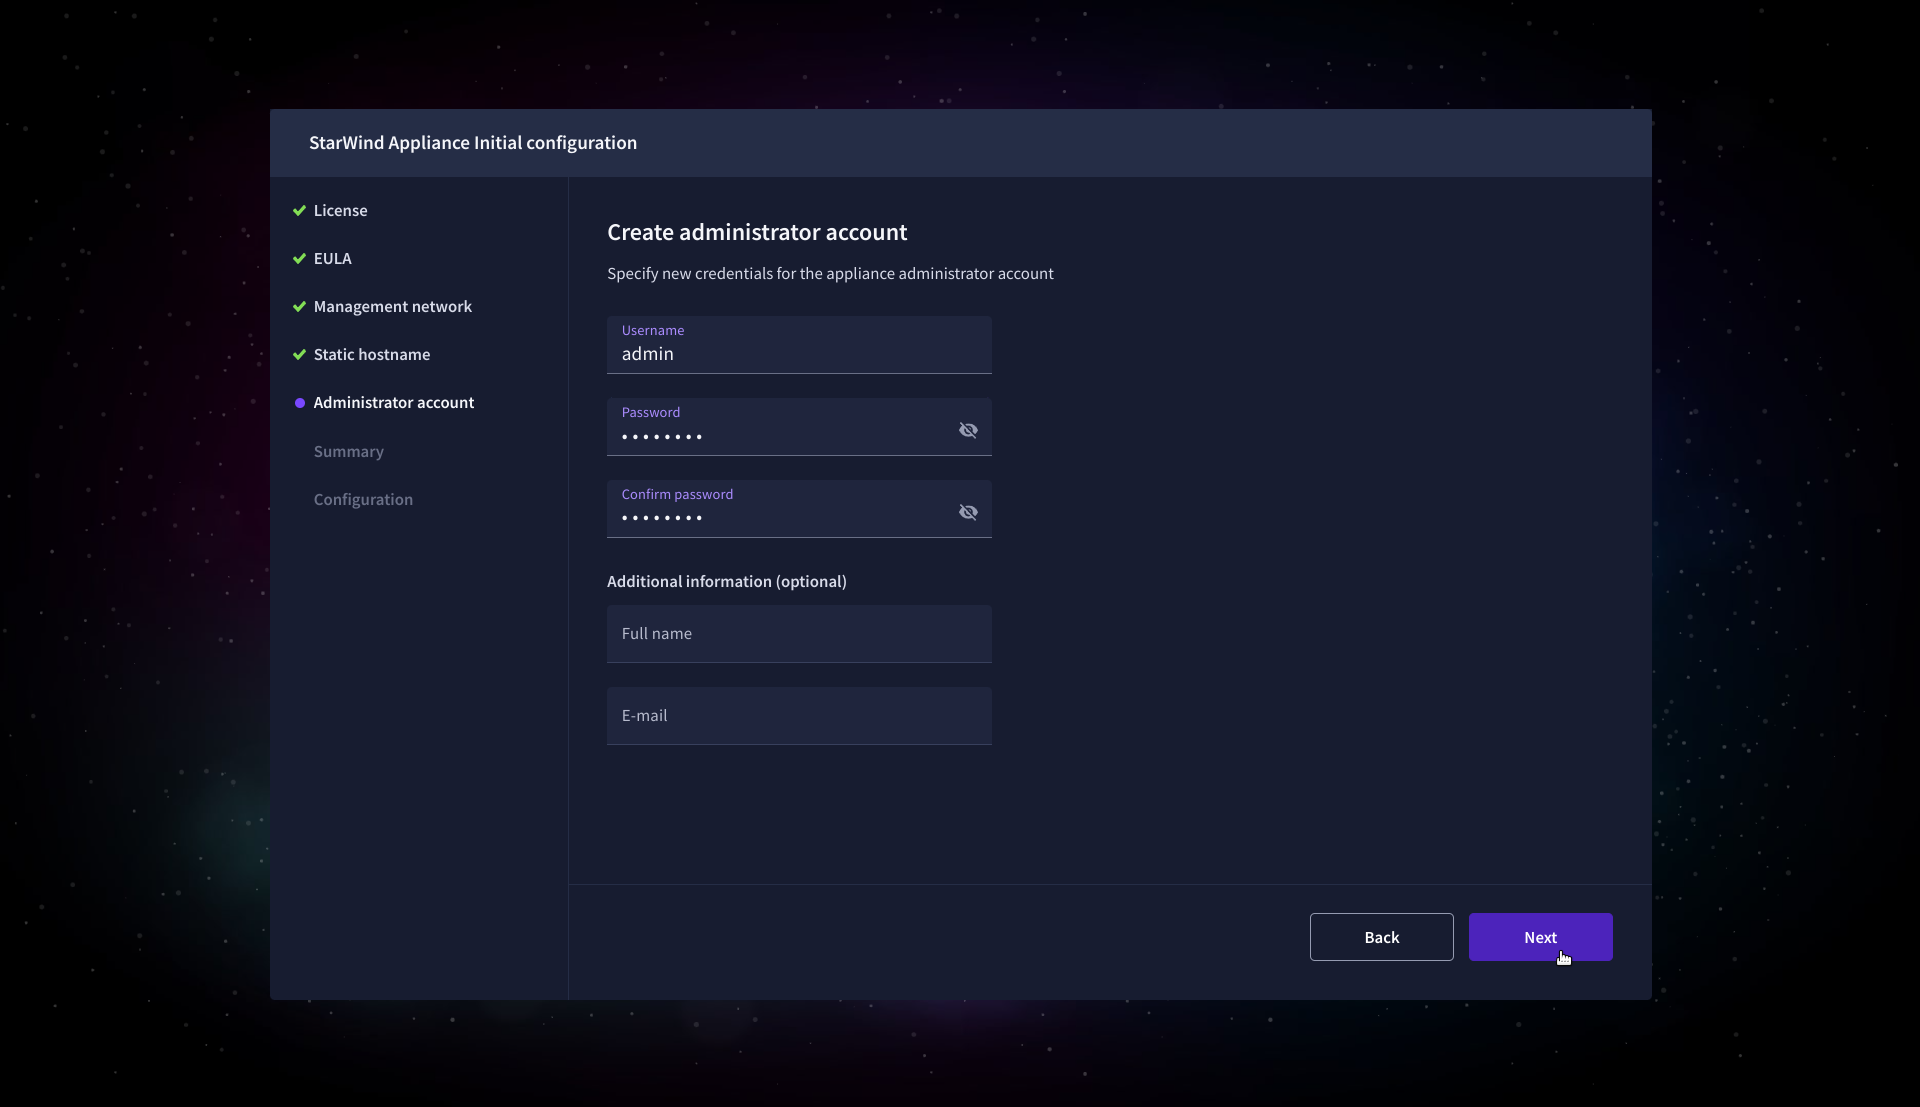
9. Create an administrator account. Click Next.
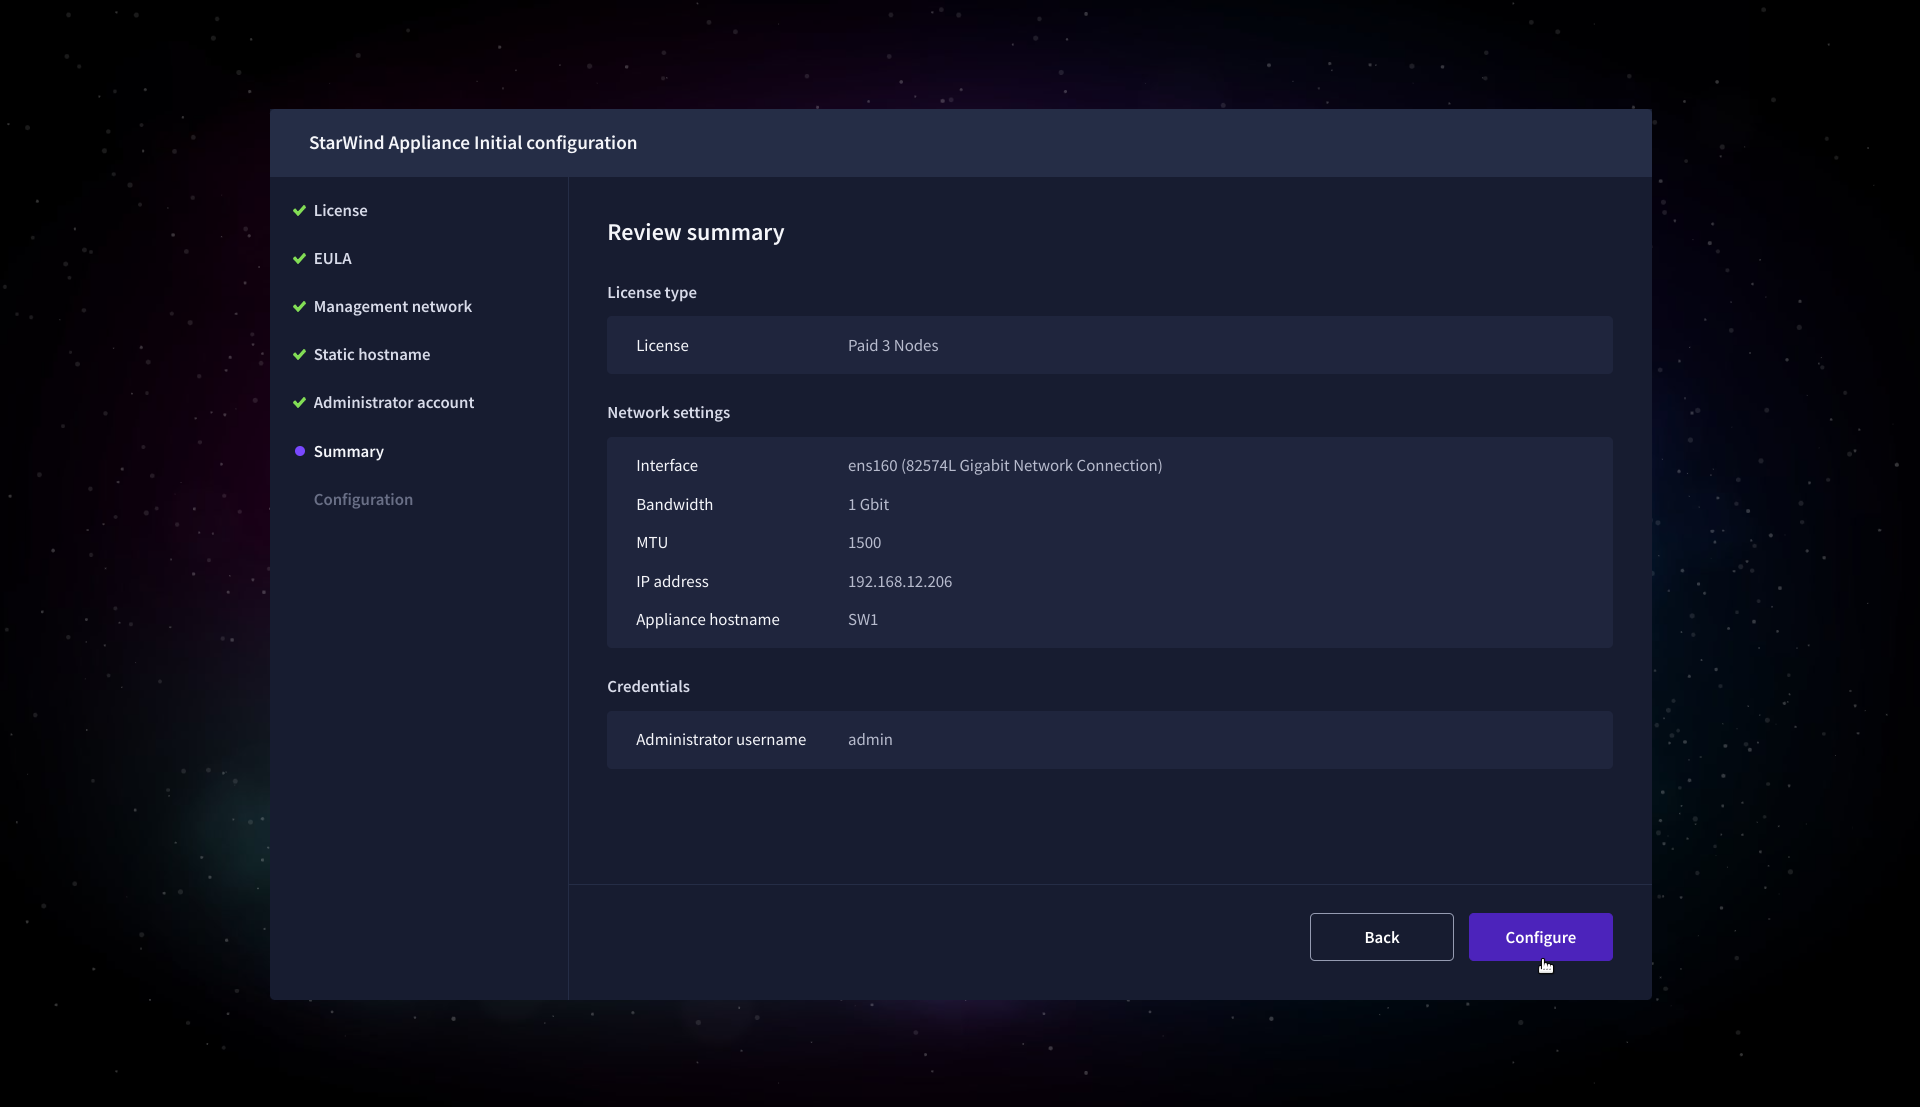
10. Review your settings selection before setting up StarWind VSAN.
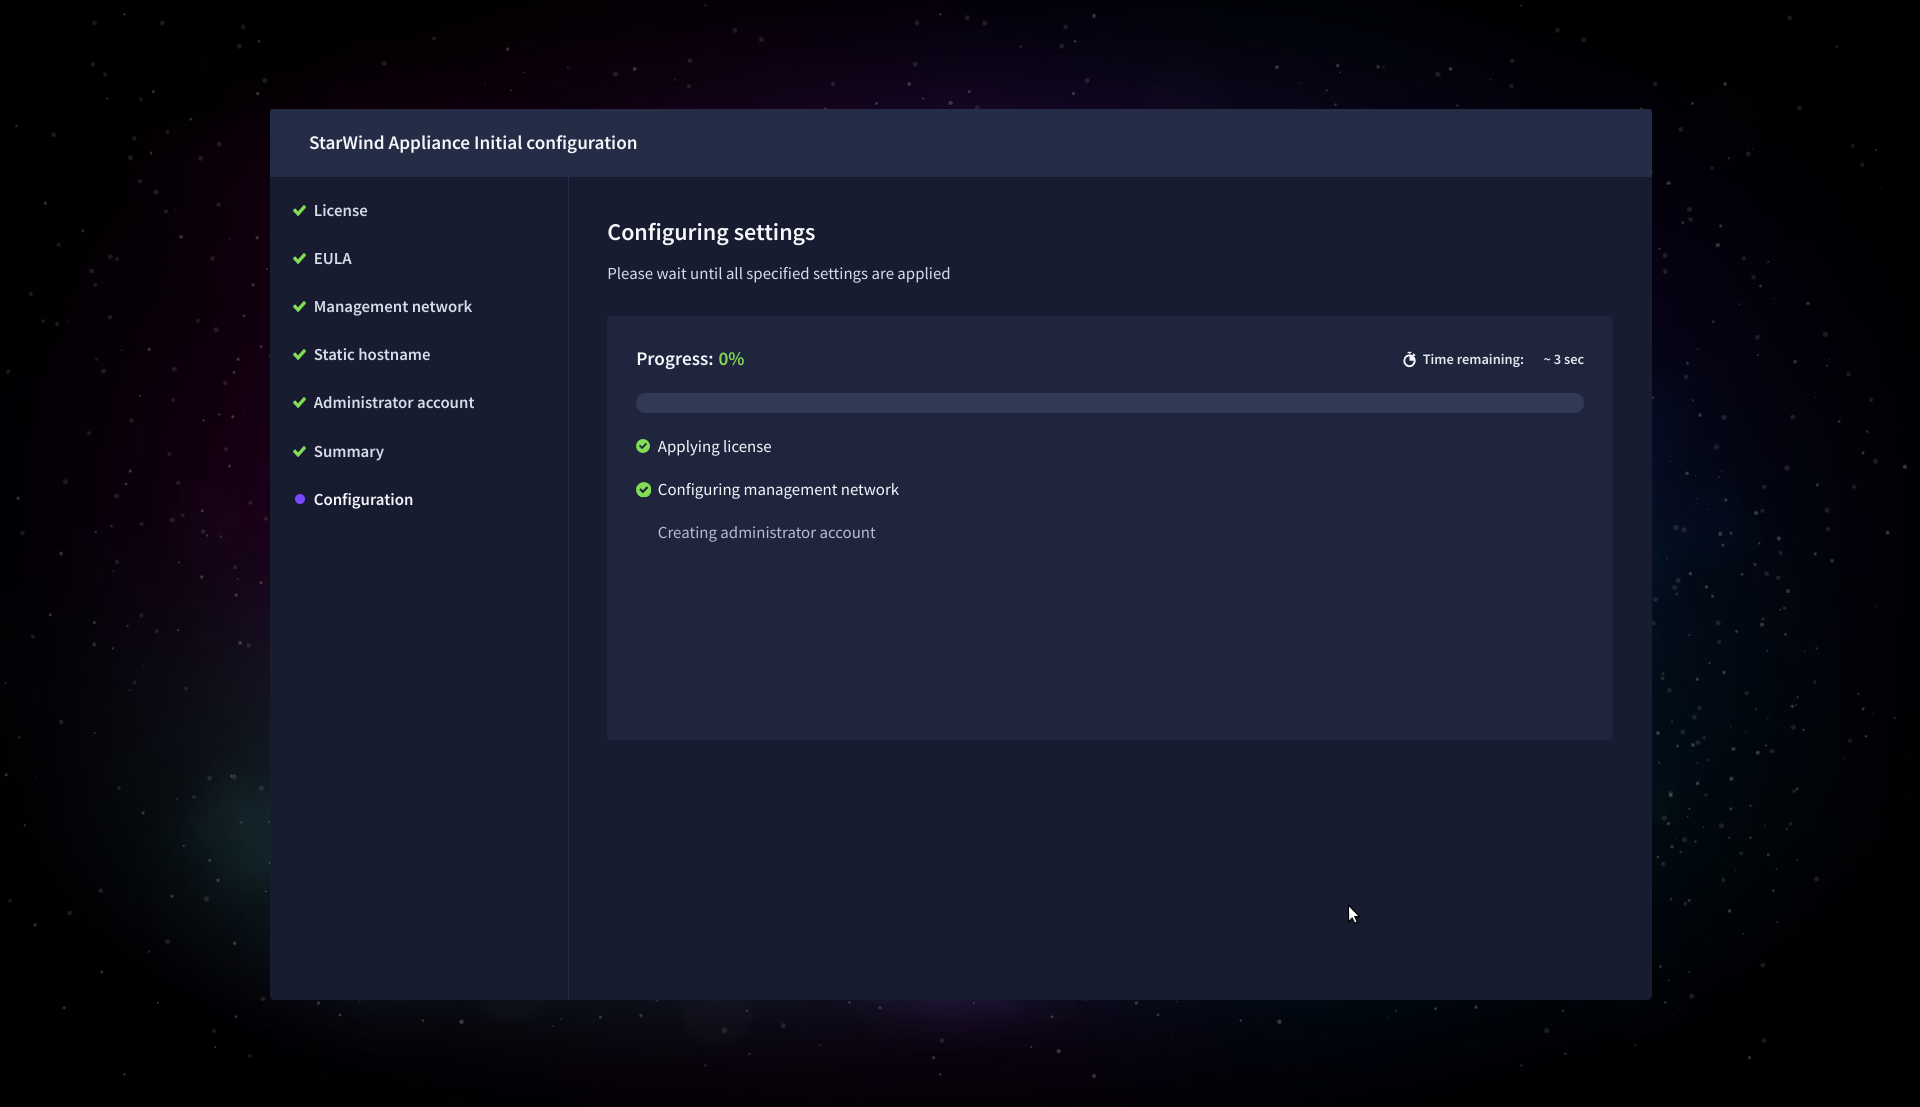
11. Please standby until the Initial Configuration Wizard configures StarWind VSAN for you.
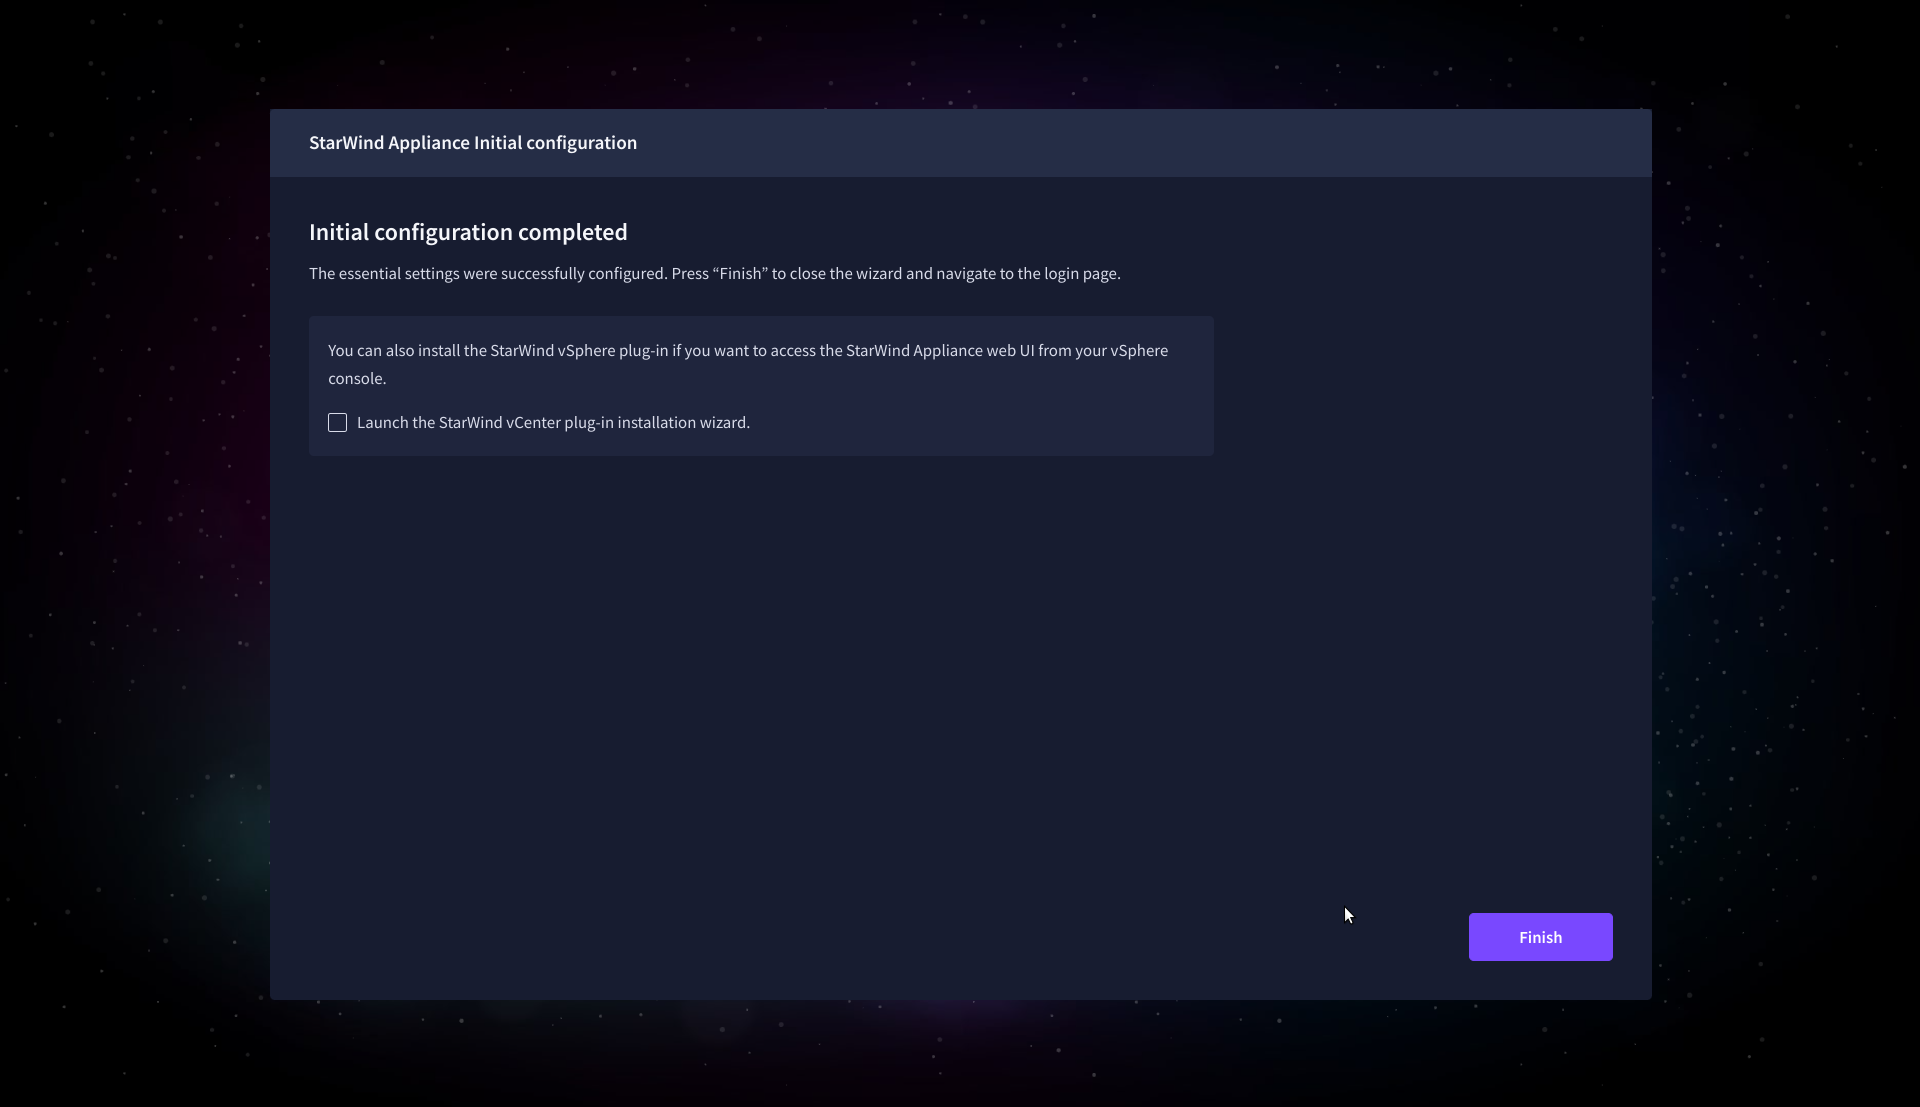
12. The appliance is set and ready. Click on the Done button to install the StarWind vCenter Plugin right now or uncheck the checkbox to skip this step and proceed to the Login page.
13. Repeat the initial configuration on other StarWind CVMs that will be used to create 2-node or 3-node HA shared storage.
Add Appliance
To create 2-way or 3-way synchronously replicated highly available storage, add partner appliances that use the same license key.
1. Add StarWind appliance(s) in the web console, on the Appliances page.
NOTE: The newly added appliance will be linked to already connected partners.
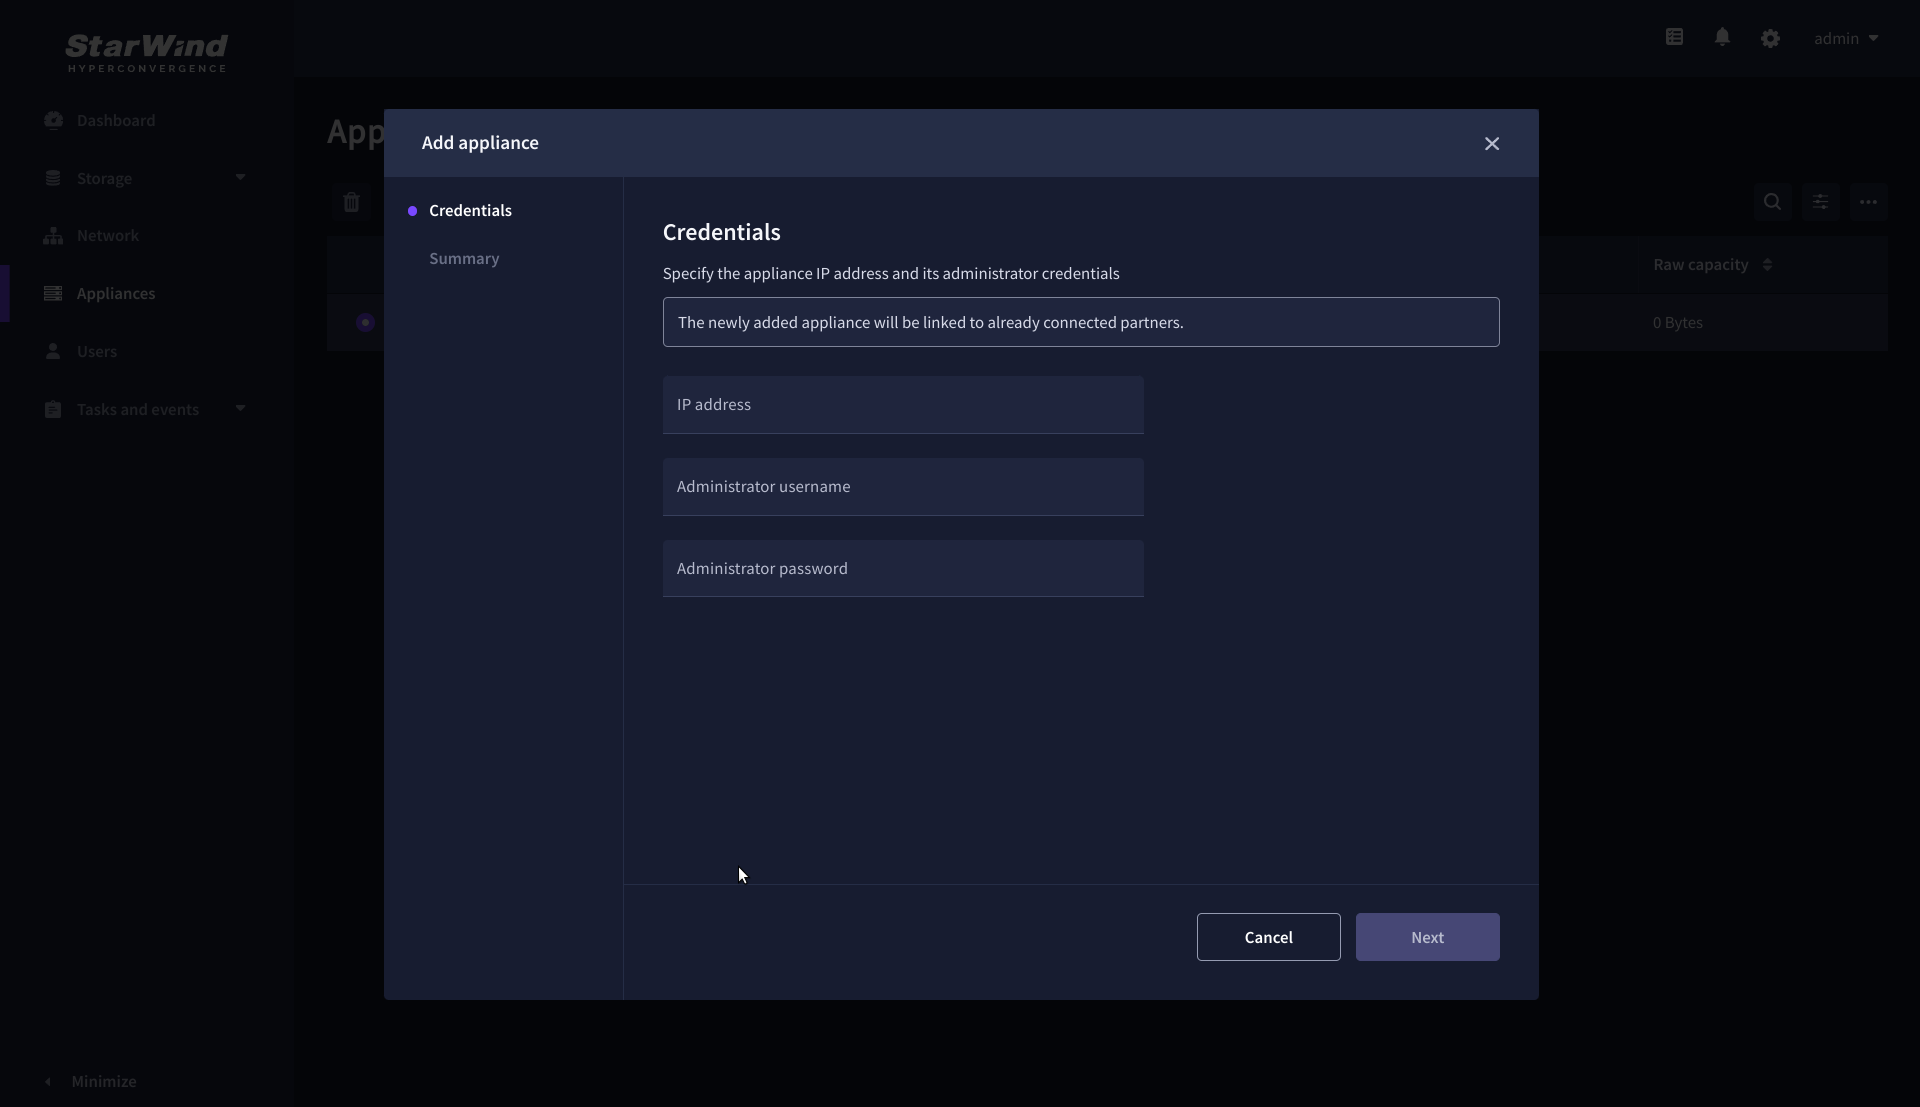
2. Provide credentials of partner appliance.
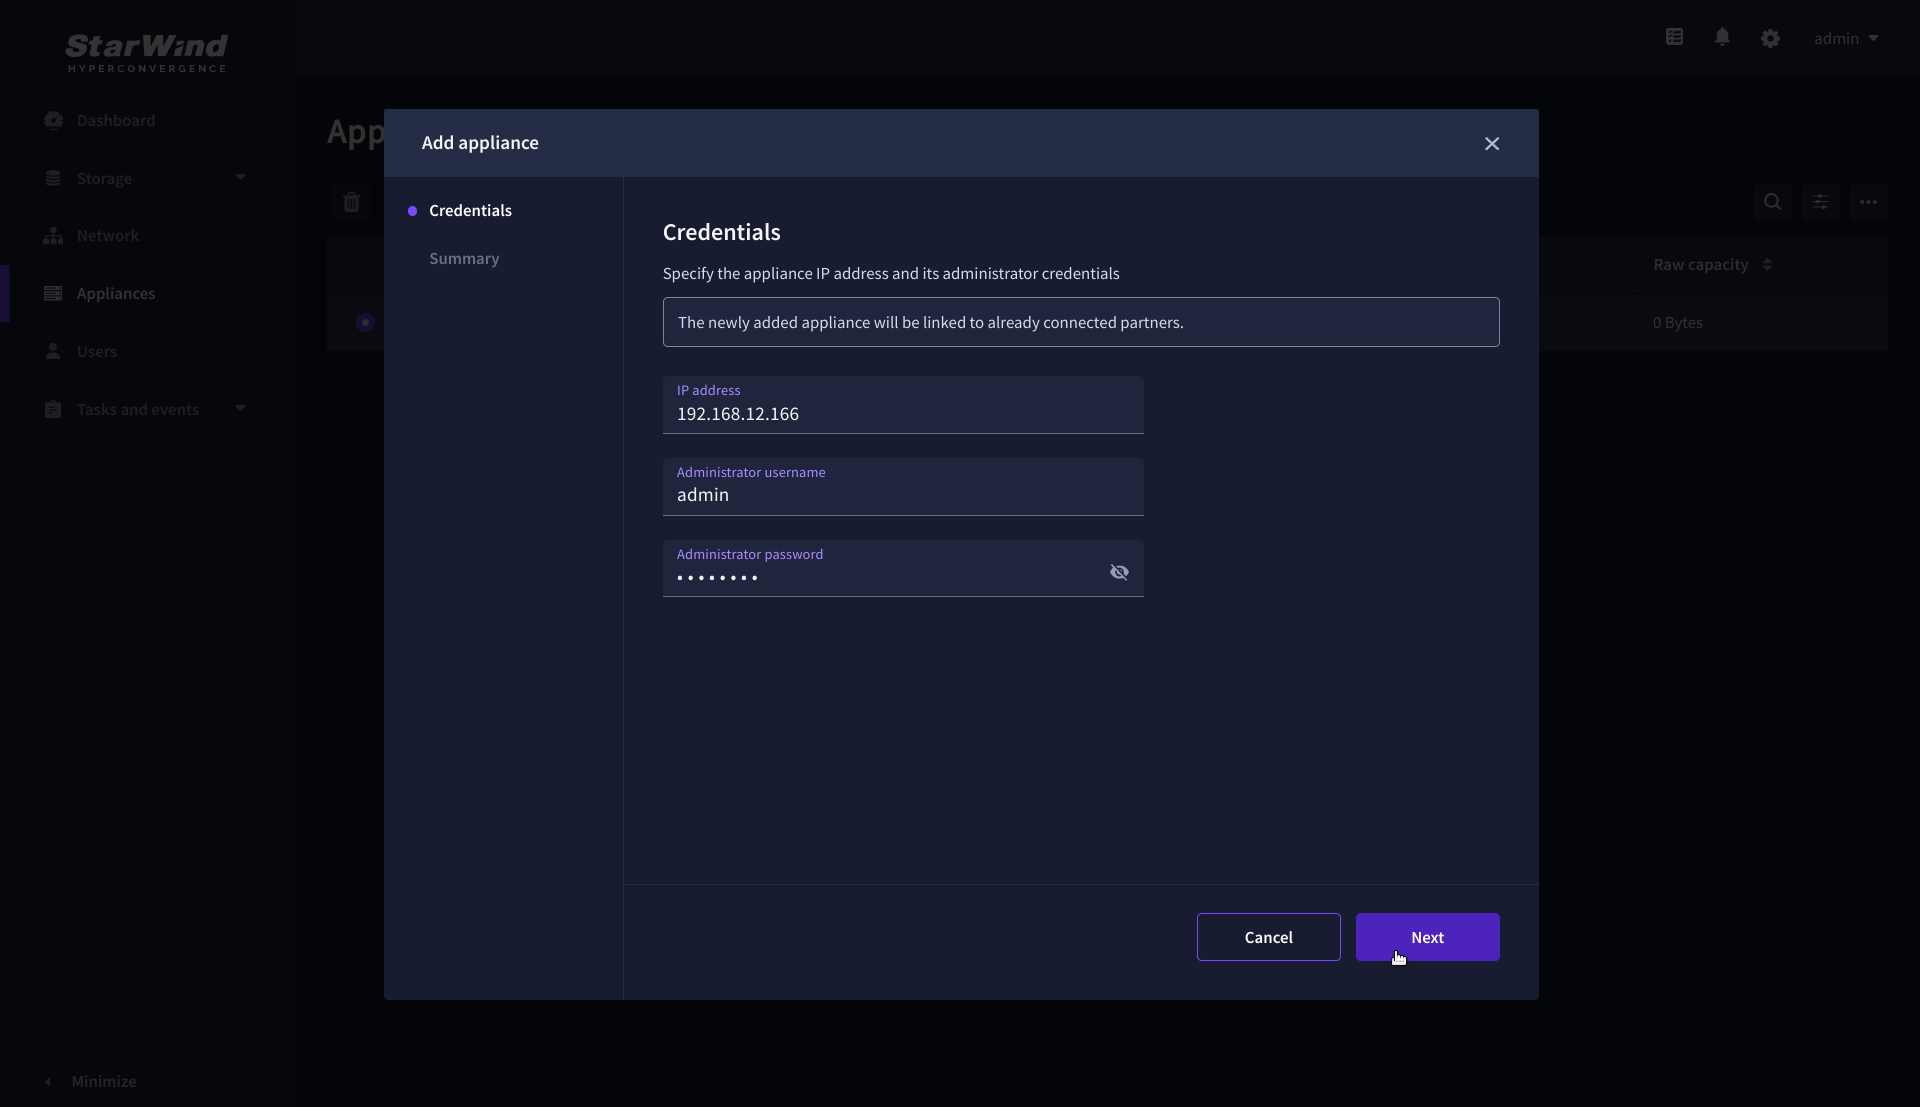
3. Wait for connection and validation of settings.
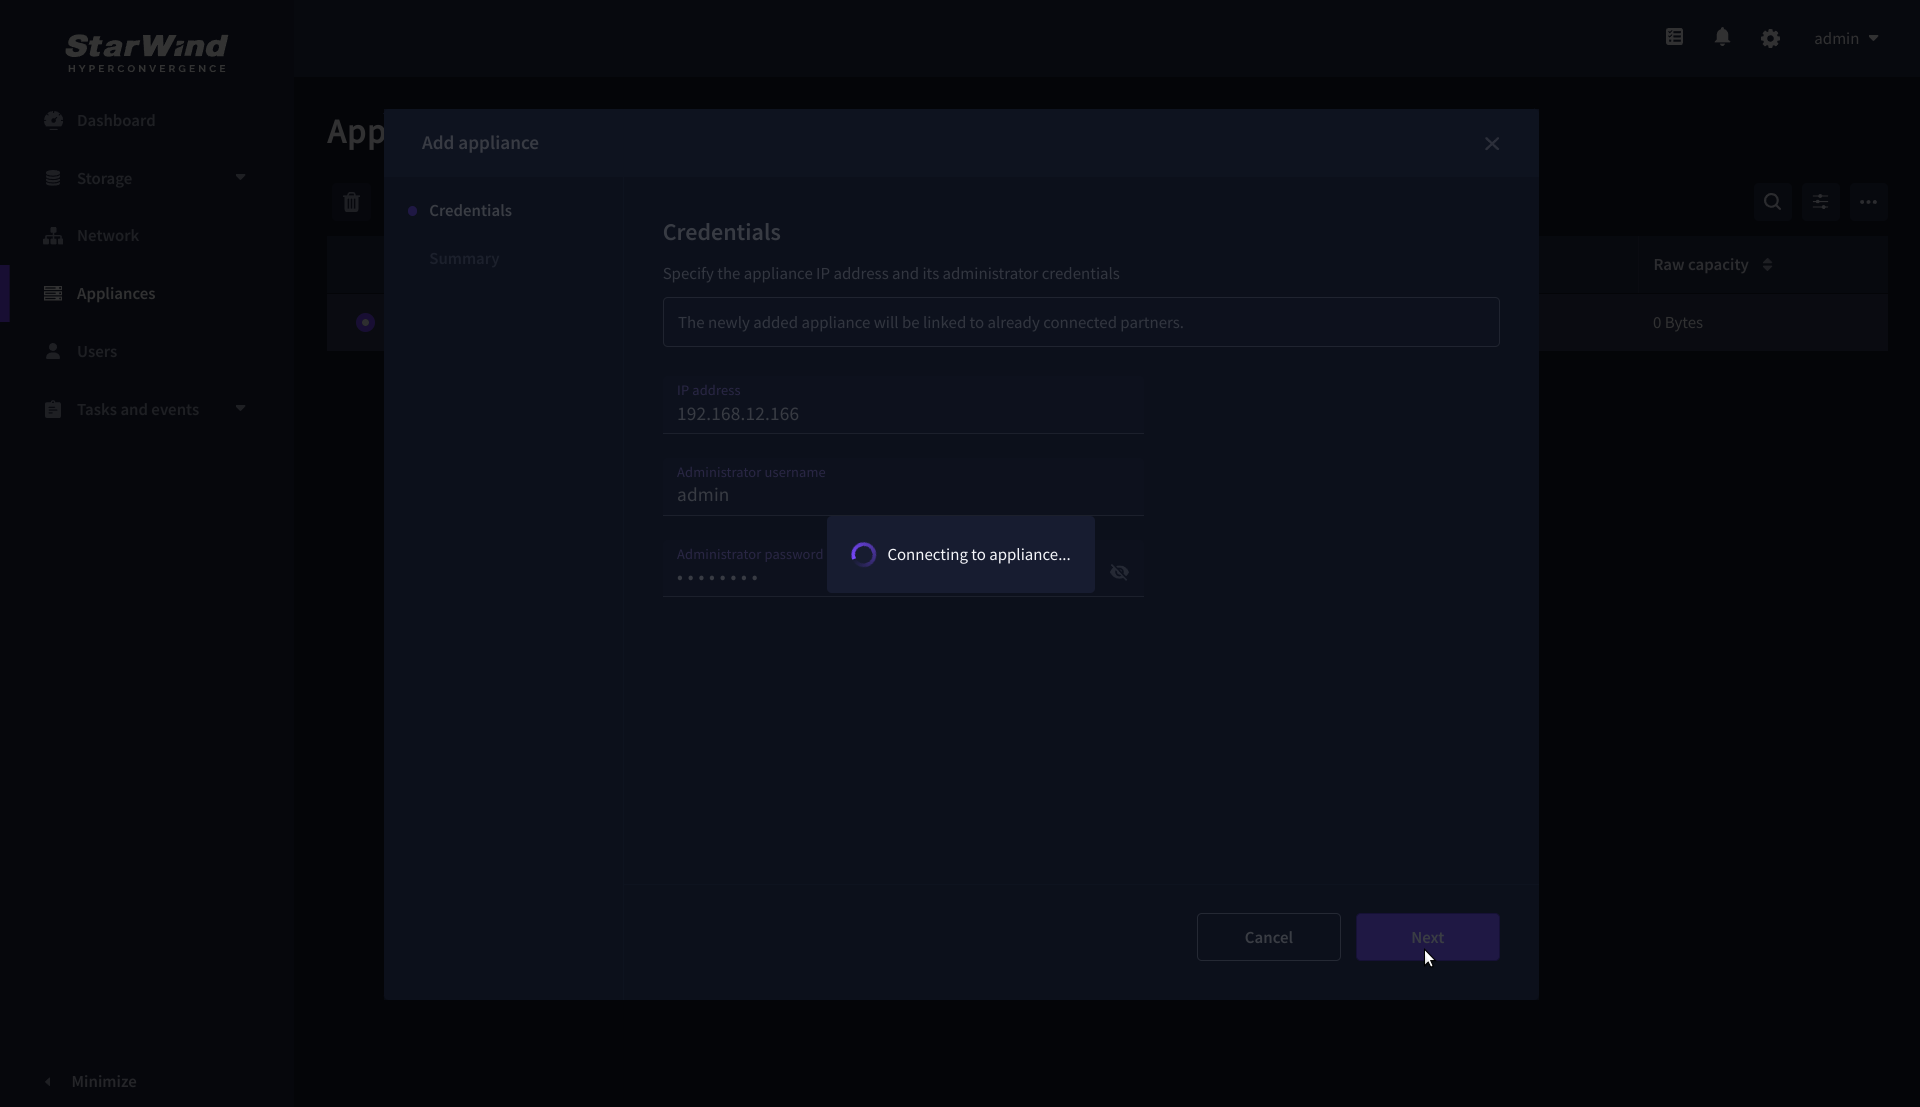
4. Review the summary and click “Add appliance”.
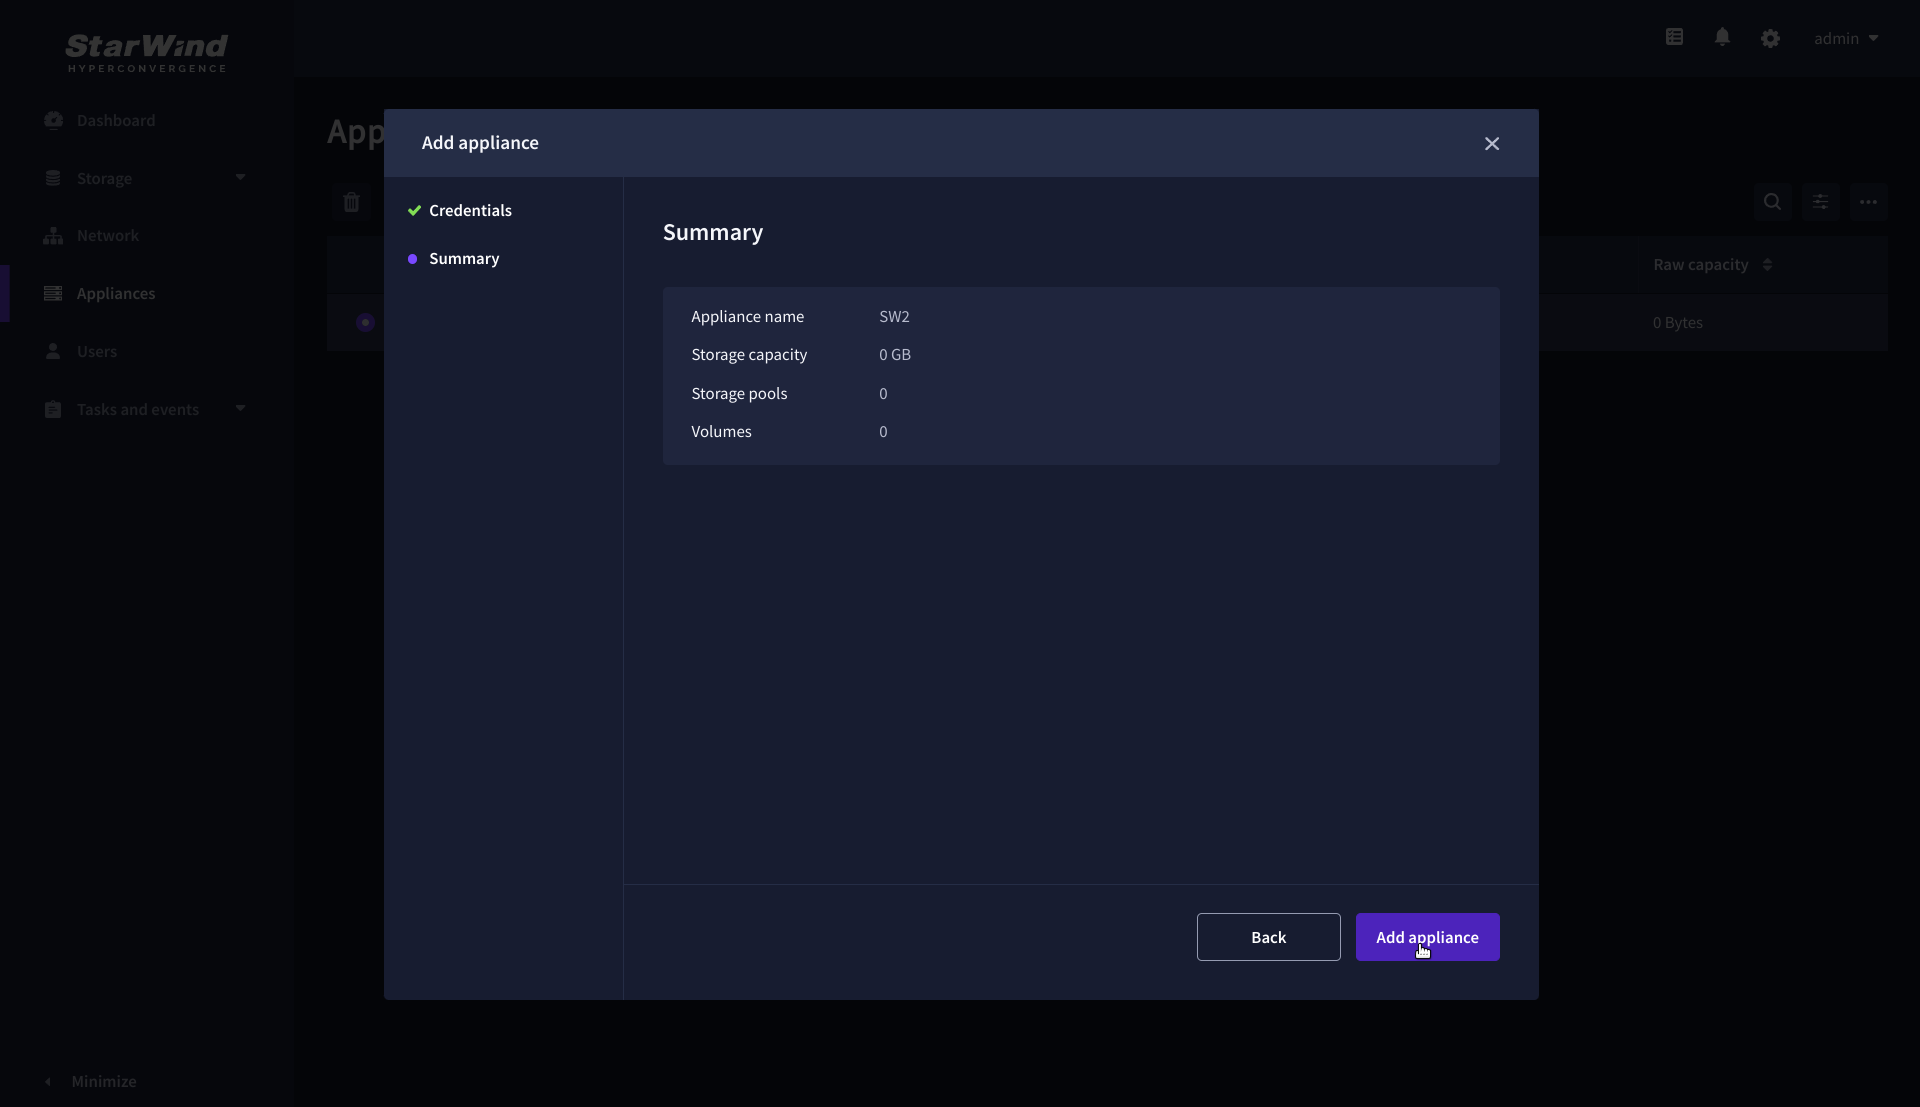
Configure HA networking
1. Launch the “Configure HA Networking” wizard.
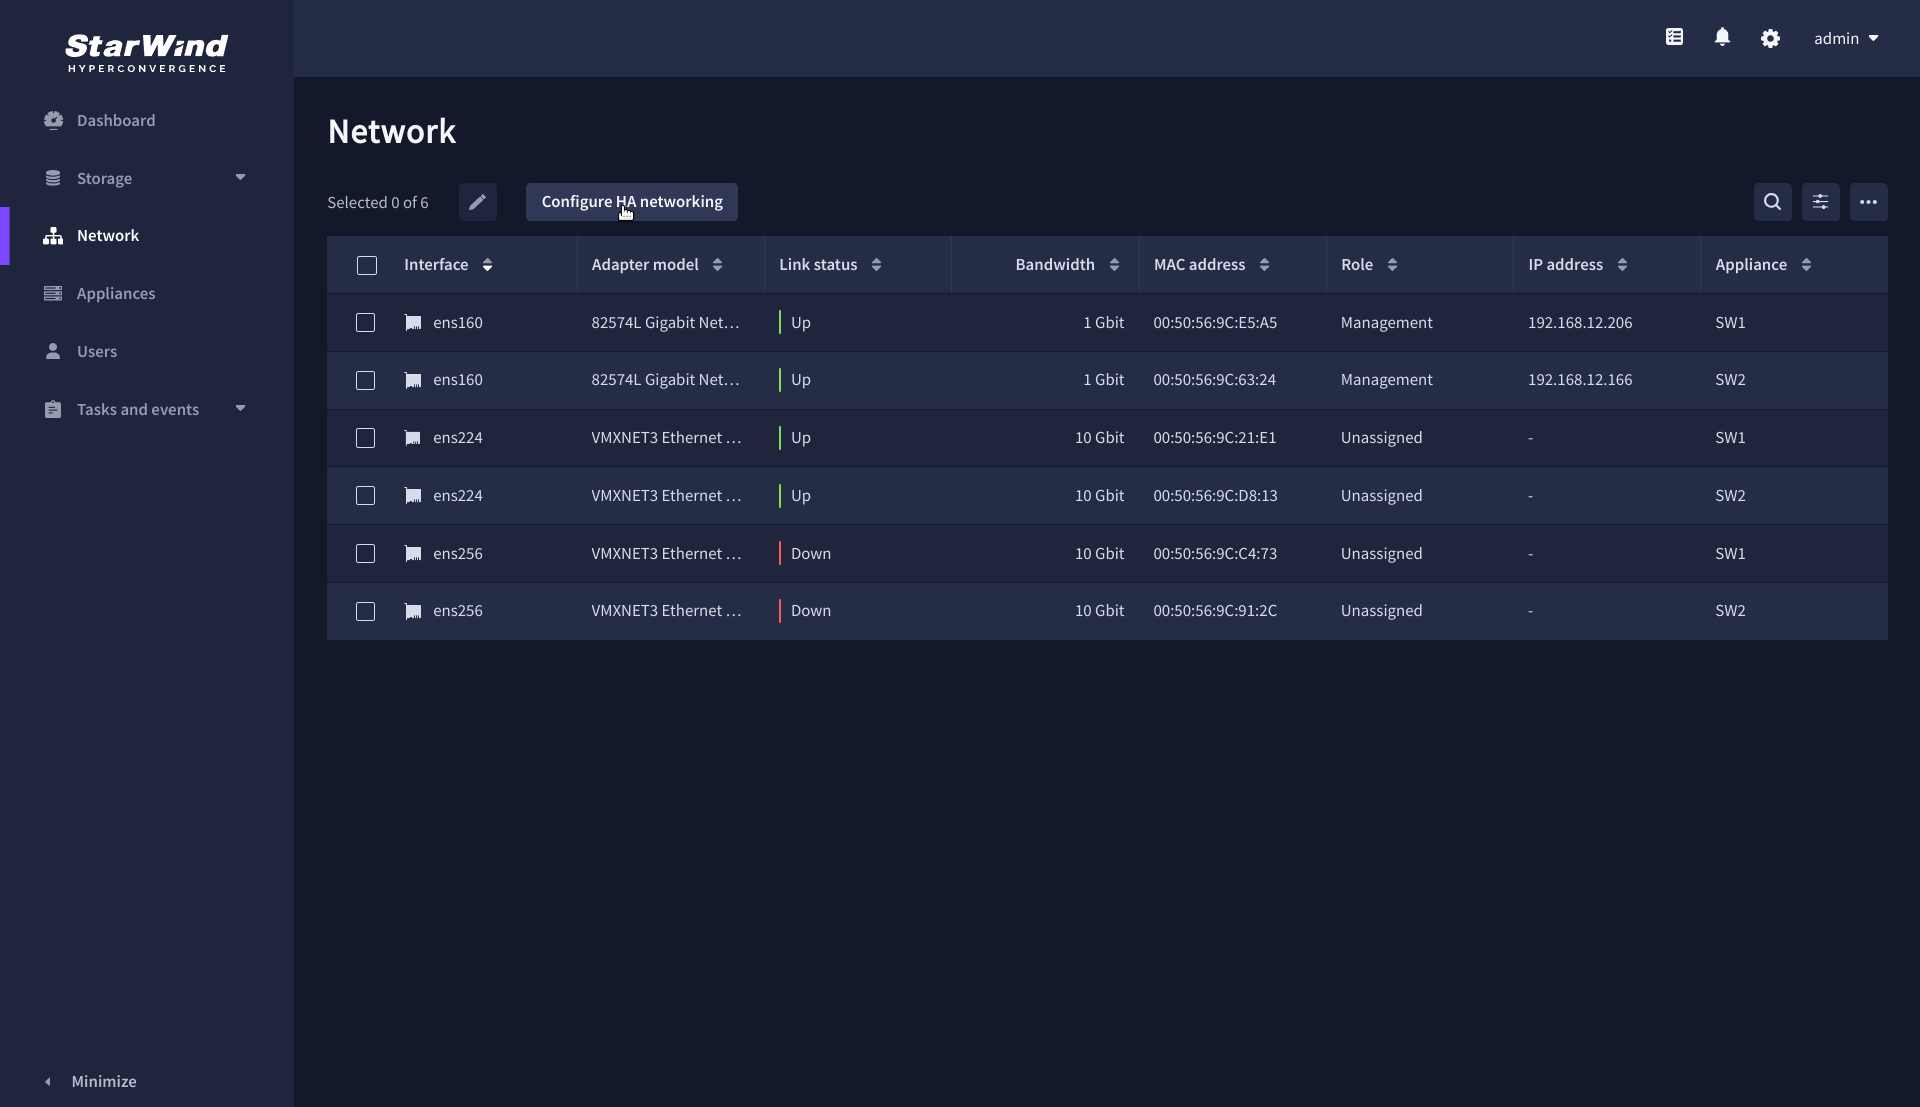
2. Select appliances for network configuration.
NOTE: the number of appliances to select is limited by your license, so can be either two or three appliances at a time.
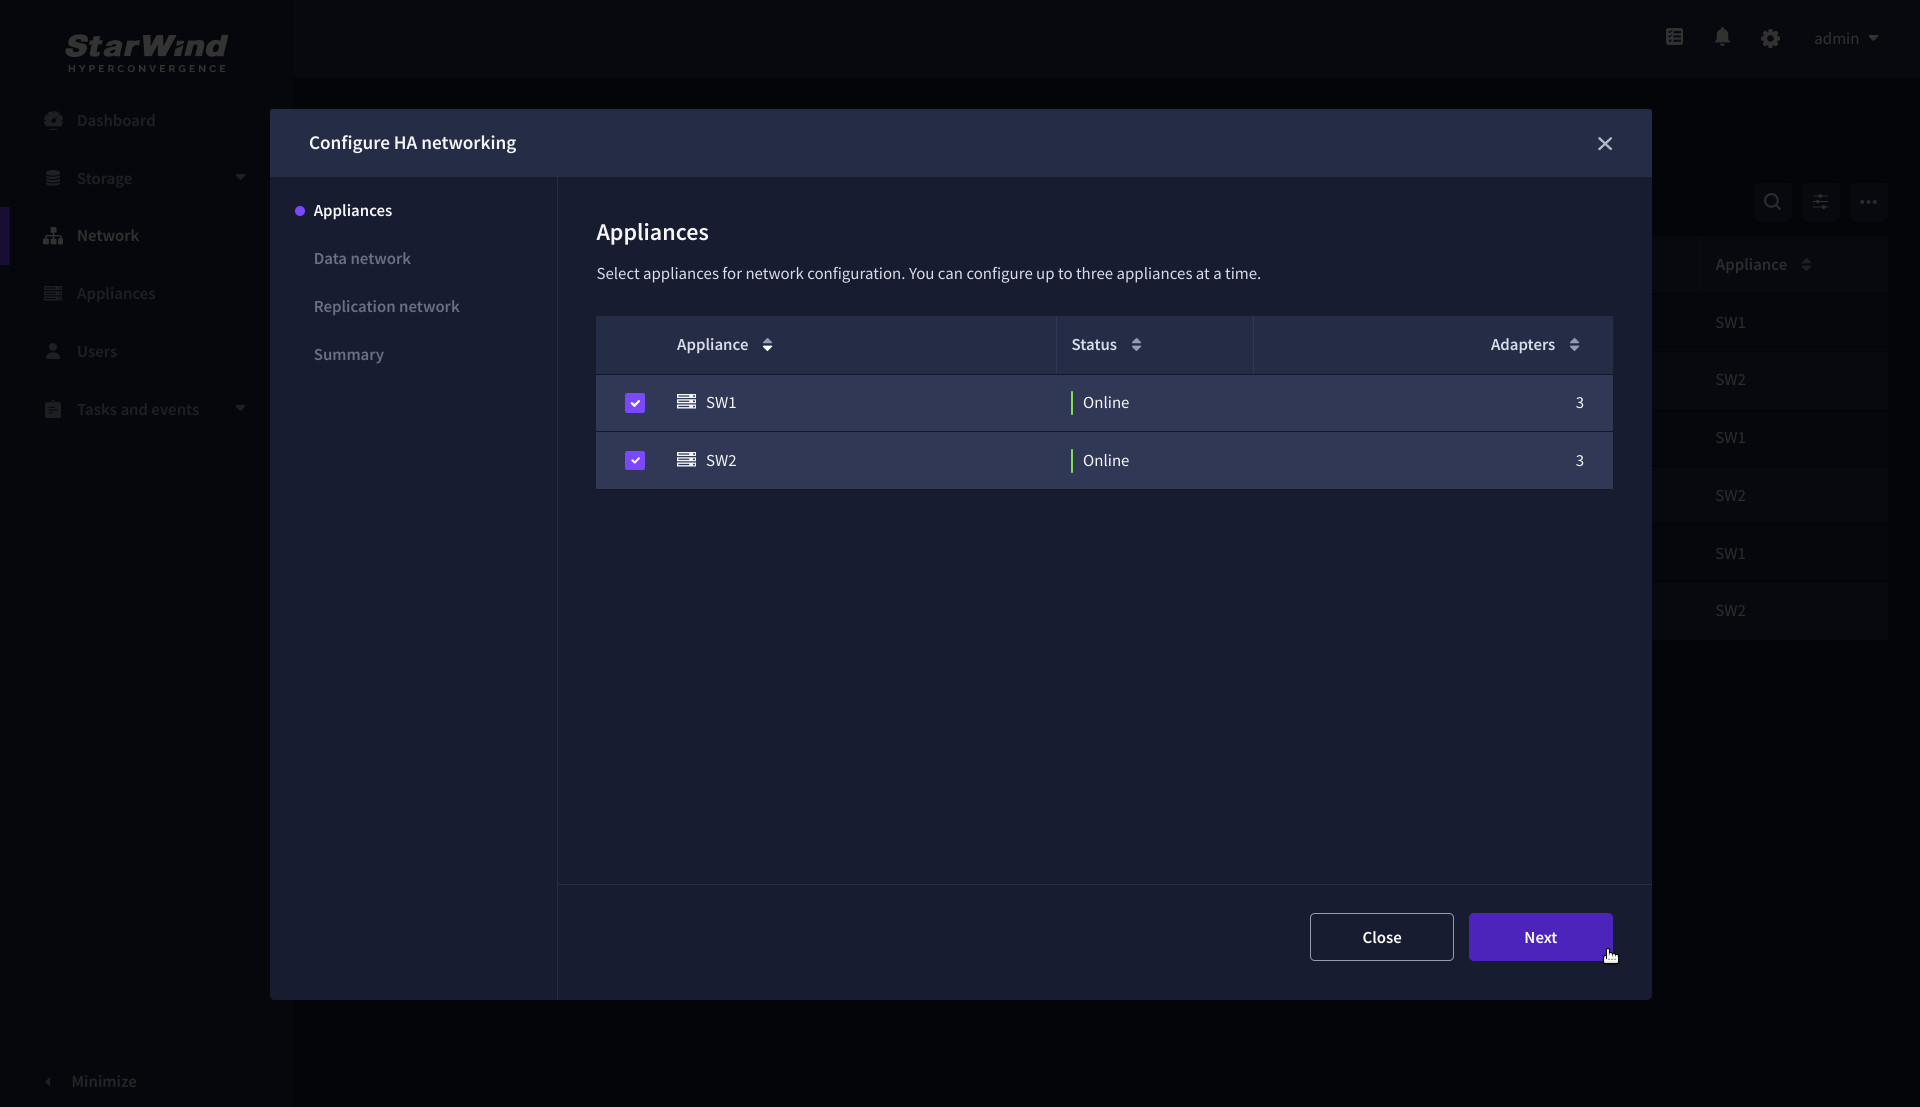
3. Configure the “Data” network. Select interfaces to carry storage traffic, configure them with static IP addresses in unique networks, and specify subnet masks:
- assign and configure at least one interface on each node
- for redundant configuration, select two interfaces on each node
- ensure interfaces are connected to client hosts directly or through redundant switches
4. Assign MTU value to all selected network adapters, e.g. 1500 or 9000. Ensure the switches have the same MTU value set.

5. Click Next to validate Data network settings.
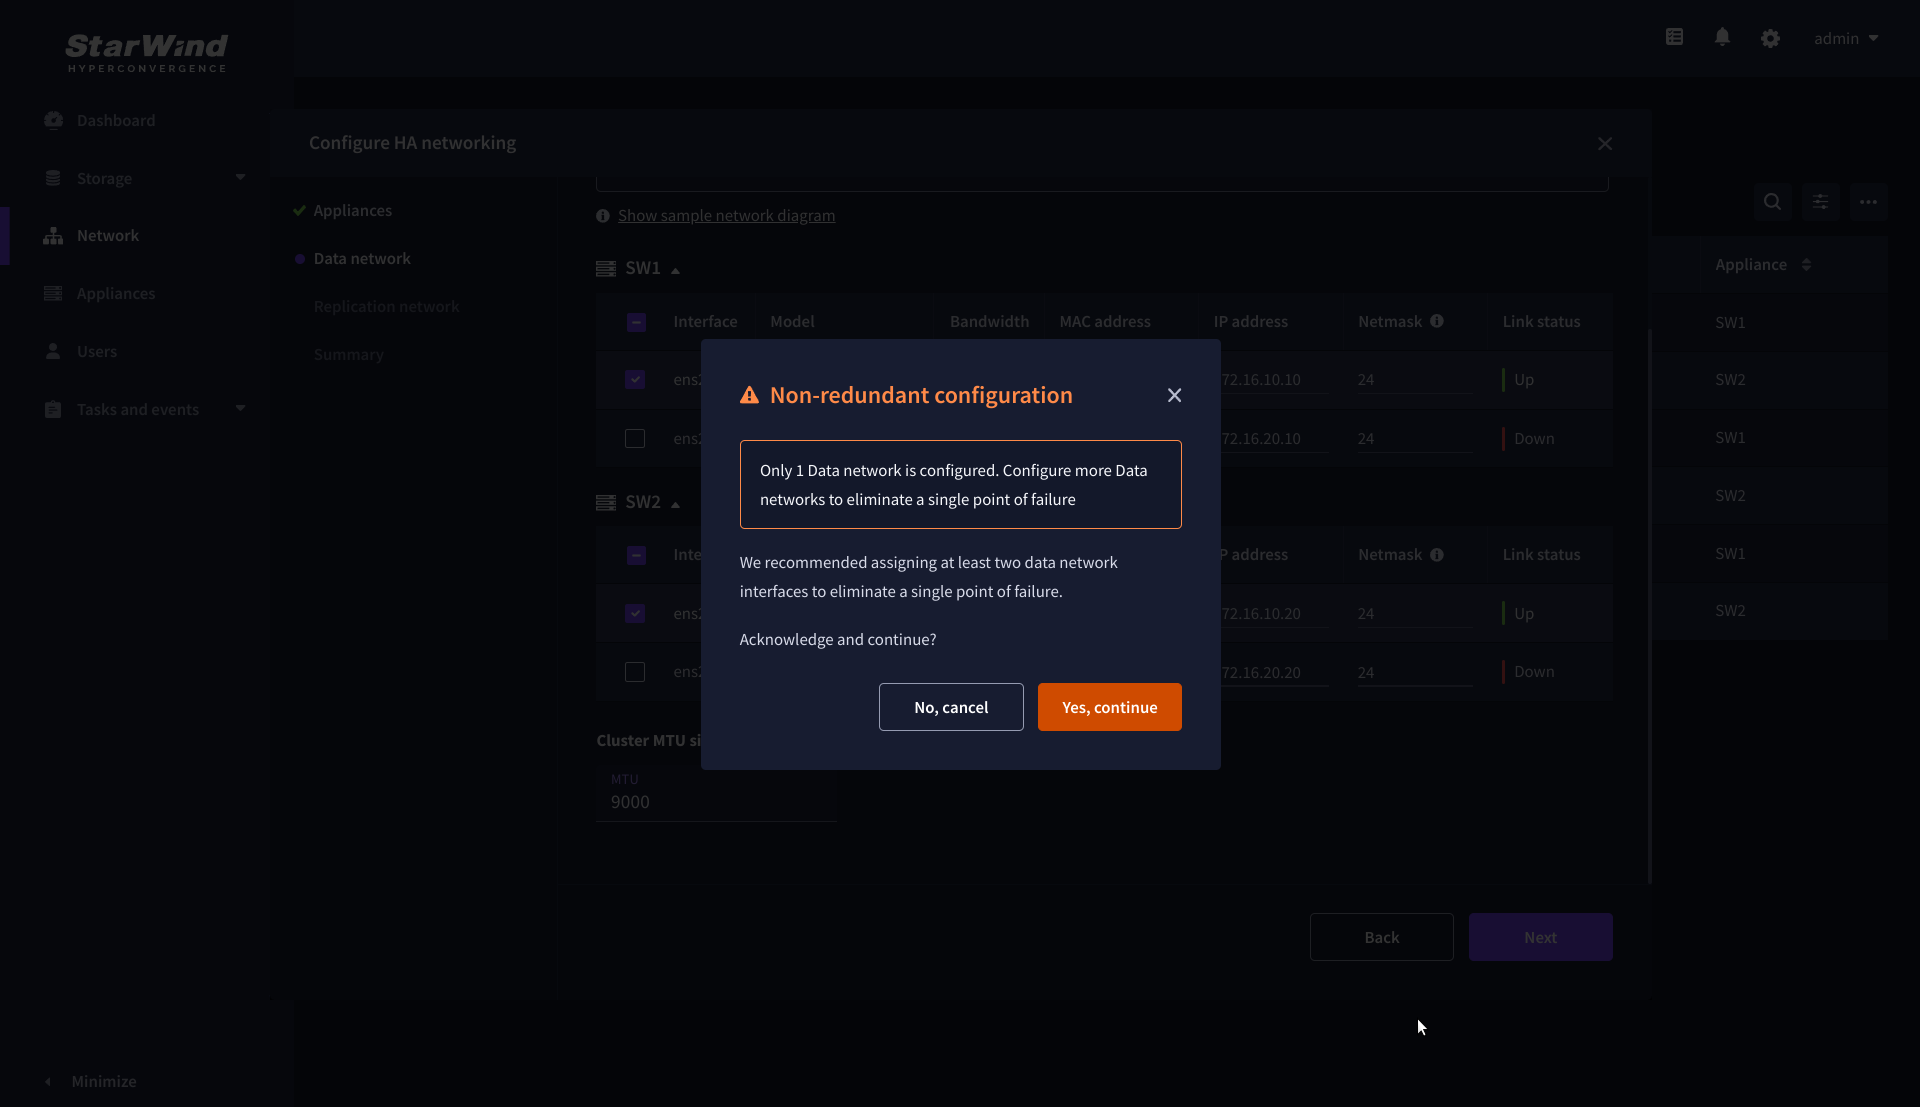
6. Configure the “Replication” network. Select interfaces to carry storage traffic, configure them with static IP addresses in unique networks, and specify subnet masks:
- assign and configure at least one interface on each node
- for redundant configuration, select two interfaces on each node
- ensure interfaces are connected to client hosts directly or through redundant switches
7. Assign MTU value to all selected network adapters, e.g. 1500 or 9000. Ensure the switches have the same MTU value set.
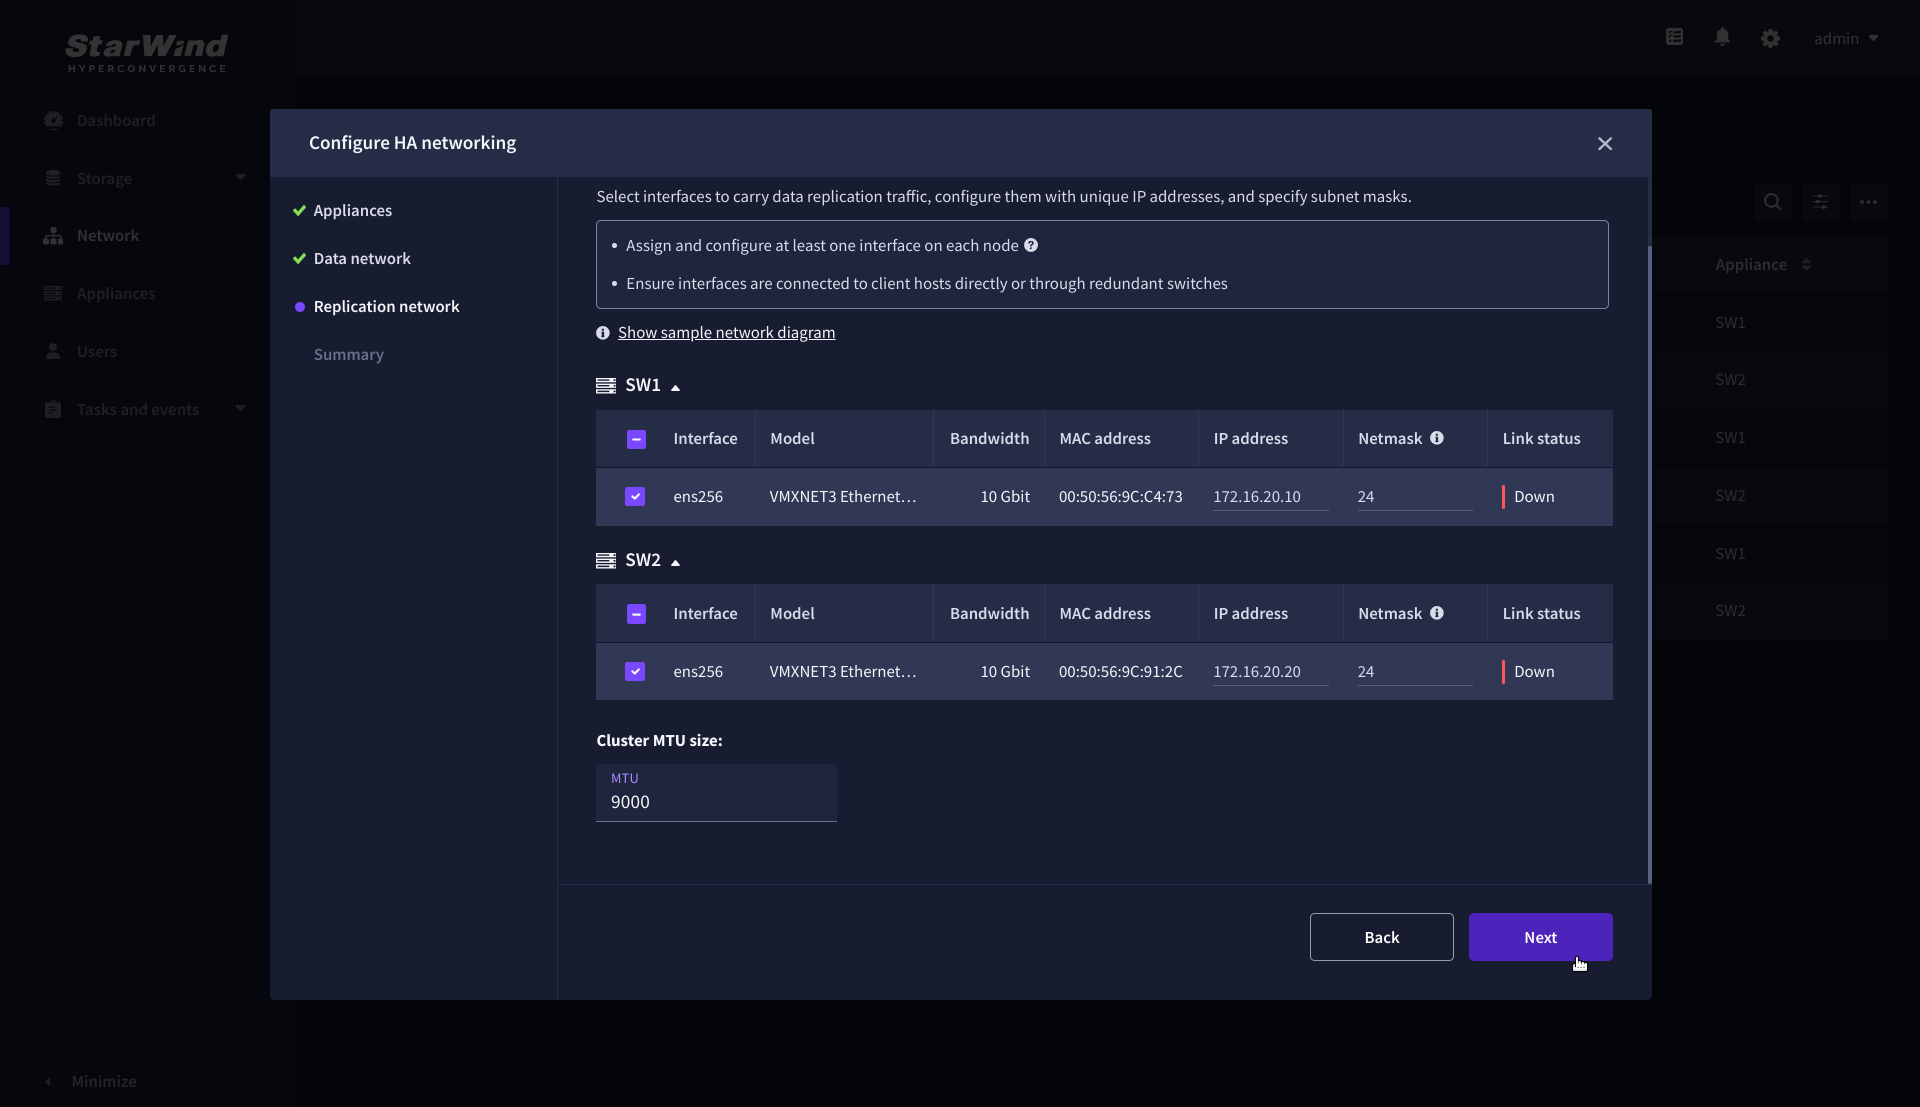
8. Click Next to validate the Replication network settings completion.
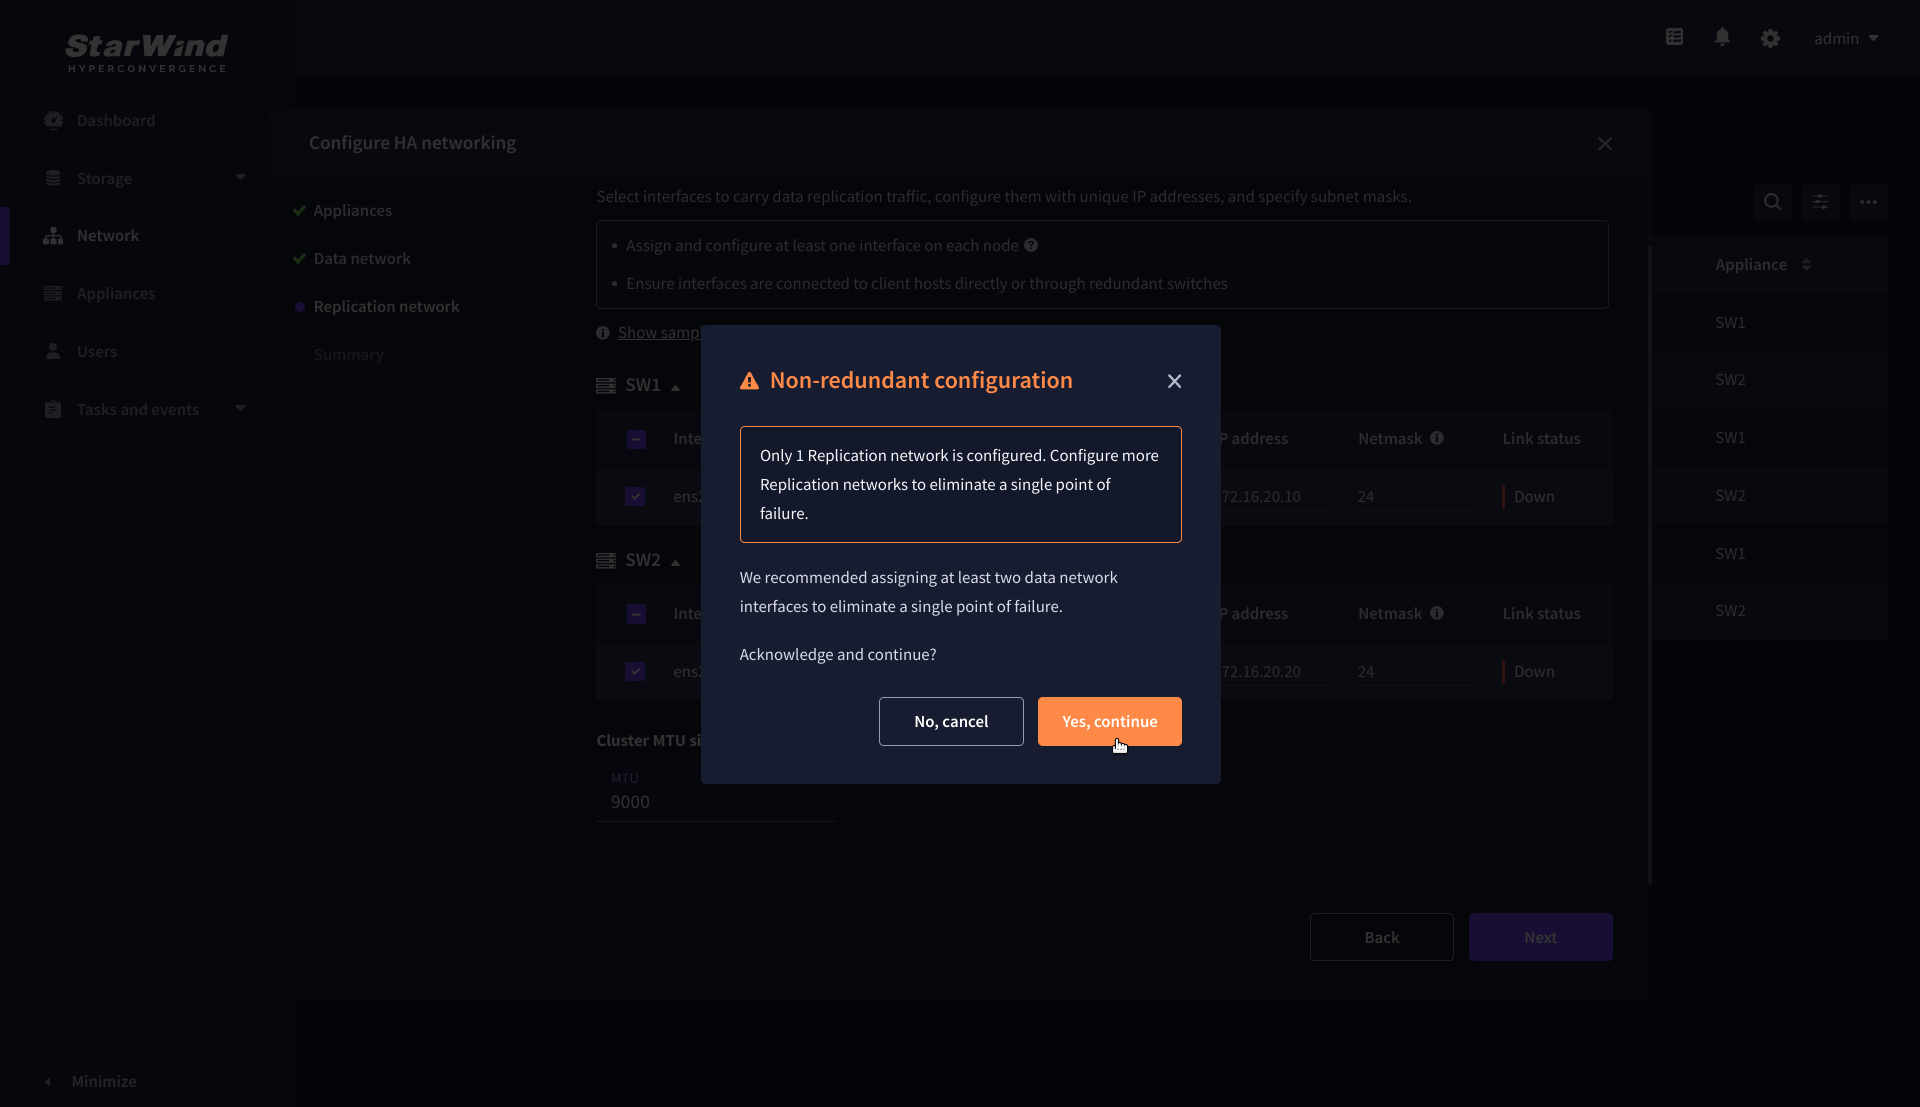
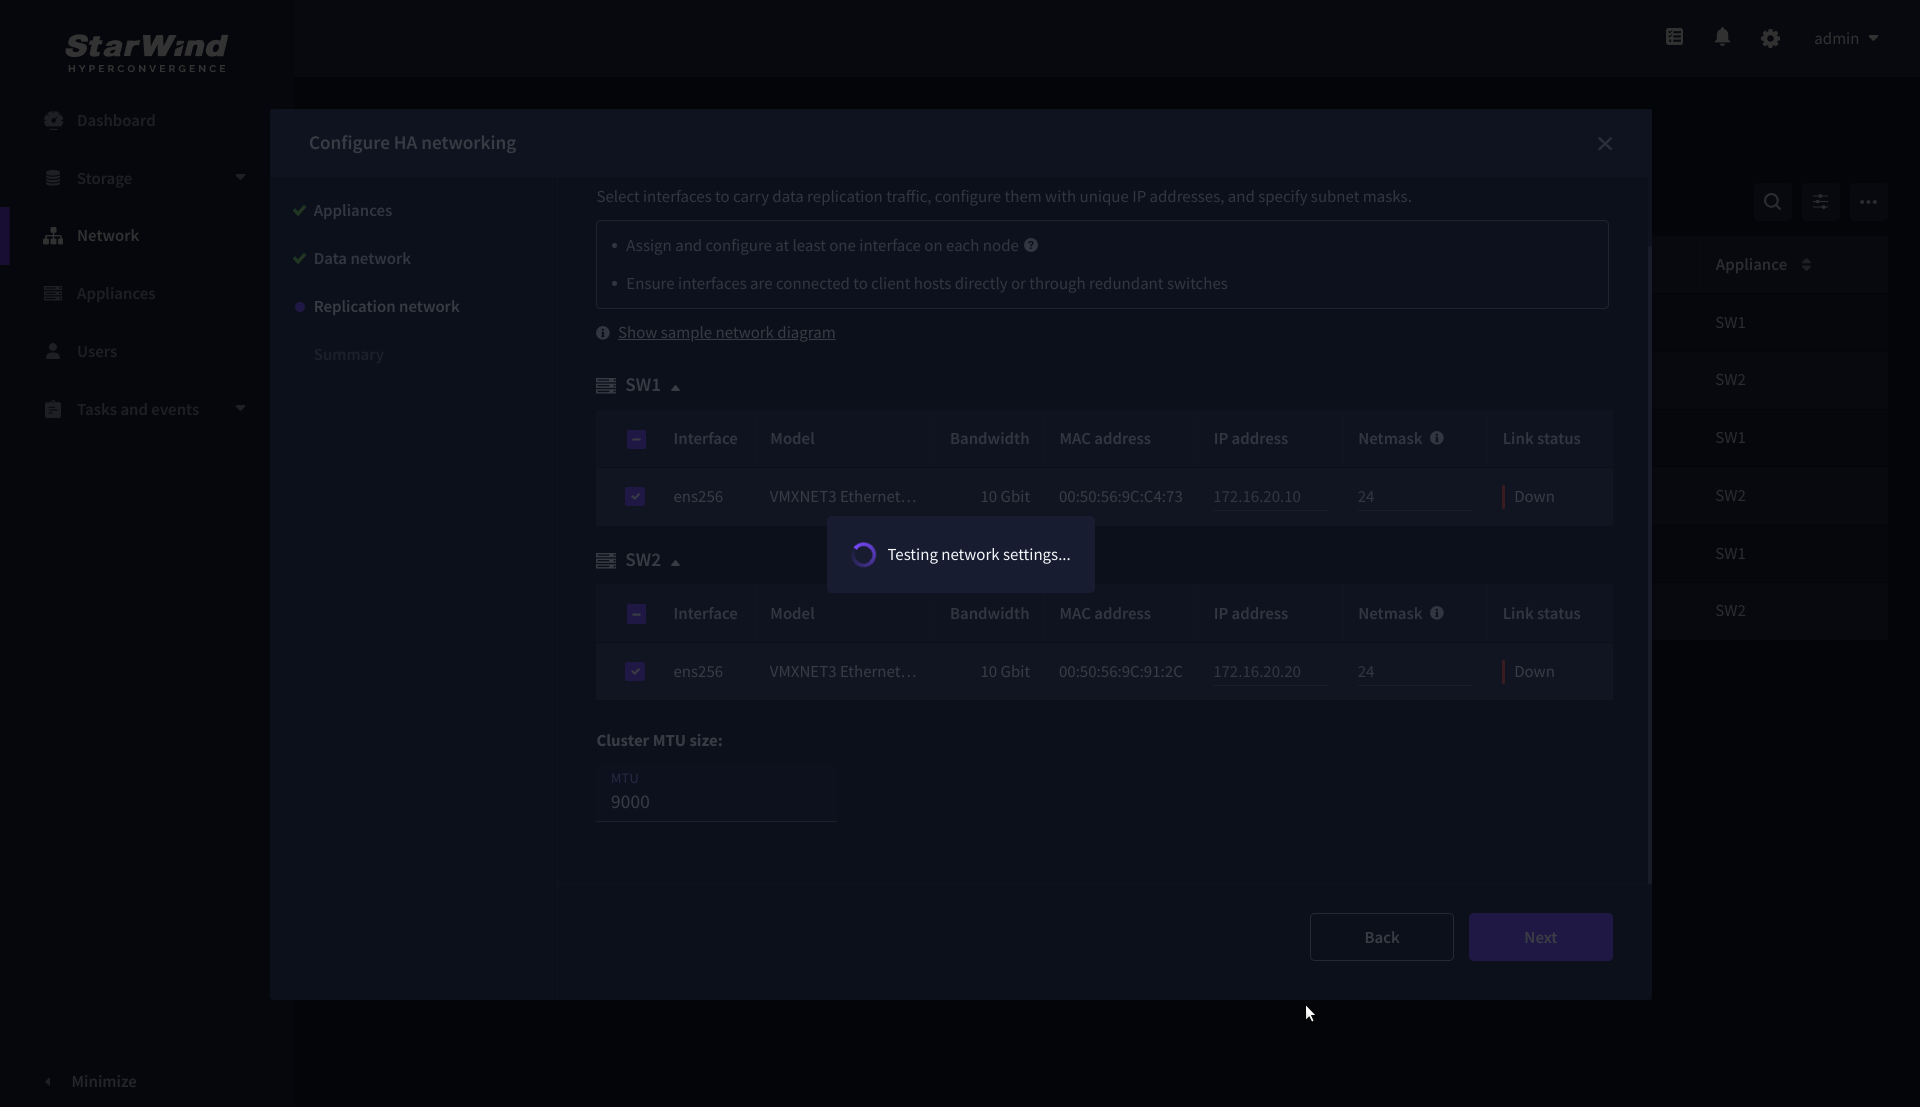
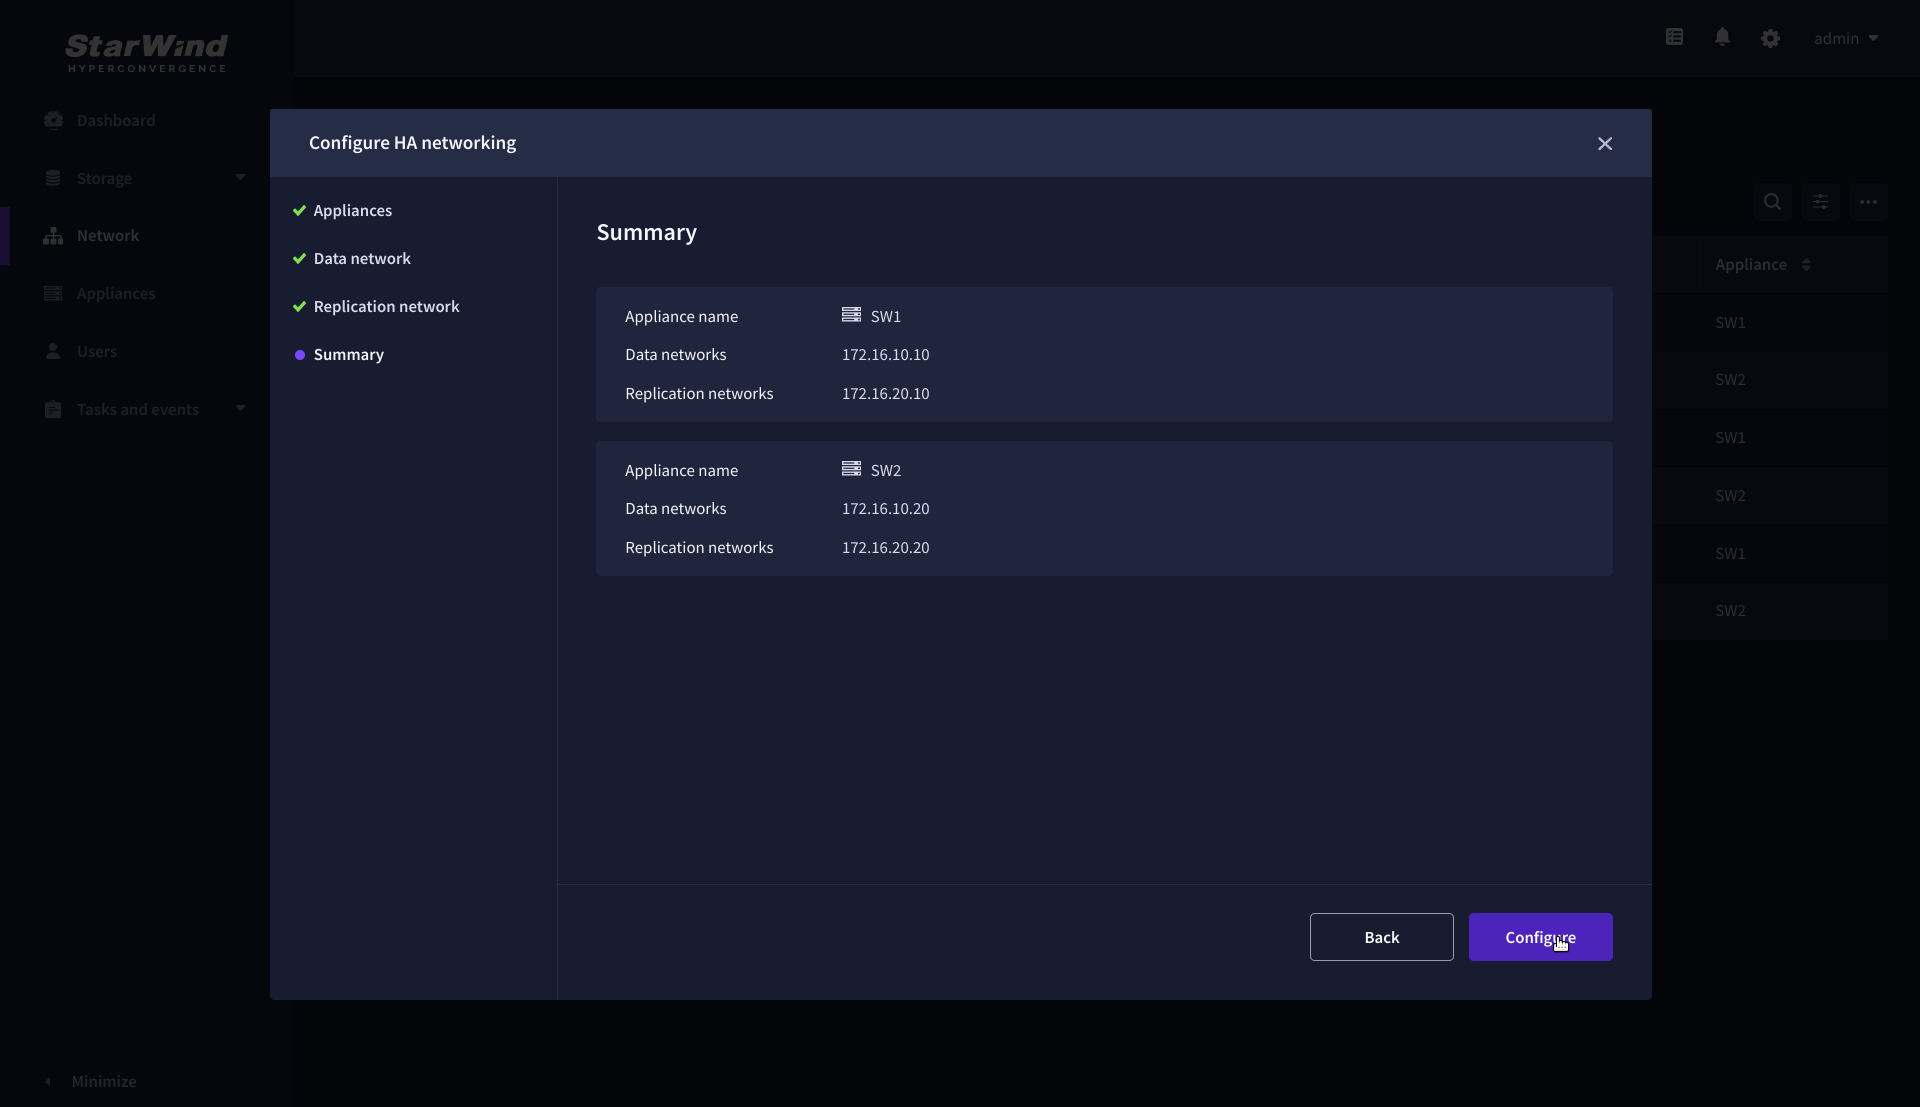
9. Review the summary and click Configure.
Add physical disks
Attach physical storage to StarWind Virtual SAN Controller VM:
- Ensure that all physical drives are connected through an HBA or RAID controller.
- Deploy StarWind VSAN CVM on each server that will be used to configure fault-tolerant standalone or highly available storage.
- Store StarWind VSAN CVM on a separate storage device accessible to the hypervisor host (e.g., SSD, HDD).
- Add HBA, RAID controllers, or NVMe SSD drives to StarWind CVM via a passthrough device.
Learn more about storage provisioning guidelines in the KB article.
Create Storage Pool
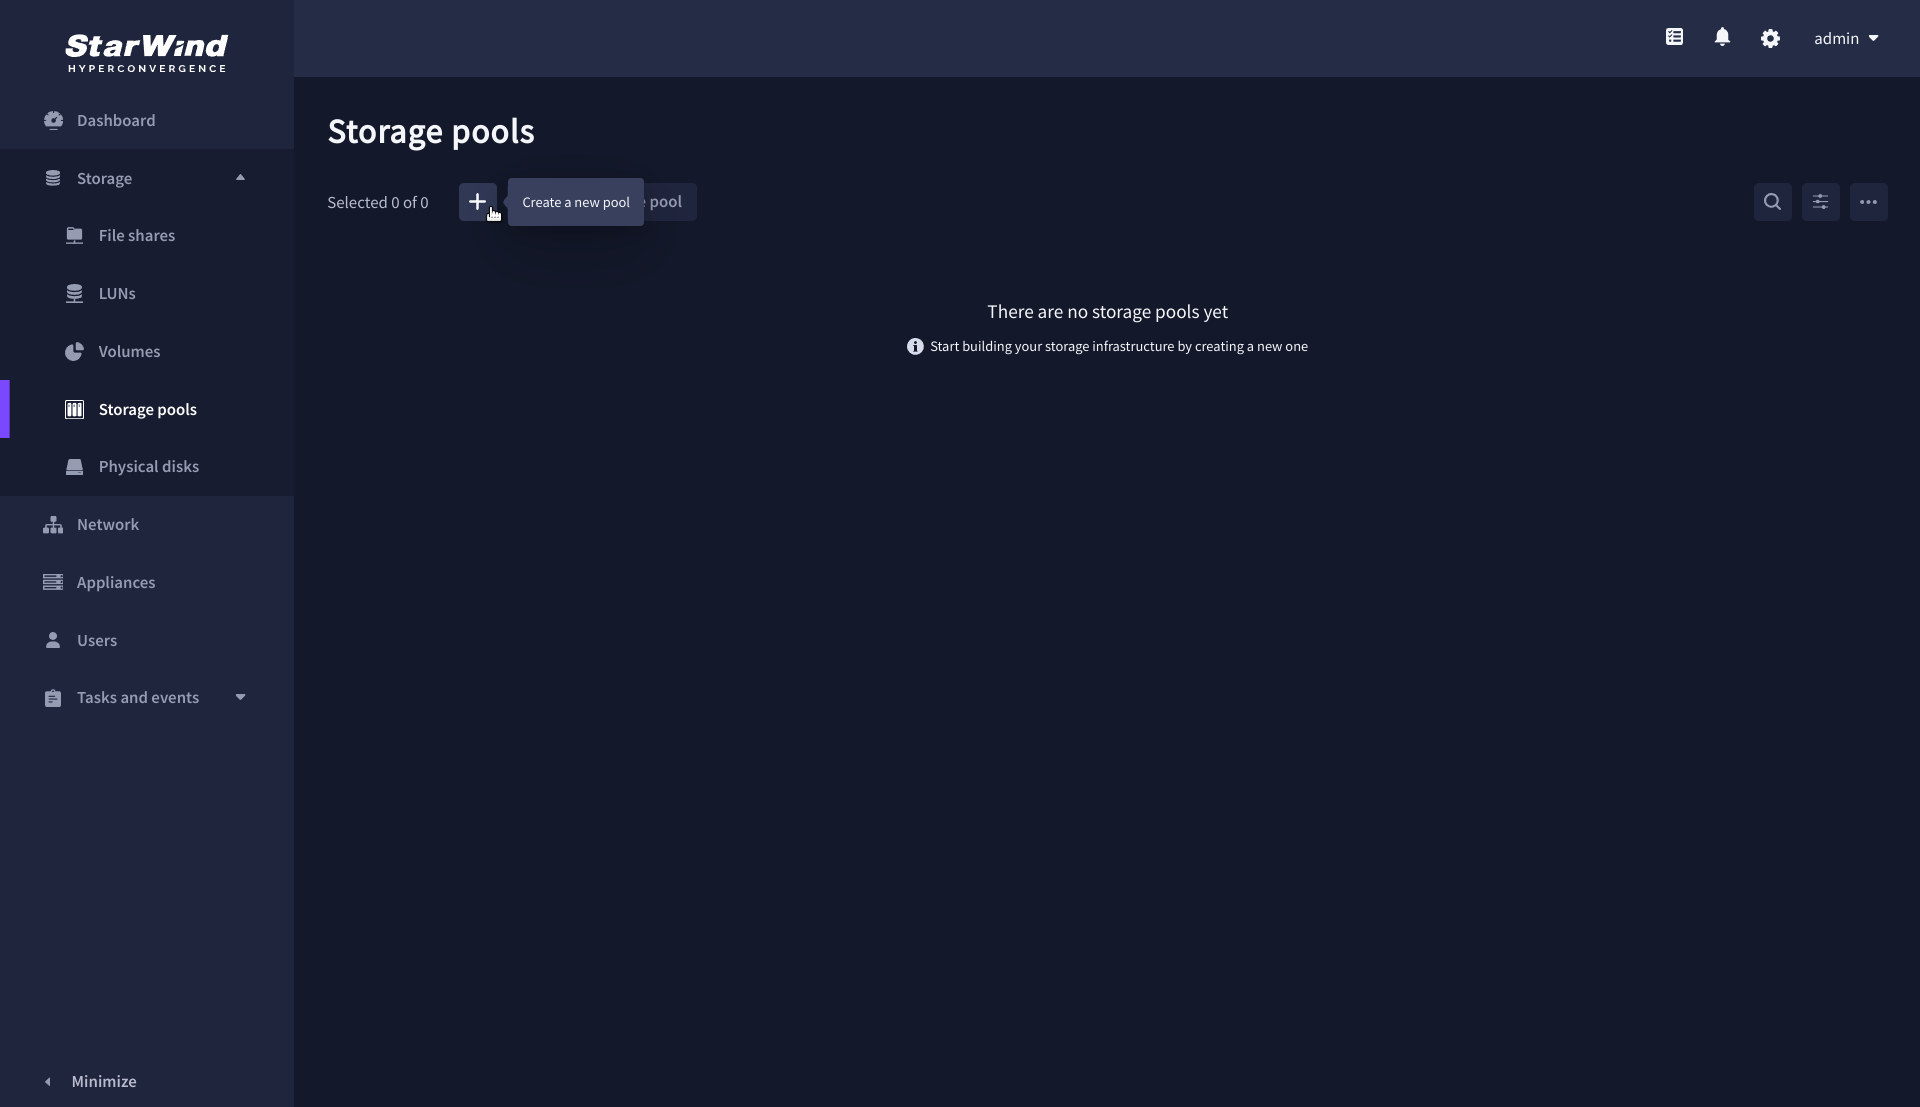
1. Click the “Add” button to create a storage pool.
2. Select two storage nodes to create a storage pool on them simultaneously.
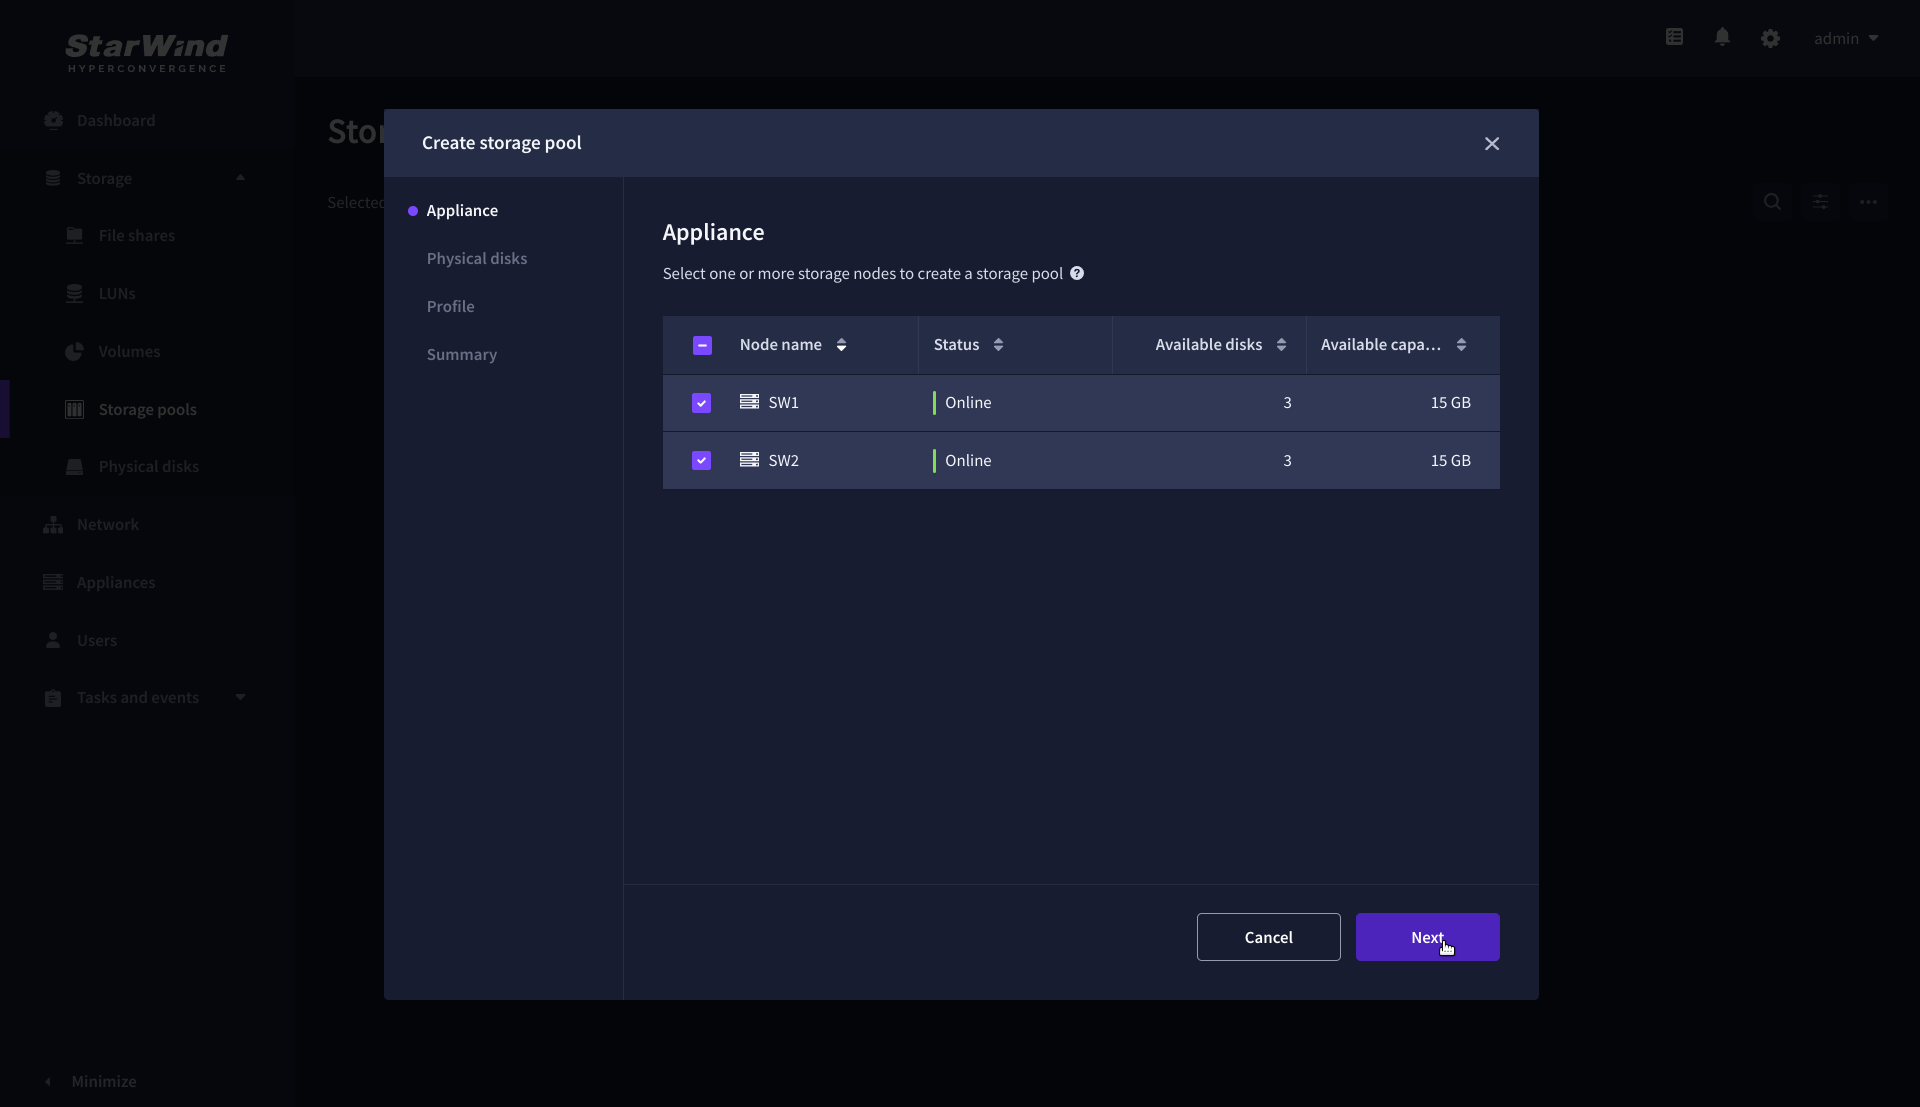
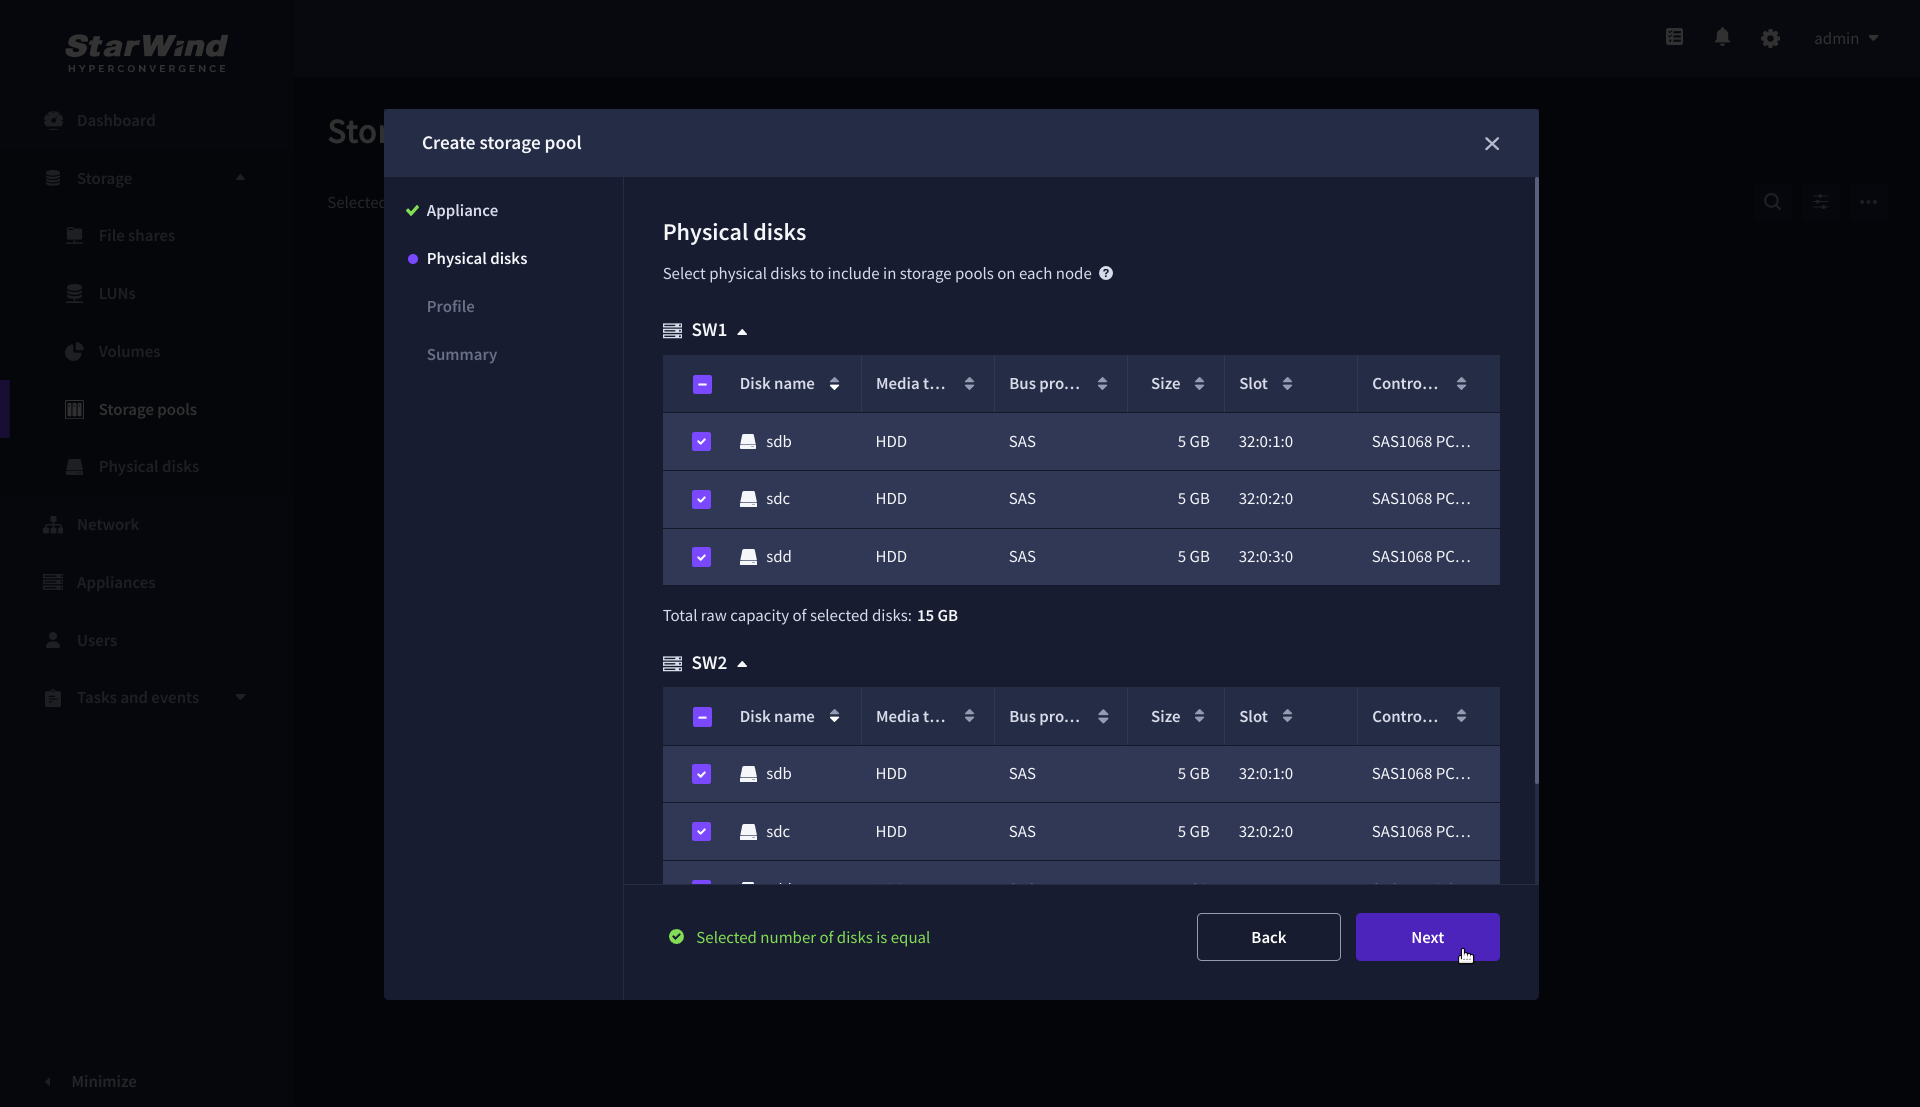
3. Select physical disks to include in the storage pool name and click the “Next” button.
NOTE: Select identical type and number of disks on each storage node to create identical storage pools.
4. Select one of the preconfigured storage profiles or create a redundancy layout for the new storage pool manually according to your redundancy, capacity, and performance requirements.
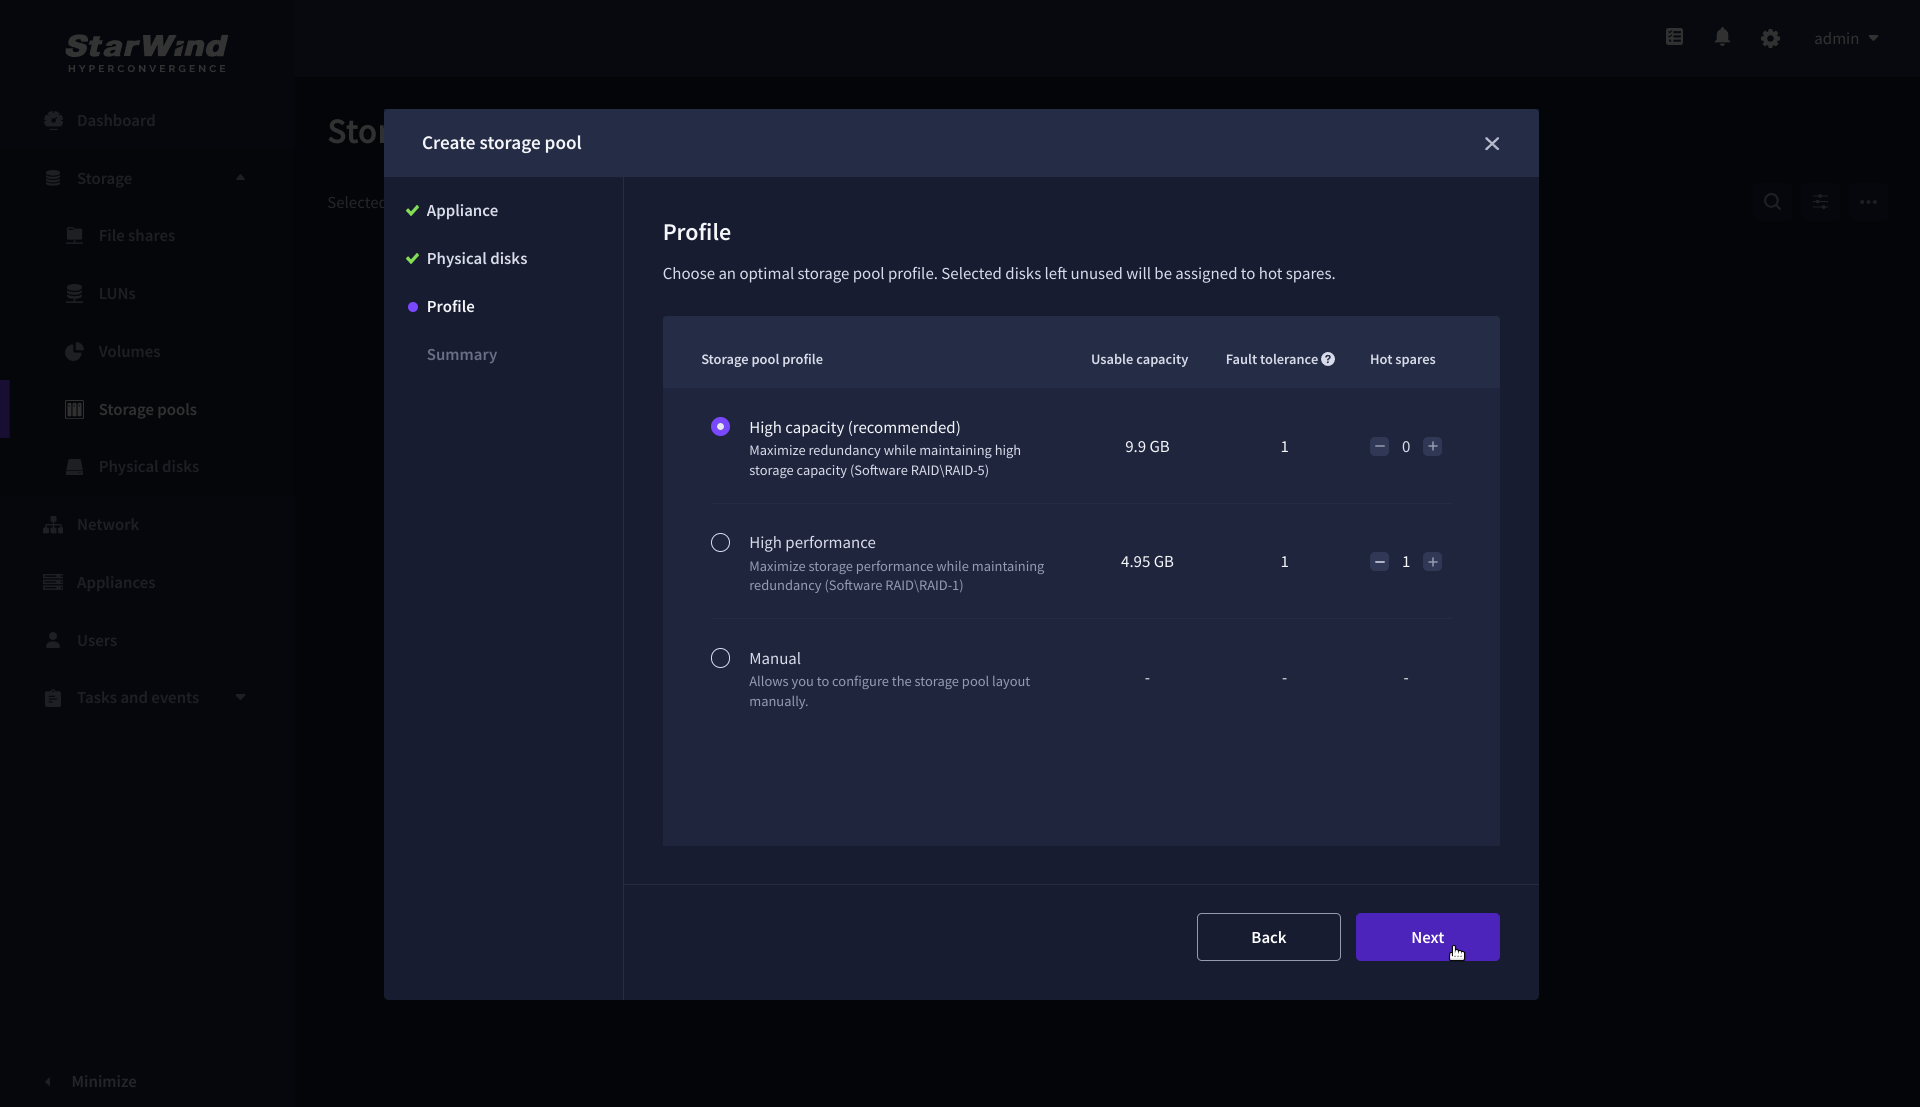
Hardware RAID, Linux Software RAID, and ZFS storage pools are supported and integrated into the StarWind CVM web interface. To make easier the storage pool configuration, the preconfigured storage profiles are provided to configure the recommended pool type and layout according to the direct-attached storage:
- hardware RAID – configures Hardware RAID’s virtual disk as a storage pool. It is available only if a hardware RAID controller is passed through to the CVM
- high performance – creates Linux Software RAID-10 to maximize storage performance while maintaining redundancy
- high capacity – creates Linux Software RAID-5 to maximize storage capacity while maintaining
redundancy - better redundancy – creates ZFS Stripped RAID-Z2 (RAID 60)) to maximize redundancy while maintaining high storage capacity
- manual – allows users to configure any storage pool type and layout with attached storage
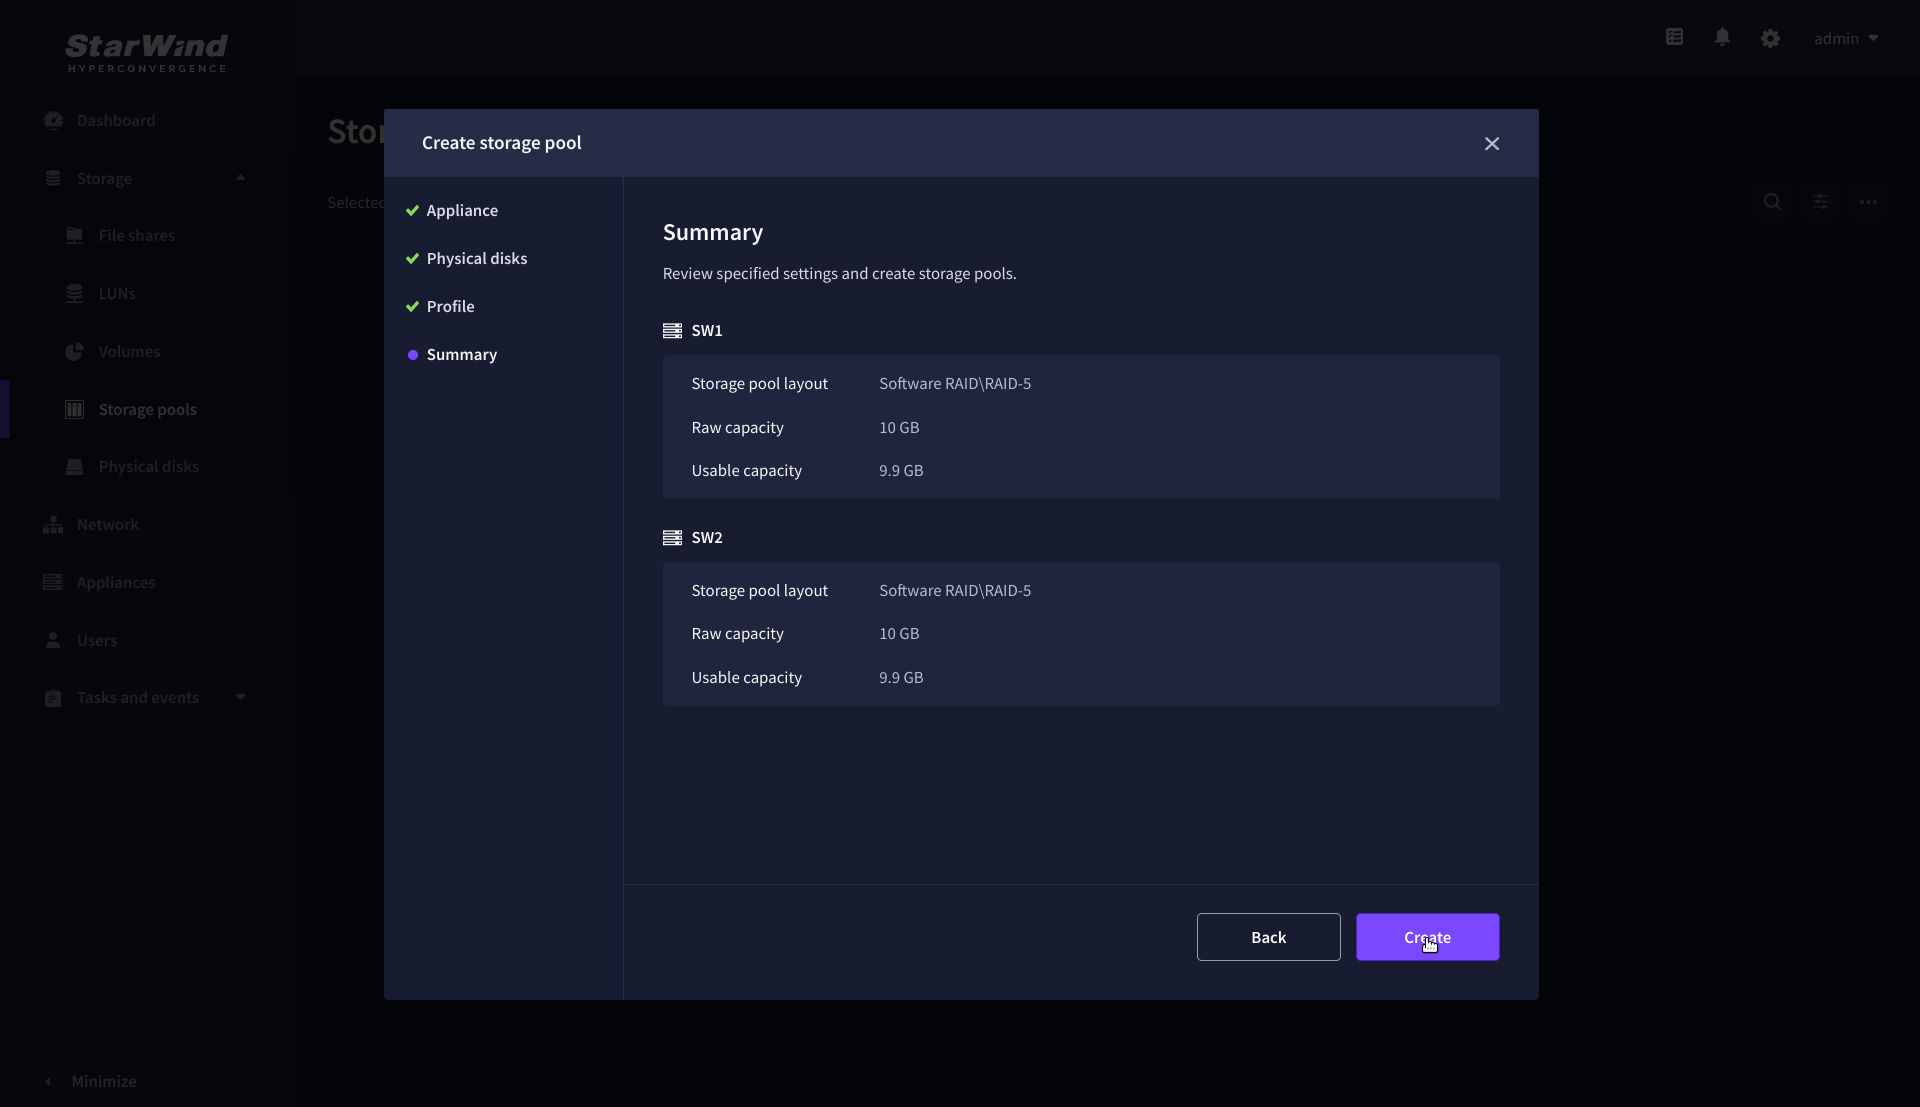
5. Review “Summary” and click the “Create” button to create the pools on storage servers simultaneously.
Create Volume
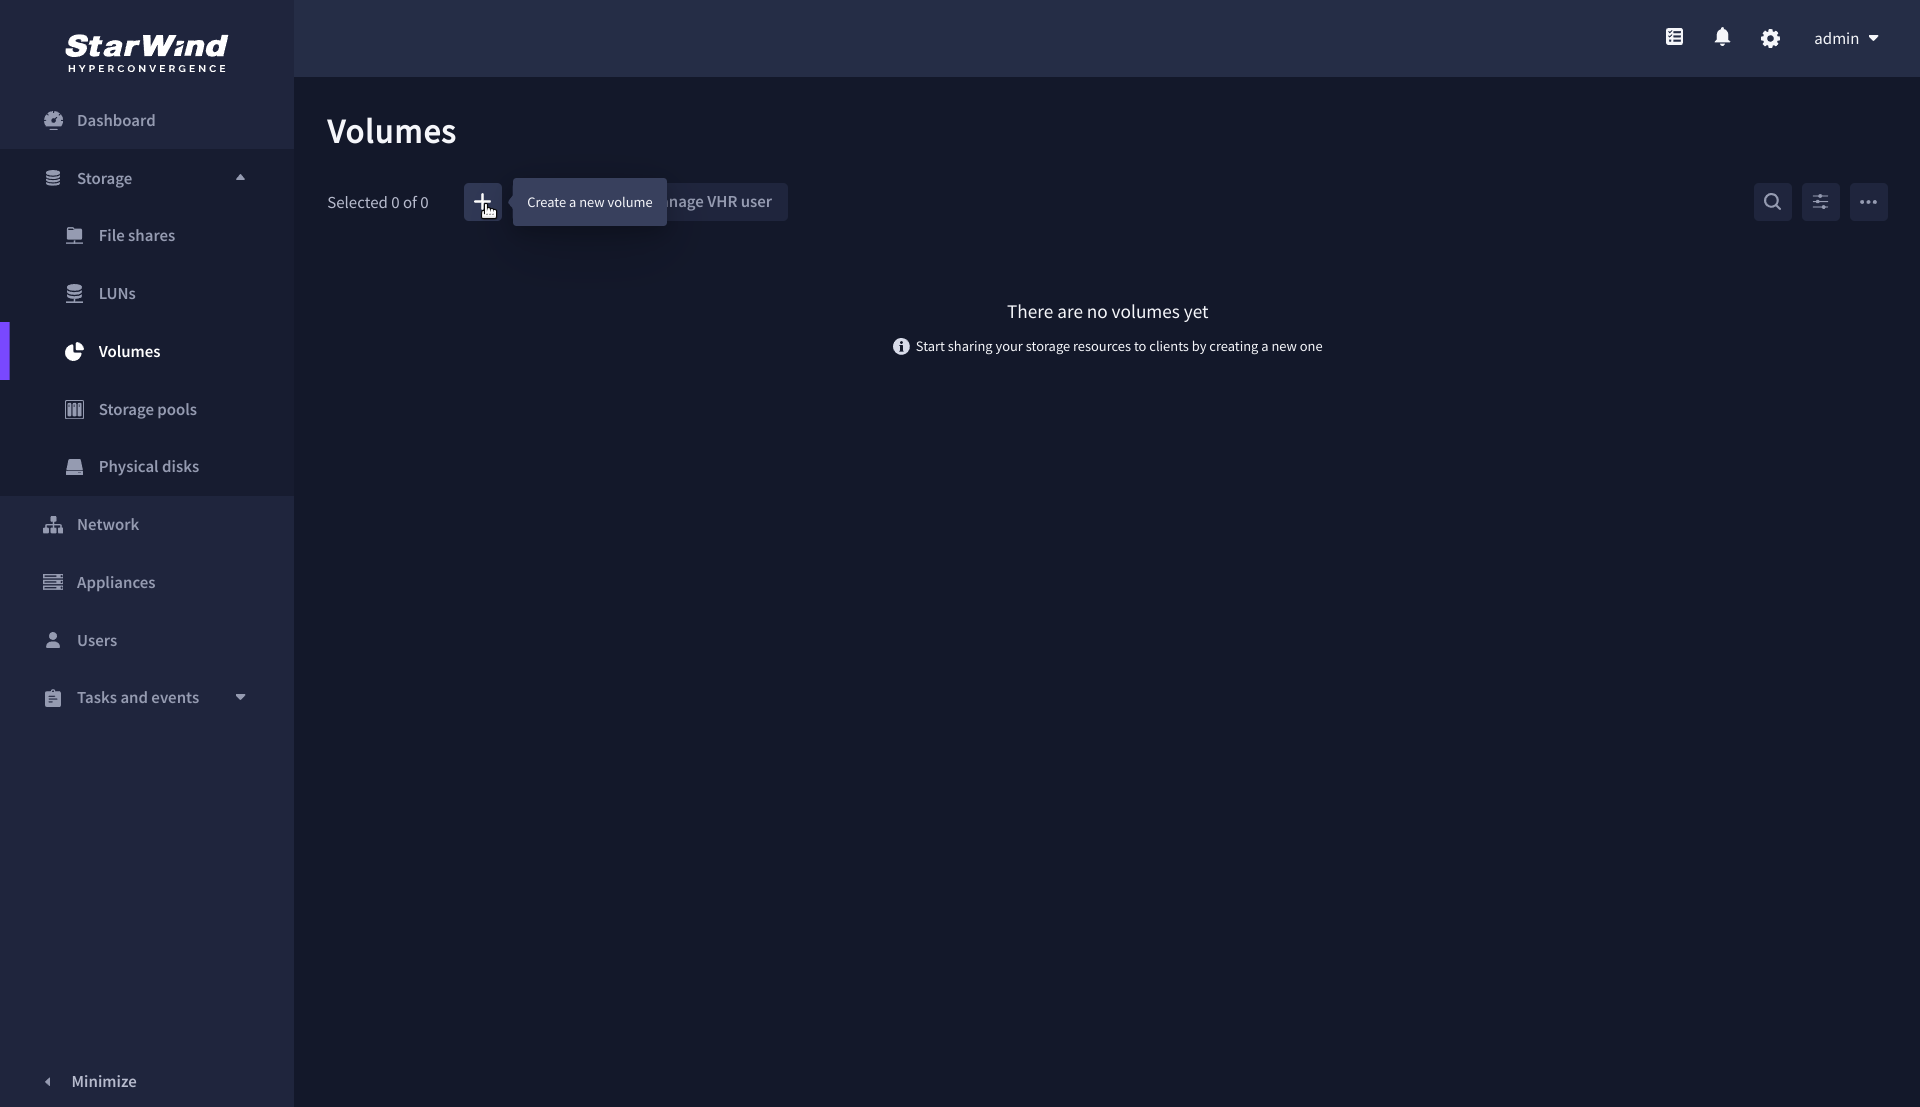
1. To create volumes, click the “Add” button.
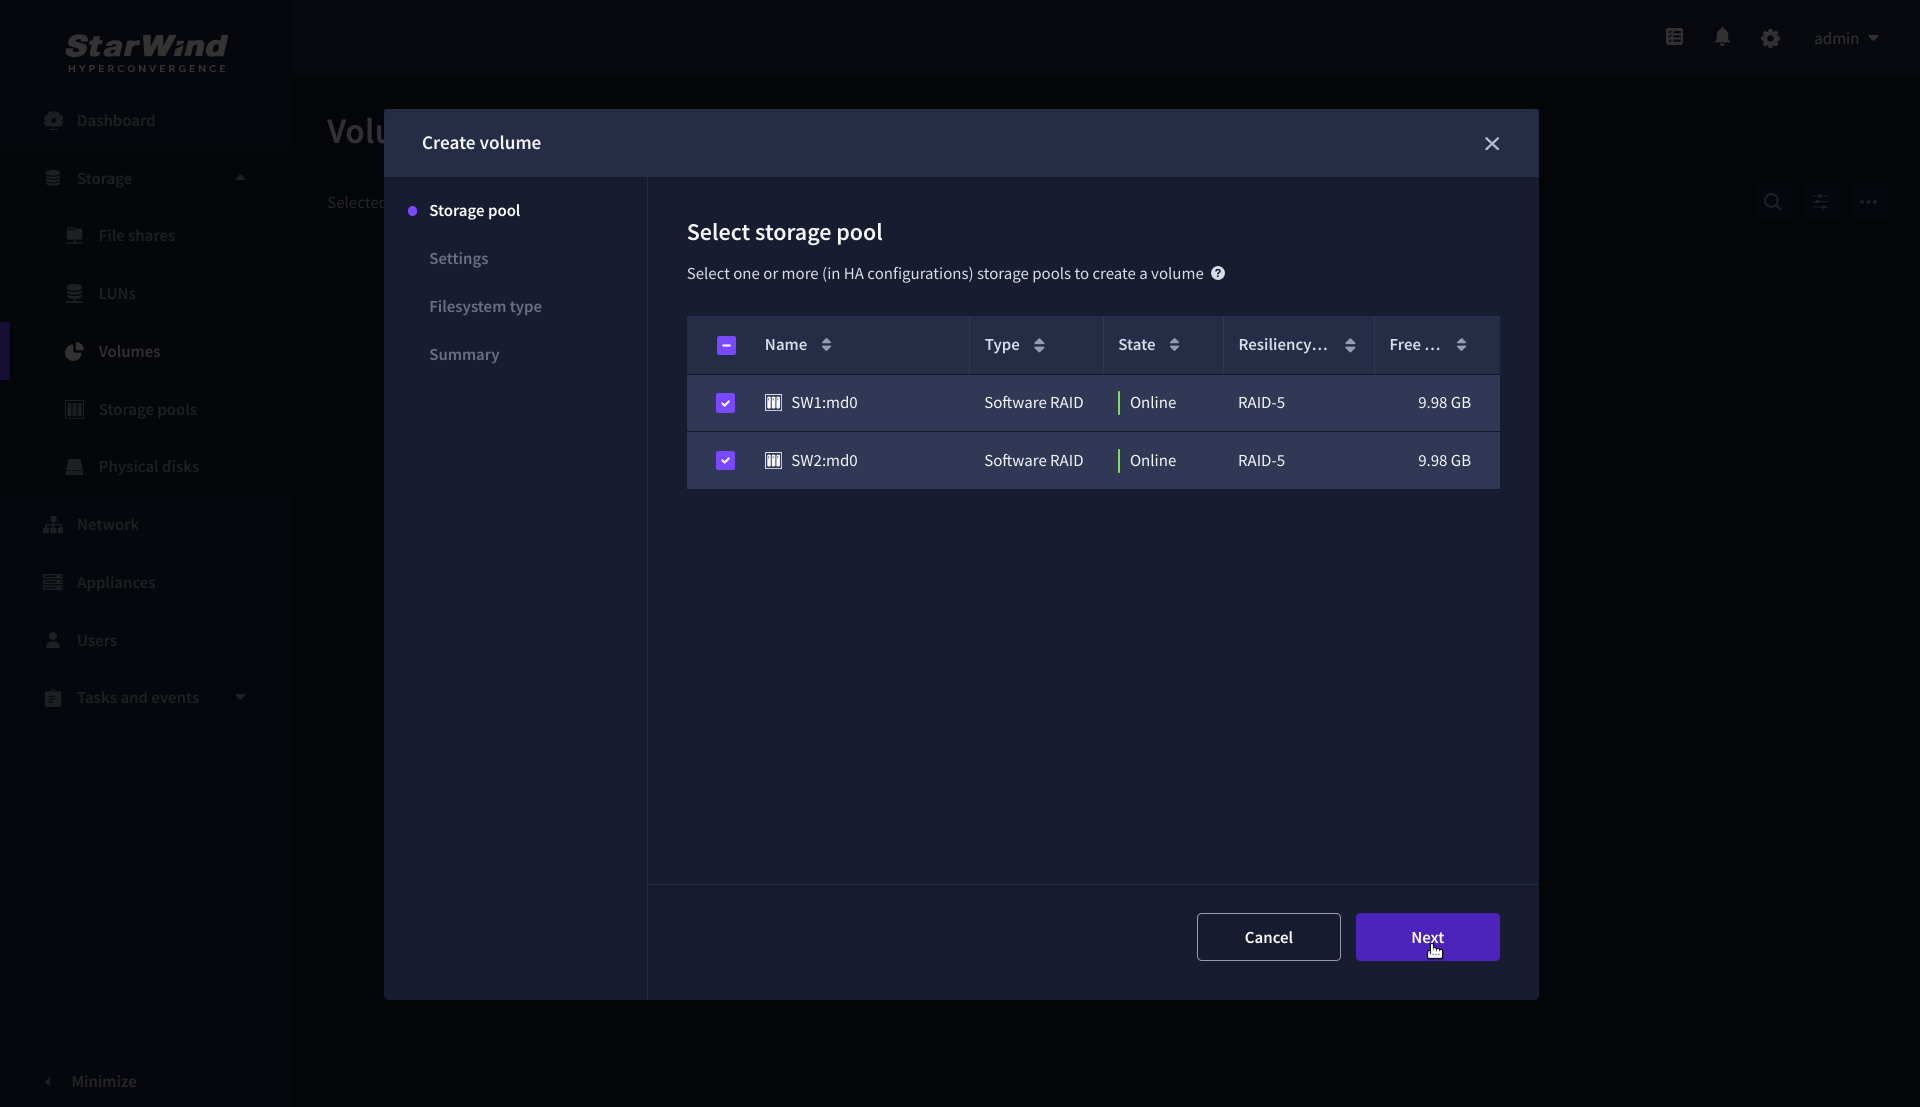
2. Select two identical storage pools to create a volume simultaneously.
3. Specify volume name and capacity.

4. Select the Standard volume type.
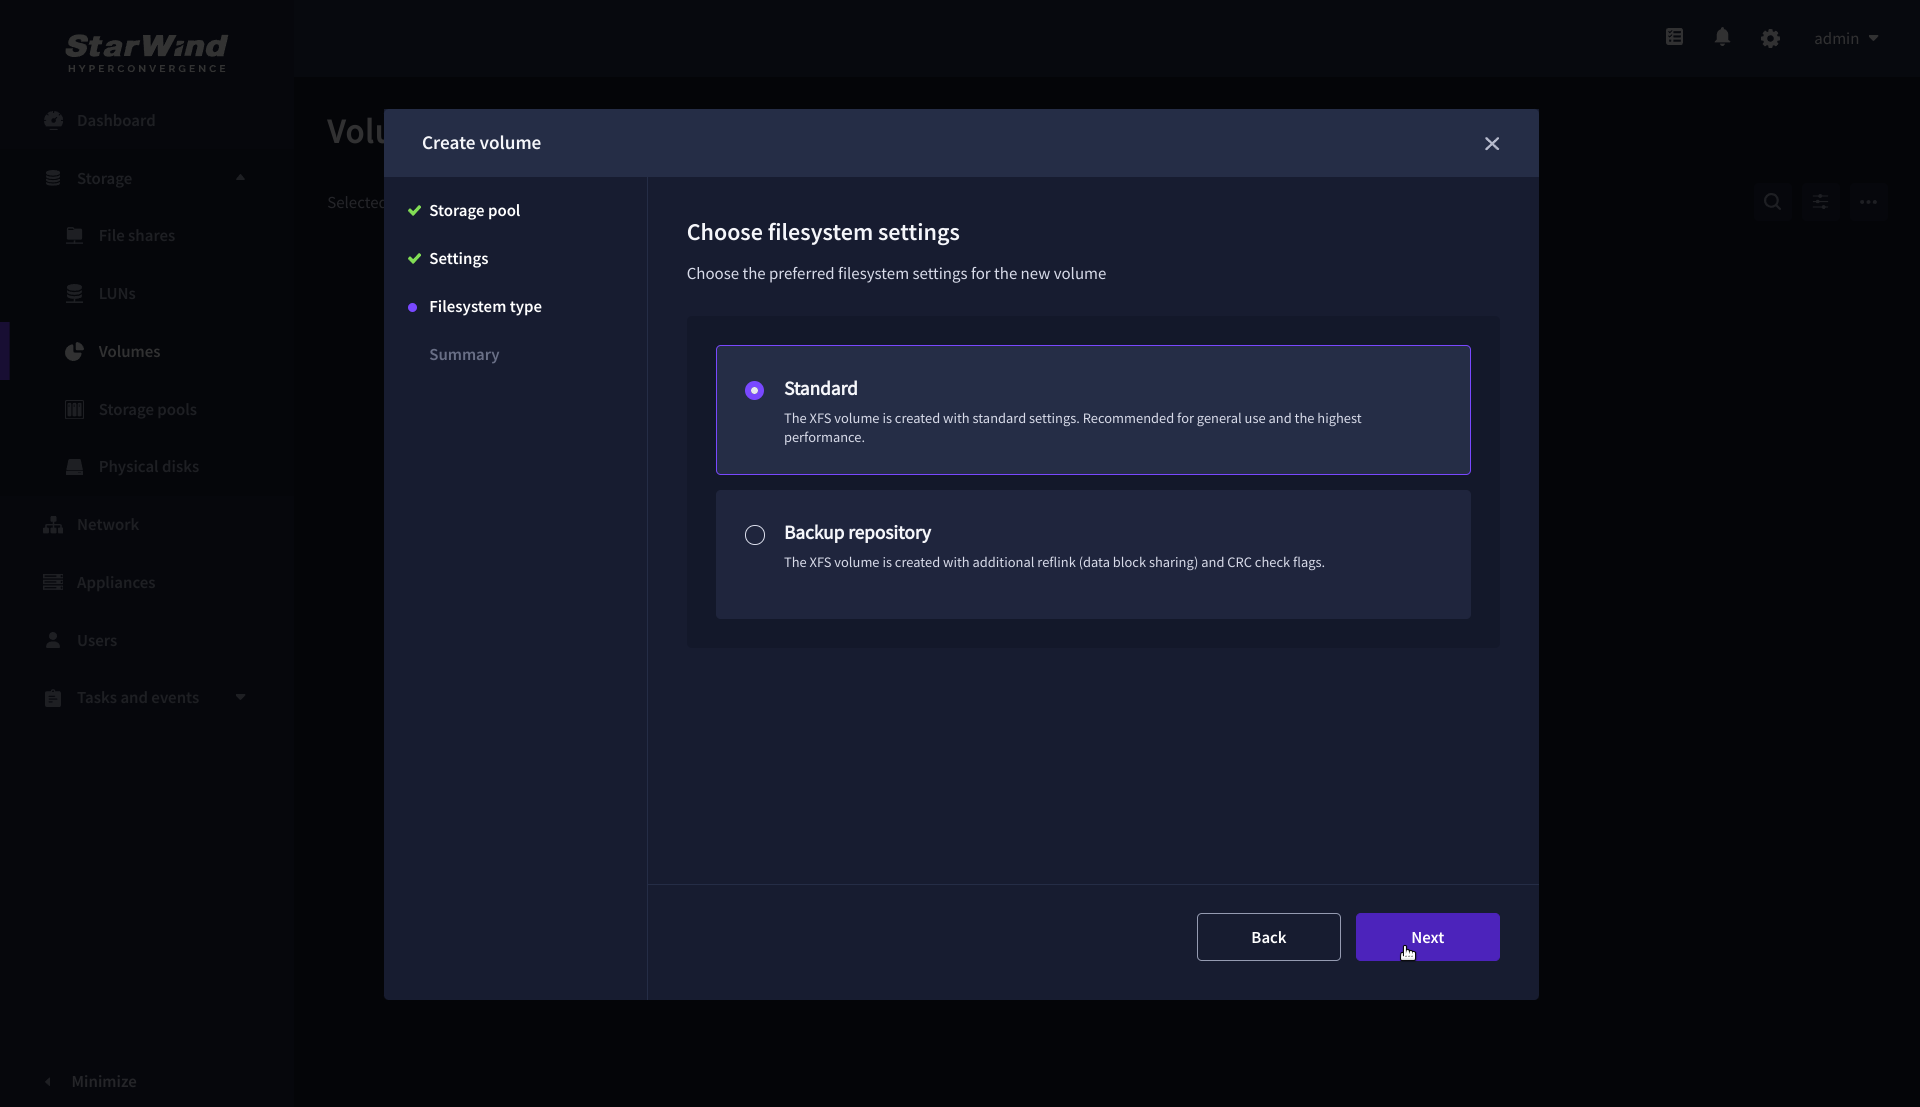
5. Review “Summary” and click the “Create” button to create the pool.
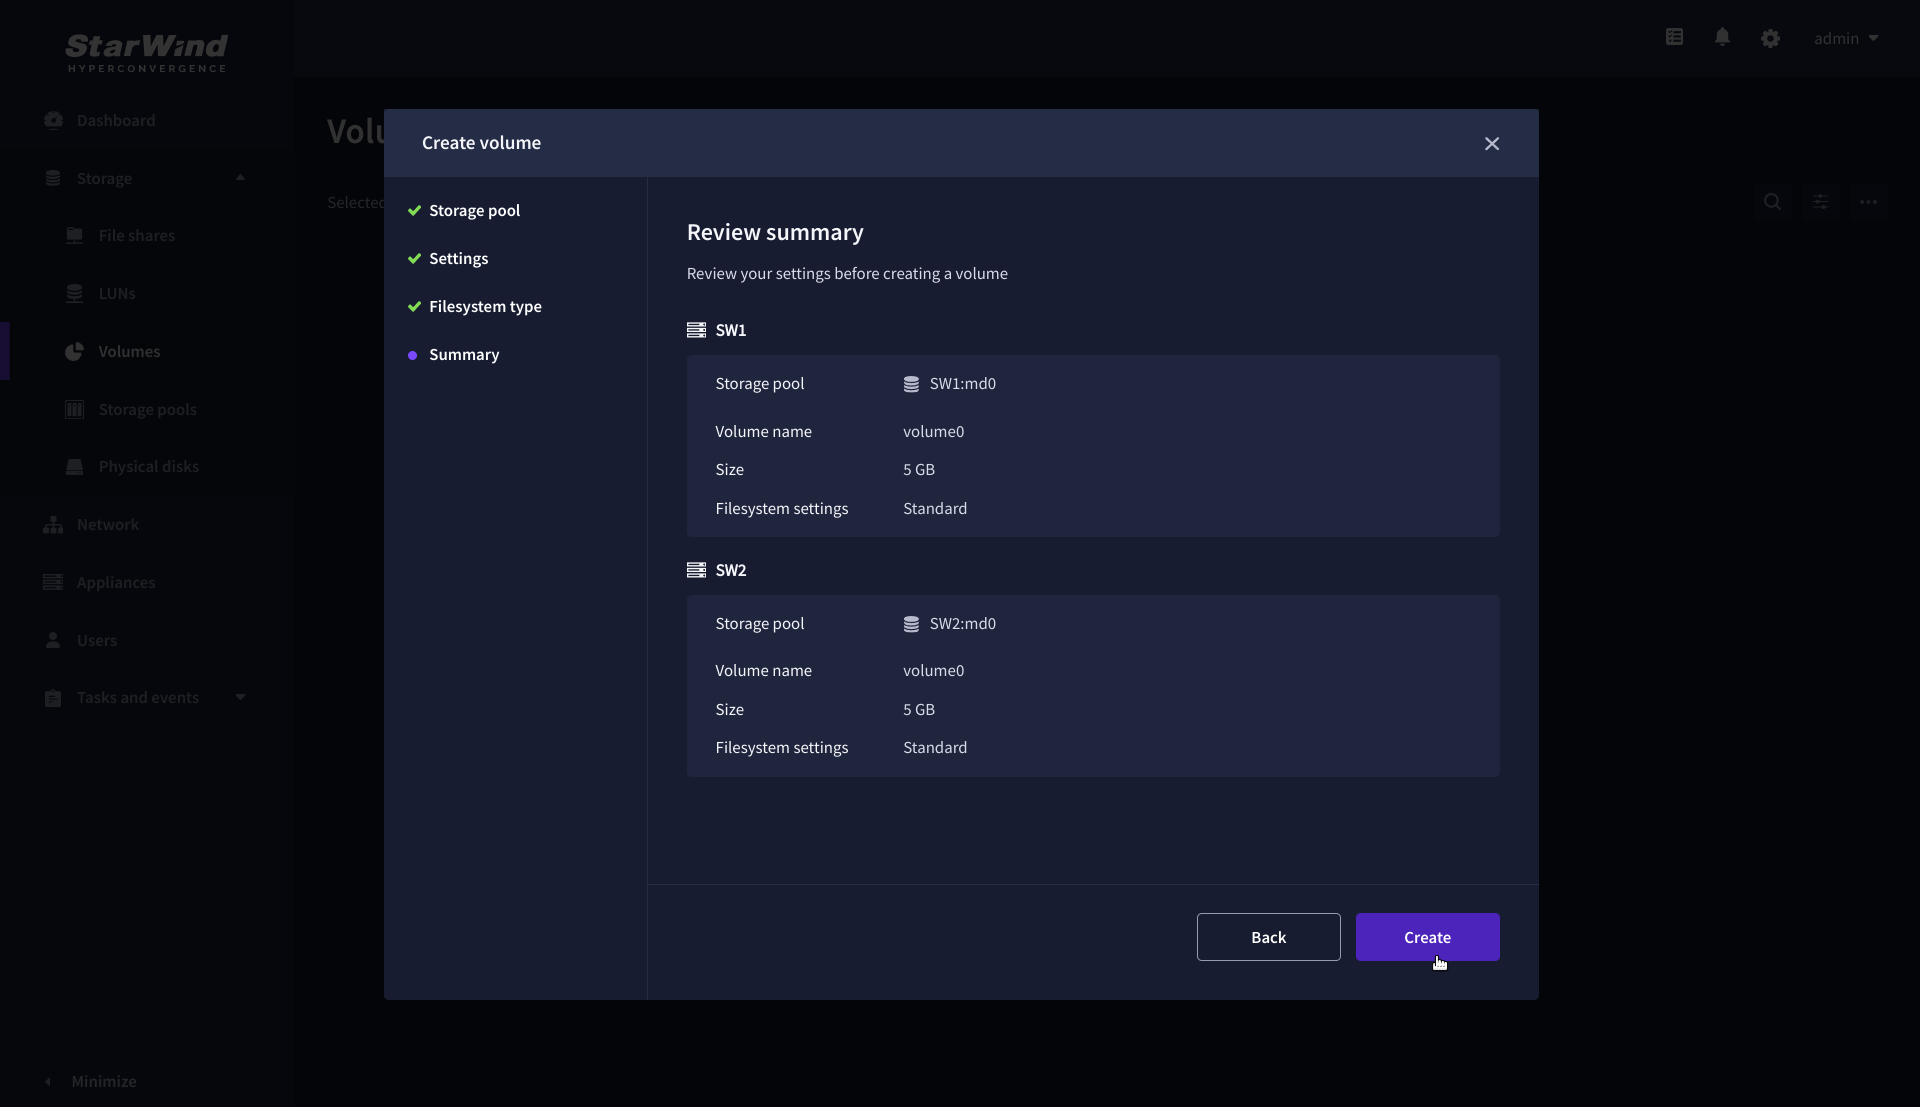
Create HA LUN
The LUN availability for StarWind LUN can be Standalone and High availability (2-way or 3-way replication) and is narrowed by your license.
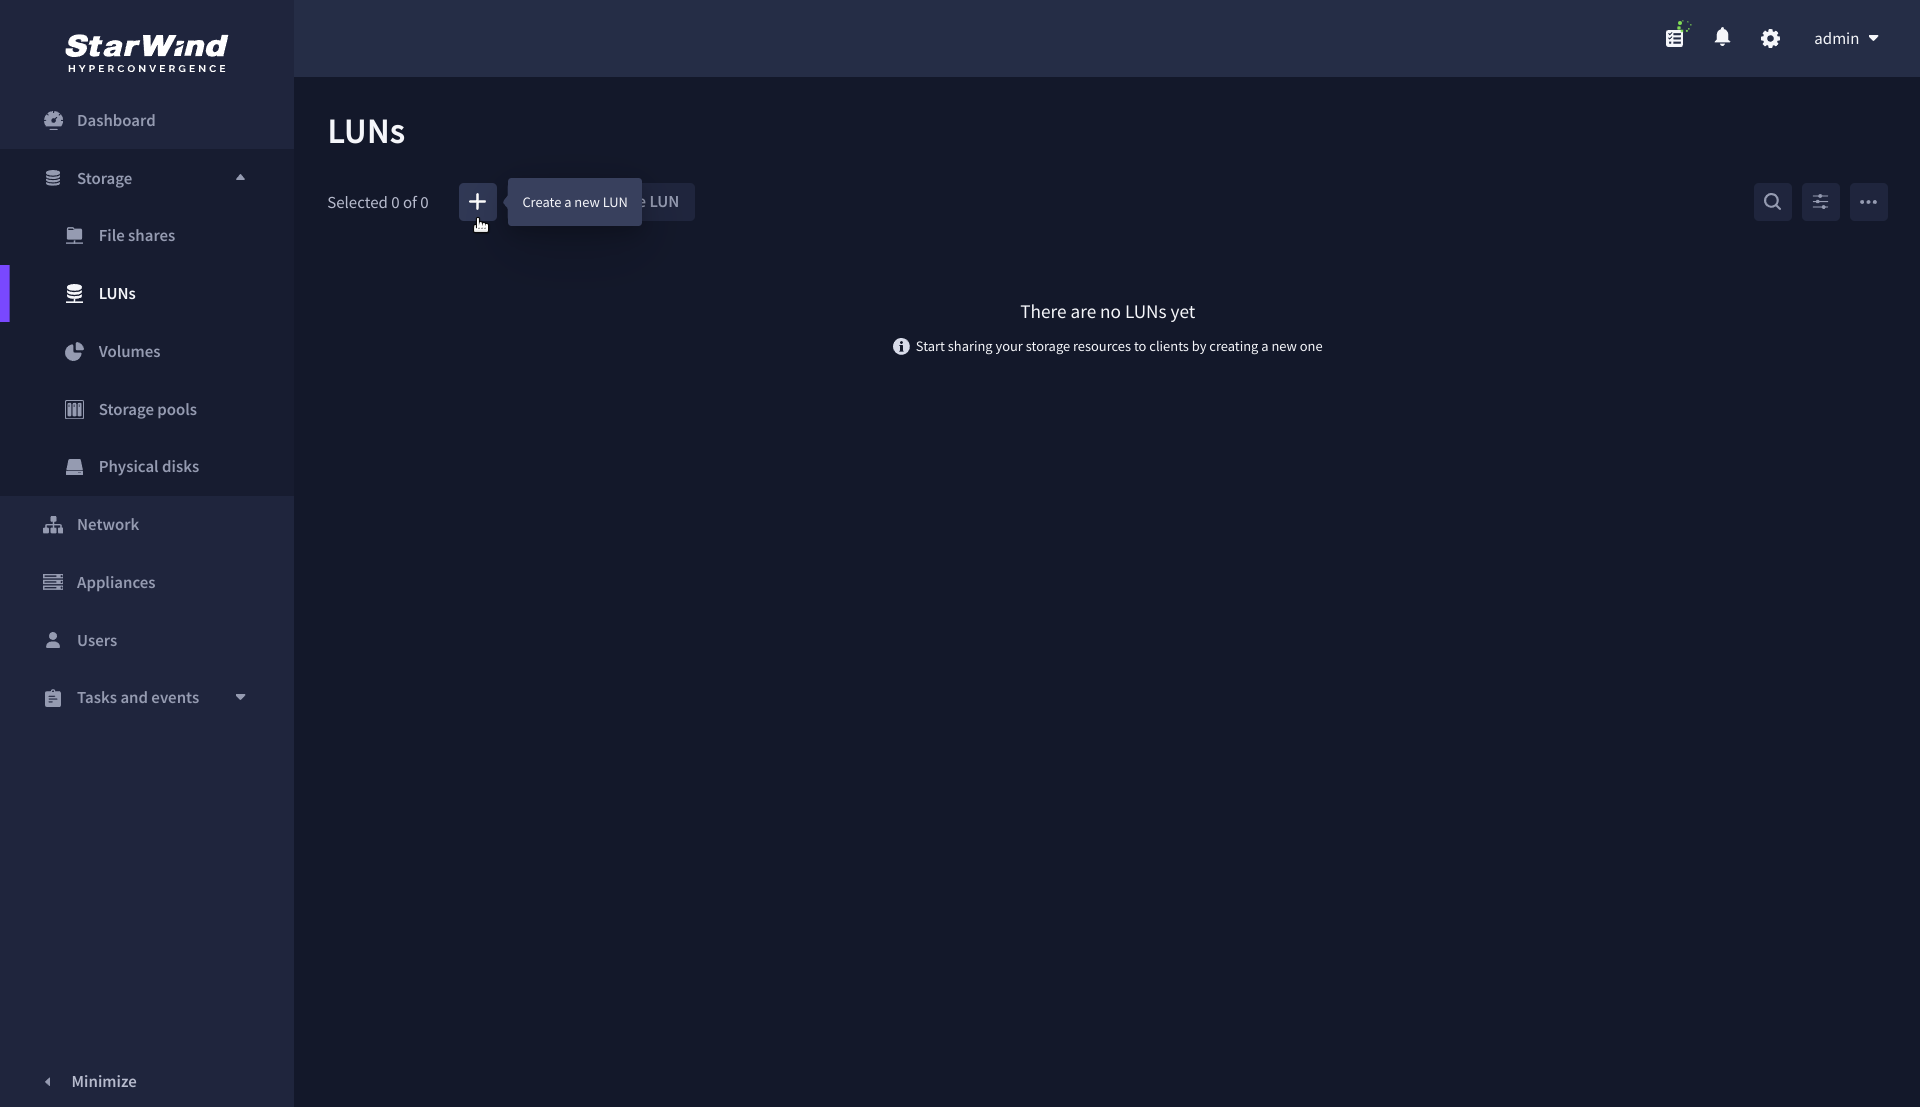
1. To create a virtual disk, click the Add button.
2. Select the protocol.
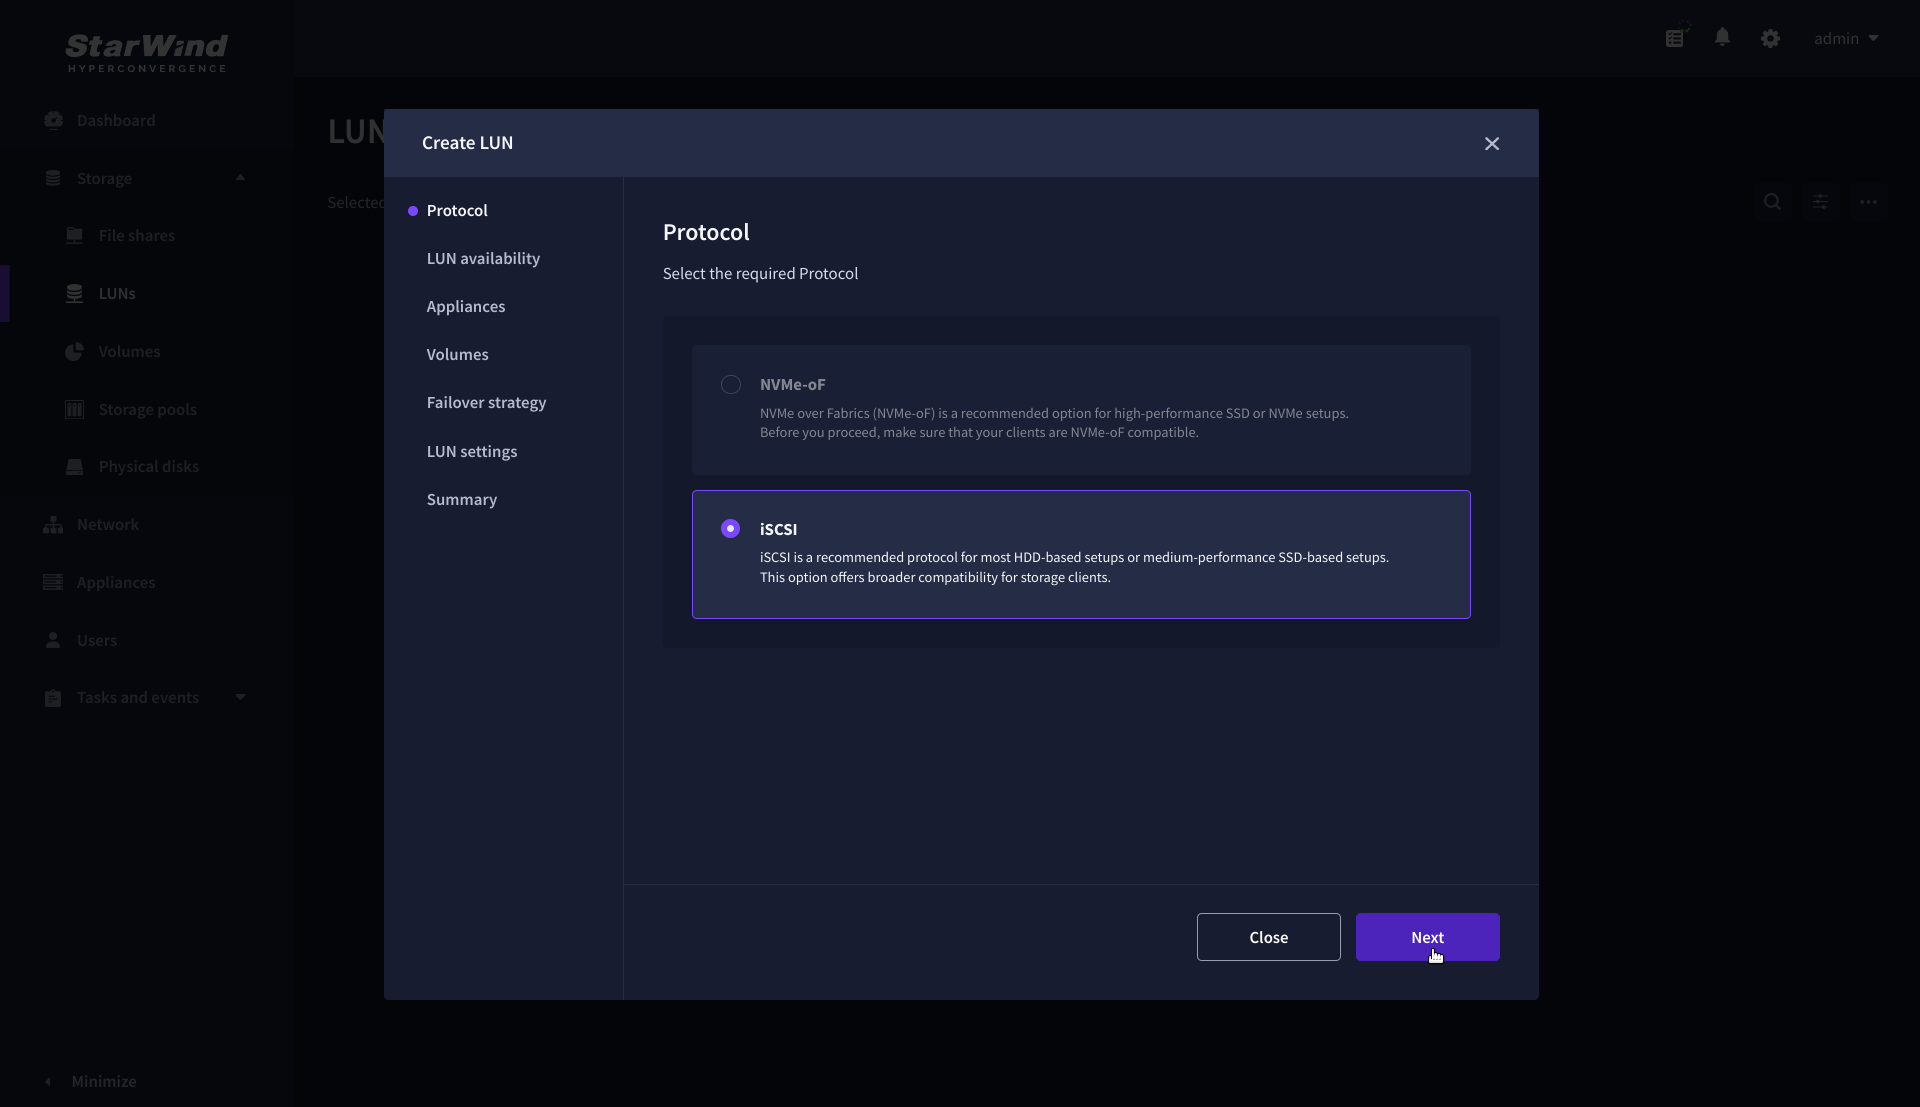
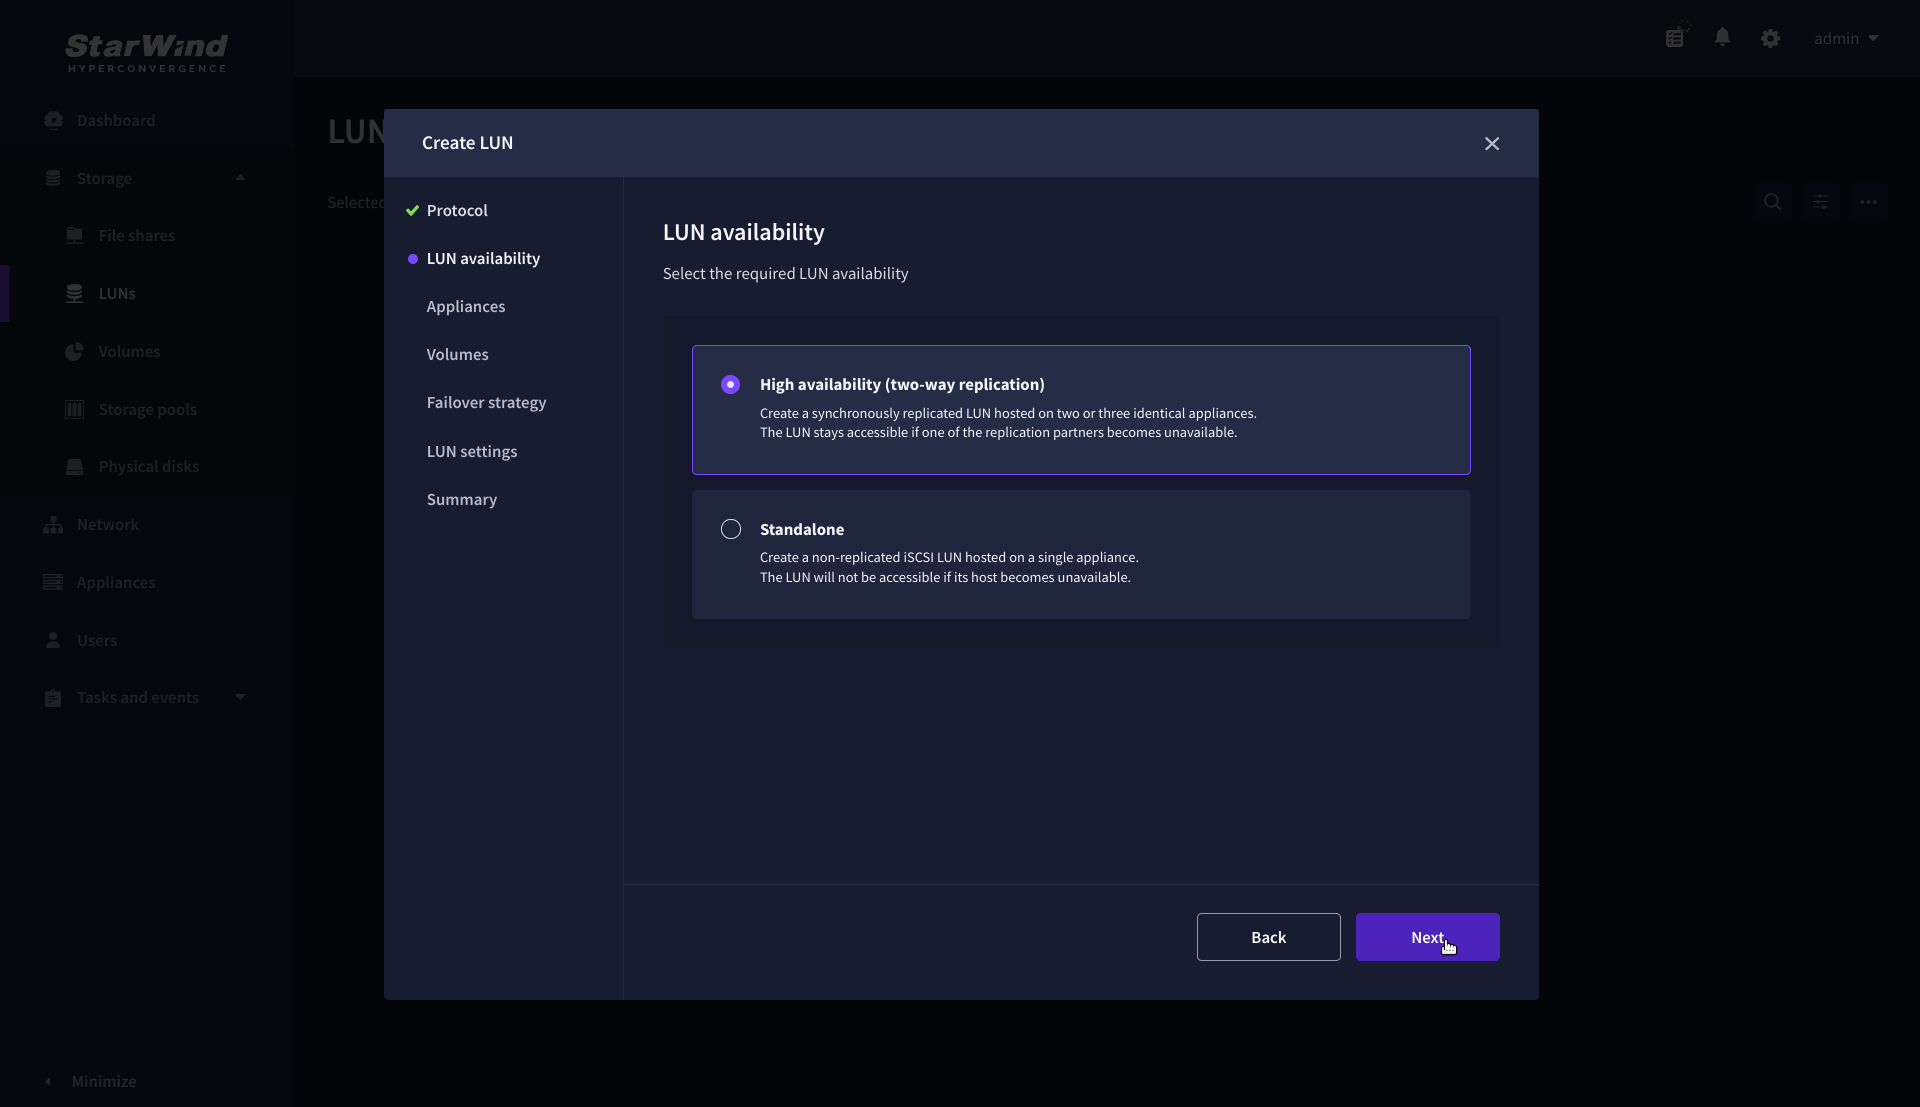
3. Choose the “High availability” LUN availability type.
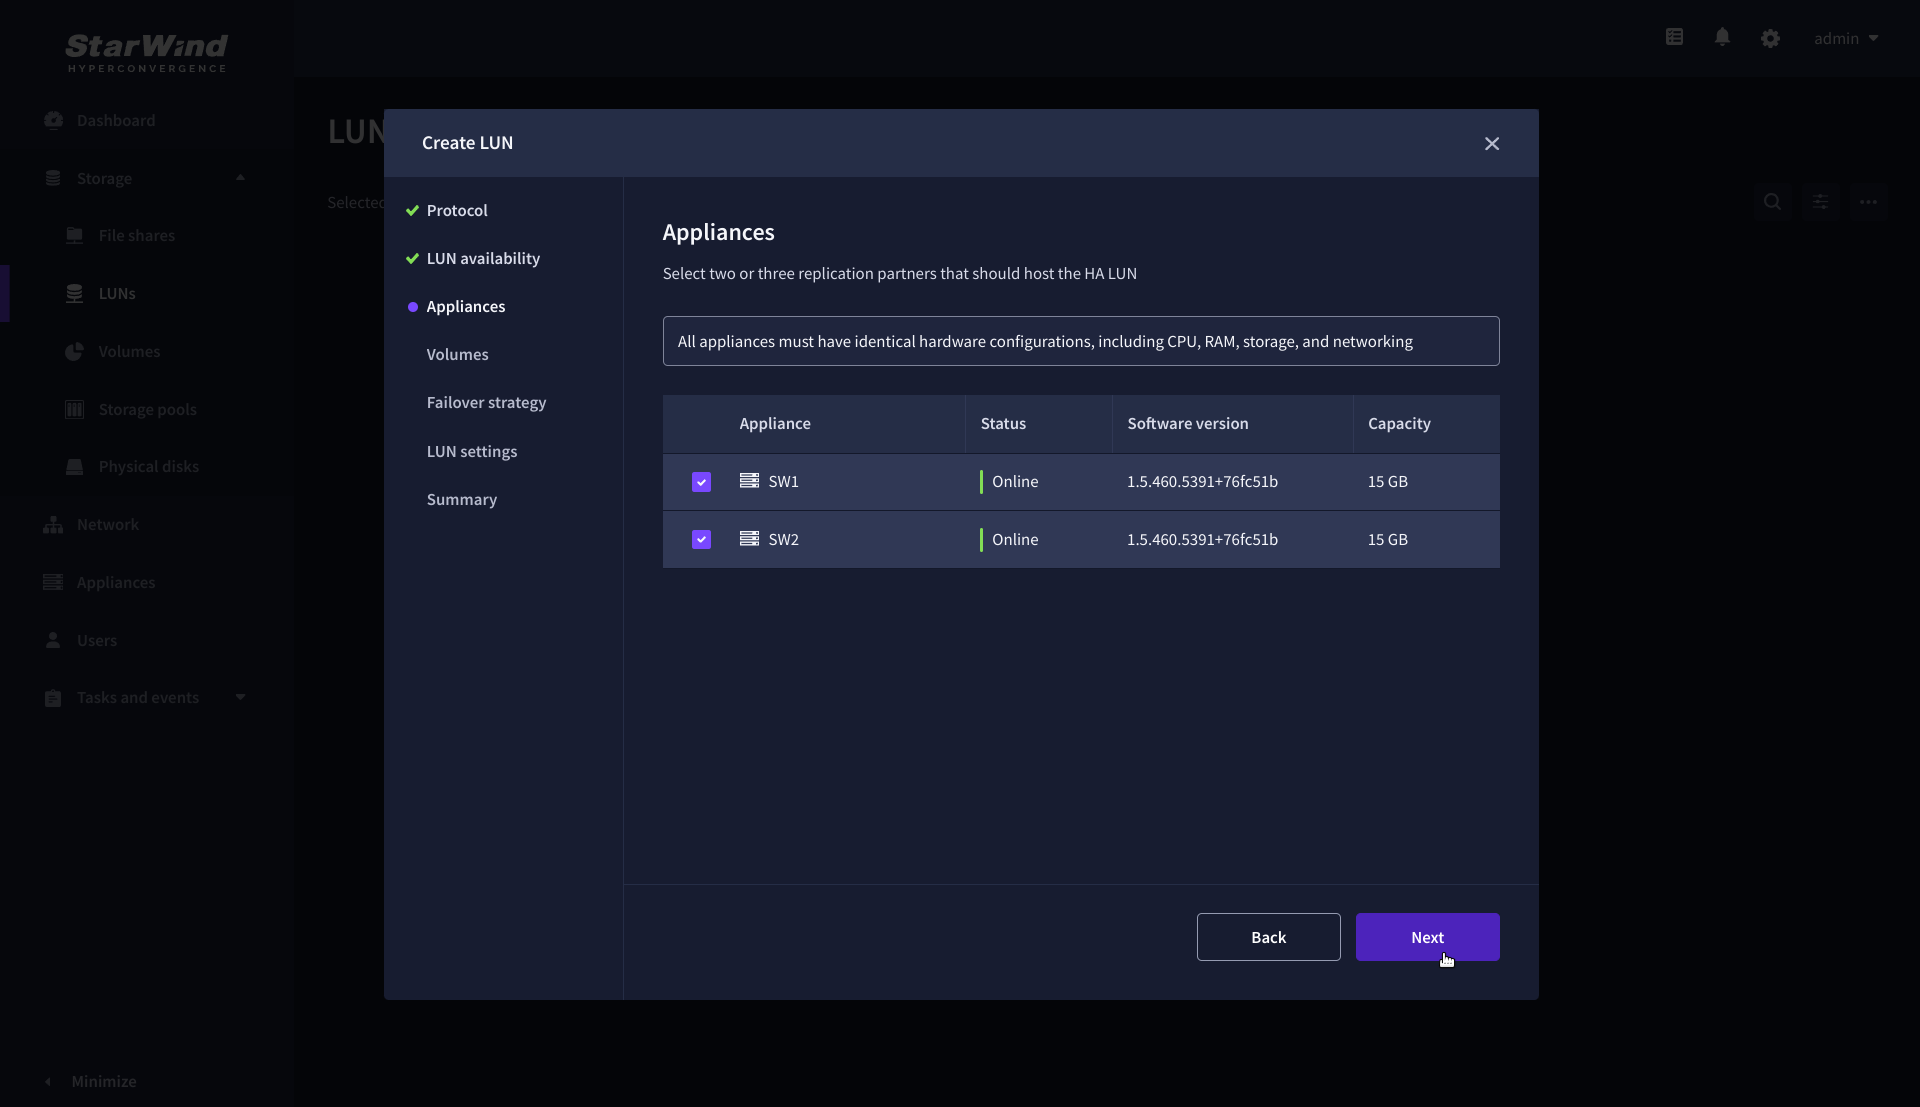
4. Select the appliances that will host the LUN. Partner appliances must have identical hardware configurations, including CPU, RAM, storage, and networking.
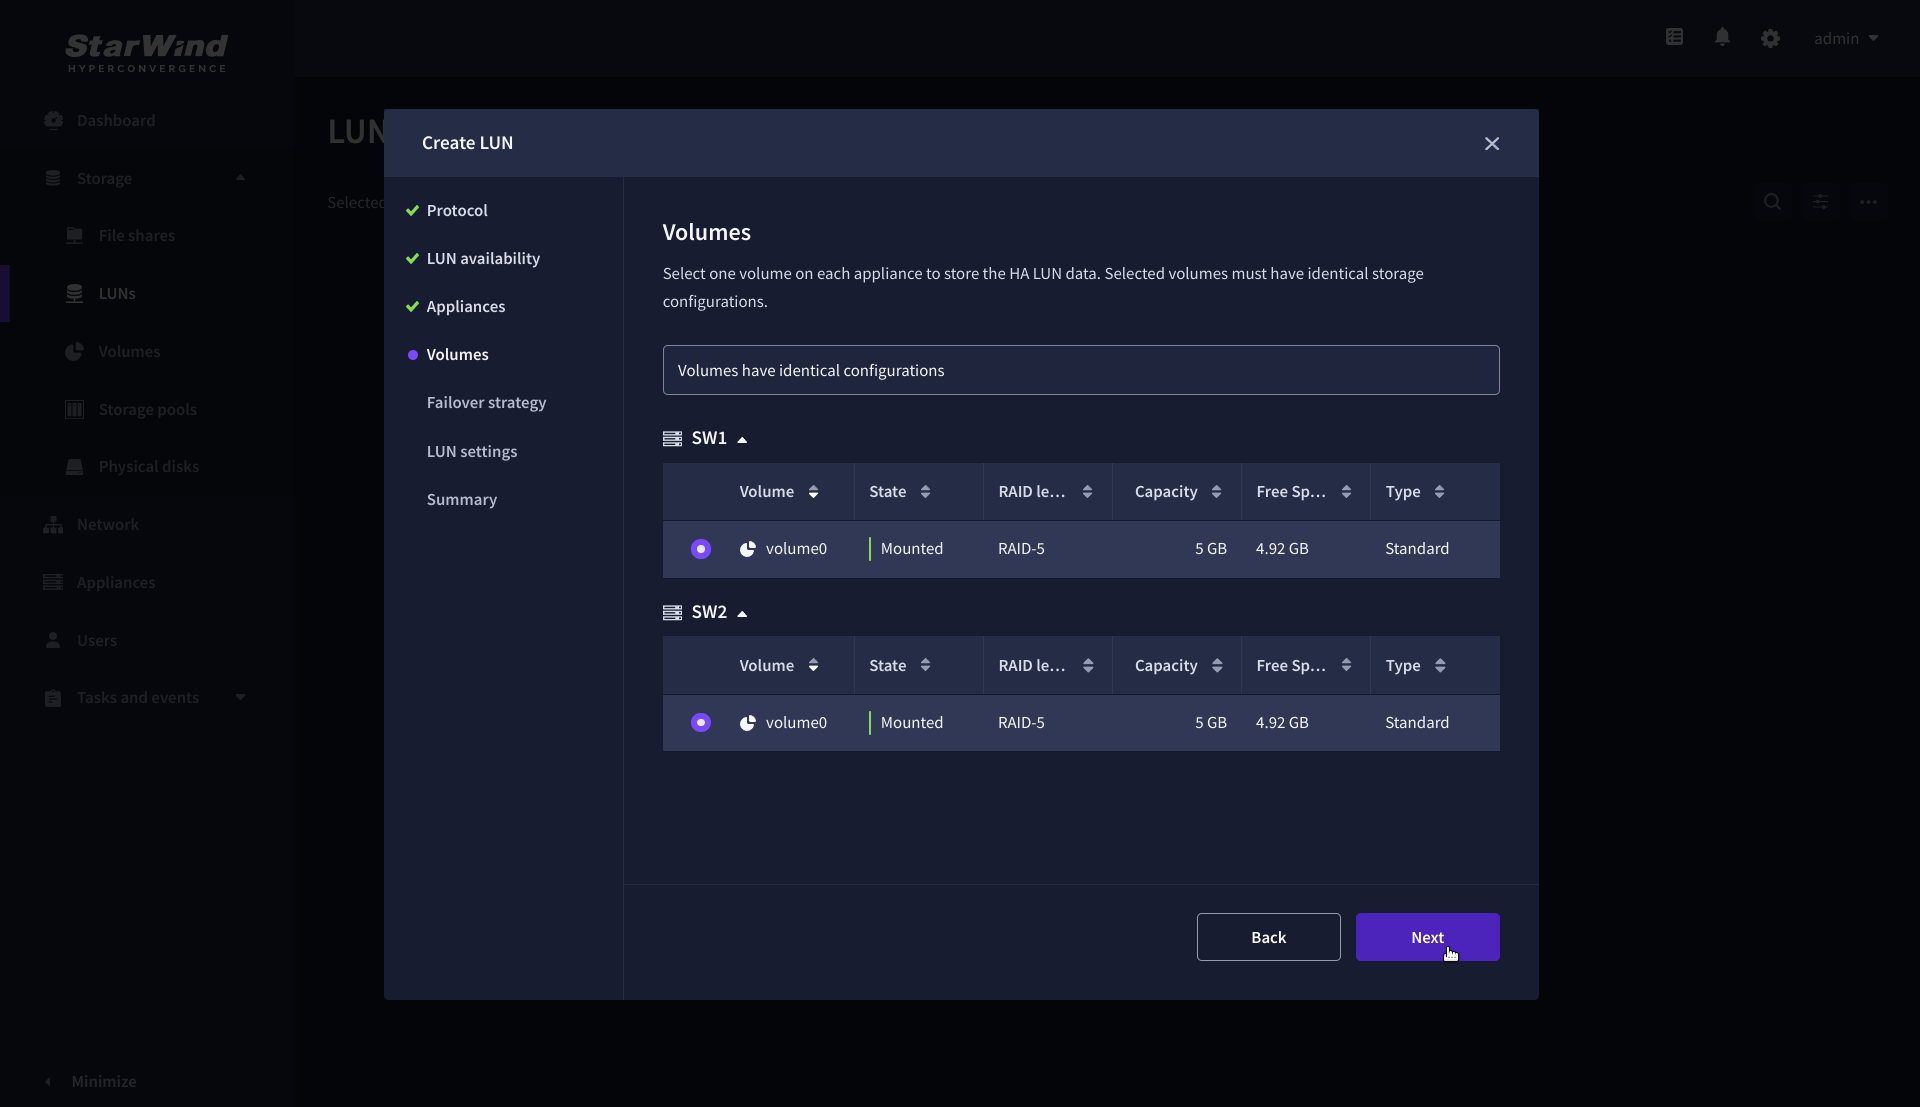
5. Select a volume to store the LUN data. Selected volumes must have identical storage configurations.
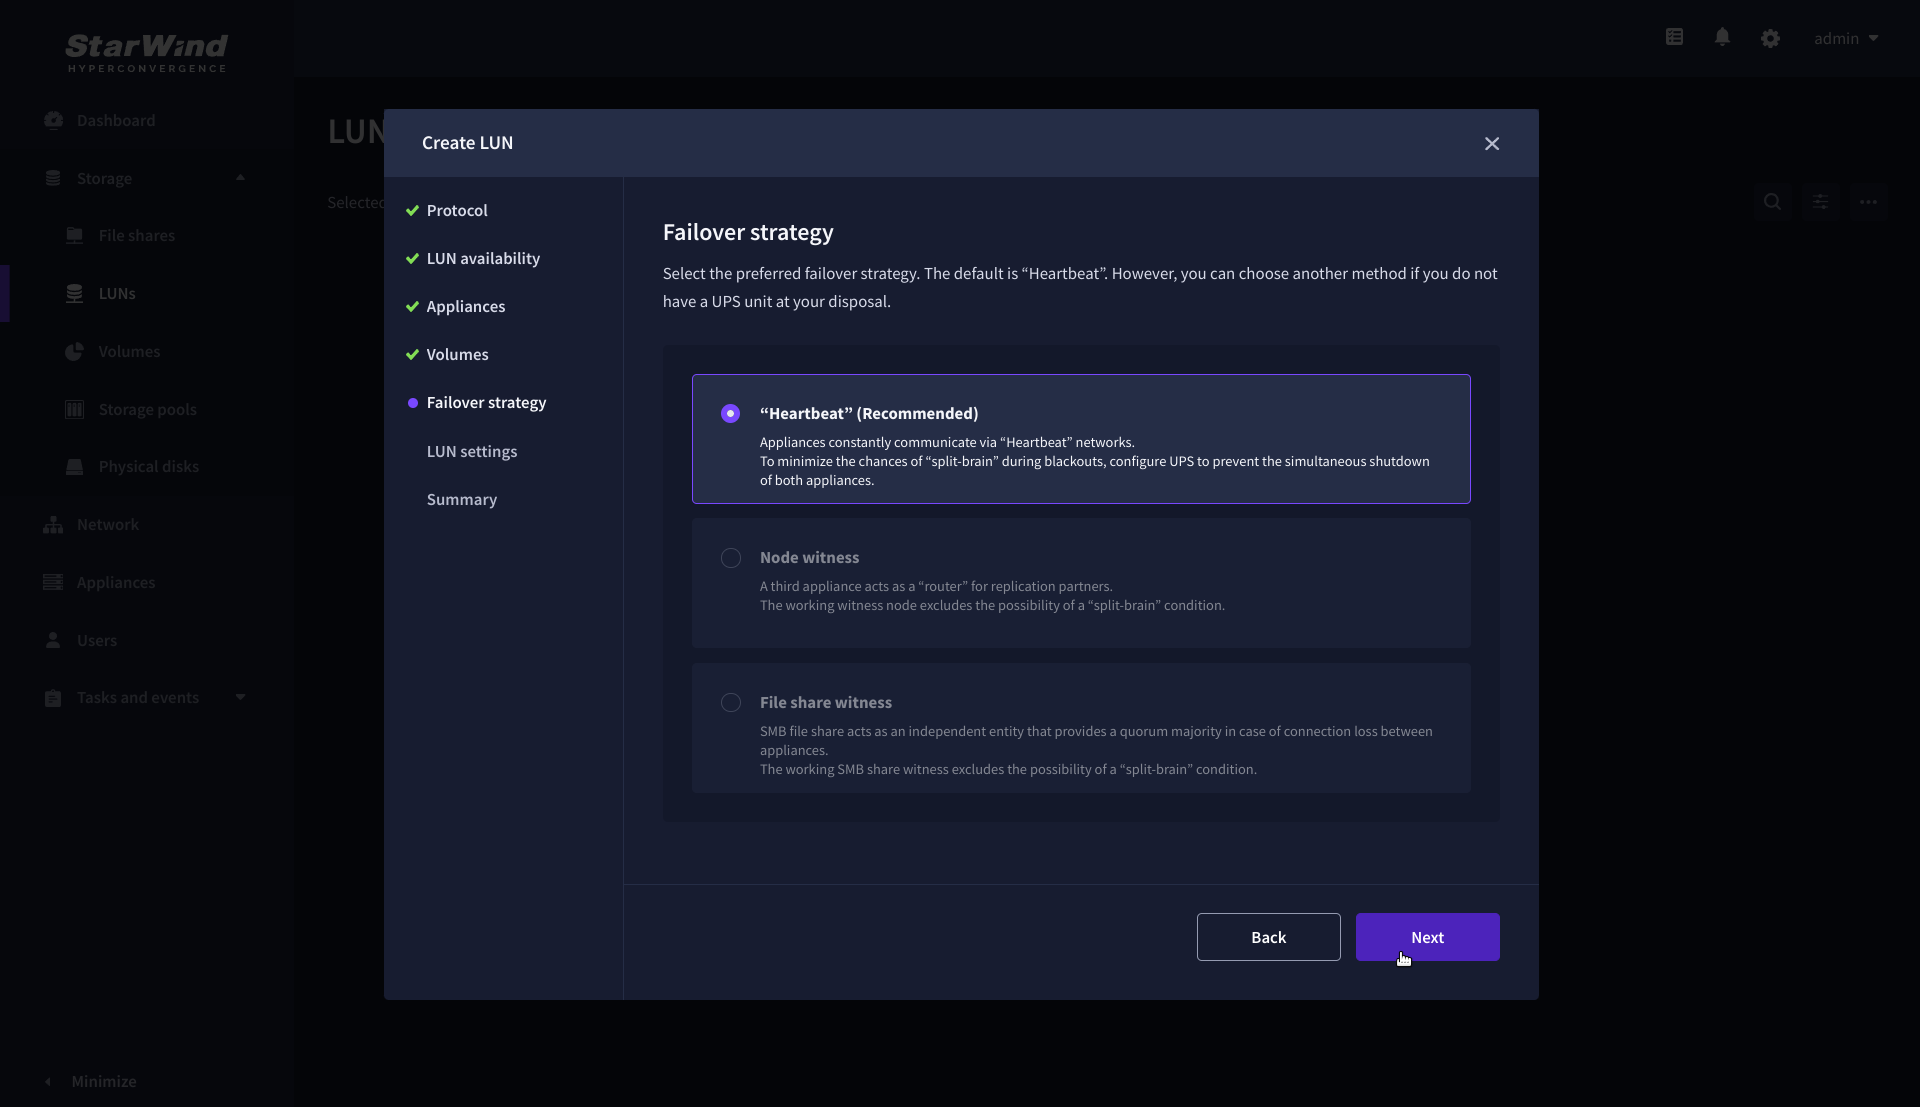
6. Select the “Heartbeat” failover strategy.
NOTE: To use the Node witness or the File share witness failover strategies, the appliances should have these features licensed.
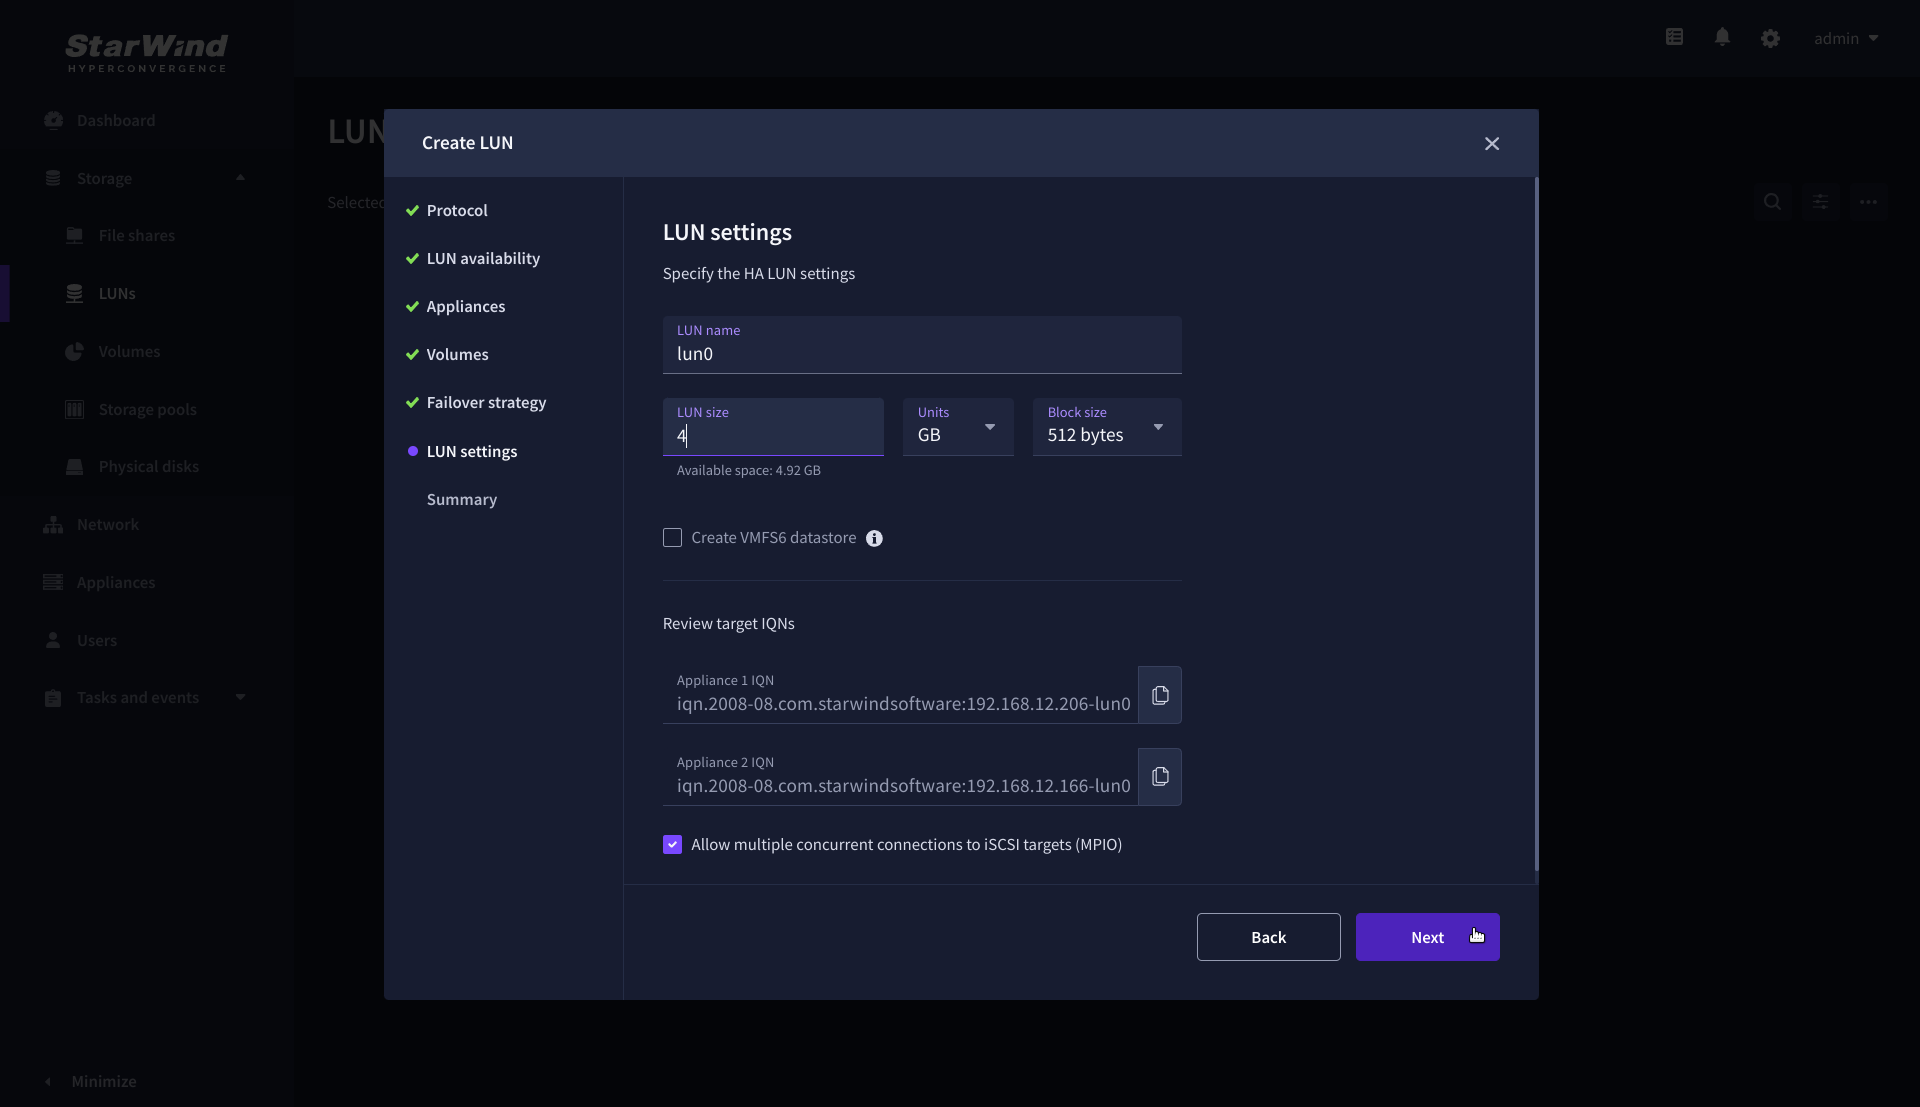
7. Specify the HA LUN settings, e.g. name, size, and block size. Click Next.
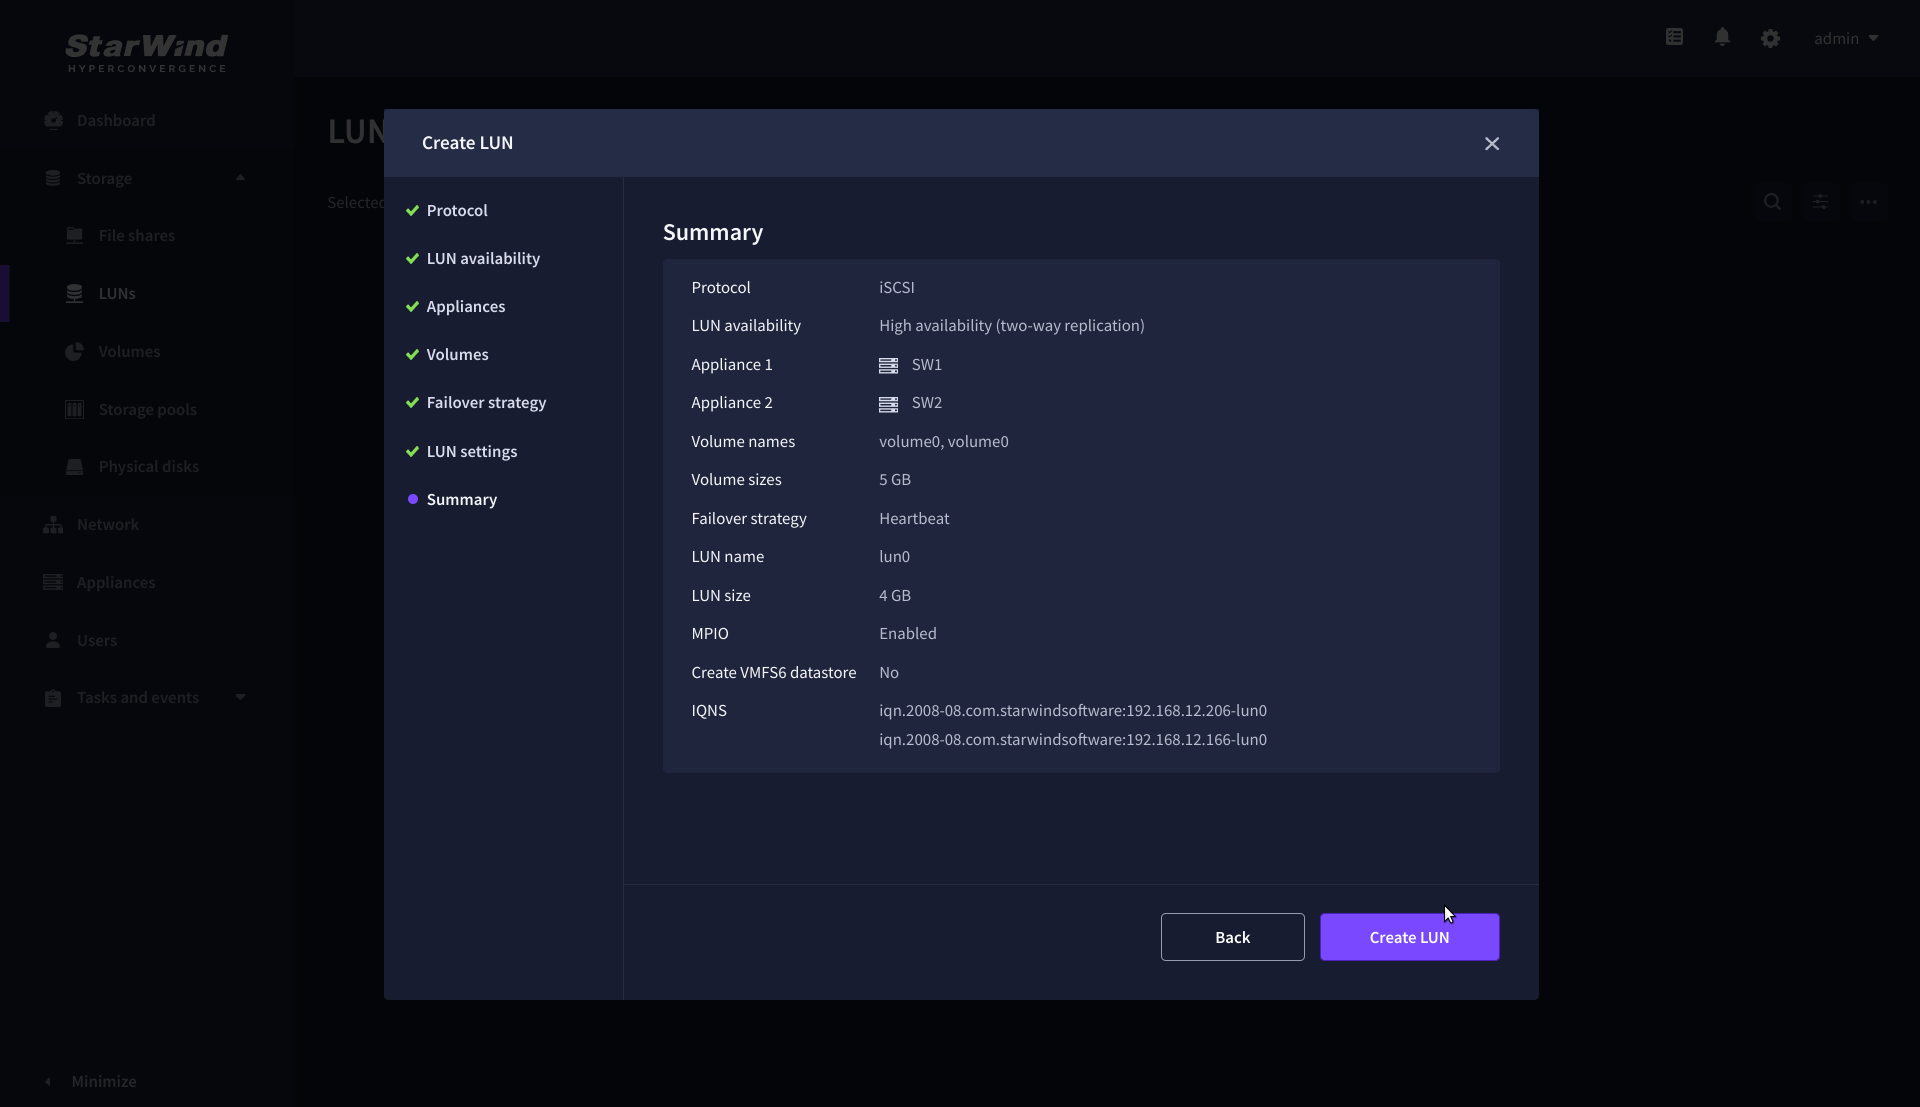
8. Review “Summary” and click the “Create” button to create the LUN.
Connecting StarWind HA Storage to Proxmox Hosts
1. Connect to Proxmox host via SSH and install multipathing tools.
|
1 |
pve# apt-get install multipath-tools |
2. Edit nano /etc/iscsi/initiatorname.iscsi setting the initiator name. 
3. Edit /etc/iscsi/iscsid.conf setting the following parameters:
|
1 2 3 |
node.startup = automatic node.session.timeo.replacement_timeout = 15 node.session.scan = auto |
Note. node.startup = manual is the default parameter, it should be changed to node.startup = automatic.
4. Create file /etc/multipath.conf using the following command:
|
1 |
touch /etc/multipath.conf |
5. Edit /etc/multipath.conf adding the following content:
|
1 2 3 4 5 6 7 8 9 10 11 12 13 14 15 16 17 18 19 20 21 22 23 24 |
devices{ device{ vendor "STARWIND" product "STARWIND*" path_grouping_policy multibus path_checker "tur" failback immediate path_selector "round-robin 0" rr_min_io 3 rr_weight uniform hardware_handler "1 alua" } } defaults { polling_interval 2 path_selector "round-robin 0" path_grouping_policy multibus uid_attribute ID_SERIAL rr_min_io 100 failback immediate no_path_retry queue user_friendly_names yes } |
6. Run iSCSI discovery on both nodes:
|
1 2 |
pve# iscsiadm -m discovery -t st -p 10.20.1.10 pve# iscsiadm -m discovery -t st -p 10.20.1.20 |
7. Connect iSCSI LUNs:
|
1 2 |
pve# iscsiadm -m node -T iqn.2008-08.com.starwindsoftware:sw1-ds1 -p 10.20.1.10 -l pve# iscsiadm -m node -T iqn.2008-08.com.starwindsoftware:sw2-ds1 -p 10.20.1.20 -l |
8. Get WWID of StarWind HA device:
|
1 |
/lib/udev/scsi_id -g -u -d /dev/sda |
9. The wwid must be added to the file ‘/etc/multipath/wwids’. To do this, run the following command with the appropriate wwid:
|
1 |
multipath -a %WWID% |
10. Restart multipath service.
|
1 |
systemctl restart multipath-tools.service |
11. Check if multipathing is running correctly:
|
1 |
pve# multipath -ll |
12. Repeat steps 1-11 on every Proxmox host.
13. Create LVM PV on multipathing device:
|
1 |
pve# pvcreate /dev/mapper/mpatha |
where mpatha – alias for StarWind LUN
14. Create VG on LVM PV:
|
1 |
pve# vgcreate vg-vms /dev/mapper/mpath0 |
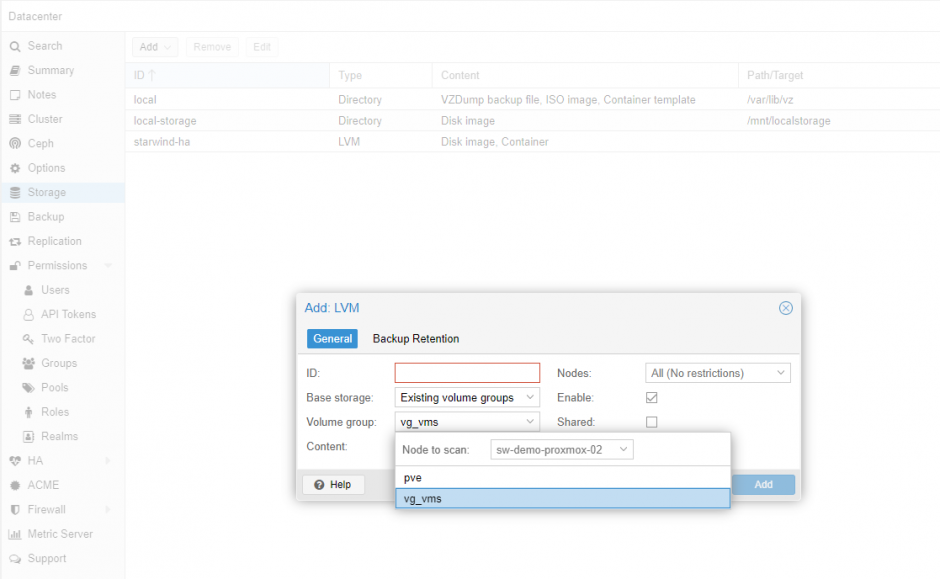
15. Login to Proxmox via Web and go to Datacenter -> Storage. Add new LVM storage based on VG created on top of StarWind HA Device. Enable Shared checkbox. Click Add.
16. Login via SSH to all hosts and run the following command:
|
1 |
pvscan --cache |
Conclusion
Following this guide, a Proxmox Cluster was deployed and configured with StarWind Virtual SAN (VSAN) running in a CVM on each host. As a result, a virtual shared storage “pool” accessible by all cluster nodes was created for storing highly available virtual machines.


