

Back in March 2017 I did a blog post about installation of SharePoint 2016. With Microsoft launching their 2019 product wave, it is the perfect time to look at SharePoint 2019 installation to see what’s new and what’s changed since the previous release.
I decided to go the completely “new and shiny” route and perform the installation of SharePoint 2019 on top of Windows Server 2019. In this blog post, I will cover this process step by step.
1. Preparing Windows Server to install SharePoint 2019
SharePoint 2019 can be installed on top of Windows Server 2016 or 2019 and both Standard and Desktop editions are supported, with Desktop Experience listed as required. Many of you will find the Desktop Experience requirement quite strange with all the push towards Core and Nano Server things, but this is how things are for now. Another thing to keep in mind is that installing the Office 2019 client and SharePoint Server 2019 on the same computer is not supported (but who installs client components on servers? 😊)
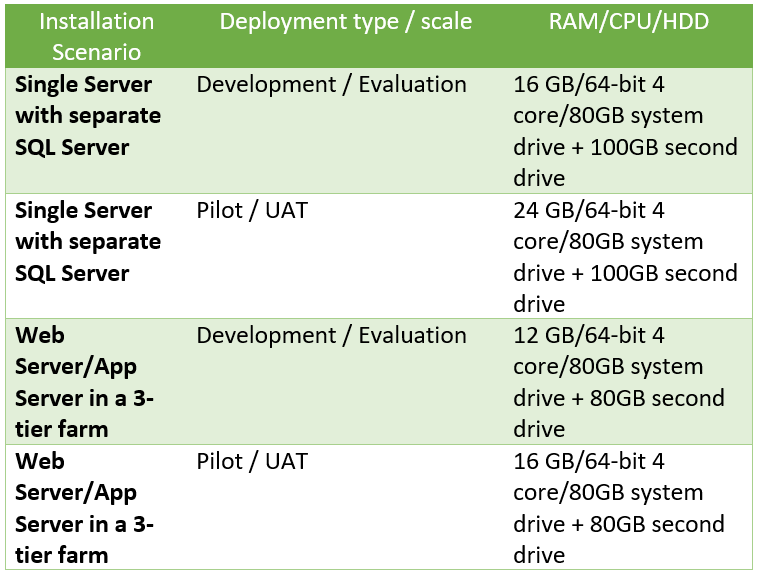
Like I said, I wanted to go the “new and shiny” route as much as possible, so I opted for Windows Server 2019. Microsoft had some delays with making the Windows Server 2019 trial available in the form of a download, so I just spinnned off Azure B4ms VM to get my Windows Server 2019 platform. B4ms has 4 vCPUs and 16 GB of memory which is enough for basic installation and testing. Official hardware requirements for SharePoint 2019 state 12 GB of RAM as the absolute minimum (in 3-tier farm scenario) and looks as follows:
And, by the way, these requirements are exactly the same as those listed for SharePoint 2016 (you can check it here), so we have no reason to complain about any increased hardware demands.
2. Database server for installation
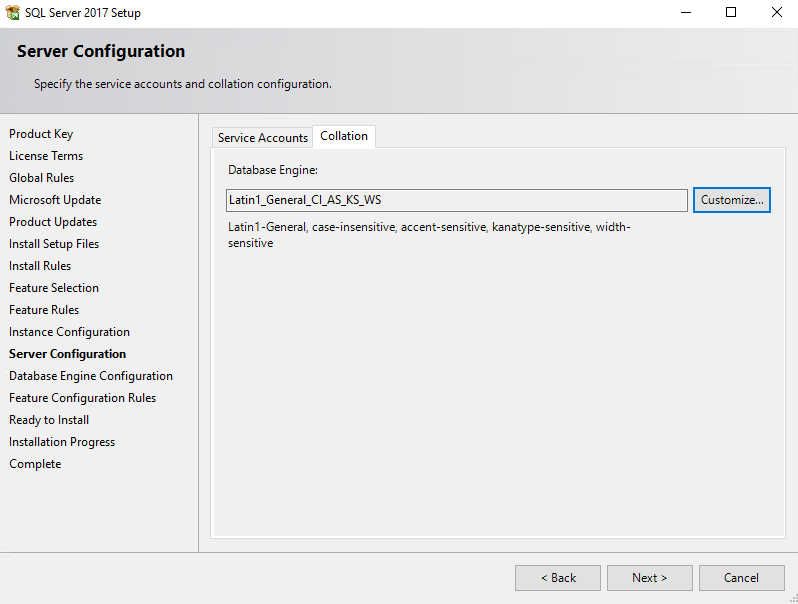
As a SQL Server for hosting SharePoint databases, we can use Server 2016/2017 Standard or Enterprise editions (any public updates are supported through the product life cycle). Obviously, SQL Server Express is not supported, and, strangely (at least to me), SQL Azure SaaS service is not supported also (for any SharePoint Databases). In my case, I’ve installed SQL Server 2017 on my Azure VM using trial version of on SQL Server 2017 on-prem. I’m not going to go into details about SQL Server installation in this article, and I will only mention that I set up SQL Server 2017 Trial default instance with Latin1_General_CI_AS_KS_WS collation, like so:
I’ve also created an SQL server alias “spdb” the same way I explained in my old blog post on SP2016 installation just for the sake of cultivating/encouraging good habit of following best practices. Remember that starting from SQL Server 2016 SQL, Server Management Studio goes as a separate download. And what is surprising (at least to me) is that SSMS 17.9.1 on top of Windows Server 2019 still reads alias settings from SysWOW64 registry hive. One might have thought that we are well in the x64 bit world with these products, yet not exactly…
3. Software prerequisites
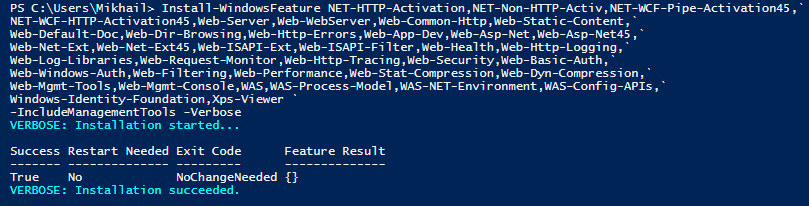
Having Windows Server 2019 and SQL Server 2017 (along with alias and SSMS) in place, the next step is to install all the software prerequisites for SharePoint 2019.
First, we need to install the required Windows Server roles and features. The easiest way to do this is with PS script. Copy the script and execute it from elevated PowerShell or PowerShell ISE window:
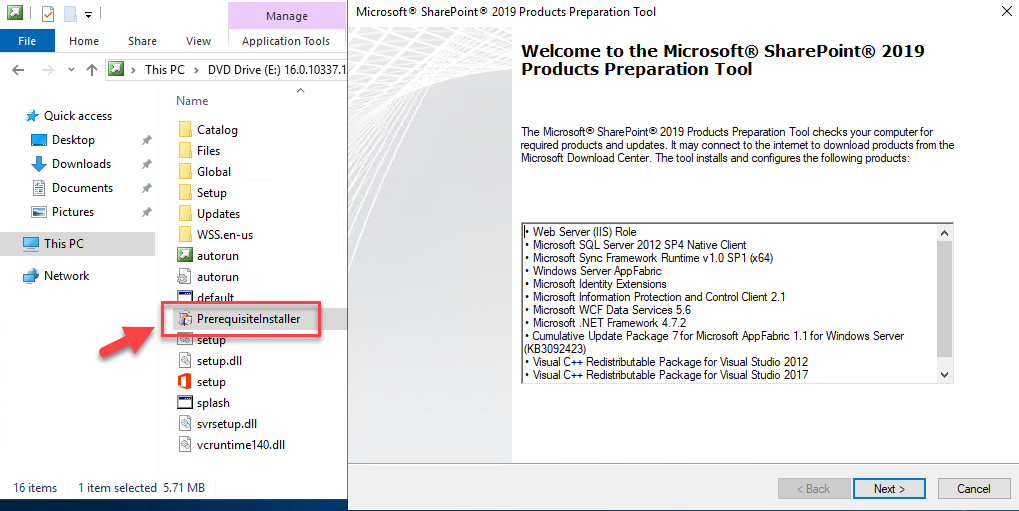
Next, we need to run SharePoint 2019 Products Preparation Tool launching PrerequisiteInstaller.exe from the root of product installation media:
We just click Next on the initial wizard´s page, accepting License Terms and letting it do its job. In my case, it was completed in 2,5 minutes and asked for a restart:
Ensure that your SharePoint 2019 installation media is still mounted after reboot, otherwise you will see the following error:
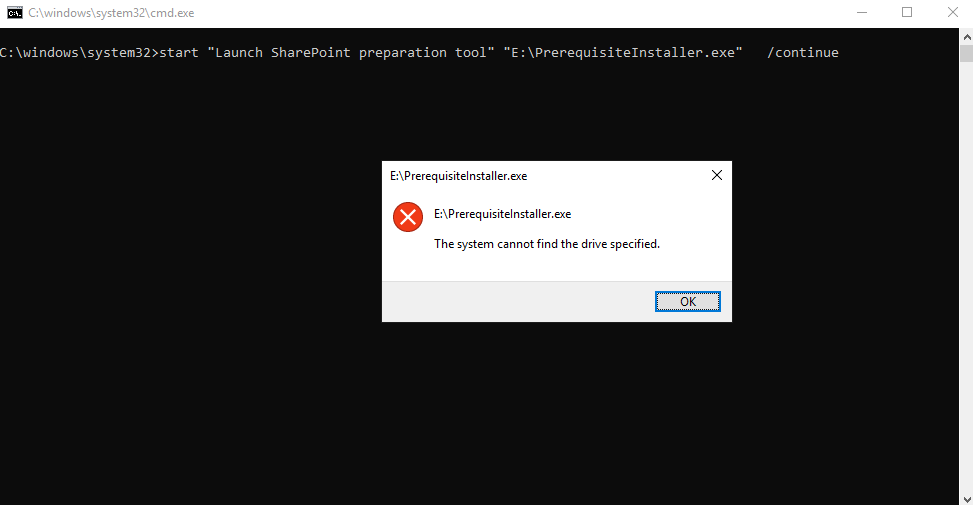
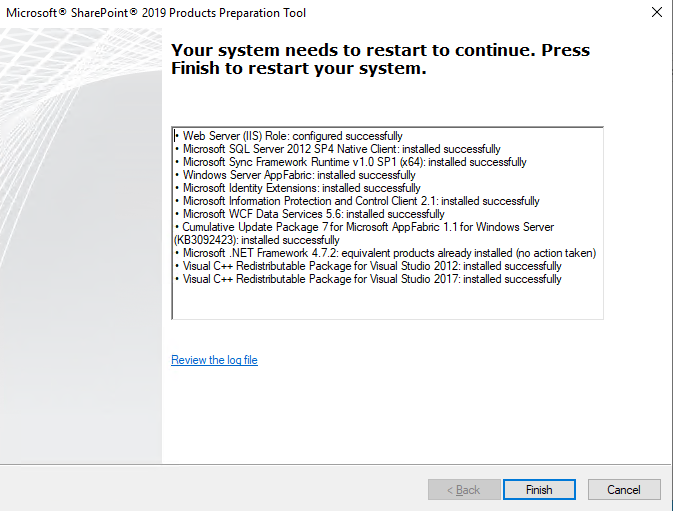
If you run into this, just re-run PrerequisiteInstaller.exe with /continue switch manually. Once it is completed, Preparation Tool will report the “Installation Complete” status:
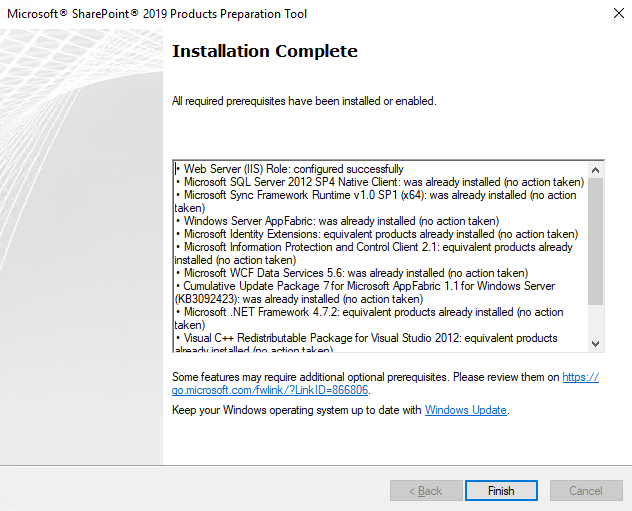
Just click Finish and move on to the next step.
4. Running SharePoint 2019 Setup
We are now ready to kick off SharePoint 2019 Setup executing setup.exe from the root of installation media:
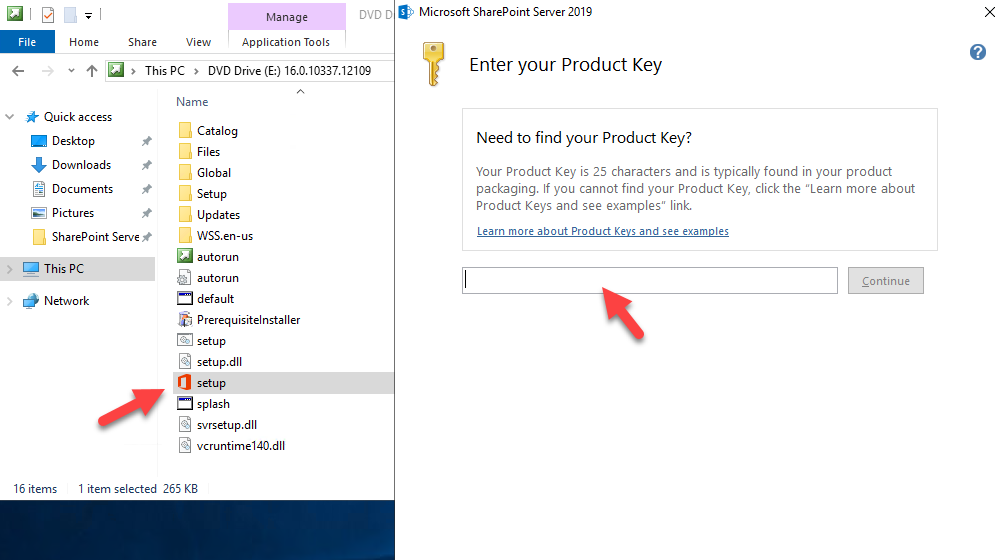
Remember that for the trial version installation, you can use the trial product key from SharePoint 2019 trial download page. Once you enter the product key, you will be prompted to agree with the license terms – no surprises here, first things first 😊:
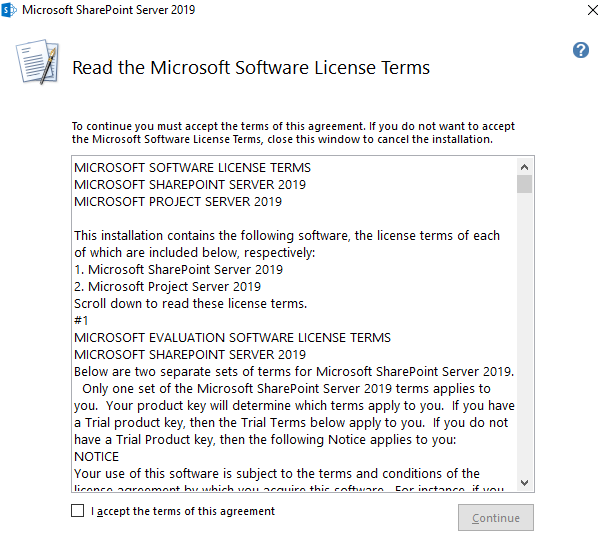
Tick “I accept…” check box and hit Continue to move on to file locations selection step:
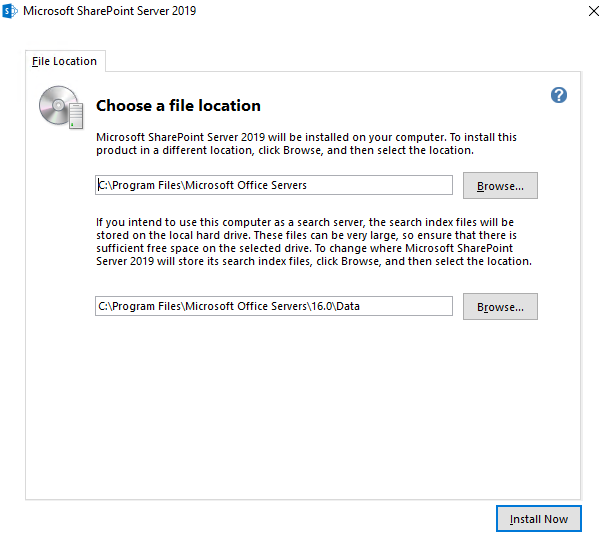
For our purpose here, it is OK to accept defaults and click on Install Now button.
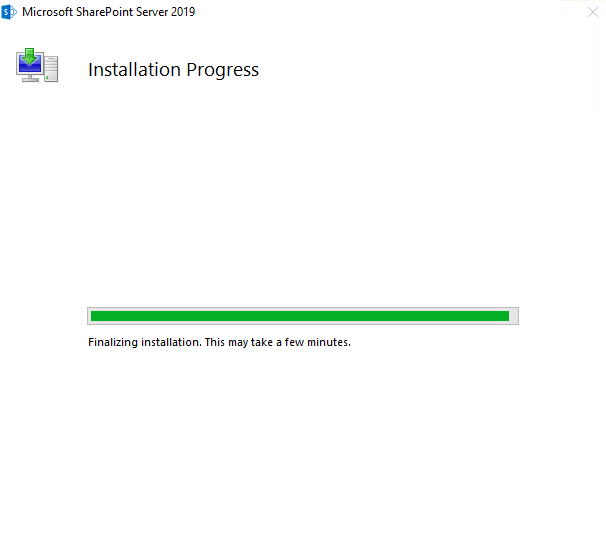
At this step, you can have some coffee and contemplate the green progress bar for some time (which generally should be your favorite part, unless you are repeating this process eight times in a row and expect it to fail yet again).
Once the installation completes, you can click Close and move on to SharePoint Products Configuration Wizard. You may be also prompted to reboot to complete your installation at this stage:
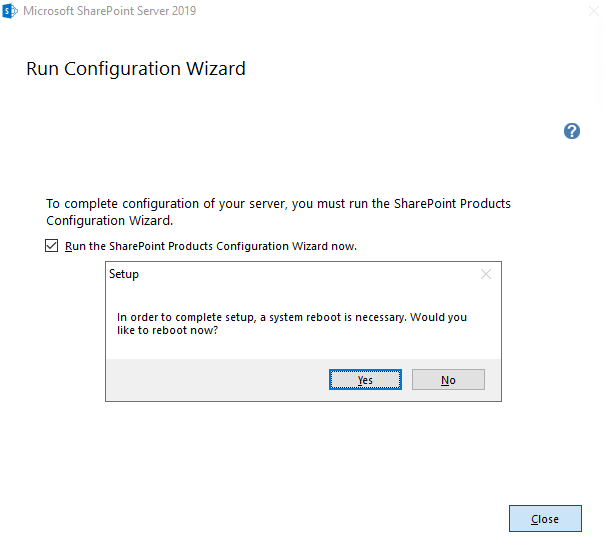
Click yes to perform the restart required to complete the installation process.
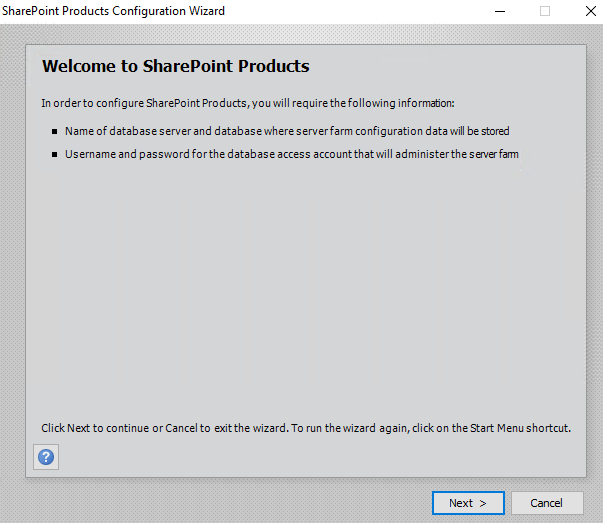
5. Running SharePoint Products Configuration Wizard
Unless you unchecked “Run the SharePoint Products Configuration Wizard now” check box or your installation media was removed, you will be presented with SharePoint Products Configuration Wizard after the reboot:
Let’s go through it together. After clicking Next on the initial screen, we need to explicitly confirm that we are OK with the restart of IIS, SharePoint Administration and SharePoint Timer services:
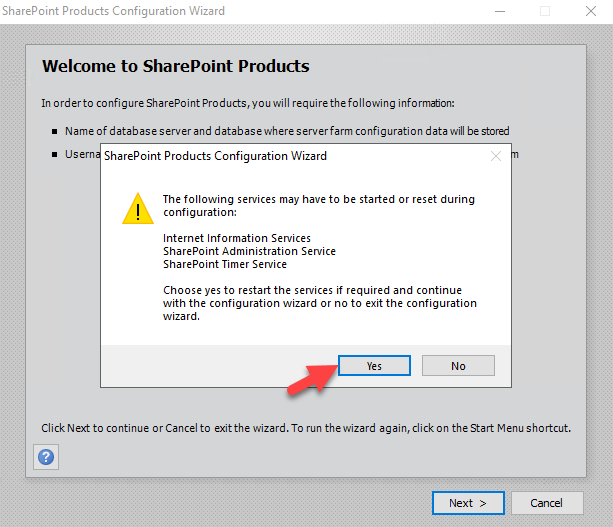
This is a way of taking care about those who don’t care about their agreed downtime windows, so that they are at least warned and have a chance to think twice.
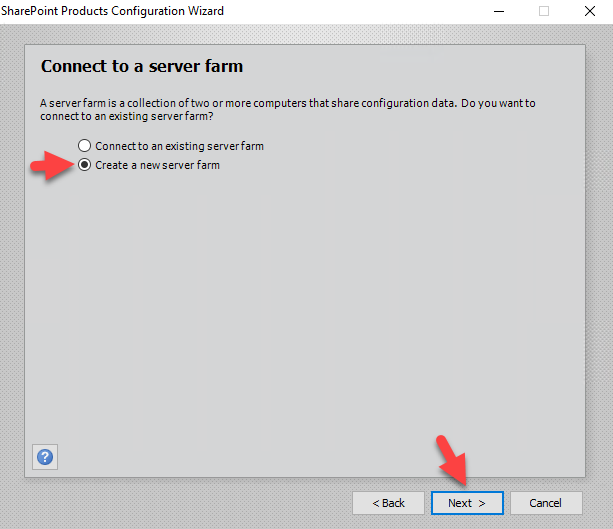
As we are performing a brand new installation, we select “Create a new server farm” on the next page of the wizard:
On the next page, we specify our SQL Server alias as database server, database name and database access account:
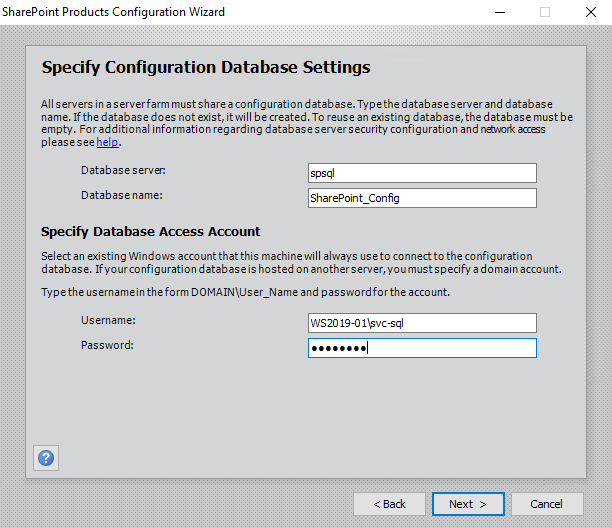
Your database access account is supposed to be the domain user, otherwise, you will get the following warning:
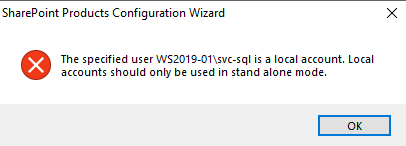
You can workaround this by creating your SharePoint configuration database using New-SPConfigurationDatabase cmdlet and specifying – the LocalServerRole SingleServerFarm parameter, like that:

Note: If you decide to go this route, you should understand all the implications of using this approach fully. In my case, I just spin up local domain controller and switch to domain accounts.
On a SQL Server side, the database access account needs to have dbcreator and securityadmin fixed server roles as well as db_owner fixed database roles on all existing SharePoint databases. To learn more about required accounts and permissions, read the “Initial deployment administrative and service accounts in SharePoint Server” section of the SharePoint 2019 product documentation.
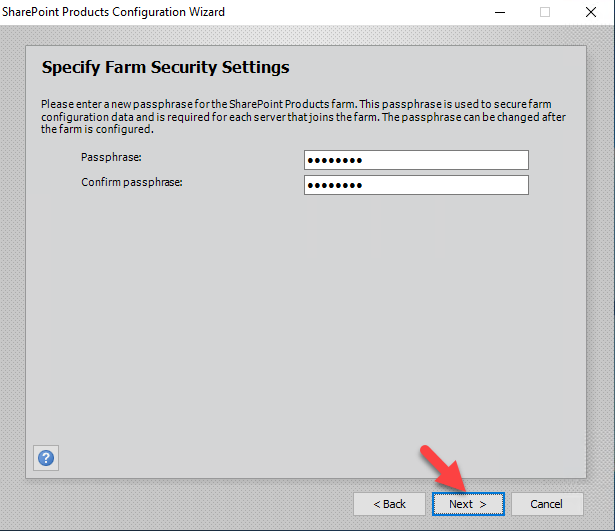
Following the wizard, our next step is to specify the farm pass phrase, which will be used to join new servers to the farm, and click Next:
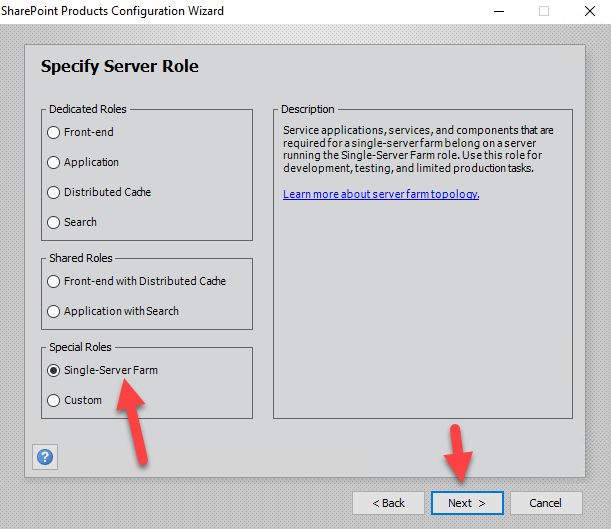
We then specify our server role as “Single-Server Farm”:
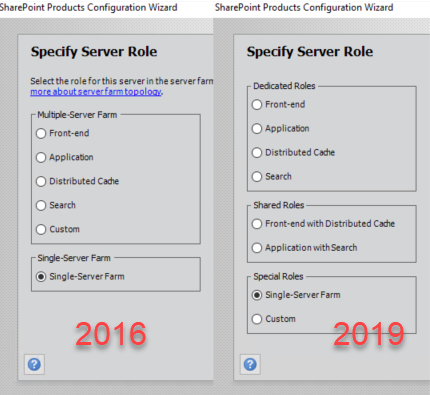
This is the part where we can see some differences in the server role options exposed to us by the wizard as you can easily see if we compare respective pages in SP2016 and SP2016 configuration wizards:
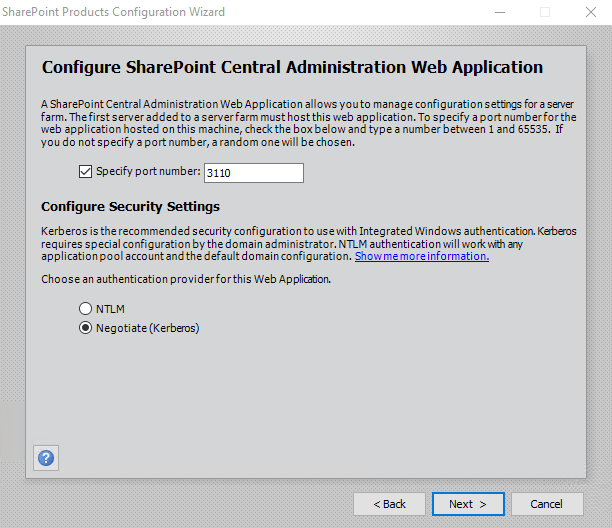
On the next step, we have options for configuring Central Administration (CA) web application port number (be sure to specify one, if you don’t want to end up with a random port), as well as the authentication provider for it:
If you select the Negotiate (Kerberos) option, you will receive a warning about additional manual configuration steps required:
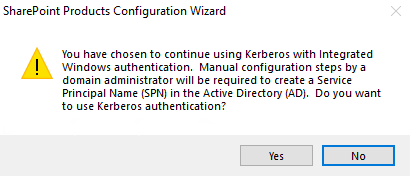
This lengthy blog post explains Kerberos related configuration settings in great details and contains references to additional resources if you want to learn more (there is always more when it comes to Kerberos 😊).
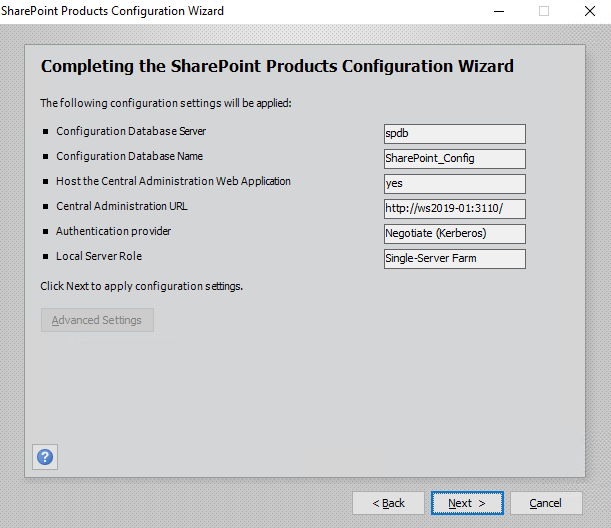
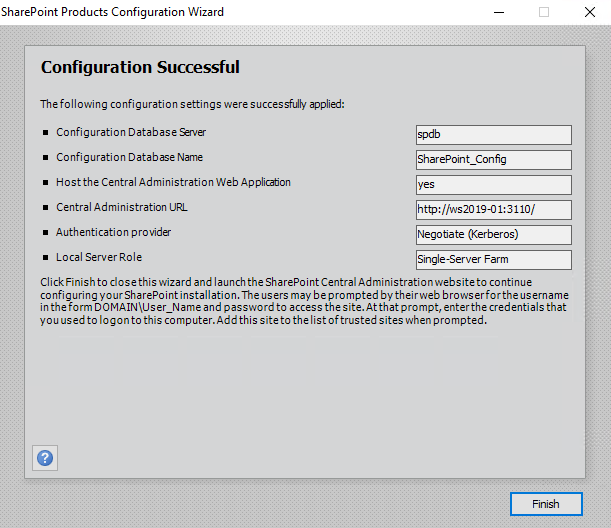
The next wizard step just shows you the summary of selected configuration settings to review before you start the configuration process:
Once you click Next, the configuration process begins:
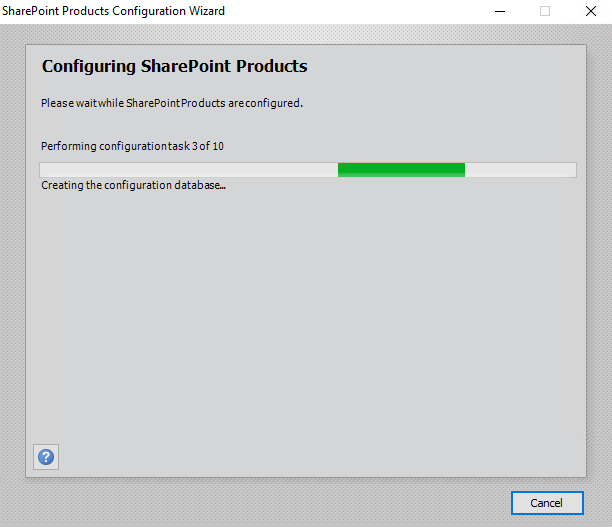
It involves ten configuration tasks, including such things as creation of configuration database, registration of SharePoint features, provisioning of SharePoint CA web application and so on. As soon as the process completes, we will see the Configuration Successful window and click Finish to complete the process:
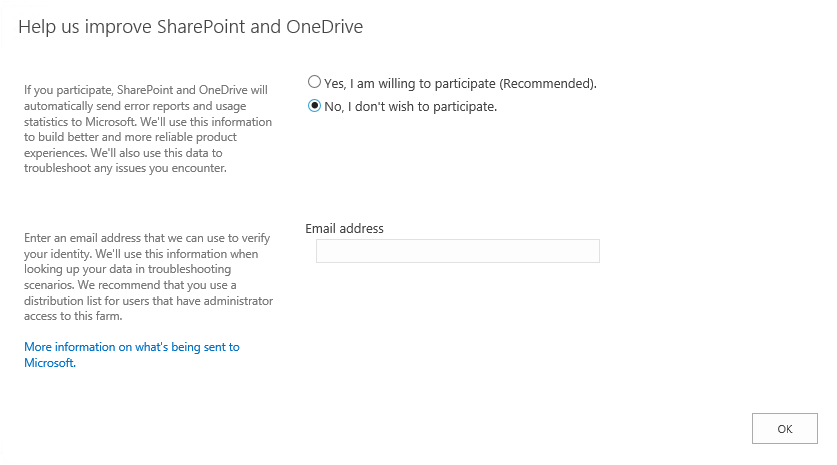
After you click Finish, Setup Manager opens the CA page for you, presenting you with the “Help us improve SharePoint and OneDrive” pop up prompt (something we used to know as Customer Experience Improvement Program or CEIP):
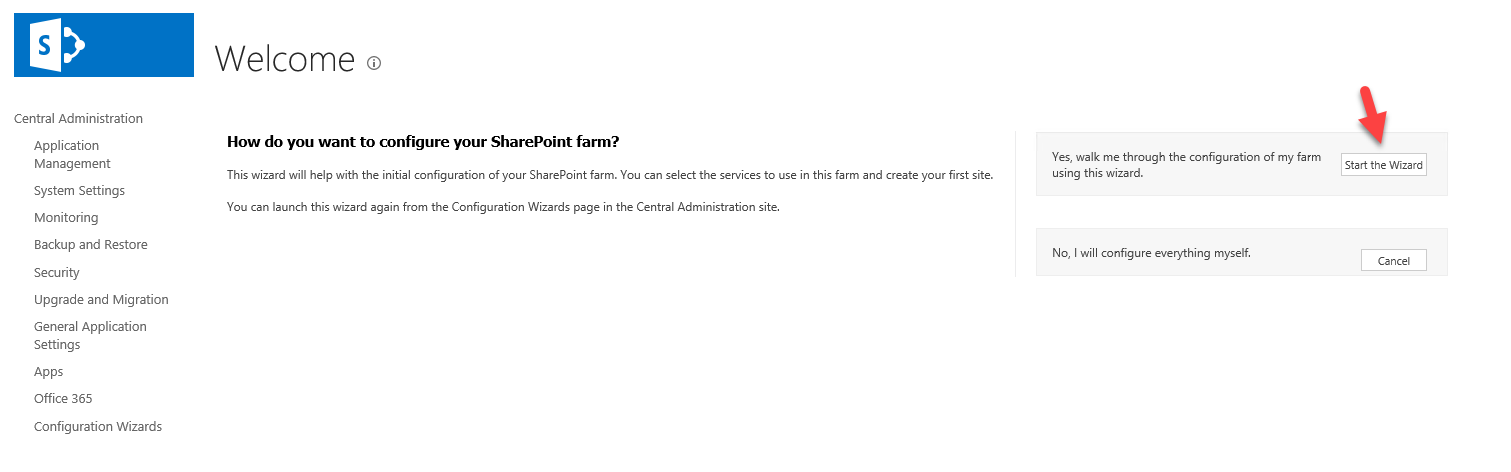
Once you get that pop up out of the way of selecting options of your preference, then you can select between manual and wizard configuration approaches to further configure your farm. For the sake of simplicity, we opt for the “Start the Wizard” option:
Wizard presents us with options to configure the service account, service applications and services:
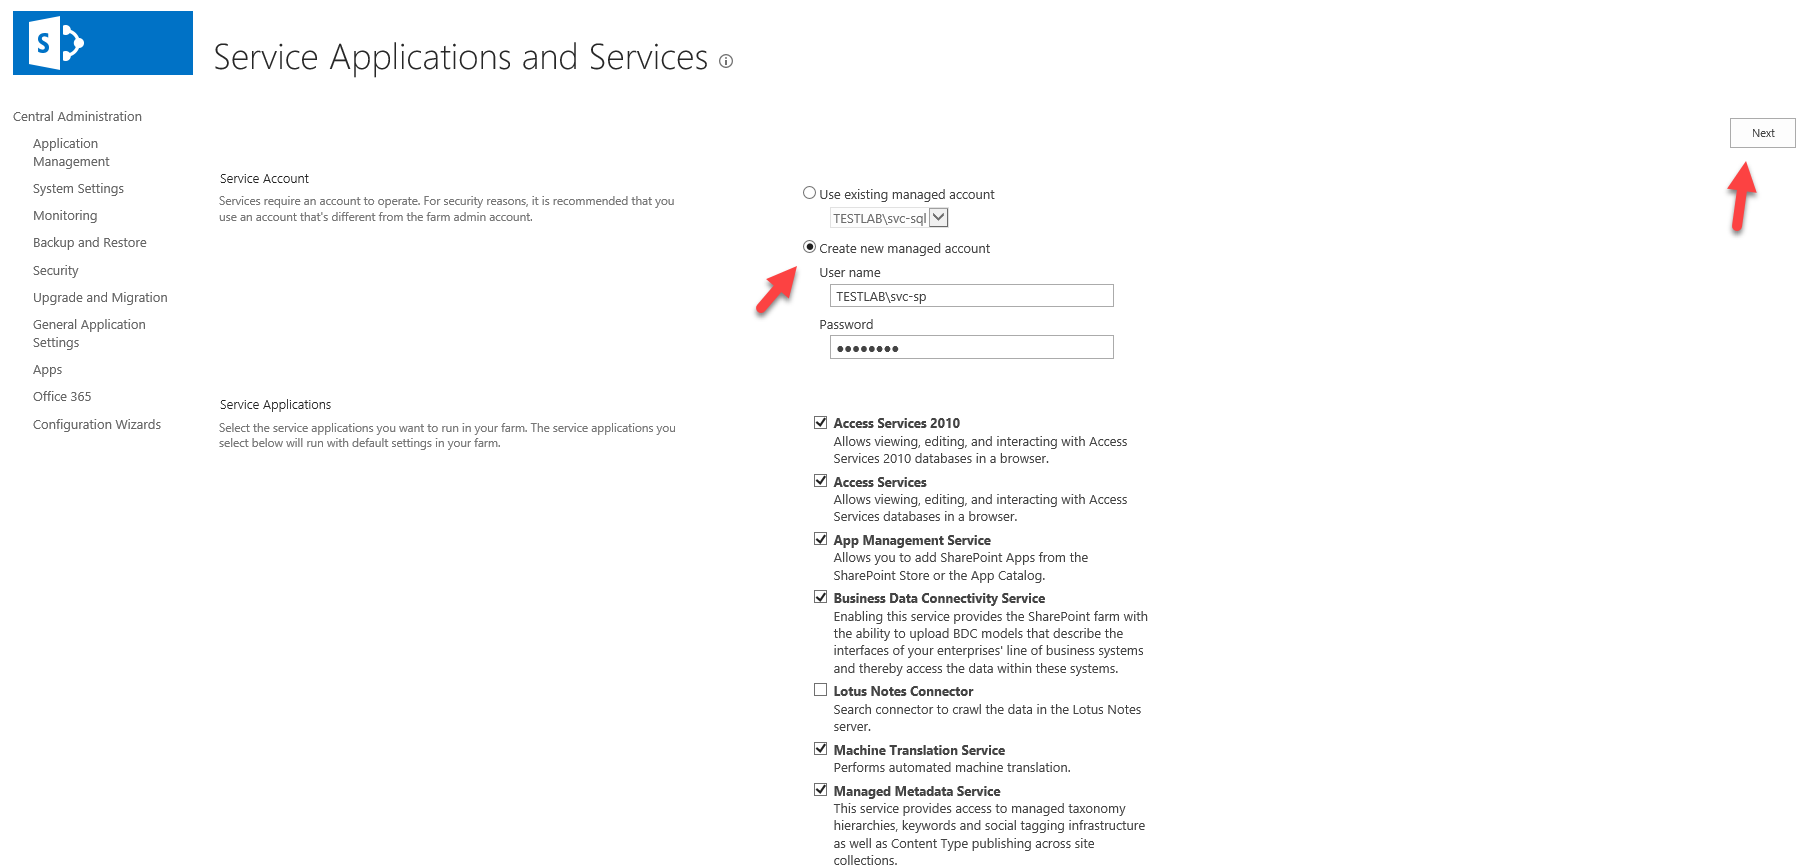
Create the new service account in AD DS and type in its name and password to register it as a new managed account, make your service applications and services selection and click Next. After contemplating a bit about that famous “This shouldn’t take long” message (which sometimes does take long), you will be redirected to Create Site Collection page:
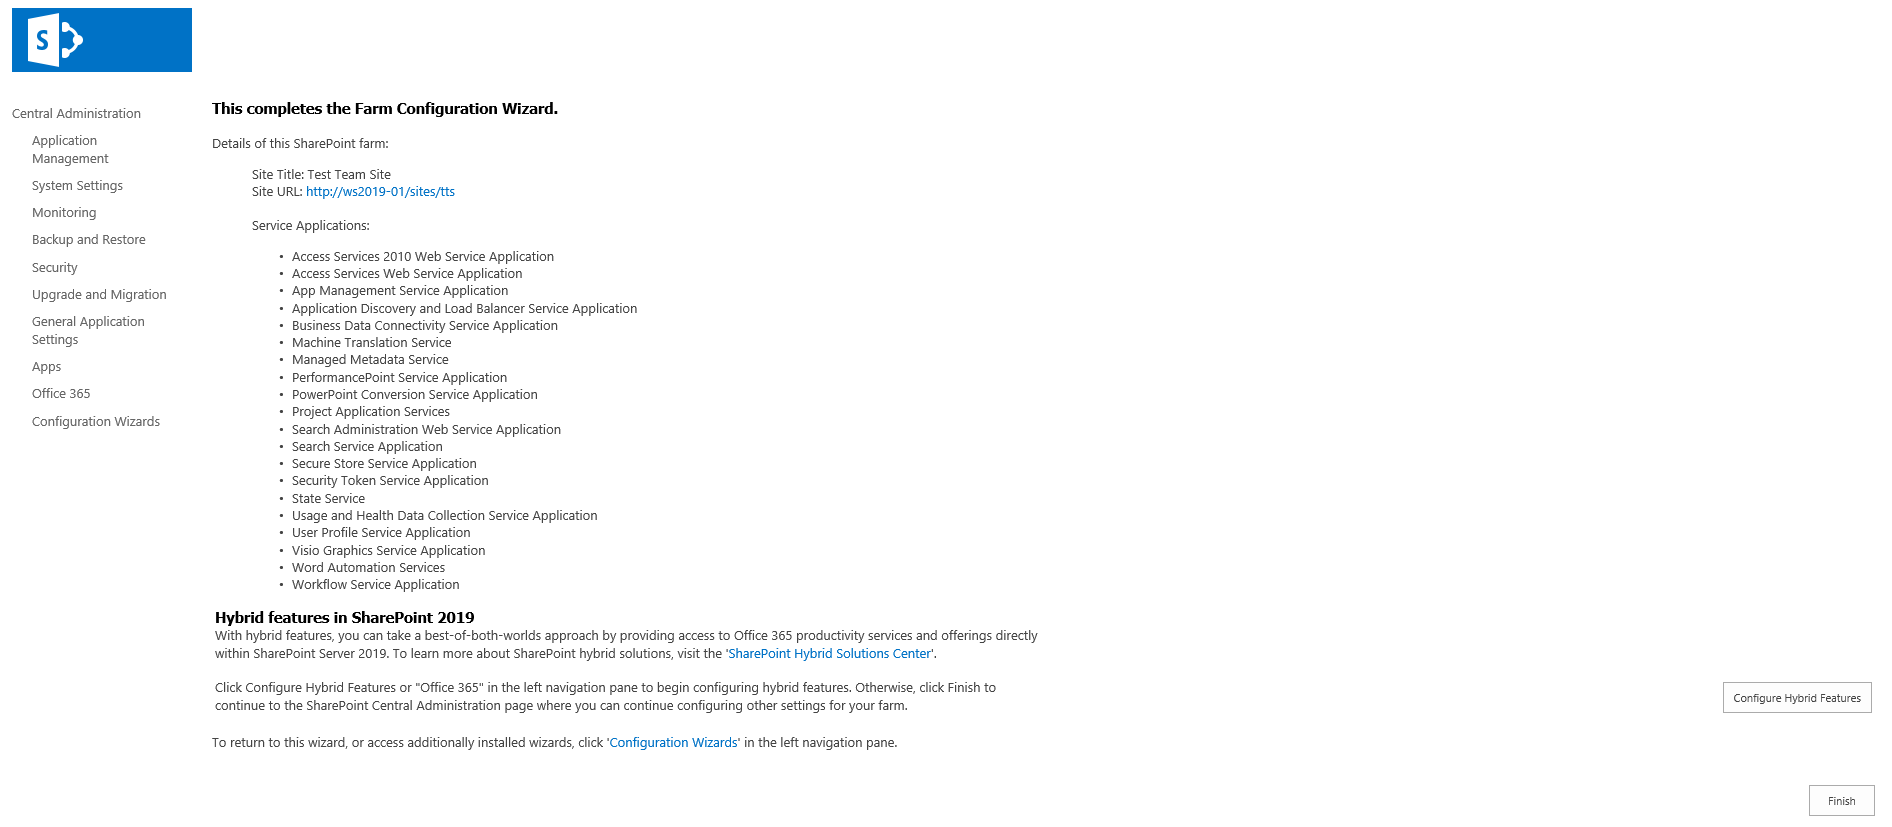
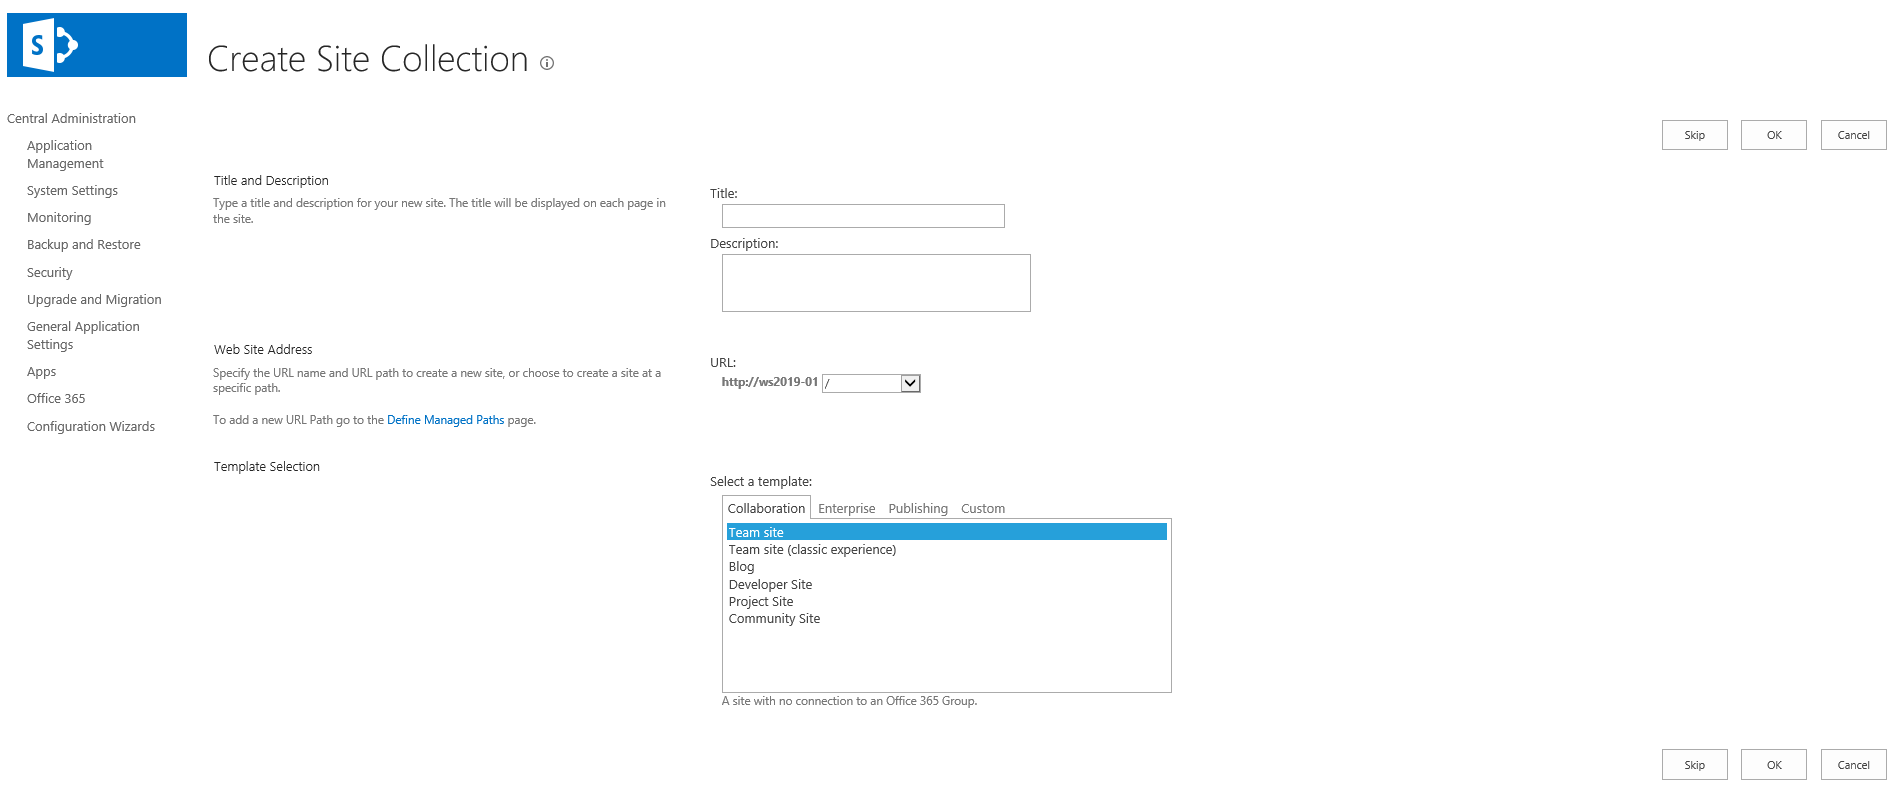 As you may notice, you now have Team Site and Team Site (classic experience) options amongst available templates. You can create site collection or skip this step, but in any case you will be next presented with the Farm Configuration Wizard completion page, which lists the details of your SharePoint farm configuration and offers you to configure SharePoint 2019 Hybrid Features:
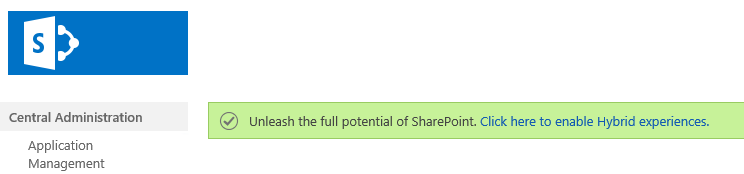
As you can see, the installation process has not changed too drastically compared with SharePoint 2016, but what is clear about this version is that this release really tries to get you ready to move to the cloud – no more loud declarations about “last on-premise release.” Instead, it is just very clear that all ground work is here in the product to prepare you to go the hybrid route, if not fully cloud, along with a clear message that you need to design and build your SharePoint based solutions and infrastructures with the cloud in mind, even if you still install the on-premise version. Just another example of this messaging:
And, yes, you can now create these sleek looking Team Sites which we saw before only in SharePoint Online:

I hope this quick installation tour was useful and informative, and in case you want to go into more details and be ready to do a production/real world installation, be sure to read through the official product documentation from Microsoft, starting from the Install SharePoint Server 2019 section. I think the overview of new features in SharePoint 2019 may be a topic for the next article, but you can also read up on those in the New and improved features in SharePoint Server 2019 section of the Microsoft product documentation.
