
Part 1 installed App Volumes Manager and prepared the SQL database and SMB share. Part 2 configured Active Directory, VHD In-Guest Services, and storage templates, and Part 3 created and verified a Writable Volume.
This final guide packages Notepad++ on a clean capture VM, stores the application as a VHD on the configured SMB share, assigns the current package version to an Active Directory group, and verifies delivery inside a Horizon desktop. The workflow uses VHD In-Guest Services, so the endpoint mounts the package from SMB without a vCenter-managed disk attachment.
Prerequisites
Before creating the package, confirm that the following components and access requirements are in place:
- App Volumes Manager – Installed and configured with VHD In-Guest Services, Directory Services, and a storage location.
- SMB 3 file share – Reachable by App Volumes Manager, the packaging VM, and the target desktops. The share was created in Part 1 and registered as storage in Part 2.
- Correct permissions:
- The target desktops’ computer accounts or entitled user accounts can read the SMB share, according to the access model used in your environment.
- The storage credentials registered in App Volumes Manager can create and update package files on the share.
- Application installer – The software to capture. This guide uses Notepad++ as the example application.
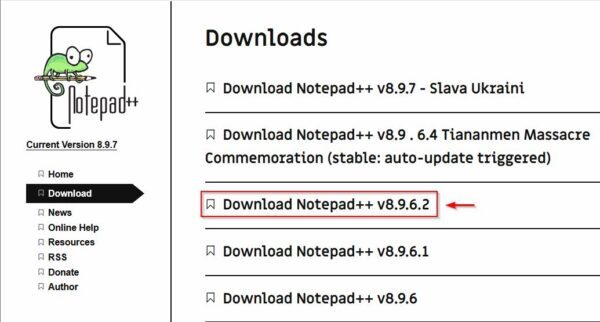
- Packaging VM – A clean Windows VM with the App Volumes Agent installed. Match the target desktop OS version and patch level, omit the Horizon Agent and Dynamic Environment Manager FlexEngine, and take a clean snapshot so the VM can be reverted after each capture. These points follow Omnissa’s packaging recommendations.
Create an Omnissa App Package with In-Guest VHD
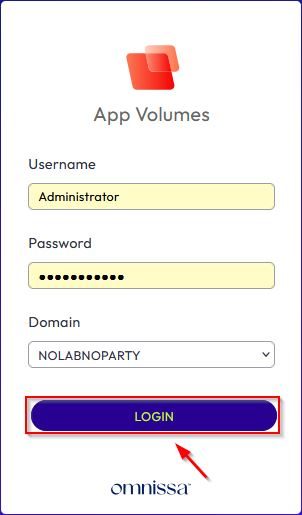
Open App Volumes Manager, enter your administrative credentials, and click Login.
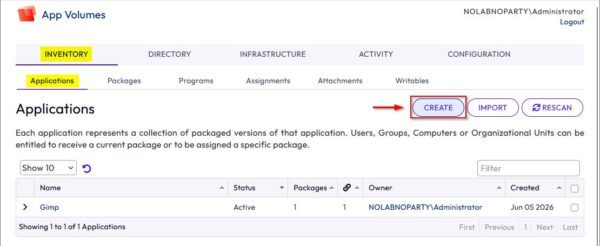
Go to Inventory > Applications and click Create.
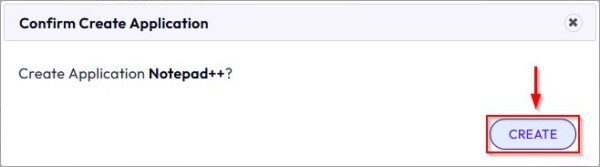
Enter a Name and, optionally, a Description for the application. Click Create.
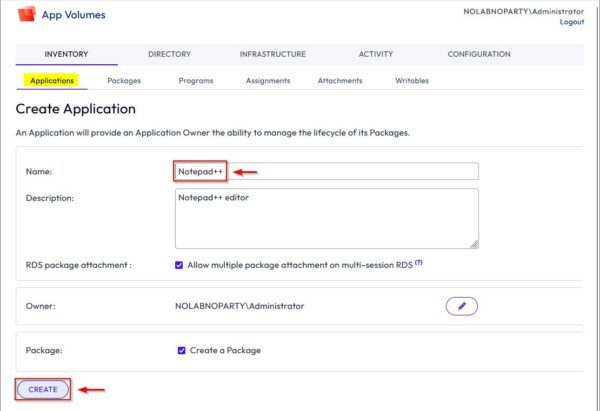
Click Create again to confirm the application.
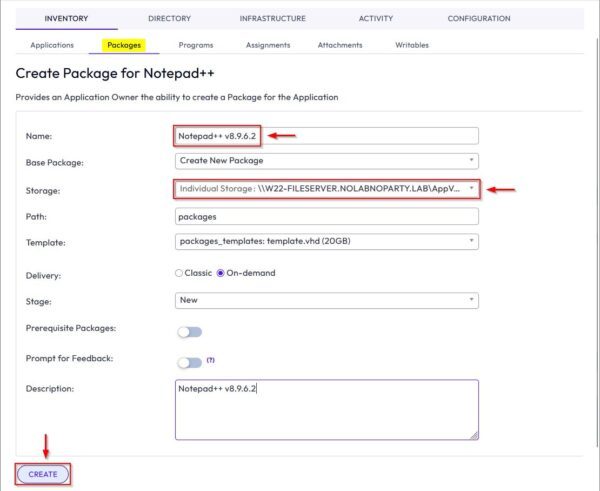
On the Packages tab, enter a package Name, select the SMB share under Storage location, and add an optional Description. Click Create.
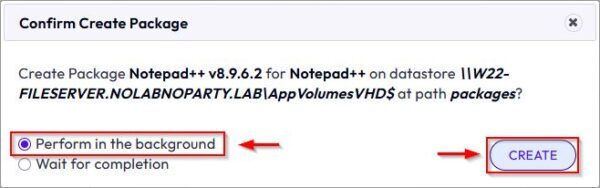
Leave Perform in the background selected unless you need to wait for completion in the current session, then click Create.
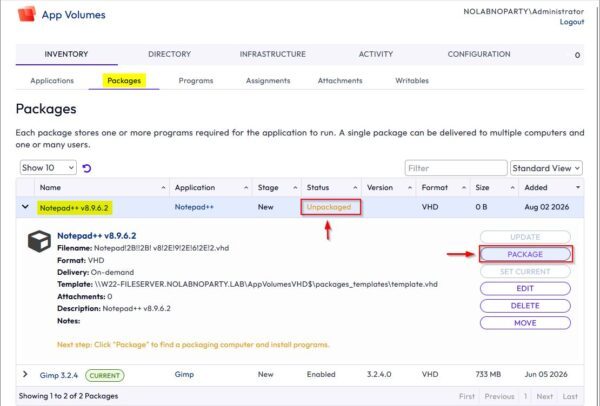
The new package appears on the Packages tab with the Unpackaged status. Expand the package and click Package to select a provisioning computer.
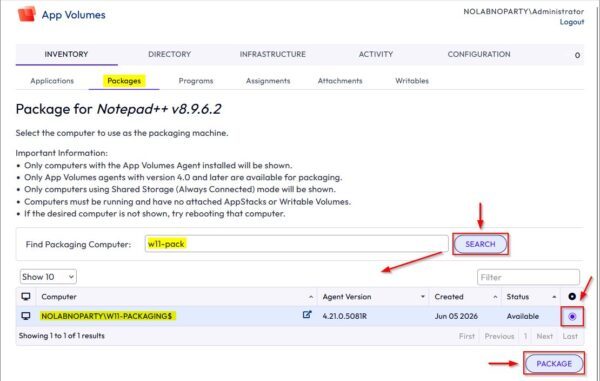
In Find Packaging Computer, enter the name of the dedicated packaging VM and click Search. The VM must be powered on, joined to the Active Directory domain, and running the App Volumes Agent. Select the correct result and click Package.
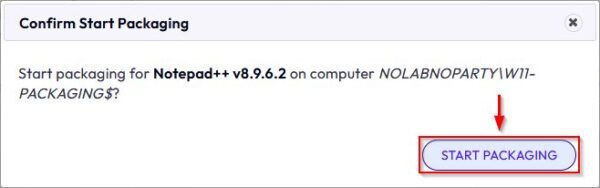
Click Start Packaging.
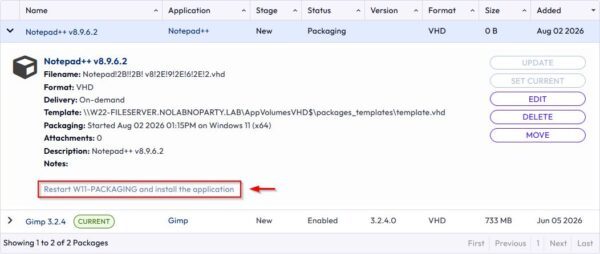
App Volumes prompts you to restart the packaging VM. Reboot it to begin the capture workflow.
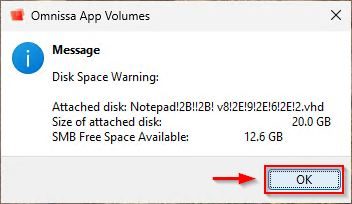
After the VM restarts, sign in through RDP. A notification confirms that the packaging disk has been attached. Click OK.
Copy the previously downloaded installer to the desktop before capture begins, then click Yes to start capturing changes.
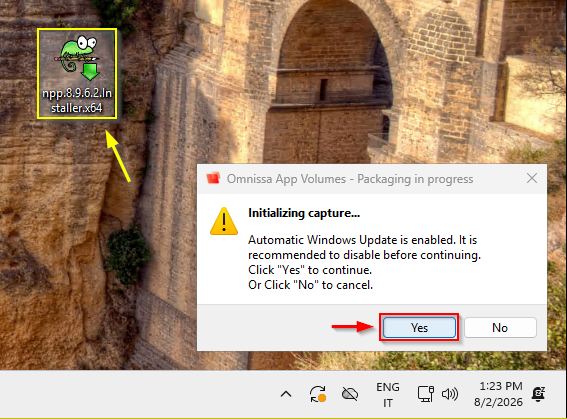
Install the application as you normally would. The App Volumes packaging process records the installation changes in the background.
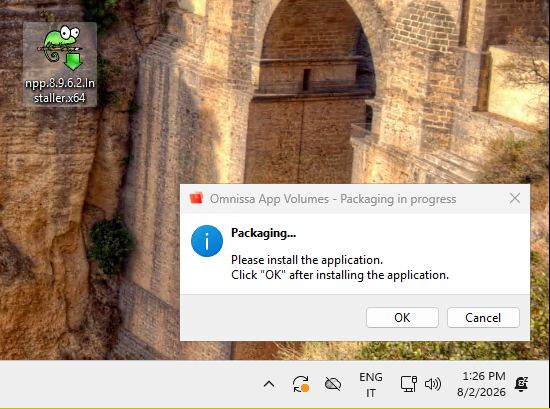
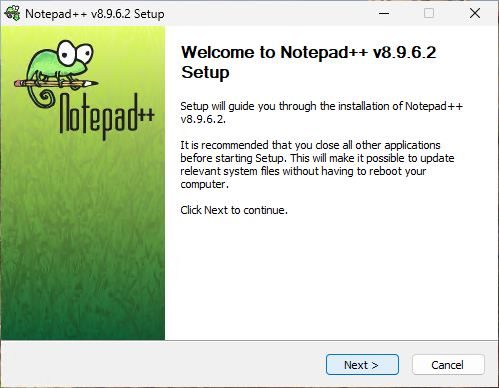
Complete the application’s installation wizard.
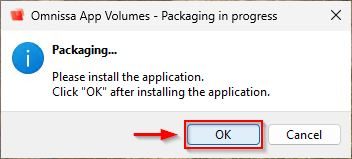
When installation is complete, return to the App Volumes Packaging dialog and click OK.
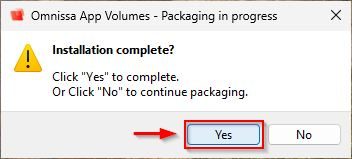
If the application installed successfully, click Yes.
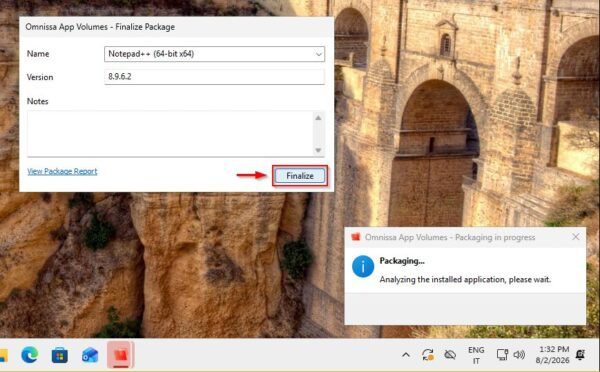
Review the package information, then click Finalize.
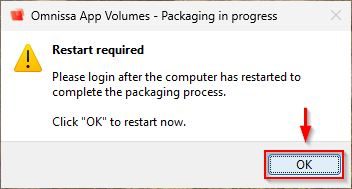
Click OK to restart the packaging VM and complete the workflow.
After the VM restarts, sign in once more so App Volumes can finalize the package.
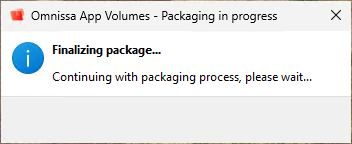
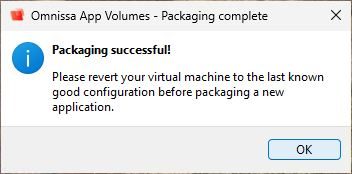
When App Volumes reports that packaging completed successfully, click OK. Revert the packaging VM to its clean snapshot before capturing another application.
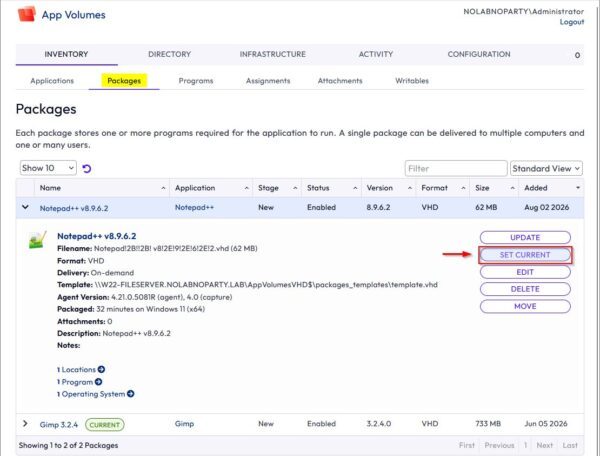
Set the current package version
An application can contain several package versions. The Current marker identifies the version delivered by assignments that use the marker. On the Packages tab, select the package version you want to publish and click Set Current.
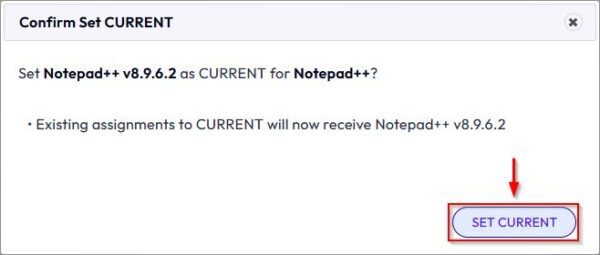
Click Set Current again to confirm.
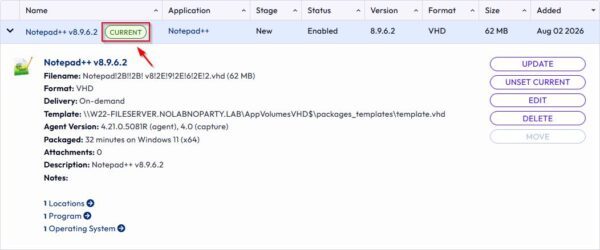
The selected package is now marked Current and is ready for assignment.
Assign the package to users
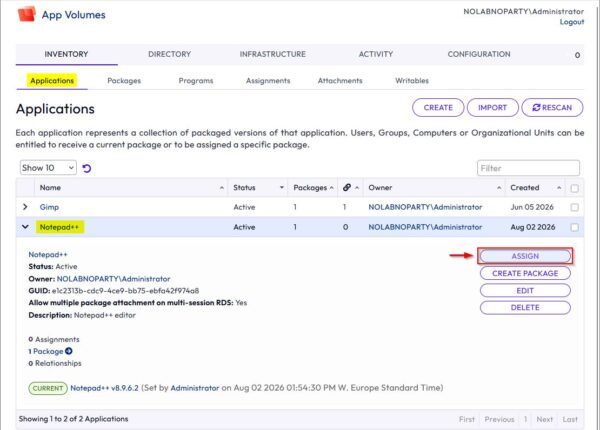
Open the Applications tab, expand the application, and click Assign.
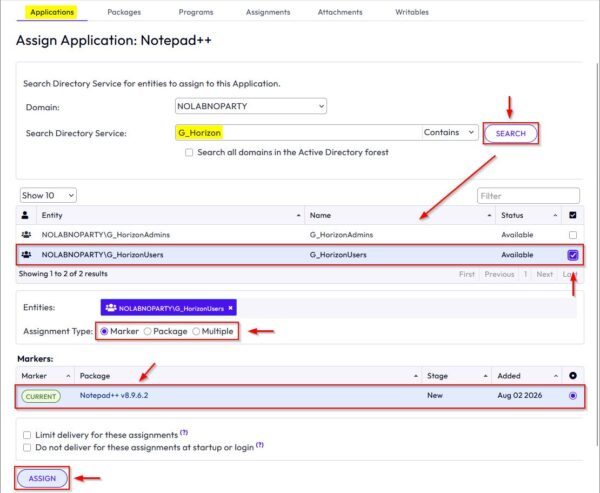
In Search Directory Service, select the configured Active Directory domain, enter the target group name, and click Search. Select the group, such as G_HorizonUsers in this example, and set Assignment Type to Marker. With a marker assignment, users receive whichever package version is marked Current. Click Assign.
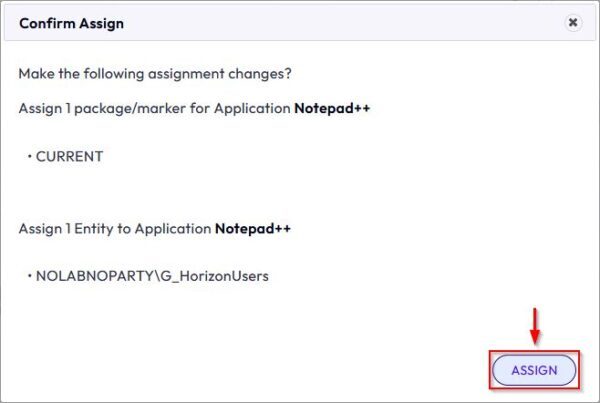
Review the assignment details and click Assign to confirm.
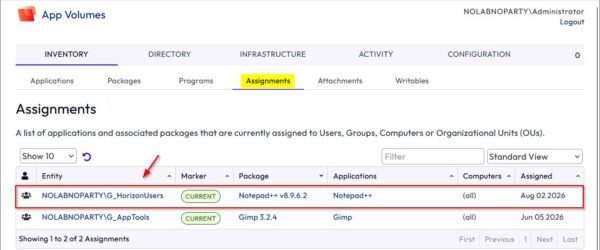
Open the Assignments tab and confirm that the application and Active Directory group are listed.
Test the assigned package
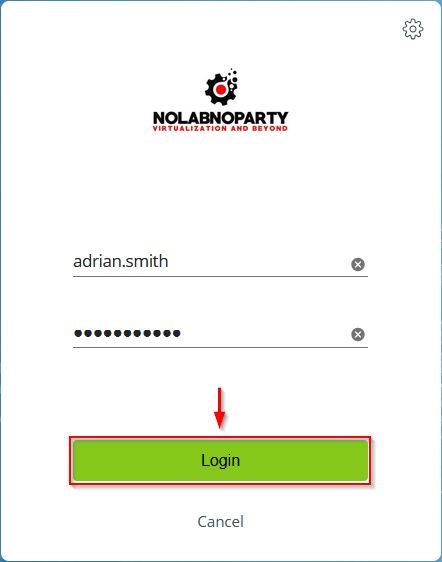
Connect to the Horizon environment and sign in with a test user who belongs to the assigned Active Directory group. Click Login.
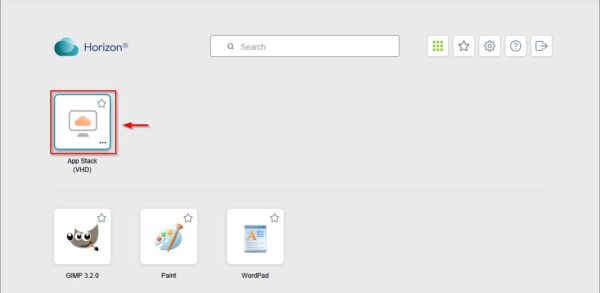
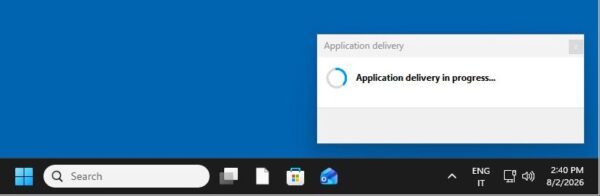
Launch the assigned VDI desktop. An In-Guest VHD package does not appear as a separate published application in the Horizon portal; App Volumes attaches it inside the Windows desktop session.
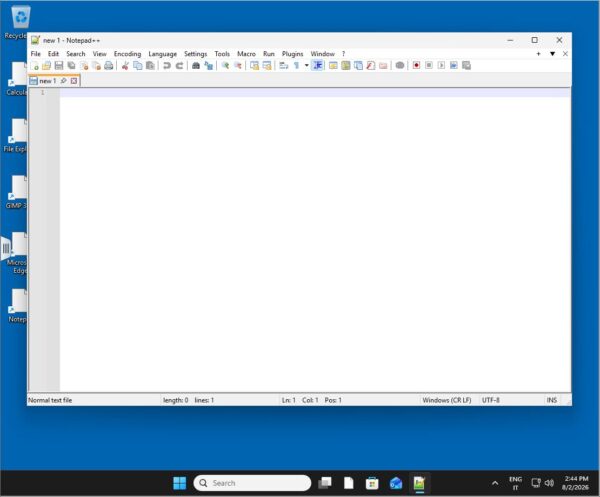
Inside the VDI, locate the Notepad++ shortcut and open the application.
Confirm that the application starts and its basic functions work as expected.
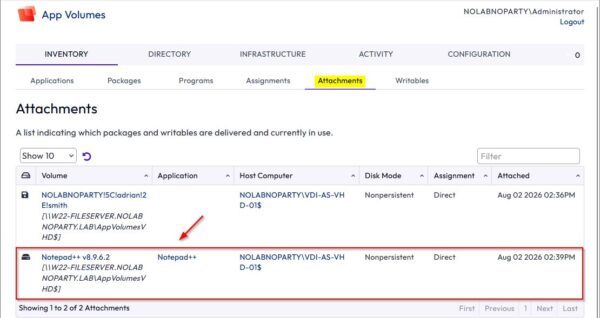
For an administrative check, return to App Volumes Manager and open the Attachments tab. Confirm that the expected package is attached to the test desktop and user session.
Conclusion
The Notepad++ installer is now captured in a VHD package, marked as the current version, assigned to an Active Directory group, and verified from both the user desktop and App Volumes Manager. This completes the series: the same App Volumes environment now provides persistent user data through Writable Volumes and centrally managed applications through packages stored on SMB.
FAQ
What is an Omnissa App Volumes package?
It is a read-only virtual disk that contains one version of an application. With VHD In-Guest Services, the package is stored as a VHD file on an SMB share and mounted inside an entitled endpoint by the App Volumes Agent.
Why should the packaging VM be clean?
A clean VM limits captured changes to the application itself. Match it to the target desktop’s OS and patch level, take a snapshot before packaging, and revert to that snapshot before capturing the next application.
What does the Current marker do?
It identifies the package version used by assignments configured with the Marker assignment type. Moving the Current marker to a newer tested package updates which version those assignments deliver.
Does the target desktop need access to the SMB share?
Yes. The endpoint must be able to reach the SMB 3 share and read the assigned VHD package. App Volumes Manager’s registered storage credentials need sufficient rights to create and update package files.
How can I verify that the package was delivered?
Sign in as an entitled test user, launch the VDI desktop, and open the packaged application. Then check the Attachments tab in App Volumes Manager to confirm that the expected package is attached to that session.