

Introduction
If you work with Azure, you probably know that you can run Hyper-V in Azure using the Nested Virtualization. Why? It can be interesting to use this architecture for testing purpose. Of course, the price will be always higher than a local hardware in your own on-premises lab. You can use Nested Virtualization since Windows Server 2016 and Windows 10.
To create a new Virtual Machine, you must use one of the instance sizes like Ev3 or Dv3. So, in a next article, I will explain how to create and configure your Hyper-V Host in Azure from scratch, but in this guide, I will use the great JSON template created by Chris Pietschmann to easily deploy the Hyper-V hosts.
Getting Started
Before going deeper, I must say that this environment is not supported by Microsoft. However, you can use it for self study and lab. This guide will split into two parts:
- The first part will be focused on how to deploy the environment.
- and the second part will be focused on how to configure the environment.
I will use the following architecture which is very simple:
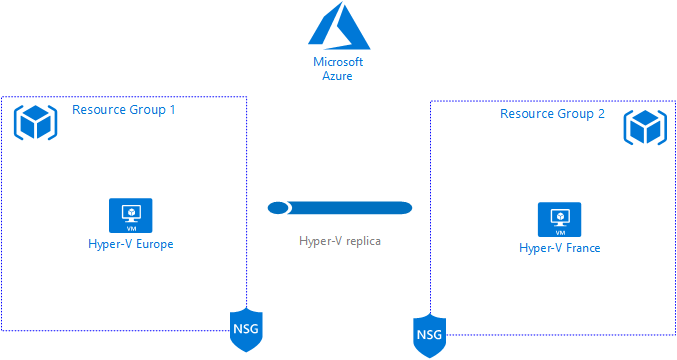
In this architecture, I will deploy two Hyper-V hosts:
- The first one is called “Hypv-Europe“, which will be located in the Resource Group 1
- and the second one is called “Hypv-France“, which will be located in the Resource Group 2
The only requirement is that the two Azure VMs must have network connectivity. So, both Resource Group will be connected using Azure Network Peering. You can find more information about Network Peering here:
https://www.starwindsoftware.com/blog/azure-virtual-network-peering.
Network Peering is similar to a Site-To-Site VPN, except that you are connecting two Azure Virtual Networks. When you peer two Virtual Networks, then resources in both VNet can communicate with each other as though the resources were in the same Virtual Network.
Once the configuration is done, we will be able to configure Hyper-V in order to replicate a Virtual Machine hosted on “Hypv-Europe” to “Hypv-France“.
Creating Resource Group and Virtual Network
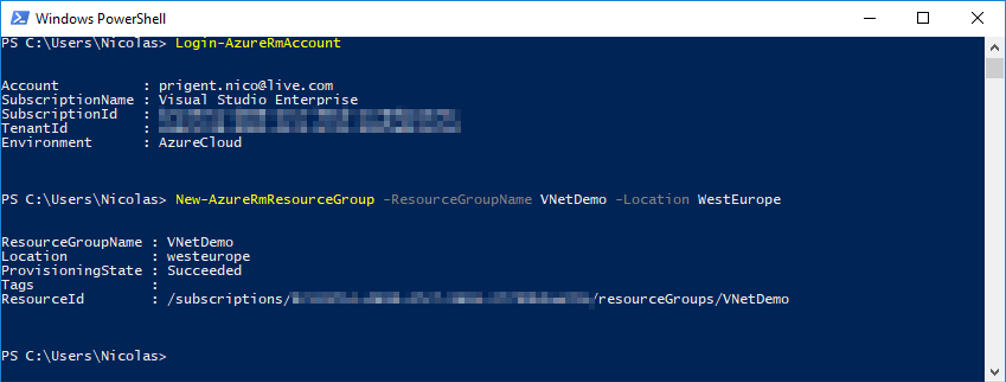
First step, you must create two Resource Groups in order to store your Hyper-V Hosts. Below is the PowerShell code to create a Resource Group:
|
1 2 3 |
PS > Login-AzureRmAccount PS > New-AzureRmResourceGroup -ResourceGroupName VNetDemo -Location WestEurope |
Once the Resource Group is created, we need to create a Virtual Network associated to this Resource Group. From the Azure Portal, go to the “Virtual Network” blade:
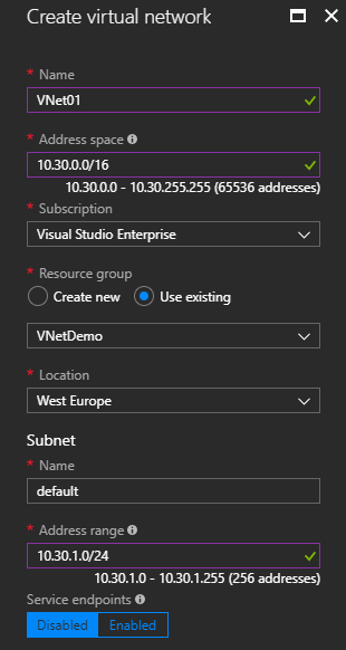
Repeat these steps to create the second Resource Group and the second Virtual Network. Be careful to not overlap with other networks.
At this step, you should have two Resource Groups, and two Virtual Networks.
Creating Virtual Network Peering
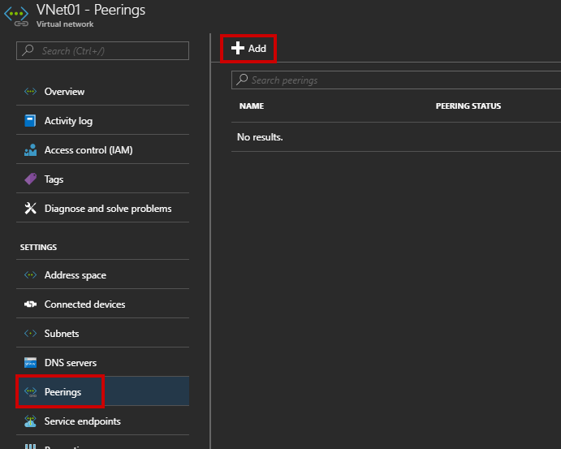
Navigate to the Virtual Network blade and click “Peerings”. You can peer a VNet with one or more VNet.:
Click “Add” and then select the VNet partner and validate the wizard. The peering must be created in both directions to enable resources in the virtual networks to communicate with each other. Go back to the Peerings blade and confirm the status:
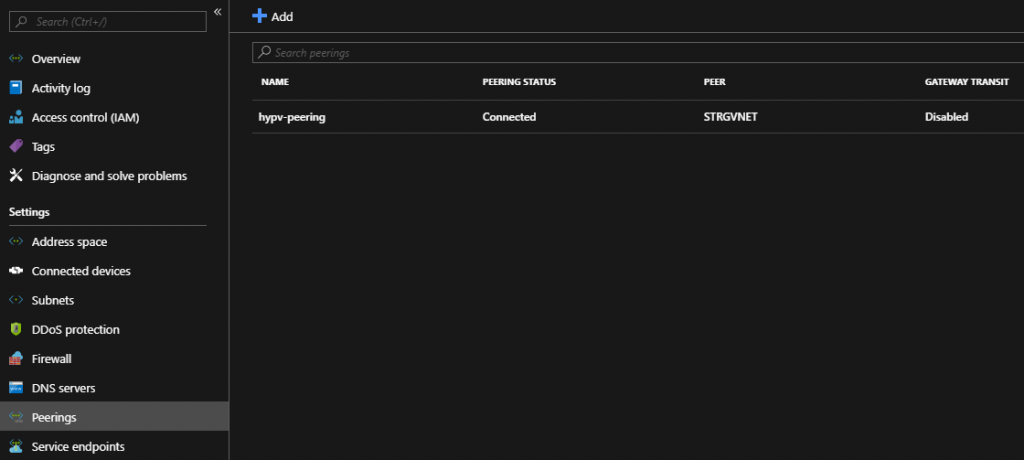
At this step, both Virtual Network are connected.
More information about Virtual Network pricing:
https://azure.microsoft.com/en-us/pricing/details/virtual-network/
Deploying Two Hyper-V Hosts
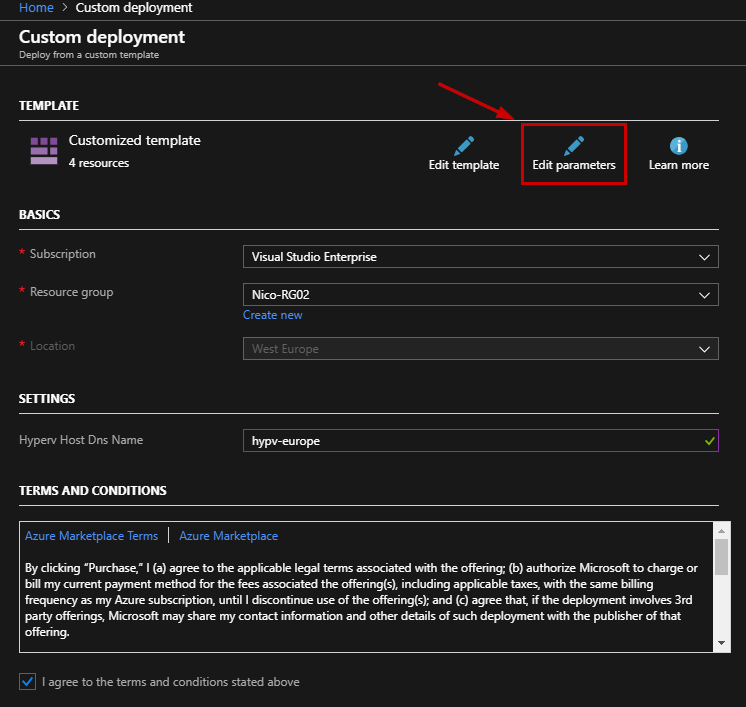
To deploy the Hyper-V Hosts, you must click on the following button to open the Azure Portal and create your first Hyper-V Host in the first Resource Group previously created. This template will use the Dv3 and Ev3 VM sizes, which allow you to use Nested Virtualization.
Please note that nested virtualization is only supported in Windows Server 2016 and Windows 10.
![]()
You can change some settings to suit your needs:
Now, just wait 15 minutes until the deployment is done and repeat this step to deploy your second Hyper-V host in the second Resource Group.
In my case, I deployed two Hyper-V hosts:
- Hypv-europe is located in the Resource Group called “Nico-RG04“
- Hypv-france is located in the Resource Group called “Nico-RG02“

Connect through RDP to your Hyper-V hosts and run the following command to enable ICMP in the Windows firewall:
|
1 |
PS > netsh advfirewall firewall add rule name=Allw-ping protocol=icmpv4 dir=in action=allow |

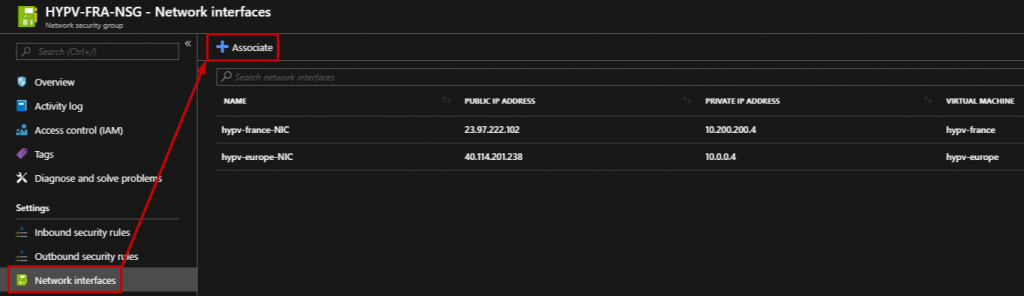
Next, at both Azure VMs you must also open the 443 port at both the NSG and the Windows Firewall. Network Security Group (NSG) allow you to create Inbound security rules and Outbound security rules.
Once the security rules are created, you must associate both Hyper-V NICs to this NSG:
Verifying Hosts Communication
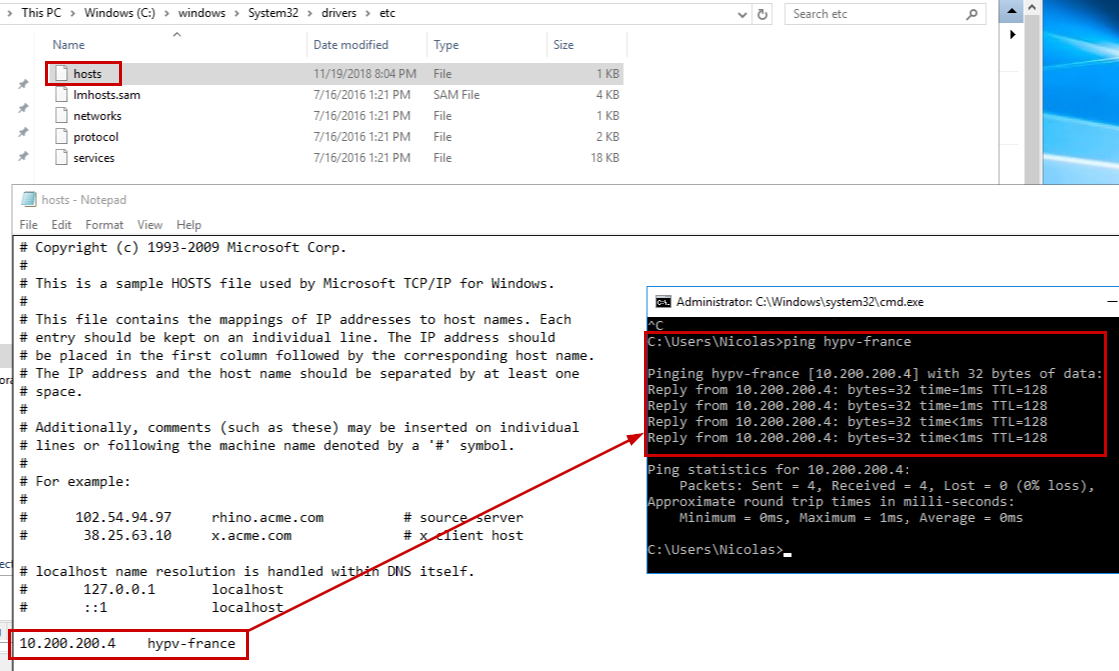
Hyper-V Replica uses computer names, so I will modify the host file to bind the IPs with the computer names. On the first Hyper-V Virtual Machine, browse to the following path “C:\Windows\System32\drivers\etc“, and open the “hosts” file. Then, enter the IP of the second Hyper-V Virtual Machine following by the computer name.
In my case, both Hyper-V VMs are not domain joined:
- on Hypv-Europe, I will map “10.200.200.4” to “Hypv-France“
- on Hypv-France, I will map “10.0.0.4” to “Hypv-Europe“
You can perform the same task on the second Hyper-V VM.
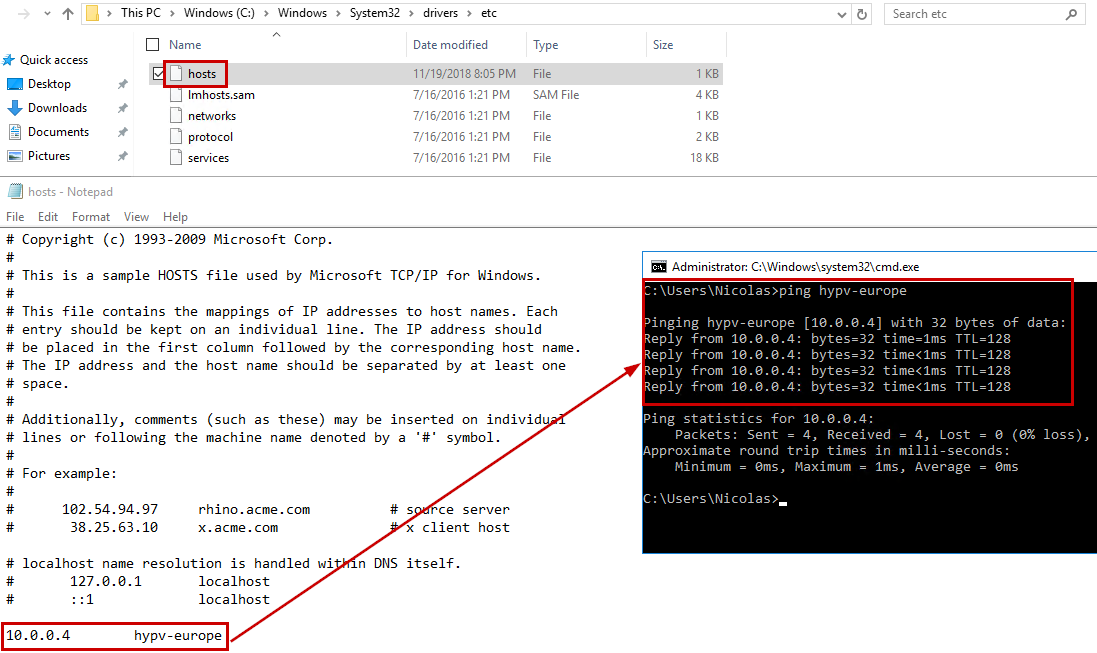
You must confirm that you can ping both Virtual Machine. At this step, if it does not work, then you must check your Virtual Network configuration. Be sure that the peering status between both VNet is “connected” and check your NSG or Windows Firewall.
If it works, then you can move to the second part of this guide to configure your first Hyper-V replica.
Conclusion
Thanks to the first part of this guide, you should be able to create your own Hyper-V lab on Azure. You can use both Hyper-V hosts to test the Hyper-V features, especially if you do not have your own lab at home.
Thanks for reading!
