


Introduction
In Windows 10 Fall Creator Update, Microsoft introduced a new feature called the “Hyper-V Quick Create Wizard” which is very useful because you can create a Virtual Machine with the default settings and save time. Using this feature, you can create a VM with a single ISO file located on your system, or you can create a VM from the Online Gallery. By default, Quick Create will list a Windows 10 Developer Environment but you can easily add your own Virtual Machine Images from your local/online repository.
In this article, I will describe how to use this feature and how to add a custom VM Image into your own Gallery.
Getting Started
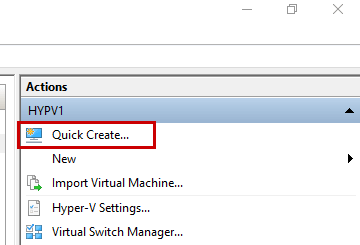
Open the Hyper-V Management Console and click “Quick Create…” to open the wizard an confirm that the default Online Gallery is loaded.
The new window will appear with a simple set of options:
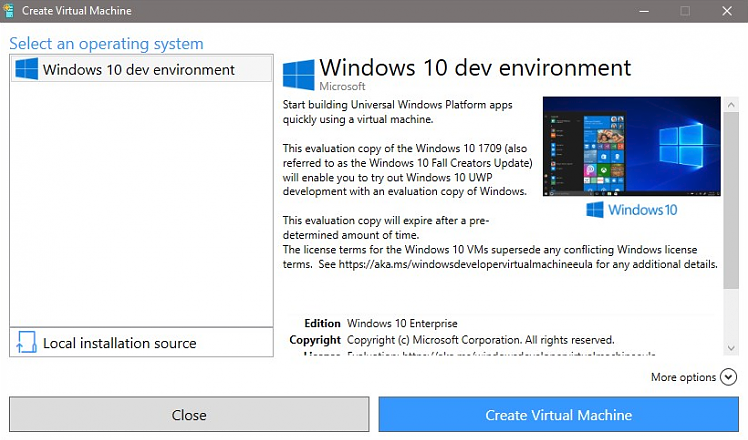
When you open the “Hyper-V Quick Create” window, it will open all pre-set virtual hard disks located in your local repository or Online Gallery. At this step, you can only use the Windows 10 dev environment or create a new VM from a local source.
How to Add a Custom Virtual Machine Image in the Gallery?
A gallery can be hosted online or locally. A Gallery contains Virtual Disk Images described by a JSON file. So the first thing you will need is a JSON document, which describes the image you want to show up in “Quick Create” window. Below is a simple code example that you can use to add your first image. Before going deeper with the JSON code, you must create the following files:
- Logo image
- Symbol image
- Thumbnail image
These files are not required, but in this example, we will use these images. Once you retrieved these files, you must generate the hash for each image using the following PowerShell command:
|
1 |
PS > Get-FileHash -Path <FileName> -Algorithm SHA256 |
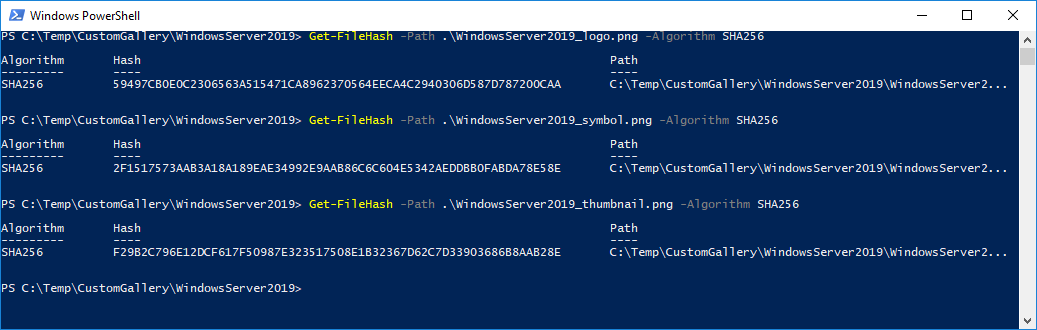
This hash will be used by the JSON code to display the image in the “Quick Create” window. Please note the hash for each image because you will need to copy/paste it in the following JSON code.
Now, you need to store these files somewhere where the Hyper-V Manager can access it. So, it can be in a local directory, a webserver, or a network share. Usually, I like to store all the required files in the same folder as shown below, but once again, it is not mandatory:
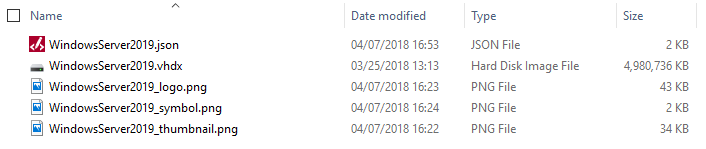
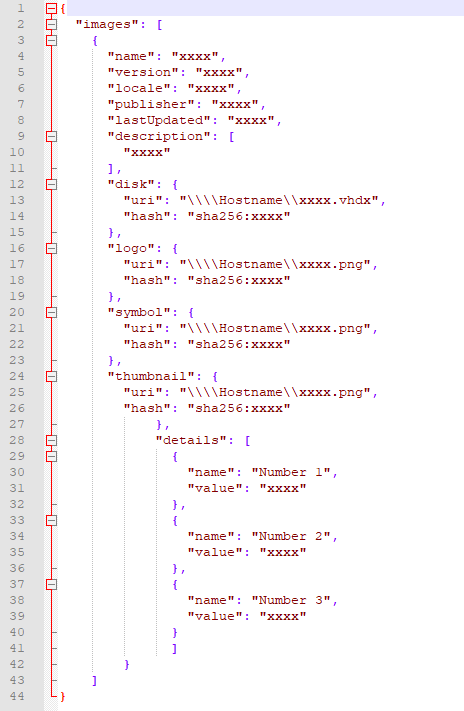
Do not forget to store the VHDx disk in this folder and sysprep the disk. Of course, the sysprep is not mandatory to add the image in the Custom Gallery. To finish, create an empty JSON file and copy/paste the following code.
Note that if you edit it in VSCode, it will automatically provide IntelliSense.
|
1 2 3 4 5 6 7 8 9 10 11 12 13 14 15 16 17 18 19 20 21 22 23 24 25 26 27 28 29 30 31 32 33 34 35 36 37 38 39 40 41 42 43 44 45 46 47 48 49 50 51 52 53 54 55 56 57 58 59 60 61 62 63 64 65 66 67 68 69 70 71 72 73 74 75 76 77 78 79 80 81 82 83 84 85 86 87 |
{ "images": [ { "name": "xxxx", "version": "xxxx", "locale": "xxxx", "publisher": "xxxx", "lastUpdated": "xxxx", "description": [ "xxxx" ], "disk": { "uri": "\\\\Hostname\\xxxx.vhdx", "hash": "sha256:xxxx" }, "logo": { "uri": "\\\\Hostname\\xxxx.png", "hash": "sha256:xxxx" }, "symbol": { "uri": "\\\\Hostname\\xxxx.png", "hash": "sha256:xxxx" }, "thumbnail": { "uri": "\\\\Hostname\\xxxx.png", "hash": "sha256:xxxx" }, "details": [ { "name": "Number 1", "value": "xxxx" }, { "name": "Number 2", "value": "xxxx" }, { "name": "Number 3", "value": "xxxx" } ] } ] } |
Replace the following values:
- name
- publisher
- lastUpdated
- description
- disk uri/hash: Here, it is important to note that you can use a website in the uri field or a network path. If you use a network path, do not forget to add two backslashes to escape the slash character.
- logo uri/hash
- symbol uri/hash
- thumbnail uri/hash
- details information (name/value)
Note that you can also add a “requirements” section.
Set the Custom Repository Location
The last step is to configure the repository location in order to load the custom images when the “Quick Create” window will appear. This task can be performed using the registry on the machine where you use the “Quick Create” feature. You can perform this task in two ways:
You can add the registry key manually:
- Navigate to: Computer\HKEY_LOCAL_MACHINE\SOFTWARE\Microsoft\Windows NT\CurrentVersion\Virtualization\
- Look for the GalleryLocations item.
- Add your gallery to the “GalleryLocations” registry key
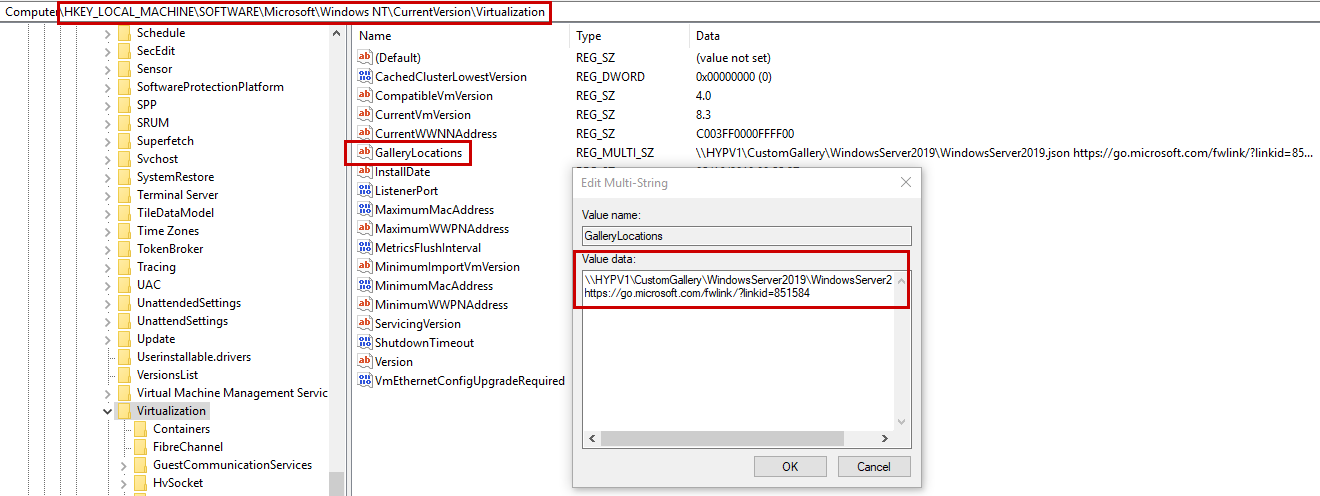
Or using Windows PowerShell. It is great to use Windows PowerShell if you need to automate the configuration:
|
1 2 3 4 5 6 7 8 9 10 11 12 13 14 15 16 17 |
[string[]]$gallerylocations = ( # Custom images "\\HYPV1\CustomGallery\WindowsServer2019\WindowsServer2019.json", # Official Windows 10 developer images "https://go.microsoft.com/fwlink/?linkid=851584" ) $registrypath = "HKLM:\SOFTWARE\Microsoft\Windows NT\CurrentVersion\Virtualization" Set-ItemProperty -Path $registrypath -Name GalleryLocations -Value $gallerylocations Get-Item ‘HKLM:\SOFTWARE\Microsoft\Windows NT\CurrentVersion\Virtualization\’ |
Note: To deploy this setting on multiple machines, you can use a Group Policy Object.
It is time to test! Open the Hyper-V Management Console and Click “Quick Create“:
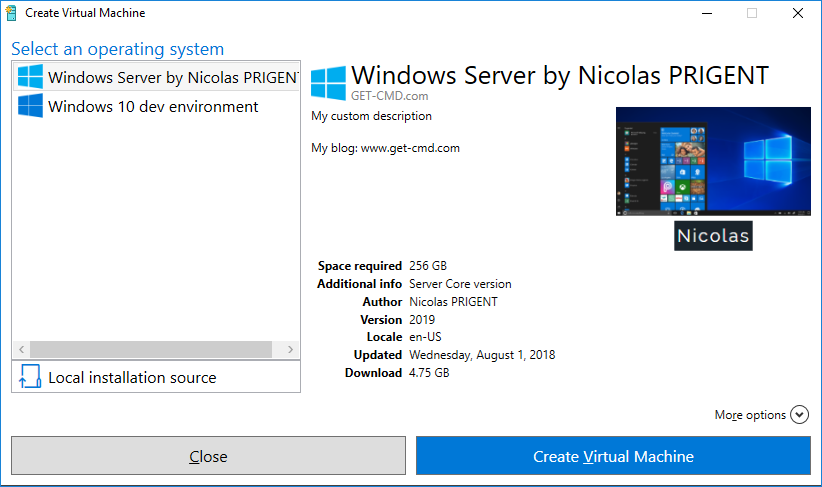
To modify the custom image:
- Close the wizard
- Modify and save the JSON file
- Open the wizard
Note: If the custom image does not appear in the list, then there is probably a wrong path or a wrong filename in the JSON file.
Conclusion
Thanks to this new feature, you can easily use your own Virtual Machine images in the “Hyper-V Quick Create” in order to create a new Virtual Machine. You can also share your Gallery with your colleagues.
There are some scripts in GitHub that can help you to implement your custom Gallery:
https://github.com/MicrosoftDocs/Virtualization-Documentation/tree/live/hyperv-tools/vmgallery
Thanks for reading!
