


Introduction
It is common to use a VPN when we are working remotely, and we need to access our company assets. If you work with Azure, you may notice that you can configure two types of VPN:
- Site-To-Site VPN: Site-to-site is used when you want to connect two networks and keep the communication up all the time. You will need to use your Firewall device to configure a Site-To-Site VPN.
- Point-To-Site VPN: It will create a secure connection to your Azure Virtual Network from an individual client computer. The main difference is that if you log-off or restart the workstation, it loses connection, and you have to reconnect every time.
In this article, we will focus on how to connect our local network to our Azure Virtual Network. To reach this goal, we will perform the following steps:
- Create a Resources Group
- Create a Virtual Network
- Create a VPN Gateway
– As described by Microsoft: “A VPN gateway is a specific type of virtual network gateway that is used to send encrypted traffic between an Azure virtual network and an on-premises location over the public Internet.”
- Create a Gateway subnet / Virtual Network Gateway
– As described by Microsoft: “A virtual network gateway is composed of two or more virtual machines that are deployed to a specific subnet you create, which is called the gateway subnet […] Virtual network gateway VMs are configured to contain routing tables”
- Create Root and Client Certificates
- Configure a Point-To-Site Connection
- Testing the VPN Connection
Getting Started
From the Azure portal, Click on Resources Groups from the services list and create a new Resources Group. Select the Add button to create new resource group. In my case, the RG is named “GET-CMD-VPN“:
![]()
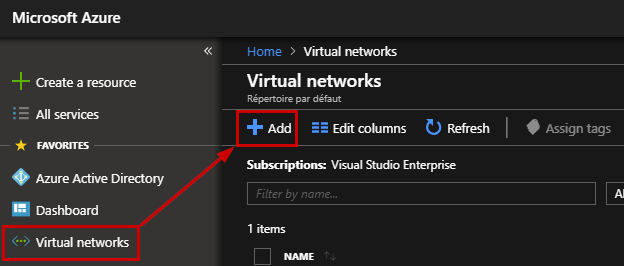
Now we need to create a new virtual network. Click the “Add” button to create the new virtual network:
A new blade will appear, and you must provide the required information for the following fields:
- Name: It is the friendly name of your VNet
- Address space: You will be able to access to this network when you will be connected through your VPN
- Subscription: Select your Azure subscription
- Resource Group: Select a Resources Group or create a new one
- Location: Select the location where the VNET will be located
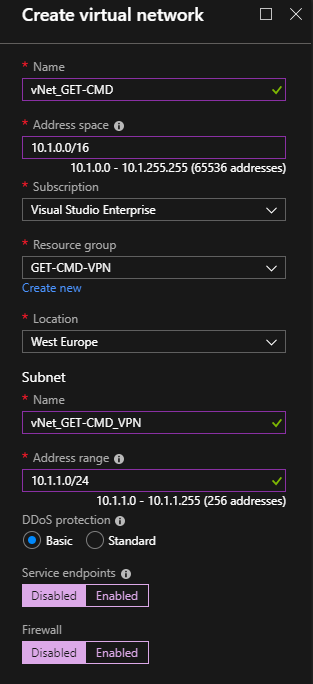
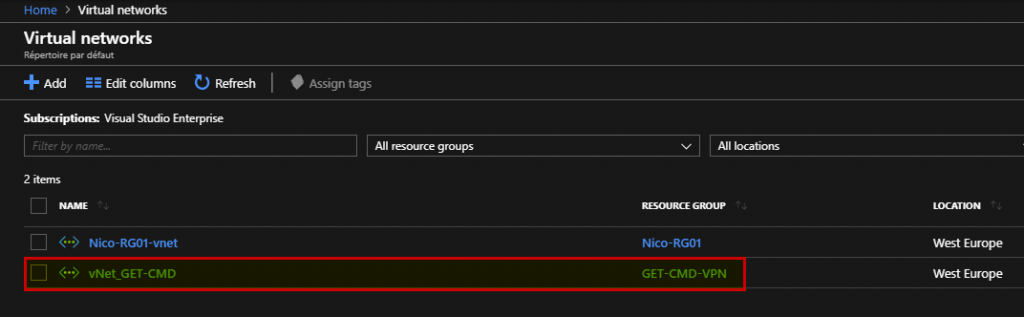
Click the Create button and refresh the Virtual Networks list:
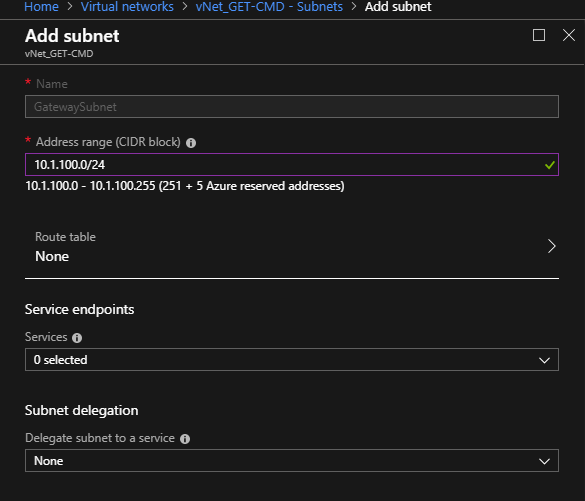
Go to the newly Virtual Network, and create a new Gateway subnet:
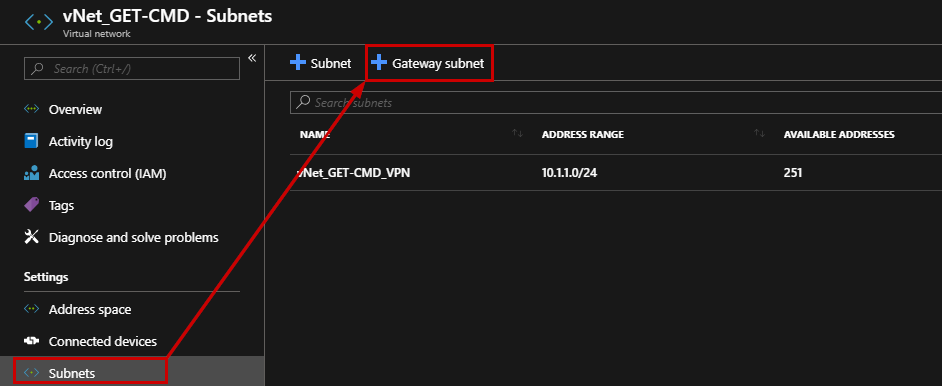
This subnet is dedicated to the Virtual Network Gateway Virtual Machines that will be automatically created by Azure.
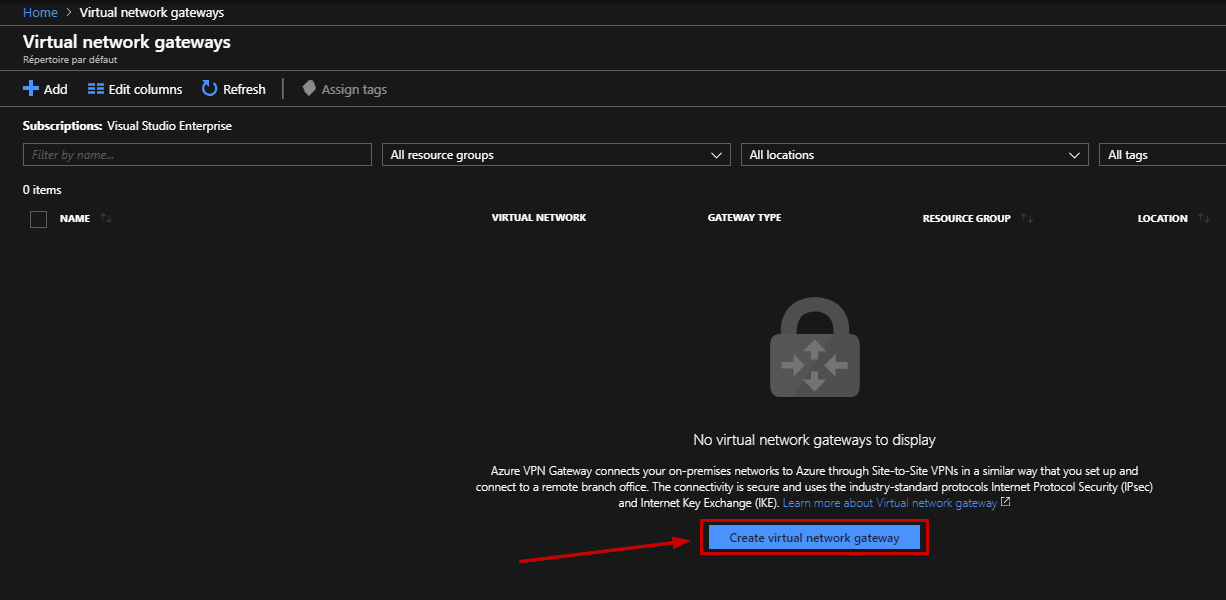
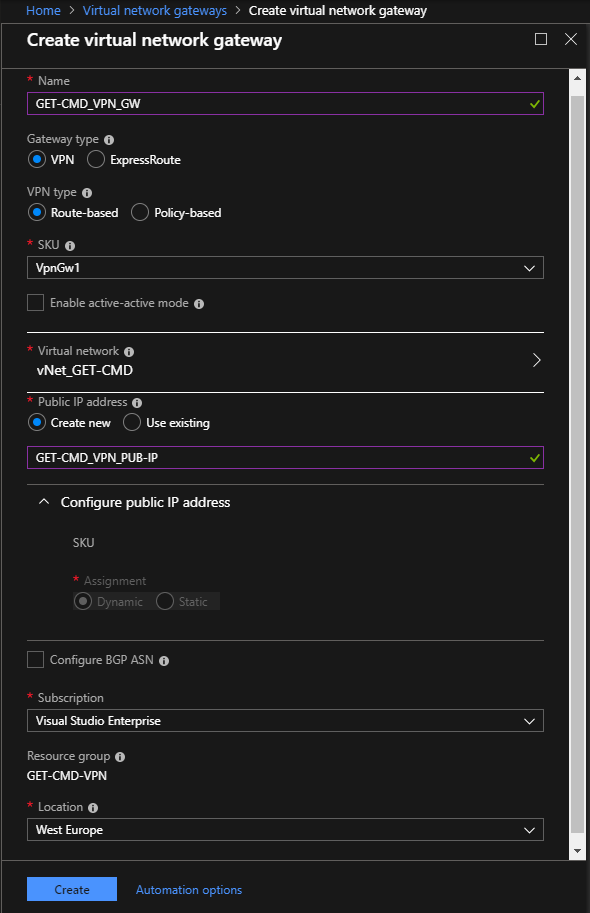
Now, we can create the Virtual Network Gateway:
At this step, we need to create a Root Certificate and a Client Certificate. In my case, I do not have an internal PKI in my lab, so I will use a self-signed certificate.
The following script has been released by the Microsoft Team:
|
1 2 3 4 5 6 7 8 9 10 11 12 13 14 15 16 17 18 19 20 21 |
#Create a self-signed root certificate $cert = New-SelfSignedCertificate -Type Custom -KeySpec Signature ` -Subject "CN=GET-CMD-RootCert" -KeyExportPolicy Exportable ` -HashAlgorithm sha256 -KeyLength 2048 ` -CertStoreLocation "Cert:\CurrentUser\My" -KeyUsageProperty Sign -KeyUsage CertSign #Generate a client certificate New-SelfSignedCertificate -Type Custom -DnsName GET-CMD-ClientCert -KeySpec Signature ` -Subject "CN=GET-CMD-ClientCert" -KeyExportPolicy Exportable ` -HashAlgorithm sha256 -KeyLength 2048 ` -CertStoreLocation "Cert:\CurrentUser\My" ` -Signer $cert -TextExtension @("2.5.29.37={text}1.3.6.1.5.5.7.3.2") |
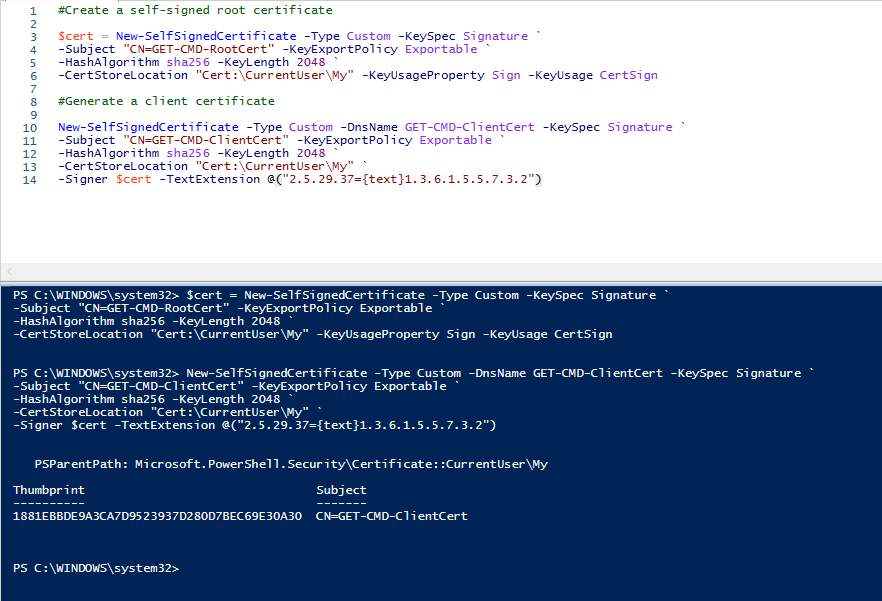
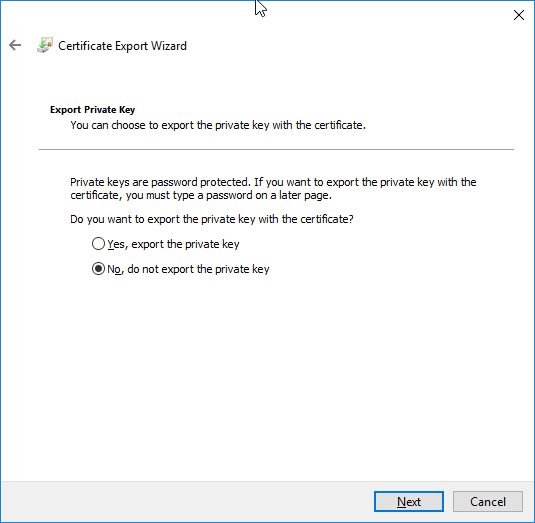
This will create the ROOT certificate and install it under current user certificate store. We need to export the ROOT Certificate so that we can import it to Azure. Right click on the ROOT Certificate and select “Export”:

In the private key page, select “Do not export the private key”
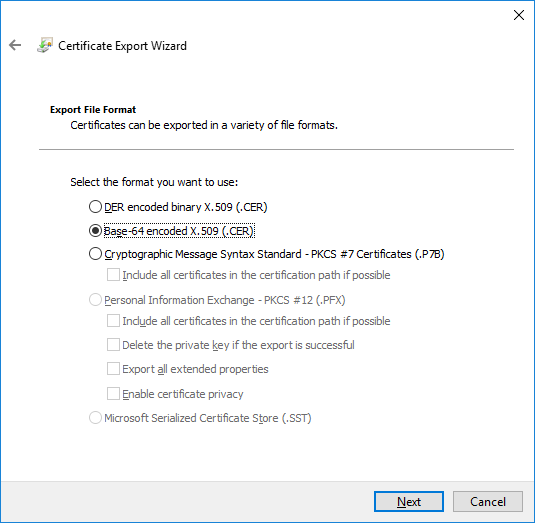
Select the following format:
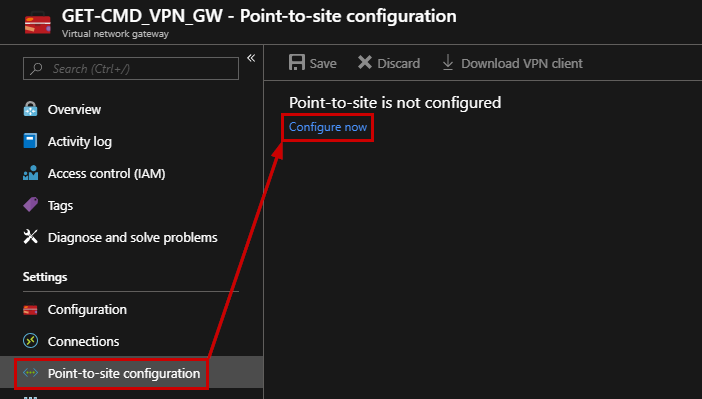
Once the certificate has been exported, then go to the Azure Portal, and open the Virtual Network Gateway blade. Next, click “Configure now” in order to configure your Point-To-Site VPN:
At this step, I advise to use the following PowerShell script, because sometimes, when you try to copy/paste the ROOT Certificate, you may get some issues. Open a PowerShell console, and run the following script:
|
1 2 3 4 5 6 7 8 9 10 11 12 13 14 15 16 17 18 19 20 21 22 23 24 25 26 27 28 29 30 31 32 33 34 35 36 37 38 39 40 41 42 43 |
#Log in to ARM Azure Login-AzureRmAccount #Making sure you are working with the correct Subscription if there are multiple Subscriptions in the account Get-AzureRmSubscription #Select the subscription Select-AzureRmSubscription -SubscriptionId xxxxxxxxxx-xxxx-xxxx-xxxx-xxxxxxxxxxx #Getting the public Key from the certificate $cert = New-Object System.Security.Cryptography.X509Certificates.X509Certificate2("C:\GET-CMD_VPN_RootCert.cer") $RootCertBase64 = [system.convert]::ToBase64String($cert.RawData) #Setting the Root Certificate name, it can be whatever name you want $P2SRootCertName2 ="GET-CMD-RootCert.cer" #Setting the variables $RG = "GET-CMD-VPN" $GWName="GET-CMD_VPN_GW" $Gateway=Get-AzureRmVirtualNetworkGateway -Name $GWName -ResourceGroupName $RG $VPNClientAddressPool="172.31.21.0/24" #whatever client address pool #Disabling BGP $Gateway.BgpSettings =$null #Setting the VPN Client Address Pool Set-AzureRmVirtualNetworkGatewayVpnClientConfig -virtualnetworkgateway $Gateway -VpnClientAddressPool $VPNClientAddressPool #Uploading the Certificate to the gateway Add-AzureRmVpnClientRootCertificate -VpnClientRootCertificateName $P2SRootCertName2 -VirtualNetworkGatewayname $GWName -ResourceGroupName $RG -PublicCertData $RootCertBase64 |
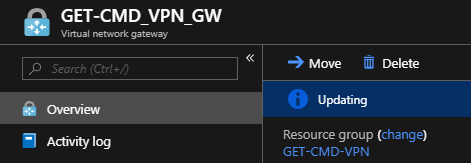
Wait until the Virtual Network Gateway is updating …
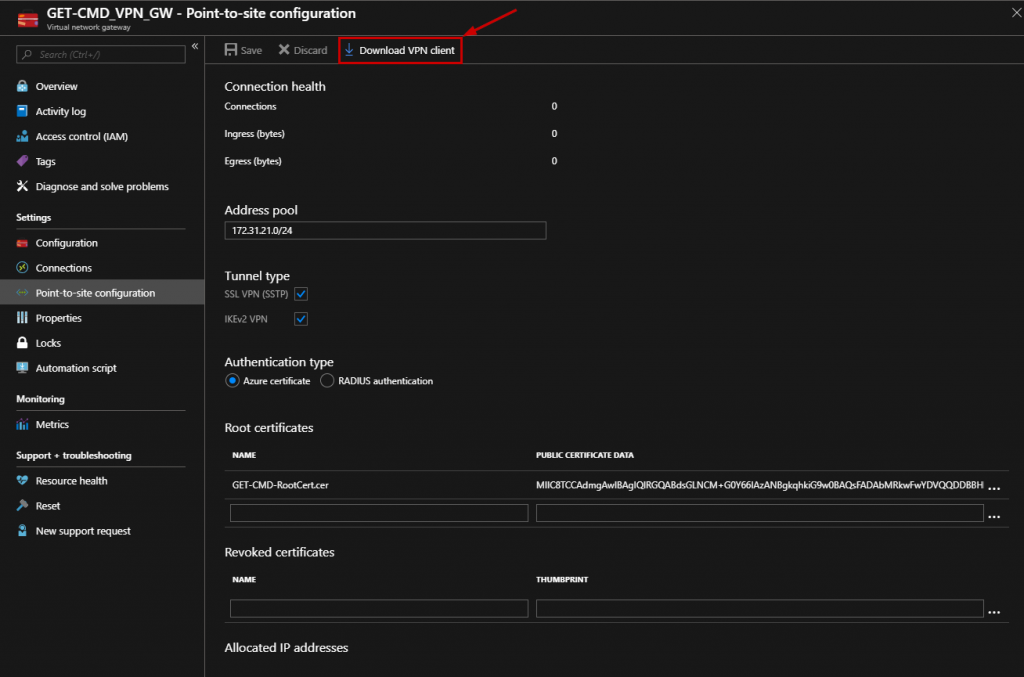
Then, you can download the VPN Client configuration in order to import it on your Windows 10 machine:
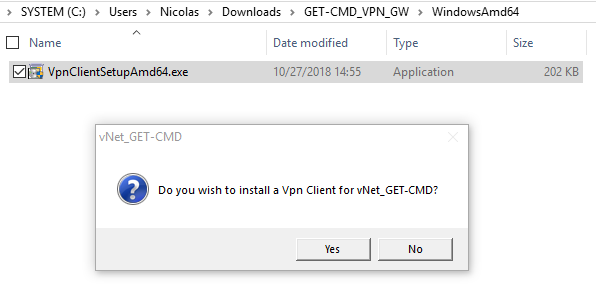
Extract the ZIP archive, and run the following executable:
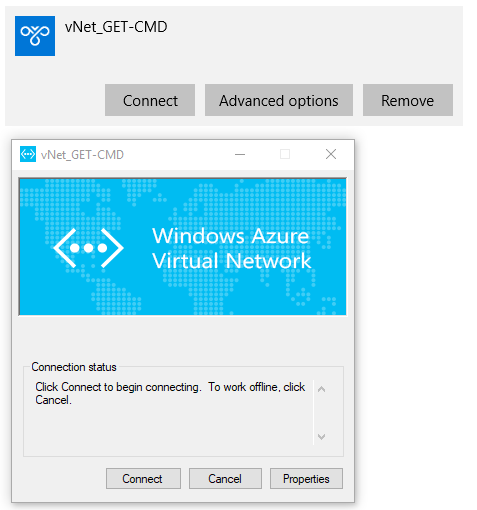
Go to the Windows Control panel, and click “Connect”:
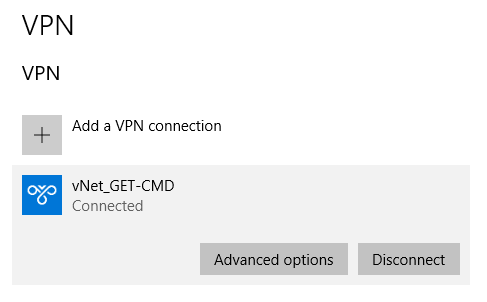
Wait a few seconds, and confirm the VPN status, which must be “connected“:
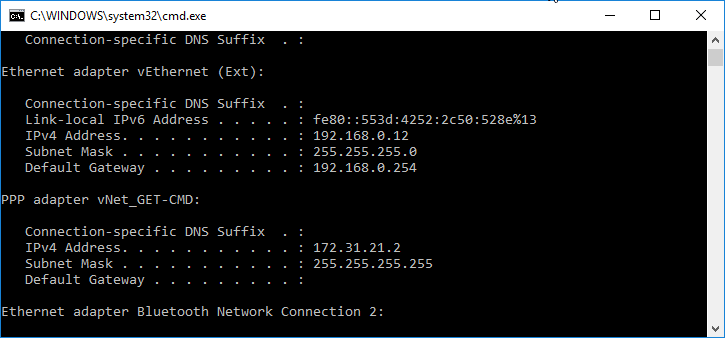
Let’s check the IP address by running the “ipconfig” command to verify the IP allocation from the VPN address pool. As you can see, the IP address is 172.31.21.2.
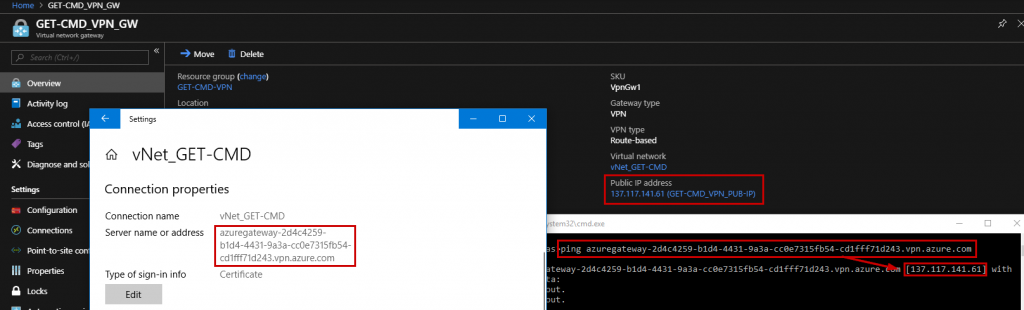
From the Windows 10 machine, the VPN configuration is mapped on the Gateway Public IP Address:
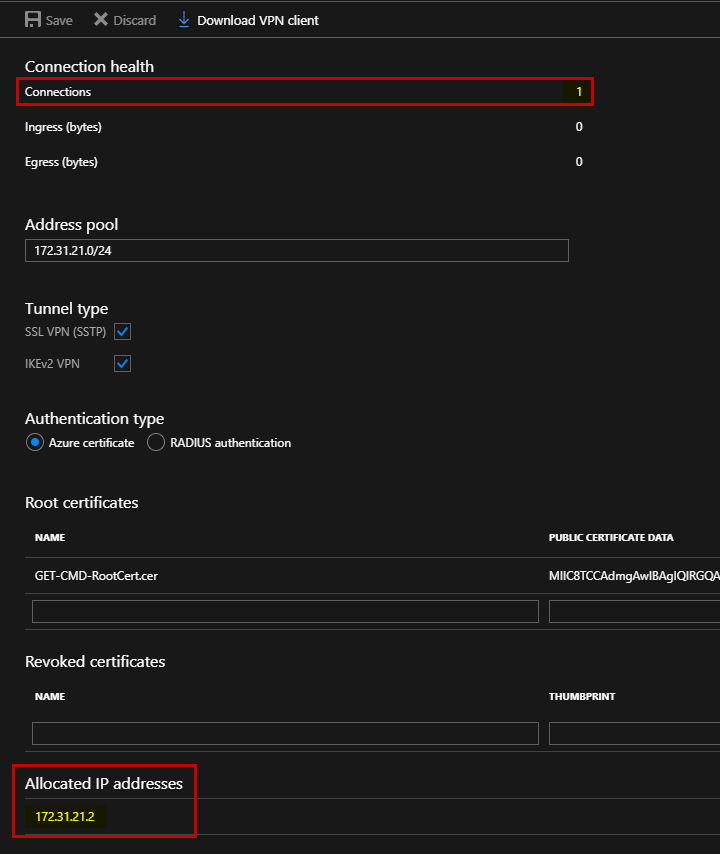
In VPN gateway page, I can confirm there is one active connection:
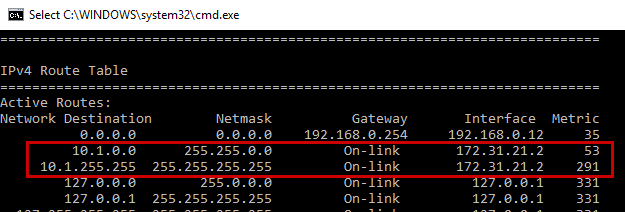
To finish, on the Windows 10 machine, run the “route print” command. Two active routes has been created, so it means that when I try to reach the following network: 10.1.0.0/16, my computer will use the Azure Point-To-Site VPN connection:
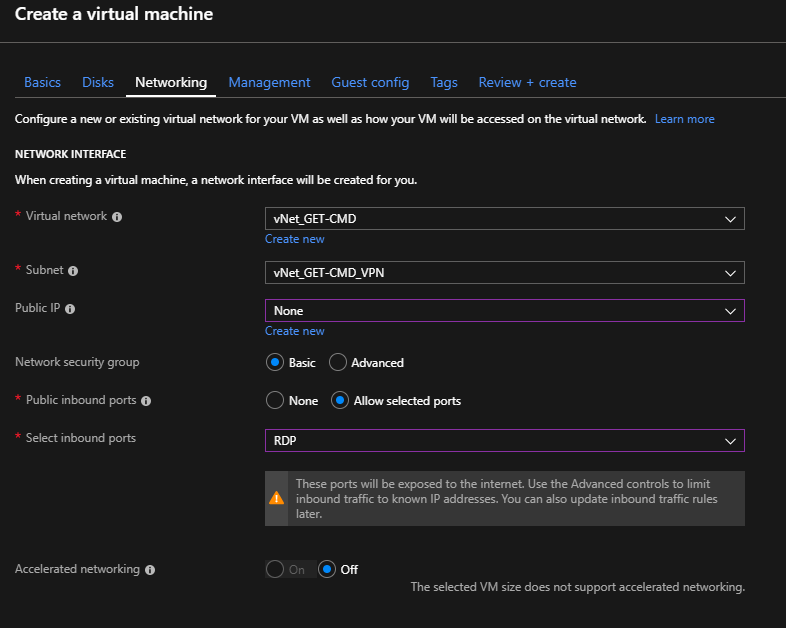
Now, I can test my VPN connection. I just need to create a new Virtual Machine, and create a network interface in the VPN Virtual Network:
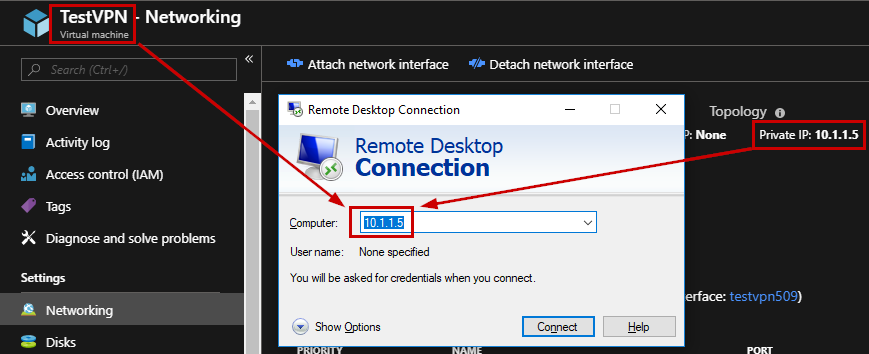
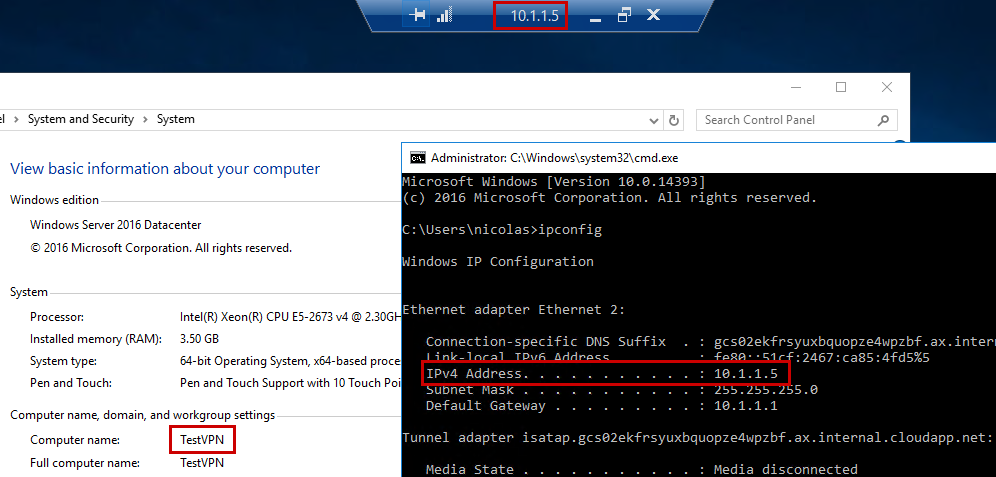
When the Virtual Machine is created, I can connect through RDP using the private IP Address, which is part of the VPN Virtual Network:
Conclusion
Thanks to the VPN Gateway, you can easily create a VPN tunnel between your laptop and your Azure Virtual Network. Here is a very helpful link:
https://docs.microsoft.com/en-us/azure/vpn-gateway/vpn-gateway-troubleshoot-vpn-point-to-site-connection-problems that will help you to solve issues regarding the VPN Gateway.
Thanks for reading!
