


After seeing how to migrate IIS websites quickly and easily, we’ll see how to migrate SQL Server databases, with a reduced time of unavailability, to Azure SQL. Be careful, this functionality is in Preview.
I’ve for this demonstration, a database learningsql who is running on Windows Server 2019, with SQL Server 2017 Standard, and populated with some data:

To start, you need to download the Data Migration Assistant tool and install it on a computer that has access to:
- The SQL Server
- Internet
After that, before launching the software, we need to verify some points for this online migration (not mandatory if you’re doing an offline migration, but it’ll be longer 😊).
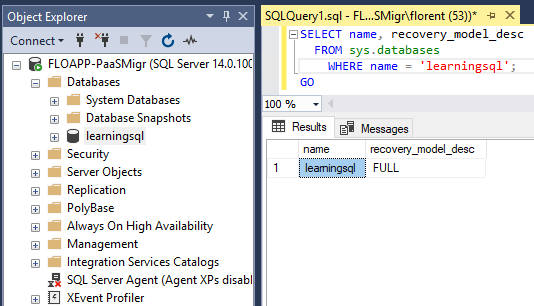
The first thing to verify is to know if your SQL Server version is superior to SQL Server 2005. After, the Recovery Model of your database must be in Full or Bulk-Logged. You can verify this with the following request:
| SELECT name, recovery_model_desc
FROM sys.databases WHERE name = ‘learningsql’; GO |
If you don’t have one of these 2 modes, please follow how to change it here:
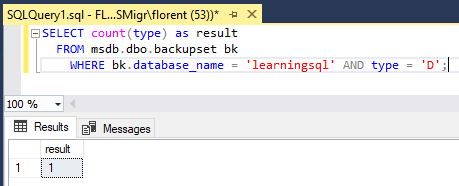
You also need to do a full backup of the database. Execute the following request to see if you done a full database backup before:
| SELECT count(type) as result
FROM msdb.dbo.backupset bk WHERE bk.database_name = ‘learningsql’ AND type = ‘D’; |
If the number is 0, please follow instructions here:
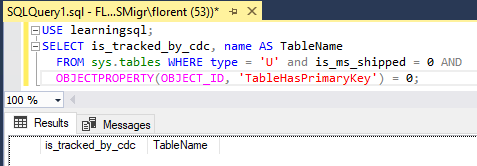
Another important point is if tables didn’t have primary key, you must activate the CDC (Chage Data Capture) on the database and tables that didn’t have primary key. To know which tables must be remediated, execute the following request:
| USE learningsql;
SELECT is_tracked_by_cdc, name AS TableName FROM sys.tables WHERE type = ‘U’ and is_ms_shipped = 0 AND OBJECTPROPERTY(OBJECT_ID, ‘TableHasPrimaryKey’) = 0; |
If you’ve results, please have a look here:
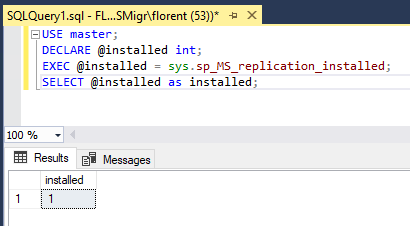
Finally, to finish with prerequisites, we need to verify that the SQL Server Replication service is installed correctly, with the following request:
| USE master;DECLARE @installed int;
EXEC @installed = sys.sp_MS_replication_installed; SELECT @installed as installed; |
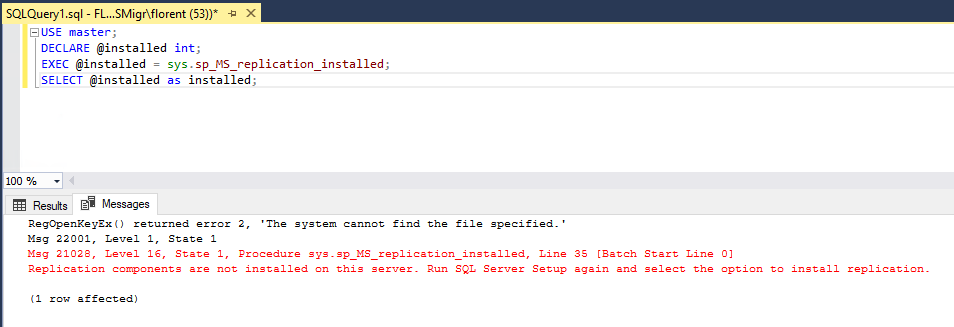
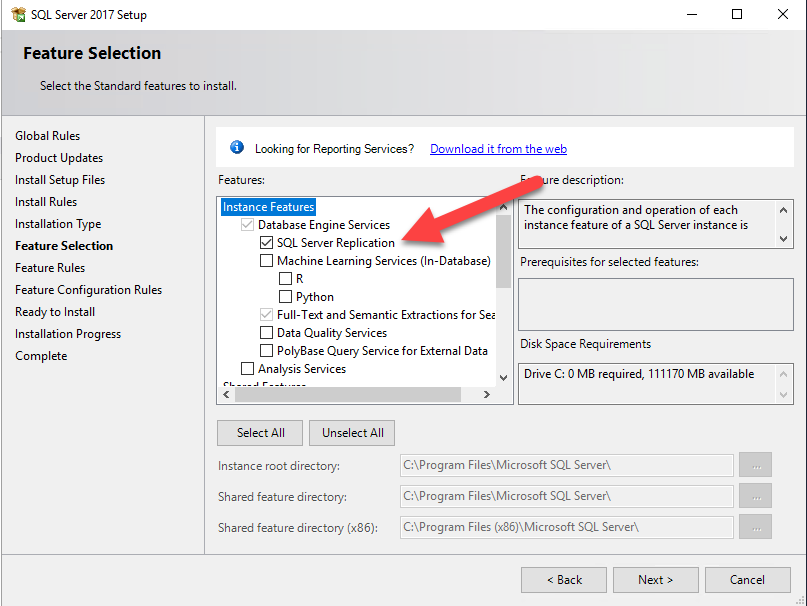
If like me, the service is not installed, mount the SQL Server ISO on the server, and add the SQL Server Replication feature on the instance where the database to migrate is located:
Verify again to see if the feature has been installed correctly:
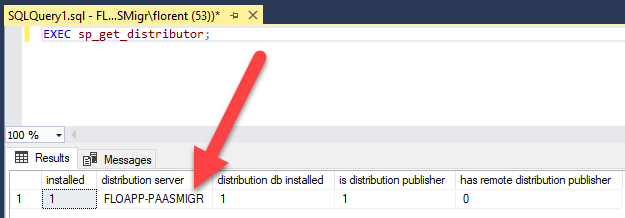
After, verify if the distribution role is installed, with the following request:
| EXEC sp_get_distributor; |
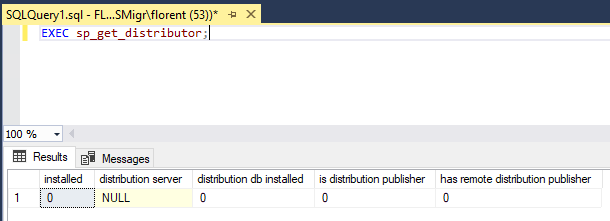
If the column distribution server is empty, you must configure the service with the help of the following article (you can do it with the console or with a request):
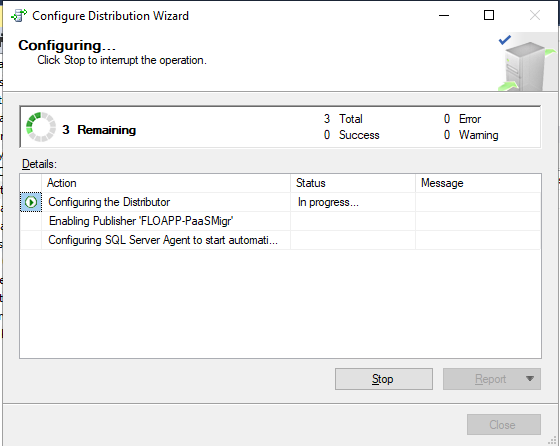
Verify again. You should be able to see the name that you gave during the configuration:
The prerequisites verification is now finished.
Now, you need to create a new database on Azure SQL, to do the migration. If you need help to do this, follow this link:
https://docs.microsoft.com/en-us/azure/sql-database/sql-database-get-started-portal
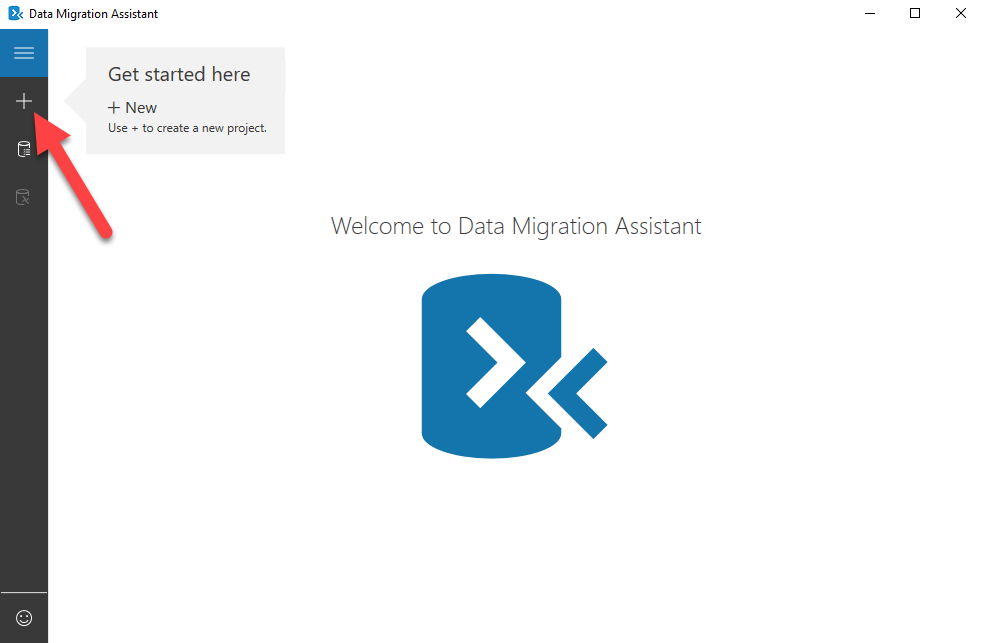
You can now launch the Data Migration Assistant console and click on the +, to start a new project:
Give a name to the project, choose the source, the destination, and what you want to migrate:

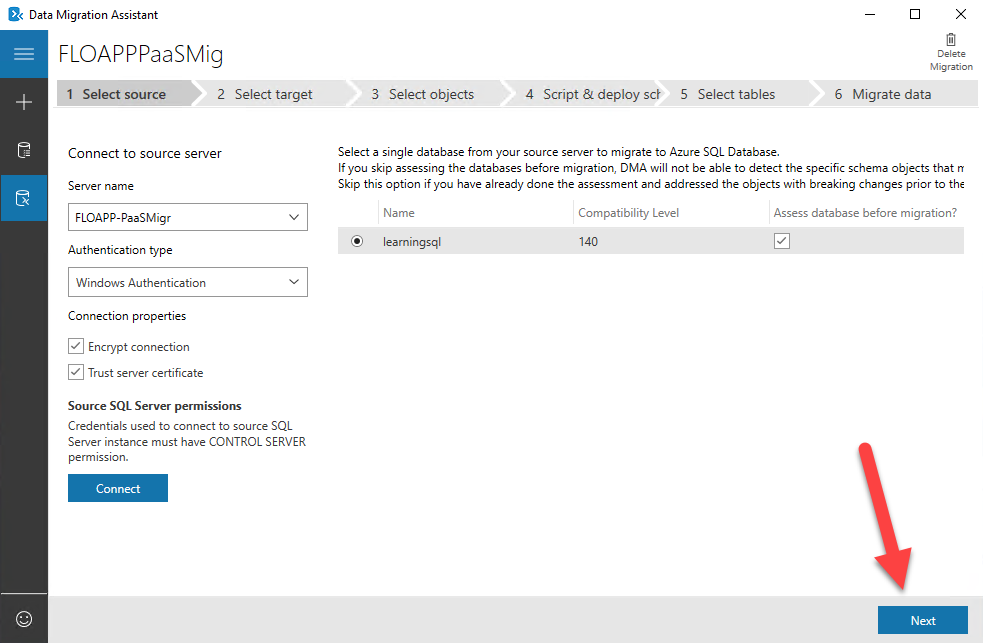
Provide information that we need to connect to the instance where the database that we want to migrate is located, select the database to migrate and click on Next:
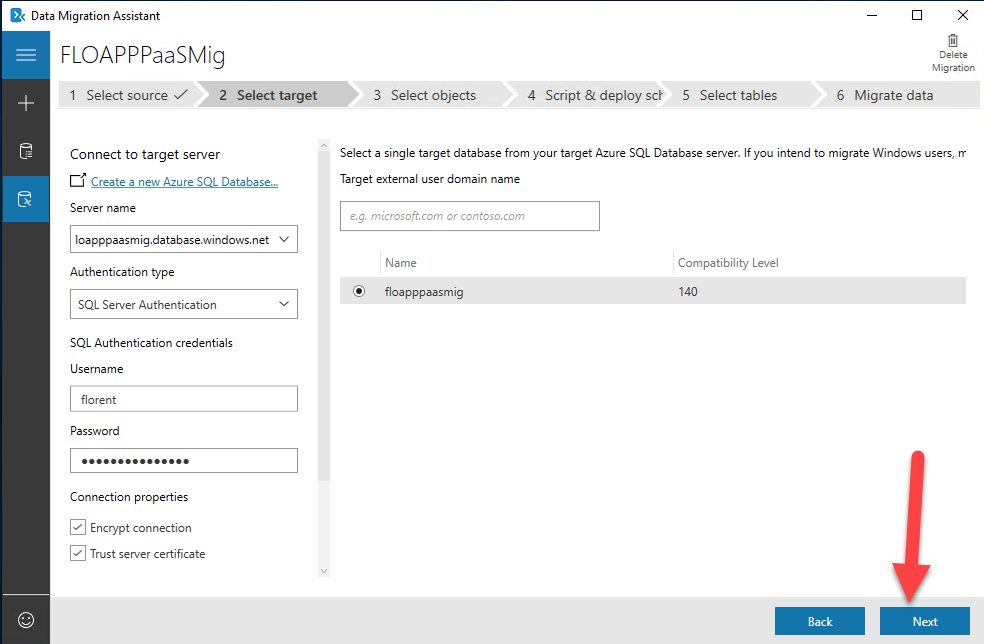
Provide information to connect to the Azure SQL where the On-Premises database will be migrated, and if the server has multiple databases, select the database that you want to use:
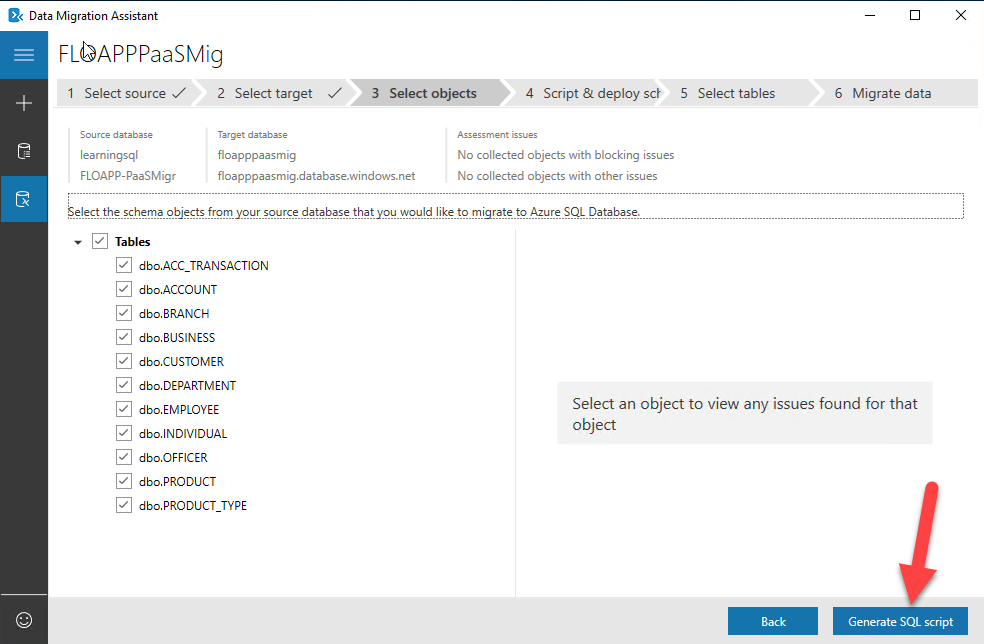
Choose tables that you want to migrate and generate the SQL script that will help to the schema creation on the Azure SQL instance:
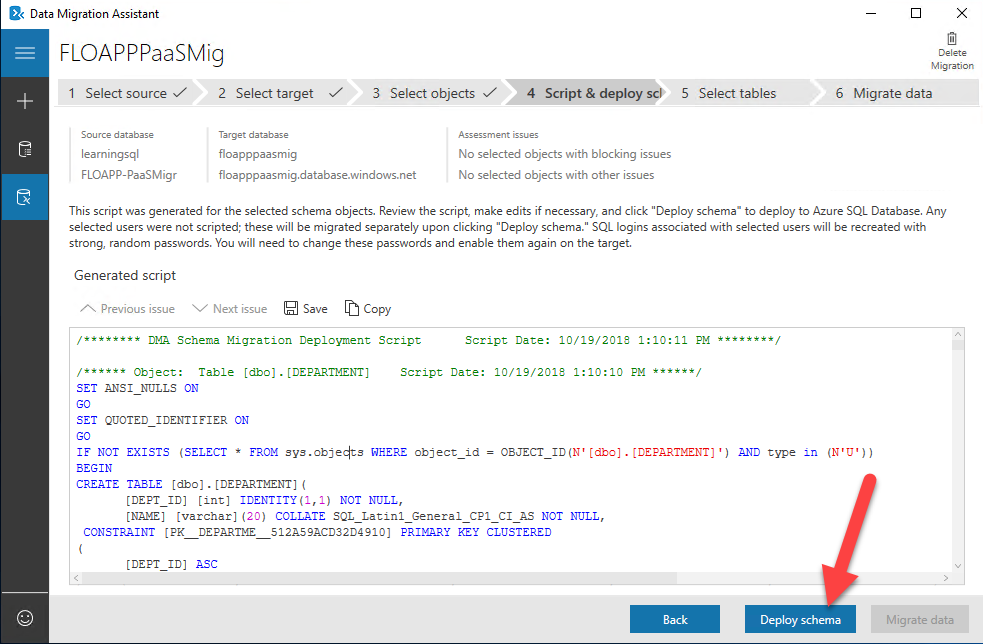
Click on Deploy Schema to deploy the schema from your On-Premises database to Azure SQL:
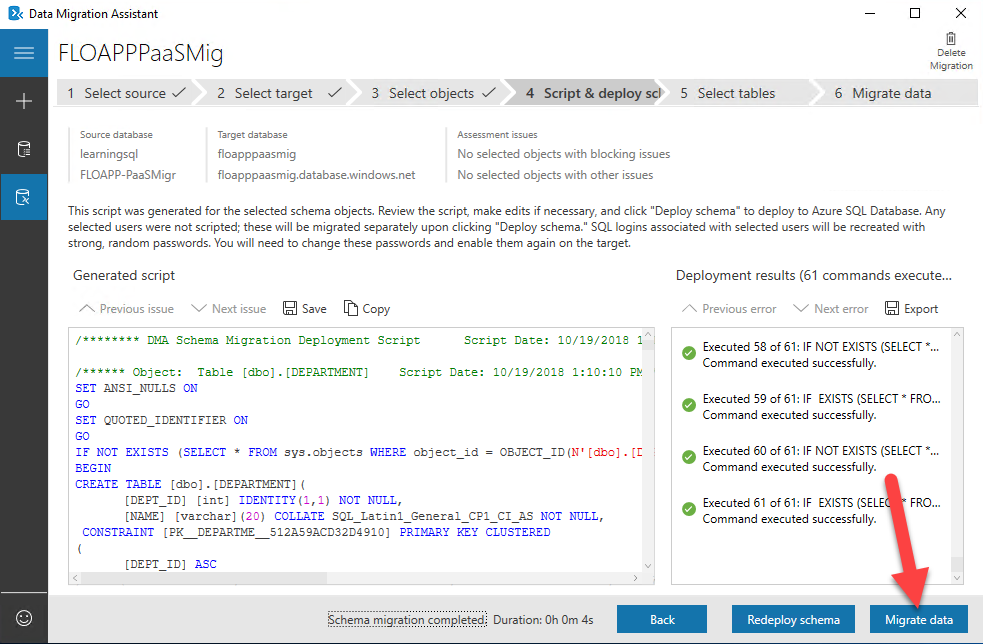
You can now move to the next step, data migration, if everything worked fine, by clicking on Migrate data:
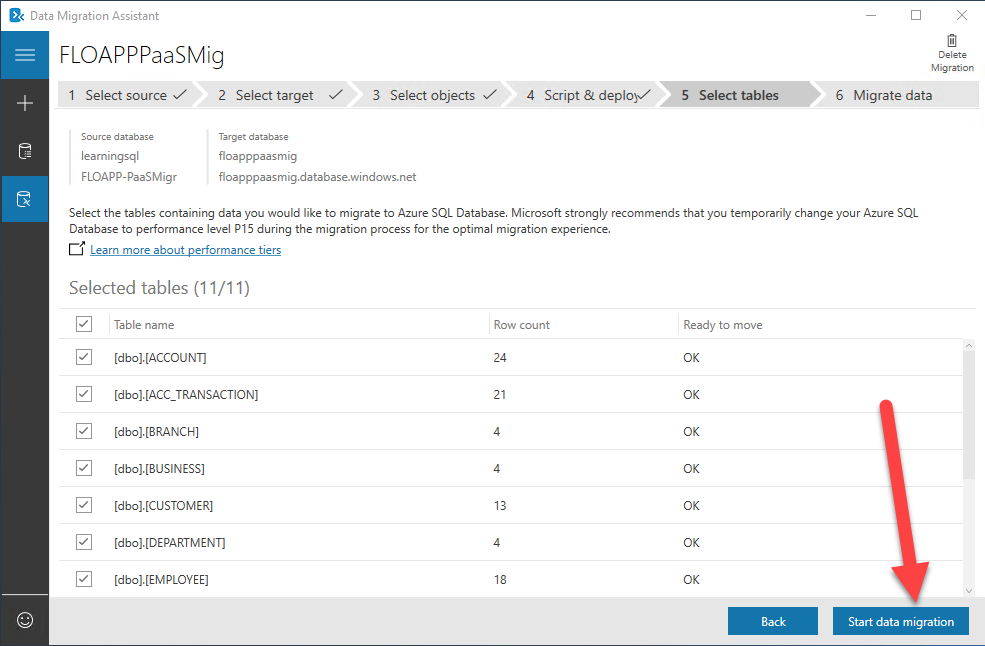
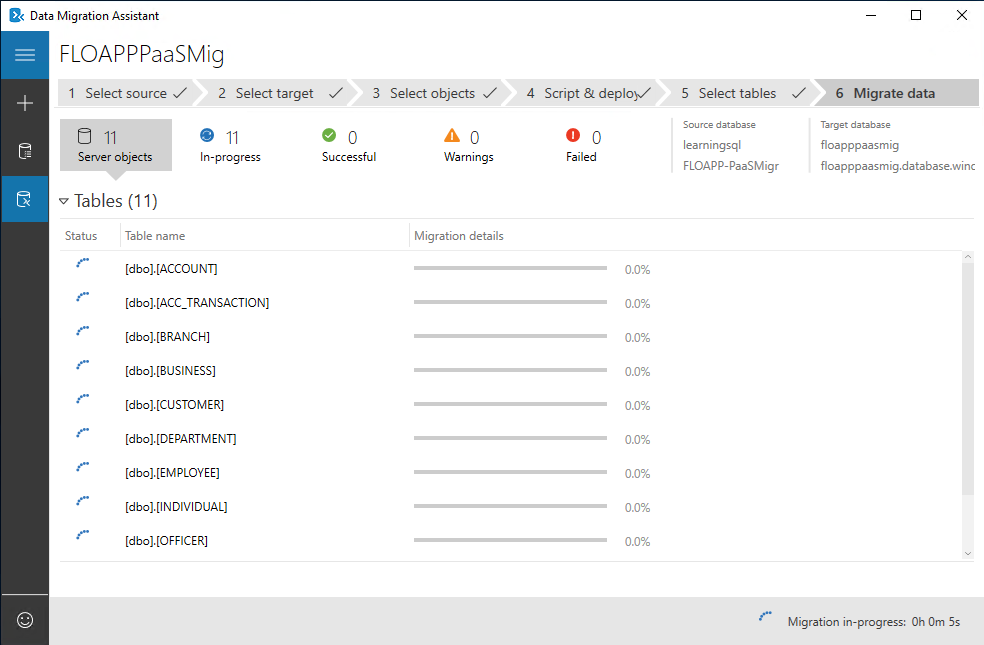
Click on Start data migration to start the data migration, after selecting data on tables that you want to migrate:
The migration start:
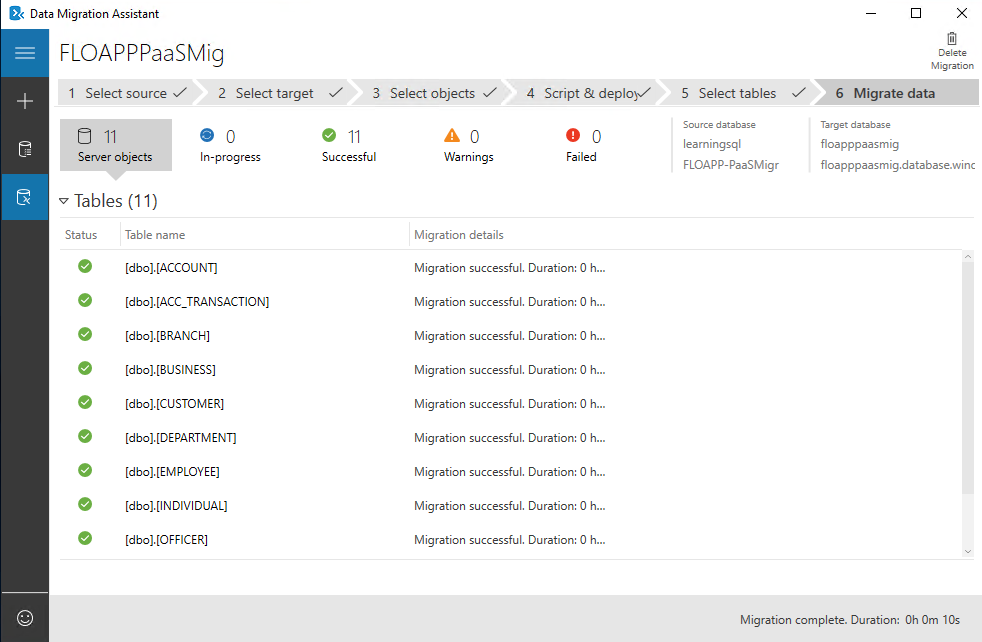
Because I don’t have many data in my database, the migration has been done in less 1 minute:
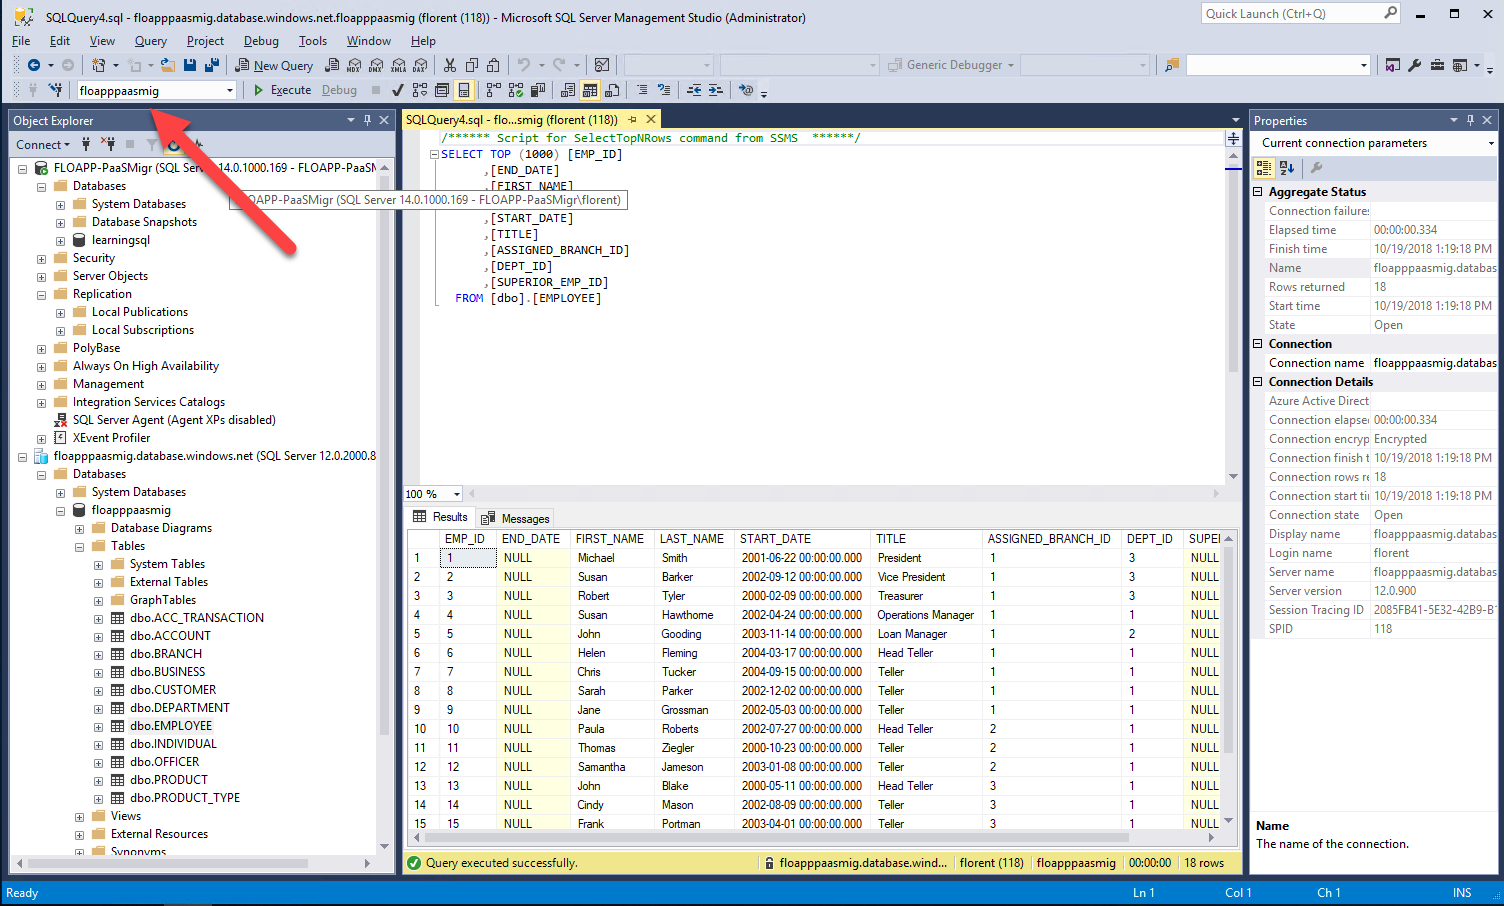
If I connect to my Azure SQL, with the Management Studio, and I look my database, I can find tables that I migrated, with data:
This new functionality, in preview, to do a hot data migration, with a very small interruption, is very interesting and will help you to migrate quickly and easily to Azure SQL.
