

During its lifetime, any system reaches a point when it needs to be upgraded, either in terms of hardware or software. Today, I will talk about such changes, in particular, about upgrading Windows Failover Cluster nodes from Windows Server 2012 R2 to Windows Server 2016 with no production interruption. Thanks to Microsoft, we do have a Cluster Rolling Upgrade procedure at our fingertips, and I am going to get through it and confirm it works for virtualized disks as cluster shared volumes in Windows Failover Cluster. This procedure assumes rebuilding nodes with clean OS deployment one by one, while the production keeps running from the other cluster node.
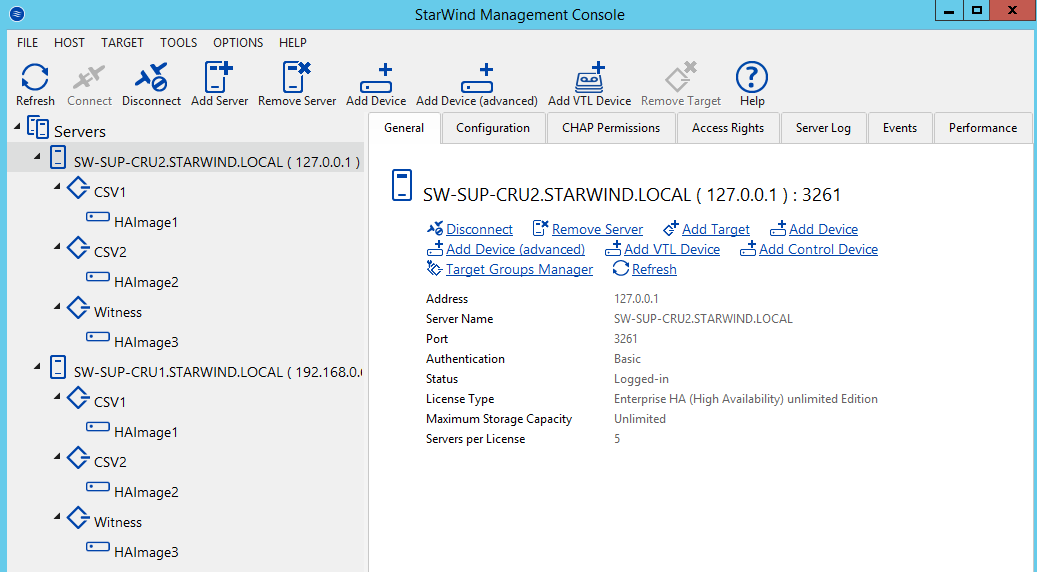
To begin with, I have a 2-node Windows Failover Cluster with Windows Server 2012 R2 installed on the nodes. The cluster has got 2 CSVs along with the Quorum. The whole system is configured in a hyperconverged scenario.
Before making any further steps in terms of Cluster Rolling Upgrade, taking into account that in my case the cluster storage is provisioned by StarWind VSAN, I would like to mention that step #0 is checking that all disks are synchronized on all nodes. Without making sure that they are, the below actions can endanger the stability of the production environment.
After having checked the StarWind devices synchronization status, I proceed with the upgrade starting from node 1 with the following steps:
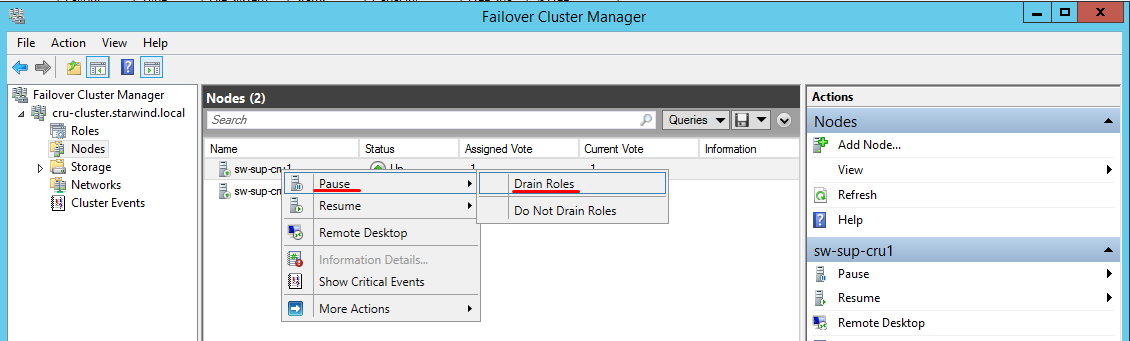
1. Drain roles from node 1 inside the Failover Cluster Manager.
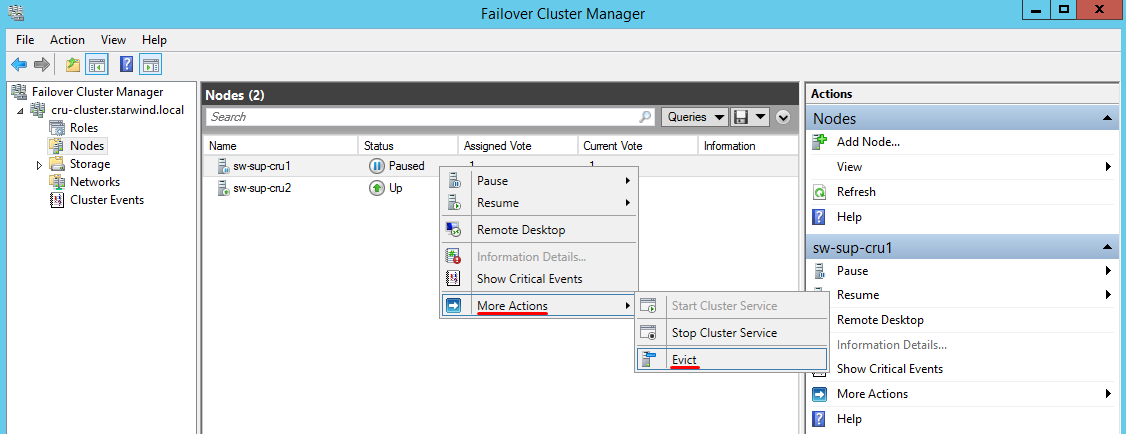
2. Evict node 1 from the cluster.
3. Stop the StarWind VSAN service on node 1.
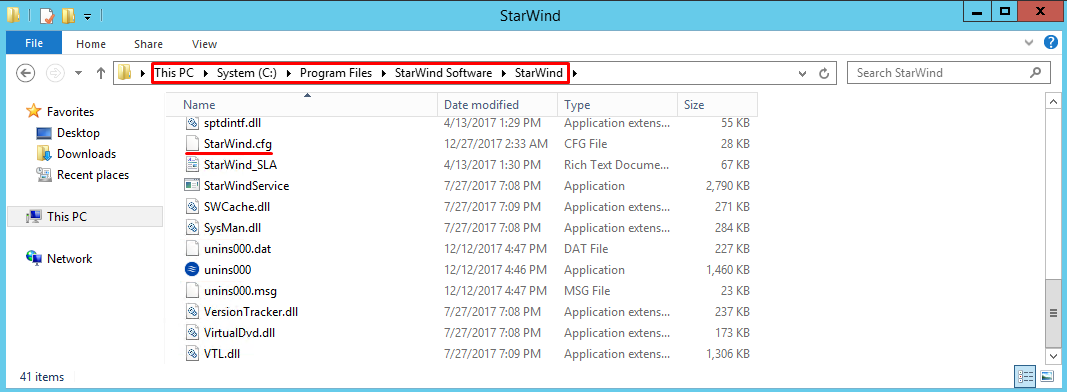
4. Back up the StarWind configuration file StarWind.cfg on node 1 (the default location: “C:\Program Files\StarWind Software\StarWind\StarWind.cfg”) to restore StarWind setup with less effort after OS reinstallation.
Note: Make sure that there are no StarWind devices located on the OS partition. Do not format partitions where StarWind devices are located.
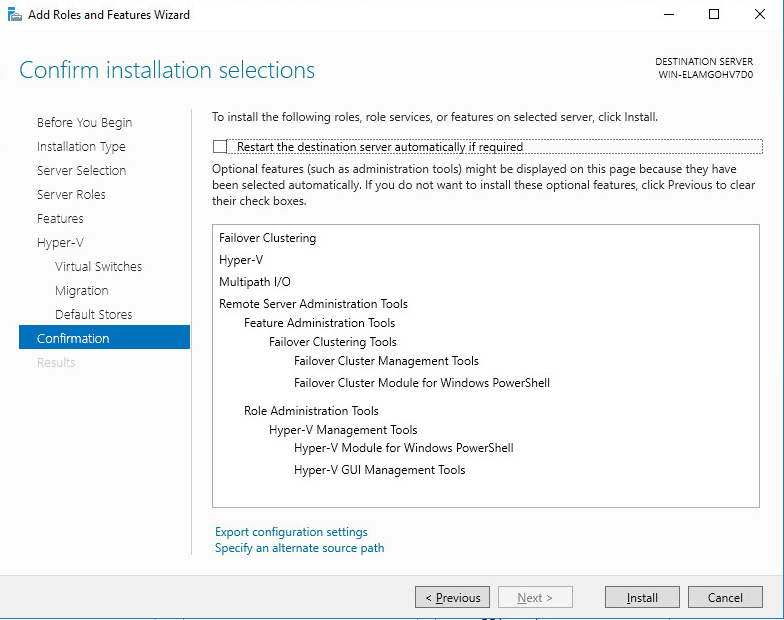
5. Make a clean install of Windows Server 2016 on the system partition of node 1. Supply it with all required roles and features like Hyper-V, Multipath I/O, and Failover Clustering as well as correct network settings that have been previously used on Windows Server 2012 R2 on this node. For the guidance on how to configure this, refer to the configuration guide.
6. Install StarWind VSAN. The above guide offers instructions on that as well. To keep the previous configuration consistency, make sure you install the same build of StarWind VSAN as used before.
7. Stop the StarWind VSAN service on node 1.
8. Swap the existing StarWind.cfg file with the one you have previously backed up from node 1.
9. Start the StarWind VSAN service and check whether all devices appear in the StarWind Management Console on node 1, and confirm there are no non-active devices on it. In my case, at this step, I had the fast sync process automatically initiated from node 2 to node 1.
Note: If you do not have a valid backup for the StarWind.cfg file, just go to node 2 and recreate replicas to node 1 for all StarWind devices in the Replication Manager. To access it, right-click on each device and select the Replication Manager in the menu. After this is done, wait for the process of full synchronization to complete.
10. Connect targets in Microsoft iSCSI initiator on node 1 after the synchronization process is over. You can find the guidance on configuring iSCSI connections in the document mentioned in step 5.
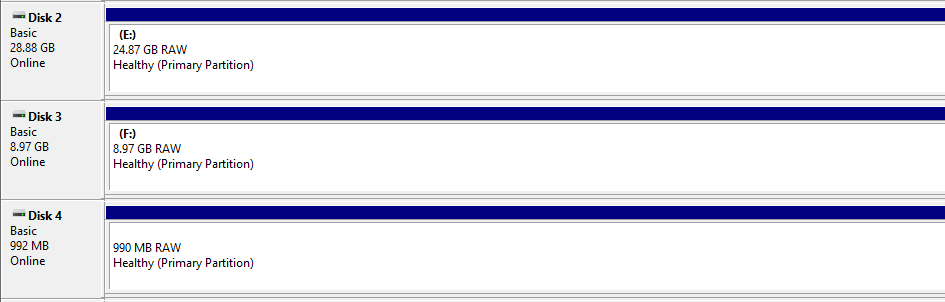
11. In Disk Management, bring all StarWind-related disks online. They will show up as RAW but do not worry, as this is caused by the fact that they are clustered already.
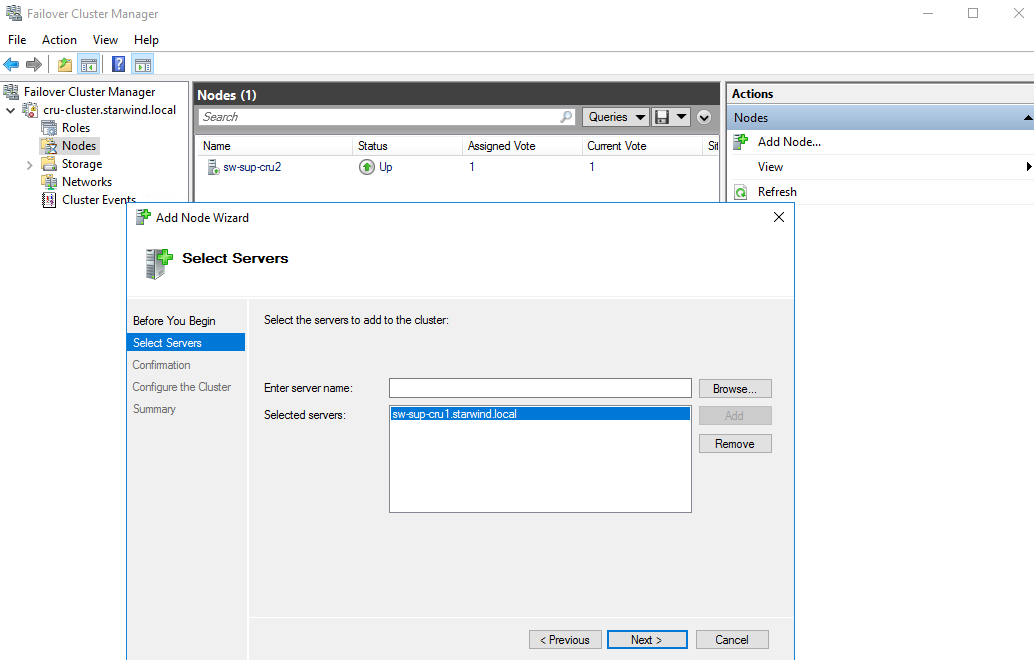
 12. On node 1 (important!), open Failover Cluster Manager, connect to your cluster and add node 1 to it. Do not try to perform this from node 2, which still runs on Windows Server 2012 R2, as the Failover Cluster Manager console will most likely keep failing when connecting to the hybrid-mode cluster (with node 1 on Windows 2016 and node 2 on Windows 2012 R2).
13. Perform steps 1-12 for node 2. Keep in mind step 0 😊
14. Once all cluster nodes are upgraded to Windows Server 2016, follow the Microsoft’s guide on how to upgrade the VMs and the cluster’s functional level. The following PowerShell cmdlet can be used for this purpose:
|
1 |
Update-VMVersion -Name VM_Name |
and
|
1 |
Update-ClusterFunctionalLevel. |
Hint: if you decide to check the functional level of the cluster containing only 2012 R2 nodes, the PowerShell command
|
1 |
Get-Cluster | Select ClusterFunctionalLevel |
will not even return the value. But whenever at least one 2016 node is added, this property will be available for monitoring.
Conclusion
At all stages of the Сluster Rolling Upgrade procedure, the production kept operating from the active cluster node, with StarWind VSAN properly serving the storage to the cluster. Thus, the Cluster Rolling Upgrade can be considered for the “live” upgrading of StarWind VSAN based environments where 24/7 availability is required.
