

We will see how to implement this solution (the Microsoft documentation is available here). To start, you need to be sure to have the following requirements:
- Azure Container Service
- Azure Container Registry
- A Github account
- Your application in a repository
- Your Dockerfile in a repository
- A VSTS account
- A server with Docker installed
Before starting, you must deploy on your ACS, the VSTS agent.
You need a token to install this agent. Go in your VSTS > Your account > Security :

Click on Add to create a new token:
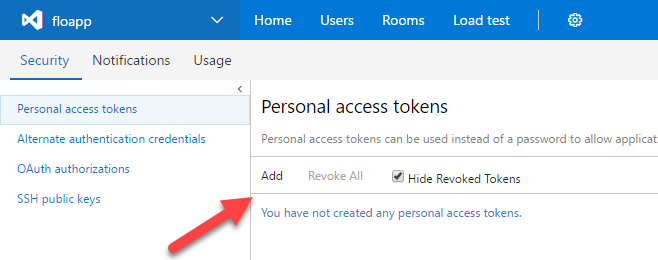
Select Agent Pools (read, manage) for the permission and create the token:

Save the key that VSTS will generate because you’ll not be able to get it later. Connect to a server where Docker is available to install the VSTS Agent (you can deploy this agent on a Docker container). My server is on Ubuntu 16.04. In the VSTS interface, click on Settings > Agent queues > Download Agent and select your OS:
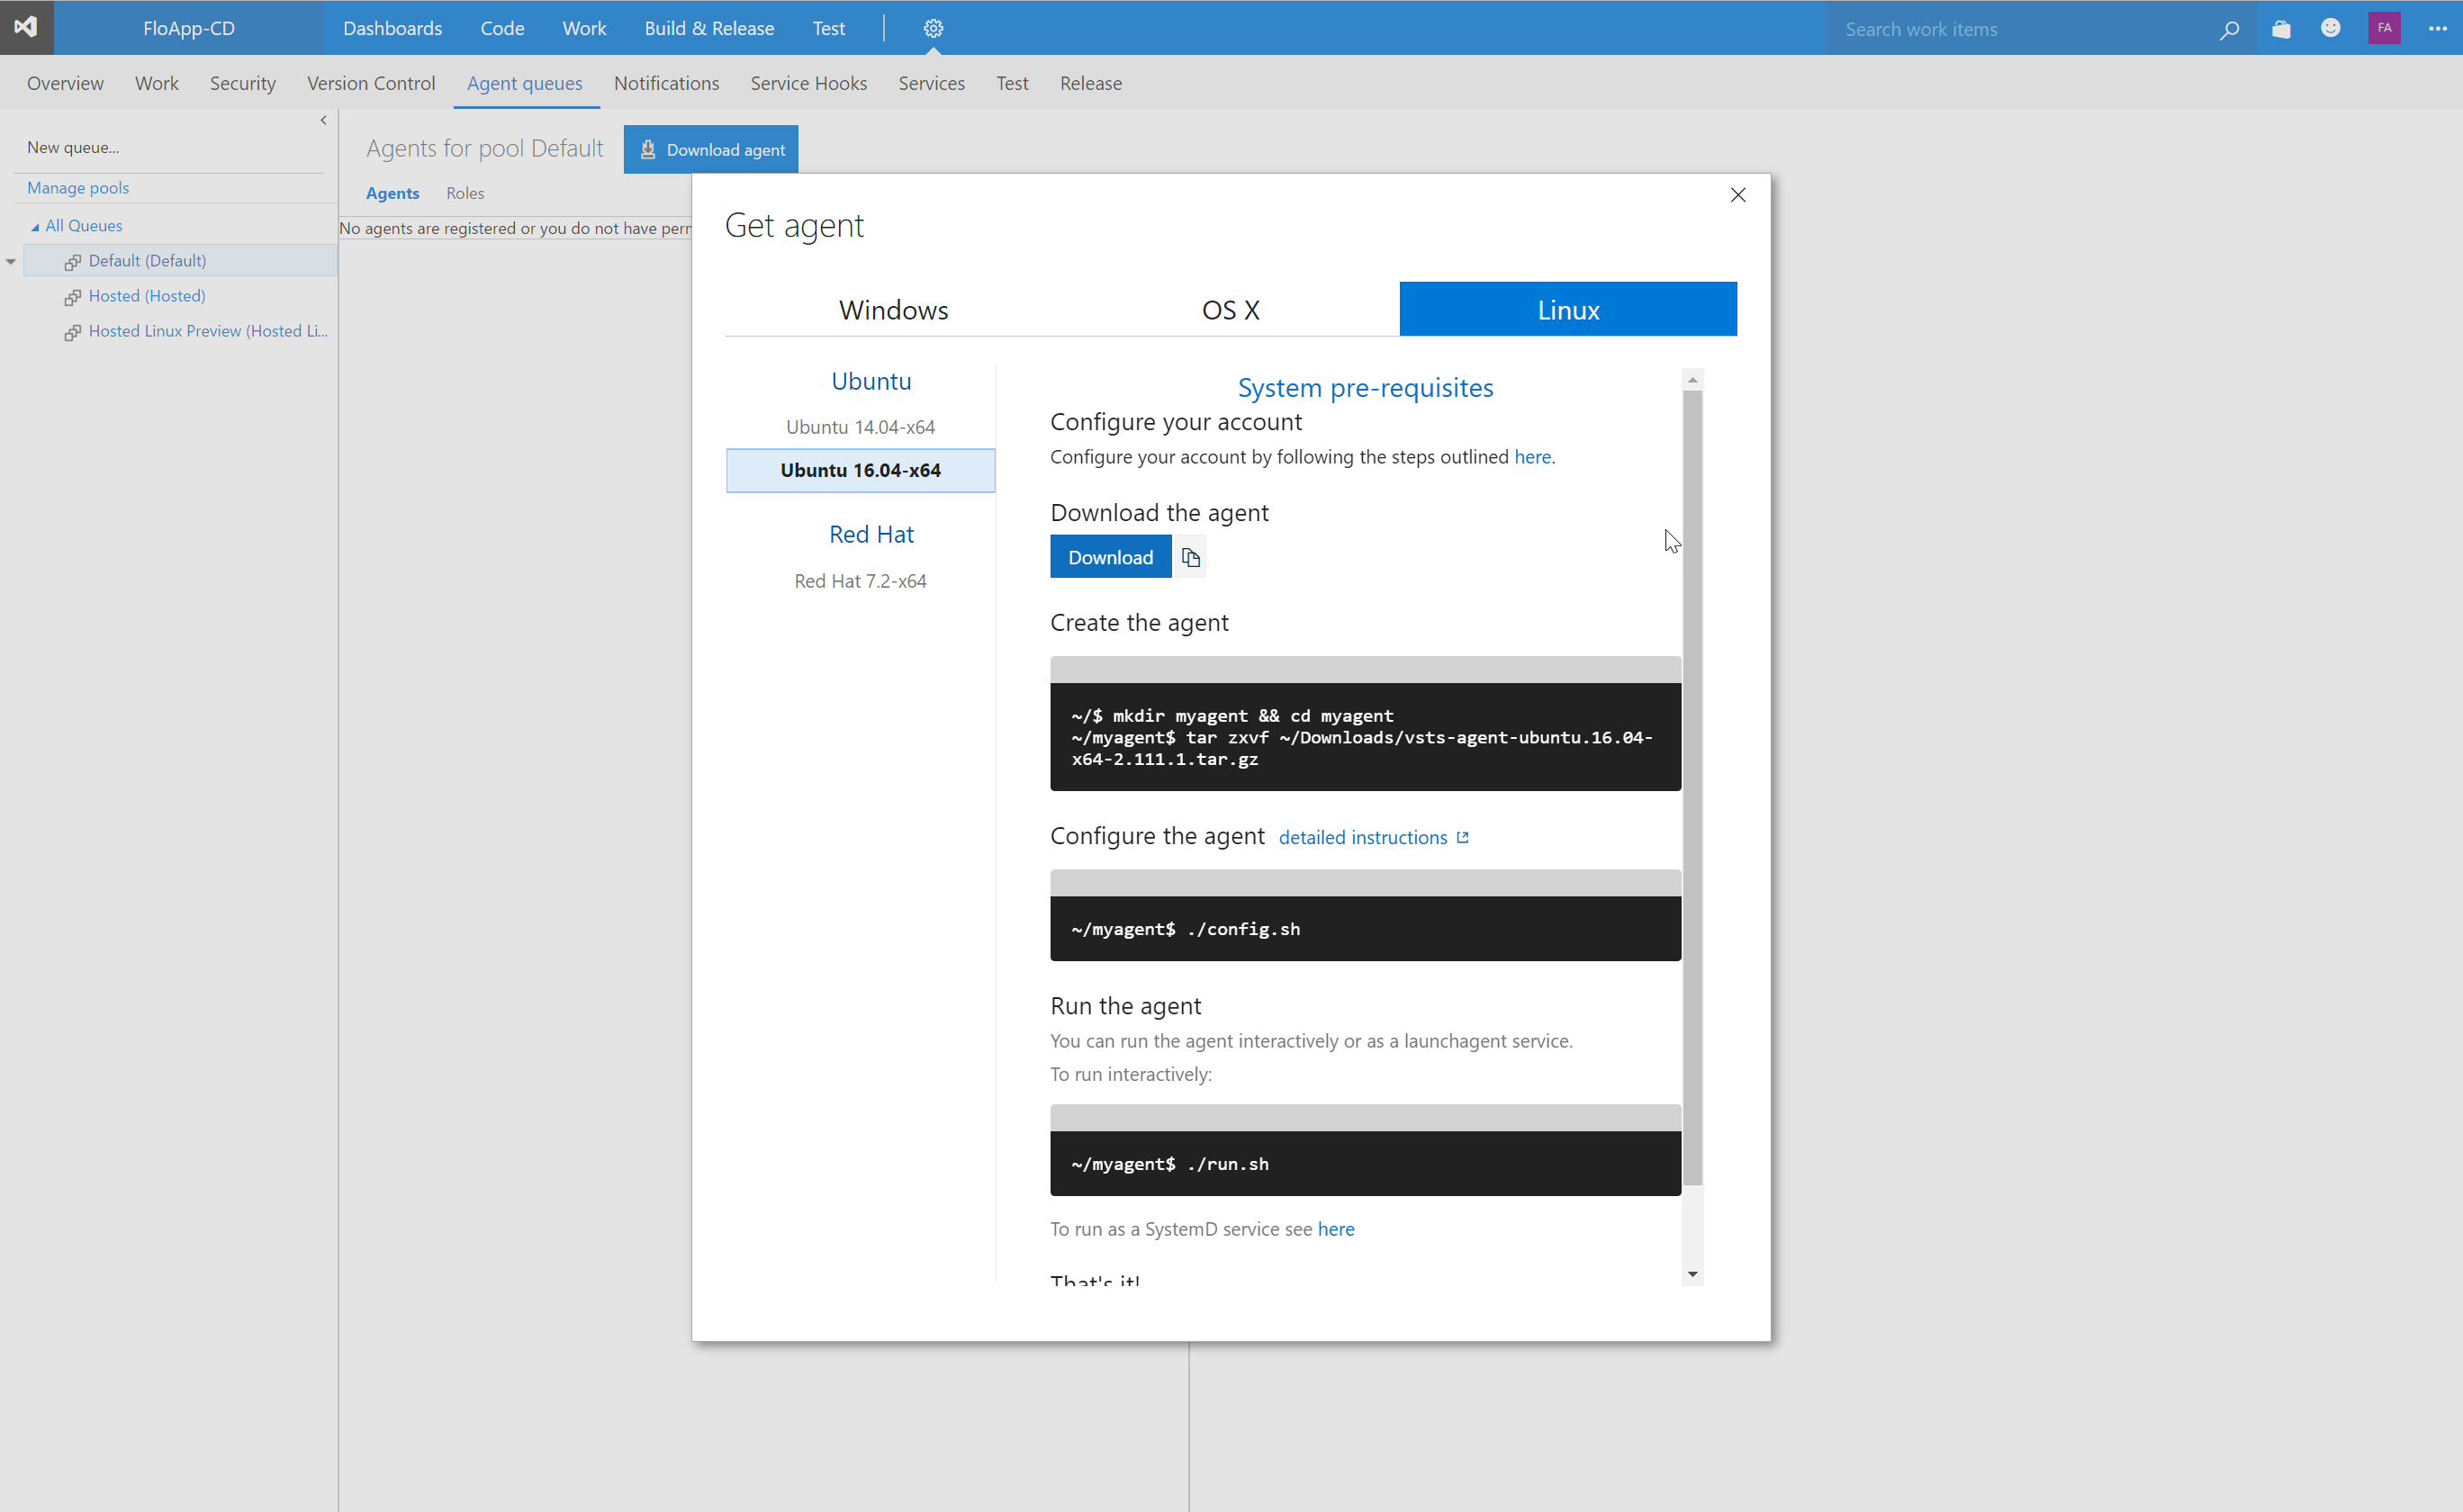
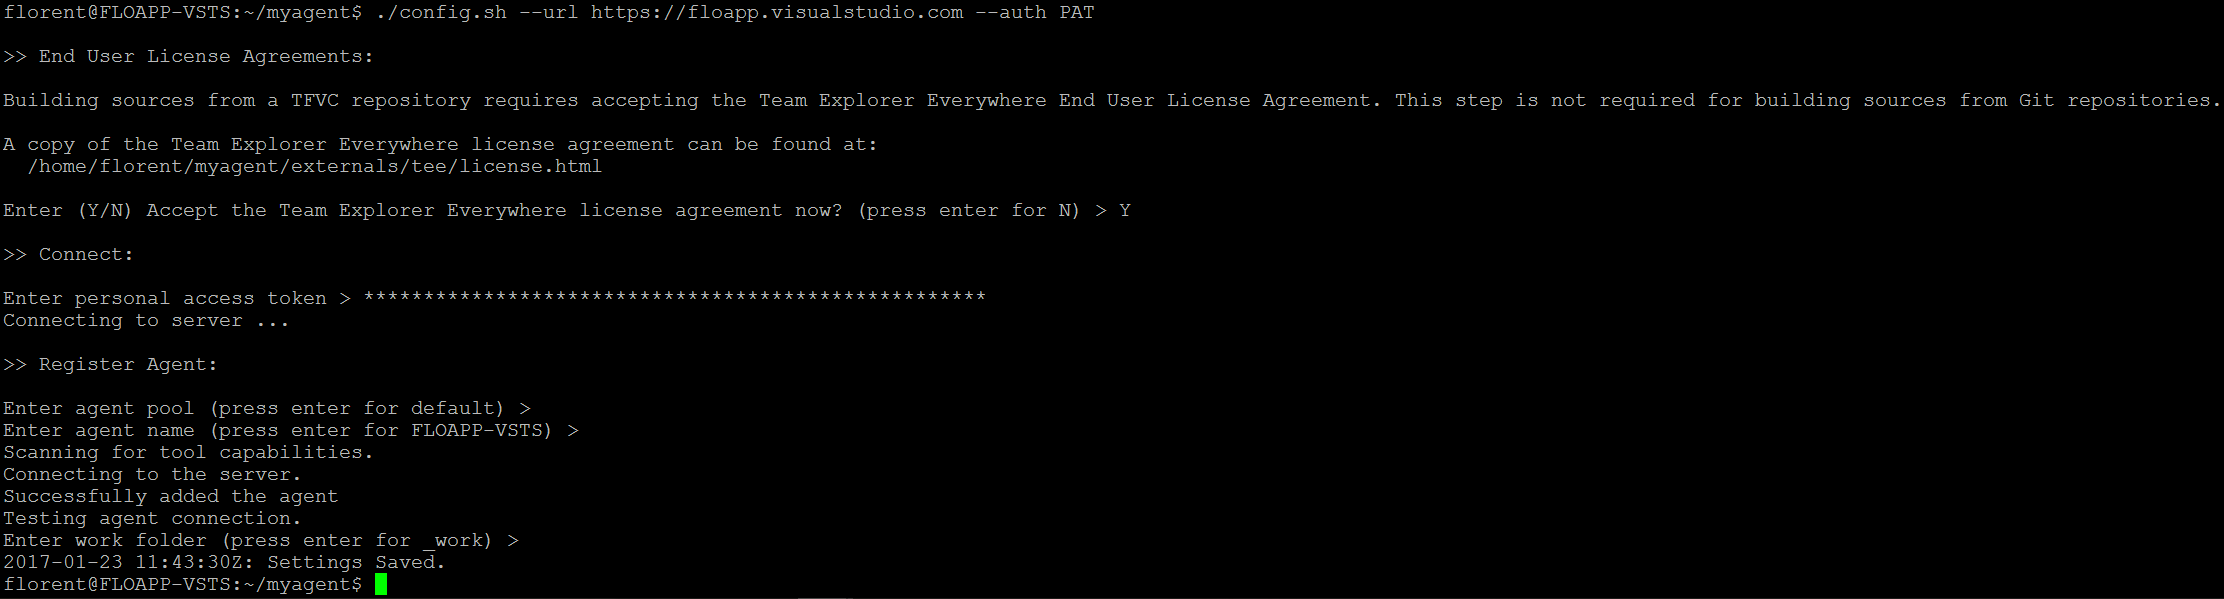
Download the agent from the server and execute the configuration command by replacing the URL of your VSTS. Provide the token that you created just before for the authentication:
|
1 2 3 4 |
wget https://github.com/Microsoft/vsts-agent/releases/download/v2.111.1/vsts-agent-ubuntu.16.04-x64-2.111.1.tar.gz mkdir myagent && cd myagent tar zxvf /home/florent/vsts-agent-ubuntu.16.04-x64-2.111.1.tar.gz ./config.sh –url https://floapp.visualstudio.com –auth PAT |
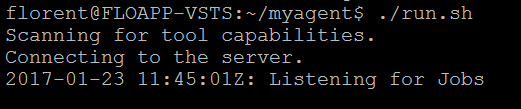
The agent is now configured. To start it, execute the script ./run.sh:
To give the possibility to each component to speak each other’s, you need to install the Docker component on VSTS. It will allow the communication between your VSTS and your Docker environment. On the marketplace of Visual Studio ( https://marketplace.visualstudio.com/items?itemName=ms-vscs-rm.docker ) click on Install:
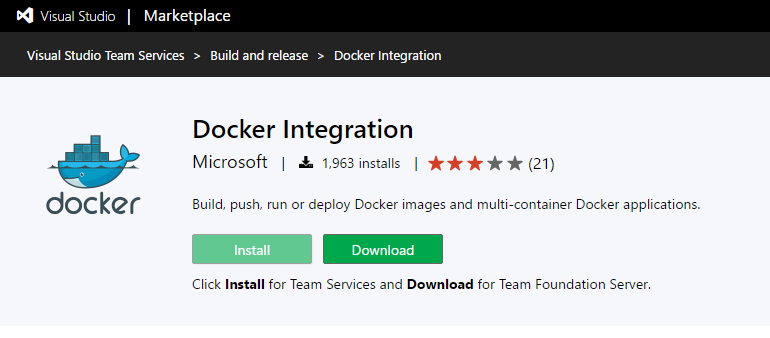
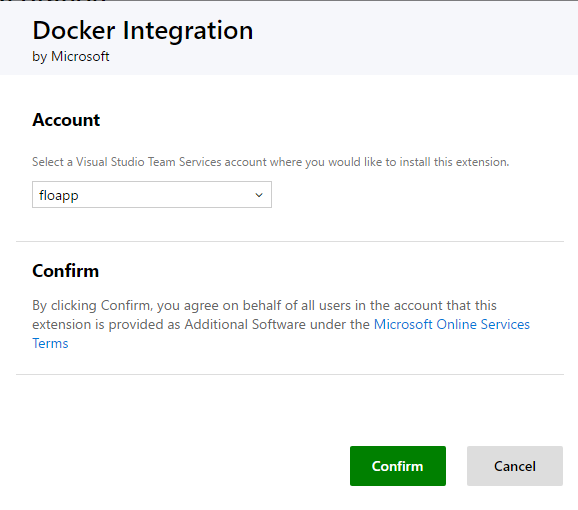
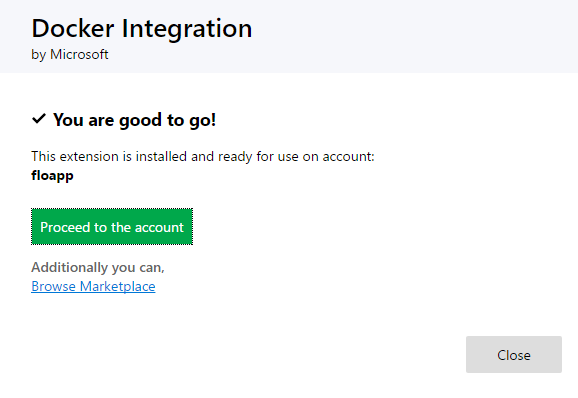
Choose on which VSTS account to install the Docker Integration component:
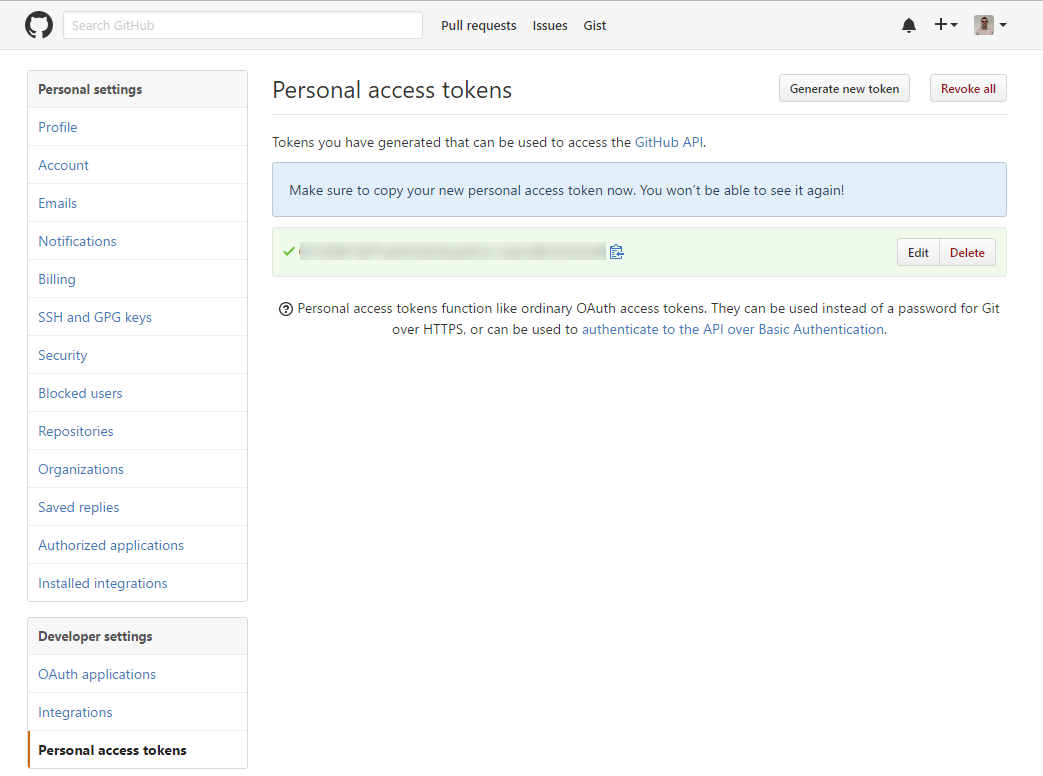
To continue, get a GitHub token who has permissions repo, user, admin:repo_hook :
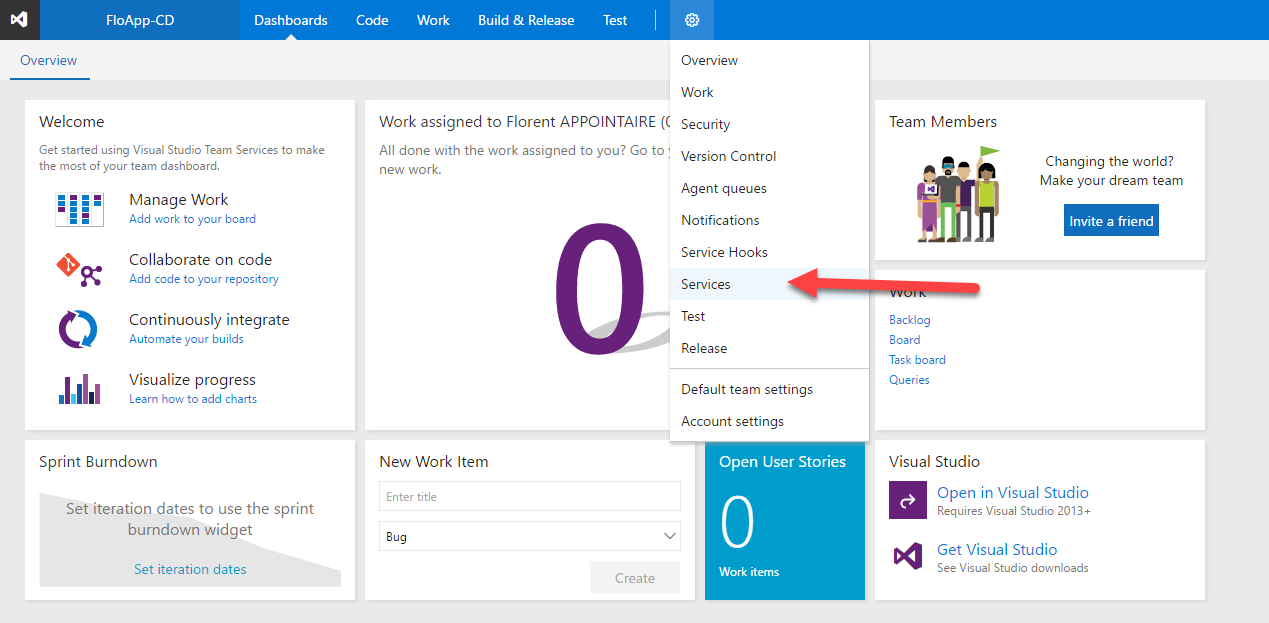
The next step is to associate your VSTS and your GitHub account. Open the project and click on Settings > Services:
Here, click on New Service Endpoint > Github:

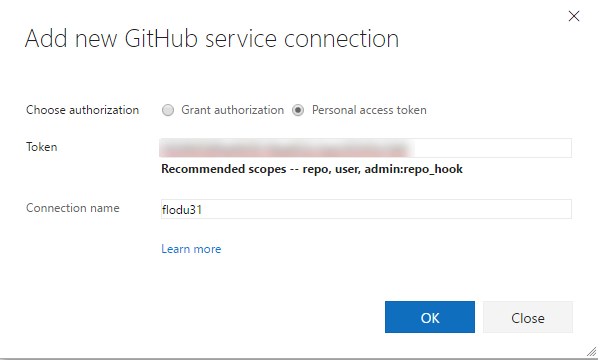
In the new window, provide the token that you generate before and the name associated with this token:
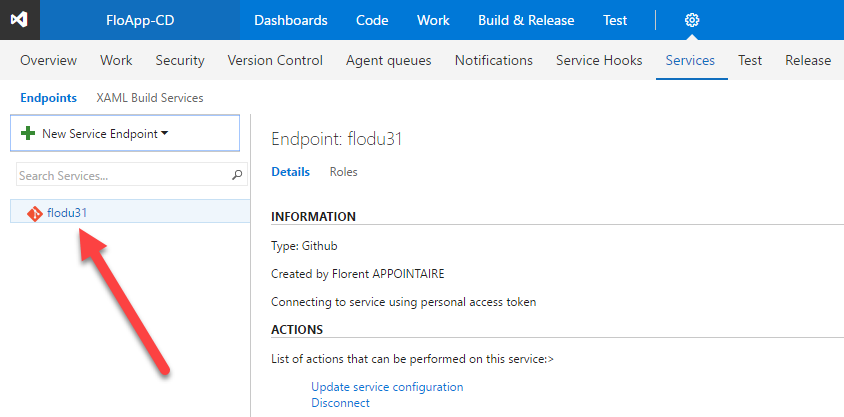
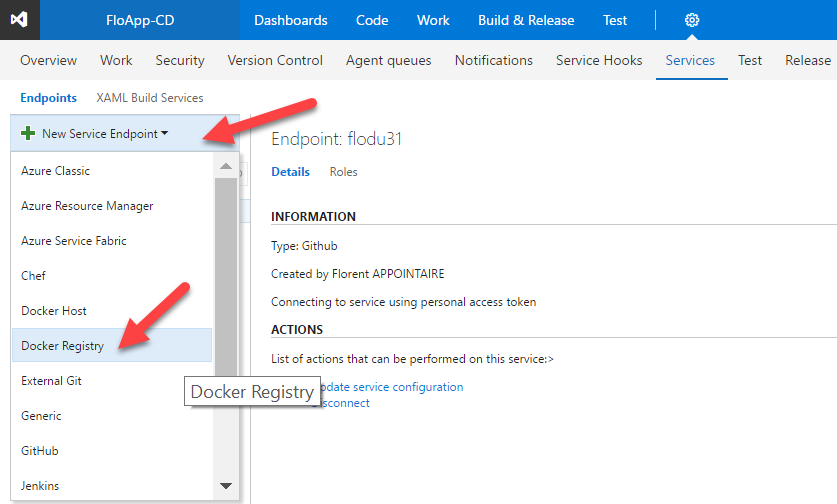
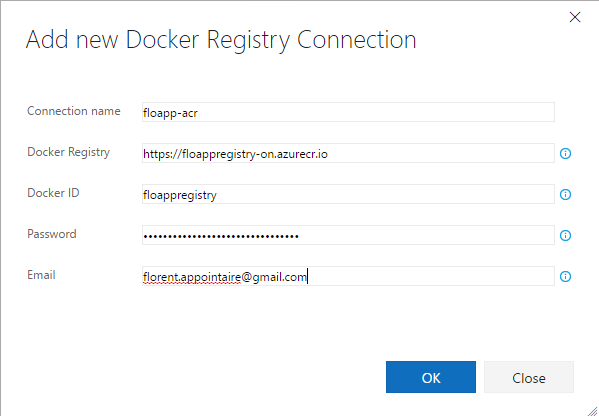
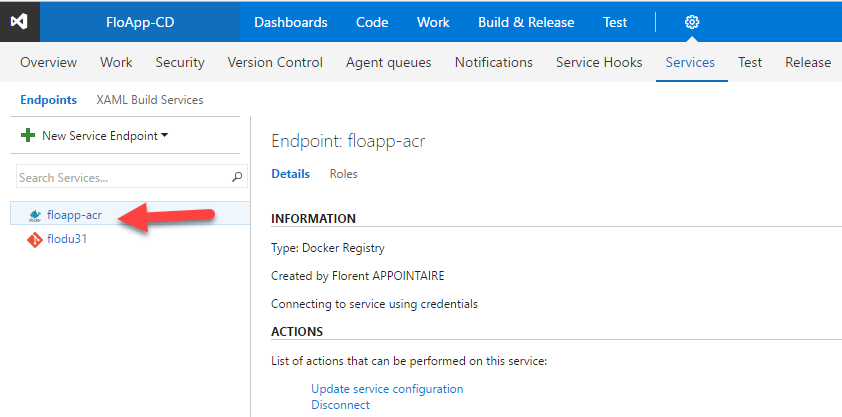
It is necessary to register the Docker registry, by clicking on New Service Endpoint > Docker Registry:
Provide information of your registry, that you can find on Azure, in the menu Container Registry > Access Key:
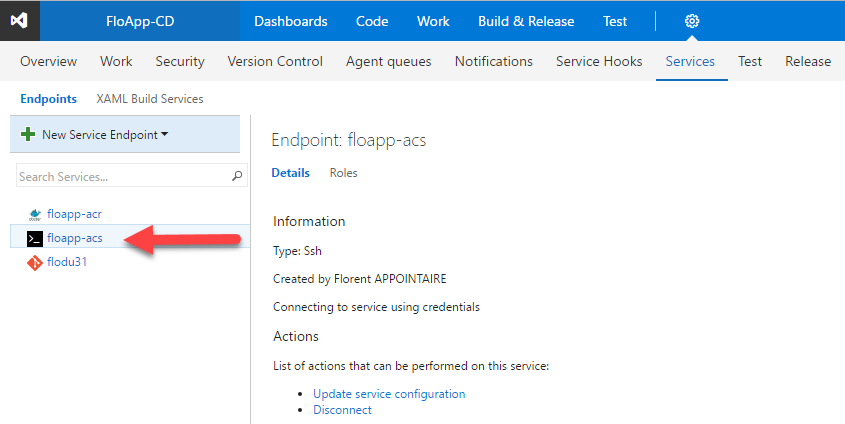
To finish this part, you need to add a new service, SSH. Give a name, the URL to connect that you can find on Azure, in the Container Service part, the port (2200 by default), the username that you provide when you created the ACS and finally, the private key used during the installation of the ACS:

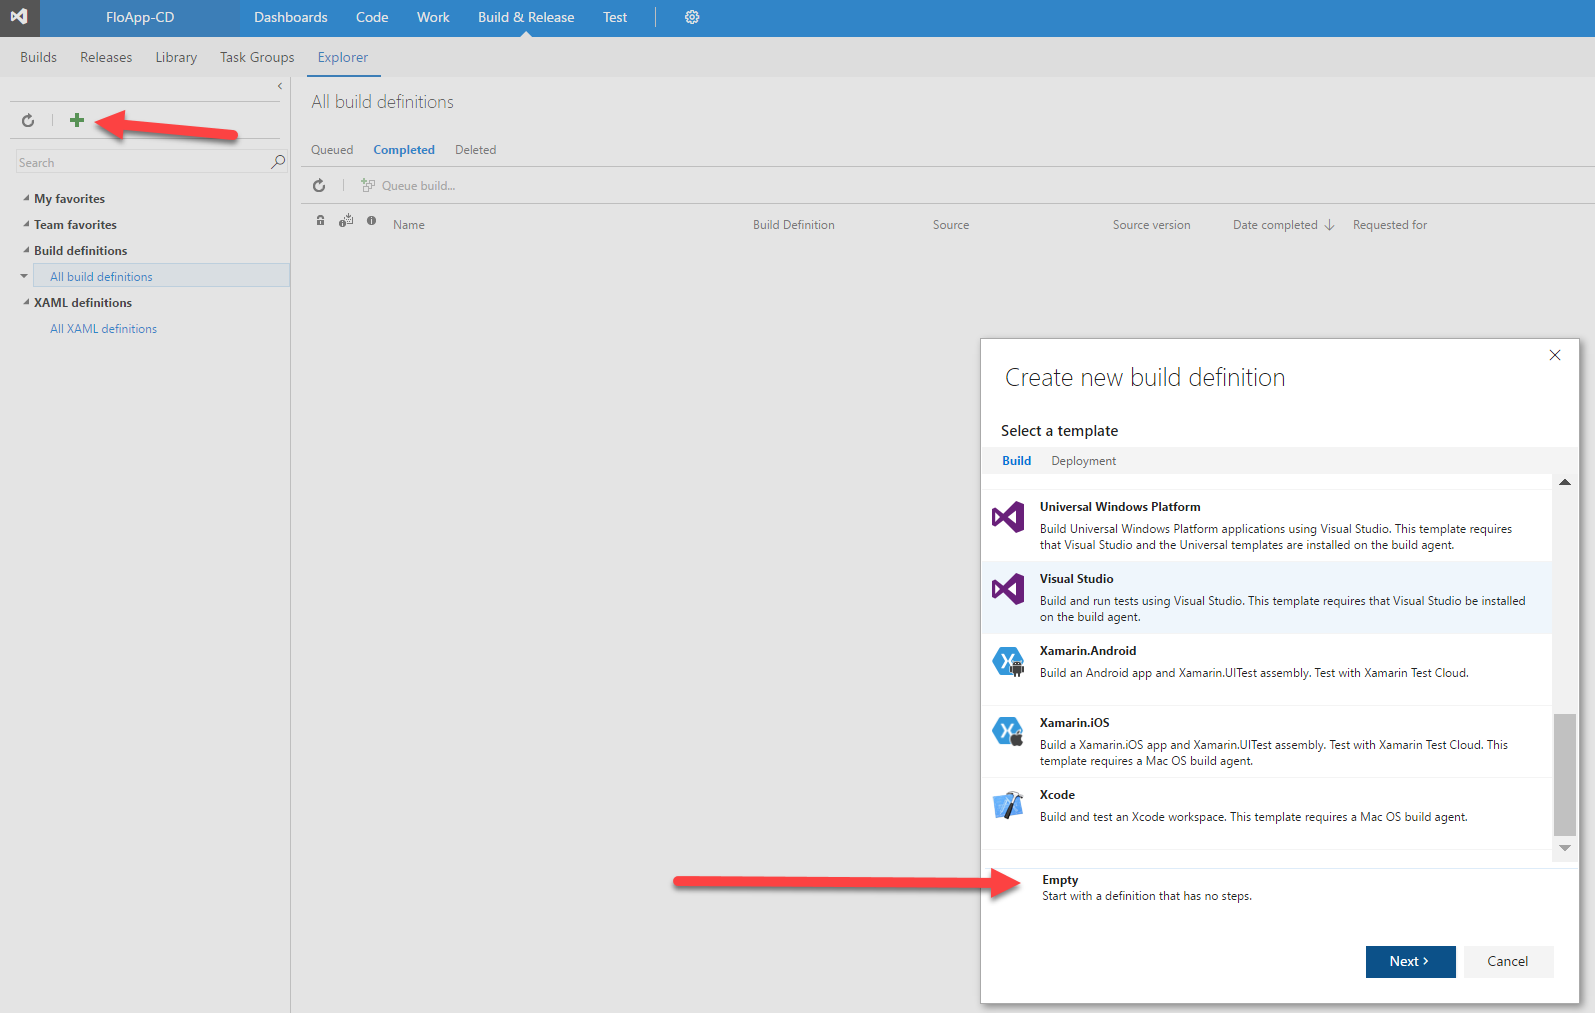
The configuration part is now finished. Move to the next. We will start by creating the base of the build. Navigate to VSTS, in Build & Release. Click on New > Empty:
Click on Github and select Continuous integration. Choose the type of the agent, Default:
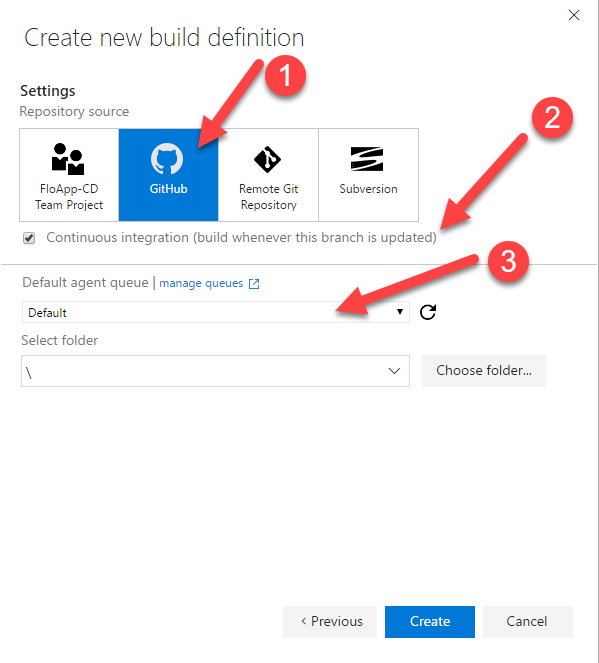
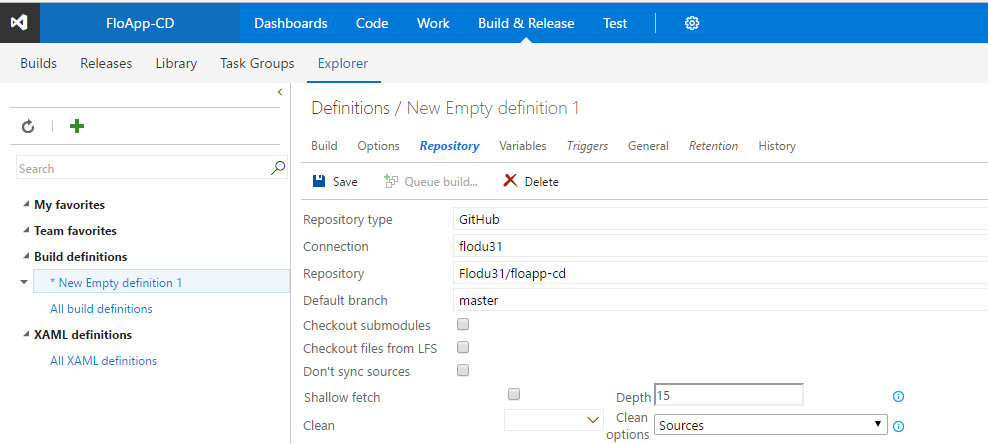
On your new definition, click on Repository and select the Github account that you configured before, thus the repository that you want to use for the CD:
On Triggers tab, select Continuous Integration. This will activate the trigger when you will do a commit on the application:

Click on Save:
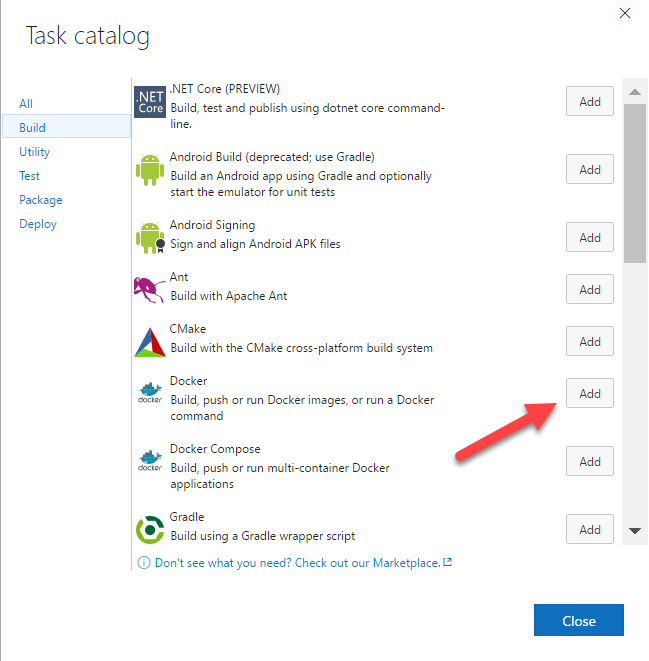
My application, that I want to deploy, contains one image, nginx. I’ll create 2 Docker steps, one to send the image to ACS and one on ACR. Click on Add build step… in Build:
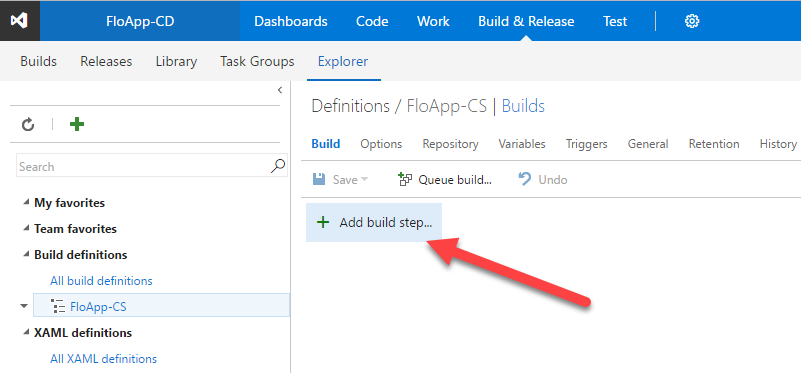
Choose Docker and click on Add 2 times (for ACS and ACR):
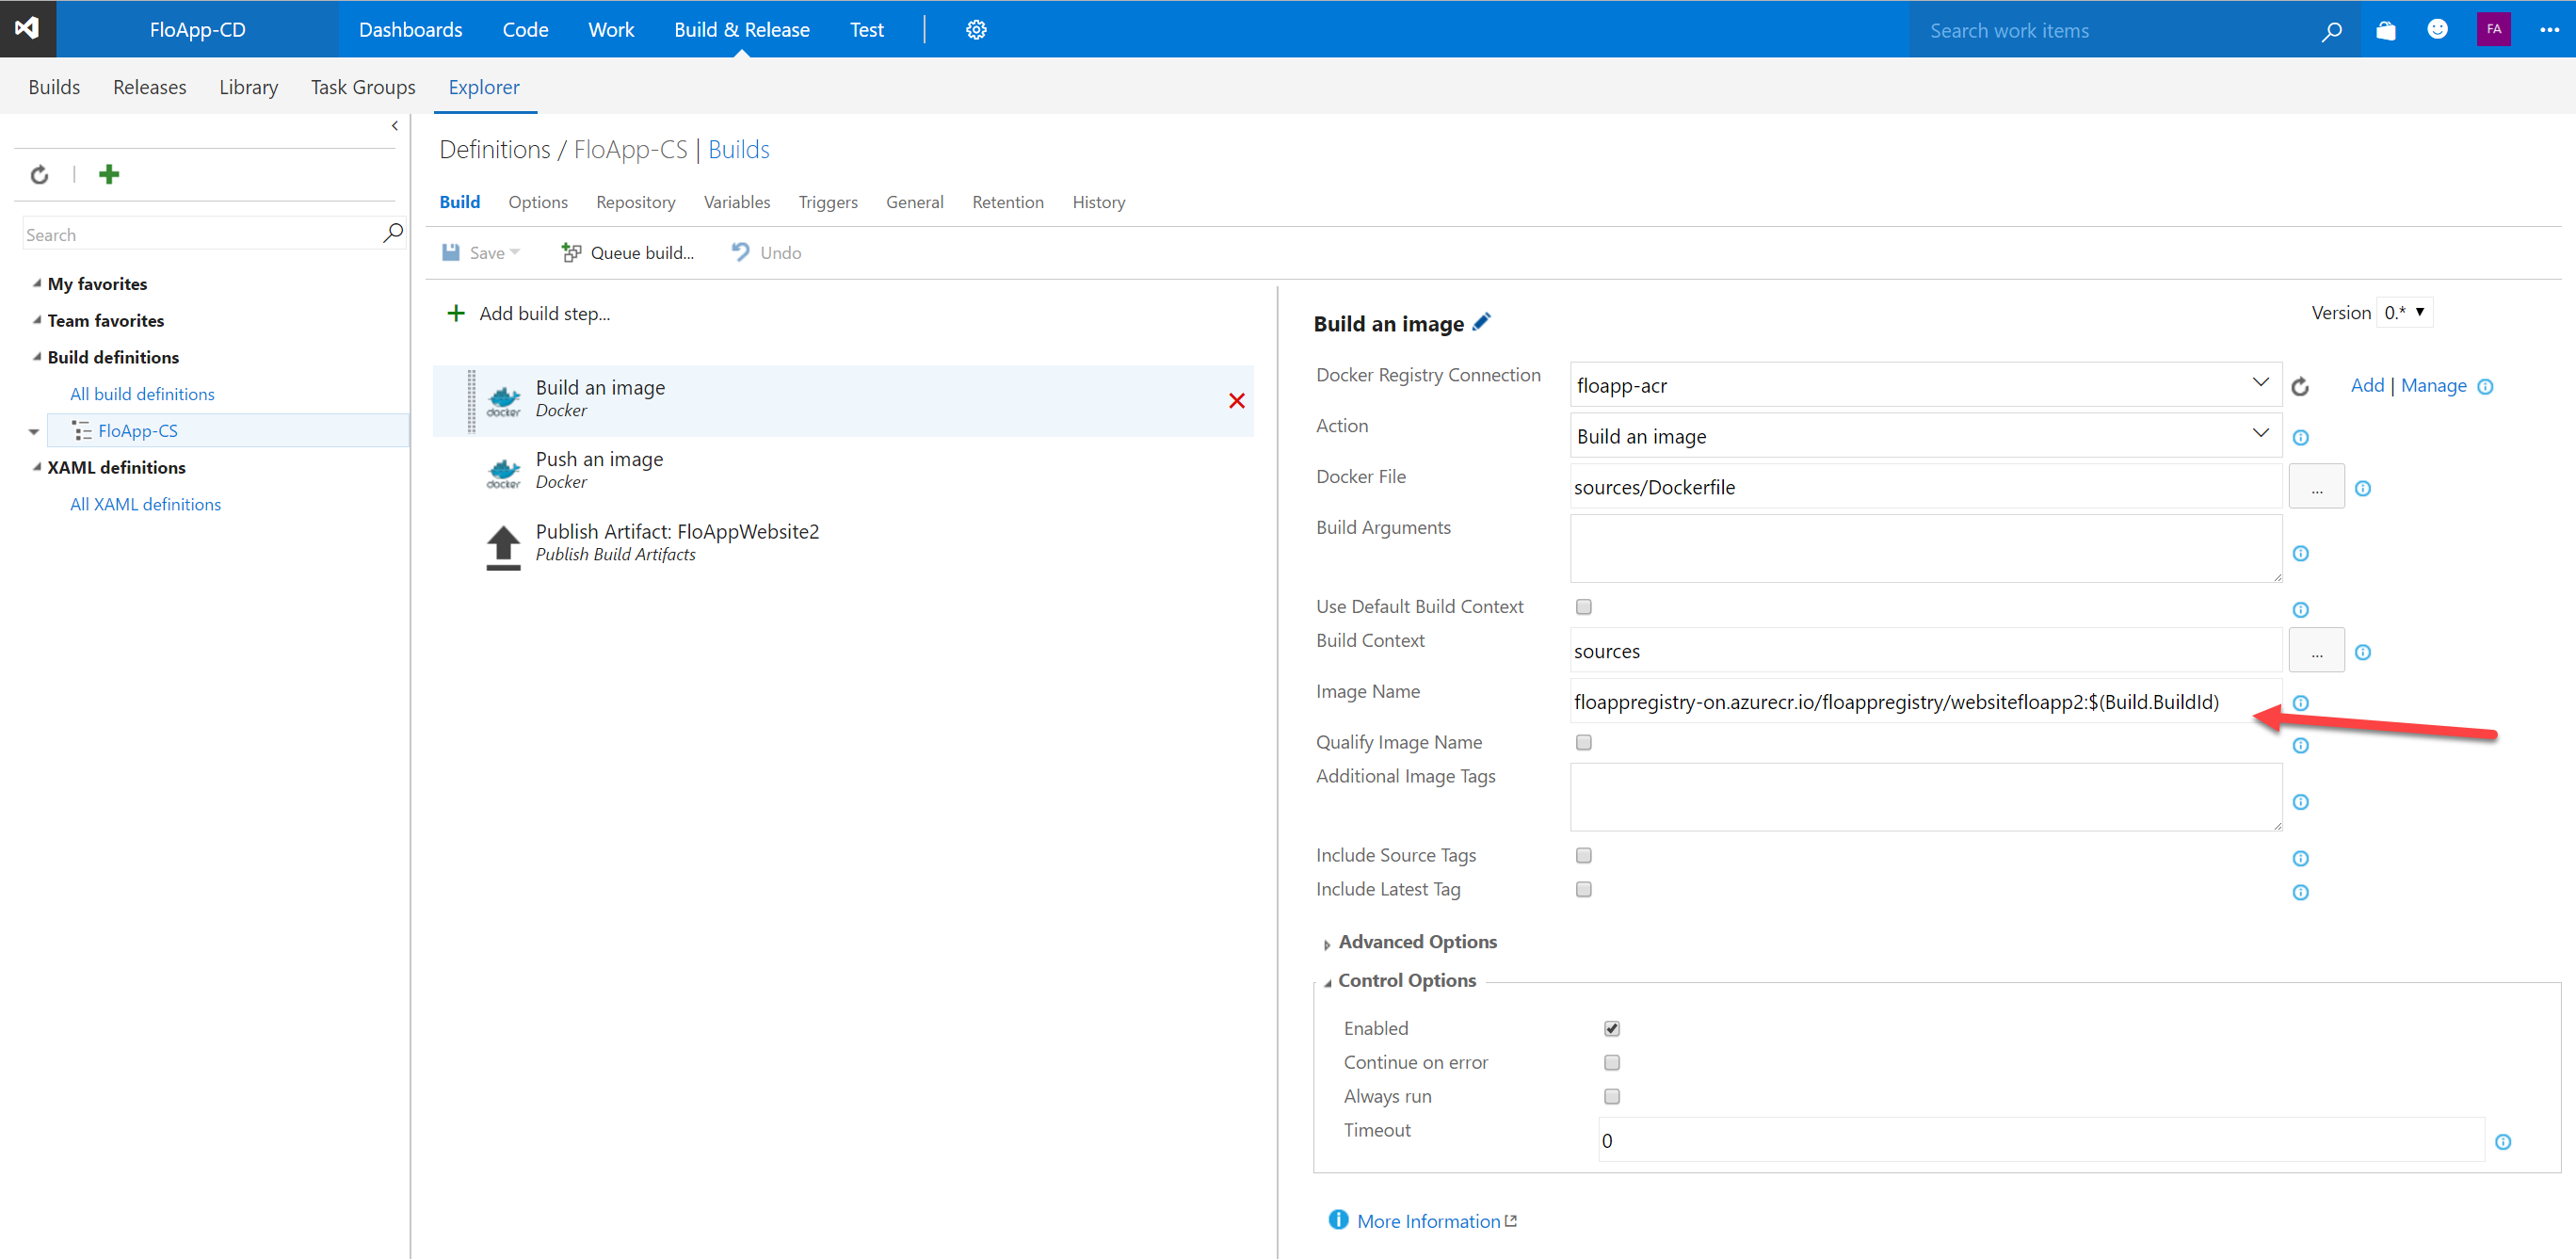
For the first build, select the connection to your registry, the action Build an image, the path to your Dockerfile who is on Github, the path to sources and to finish, the name of your image, with the full path to your registry:
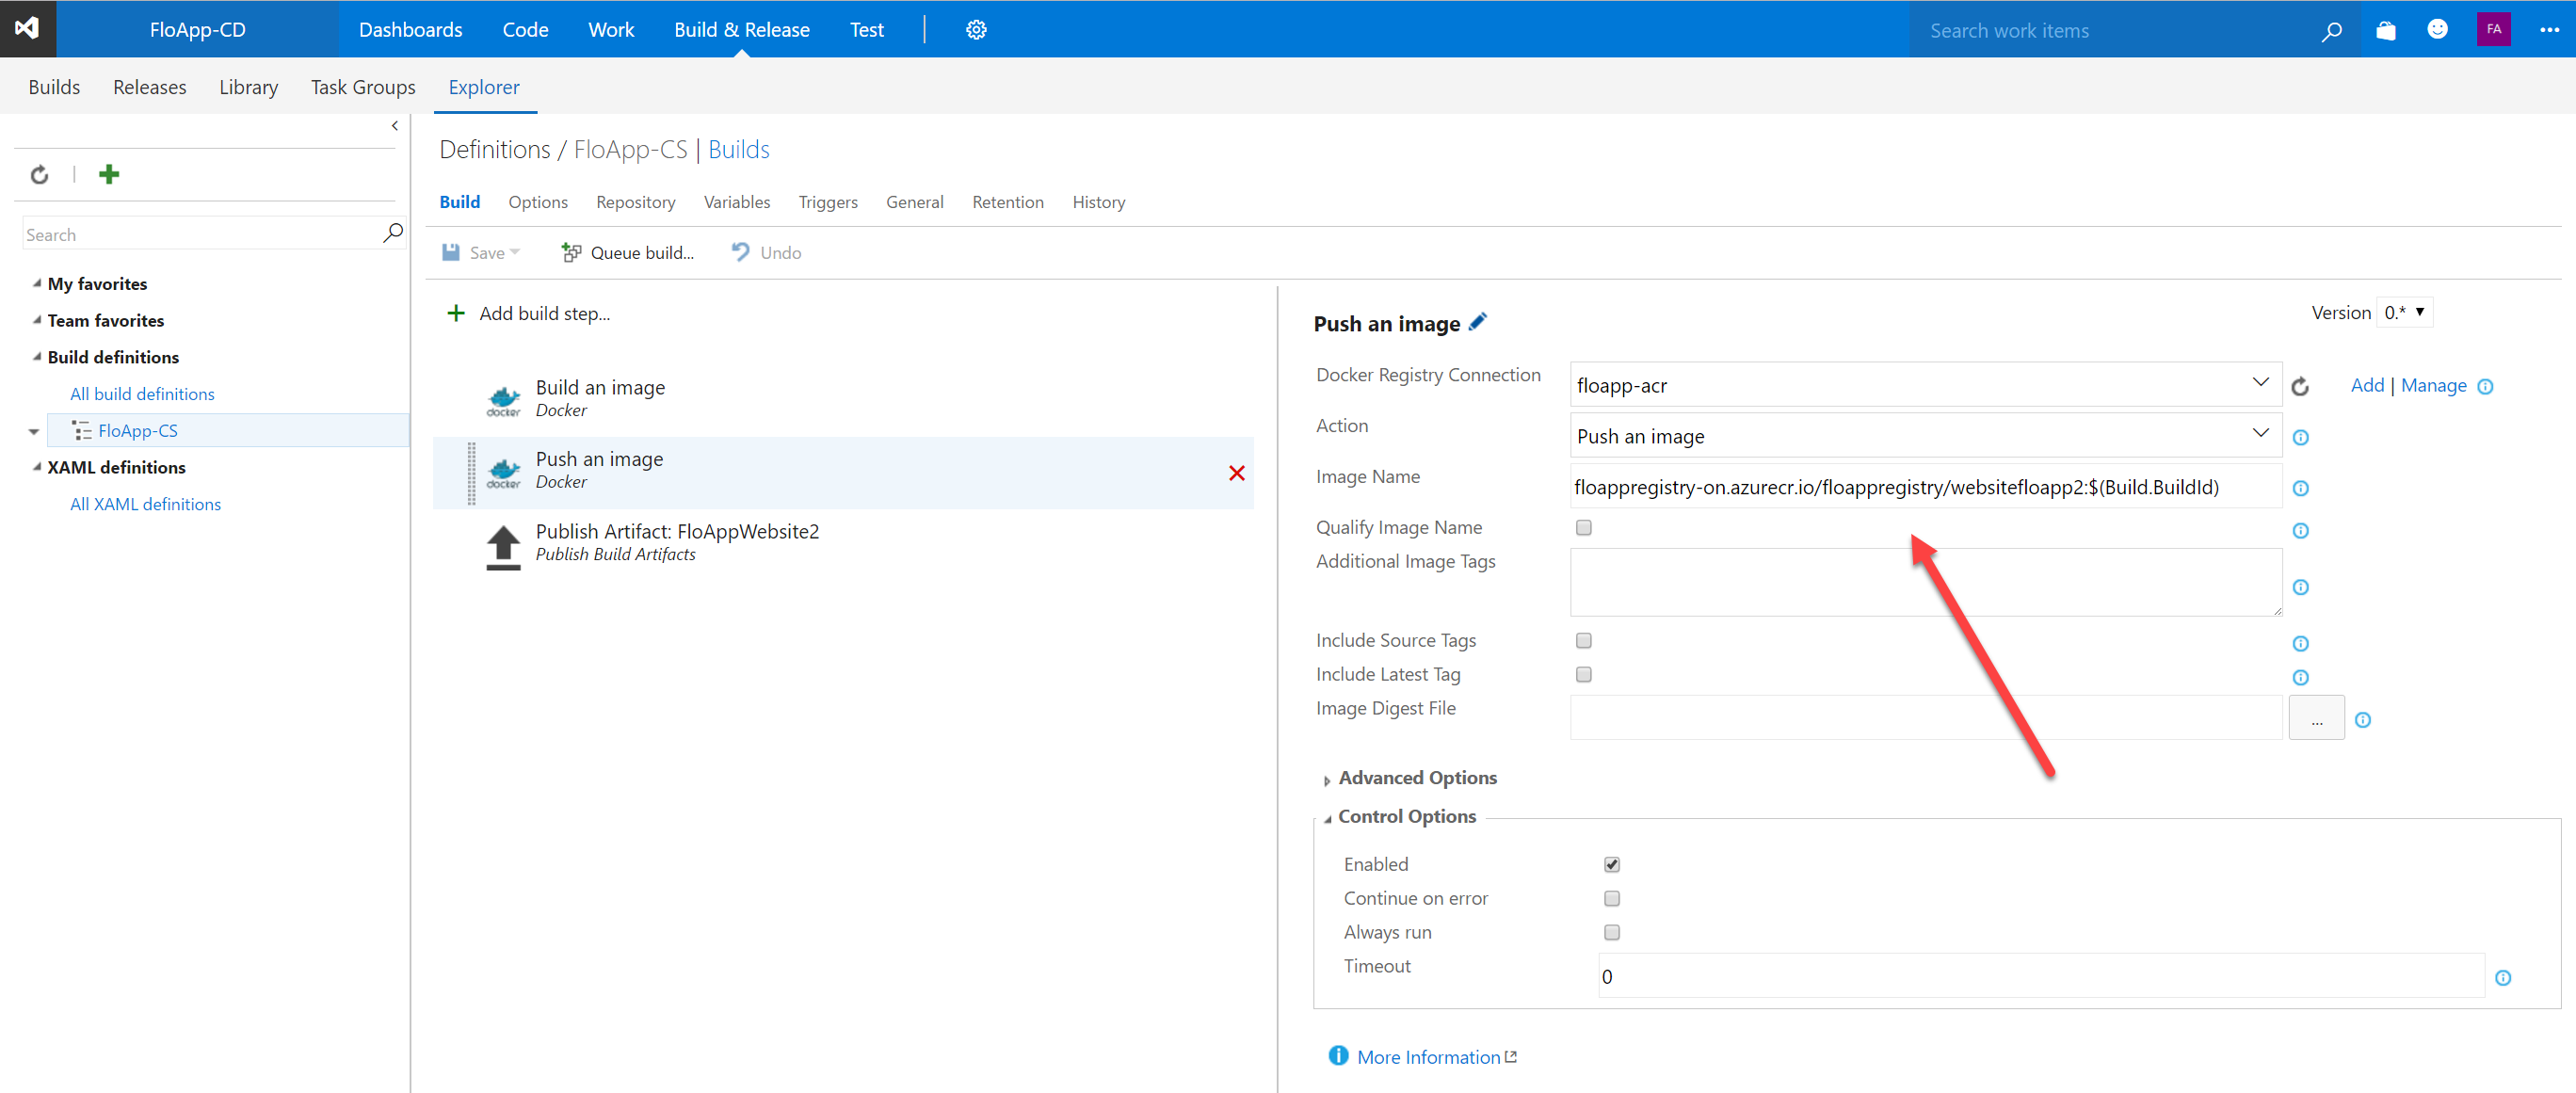
For the push part of your Registry, select the connection to your registry, the action Push an image and the name of your full image to your registry:
To finish, you need to add the following step, only if you have a docker-compose.yml file, for multi-tiers applications. Otherwise, go to the next step:
- Command Line ()
- Tool: bash
- Arguments: -c “sed -i ‘s/BuildNumber/$(Build.BuildId)/g’ sources/docker-compose.yml”
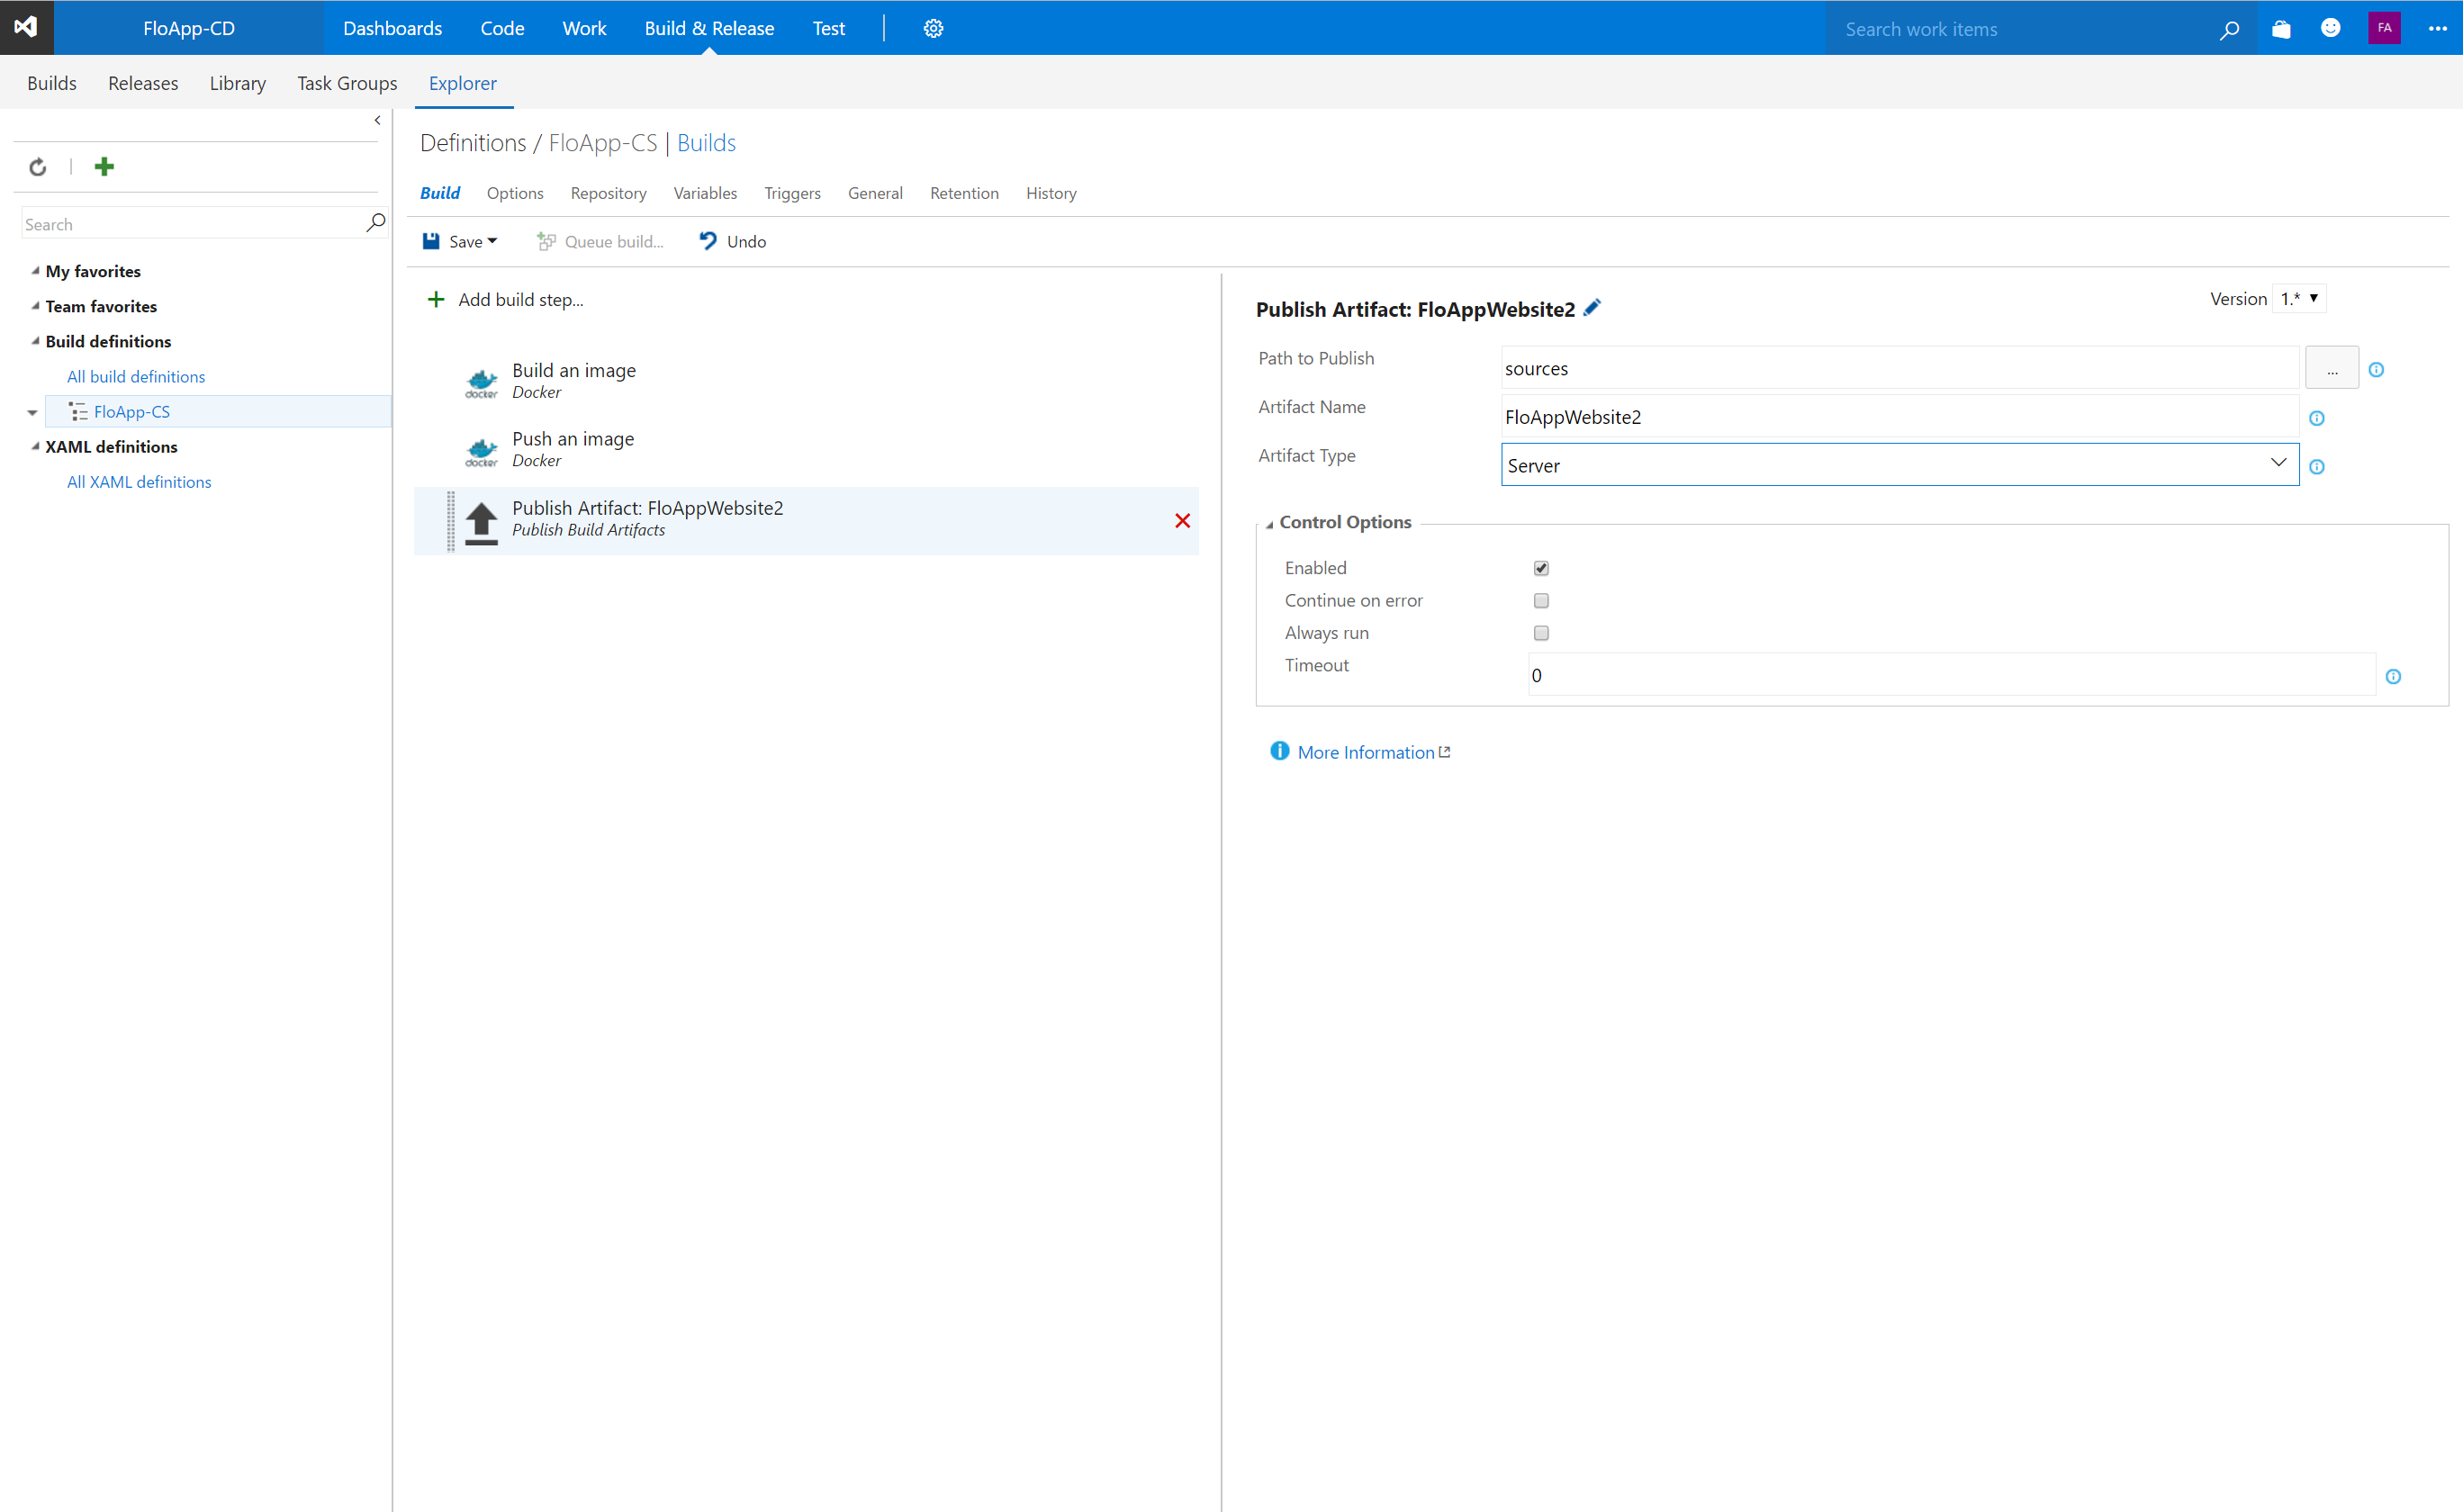
And for everyone, you need to add the step for the publication of the artifact, with sources:
- Publish Build Artifacts
- Path to publish: sources
- Artifact Name: FloAppWebsite2
- Artifact Type: Server
Click on Save to save the configuration.
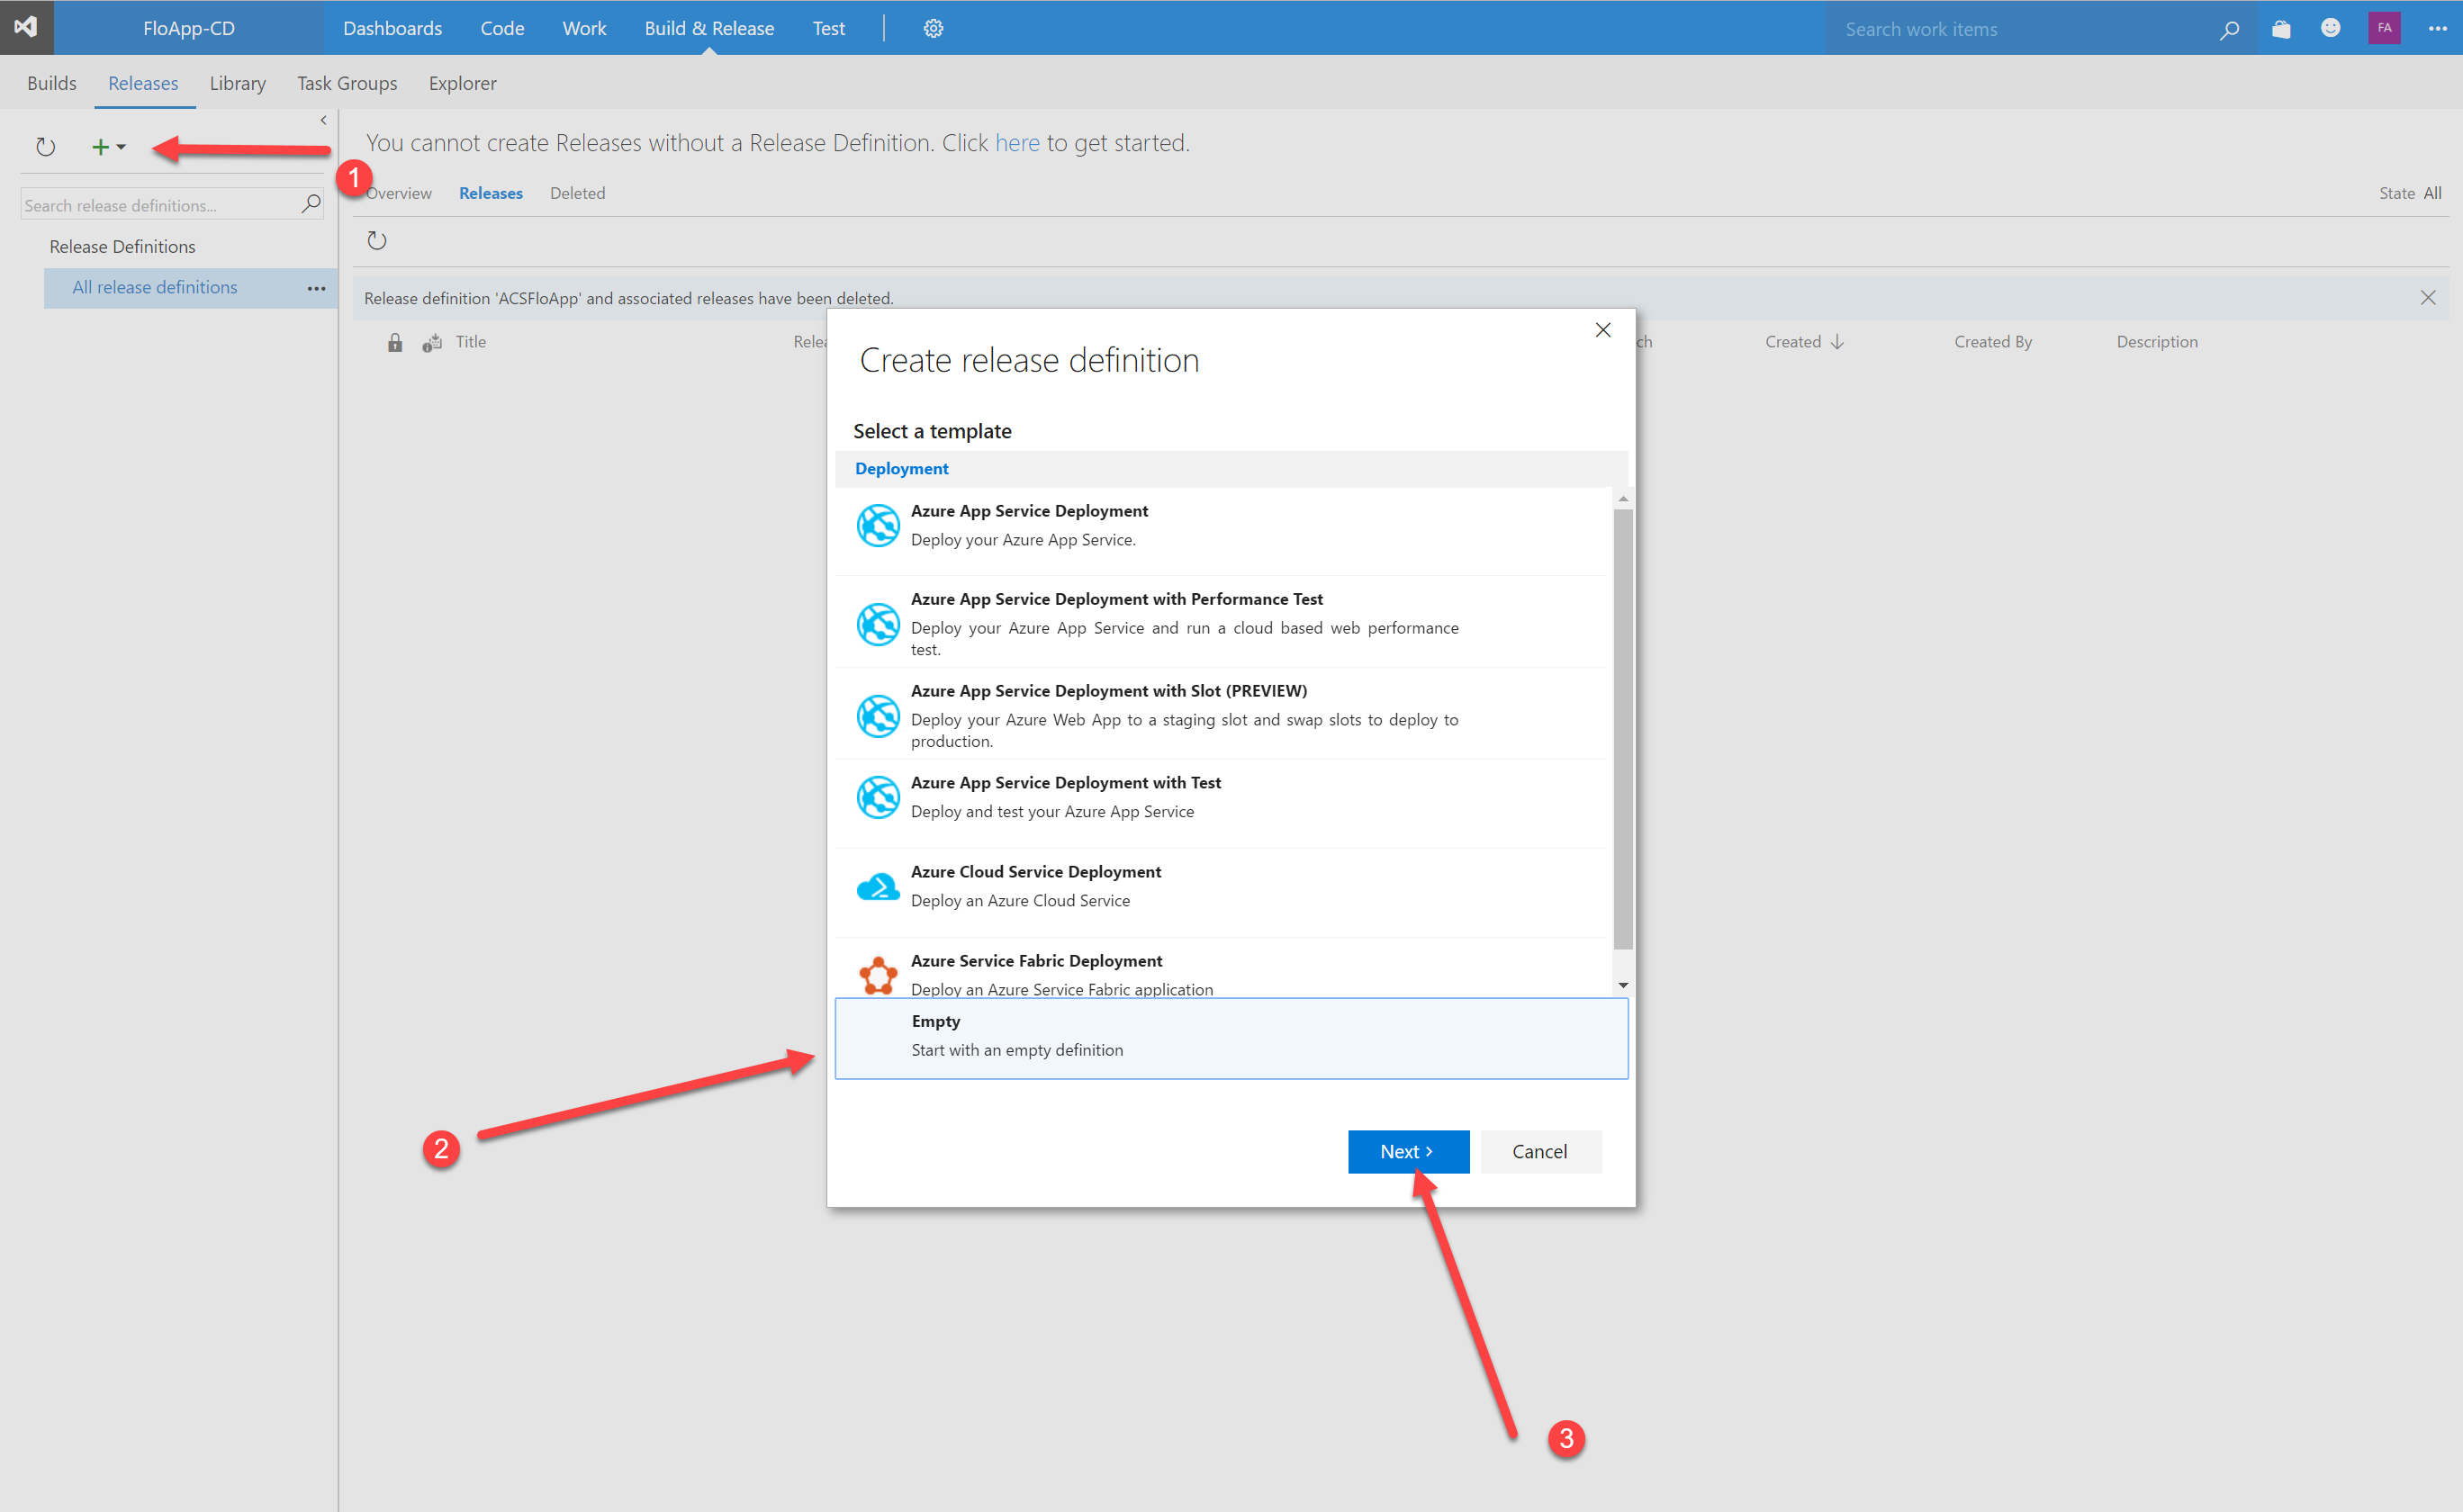
After that, create the new configuration for the release, to push the container on your ACS. In Releases, click on + then choose Empty and finally, click on Next:
Your release definition will look like this:
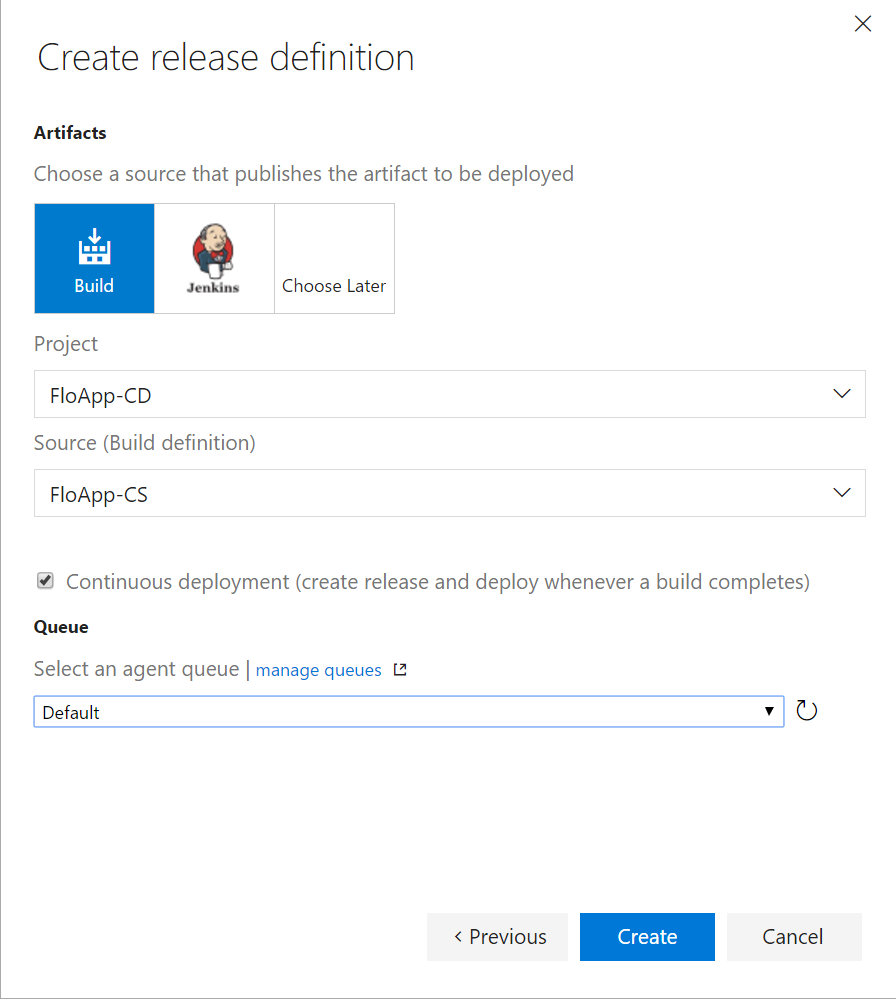
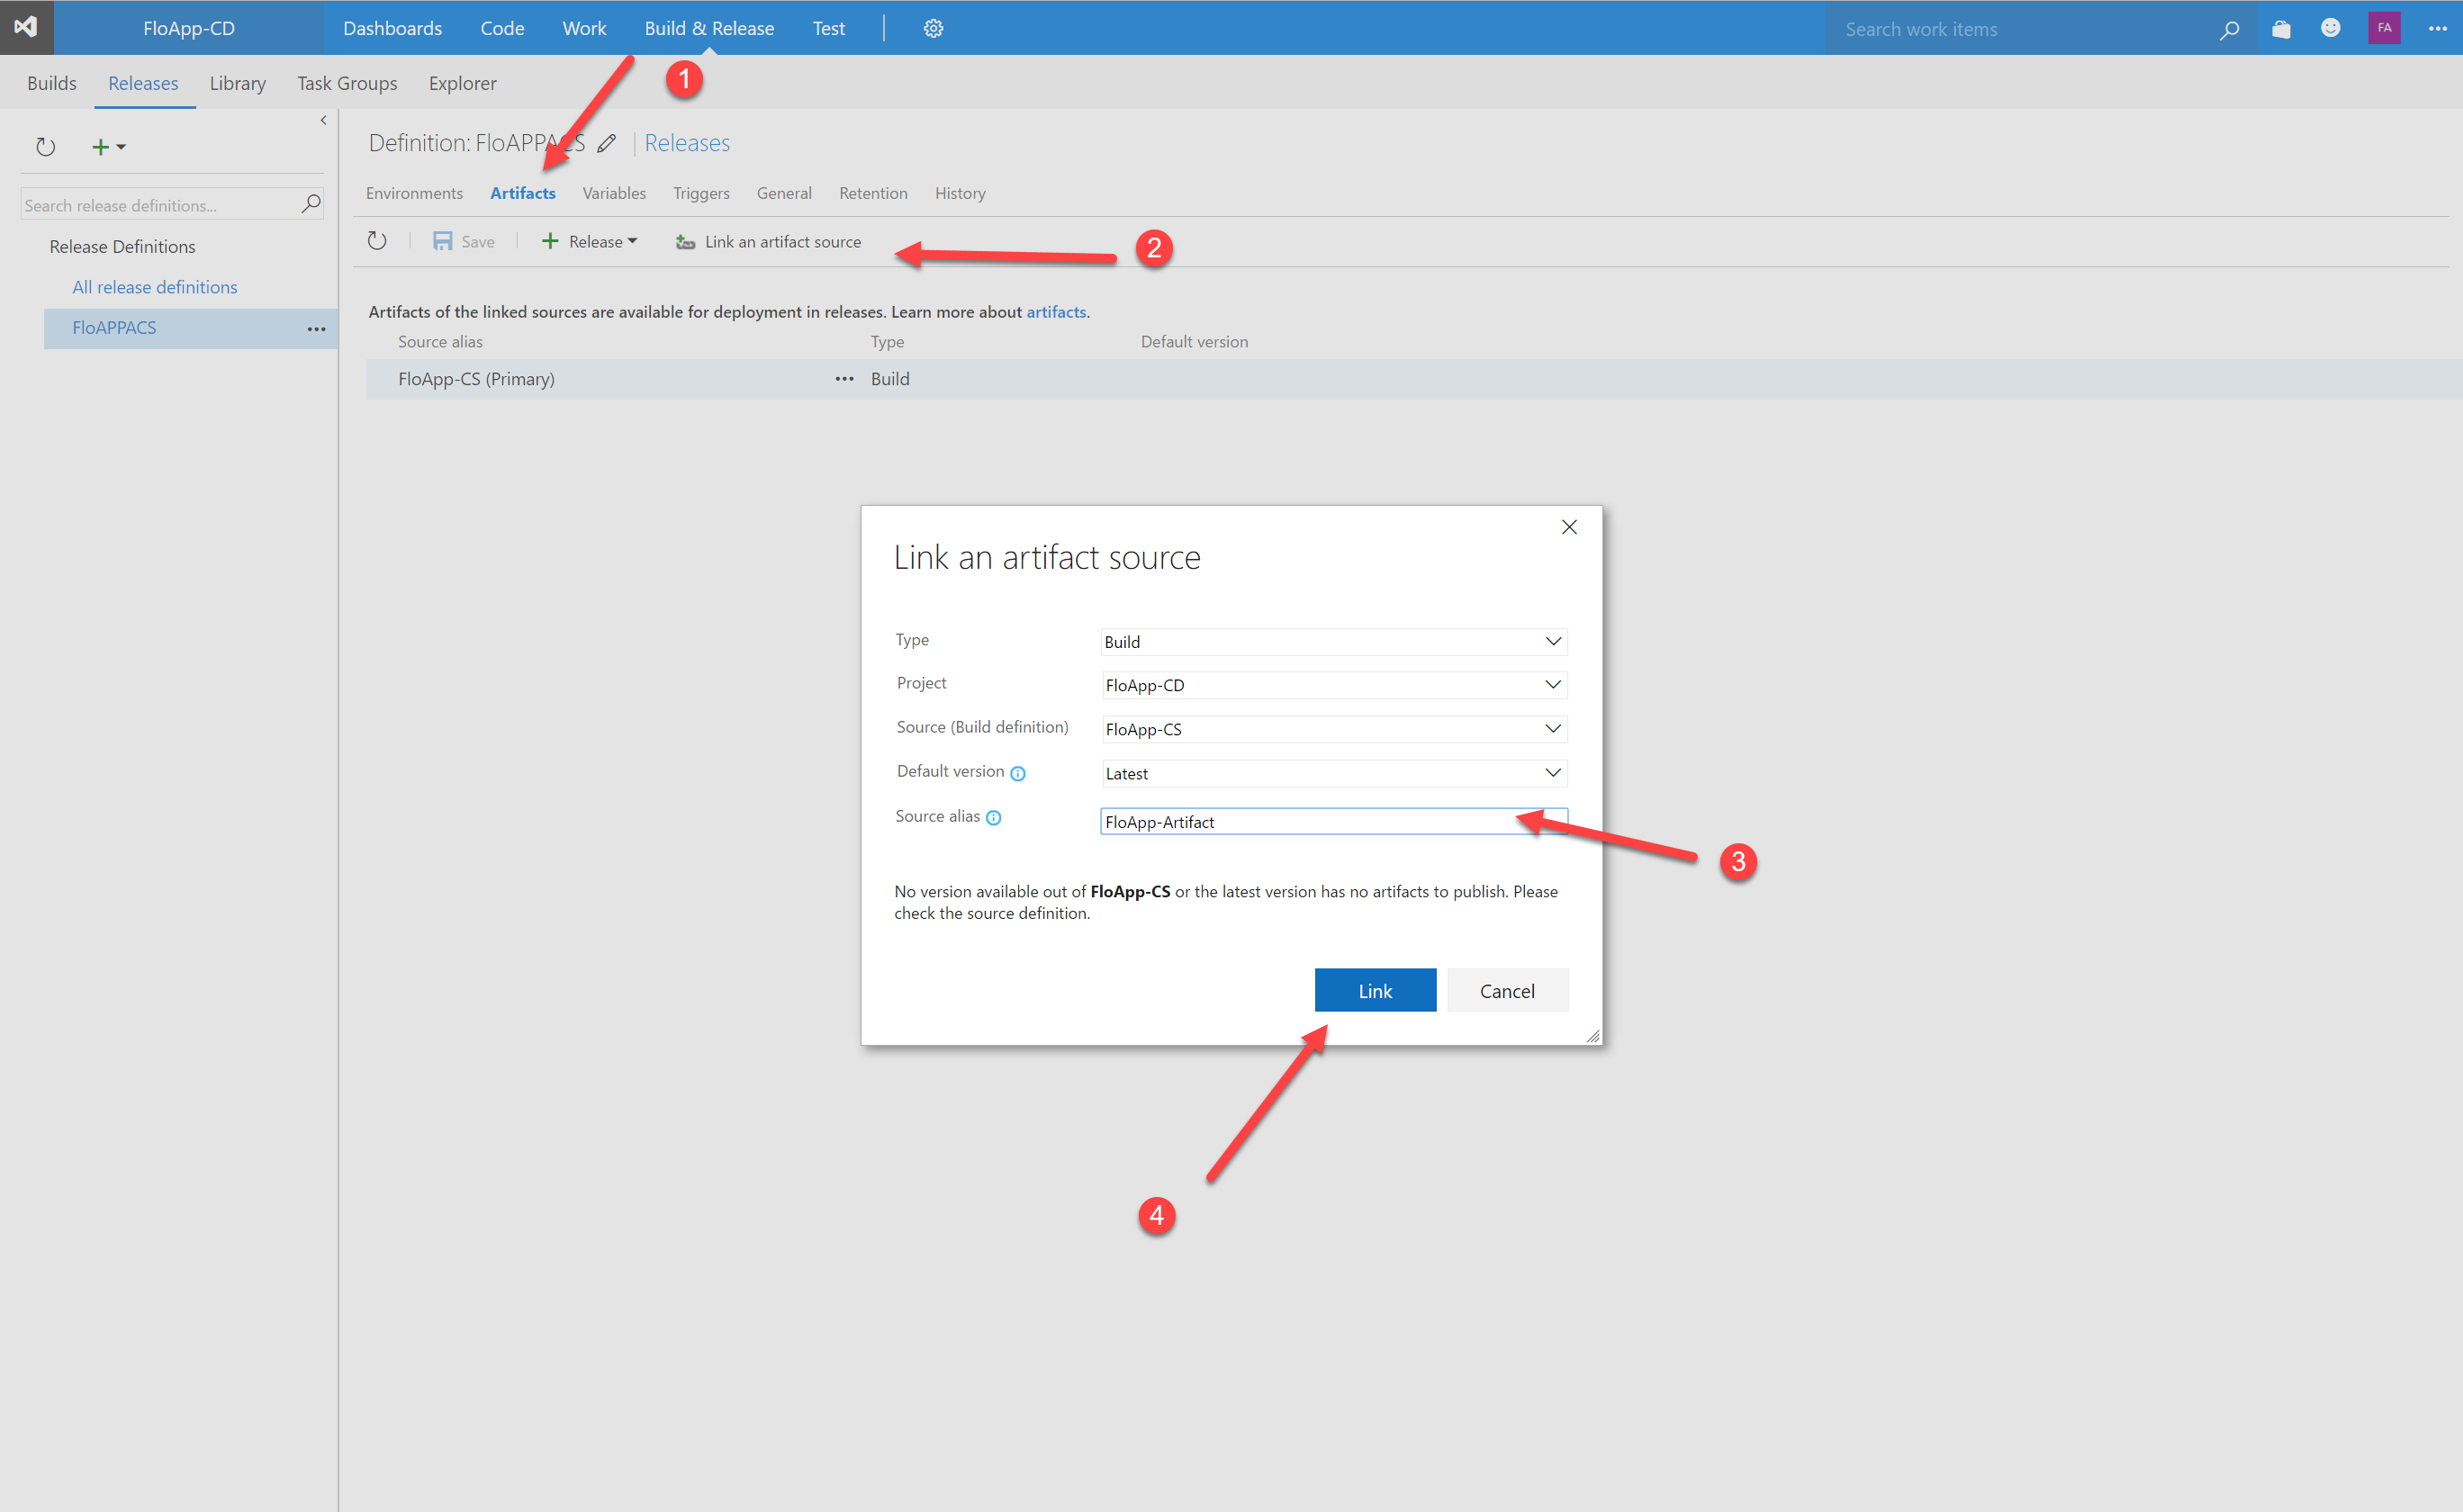
We will now create the artifact. In your release, click on Artifacts > Link an artifact source and provide another name. Click on Link:
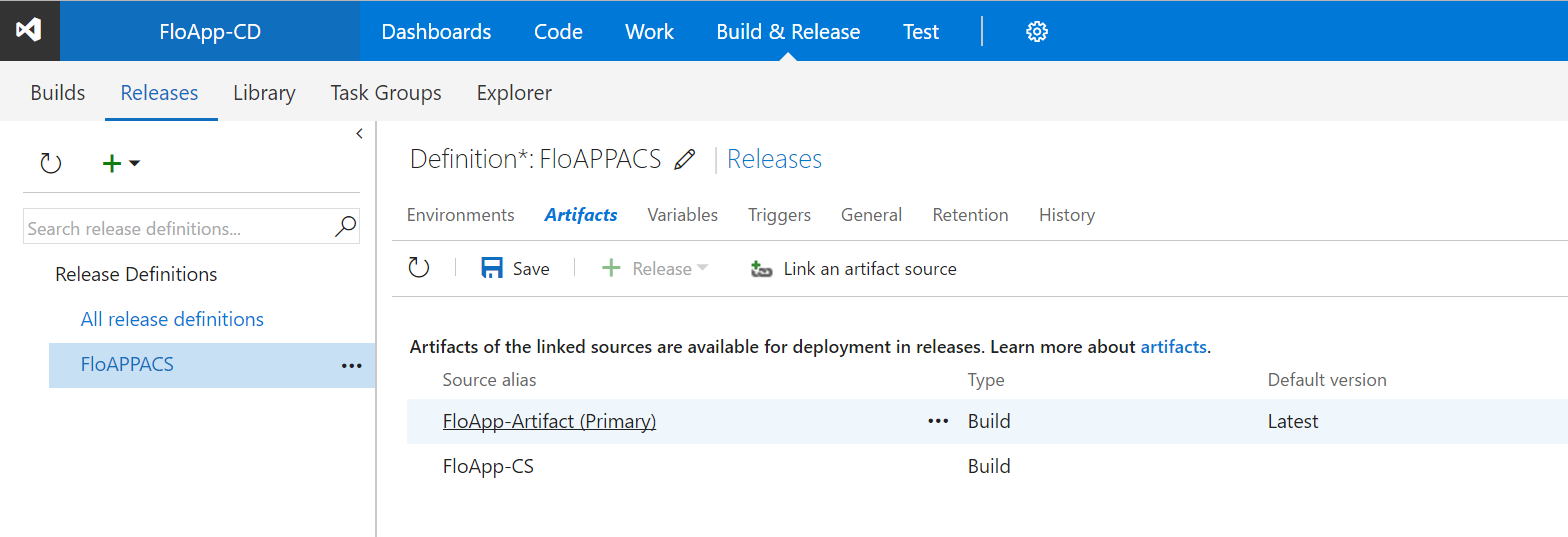
Move it as Primary:
Now, click on Triggers and check the box Continuous Deployment, then select the new artifact that you created previously:

Save. Click on Add tasks in Environments in your new release, then add an SSH task with the following command and uncheck the case Fail on STDERR:
|
1 |
docker login $(docker.registry) -u $(docker.username) -p $(docker.password) && export DOCKER_HOST=10.0.0.4:2375 && if docker inspect --format="{{ .State.Running }}" floappcicdwebsite >/dev/null 2>&1; then echo "Container floappcicdwebsite exist."; docker rm -f floappcicdwebsite; docker run --name floappcicdwebsite -d -p 80:80 floappregistry-on.azurecr.io/floappregistry/websitefloapp2:$(Build.BuildId); else echo "floappcicdwebsite does not exist, creation"; docker run --name floappcicdwebsite -d -p 80:80 floappregistry-on.azurecr.io/floappregistry/websitefloapp2:$(Build.BuildId); fi; |
The command will connect to the registry, download the image and deploy it if it doesn’t exist, or replace it if existing, with the last published version:
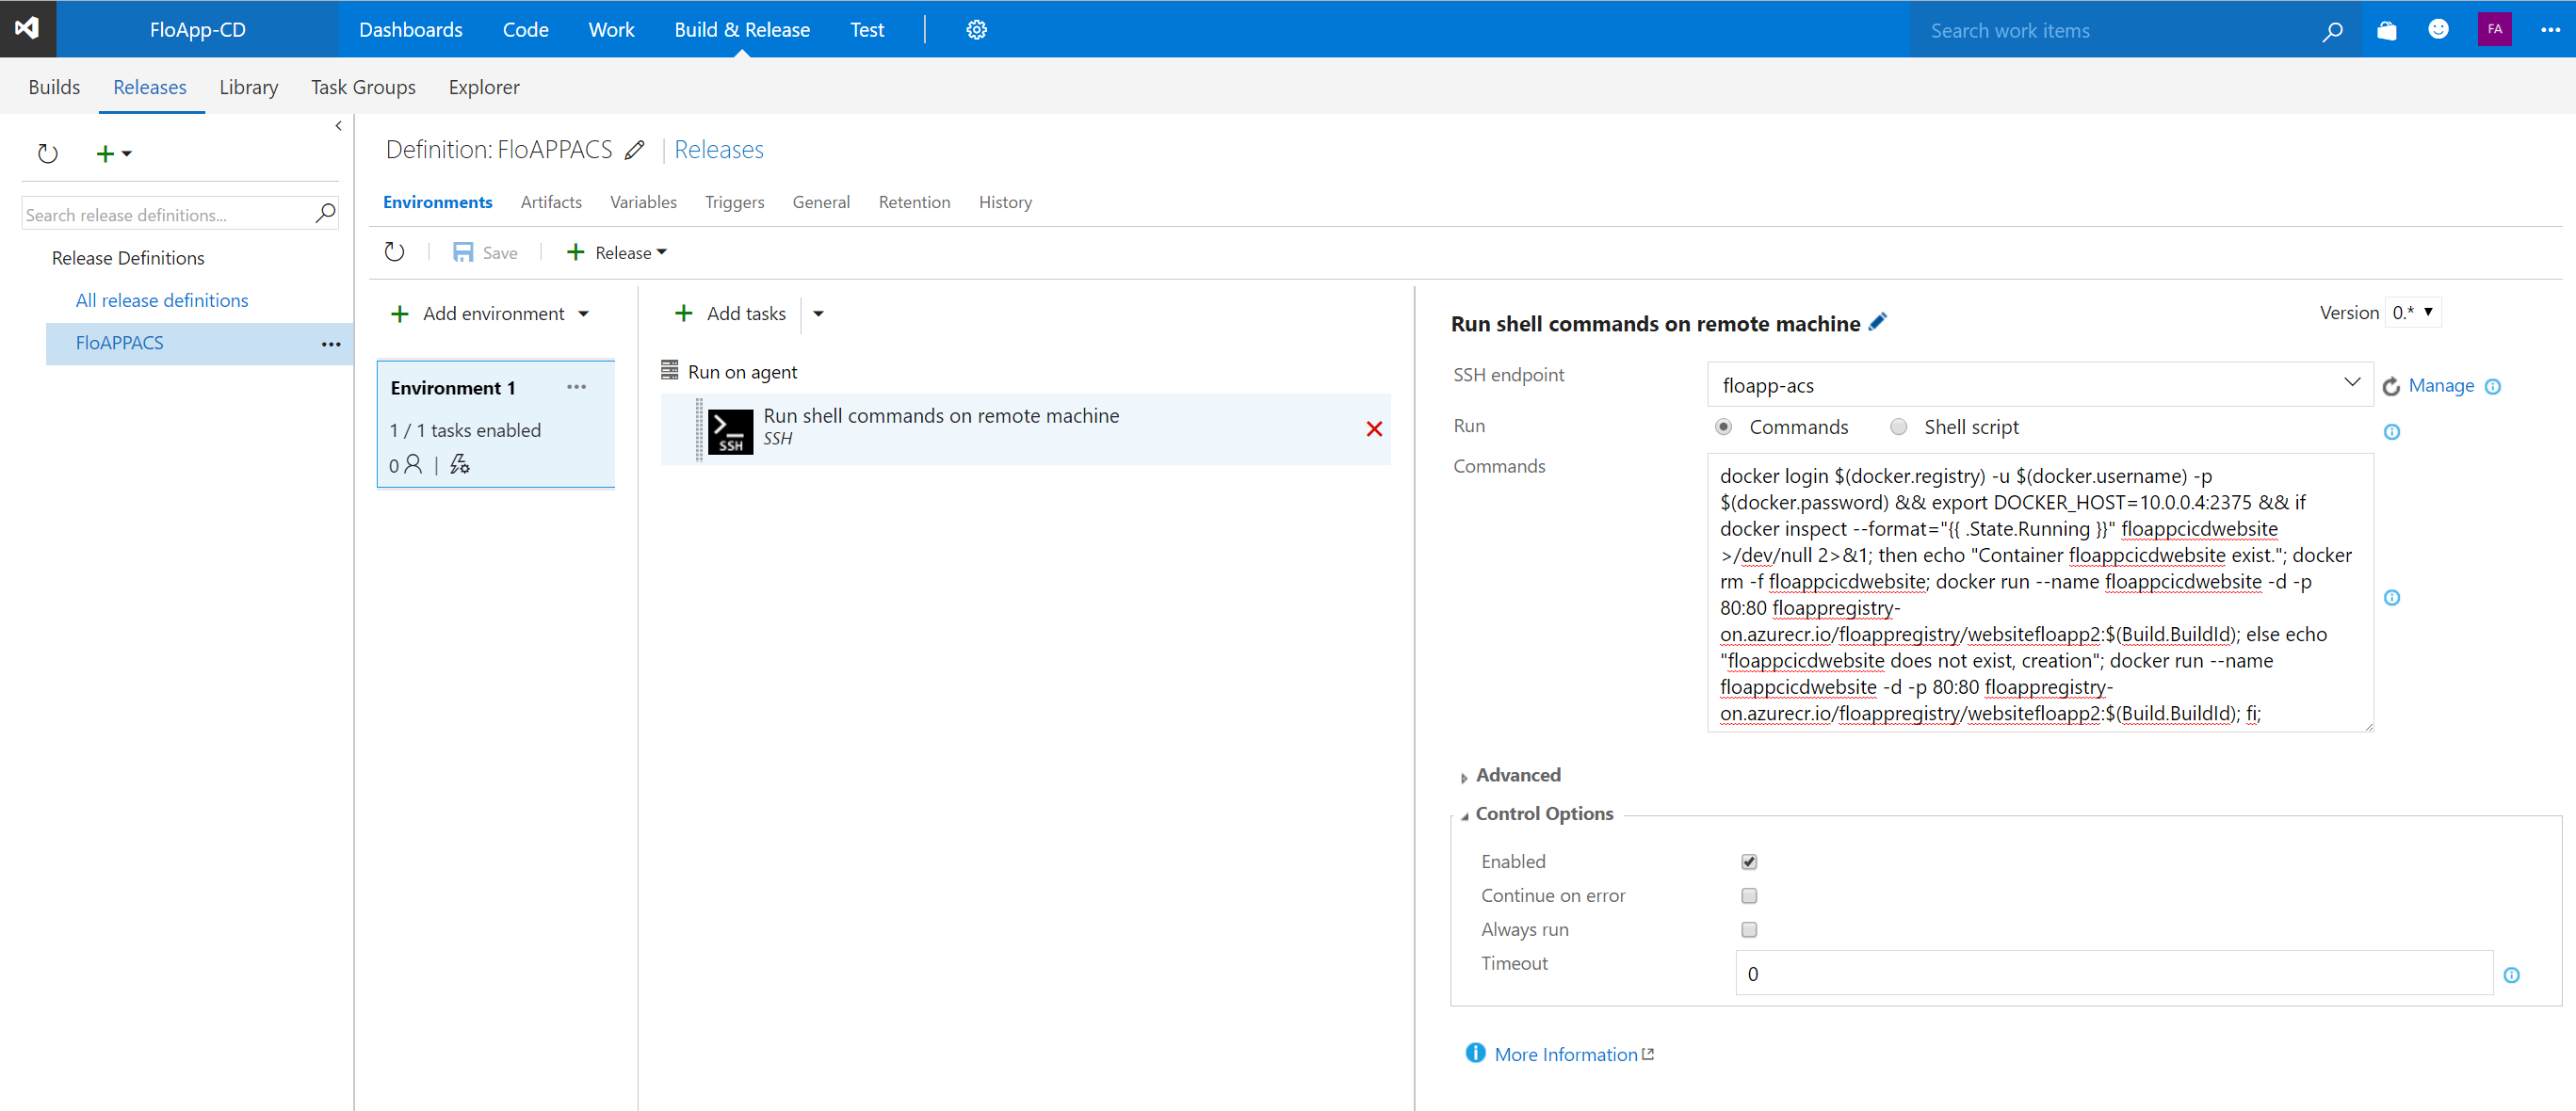
You need to add 3 variables:
- username: contains the username to connect to the registry
- password: contains the password associated with the user to connect to the registry
- registry: contains the URL to connect to the registry

Don’t forget to save 🙂
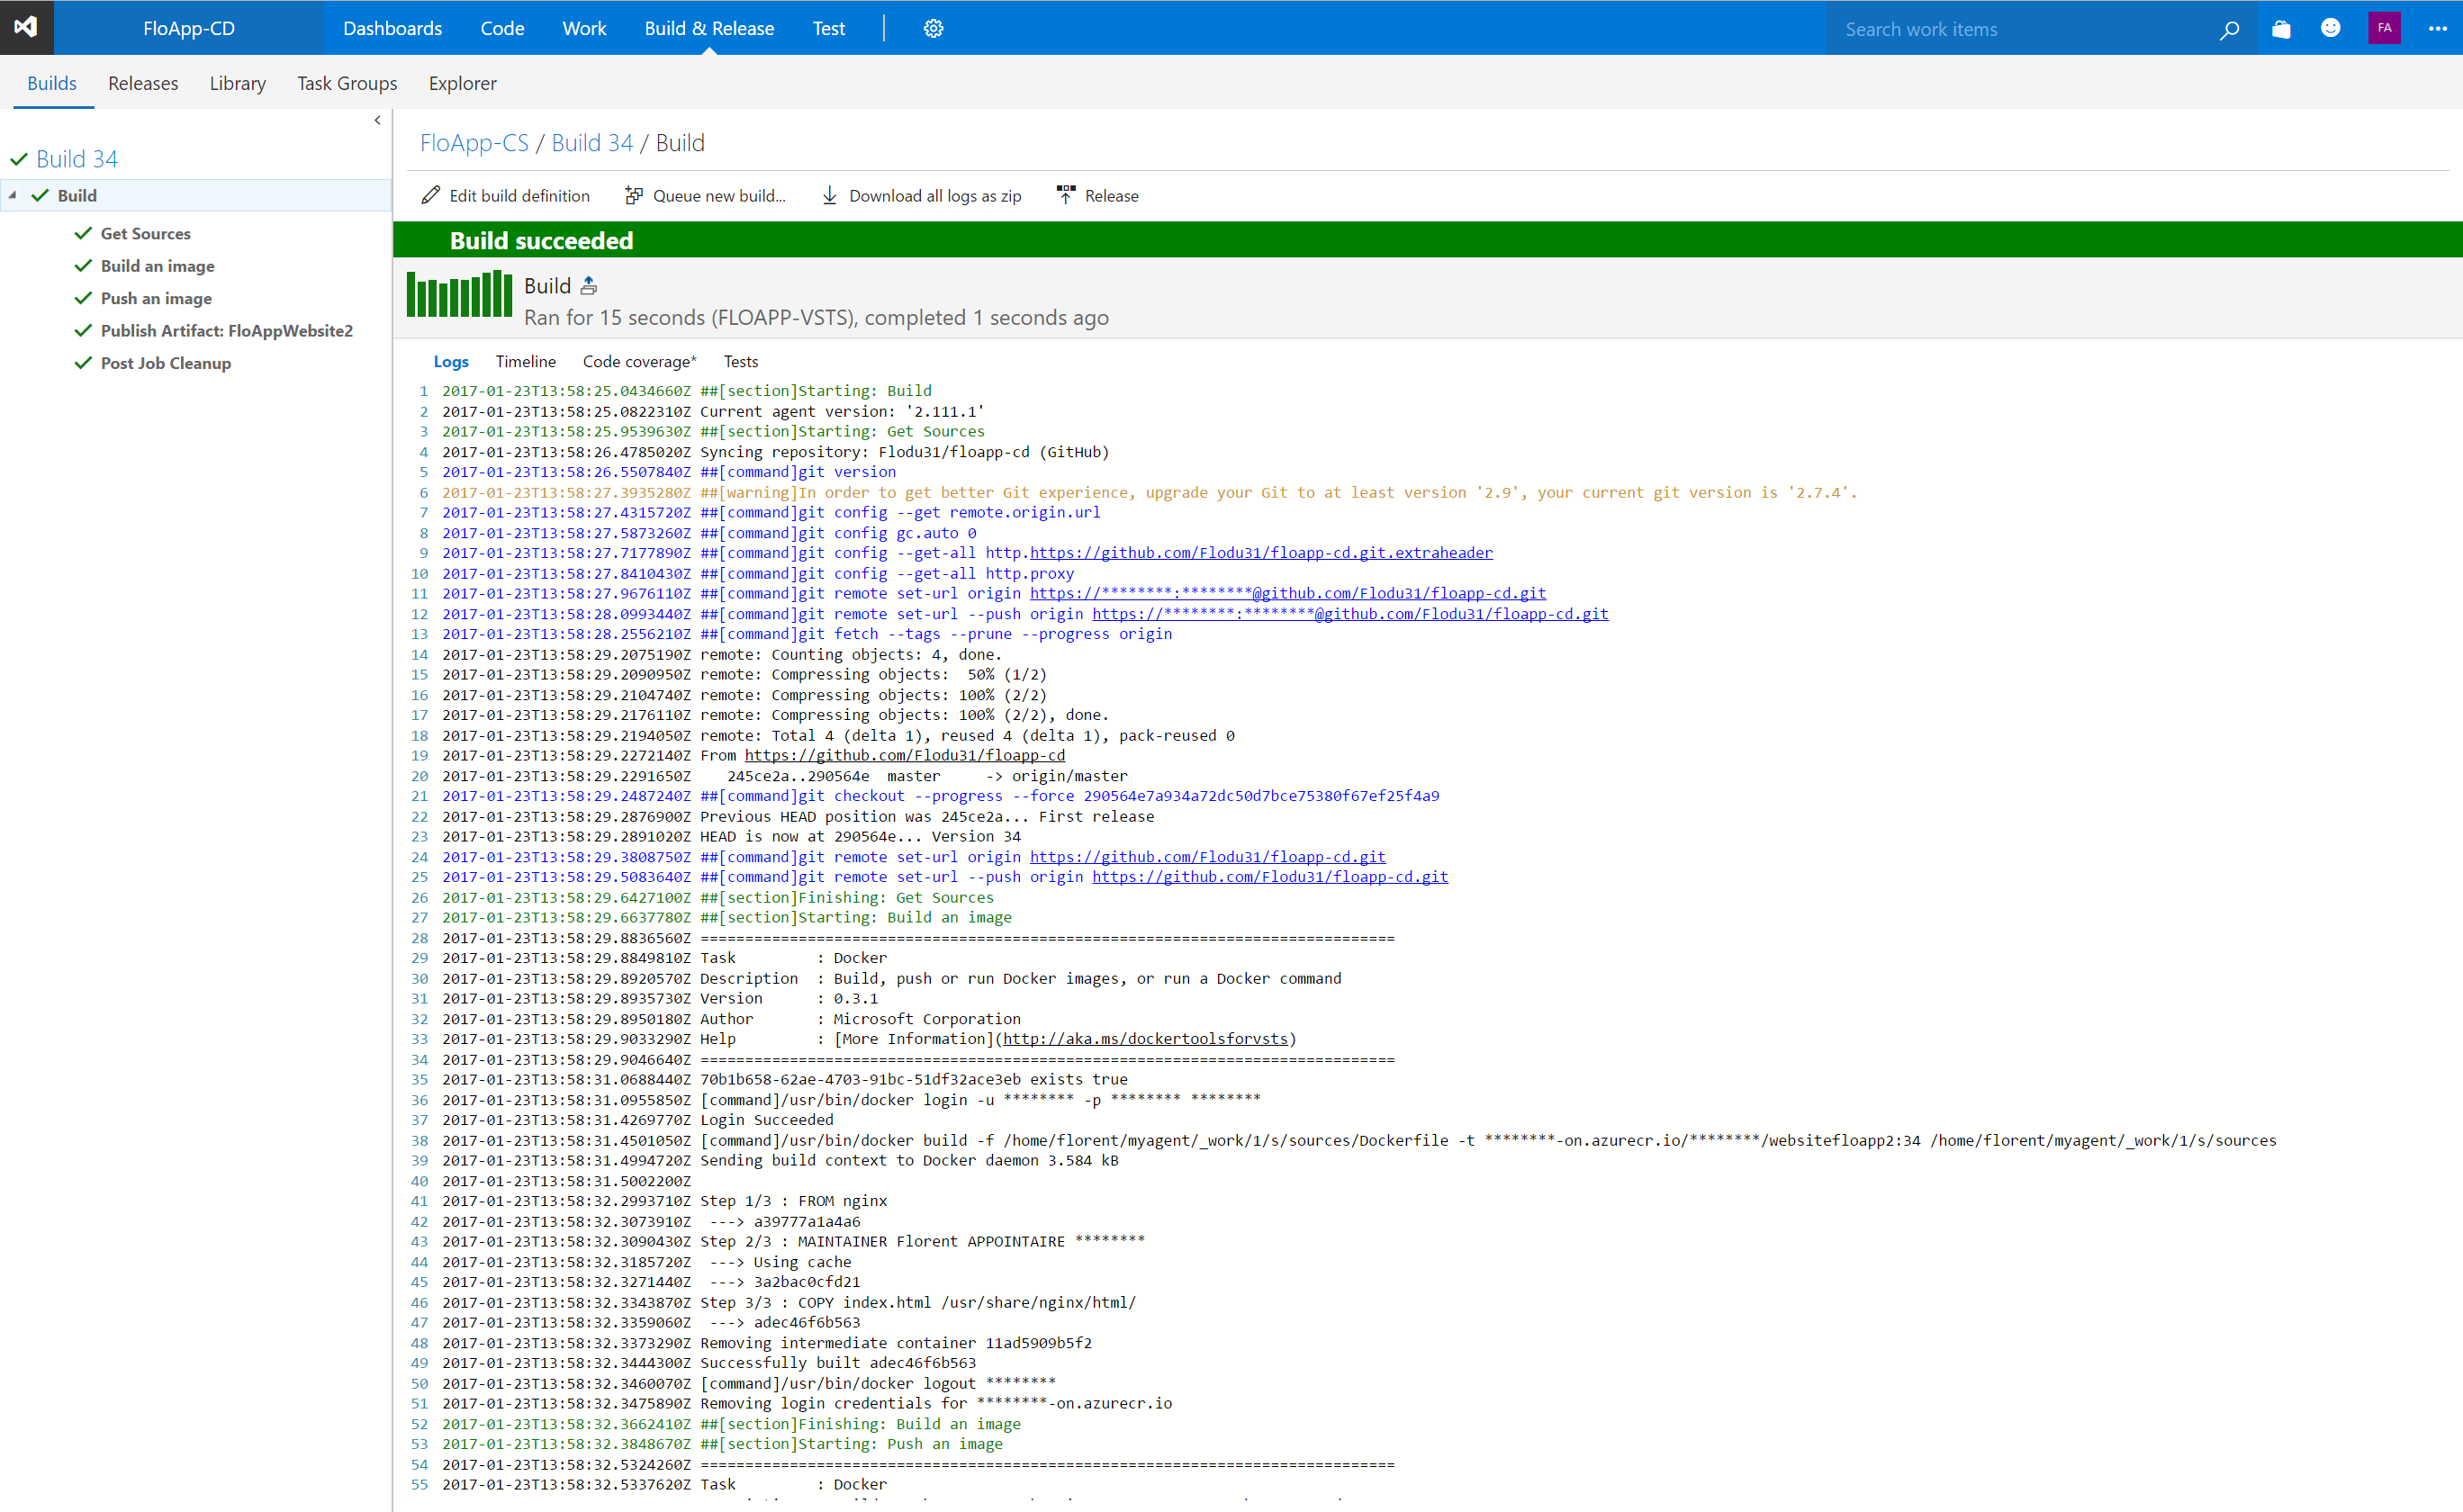
We can now test our configuration. To start, modify your source code, and send it to GitHub. After few seconds, on your VM where the VSTS agent is running, you can see this:

And from the VSTS console, I can see that the Build step has been completed correctly:
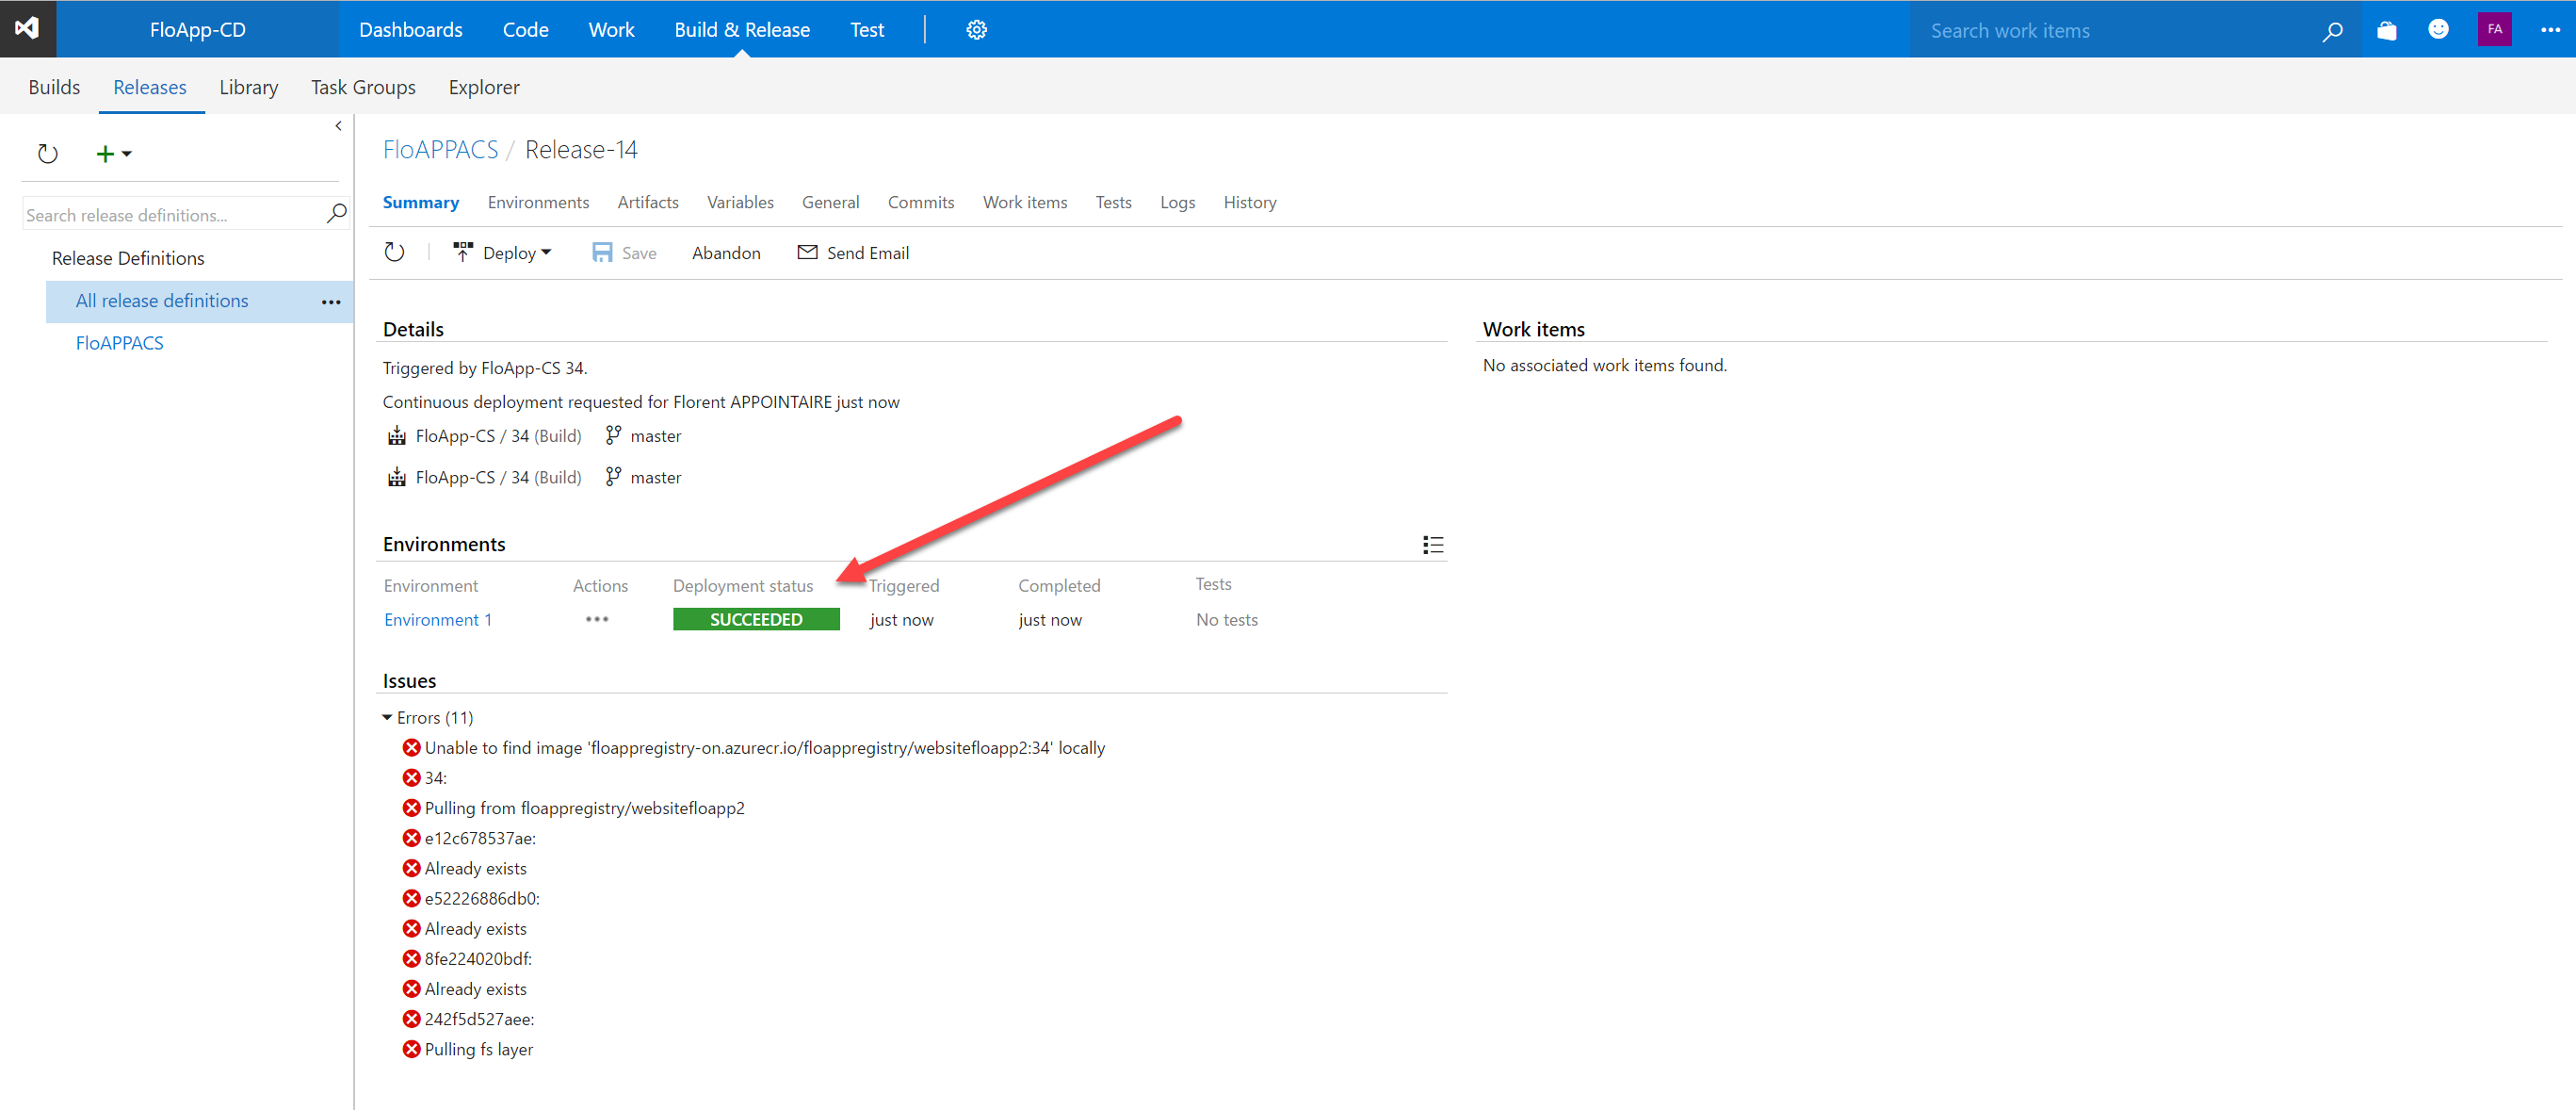
Same as the release:
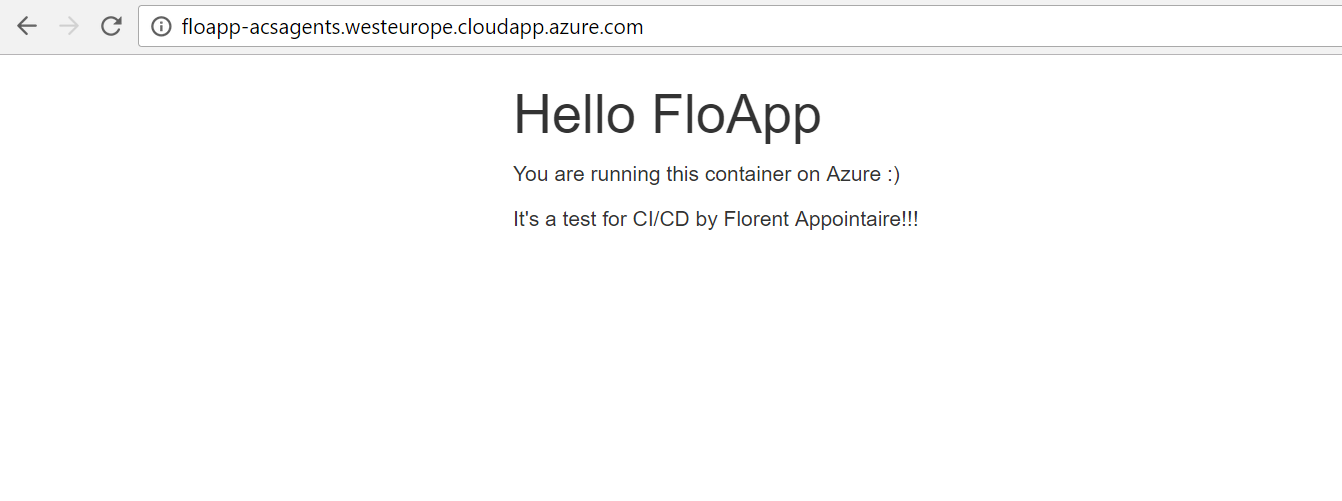
And if I try to access to the URL that redistributes to Docker agents, I have this:
I’ll now modify my index.html file, and send it on Github. From the VSTS agent, you can see this:
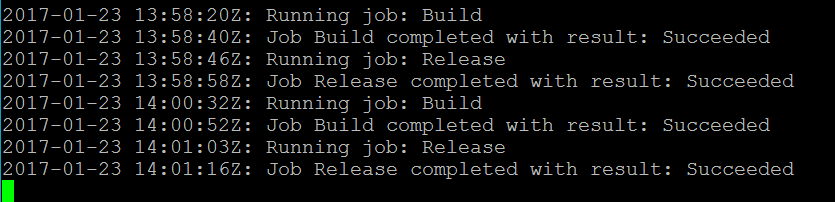
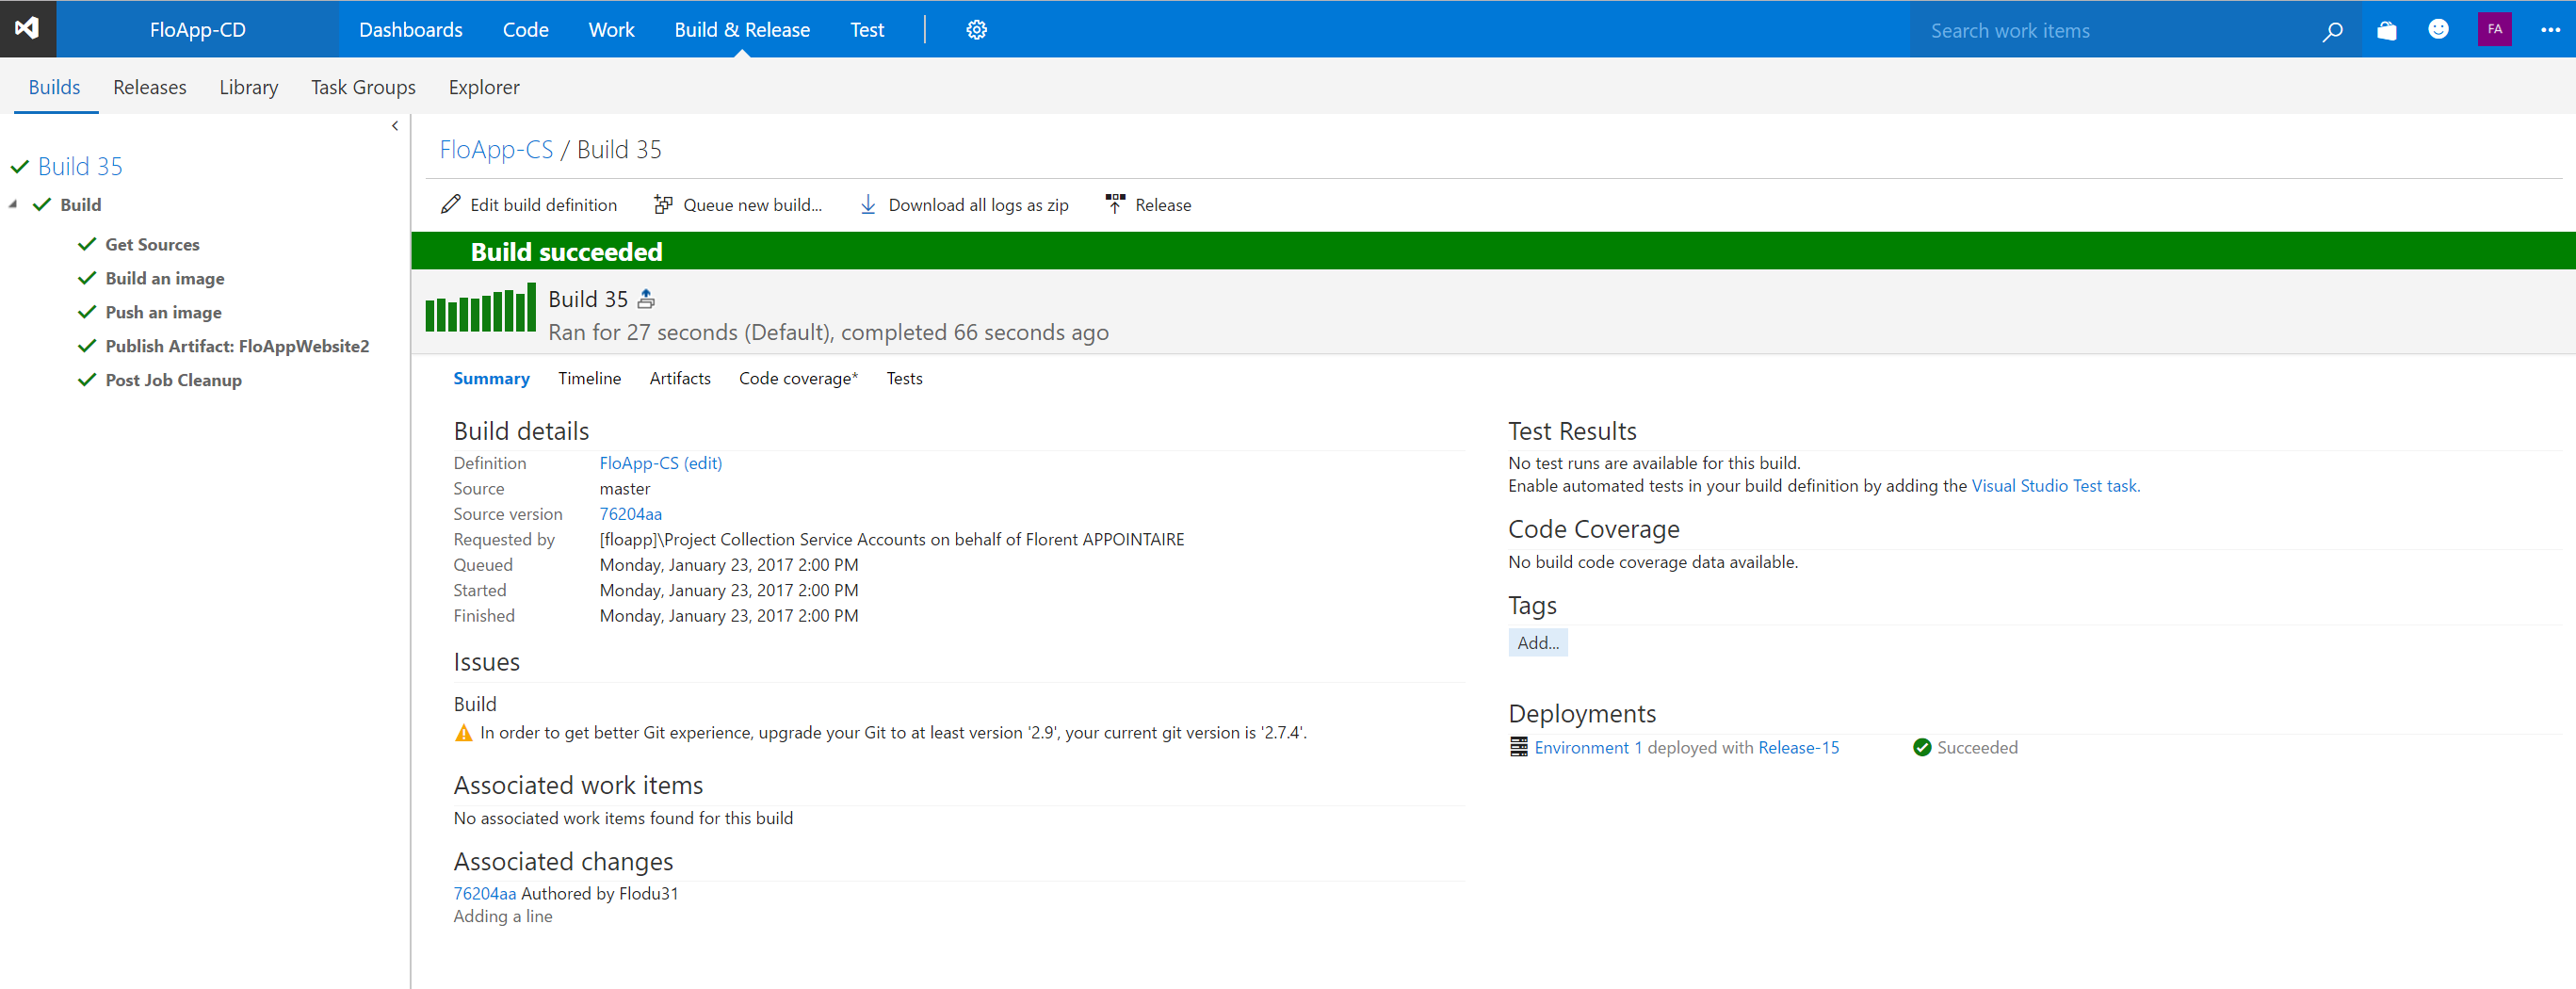
And from VSTS console, a new build, 35 (versus 34 before), is available:
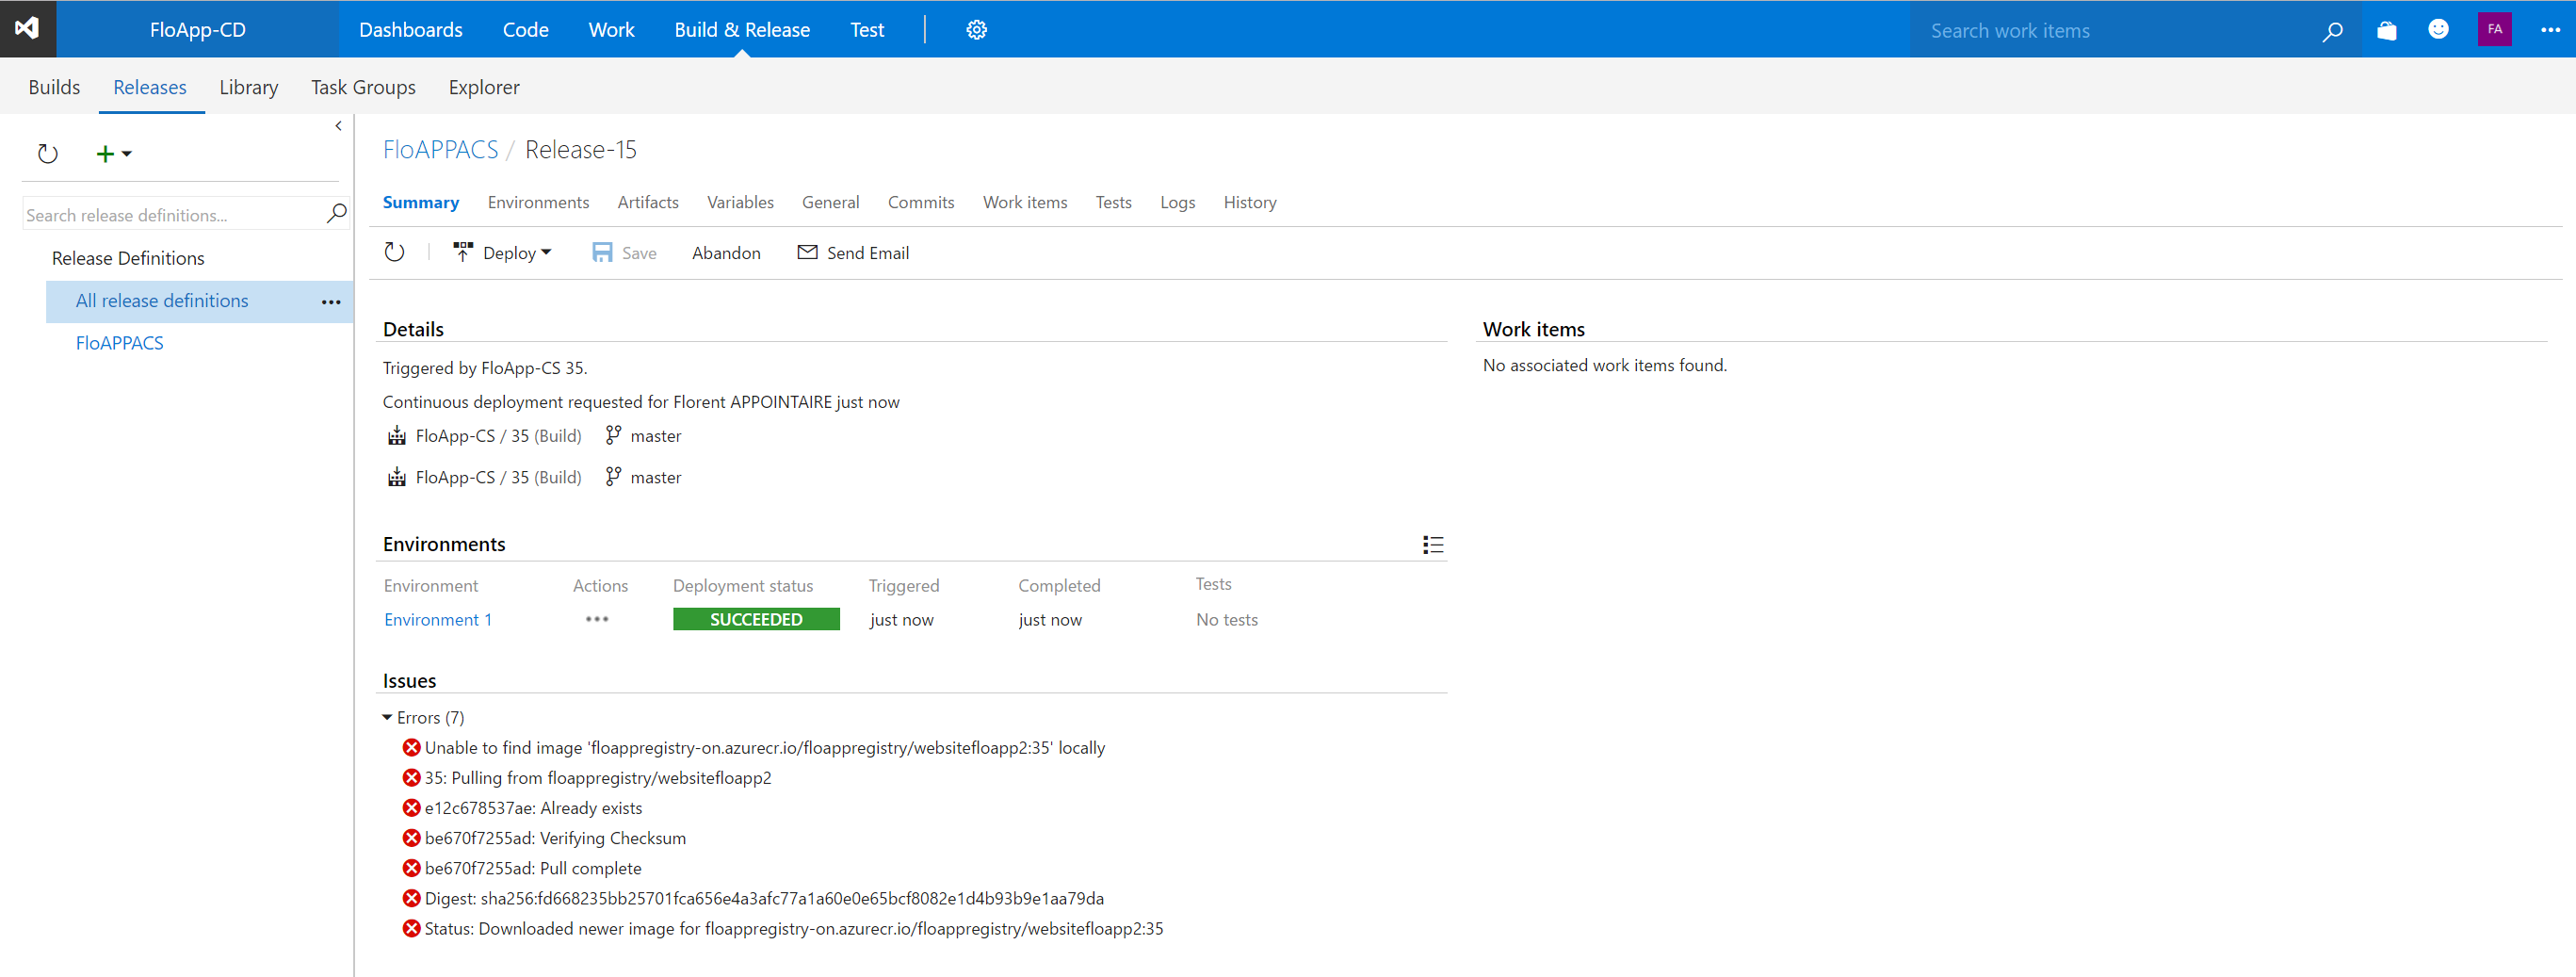
And the release:
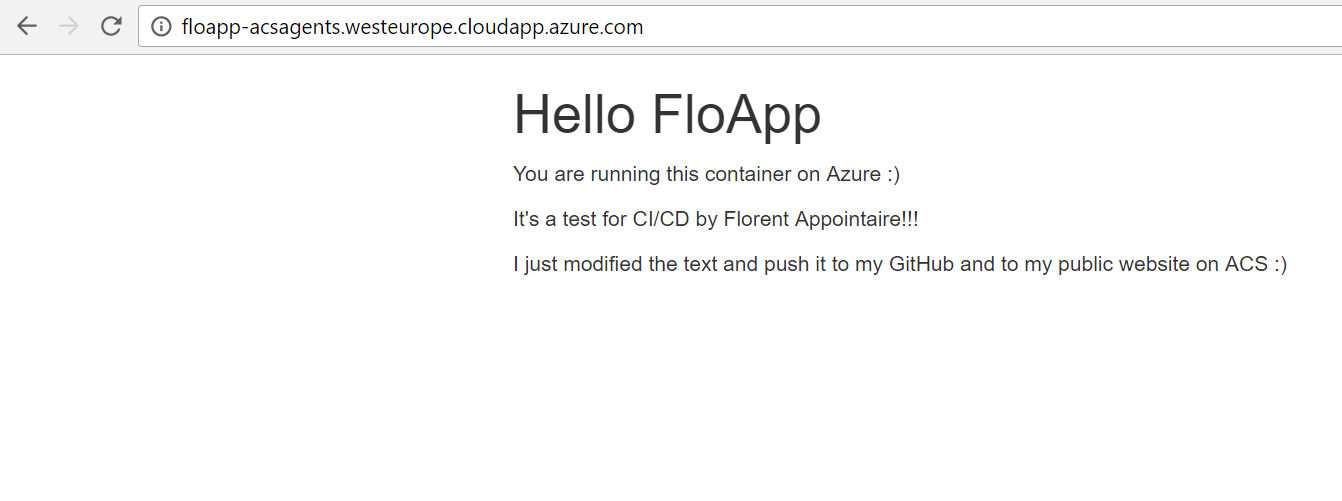
The view from my WebApp:
And in the movie:
https://www.youtube.com/watch?v=3h0rXjt1emg
To conclude, this new method will delight your developers but also admins.
Developers because they will be autonomous, and will just have to push their code changes on a Git to be able to deploy it into production.
And from the admin side, finished the repetitive tasks that are not always the most interesting 🙂
