

Microsoft has introduced Azure Cloud Shell, a new way of managing resources from the Azure Portal. Within a browser, you can use Bash to troubleshoot and automate your most common management tasks. Support for Windows PowerShell is expected soon. Azure Cloud Shell will help you to store your favorite scripts in the Cloud.
What is Azure Cloud Shell?
Azure Cloud Shell enables developers and sysadmins to configure Azure without having to set up a connection from their workstation. Azure Cloud Shell can be used from any modern web browser and the Azure Mobile App. It means that you don’t need to install any module on your workstation. You just have to open your web browser, connect to the Azure web portal and use the Cloud Shell.
Thanks to the Cloud Shell, it will be easier for developers to trigger multiple tasks with familiar commands and scripts. The only prerequisite is an Azure storage account in order to store files, session state and preferences in your $Home directory.
How does it work?
Azure Cloud Shell provides secure terminal access to a Linux Virtual Machine without the need to install and maintain a machine yourself. Azure Cloud Shell provisions machines on a per-request basis. It means that when you open your Cloud Shell, a Virtual Machine will be deployed automatically. Cloud Shell automatically terminates after 20 minutes of shell inactivity. That’s the reason why you must have an Azure storage account to store your files in an Azure file share. Cloud Shell will automatically attach a 5-GB disk image that stores your $Home directory contents for the future session.
Let’s see how it works. First, log in to the Azure Portal https://portal.azure.com and click on the Cloud Shell icon.
![]()
When you start the Azure Cloud Shell for the first time, you will be prompted to create a storage account in order to associate a new Azure File Share to persist files across sessions.
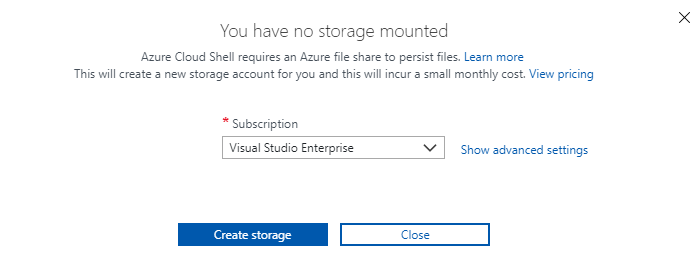
You can use basic or advanced settings. Basic settings will create in the supported region that’s nearest to you:
- A Resource Group: “cloud-shell-storage-<region>”
- A Storage Account: “cs<uniqueGuid>”
- A File Share: “cs-<user>-<domain>-com-<uniqueGuid>”
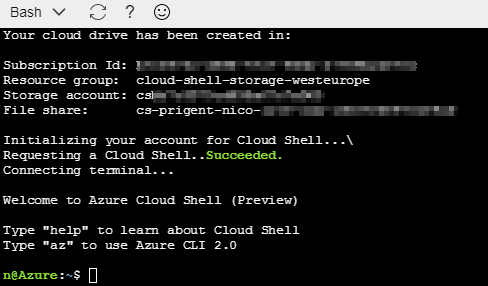
In my case, it has been created in West Europe:

Next, the following tasks will be performed:
- Initializing your account for Cloud Shell
- Requesting a Cloud Shell
- And finally, connecting to the terminal
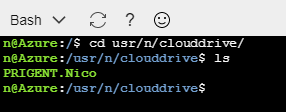
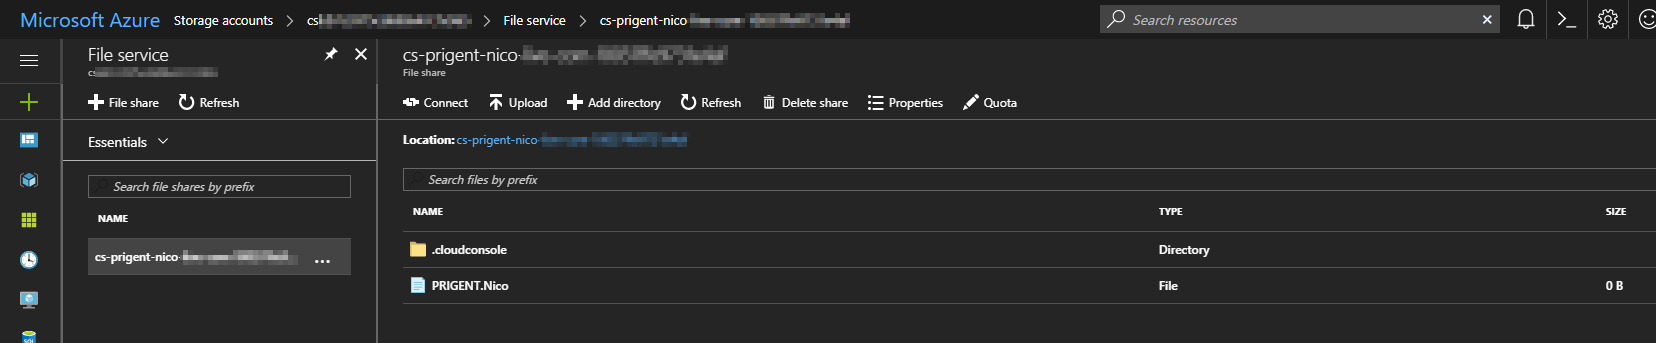
Now, I have a Cloud Drive created for my profile. So, everything that I will store outside of my $Home directory will be lost for future session. At the top of the following screenshot, you can notice an overview of my Azure Storage Account:
OK, now I have a terminal which is very similar to a Linux terminal. It means that you can use all the basic Linux commands and tools. And every time I will start the Cloud Shell, Azure will mount my .img file in the following path:
usr/<username>/clouddrive/
On the upper left corner of the following screenshot, I can switch between “Bash” and “PowerShell”. But PowerShell is not fully integrated and is actually available as a limited preview (https://azure.microsoft.com/en-us/blog/sneak-peek-powershell-in-azure-cloud-shell/):
To discover which file share is mounted as Cloud Drive, run the following “df” command:

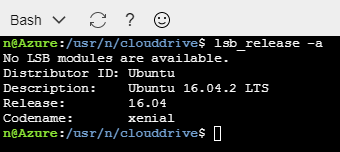
The Azure Cloud Shell runs an instance of bash from the Ubuntu release. Let’s see which version:
Note that you can download your scripts/files stored on your Cloud Drive from the Azure Portal because of Cloud Drive directory syncs with the Azure Portal Storage. Below, I can see and transfer the content of my Cloud Drive from the Azure Portal:
Azure Cloud Shell comes pre-installed with popular command-line tools and language support:
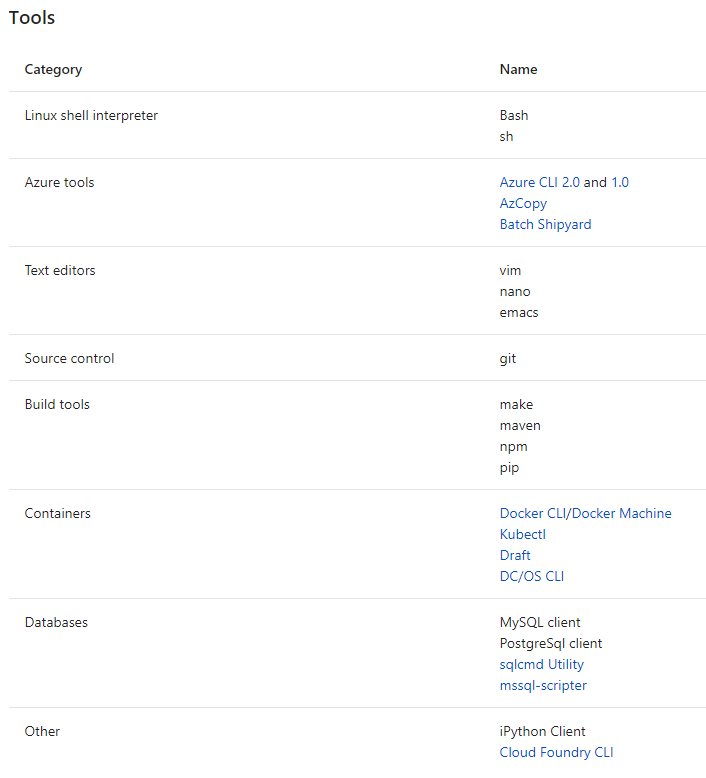
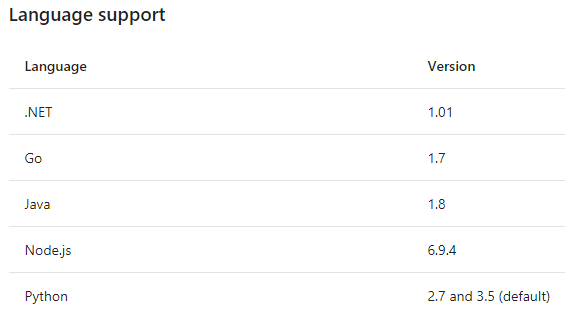
Source: https://docs.microsoft.com/en-us/azure/cloud-shell/features#tools
Azure CLI
Now, let’s focus on the Azure CLI. What is it? The Azure CLI is the cross-platform, command-line tool for managing resources in Microsoft Azure. You can install Azure CLI on your workstation (MacOS, Linux, and Windows) or just use it from the Azure Cloud Shell. Read this article in order to install Azure CLI on Linux and MacOS: https://docs.microsoft.com/en-us/cli/azure/install-azure-cli?view=azure-cli-latest
Microsoft recently released the Azure CLI 2.0, so you can use Azure CLI 1.0 or Azure CLI 2.0, it’s up to you to decide but I advise you to use the Azure CLI 2.0.
What are the differences?
- With Azure CLI 1.0, the commands start with ‘azure’ instead of ‘az’ for Azure CLI 2.0
- Azure CLI 2.0 is a better cross-platform command-line tool
- Azure CLI 1.0 was written with Node.js (https://github.com/Azure/azure-xplat-cli)
- Azure CLI 2.0 is written in Python (https://github.com/Azure/azure-cli)
- Both are Open Source and available on Github
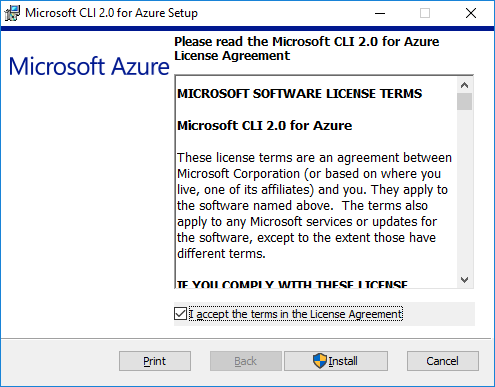
Ok, let’s see how to install Azure CLI 2.0 on a Windows workstation. In order to install Azure CLI on your workstation, you must download the MSI from https://aka.ms/InstallAzureCliWindows
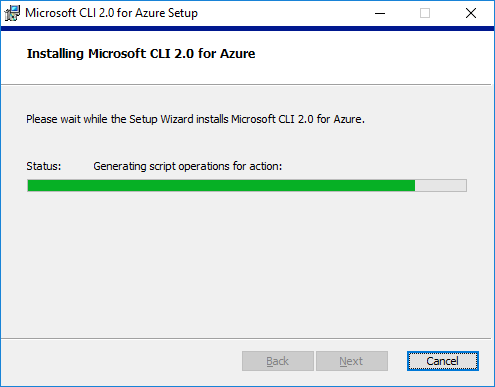
Let’s confirm that Azure CLI 2.0 has been successfully installed on my workstation:
Getting Started with Azure CLI Commands
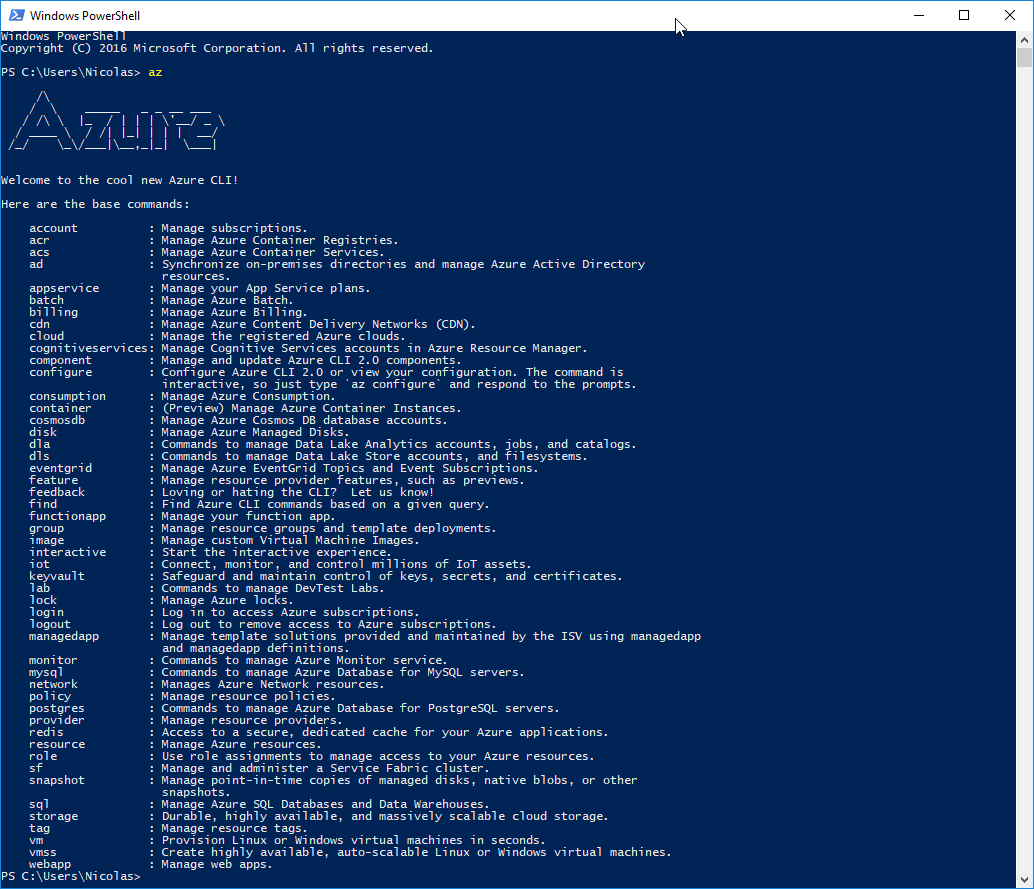
Ok now, I can use Azure CLI from my workstation and my Cloud Shell. Let’s check the versions:

Now, I need to first login to my Azure Subscription:
|
1 2 3 4 5 6 7 8 9 |
# Azure CLI 1.0 azure login # Azure CLI 2.0 az login |
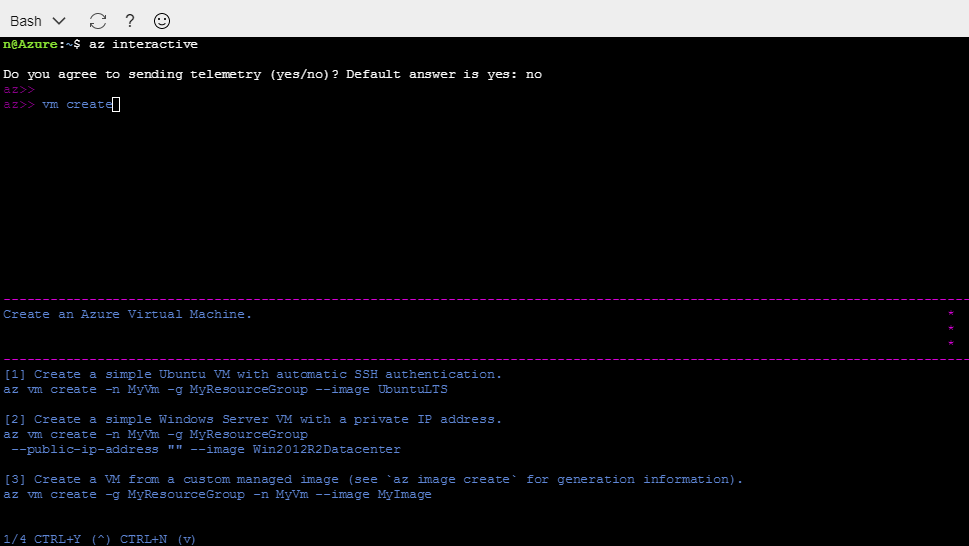
To sign in, you must use a web browser to open the page https://aka.ms/devicelogin and enter the code to authenticate the login. Now you can easily manage all your Azure Resources. Microsoft also added an interactive shell to help us in our day-to-day tasks. Commands are auto-completed, descriptions and examples are available!
Run the following command to start the interactive shell:
|
1 2 3 |
# Interactive Shell az interactive |
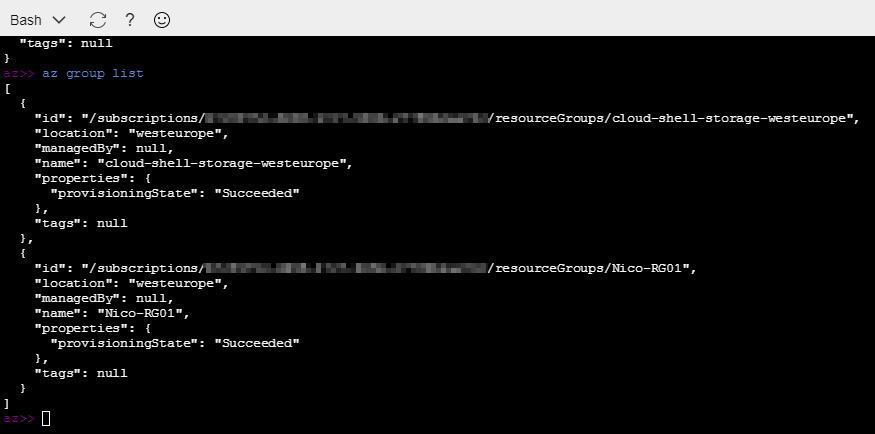
Below, I want to create a Resource Group called “Nico-RG01”. I use the following:
|
1 |
az group create --name Nico-RG01 --location westeurope |
Here is the output:
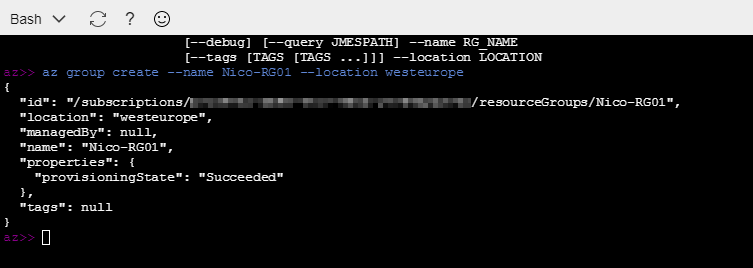
And I can confirm that the RG has been created as expected:
You also can use the GUI in order to manage your Azure Resources, but trust me, you MUST use command-line tools to manage your resources because you will save so much time!

Conclusion
Thanks to Azure Cloud Shell and Azure CLI, you can quickly and easily configure your Azure Resources by creating or deleting:
- Resource Group
- Linux Virtual Machine
- Windows Virtual Machine
- Network
- Web App
- Disk
- Azure Container Service
- …
If you need more information, you can read this article to get started with Azure CLI: https://docs.microsoft.com/en-us/cli/azure/get-started-with-azure-cli?view=azure-cli-latest
Thanks for reading!
