

StarWind NVMe-oF Initiator: Installation Guide
- June 24, 2025
- 15 min read
- Download as PDF
Annotation
Relevant Products
StarWind NVMe over Fabrics (NVMe-oF) Initiator
Purpose
This guide outlines the process for installing and configuring the StarWind NVMe over Fabrics (NVMe-oF) Initiator on Windows Server. It includes instructions for server initial configuration, verifying RDMA connectivity, and step-by-step installation. Additionally, it covers methods to manage the initiator using a command-line utility, the StarWind NVMe-oF Initiator graphical user interface (GUI), and PowerShell.
Audience
This guide is intended for IT professionals, system administrators, and technology enthusiasts looking to implement high-performance NVMe over Fabrics shared storage solutions in a Windows Server environment.
Expected Outcome
By following this guide, users will be able to successfully install and configure the StarWind NVMe-oF Initiator on a Windows Server. The configuration connects the initiator to NVMe-oF target with an NVMe drive over an RDMA network, enabling efficient and high-speed shared storage access through NVMe over Fabrics functionality.
Solution Diagram
Here is the network diagram for the configuration described in this guide.

Preconfiguring the Servers
Prerequisites
Before installing StarWind NVMe-oF, please make sure that the latest network card firmware and drivers are installed.
For connecting storage over NVMe-oF/RMDA, please make sure that NIC supports RoCE v2.
For successful installation, please make sure that none of the antivirus or security settings do not block the creation of directories in C:\ and modifying the registry. For fresh installations, please install StarWind NVMe-oF Initiator before AV or joining the server to the domain.
For Microsoft Failover Cluster deployments and third-party targets, please make sure the target and its licensing support NVM reservations.
If MPIO is needed (for Windows server OS), add MPIO feature from the Server Manager and make sure to configure it on the hosts. Open MPIO settings (cmd or Win+R > mpio.cpl), enable MPIO support for SAS devices and press Add. Once done, press OK and restart the host if needed.
Configuration description
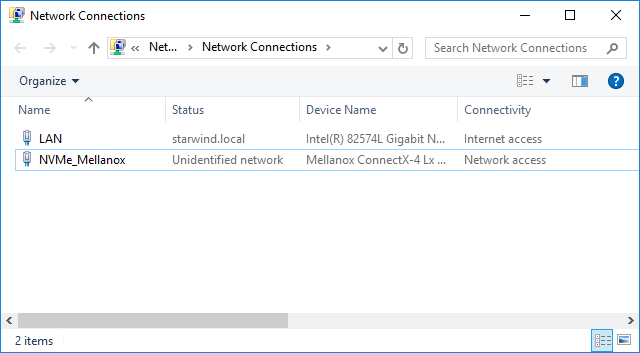
In this document, the first host with Mellanox ConnectX-5 adapter and NVMe SSD drives is running Windows Server 2022 with Hyper-V Role installed. As NVMe-oF target server, StarWind VSAN deployed as Controller virtual machine. The NVMe SSDs are passed through to VSAN CVM and exposed to the network as NVMe over Fabrics (NVMe-oF) target.
The second host is running Windows Server 2022 and has Mellanox ConnectX-5 adapter installed accordingly. StarWind NVMe-oF Initiator is deployed on the second Windows Server 2022 and connected to the StarWind Virtual SAN NVMe-oF target via 172.16.10.x subnet.
Windows Server 2022 should have the latest Mellanox driver installed, which is available here:
https://www.mellanox.com/products/adapter-software/ethernet/windows/winof-2
To check the RDMA connectivity and bandwidth between the initiator server and target server, use the StarWind rPerf utility, which can be downloaded here: https://www.starwindsoftware.com/starwind-rperf
Installing StarWind NVMe over Fabrics Initiator
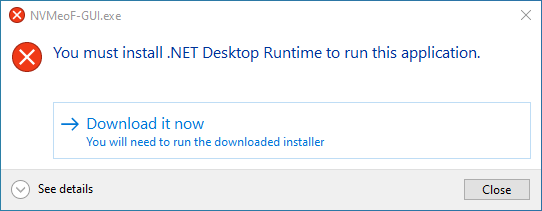
NOTE: StarWind NVMe-oF Initiator GUI requires .NET Desktop Runtime to operate. For using StarWind NVMe-oF Initiator cmdlet and PowerShell no additional components are required.
1. Download StarWind NVMe-oF from the following link: https://www.starwindsoftware.com/starwind-nvme-of-initiator#download
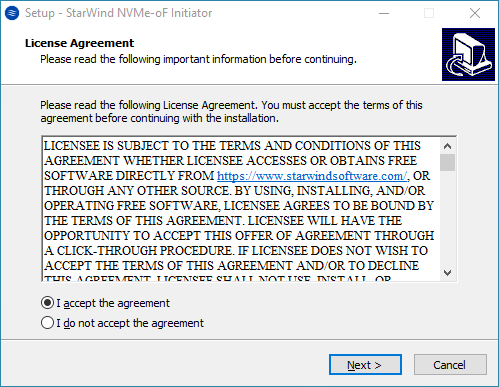
2. Execute the .exe to install StarWind NVMe-oF Initiator and follow the steps in the wizard.
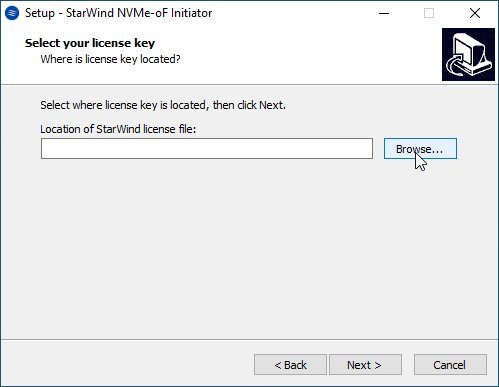
3. Apply the license key to activate the product
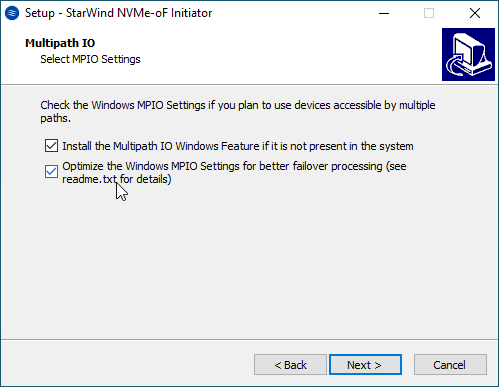
4. Optionally, check the Installing Multipath IO Windows feature and optimize its settings.
NOTE: For desktop OS, MPIO is not available, so to proceed with the installation, just press Next.
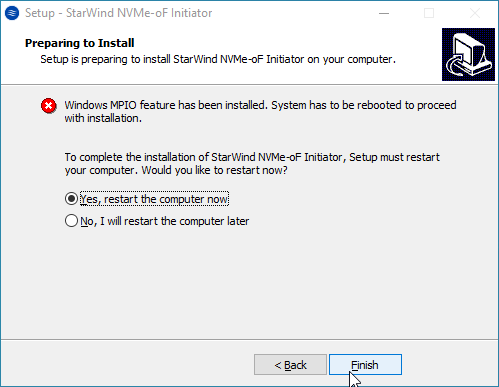
5. Once installed, restart the server.
6. Install .NET Desktop Runtime to run StarWind NVMe-oF Initiator GUI. Click Download it now to get and install the software.
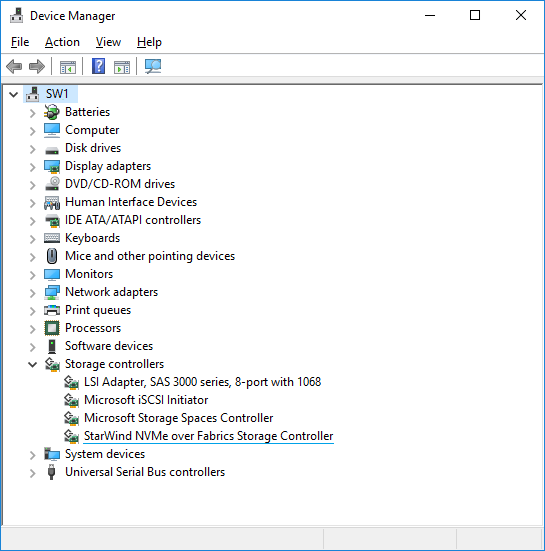
7. Open Device Manager to check that StarWind NVMe-oF Initiator is installed on the system.
Working with StarWind NVMe over Fabrics Initiator
The StarWind NVMe-oF Initiator offers three methods for establishing and managing connections between the target and initiator hosts:
- StarWind NVMe-oF Initiator GUI (Preferred)
A user-friendly graphical interface for discovering, connecting, and managing NVMe-oF targets with minimal configuration effort.
- StarNVMeoF_Ctrl Command-Line Utility
A powerful command-line tool offering full control over connection setup, ideal for advanced users and script-based automation.
- PowerShell Cmdlets
Enables seamless integration with Windows PowerShell, allowing for automated workflows and complex configuration scenarios.
Choose any of these methods to establish an NVMe-oF connection between the target and the initiator hosts.
Using StarWind NVMe-oF Initiator GUI
Discovering targets
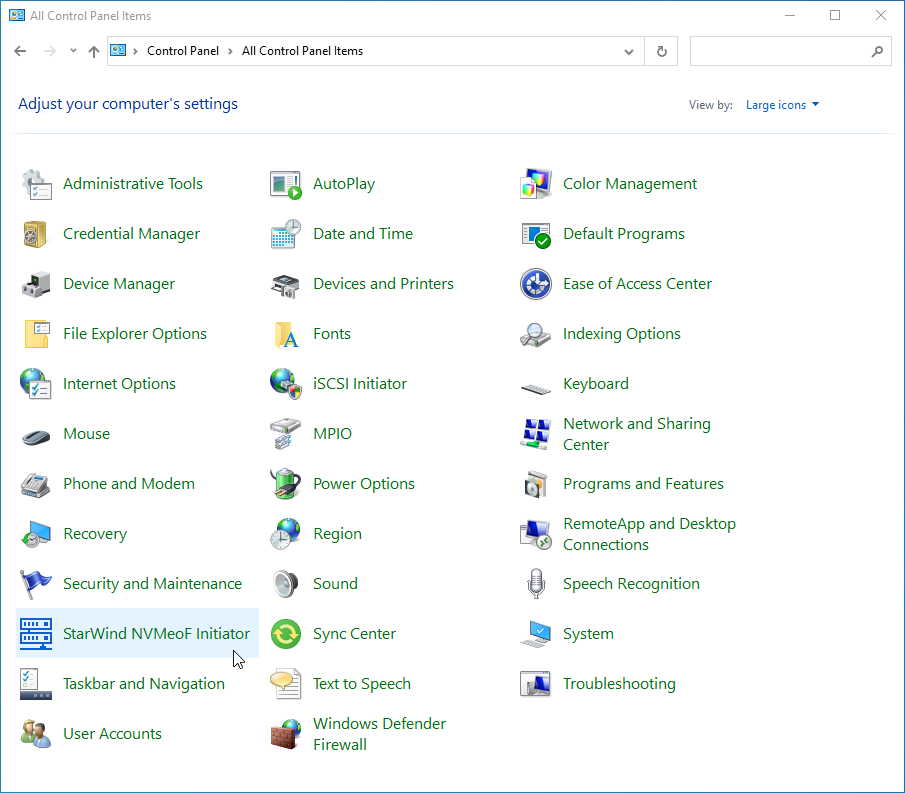
1. Launch StarWind NVMe-oF Initiator: Start -> Control Panel -> StarWind NVMe-oF Initiator.
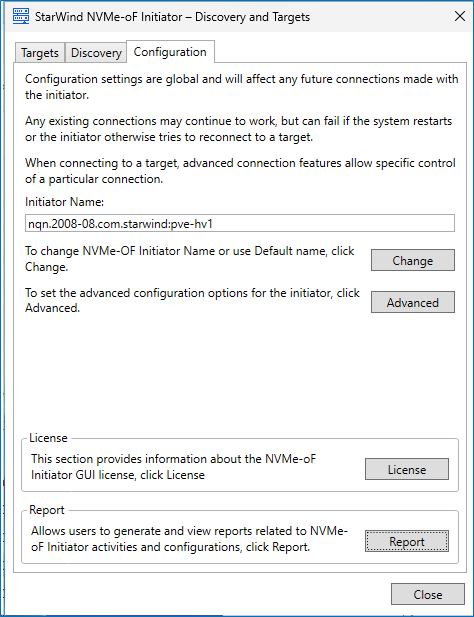
2. Navigate to the Configuration tab.
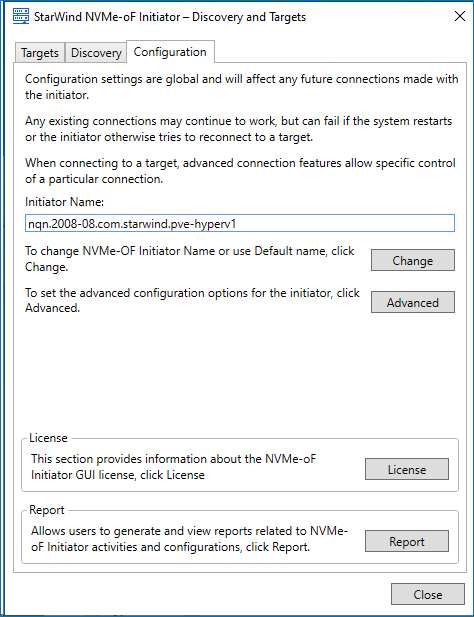
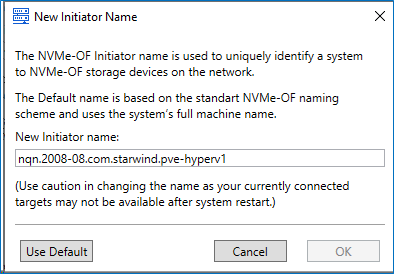
3. Press Change to modify the Initiator name if needed.
NOTE: Some targets have access control lists that allow only certain NQNs. Make sure the host NQN aligns with the one in the target settings. Also, make sure that the target allows for connectivity over NVMe-oF.
4. Press Advanced to modify StarWind NVMe over Fabrics Storage Controller settings. Parameters can be left default.
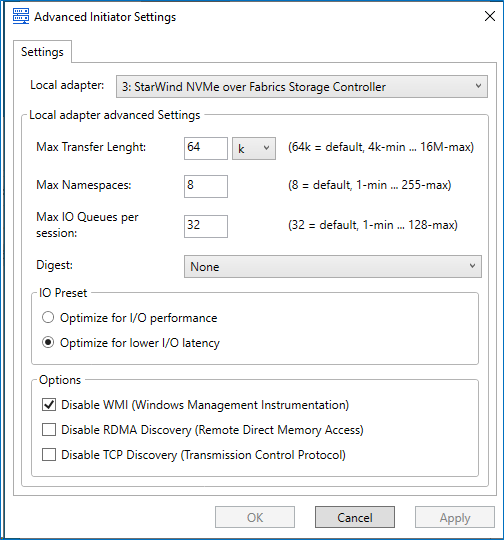 NOTE: Certain use cases might require adjusting Max Transfer Length. Max Transfer Length is to be aligned with the target. 64K works with most of the known targets. This value can be left as is.
Max Namespaces allows for adding multiple LUNs per target. Can be adjusted for multi-LUN setups.
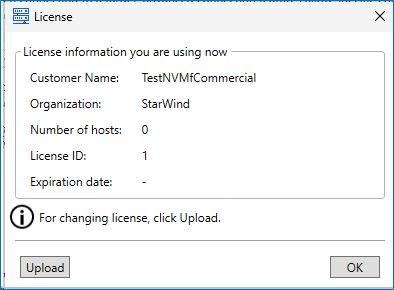
5. It is possible to review the License details or apply the license via GUI. Press Upload to navigate to the license key.
6. Press Report to generate the support bundle.
7. Navigate to the Discovery tab and press Discover Portal.
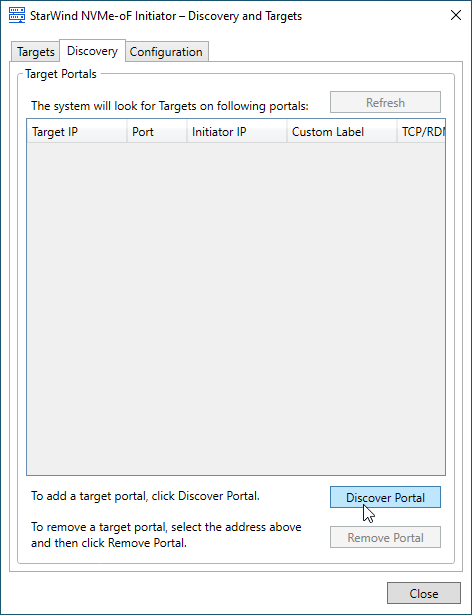
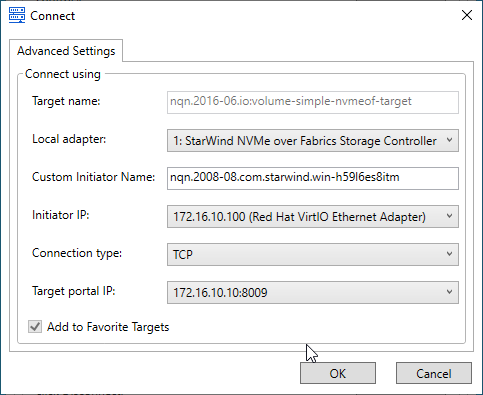
8. In the Discover Target Portal dialog enter the IP address of the NVMe-oF target server to connect to the provisioned targets, along with the appropriate port number.
NOTE: Default values: for NVMe-oF/TCP, use port 8009; for NVMe-oF/RDMA, use port 4420. Make sure that the corresponding port is opened.
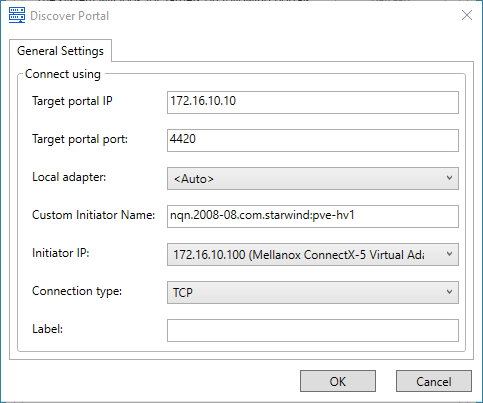
9. Specify a Custom Initiator Name. Use this option if you need the client connection to use a name other than the default hostname. This allows for more flexible identification of the initiator in the target server configuration.
10. Select Initiator IP.
11. Specify Connection Type (RDMA or TCP).
12. Add a Label for the Target Connection (Optional).
13. Press OK to Start Discovery.
14. Once the Target Portal is Discovered navigate to the Targets tab.

15. The target(s) should be visible under Targets. Select the Target Name and Press Connect.
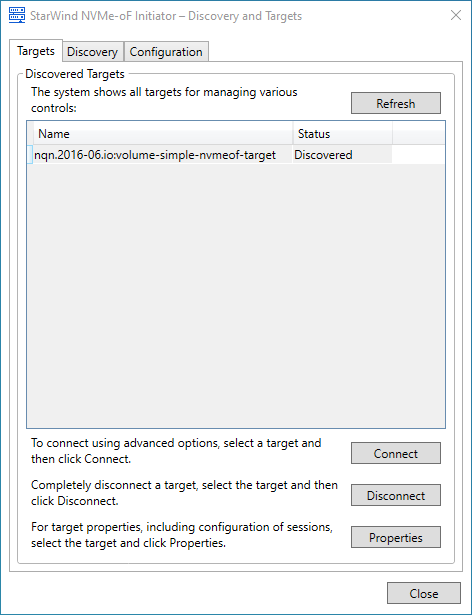
16. Specify the Target Portal IP address to establish the connection.
17. Verify Connection. Once the target shows the status “has sessions,” it is connected.
Establish additional connections to other NVMe-oF targets using different Target Portal IP addresses (Network adapter ports) as needed.
18. Open the Disk Management snap-in. The connected disk(s) will appear as unallocated and offline.
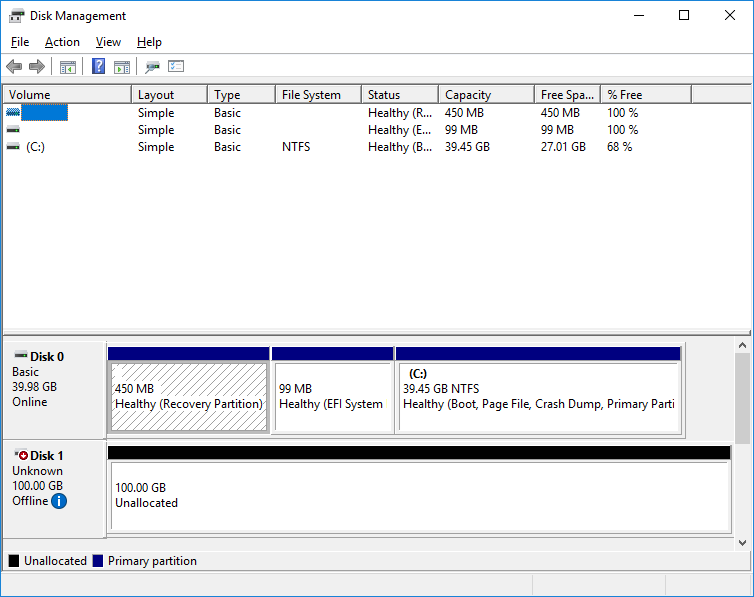
19. Bring the disks online by right-clicking on them and selecting the Online menu option.
Disconnecting targets
1. To disconnect the NVMe-oF target choose the specified target from the Discovered Targets list and press the Disconnect button.
NOTE: Make sure that LUNs are not used by other applications at the moment of disconnection, as removing LUNs with active file operations may lead to data corruption.
Using command-line utility
The StarNVMeoF_Ctrl.exe command-line utility is used to work with the NVMe-oF initiator.
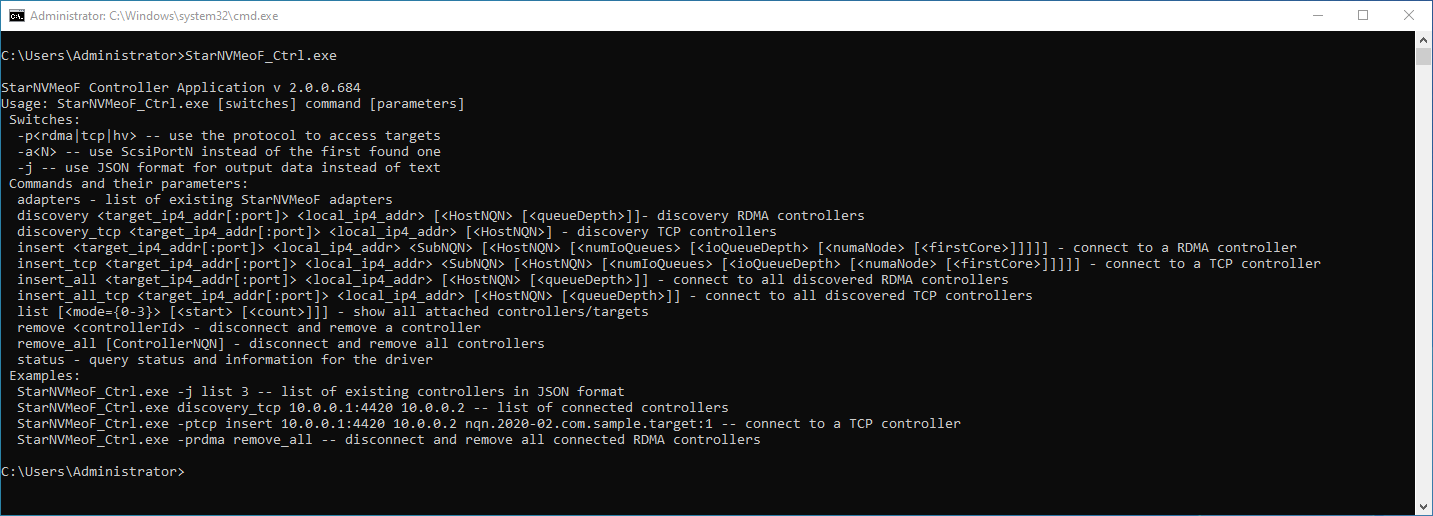
Usage: StarNVMeoF_Ctrl.exe [switches] command [parameters]
Switches:
  -p<rdma|tcp|hv> -- use the protocol to access targets

  -a<N> -- use ScsiPortN instead of the first found one

  -j -- use JSON format for output data instead of text
parameters
  adapters - list of existing StarNVMeoF adapters

  discovery <target_ip4_addr[:port]> <local_ip4_addr> [<Horstman> [<queueDepth>]]- discovery RDMA controllers

  discovery_tcp <target_ip4_addr[:port]> <local_ip4_addr> [<HostNQN>] - discovery TCP controllers

  insert <target_ip4_addr[:port]> <local_ip4_addr> <SubNQN> [<HostNQN> [<numIoQueues> [<ioQueueDepth> [<numaNode> [<firstCore>]]]]] - connect to a RDMA controller

  insert_tcp <target_ip4_addr[:port]> <local_ip4_addr> <SubNQN> [<HostNQN> [<numIoQueues> [<ioQueueDepth> [<numaNode> [<firstCore>]]]]] - connect to a TCP controller

  insert_all <target_ip4_addr[:port]> <local_ip4_addr> [<HostNQN> [<queueDepth>]] - connect to all discovered RDMA controllers

  insert_all_tcp <target_ip4_addr[:port]> <local_ip4_addr> [<HostNQN> [<queueDepth>]] - connect to all discovered TCP controllers

  list [<mode={0-3}> [<start> [<count>]]] - show all attached controllers/targets

  remove <controllerId> - disconnect and remove a controller

  remove_all [ControllerNQN] - disconnect and remove all controllers

  status - query status and information for the driver
Examples:
  StarNVMeoF_Ctrl.exe -j list 3 -- list of existing controllers in JSON format

  StarNVMeoF_Ctrl.exe discovery_tcp 10.0.0.1:4420 10.0.0.2 -- list of connected controllers

  StarNVMeoF_Ctrl.exe -ptcp insert 10.0.0.1:4420 10.0.0.2 nqn.2020-02.com.sample.target:1 -- connect to a TCP controller

  StarNVMeoF_Ctrl.exe -prdma remove_all -- disconnect and remove all connected RDMA controllers
Discovering targets
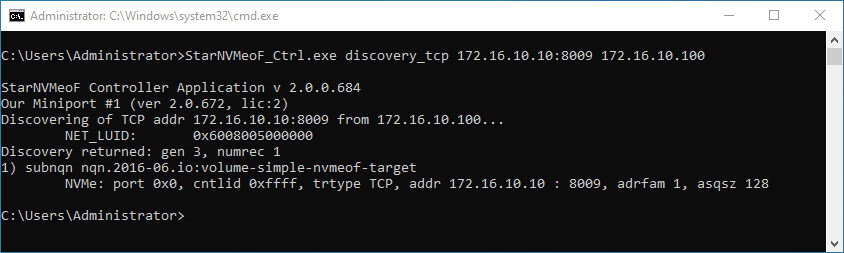
1. To discover the target, run the discovery command: StarNVMeoF_Ctrl.exe <discovery|discovery_tcp> <target_ip_addr:[port]> <local_ip_addr> by specifying the protocol, target host IP address and port number:
RDMA example : StarNVMeoF_Ctrl.exe discovery 172.16.10.10:4420 172.16.10.100
TCP example : StarNVMeoF_Ctrl.exe discovery_tcp 172.16.10.10:8009 172.16.10.100
Where:
<172.16.10.10:4420> — NVMe-oF target host IP and port;
<172.16.10.100> — initiator host IP.
Connecting targets
1. To connect the target, run the command: StarNVMeoF_Ctrl.exe <insert|insert_tcp> <target_ip_addr[:port]> <local_ip_addr> <SubNQN> <HostNQN> [<num_io_queues> <io_queue_depth> <numaNode> <first_core>]
RDMA example: StarNVMeoF_Ctrl.exe insert 172.16.10.10:4420 172.16.10.100 nqn.2008-08.com.starwindsoftware:NVMeofTarget nqn.2008-08.com.starwind:pve-hv1 128 128 1 0
TCP example: StarNVMeoF_Ctrl.exe insert_tcp 172.16.10.10:8009 172.16.10.100 nqn.2008-08.com.starwindsoftware:NVMeofTarget nqn.2008-08.com.starwind:pve-hv1 128 128 1 0
Where:
<172.16.10.10:4420 > — target host IP and port.
<172.16.10.10> — initiator host IP.
<nqn.2008-08.com.starwindsoftware:NVMeofTarget> — SubNQN of the target (may be copied from the discovery results screen).
<nqn.2008-08.com.starwind:pve-hv1> — local HostNQN.
<128> — quantity of connections to the target.
<128> — queue depth.
<1> — number of the numa node.
<0> — number of the initial core.

2. After the “insert” or “insert_tcp” command is executed, disk LUNs for the connected target devices should appear in the Disk Management.

Getting information about targets
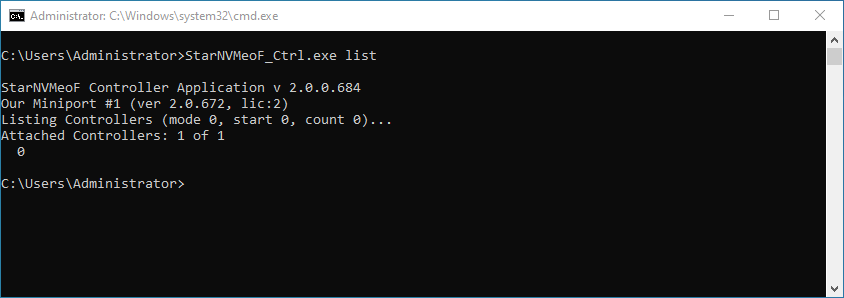
1. To show the list of connected NVMe-oF controllers, run the “StarNVMeoF_Ctrl.exe list” command.
Disconnecting targets
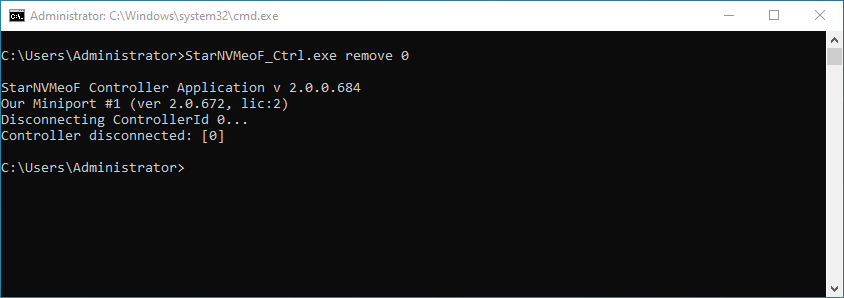
1. To disconnect LUNs from the system, run the controller disconnection command: StarNVMeoF_Ctrl.exe remove <controllerId>
Example: StarNVMeoF_Ctrl.exe remove 0
Where:
<1> — controller Id
NOTE: Make sure that LUNs are not used by other applications at the moment of disconnection, as removing LUNs with active file operations may lead to data corruption.
Using PowerShell
Discovering targets
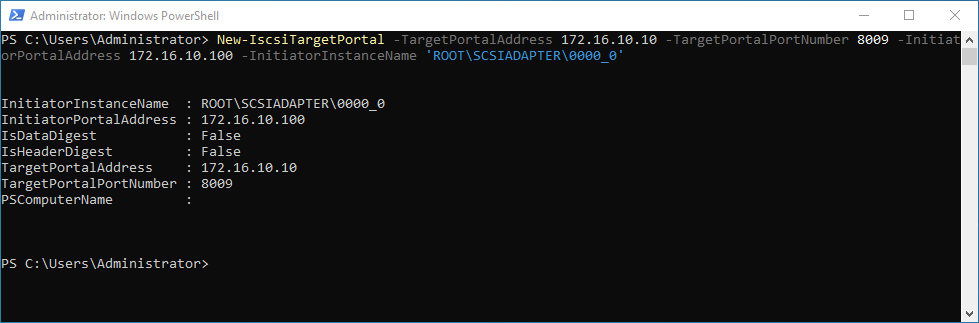
1. To discover the target, run the discovery commandlet in Powershell: New-IscsiTargetPortal -TargetPortalAddress <target IP> -TargetPortalPortNumber <target port> -InitiatorPortalAddress <initiator IP> -InitiatorInstanceName <‘initiator controller‘> by specifying target host IP address and port number:
Example:
New-IscsiTargetPortal -TargetPortalAddress 172.16.10.10 -TargetPortalPortNumber 8009 -InitiatorPortalAddress 172.16.10.100 -InitiatorInstanceName ‘ROOT\SCSIADAPTER\0000_0’
Where:
<172.16.10.10> -TargetPortalAddress;
<8009> -InitiatorPortalAddress
<172.16.10.10> -InitiatorPortalAddress
<‘ROOT\SCSIADAPTER\0000_0’> -InitiatorInstanceName – StarWind NVMe over Fabrics Storage Controller
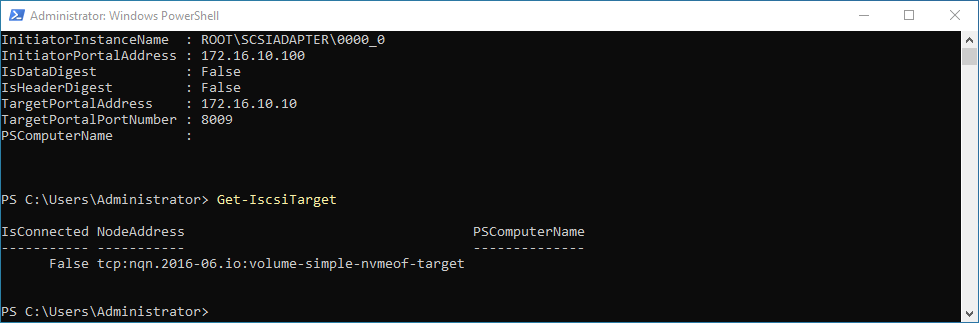
2. To get NVME targets name, run the commandlet Get-IscsiTarget:
Get-IscsiTarget
Connecting targets
1. To connect the target, run the commandlet: Connect-IscsiTarget -NodeAddress <NodeAddress>-IsPersistent $True
Example:
Connect-IscsiTarget -NodeAddress tcp:nqn.2016-06.io:volume-simple-nvmeof-target -IsPersistent $True
2. To get the information about the sessions, run the command:
Get-iSCSISession | select *
Disconnecting targets
1. To disconnect the target, run the command: Disconnect-IscsiTarget -NodeAddress <NodeAddress>
Example:
Disconnect-IscsiTarget -NodeAddress tcp:nqn.2016-06.io:volume-simple-nvmeof-target
NOTE: Make sure that LUNs are not used by other applications at the moment of disconnection, as removing LUNs with active file operations may lead to data corruption.
Conclusion
The StarWind NVMe-oF Initiator installation guide provides a clear and structured approach to deploying NVMe over Fabrics in a Windows Server environment. By carefully following the outlined steps, users can establish high-performance storage connectivity, taking full advantage of NVMe technology’s low-latency and high-speed capabilities across a network fabric. This setup not only optimizes storage efficiency but also positions the server infrastructure for modern, scalable, and robust data management solutions.
