

SQL Server 2017 on Windows Server 2016
- April 26, 2019
- 7 min read
- Download as PDF
Installing SQL Server 2017 on the Failover Cluster
This configuration part assumes that the Windows Server 2016 hosts are configured and Failover Cluster is created on top of StarWind HA storage.
Note: The installation process will be performed on the first node of the cluster, SQLNODE1.
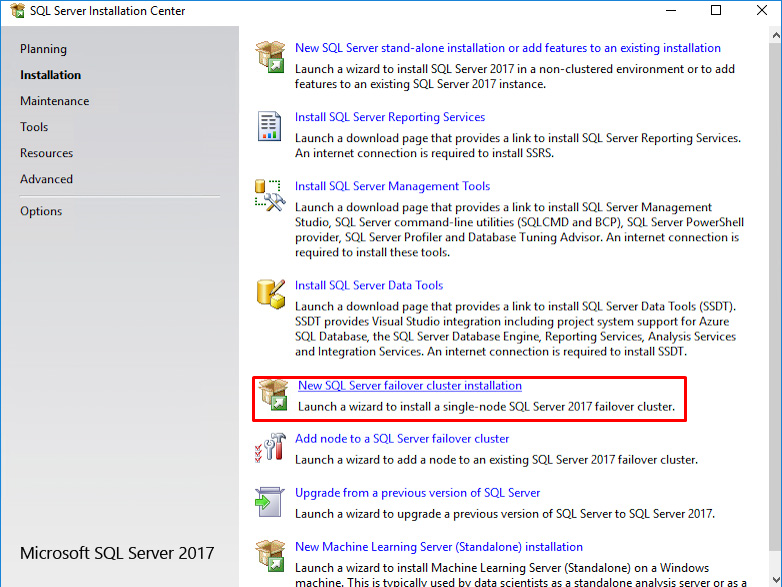
1. Run setup.exe from the SQL Server 2017 installation media to launch SQL Server Installation Center.
2. Click on the New SQL Server failover cluster installation link to run the SQL Server 2017 Setup Wizard.
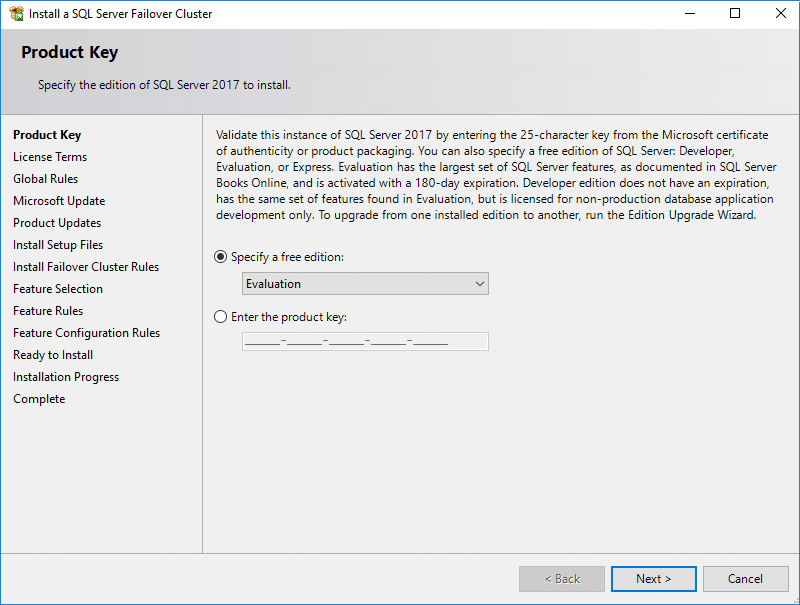
 3. In the Product Key dialog box, enter the product key that came with the installation media and click Next.
 4. Read the License Terms dialog box and enable the I accept the license terms. Click Next.
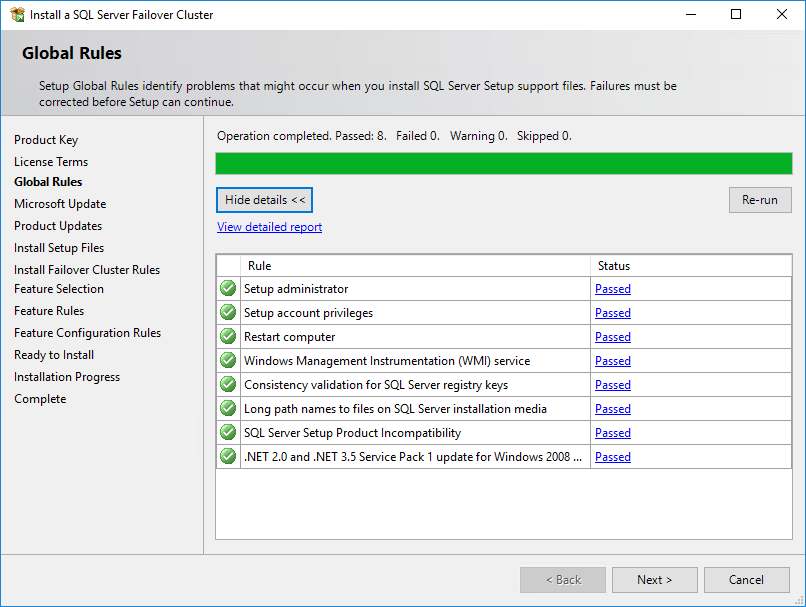
5. In the Global Rules dialog box, validate that the tests return successful results and click Next.
 6. In the Microsoft Update dialog box, click Next.
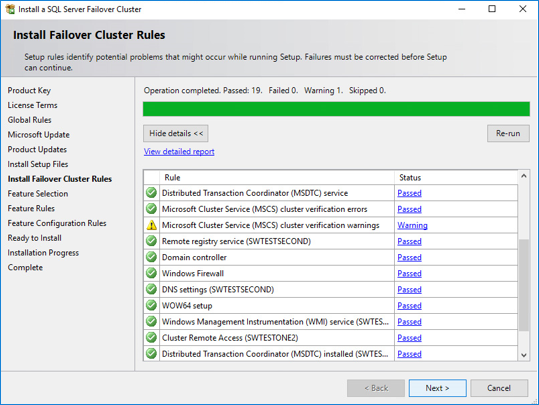
7. In the Install Failover Cluster Rules dialog box, validate that the tests return successful results. If the tests return warnings, make sure they are fixed before proceeding with the installation. Click Next.
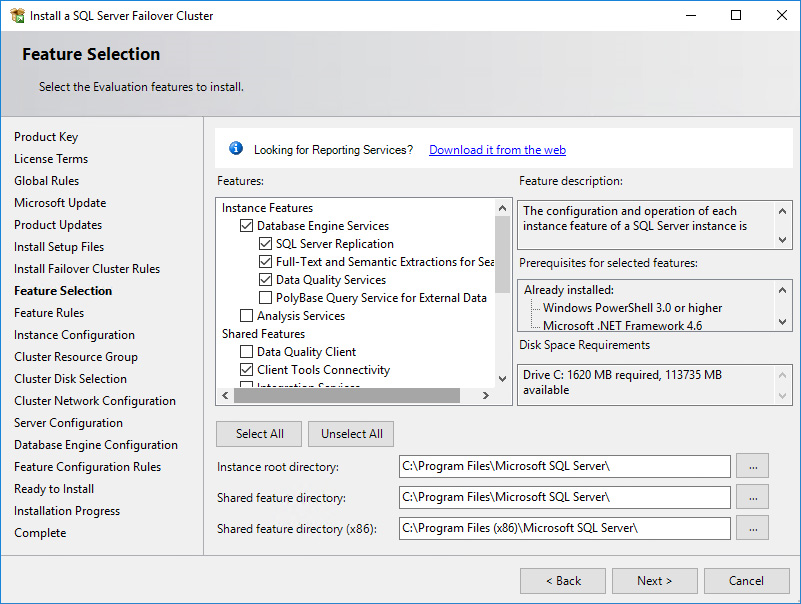
 8. In the Feature Selection dialog box, select Database Engine Services and Management Tools. Click Next.
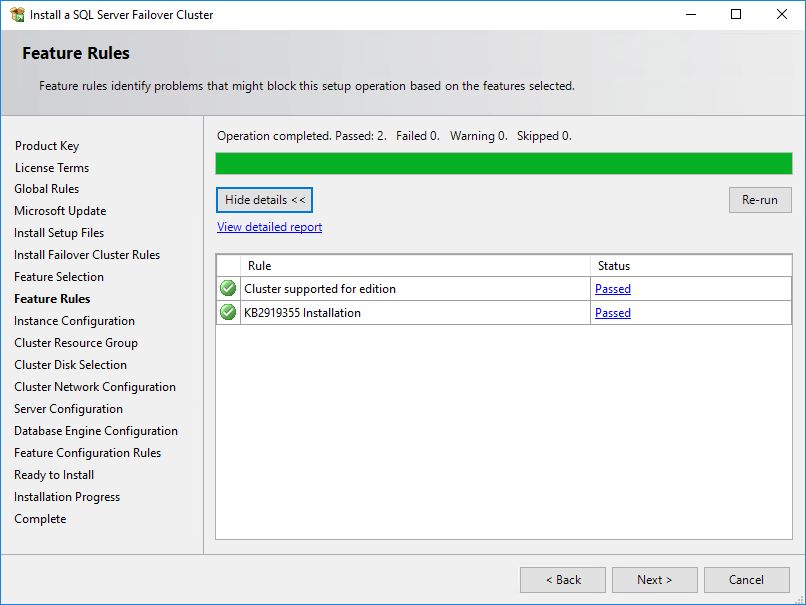
 9. In the Feature Rules dialog box, verify that all the rules have passed. If the rules return warnings, make sure they are fixed before proceeding with the installation. Click Next.
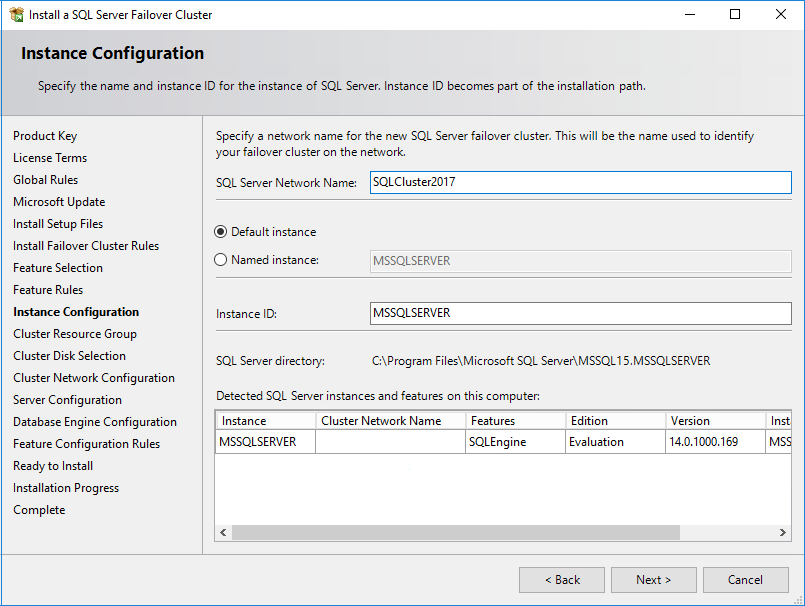
 10. In the Instance Configuration dialog box, enter the following details:
SQL Server Network Name: type the name of the cluster
Instance ID: MSSQLSERVER
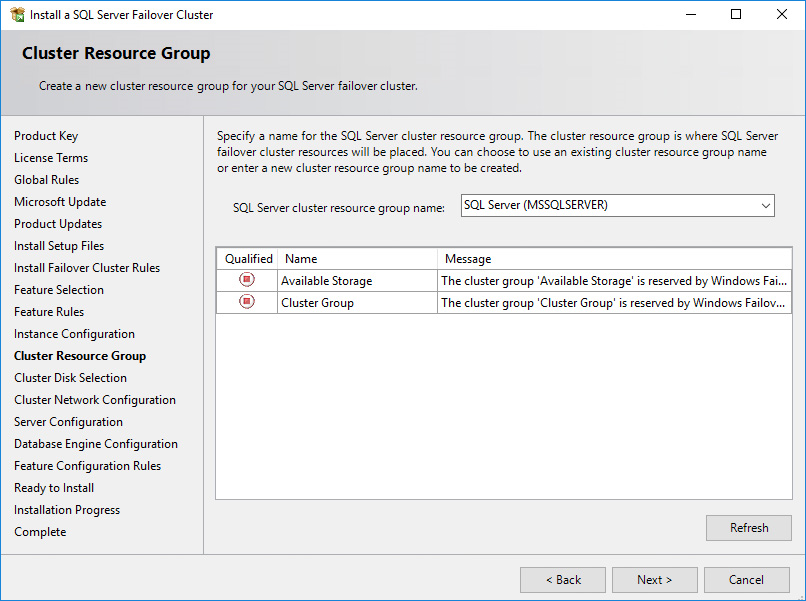
 11. To make sure that a new Resource Group for the SQL Server Failover Cluster Instance can be created, check the resources availability in the Cluster Resource Group dialog box. To specify an existing SQL Server cluster resource group name, use the drop-down list or type the name of a new group to create it. Accept all the defaults and click Next.
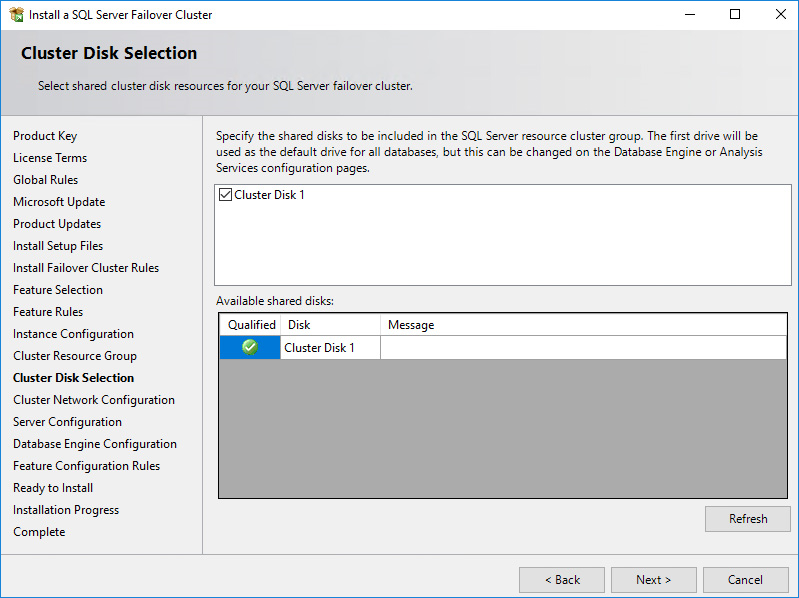
 12. In the Cluster Disk Selection dialog box, select the available disk groups that are to be used in the cluster for SQL Server 2017.
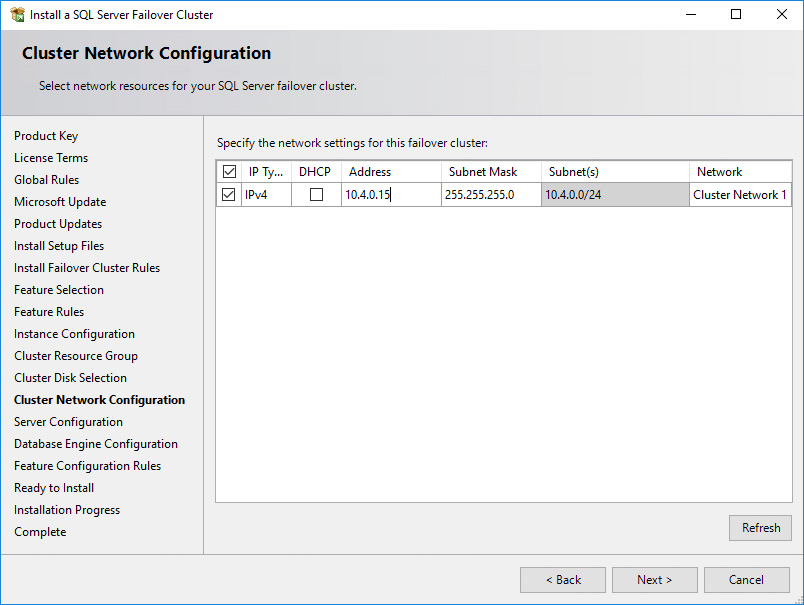
 13. In the Cluster Network Configuration dialog box, enter the virtual IP address that the SQL Server 2017 Failover Cluster Instance will use. The checkbox next to the IPv4 column will be used as a static IP address instead of the DHCP-assigned one. Click Next.
14. Type the IP address: 10.4.0.15 (similar to the virtual IP address for the virtual host name/client access point, the IP address could be any within the range of the Production subnet as long as it is available).
 NOTE: The network adapter settings that will be displayed in this dialog box will depend on how the cluster network adapters are configured. Make sure to configure the Heartbeat-iSCSI network adapters with the Do not allow cluster network communication on this network option.
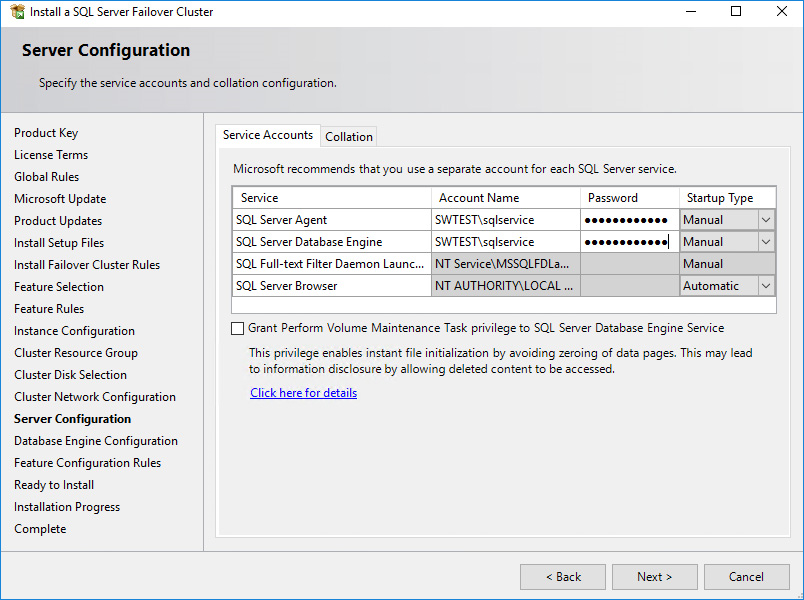
15. In the Server Configuration dialog box, use the following credentials for the SQL Server service accounts in the Service Accounts tab:
SQL Server Agent: SWTEST\sqlservice
SQL Server Database Engine: SWTEST\sqlservice
Note: Make sure that both SQL Server Agent and SQL Server Database Engine services have the Manual Startup Type. The Windows Server Failover Cluster will take care of stopping and starting the service. Also, set the Collation property for the instance according to the application requirement.
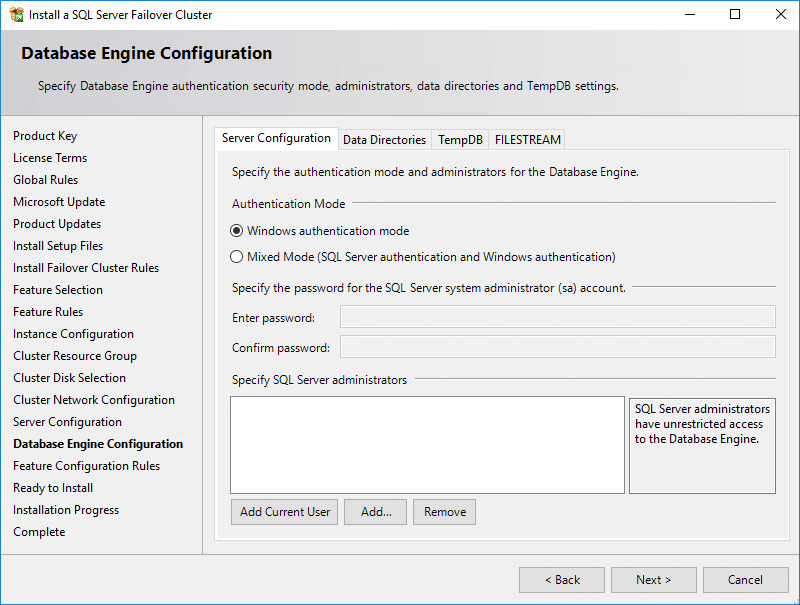
 16. In the Database Engine Configuration dialog box, select the appropriate Authentication Mode in the Server Configuration tab. To add the currently logged on user to the SQL Server administrators group, click the Add Current User button. Otherwise, add the appropriate domain accounts or security groups.
 17. In the Data Directories tab, enter the following data (based on the available cluster disks):
Data root directory: J:\
User database directory: J:\MSSQL12.MSSQLSERVER\MSSQL\Data
User database log directory: L:\MSSQL12.MSSQLSERVER\MSSQL\Data
Temp DB directory: J:\MSSQL12.MSSQLSERVER\MSSQL\Data
Temp DB log directory: L:\MSSQL12.MSSQLSERVER\MSSQL\Data
Backup directory: J:\MSSQL12.MSSQLSERVER\MSSQL\Backup
NOTE: For WSFC, it is recommended to store the tempdb database on a local drive instead of the replicated storage. Make sure that all the nodes in the cluster contain the same directory structure and that the SQL Server service account has Read/Write permissions for those folders.
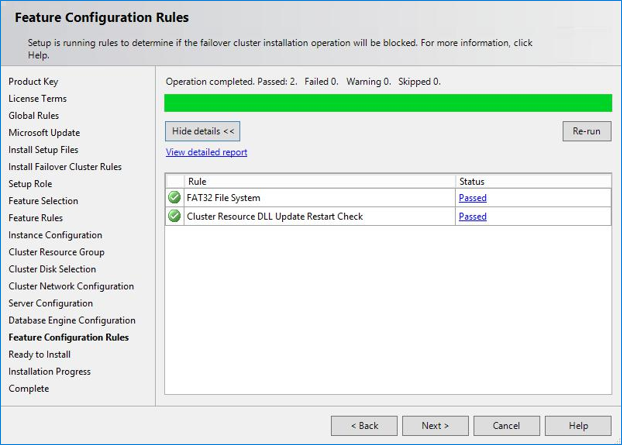
18. In the Feature Configuration Rules dialog box, verify that validation tests have passed successfully.
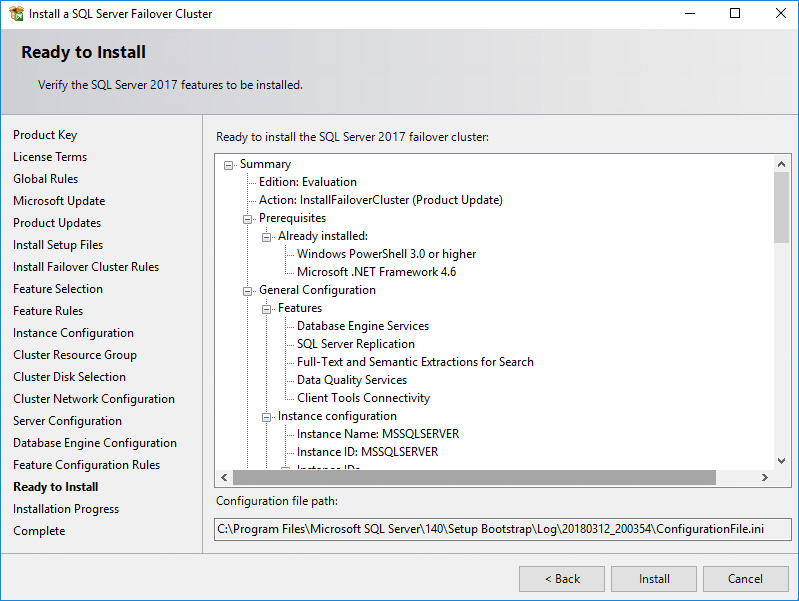
 19. In the Ready to Install dialog box, verify that all configurations are correct and click Install.
 20. Once the installation is finished, in the Complete dialog box, click Close.
Adding Node to SQL Server 2017 Failover Cluster
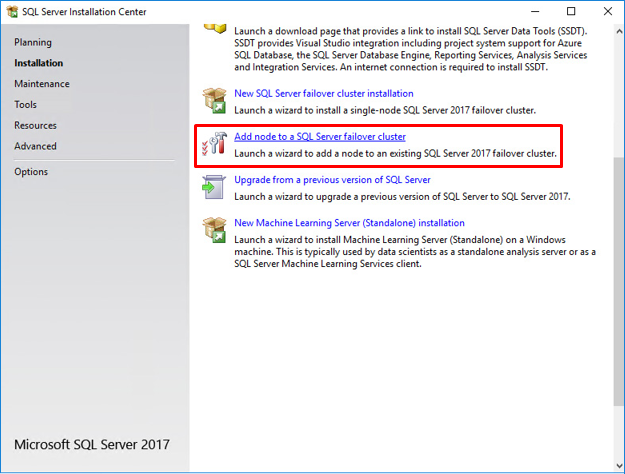
1. Run setup.exe from the installation media to launch SQL Server Installation Center.
2. Click the Add node to a SQL Server failover cluster link to run the SQL Server 2017 Setup wizard.
 3. In the Product Key dialog box, enter the product key that came with the installation media.
4. Read and accept the License Terms.
5. In the Global Rules dialog box, validate that the tests return successful results.
6. In the Microsoft Update dialog box, click Next.
7. In the Add Node Rules dialog box, validate that the tests return successful results. If the tests return warnings, make sure to fix them before proceeding with the installation.
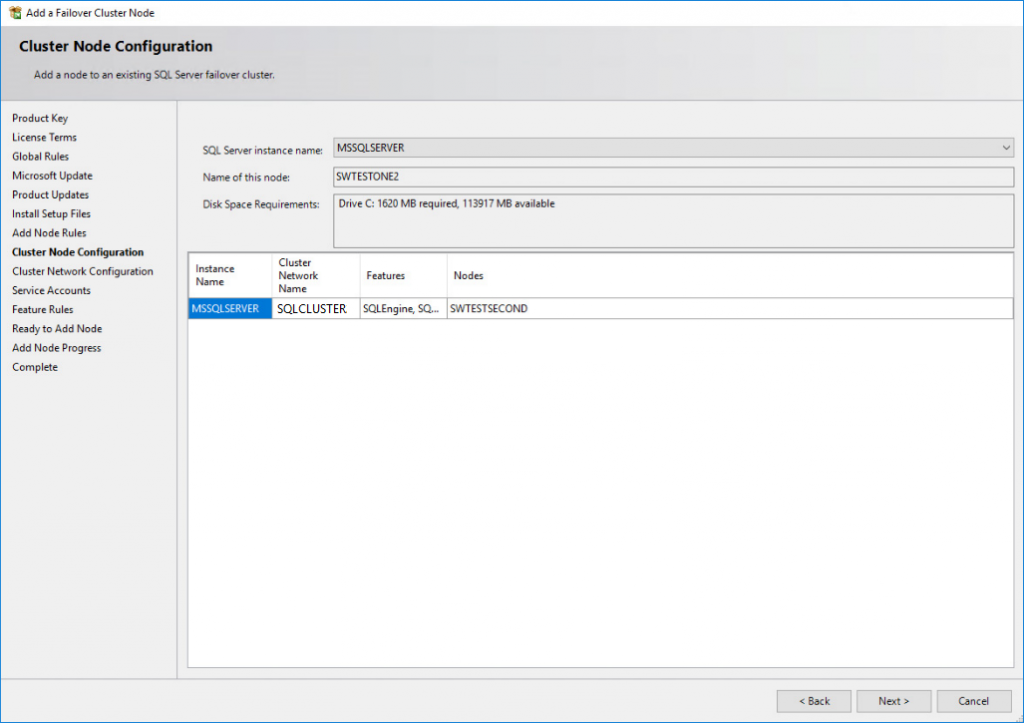
8. In the Cluster Node Configuration dialog box, verify that the information for the existing SQL Server 2017 Failover Cluster Instance is correct.
 9. In the Cluster Network Configuration dialog box, review the configuration of the SQL Server Failover Cluster Instance.
10. In the Service Accounts dialog box, verify that the information of the configuration is the same as was used to configure the first node. Provide the appropriate password for the SQL Server service accounts.
 11. In the Feature Rules dialog box, verify that all the rules have passed. If the rules return warnings, make sure they are fixed before proceeding with the installation. Click Next.
12. In the Ready to Add Node dialog box, verify that all settings are correct and click Install.
13. Once the installation is finished, click Close in the Complete dialog box.
14. Repeat the steps 1-13 to add other nodes to the existing SQL Server 2017 Failover Cluster.
