


Introduction
We are living in a dynamic world where it’s very popular to use iSCSI NASs, SANs or virtual SANs and important to secure the connection to their volumes. There are a lot of methods for protecting connections to the volumes. Today we will look at one of them – Challenge Handshake Authentication Protocol or CHAP.
Before we start, let me tell you a few words about CHAP. Challenge Handshake Authentication Protocol (CHAP) is a network login protocol that uses a challenge-response mechanism. You can use CHAP authentication to restrict iSCSI access to volumes and snapshots to hosts that supply the correct account name and password (or “secret”) combination. Using CHAP authentication can facilitate management of access controls because it restricts the access through account names and passwords, instead of IP addresses or iSCSI initiator names.
The iSCSI protocol supports two levels of CHAP authentication: initiator authentication and target authentication.
Initiator authentication
The iSCSI initiator (host) is authenticated by the iSCSI target (volume or snapshot). When an initiator tries to connect to a target (manually or through the discovery), it provides a user name and a password to the target. Some implementations refer to the password as a “secret”. The target checks whether the supplied user name matches an entry in the access control record for the volume.
Target authentication
Each iSCSI target presented by the group is authenticated by the iSCSI initiator. When an initiator tries to connect to a target, the target provides a user name and a password to the initiator. The initiator compares the supplied user name and password to information it holds. If they match, based on a hashing algorithm, the initiator can connect to the target. On the group side, target authentication is always enabled, although you can modify the password and account name as needed. The iSCSI initiator settings determine whether the target authentication is enforced.
In my test lab I have a pair of 2-node setups based on the Dell R630 servers. As for the software: the first setup was configured with VMWare ESXi 6.5 and the second one with Windows Server 2016. VSAN from StarWind is being used as an example of the virtual iSCSI storage.
This article will be divided into three parts:
1. Configuring CHAP in ESXi
2. Configuring CHAP in Hyper-V
3. How to configure CHAP in StarWind VSAN
So, let’s start!
Configuring CHAP in ESXi
Working with the ESXi environment and configuring CHAPs, you need to have configured servers that were added to the cluster and already configured iSCSI storage for creating the connection.
Take the following steps on ESXi servers for configuring CHAPs:
1. Launch vSphere Client and select the needed ESXi server.
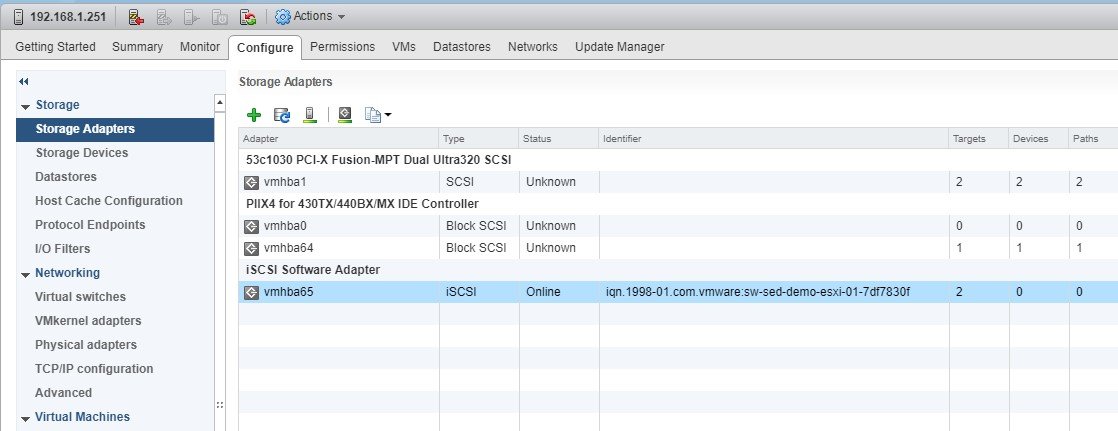
2. Switch to the Configuration tab and select Storage Adapters in the Storage pane.
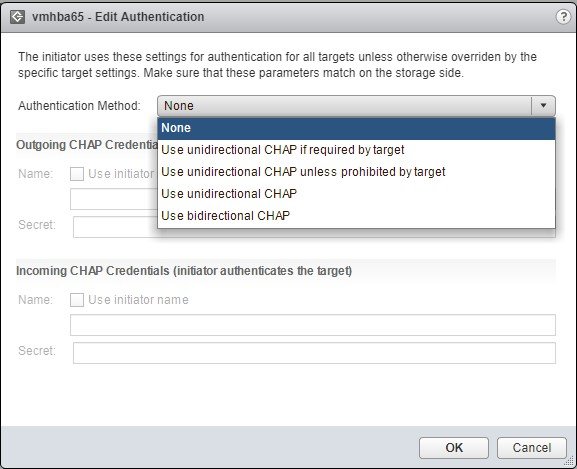
3. Select a storage adapter from the iSCSI Software Adapter list, go to the Properties section and choose the Edit Authentication pane.
4. Select Unidirectional CHAP.
5. Specify the CHAP Name and Secret.
NOTE: If the mutual CHAP was specified earlier, a bidirectional CHAP Name and Secret need to be specified as well.
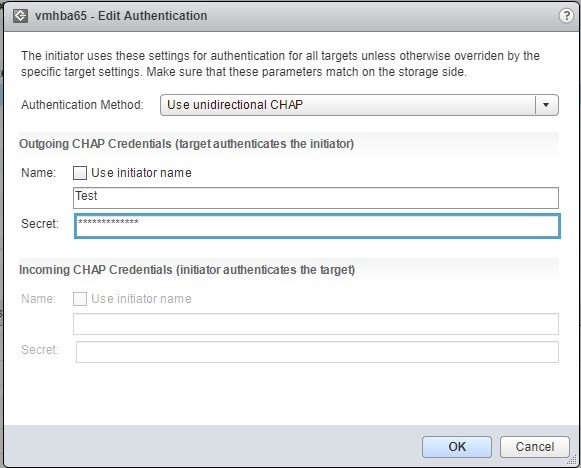
Click OK.
We looked at the configuration steps, and you can see that they are straightforward and easy to take. Now we can proceed to the second part of the article.
Configuring CHAP in Hyper-V
As the Hyper-V environment preparations are pretty like ESXi, you need to configure your servers (hypervisor, network stuff, etc.) and the iSCSI storage.
For configuring CHAPs follow the steps below:
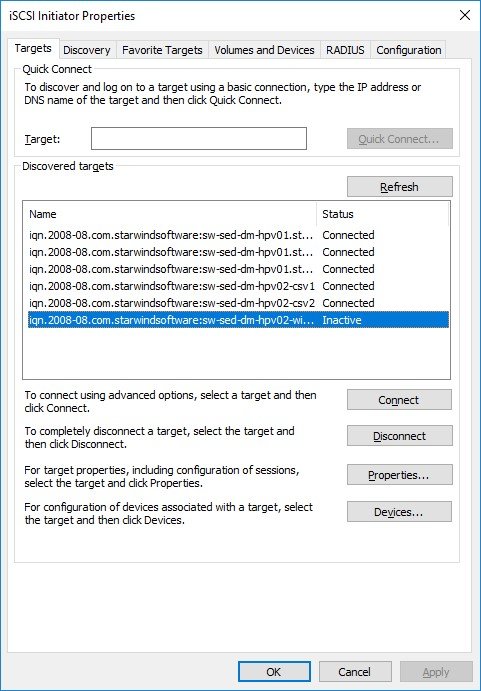
1. Launch iSCSI Initiator: Start->Administrative Tools->iSCSI Initiator.
2. Select the required Target and click Connect.
3. Enable Multi-path and click Advanced.
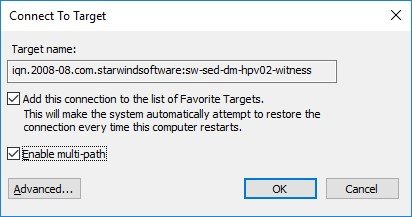
4. Select the Enable CHAP log on checkbox and specify Name and Target secret.
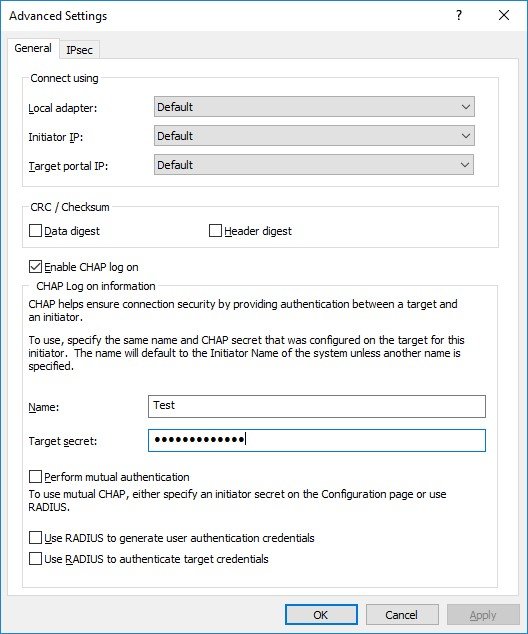
Click OK.
As you can see, there is nothing complicated with the configuration of CHAPs in Hyper-V, and now we can go to the last part of the article and look on the configuration of CHAPs in StarWind VSAN.
Configuring CHAP for an HA Device in StarWind VSAN
Before you start configuring CHAPs for HA Devices in StarWind, you need to prepare the physical storage that will be used for storing StarWind devices, install StarWind VSAN, configure HA Devices and then follow the steps below:
1.Launch StarWind Management Console and connect the first StarWind HA partner node.
2.Right-click the HA device on the CHAP Permissions tab and click Add permission.
3. Select Authentication Type.
4. Specify the device values: CHAP name, Local secret and click OK.
Select the Mutual CHAP authentication checkbox to ensure a higher level of iSCSI security, if needed.
5. Connect to the second HA partner node.
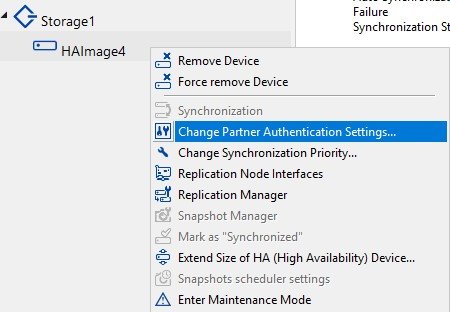
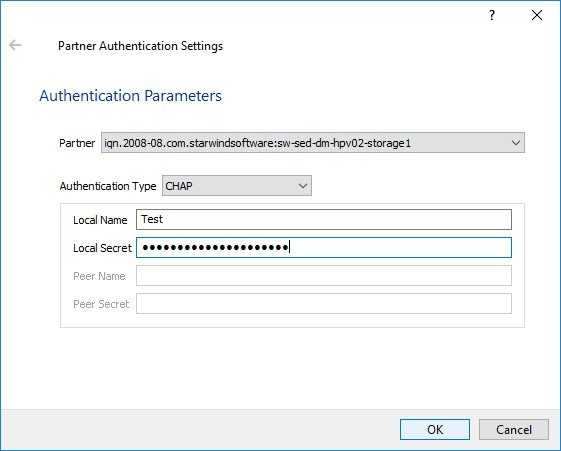
6. Right-click the HA device and click Change Partner Authentication Settings.
NOTE: If you don’t change the partner authentication settings, StarWind will not be able to synchronize HA devices to the partner node after the service restarts.
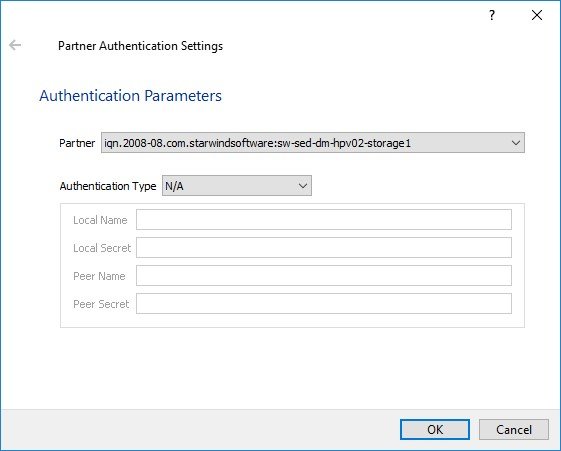
7. Specify CHAP as an authentication type and enter the Local Name and Secret specified for the first server.
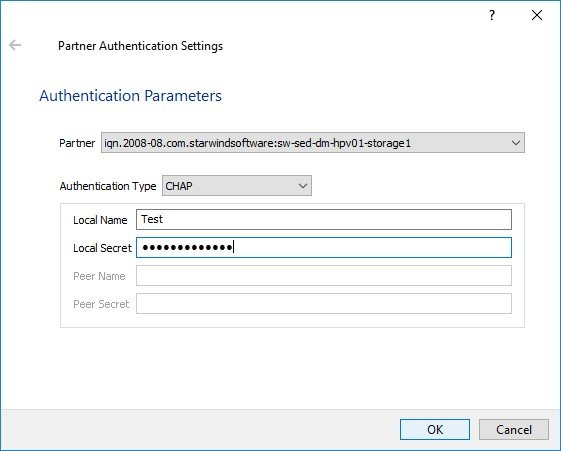
Specify Local Name and Local Secret to connect to the client node.
Conclusion
Well, we’ve looked on how to configure CHAPs in different environments. You could notice that there was nothing complicated with the configuration and now you know how to protect your data. For me, CHAP is the easiest way to protect the connection to the data because of three obvious reasons: easy to configure, easy to manage, suitable for everyone. I hope this article was useful for you and would help you in protecting the data in your environments. Good luck to everyone.
