


Picture this – you are a systems administrator working at a major banking institution. The security team walks into your office and lets you know that a major update needs to be applied to all of the servers within the institution – not a problem for most organizations, but in the case of a bank, you could have hundreds if not thousands of remote and branch offices. Sure, we can write scripts to copy out the update files and even execute them remotely from our head office – but the problem most ROBO scenarios are ever-changing – with new offices being created and others closing down all the time. Keeping track of server names, IP schemes, etc. can be quite a time-consuming process. Naturally, we want the same updates, patches, and fixes to be deployed everywhere, in the same manner, in order to provide consistency – so having this up to date list available when we need it is key to driving success within our environment.
So what does this have to do with PowerShell?
Since PowerShell’s first birth into the enterprise back in 2006, we have seen many third party and windows applications adopt the simple scripting language. With such a wide range of support it may make sense for you to keep this “location” listing stored within a PowerShell module – allowing you to access the information you need about locations and simply “pipe” other commands to its metadata – allowing us to essentially convert our branch locations into PowerShell objects that we can retrieve from a PowerShell module. Sometimes it’s easier to simply see how this works before it makes sense, so let’s take a look at a simple example…
If we think back to our banking example we can imagine that we may have a lot of branch offices – and offices of different types as well; think of a fully-fledged bank in a city, small bank kiosks in grocery stores, etc. Our first goal will be to take all of the information about our banking locations, their location codes, server names, IP schemes, bank types, etc. and build a cmdlet which will allow us to quickly retrieve this information from a PowerShell Module. To do so we will first need some sort of database or file containing this information. Today I’ll simply use a CSV file, however, you could use any type of data store you like (MSSQL, Txt, etc.) so long as you change the code below in order to get the data out of the file. Below you can see my CSV file and how I’ve structured this data – try to envision your ROBO environment within this structure…
| Location ID | Name | Type | City | Province | Country | Domain Controller Name | Domain Controller IP | Transaction Server Name | Transaction Server IP | ESX Host Name | ESX Host IP |
| 100 | Belleville-Main1 | Full | Belleville | Ontario | Canada | 100-DC | 10.100.1.50 | 100-TS | 10.100.1.60 | 100-ESXi01 | 10.100.99.200 |
| 101 | Belleville-Kiosk1 | Kiosk | Belleville | Ontario | Canada | 101-DC | 10.101.1.50 | 101-TS | 10.101.1.60 | 101-ESXi01 | 10.101.99.200 |
| 110 | Toronto-Main1 | Full | Toronto | Ontario | Canada | 110-DC | 10.110.1.50 | 110-TS | 10.110.1.60 | 110-ESXi01 | 10.110.99.200 |
| 111 | Toronto-Main2 | Full | Toronto | Ontario | Canada | 111-DC | 10.111.1.50 | 111-TS | 10.111.1.60 | 111-ESXi01 | 10.111.99.200 |
| 112 | Toronto-Main3 | Full | Toronto | Ontario | Canada | 112-DC | 10.112.1.50 | 112-TS | 10.112.1.60 | 112-ESXi01 | 10.112.99.200 |
| 113 | Toronto-Kiosk1 | Kiosk | Toronto | Ontario | Canada | 113-DC | 10.113.1.50 | 113-TS | 10.113.1.60 | 113-ESXi01 | 10.113.99.200 |
| 114 | Toronto-Kiosk2 | Kiosk | Toronto | Ontario | Canada | 114-DC | 10.114.1.50 | 114-TS | 10.114.1.60 | 114-ESXi01 | 10.114.99.200 |
| 115 | Toronto-Kiosk3 | Kiosk | Toronto | Ontario | Canada | 115-DC | 10.115.1.50 | 115-TS | 10.115.1.60 | 115-ESXi01 | 10.115.99.200 |
| 120 | Ottawa-Main1 | Full | Ottawa | Ontario | Canada | 120-DC | 10.120.1.50 | 120-TS | 10.120.1.60 | 120-ESXi01 | 10.120.99.200 |
| 121 | Ottawa-Kiosk1 | Kiosk | Ottawa | Ontario | Canada | 121-DC | 10.121.1.50 | 121-TS | 10.121.1.60 | 121-ESXi01 | 10.121.99.200 |
| 122 | Ottawa-Kiosk2 | Kiosk | Ottawa | Ontario | Canada | 122-DC | 10.122.1.50 | 122-TS | 10.122.1.60 | 122-ESXi01 | 10.122.99.200 |
| 130 | Montreal-Main1 | Full | Montreal | Quebec | Canada | 130-DC | 10.130.1.50 | 130-TS | 10.130.1.60 | 130-ESXi01 | 10.130.99.200 |
| 131 | Montreal-Main2 | Full | Montreal | Quebec | Canada | 131-DC | 10.131.1.50 | 131-TS | 10.131.1.60 | 131-ESXi01 | 10.131.99.200 |
| 132 | Montreal-Kiosk1 | Kiosk | Montreal | Quebec | Canada | 132-DC | 10.132.1.50 | 132-TS | 10.132.1.60 | 132-ESXi01 | 10.132.99.200 |
| 133 | Montreal-Kiosk2 | Kiosk | Montreal | Quebec | Canada | 133-DC | 10.133.1.50 | 133-TS | 10.133.1.60 | 133-ESXi01 | 10.133.99.200 |
| 140 | Vancouver-Main1 | Full | Vancouver | Britiish Columbia | Canada | 140-DC | 10.140.1.50 | 140-TS | 10.140.1.60 | 140-ESXi01 | 10.140.99.200 |
| 141 | Vancouver-Kiosk1 | Kiosk | Vancouver | Britiish Columbia | Canada | 141-DC | 10.141.1.50 | 141-TS | 10.141.1.60 | 141-ESXi01 | 10.141.99.200 |
| 142 | Vancouver-Kiosk2 | Kiosk | Vancouver | Britiish Columbia | Canada | 142-DC | 10.142.1.50 | 142-TS | 10.142.1.60 | 142-ESXi01 | 10.142.99.200 |
| 150 | NewYork-Main1 | Full | New York | New York | United States | 150-DC | 10.150.1.50 | 150-TS | 10.150.1.60 | 150-ESXi01 | 10.150.99.200 |
| 151 | NewYork-Kiosk1 | Kiosk | New York | New York | United States | 151-DC | 10.151.1.50 | 151-TS | 10.151.1.60 | 151-ESXi01 | 10.151.99.200 |
| 160 | LosAngeles-Main1 | Full | Los Angeles | California | United States | 160-DC | 10.160.1.50 | 160-TS | 10.160.1.60 | 160-ESXi01 | 10.160.99.200 |
| 170 | Dallas-Main1 | Full | Dallas | Texas | United States | 170-DC | 10.170.1.50 | 170-TS | 10.170.1.60 | 170-ESXi01 | 10.170.99.200 |
| 171 | Dallas-Kiosk1 | Kiosk | Dallas | Texas | United States | 171-DC | 10.171.1.50 | 171-TS | 10.171.1.60 | 171-ESXi01 | 10.171.99.200 |
As you can see above I have a lot of metadata built around all of the different bank locations, however this data as it is isn’t that useful to me when trying to run other PowerShell cmdlets against it– so let’s take this data and create PowerShell module around it, with a Get-BranchLocation cmdlet to return the data to us…
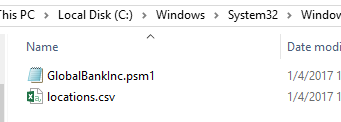
Today we will just be using a simple script module, however, you could use any PowerShell module type you wish – but to get up and running quickly simply create the folder structure shown inside of your C:\Windows\System32\WindowsPowerShell\v1.0\Modules directory, complete with our PSM1 file (the module file) and our locations.csv location listing.
Once the structure is ready it’s time to get started on the code. Our example for today only contains one function (Get-Bank Line 2 through 32) but will give us the foundation for building other types of cmdlets within our module. For simplicity sake, we can see all of the code below – with the line by line explanations below it…
function Get-Bank
{
   param
   (
   [string]$LocationID,
   [string]$Type,
   [string]$City,
   [string]$Province,
   [string]$Country
   )

   $banks = Import-CSV C:\Windows\System32\WindowsPowerShell\v1.0\Modules\GlobalBankInc\locations.csv

   $filter = "1 -eq 1"

   $ParameterList = (Get-Command -Name $MyInvocation.InvocationName).Parameters;

   foreach ($key in $ParameterList.keys)
    {
        $var = Get-Variable -Name $key -ErrorAction SilentlyContinue;
        if($var)
        {

            if ($($var.value) -ne '')
            {
                $filter = $filter + " -and `$_."+$var.name+" -eq `"" + $var.Value+"`""

            }

        }
    }
    $command = '$banks | Where-Object {'+$filter+' }'
    return (Invoke-Expression $command)
}

Export-ModuleMember Get-GlobalBankInfo, Get-Bank
Line 4 through 9 – These are our function/cmdlet parameters – meaning we define these in order to allow our users to pass information into our cmdlet. Here we have 5; LocationID, Type, City, Province, and Country – all matching with column headers in our CSV file. It’s the values of these parameters that can be passed in order to filter our result set.
Line 12 – This simply imports our CSV file of our branch locations into the banks variable.
Line 14 – Here we establish the beginning of our filtering sequence. Since the parameters of this function are not required, meaning we can pass a city value, a province value, a city and province value, or in fact no parameters at all, we have to dynamically build our filter. By beginning our filter with an always true “1 –eq 1” sequence we can make the remaining code much easier to write.
Line 16 – This line is used to gather all of the parameters which were passed to the cmdlet.
Line 18 through 31 – This loops through the passed parameters and if it finds a parameter with a value it is appended to our filter string on Line 26.
Line 32 – This takes the command which we would like to run and appends the filter string to it.
Line 33 – Here we complete our function and return the evaluated expression of our command string.
Line 36 – In order to use our Get-Bank cmdlet outside of this module, we need to ensure we export it as a module member.
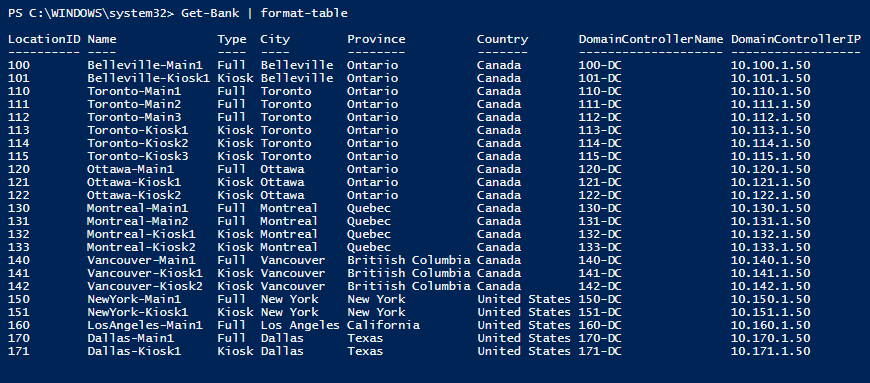
Now if we head into our PowerShell console and run our new cmdlet, you should see some similar output as that below…
So by now, you might be thinking “How can such a small little function help me with managing my branch locations?” Well, take for instance our example of copying out a patch to all of the domain controllers – In order to do this utilizing our new cmdlet we could do the following
Get-Bank | foreach-object { Copy-Item c:\super-patch.exe \\$($_.DomainControllerName\share$\ }
Need to enable ssh on your ESXi hosts which are located only in kiosk branches – no problem
Get-Bank –Type Kiosk | foreach-object { Get-VMHost –Name $($_.ESXHostName) –User username –Password password | Start-VMHostService –HostService ($_ | Get-VMHostService | Where {$_.Key –eq “TSM-SSH”} }
How about restarting all of the Transaction Services located in Quebec?
Get-Bank –Province Quebec | foreach-object { Restart-Computer –ComputerName $($_.TransactionServerName) }
By now we can really see the efficiencies and consistencies that bundling up our remote/branch offices into a cmdlet with a PowerShell module can bring – and this is just with one simple cmdlet. Certainly, this opens the doors for much more. If we take more of the mundane, repetitive tasks we perform at each location, script them into PowerShell, and simply add them into a function/cmdlet into our PowerShell module we not only make our lives easier by automating our work but down the road when things go wrong, we should be left with a more consistent environment – which we all know makes troubleshooting easier! For now, give PowerShell a shot at managing those remote locations for you, stop wasting time looking up hostnames and IPs, and just Get-Scripting!
Related materials:
PowerShell Modules – Why bother?
5 tips to help you explore the world of PowerShell scripting
