Currently, we are speaking a lot about IaC, Infrastructure as Code. That gives you the opportunity, to deploy an infrastructure, from 0, with code, without being a great developer (I assure you, me and the code, it’s not a great love story 🙂). You currently have the following tools to do IaC:
- PowerShell DSC
- Ansible
- Puppet
- Chef
- Azure Resource Manager
- Etc.
- And of course, Terraform
In the following article, I’ll show you how to deploy, from scratch, via terraform (who is an open-source software, provided by the Hashicorp’s company), a test environment on Azure. It will include a VNet, and a Windows Server VM with a public IP.
To start, you need to download and install Terraform:
https://www.terraform.io/downloads.html
You have some code examples here: https://registry.terraform.io/search?q=azure
The documentation for the AzureRM Terraform provider is available here: https://www.terraform.io/docs/providers/azurerm/index.html
Now that Terraform is installed, we will create some files:
- provider.tf that will contain information to connect to our Azure Subscription
- maint.tf that will contain resources that we want to create, and call of modules
- variables.tf that will contain values of resources that we want to create
- a modules folder
- a sub folder 1-network
- a file 1-create_base_network.tf
- a file tf
- a sub folder 2-windows_vm
- a file 1-virtual-machine.tf
- a file tf

I will use modules. The advantage of using modules is the fact that you can reuse modules in other projects later, without redoing the code. Here is my provider.tf file that contains the information to connect to the environment (if you want to specify the version of the Azure RM provider to use, insert version = “= 1.22.0”, otherwise do not put anything to use the latest version):
|
provider "azurerm" { subscription_id = "la souscription où déployer les ressources" client_id = "l'application id qui a les droits pour déployer des ressources" client_secret = "le mot de passe associé" tenant_id = "l'id de votre tenant Azure AD" } |
|
Following is my main.tf that will create a network resource group, create the virtual network by calling the network module and create the Windows VM by calling the windows module:
1 2 3 4 5 6 7 8 9 10 11 12 13 14 15 16 17 18 19 20 21 22 23 24 25 26 27 28 29 30 31 32 33 34 35 36 37 38 39 40 41 42 43 44 45
|
// Create Resource Group resource "azurerm_resource_group" "rg_network" { name = "${var.rg_network}" location = "${var.location}" } // Create Network module "create_network" { source = "./modules/1-network" location = "${azurerm_resource_group.rg_network.location}" rg_network = "${azurerm_resource_group.rg_network.name}" } // Create Windows VM module "windows_vm" { source = "./modules/2-windows_vm" computer_name_Windows = "${var.computer_name_Windows}" rg_network = "${azurerm_resource_group.rg_network.name}" subnet_id = "${module.create_network.mgmt_sub_id}" location = "${azurerm_resource_group.rg_network.location}" vmsize = "${var.vmsize}" os_ms = "${var.os_ms}" admin_username = "${var.admin_username}" admin_password = "${var.admin_password}" } |
|
The variables.tf file will contain values for resources that we will deploy. Here, my password is in clear text, but it is possible to get the password from an Azure Keyvault for example (see next articles):
1 2 3 4 5 6 7 8 9 10 11 12 13 14 15 16 17 18 19 20 21 22 23 24 25 26 27 28 29 30 31 32 33 34 35 36 37 38 39 40 41 42 43 44 45 46 47 48 49 50 51 52 53 54 55 56 57 58 59 60 61 62 63 64 65 66 67 68 69
|
variable "location" { default = "westeurope" } variable "admin_username" { default = "testadmin" } variable "admin_password" { default = "Password1234!" } variable "computer_name_Windows" { default = "WS01" } variable "rg_network" { default = "Network-Test" } variable "vmsize" { description = "VM Size for the Production Environment" type = "map" default = { small = "Standard_DS1_v2" medium = "Standard_D2s_v3" large = "Standard_D4s_v3" extralarge = "Standard_D8s_v3" } } variable "os_ms" { description = "Operating System for Database (MSSQL) on the Production Environment" type = "map" default = { publisher = "MicrosoftWindowsServer" offer = "WindowsServer" sku = "2019-Datacenter" version = "latest" } } |
|
My file 1-create_base_network.tf and variables.tf are as follows. They will deploy a VNet with a LAN subnet. Note that it is possible to add default values in variables, by adding for each variable default = “value”. Here I do not use it, to force the values in the main values.tf file. Also note the use of output to use the values of this file, directly in my main.tf file with the module value:
1 2 3 4 5 6 7 8 9 10 11 12 13 14 15 16 17 18 19 20 21 22 23 24 25 26 27 28 29 30 31
|
resource "azurerm_virtual_network" "mgmt_vnet" { name = "FLOAPP-VNet-Test" location = "${var.location}" resource_group_name = "${var.rg_network}" address_space = ["10.0.0.0/8"] dns_servers = ["8.8.8.8"] } resource "azurerm_subnet" "mgmt_sub_db" { name = "LAN" resource_group_name = "${var.rg_network}" virtual_network_name = "${azurerm_virtual_network.mgmt_vnet.name}" address_prefix = "10.0.0.0/24" } output "mgmt_sub_id" { value = "${azurerm_subnet.mgmt_sub_db.id}" } |
|
|
variable "location" { description = "Location where to deploy resources" } variable "rg_network" { description = "Name of the Resource Group where resources will be deployed" } |
|
Here are the 1-virtual-machine.tf and variables.tf files that will deploy the Windows VM using the previously created VNet:
1 2 3 4 5 6 7 8 9 10 11 12 13 14 15 16 17 18 19 20 21 22 23 24 25 26 27 28 29 30 31 32 33 34 35 36 37 38 39 40 41 42 43 44 45 46 47 48 49 50 51 52 53 54 55 56 57 58 59 60 61 62 63 64 65 66 67 68 69 70 71 72 73 74 75 76 77 78 79 80 81 82 83 84 85 86 87 88
|
resource "azurerm_network_interface" "windows_nic" { name = "${var.computer_name_Windows}-NIC" location = "${var.location}" resource_group_name = "${var.rg_network}" ip_configuration { name = "ipconfig" subnet_id = "${var.subnet_id}" private_ip_address_allocation = "Dynamic" } } resource "azurerm_virtual_machine" "windows_vm" { name = "${var.computer_name_Windows}" location = "${var.location}" resource_group_name = "${var.rg_network}" network_interface_ids = ["${azurerm_network_interface.windows_nic.id}"] vm_size = "${var.vmsize["medium"]}" delete_os_disk_on_termination = true delete_data_disks_on_termination = true storage_image_reference { publisher = "${var.os_ms["publisher"]}" offer = "${var.os_ms["offer"]}" sku = "${var.os_ms["sku"]}" version = "${var.os_ms["version"]}" } storage_os_disk { name = "${var.computer_name_Windows}-OS" caching = "ReadWrite" create_option = "FromImage" managed_disk_type = "Standard_LRS" } os_profile { computer_name = "${var.computer_name_Windows}" admin_username = "${var.admin_username}" admin_password = "${var.admin_password}" } os_profile_windows_config { provision_vm_agent = "true" timezone = "Romance Standard Time" } } output "computer_name_Windows" { value = "${azurerm_virtual_machine.windows_vm.name}" } |
|
1 2 3 4 5 6 7 8 9 10 11 12 13 14 15 16 17 18 19 20 21 22 23 24 25 26 27 28 29 30 31 32 33 34 35 36 37 38 39 40 41 42 43 44 45 46 47 48 49 50 51 52 53 54 55 56 57 58 59 60 61 62 63 64 65 66 67 68 69 70 71 72 73 74 75
|
variable "location" { description = "Location where to deploy resources" } variable "rg_network" { description = "Name of the Resource Group where resources will be deployed" } variable "computer_name_Windows" { description = "Name of the computer" } variable "subnet_id" { description = "Subnet Id where to join the VM" } variable "admin_username" { description = "The username associated with the local administrator account on the virtual machine" } variable "admin_password" { description = "The password associated with the local administrator account on the virtual machine" } variable "vmsize" { description = "VM Size for the Production Environment" type = "map" default = { small = "Standard_DS1_v2" medium = "Standard_D2s_v3" large = "Standard_D4s_v3" extralarge = "Standard_D8s_v3" } } variable "os_ms" { description = "Operating System for Database (MSSQL) on the Production Environment" type = "map" default = { publisher = "MicrosoftWindowsServer" offer = "WindowsServer" sku = "2019-Datacenter" version = "latest" } } |
|
Save everything. It is now time to execute the commands for the deployment of our environment. Go to the main folder and do a terraform init to initialize the project:

Execute after terraform plan to see what it will be do in the subscription. If you have errors, it’ll be here. Here, it will add 5 resources:
- A resource group
- A VNet
- A subnet
- A NIC
- A Windows VM
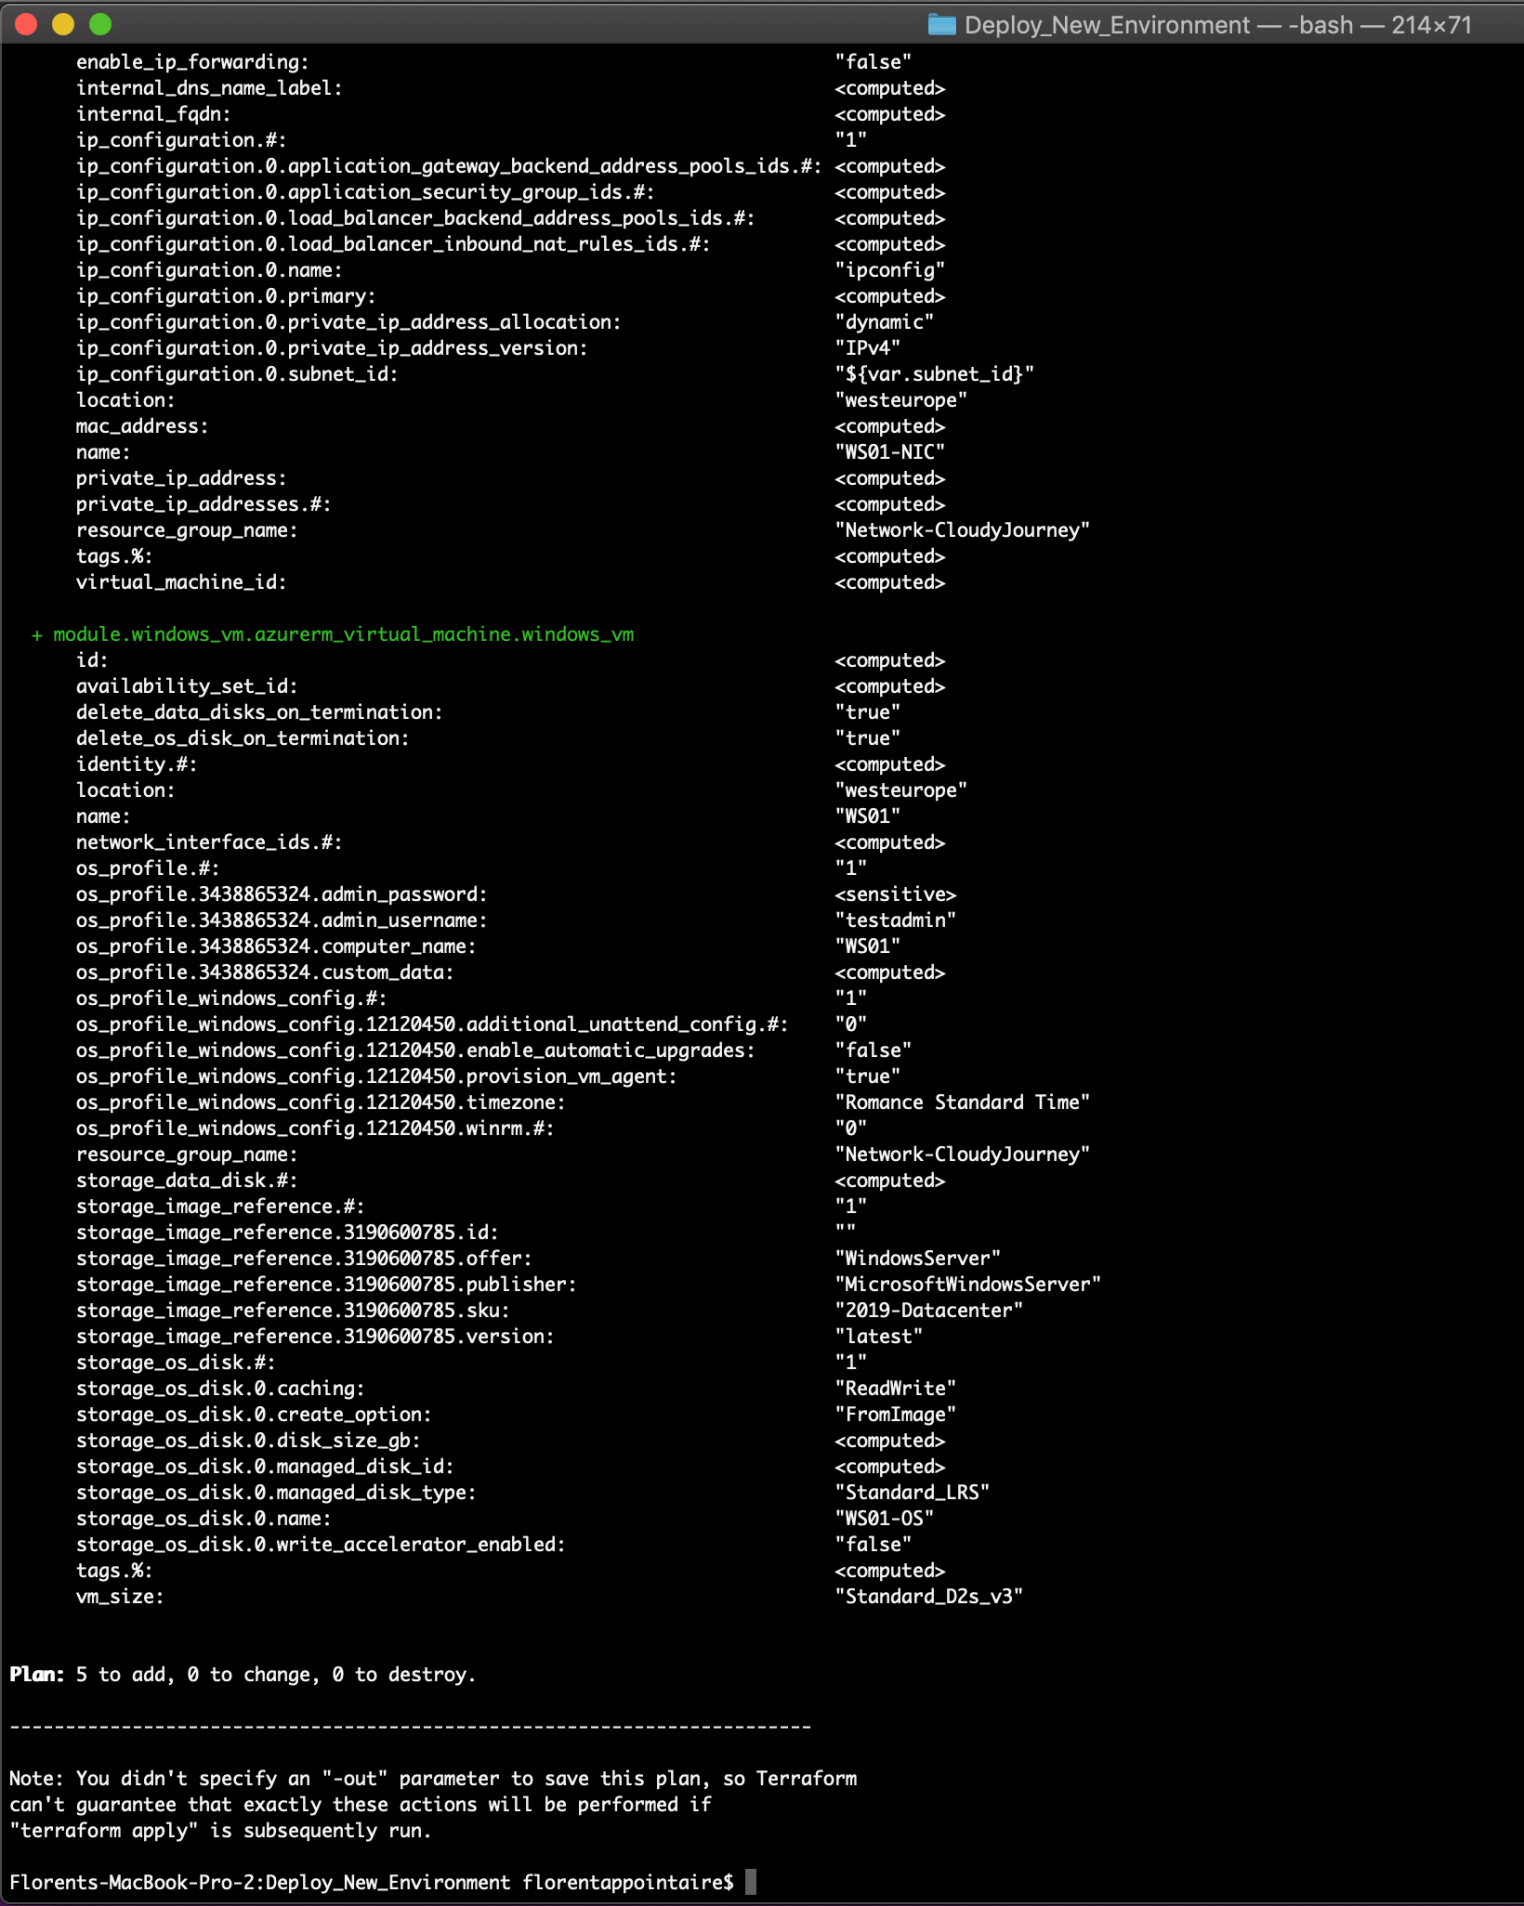
To start the deployment, do terraform apply and confirm the deployment by clicking on yes:

After few minutes, resources have been deployed:

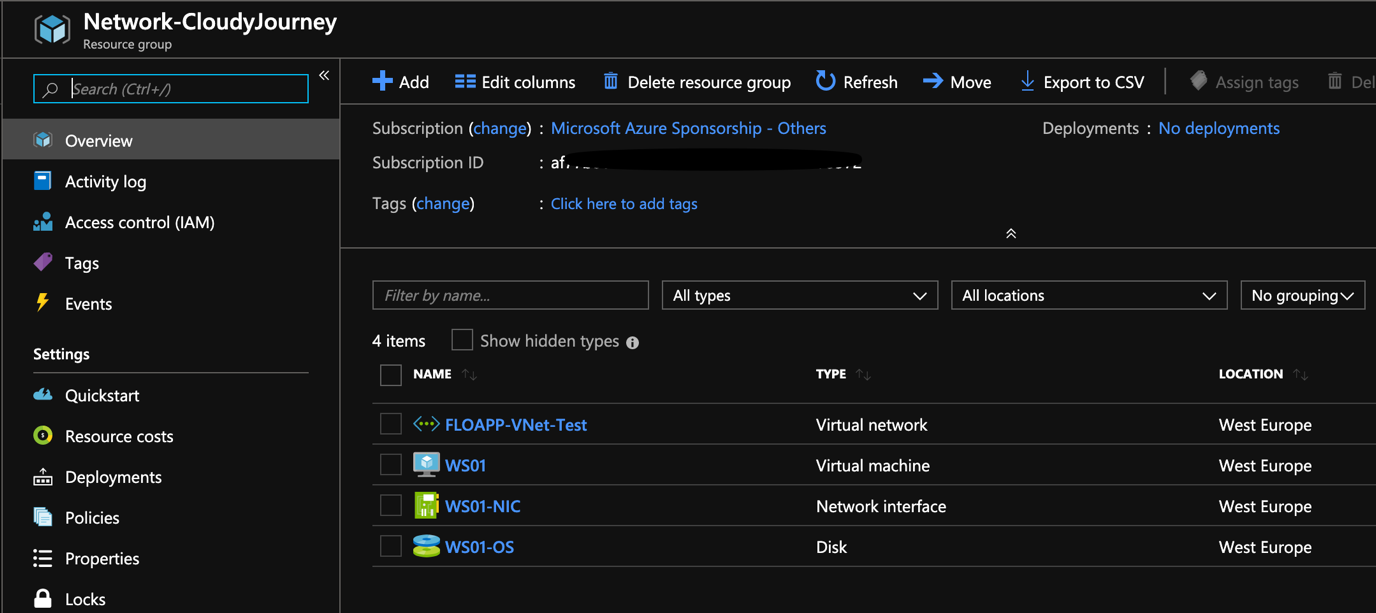
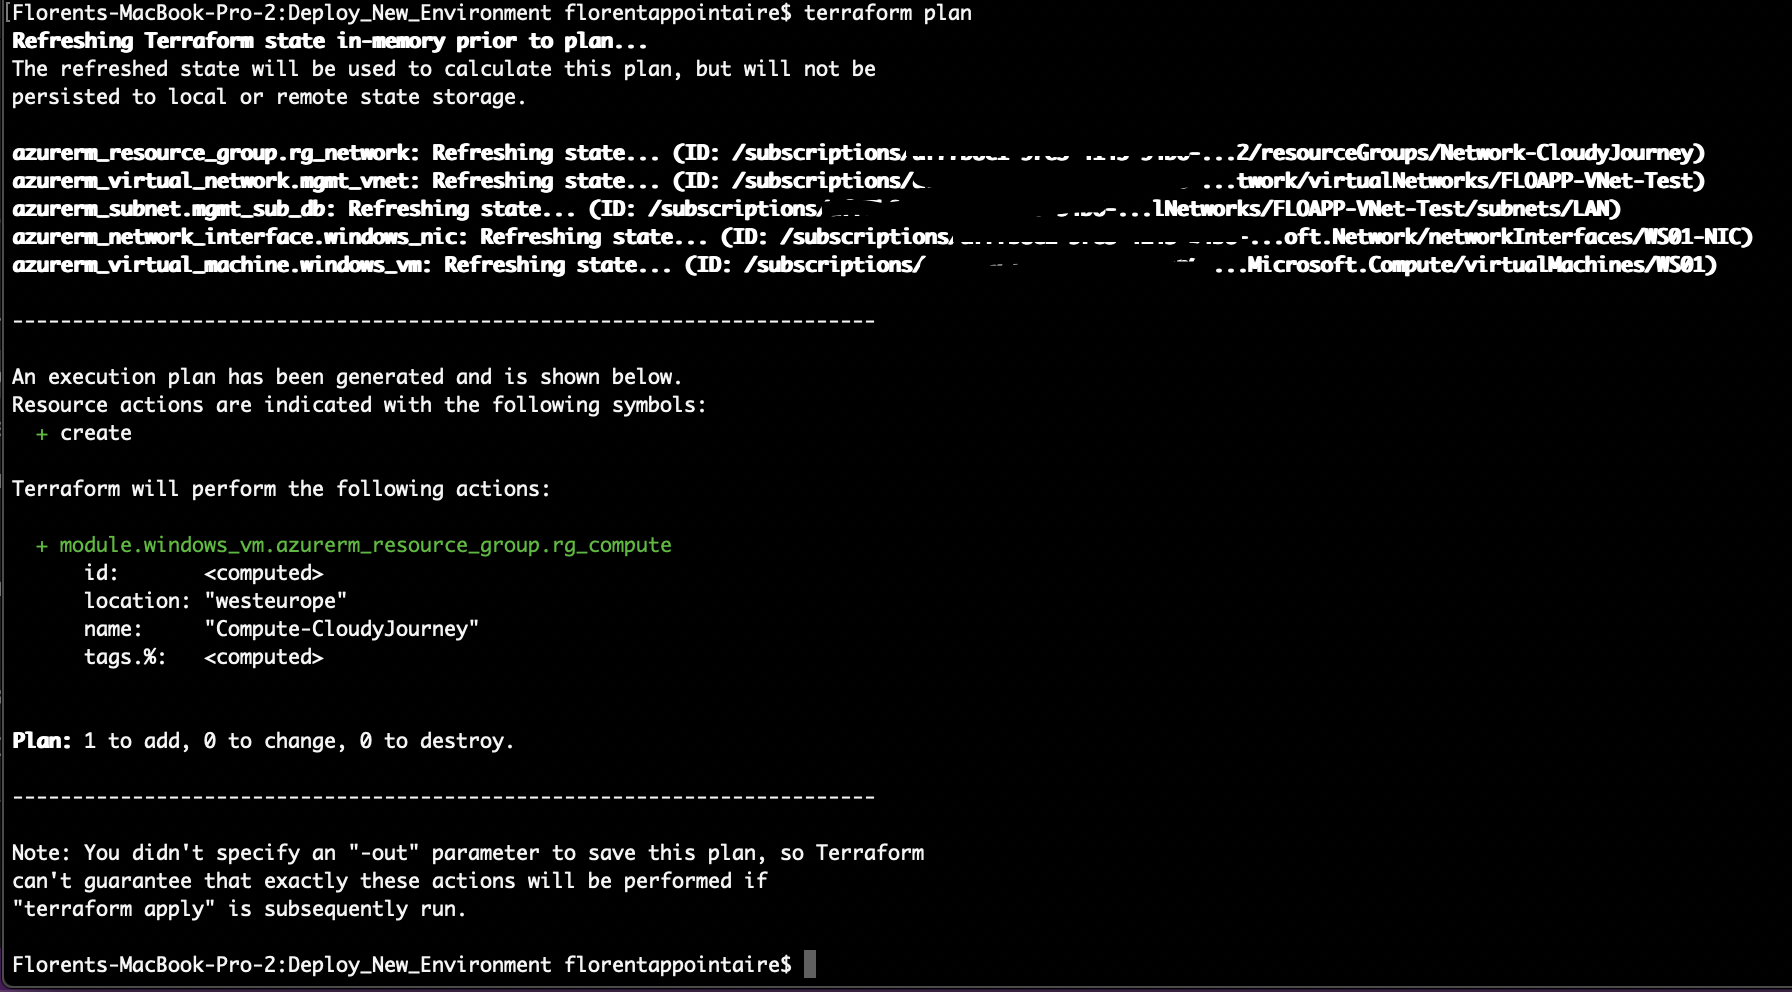
The advantage of Terraform is that you can only change what you need. For example, if I add in my 1-virtual-machine.tf file:
|
resource "azurerm_resource_group" "rg_compute" { name = "Compute-CloudyJourney" location = "${var.location}" } |
|
And that I do terraform plan, it will compare what has been done in the past (this is stored in a terraform.tfstate file) with what we have to do now. In our case, he will add a resource. It’s the same with the modification / deletion:
If you want to delete that you deployed, execute the command terraform destroy:
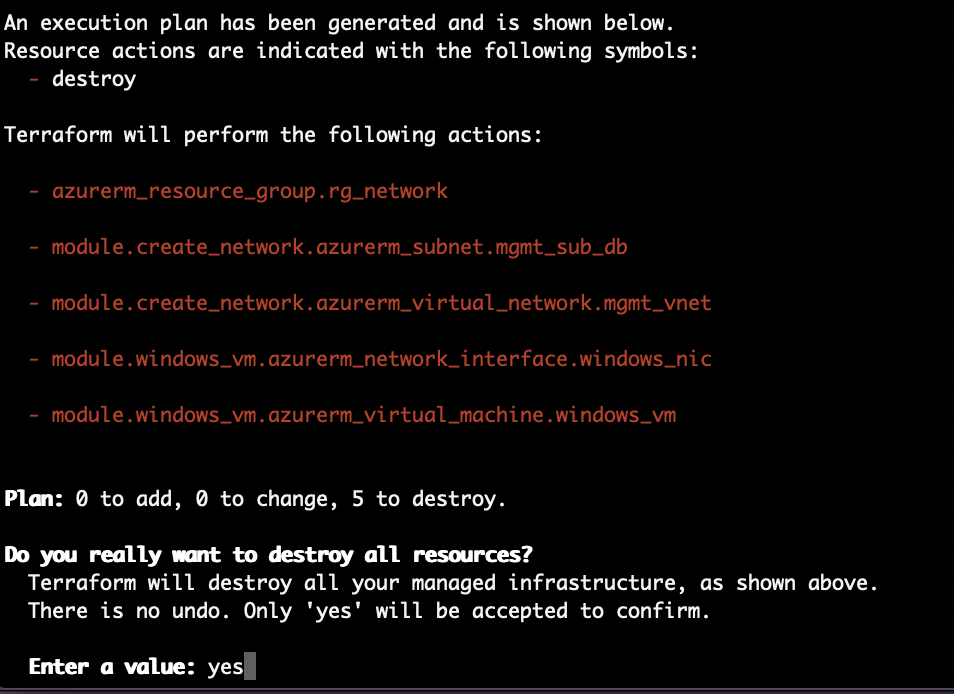
After few minutes, everything has been deleted:

All of this code is available here: https://github.com/Flodu31/Terraform/tree/master/Deploy_New_Environment
Here’s a simple example of deploying with Terraform. Of course, it is possible to go much further. In future articles, I’ll talk about recovering sensitive values in a keyvault and also running commands directly into a VM after the deployment.
Related materials: