


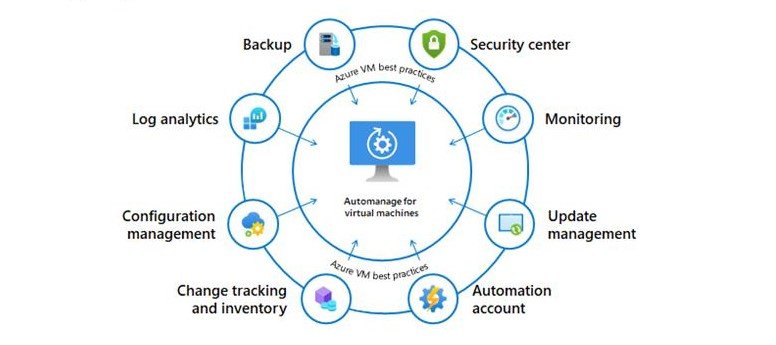
Azure Automanage is a new feature, in preview, that provide you a full automated solution to:
- Backup your workloads
- Update your VMs
- Logs changes
- Etc.
The full documentation is available here: Azure Automanage for virtual machines | Microsoft Docs
Before starting, make sure that the VM that you would like to manage are in a supported region. Otherwise, you will have an error message:

Now, search for Automanage in the portal. Select VMs that you want to add. In this demo, I’ll do the work, with a Windows Server 2019 and a Ubuntu VM:

Now, you can tell if it’s a Dev environment or a Prod environment. Depending of your choice, you will have some settings that will change, like backup retention:

In the advanced part, you can use an existing automanage account or create a new one. If you create a new one, be sure to be Owner of the RG because you need to give some rights to service accounts:

VM are currently onboarding:

After few minutes, VMs are onboarded:

If you check your subscription, you will see a new resource group, with some resources, with the subscription id in the name. You will have a new Log Analytics workspace with some solutions, an Azure Automation account and a backup vault:

You can see that VMs have been onboarded in the backup vault:

With an automanage policy:

If you go on the Automation account, in the Update Management part, you will see your 2 VMs, with the compliance status. For example here, 2 security updates are missing on my Windows VM:

Now, on your Log Analytics workspace, you can see solutions that have been deployed:

I can see my 2 VMs on the Updates solution. I have same information as in the Update Management in Azure Automation;

And changes on my Windows VM:


As you can see, it is very easy to onboard a VM, on this tool, to keep it in your standard, like all other VMs.
We will now wait for the price of this tool when it will be in GA 😊
