
Broadcom’s VMware licensing shuffle has pushed a lot of small and mid-sized businesses to look for another virtualization platform.
XCP-ng is one of the alternatives that’s picked up serious momentum. It moves fast, ships with a solid feature list, and that’s why a lot of us have been kicking the tires on it. In this article, we walk through building a highly available 2-node XCP-ng cluster with StarWind VSAN.
Why StarWind over XOSTORE?
Before we get into the build, a fair question: why StarWind? XCP-ng ships with its own software-defined storage layer called XOSTORE, and it’s a capable product. The catch is that XOSTORE needs at least three nodes to form a storage cluster, which is more than a lot of SMB and ROBO shops actually need.
There’s another wrinkle. Small shops often don’t have a dedicated crew of storage admins, and a lot of XOSTORE setup is still CLI-driven. That’s a real barrier for businesses without a full-time virtualization team.
So we’ll use StarWind Virtual SAN to put together a minimalist XCP-ng cluster instead.
Cluster architecture
Here’s what the final cluster looks like:
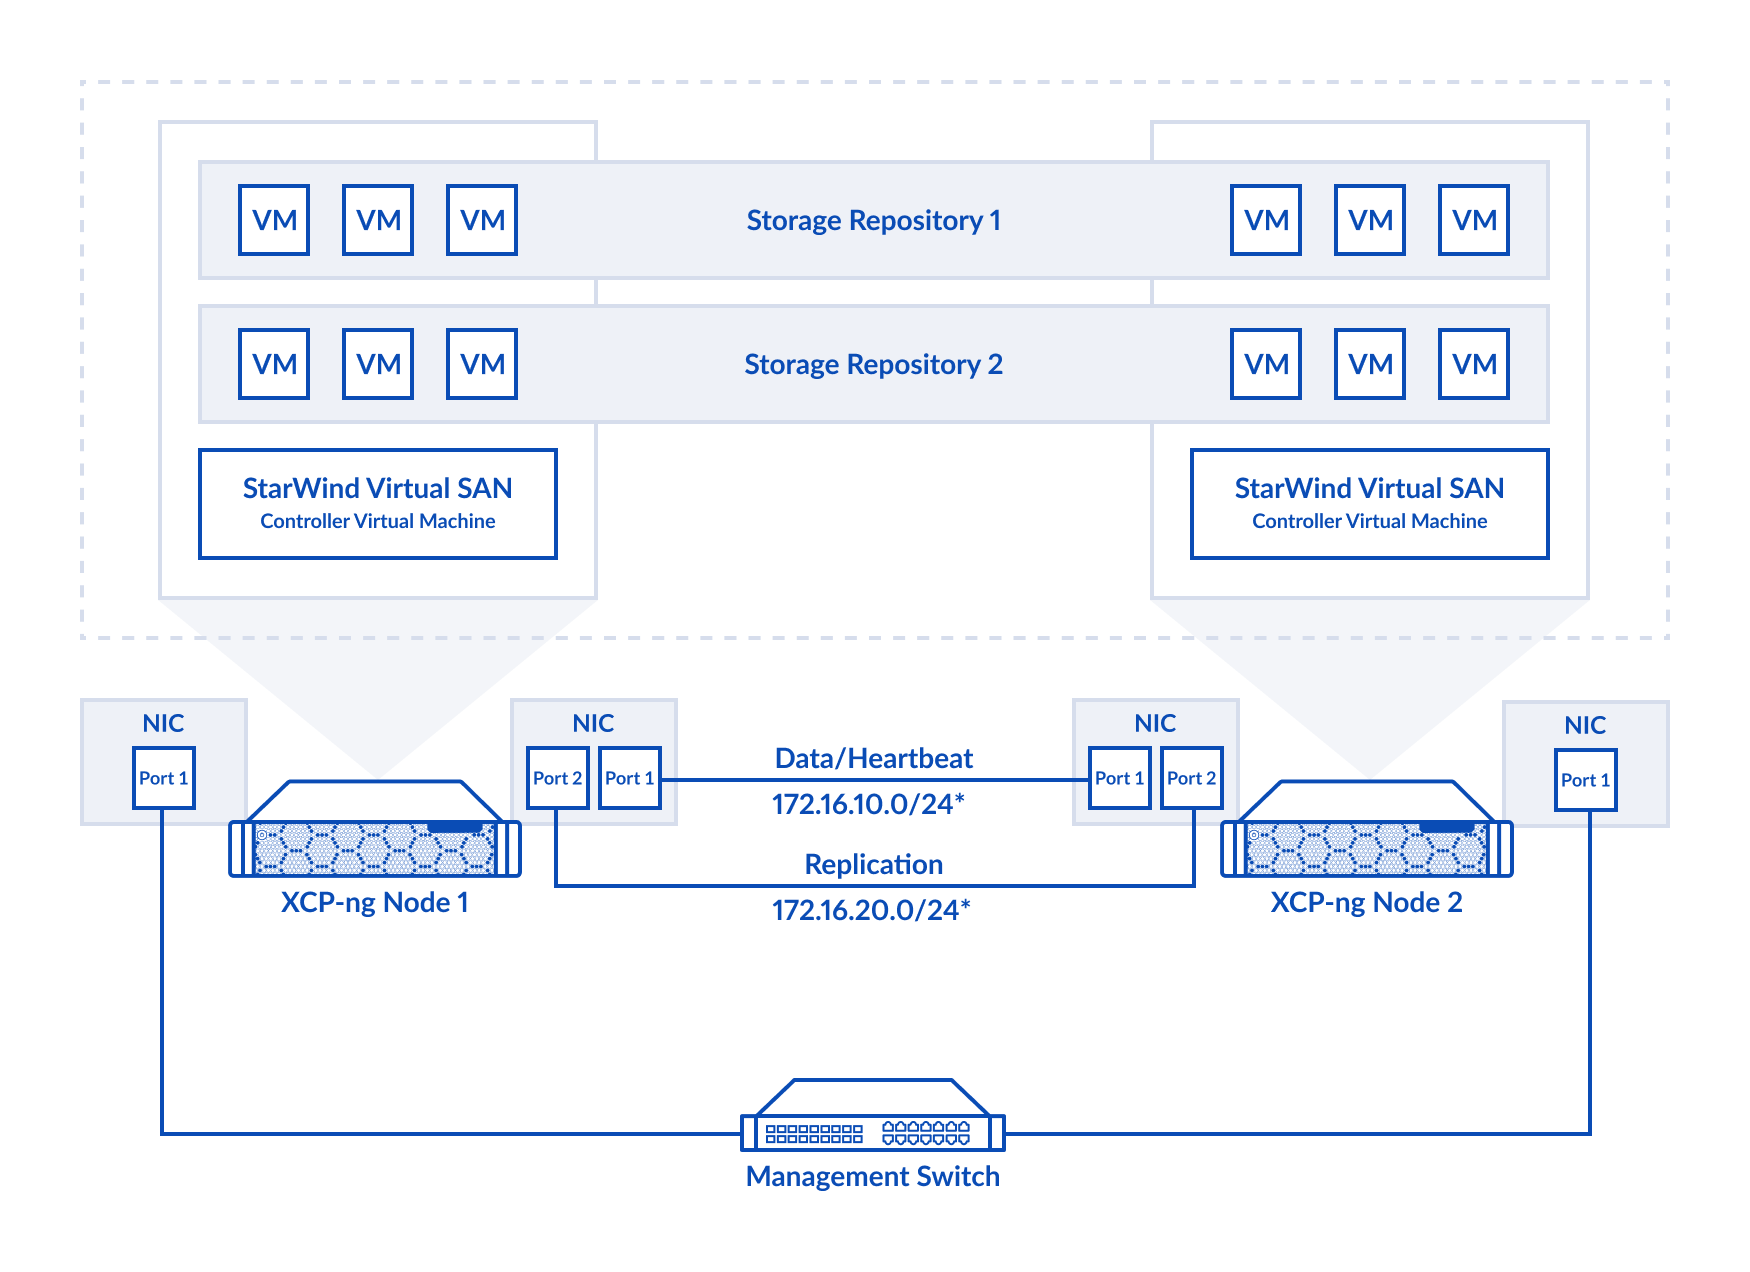
Deploy XCP-ng
The first step is to deploy the XCP-ng platform. This process is simple and straightforward. The next step is to deploy Xen Orchestra Appliance (XOA). This is also a very simple process. Today, we will not focus on these installations. Instead, here is the link for XCP-ng deployment and the link for XOA.
Create an XCP-ng cluster
1. Once XOA is deployed on one of the cluster nodes, we need to add the partner node to it. To do this, we log in to XOA and navigate to Settings->Servers. There, we put information about the IP address and login credentials:

During this process, an error message may appear. Click it and accept the self-signed certificate.
2. The next step is to add the newly added server to the pool. Navigate to Home -> Pools, where you will see individual pools, one for each host added to XOA. Select the pool with XOA installed and click the Add Host button on the right-hand side.
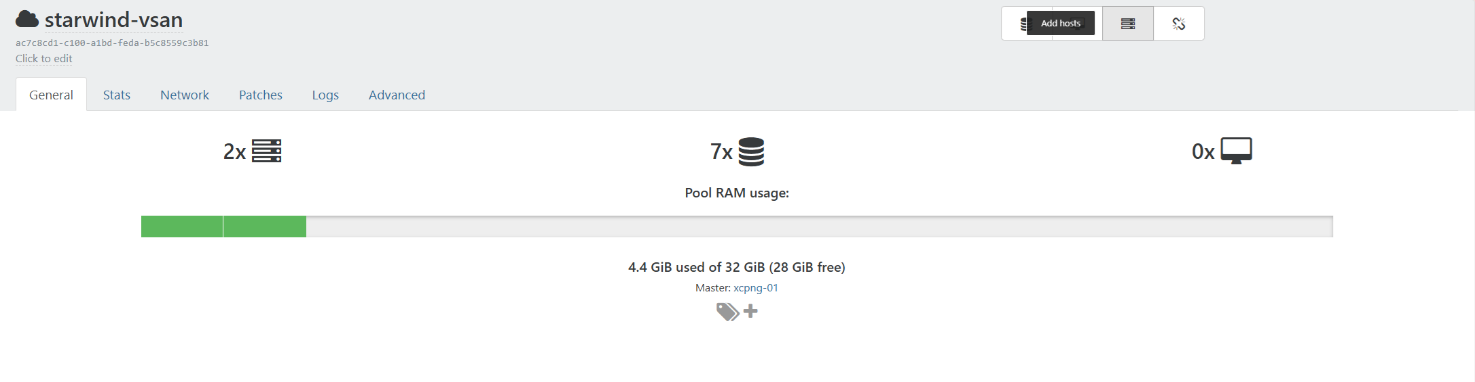
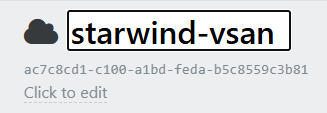
3. After this, you can rename the pool by clicking its name at the top and entering the desired cluster name.
4. Now we need to enable multipath on all hosts before deploying StarWind VSAN. To do this, navigate to Home -> Hosts and select the recently added node. Next, go to the Advanced tab and, within the host information section, click the Disabled button to enable multipath.
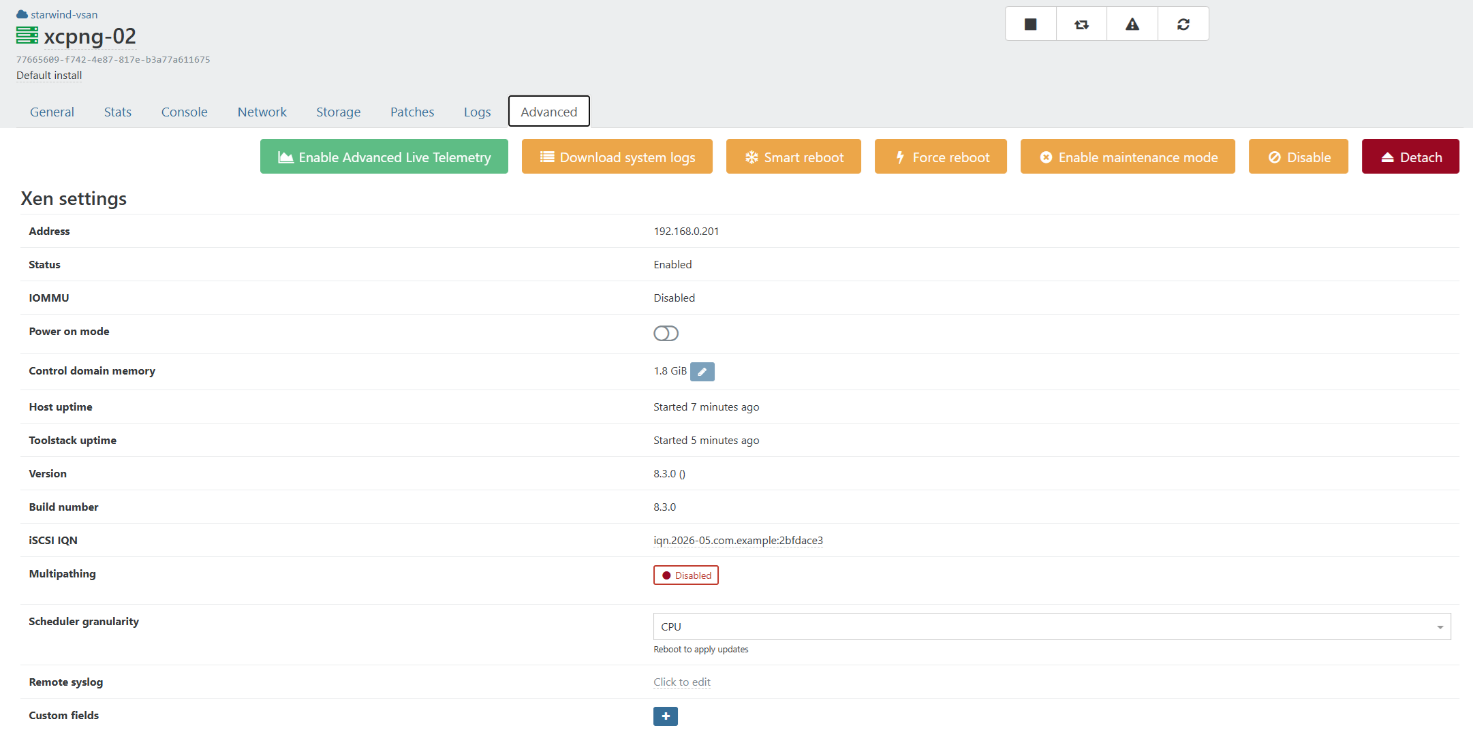
You will be prompted with a warning message concerning the existing storage repositories. Since the recently added node(s) do not host the XOA appliance, you can click OK to continue.
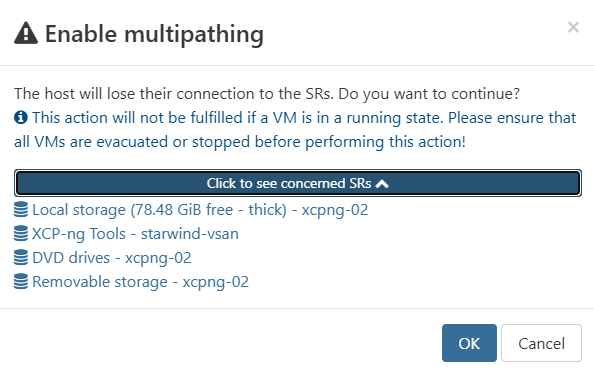
Now we can repeat these steps on the Master node.
IMPORTANT NOTE: Since the master node is running the XOA appliance, migrate the XOA VM off to another pool member first – then enable multipath.
5. The next step is to configure the storage network for the future StarWind VSAN deployment. Go to Home -> Hosts, select the first node, and open the Network tab.
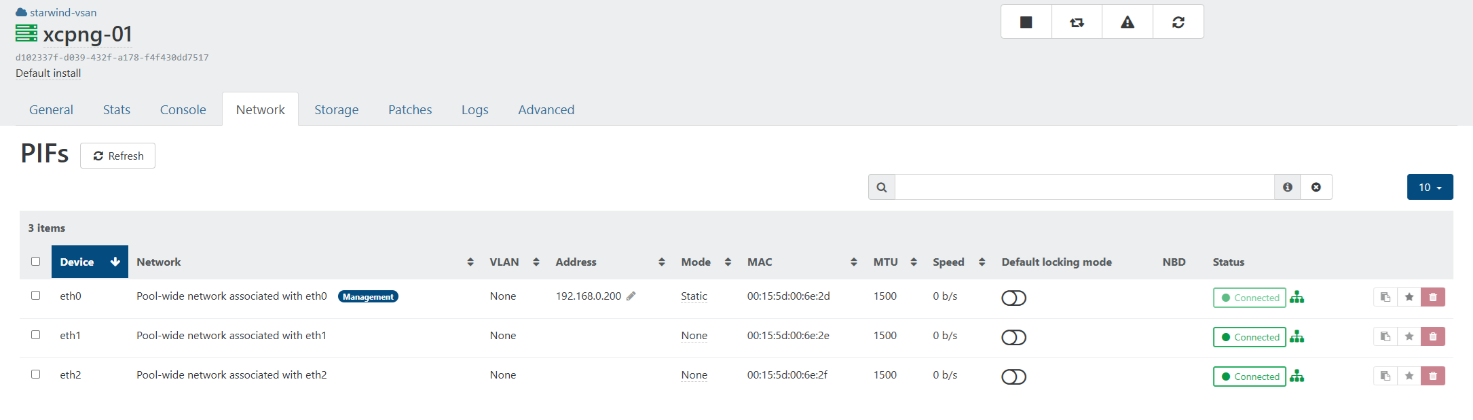
Identify the networks that you want to use for replication and iSCSI traffic. Click None in the Mode column for the network that you want to use for iSCSI/StarWind heartbeat traffic and select Static. You will be prompted with a wizard for specifying the IP address:
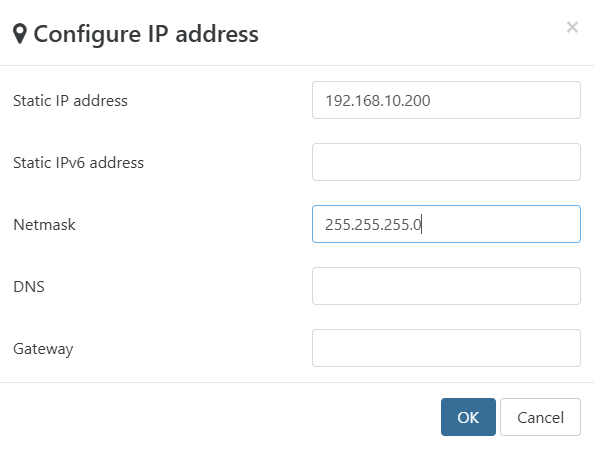
Next, navigate to Home -> Pools -> Select Pool -> Network. Here, you can rename the network interfaces and set the required MTU size.
Repeat all the above steps for all network interfaces that will be used for replication and ISCSI traffic.
6. The next step is to deploy the StarWind VSAN Controller VM (CVM).
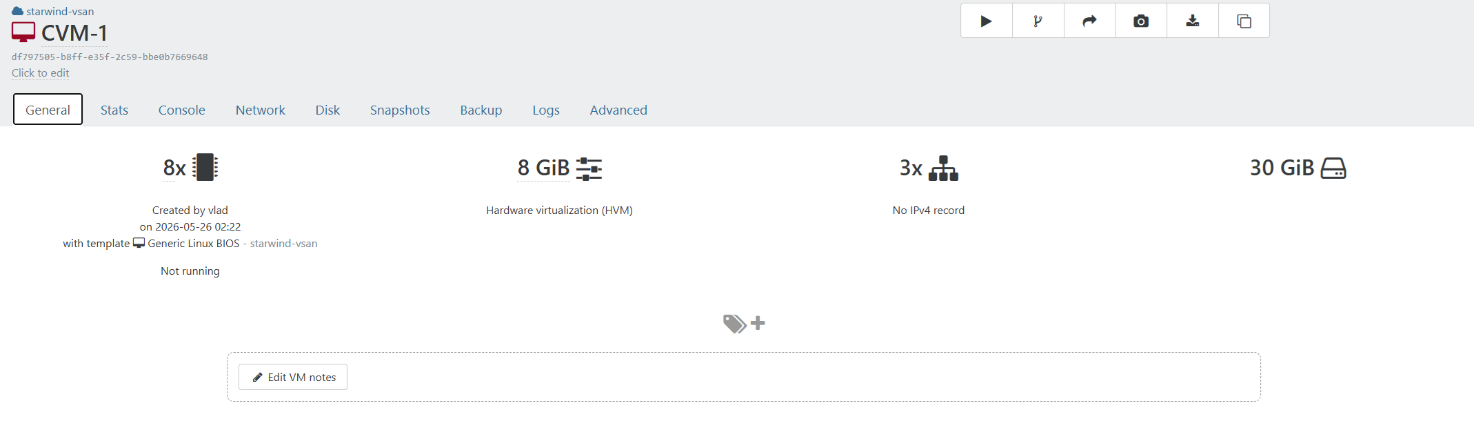
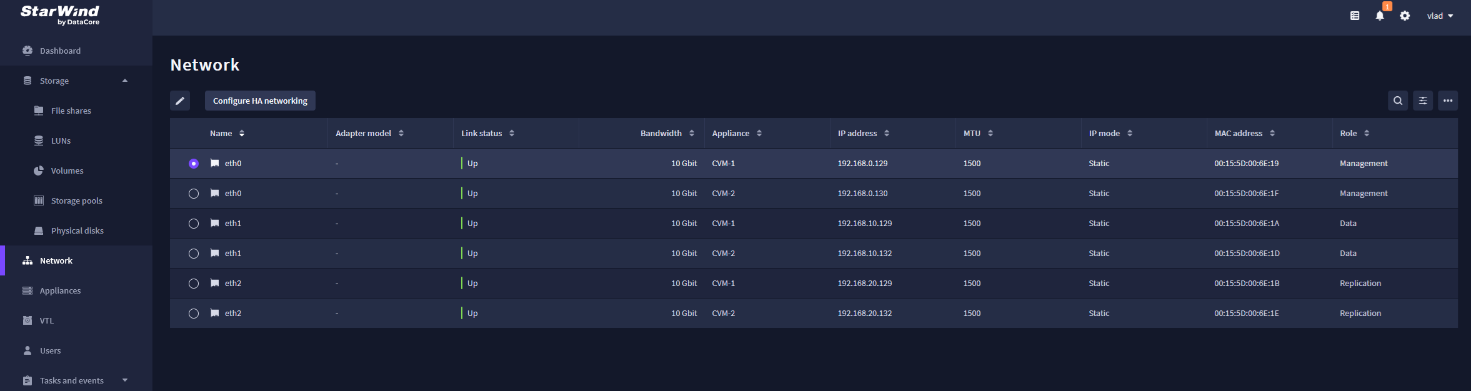
7. After powering on the CVM and logging in to its web interface, configure the HA networking.
Go to the Networking tab and click Configure HA networking.
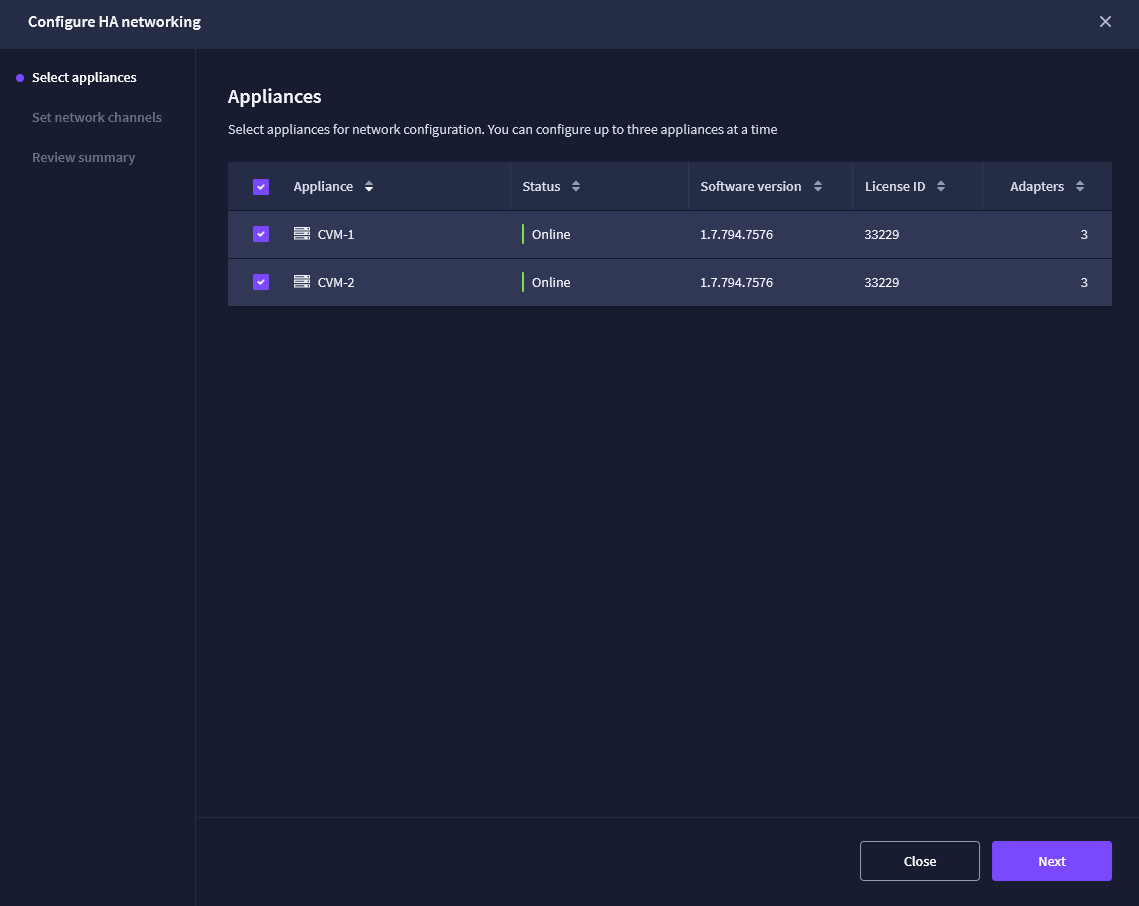
Next, select the StarWind appliances that will be used for replication.
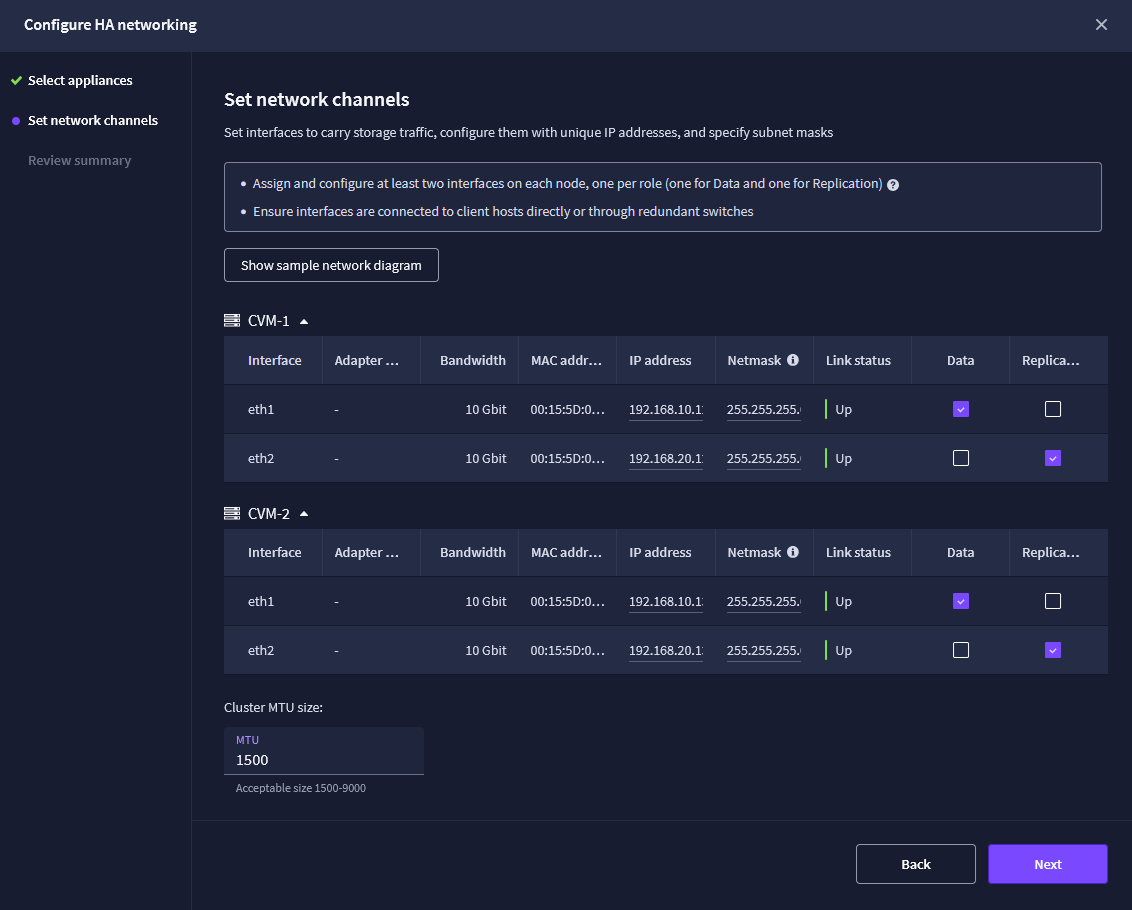
Next, select your data and replication networks and assign IP addresses.
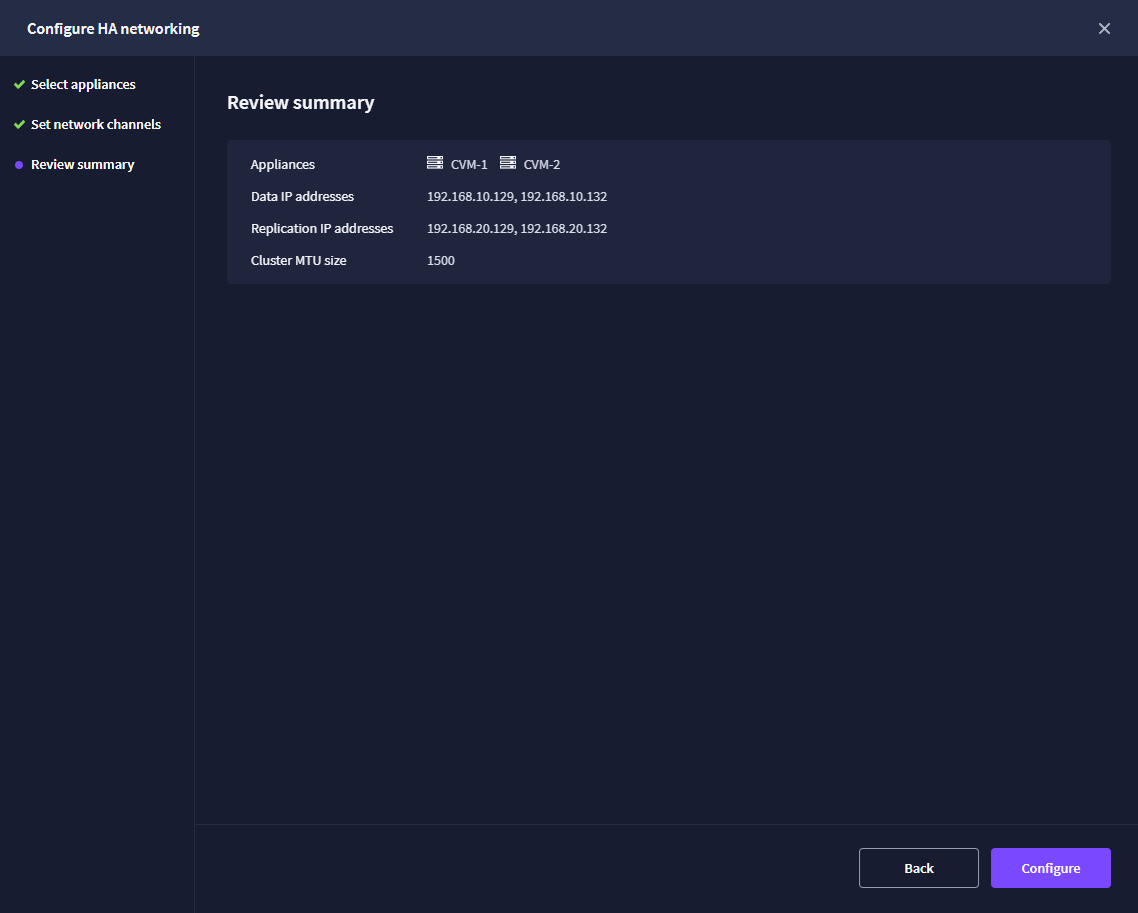
Review the configuration and click Configure if everything is correct.
8. The next step is to create a local storage pool.
First, go to the Storage tab, navigate to Storage Pools, and add a new storage pool.
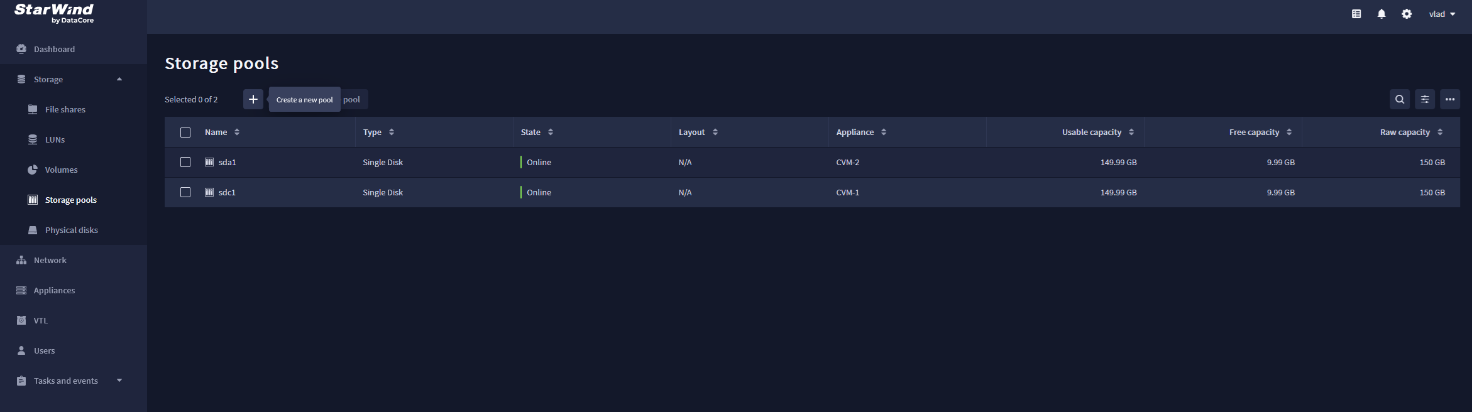
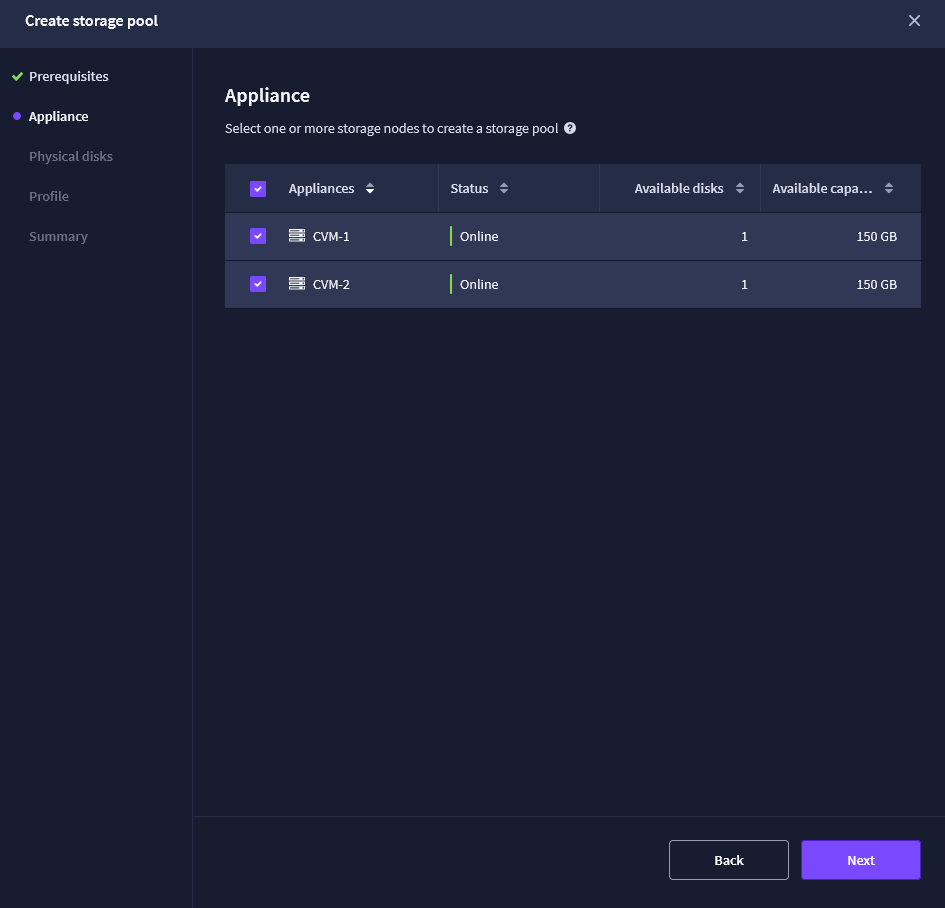
Select the StarWind appliances where you want to create the local storage pools.
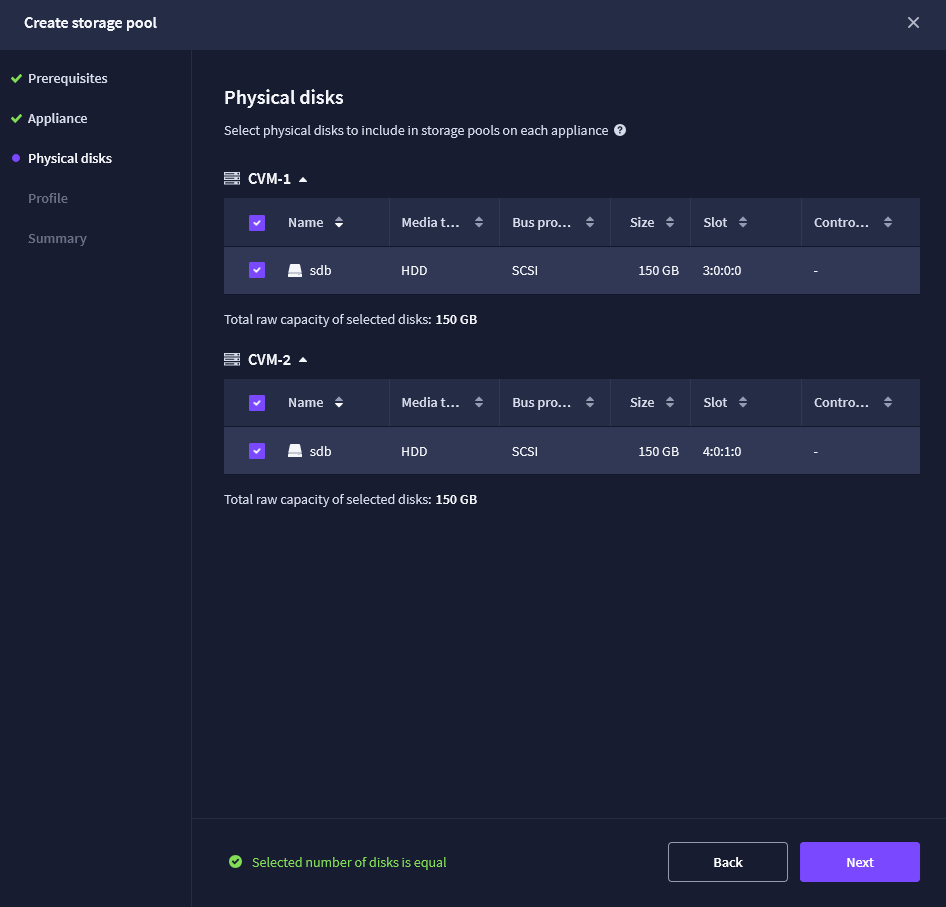
Select the local physical storage you want to use:
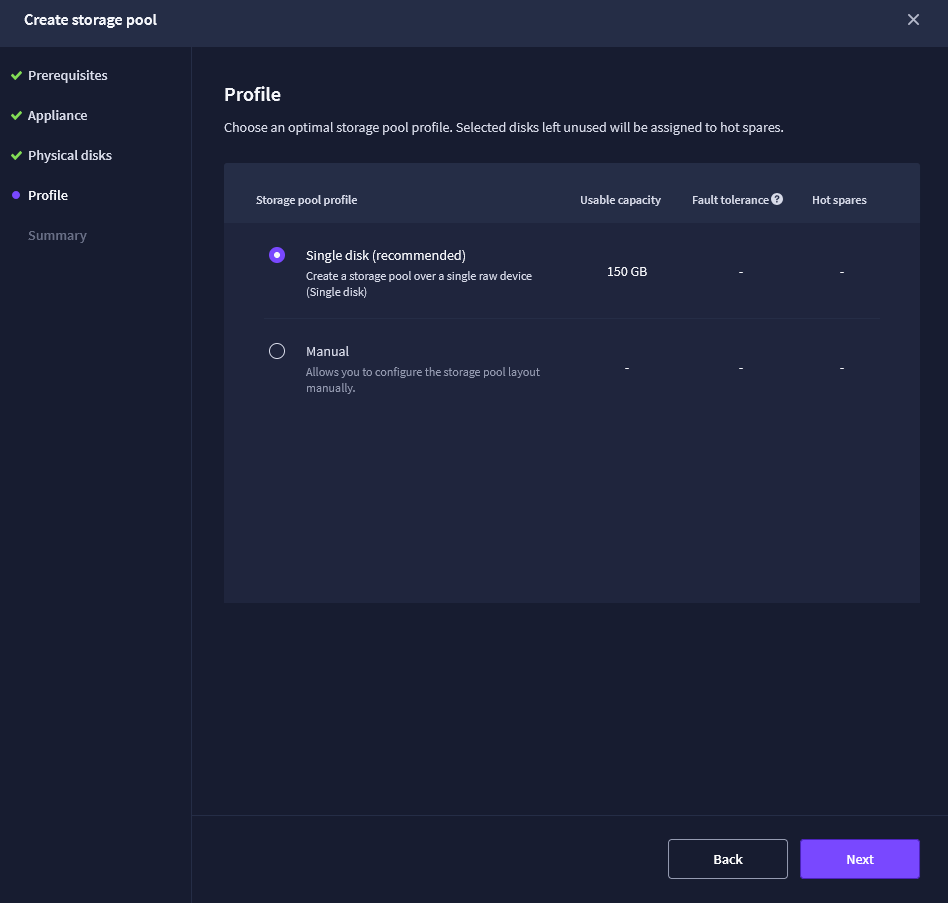
Select the storage profile:
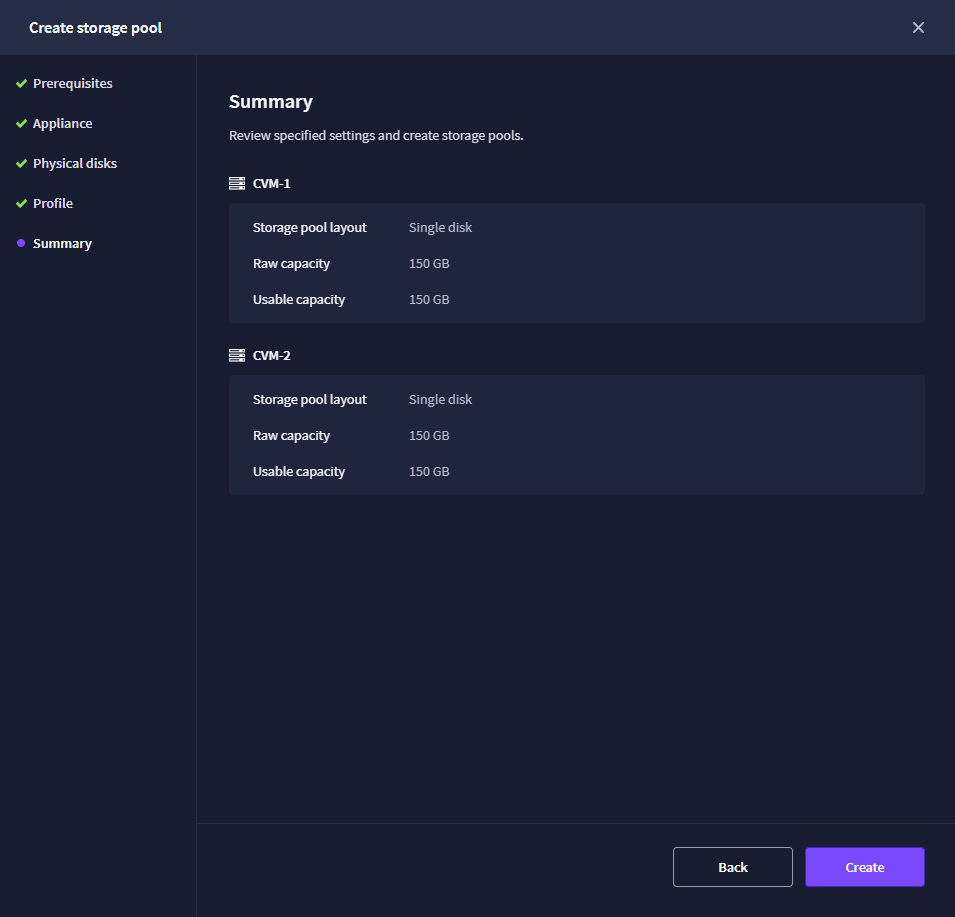
Review the configuration and click Create if everything is correct.
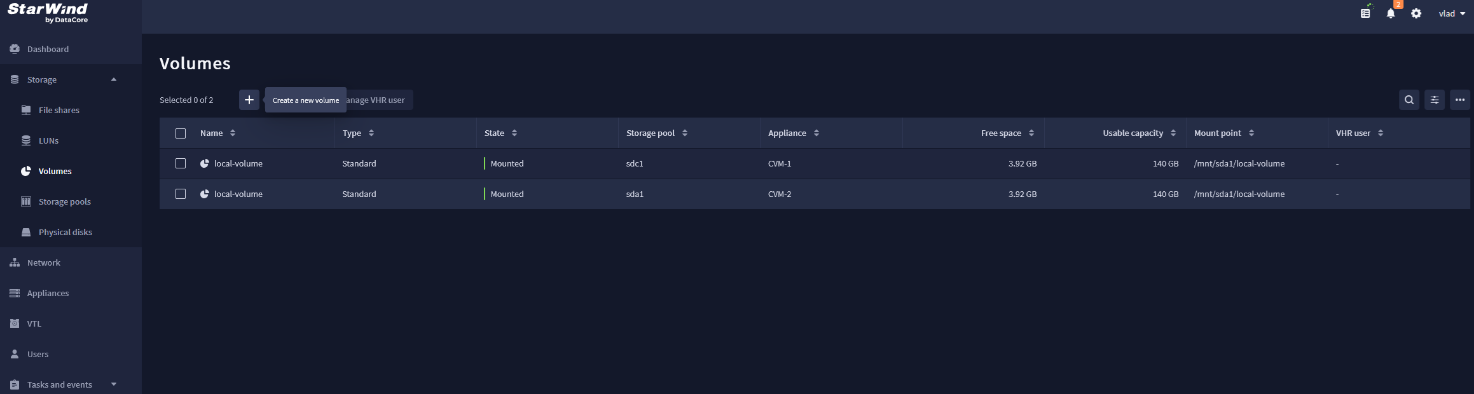
9. Now, let’s create a local volume.
Navigate to the Volumes tab and add a new volume.
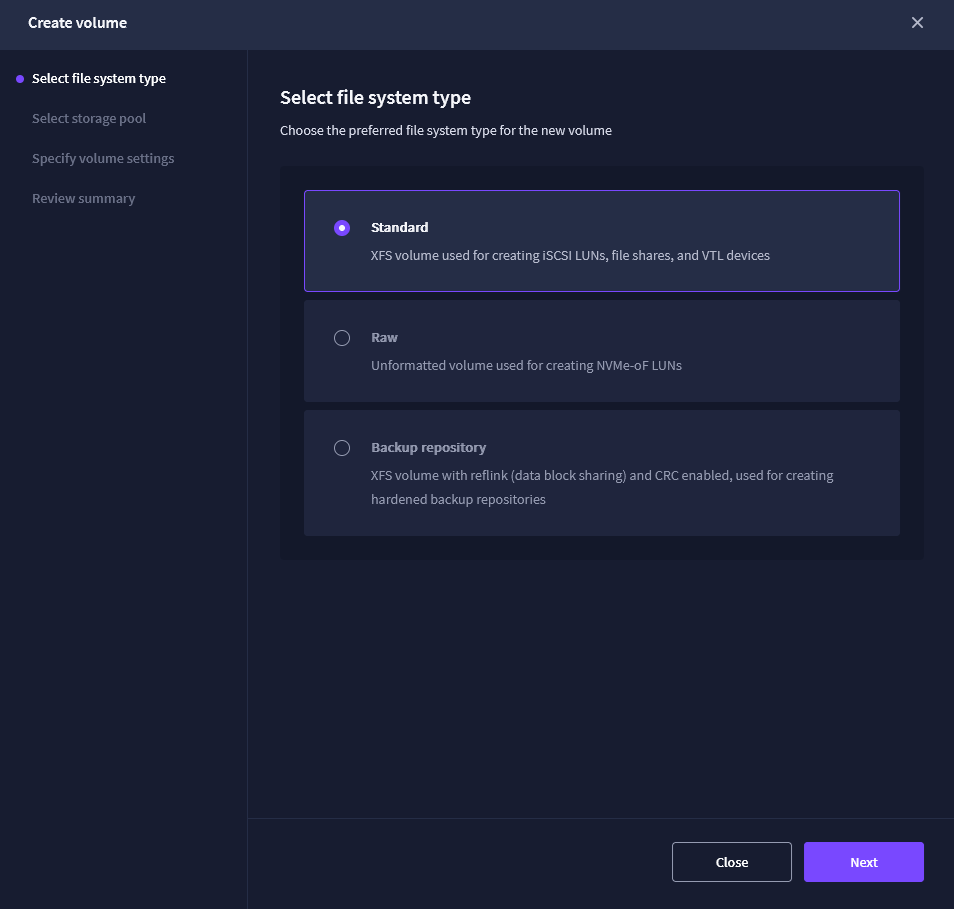
Select the desired file system type.
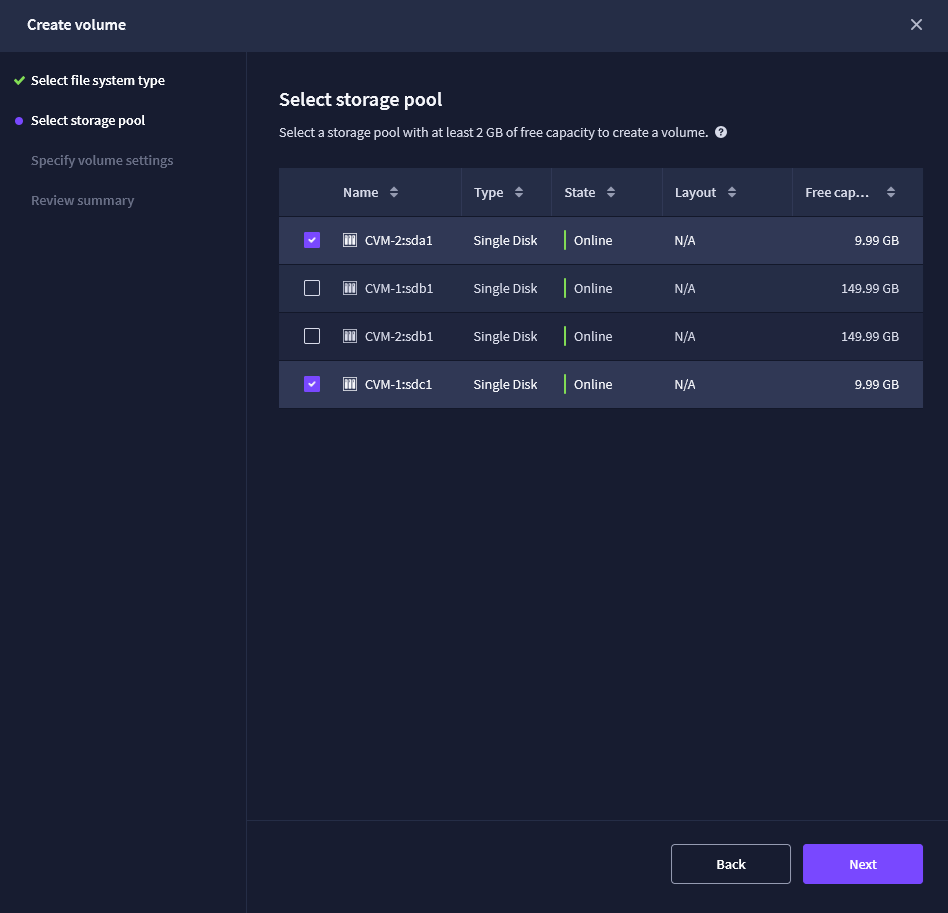
Select the local storage pool.
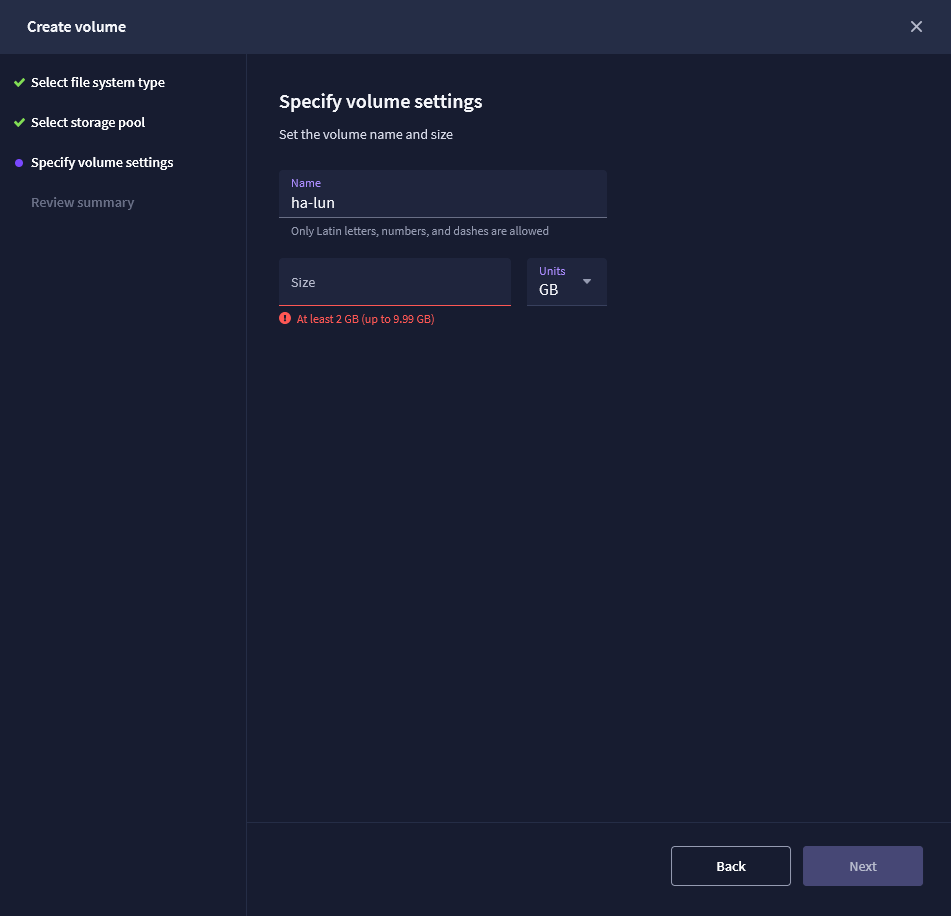
Assign the volume name and size.
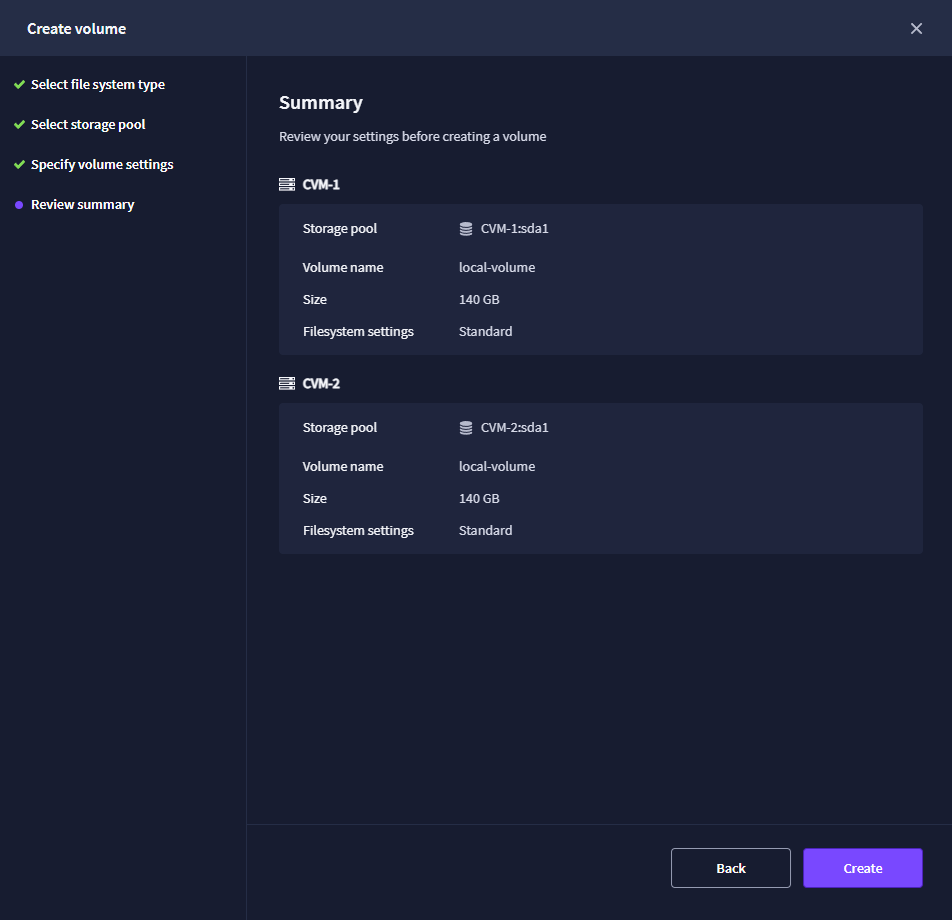
Review the configuration and click Create if everything is correct.
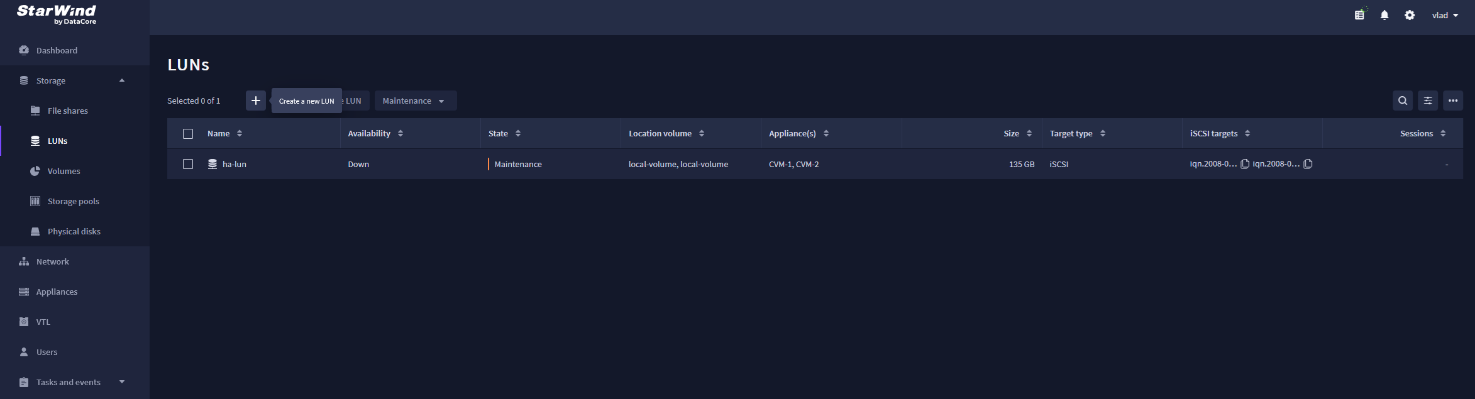
10. After creating the local volume, create the HA LUN.
Navigate to the LUNs tab and add a new LUN.
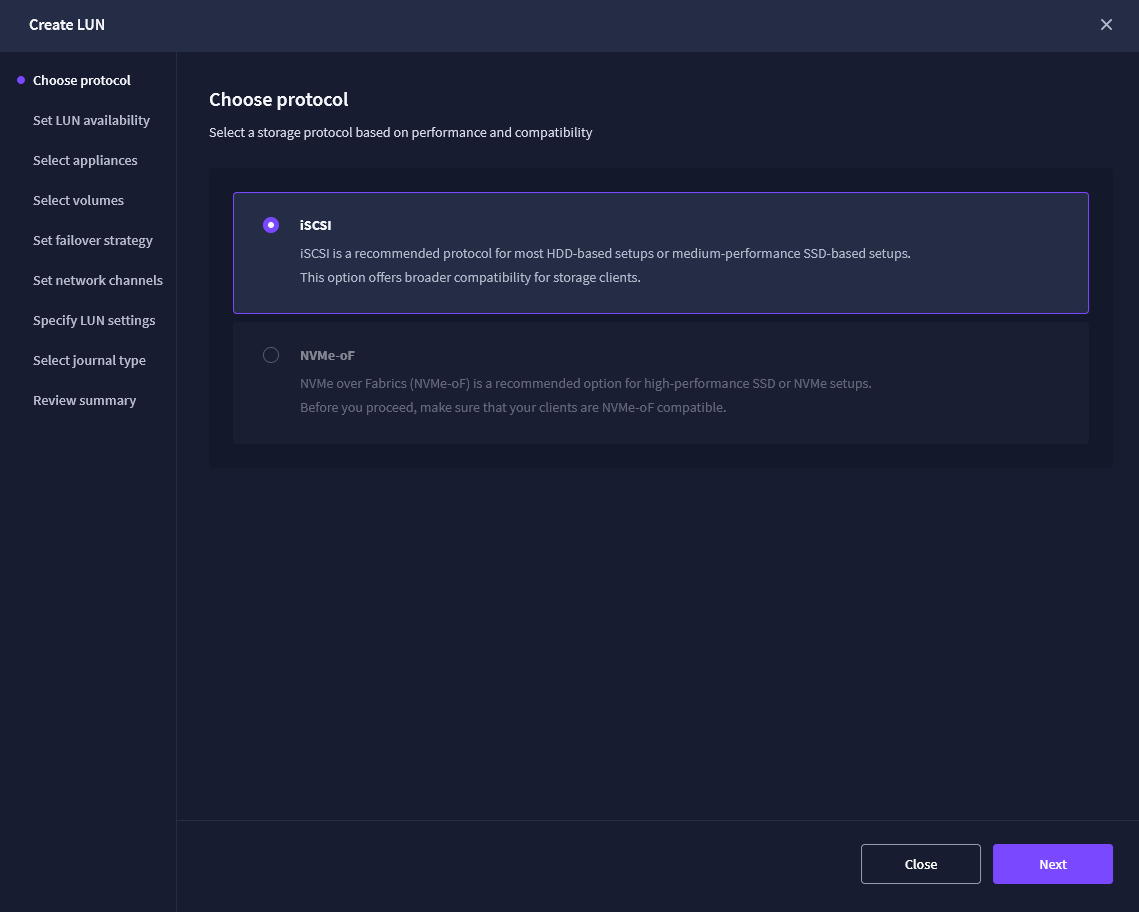
Select the storage protocol.
Select the LUN availability type.
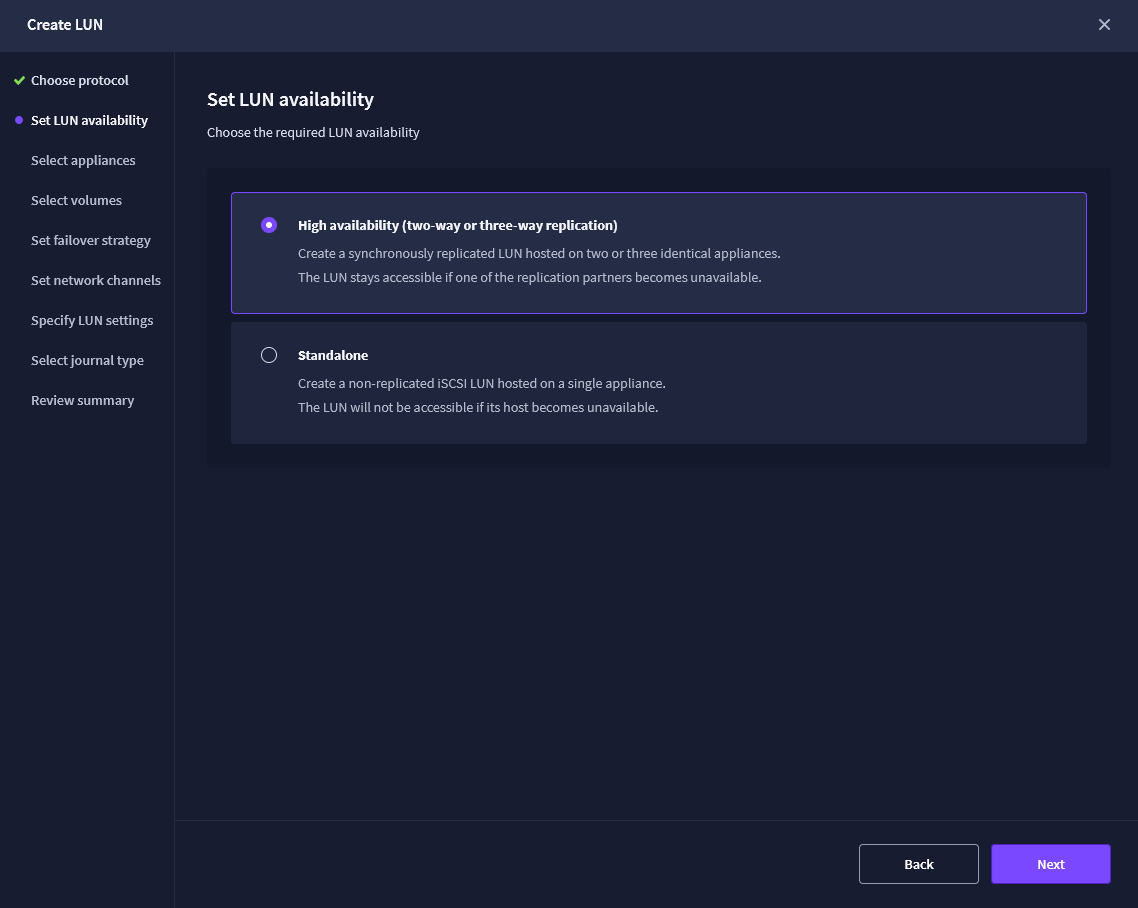
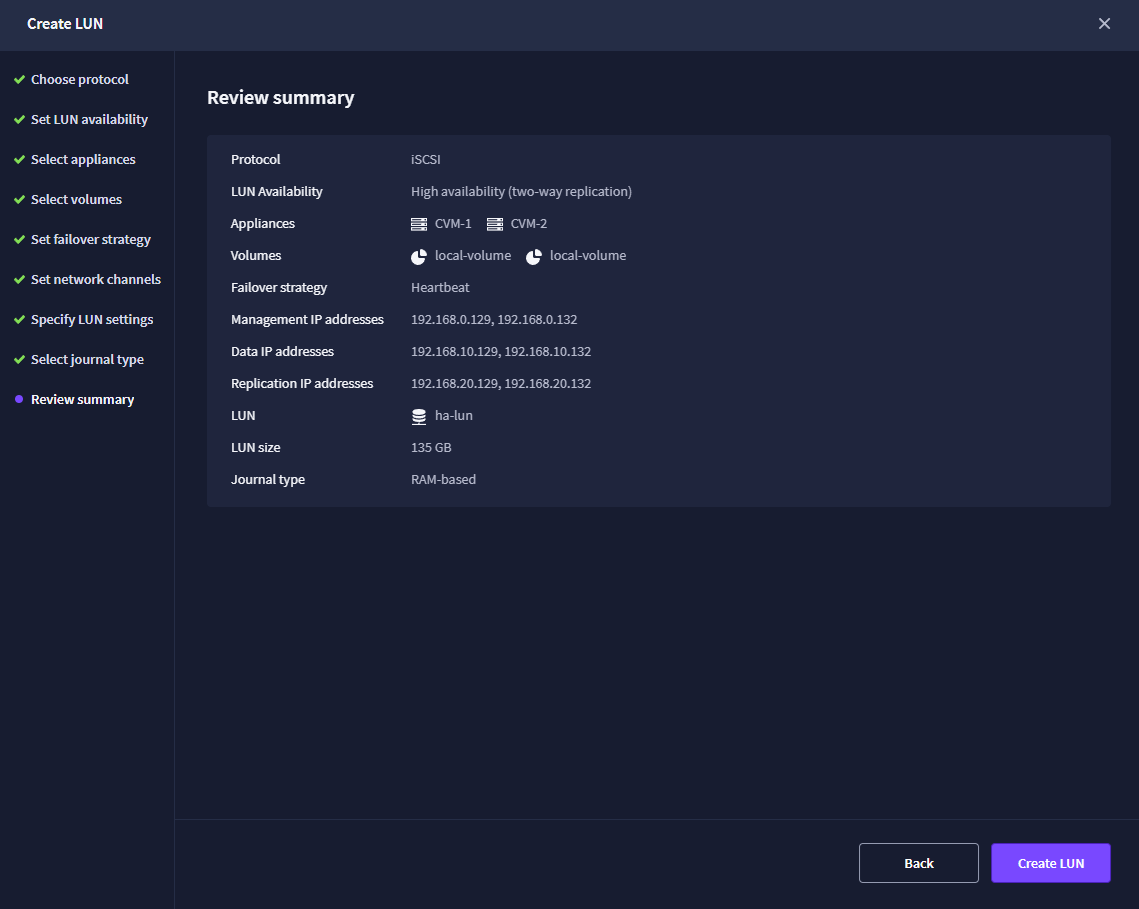
Follow all the steps and review the configuration at the end. If everything is correct, click Create LUN.
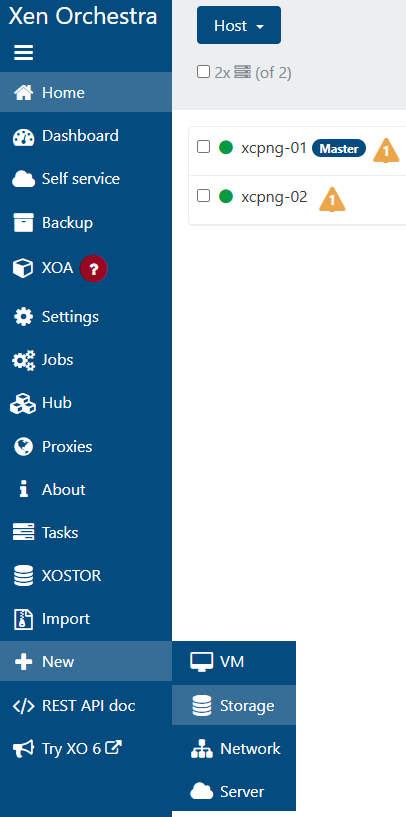
11. Now, return to the XOA interface to add the LUN to XCP-ng.
12. Enter all the information for the HA LUN and click Create.
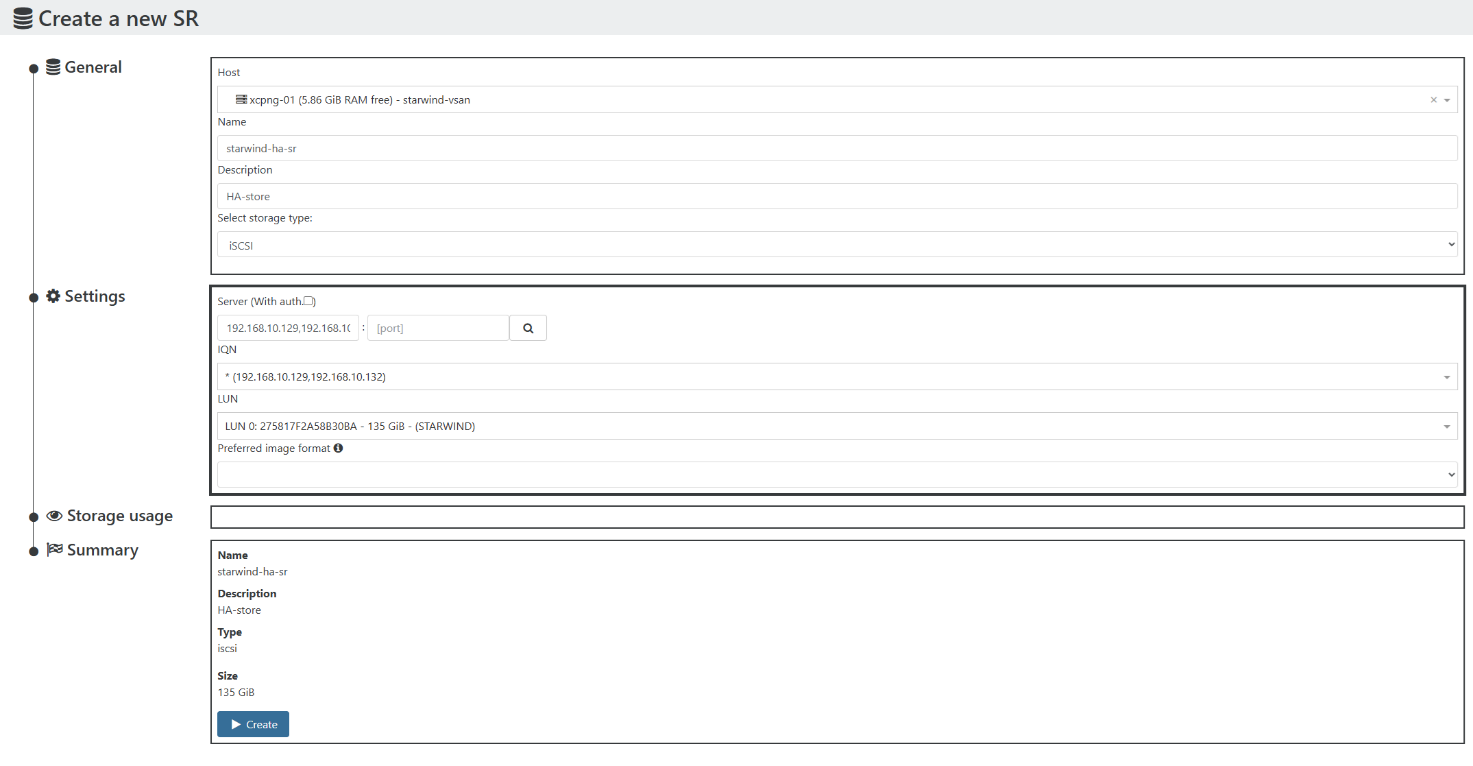
13. As a result, you will have an HA shared LUN that is replicated in real time between the cluster nodes.
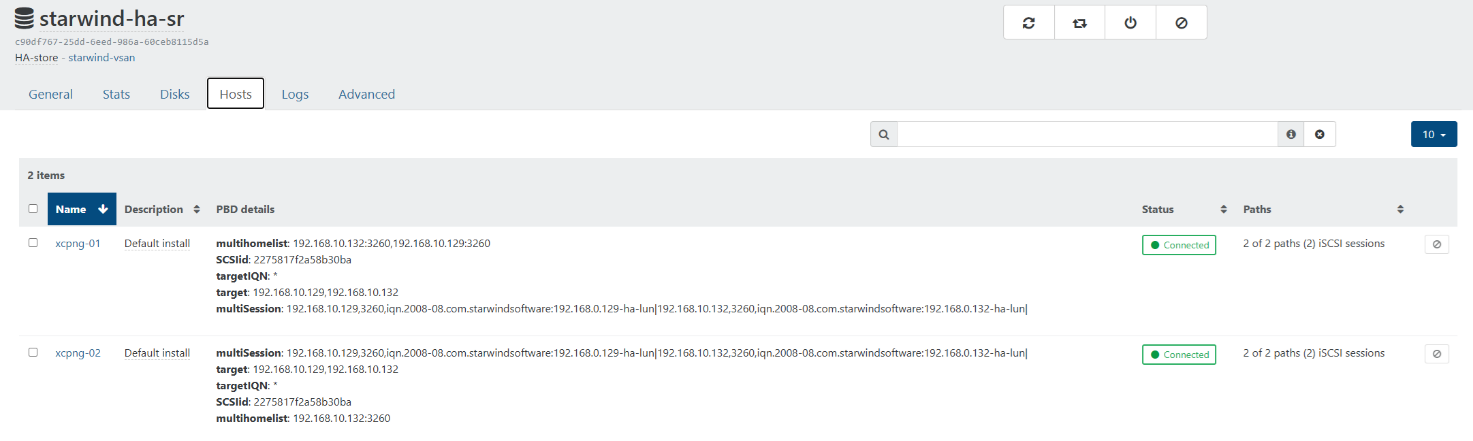
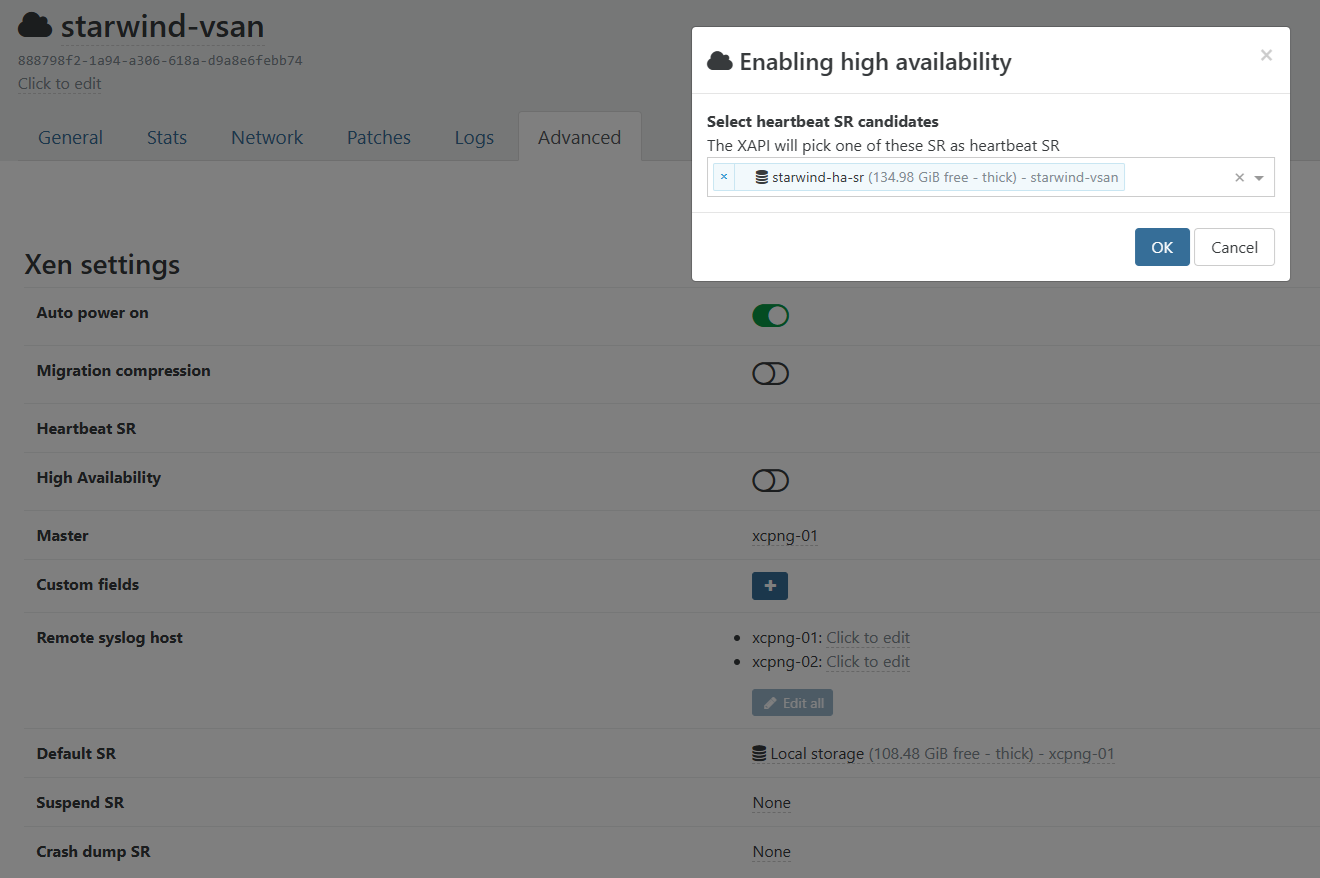
14. Now we need to assign our HA LUN as the heartbeat SR. Navigate to Home -> Pools, select your pool, go to the Advanced tab, and enable High Availability. Select StarWind HA as the heartbeat SR and click OK.
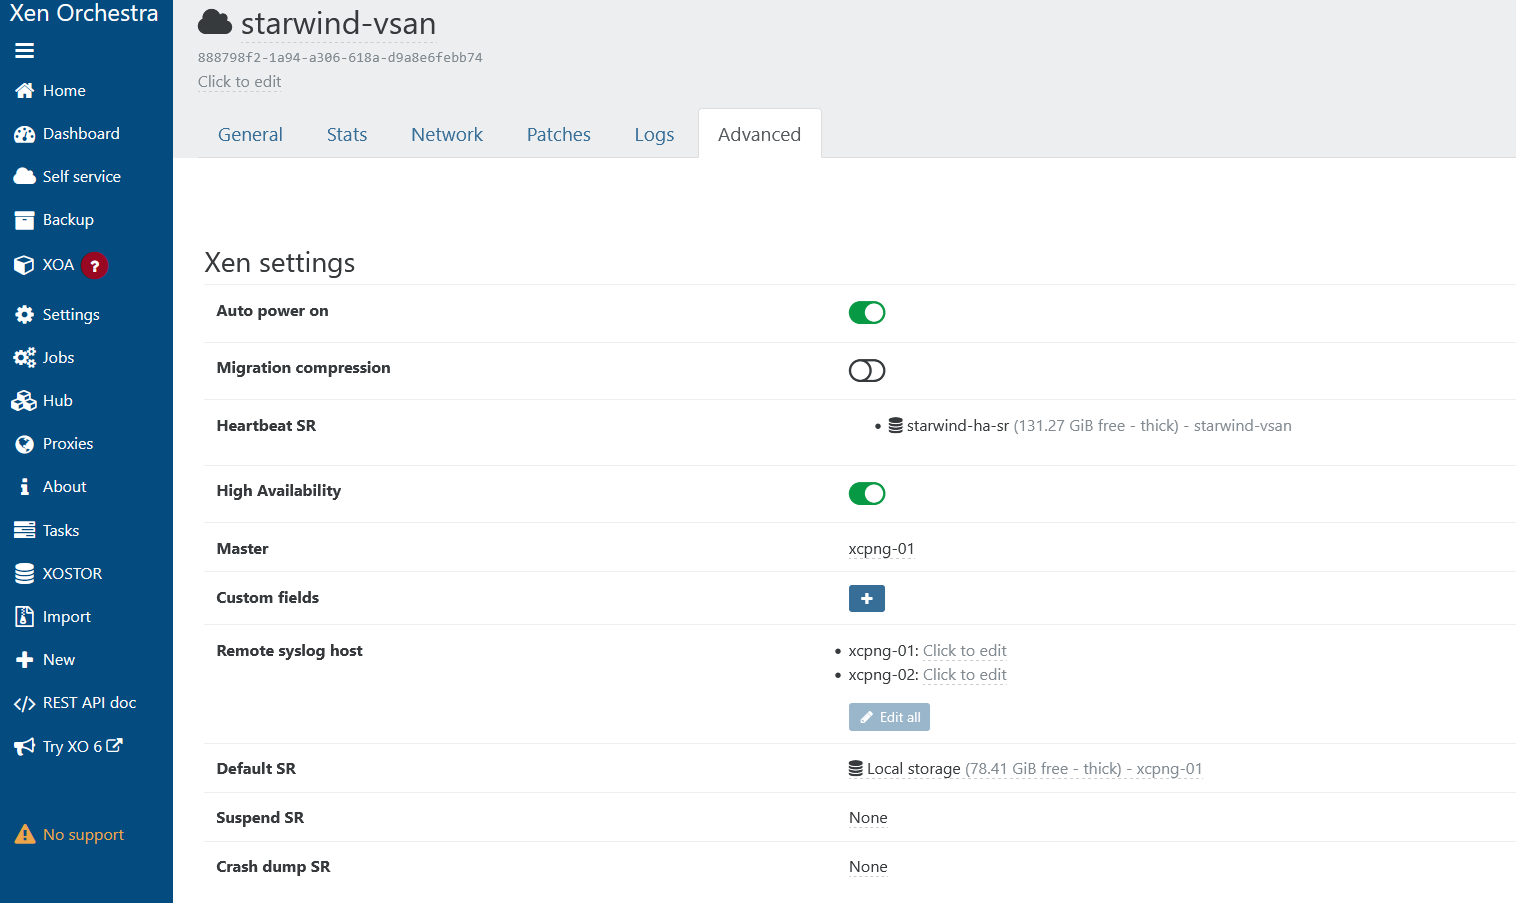
15. As the final step, create a VM in the cluster and enable HA for it.
First, navigate to Home->VMs, click New VM, and assign all the required resources.
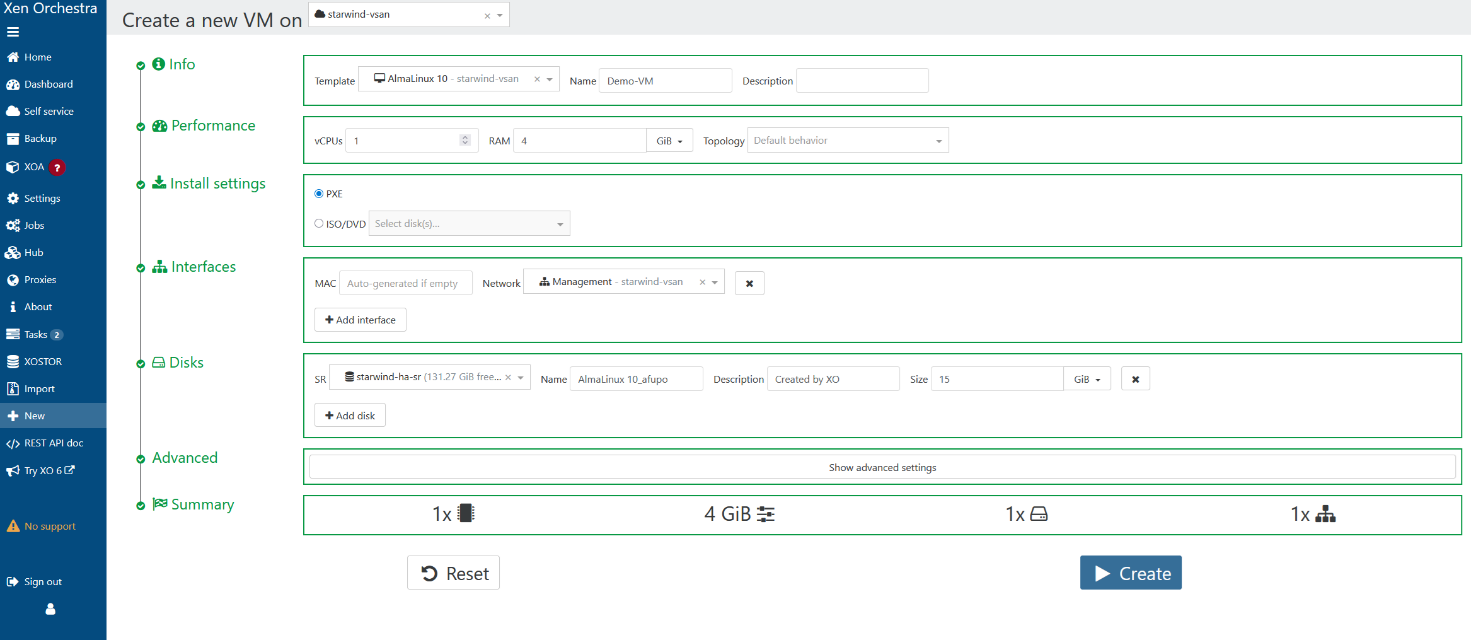
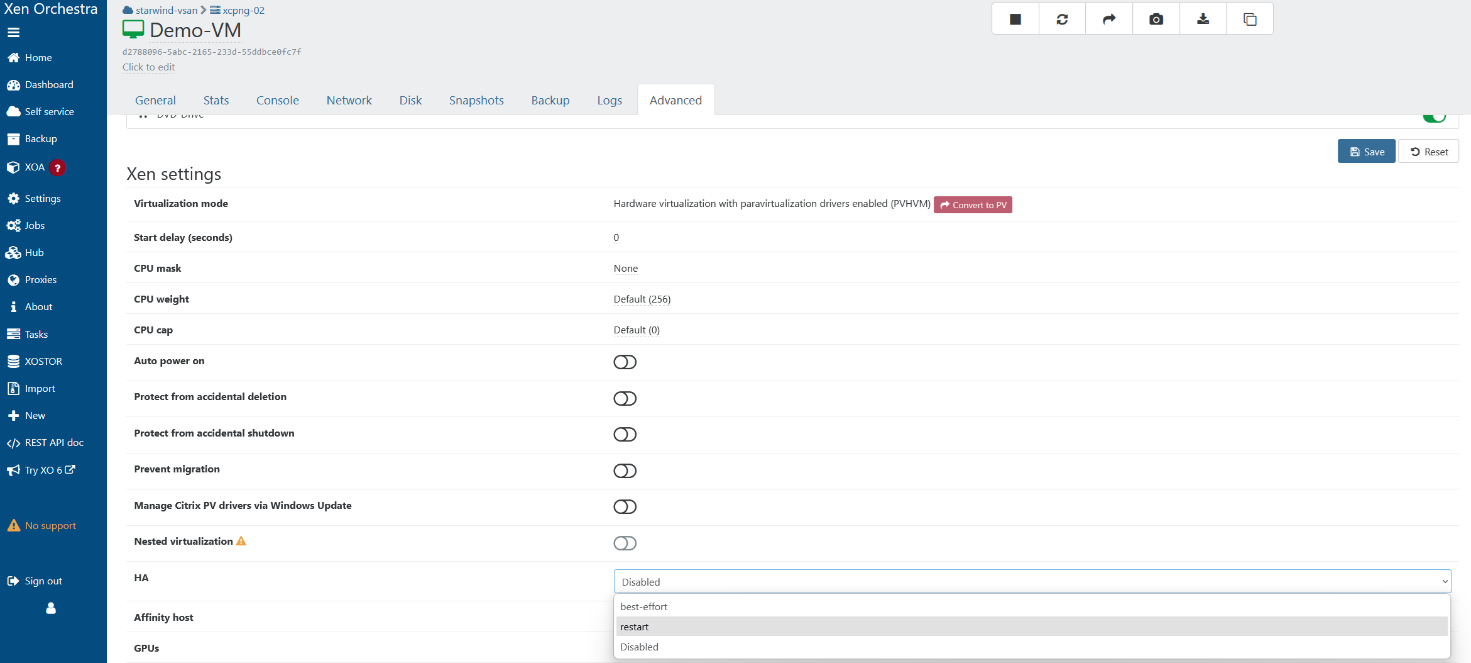
Once the VM is created, select it, go to the Advanced tab, and enable HA for the VM.
All of the above steps are fully covered in our step-by-step guide, available here. Therefore, I described each step with less detail to keep this article easier to read.
Conclusion
Two nodes, real HA, no VMware license. That’s the whole build, and you’ve got something that runs as a genuine alternative to a vSphere setup. Curious about XCP-ng? Stand up a lab and see what it can handle before you commit to anything in production.
FAQ
What hardware do you need to deploy XCP-ng
You need a 64-bit x86 server-class machine with hardware virtualization turned on, either Intel VT-x or AMD-V. The minimum CPU requirement is 1.5 GHz, though you’ll want a 2 GHz or faster multicore chip if you actually plan to run anything serious. For networking, 100 Mbit/s is the floor; one or more 1 GbE or 10 GbE NICs will make P2V migrations, import/export, and live VM moves far less painful. Don’t install XCP-ng to a USB drive or SD card either, because XAPI writes to that volume constantly and it’ll wear the flash out fast. A plain SSD is the right call.
Does XCP-ng require specific “certified” servers, or will general-purpose hardware work
Unlike some hypervisors, XCP-ng doesn’t pin you to a vendor’s certified list. Hardware support mostly comes down to Linux kernel drivers plus vendor drivers, so a wide range of devices just works. The Hardware Compatibility List at here tests devices systematically and gives you the highest confidence, but plenty of unlisted systems run fine in production. That’s the everyday reality for most of the community. Going off-list means accepting a slightly higher chance of hitting an edge case nobody’s hit yet.
How much RAM and storage do you actually need for a usable XCP-ng host
Two gigabytes of RAM will technically boot the host. If you actually plan to run VMs, you’ll want 8 GB or more.
What should you prepare before starting the XCP-ng installation
A few things are worth sorting out beforehand:
- Update your server firmware, including BIOS/UEFI, RAID controller, NIC, and disk backplane;
- If you’re running hardware RAID, carve out your virtual disks ahead of time. A mirrored pair for the hypervisor plus a separate RAID set for VM storage is what most folks go with;
- Decide which physical NIC will carry the management interface. You’ll also want your network config ready: management IP, subnet mask, default gateway, DNS servers, hostname, and NTP source. For remote installs, verify your out-of-band management interface, typically iLO or iDRAC, so you can mount the ISO and recover console access if the install stalls.