


The release of version 9, introduces new features and significant improvements making the Proxmox VE 8 to 9 upgrade worthwhile.
By upgrading, you gain access to the latest features, critical security patches, and performance optimizations.
What’s New in Proxmox VE 9?
- Improved Ceph integration (Ceph 19.2 Squid)
- Better performance in high-availability (HA) clusters
- Enhanced storage management and non-free-firmware support in Debian Trixie
- Optimized networking stack
- More stable Proxmox Backup Server (PBS) v4 support
Prerequisites
Before proceeding with he upgrade process, it’s essential to prepare your system.
- Make sure you have a valid backup of your VMs and Containers.
- Check if the root partition has at least 5 GB free (10 GB or more recommended).
- The first step is to update all nodes to the latest Proxmox VE 8 version (8.4.1 or later). Check your current version by running the command:
# pveversion

- If Ceph cluster is installed, you must first upgrade it to Ceph 19.2 Squid before starting the Proxmox VE 8 to 9 upgrade.
# ceph --version

- If Proxmox Backup Server is installed, upgrade the PBS to version 4 before upgrading Proxmox VE.
Before You Upgrade Proxmox VE 8 to 9: Essential Steps
Ensure that all VMs and containers have been migrated off the node.
Place the node in Maintenance Mode to stop HA services.
# ha-manager crm-command node-maintenance enable pve01

The node is in Maintenance Mode.
If your cluster is using Ceph for hyperconverged storage, you must prevent the cluster from attempting to rebalance data while the node is offline.
# ceph osd set noout

Update nodes to latest version 8
Make sure all nodes in the cluster are running version 8.4.1 or newer. Upgrade one node at a time to maintain cluster availability.
Refresh the repositories package.
# apt update

Install latest updates.
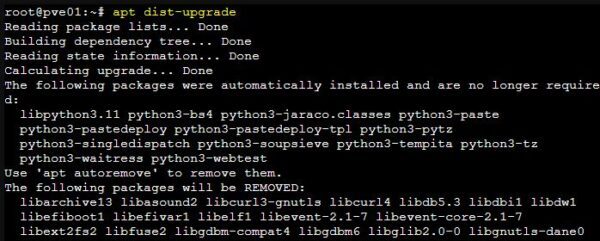
# apt dist-upgrade

When the upgrade is complete, reboot the node.
After rebooting the node, check current version.
# pveversion

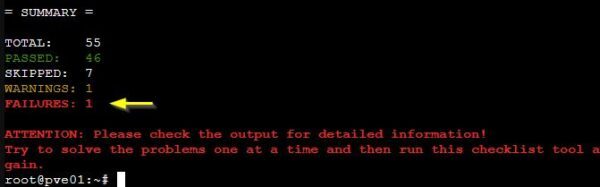
Before you begin the upgrade, run the check script to identify any potential issues and ensure your system is compatible with version 9.
# pve8to9 --full
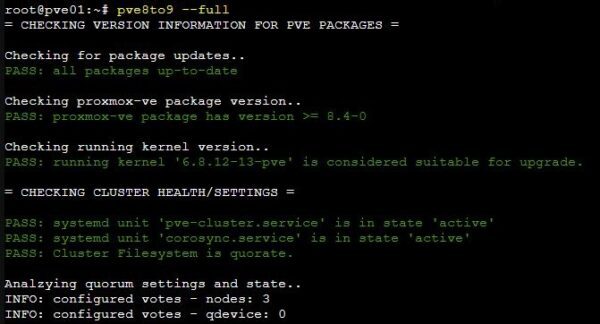
If any issues are found, fix them before proceeding with the upgrade.
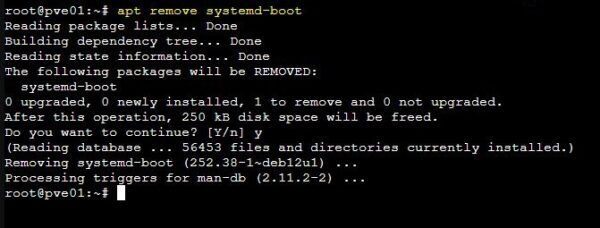
In this example, the system suggests removing the systemd-boot package.

Remove the package, but perform this operation carefully.
# apt remove systemd-boot
Update repositories
With the new version, you can add the Proxmox VE 9 enterprise repository in the new deb822 style.
Add Debian repositories
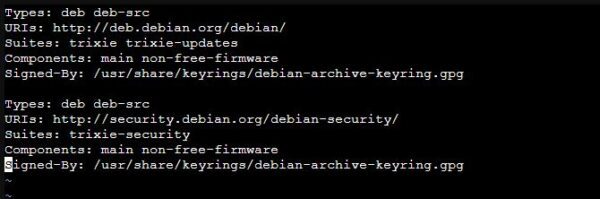
Create the file /etc/apt/sources.list.d/debian.sources and add the following lines to support the new version Trixie.
# vi /etc/apt/sources.list.d/debian.sources
Types: deb deb-src
URIs: http://deb.debian.org/debian/
Suites: trixie trixie-updates
Components: main non-free-firmware
Signed-By: /usr/share/keyrings/debian-archive-keyring.gpg
Types: deb deb-src
URIs: http://security.debian.org/debian-security/
Suites: trixie-security
Components: main non-free-firmware
Signed-By: /usr/share/keyrings/debian-archive-keyring.gpg
Add the Proxmox VE 9 repository
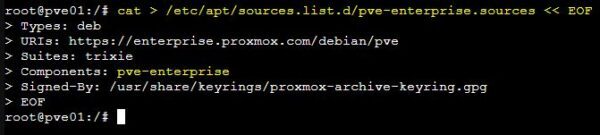
Create the related pve-enterprise.sources file.
# cat > /etc/apt/sources.list.d/pve-enterprise.sources << EOF
> Types: deb
> URIs: https://enterprise.proxmox.com/debian/pve
> Suites: trixie
> Components: pve-enterprise
> Signed-By: /usr/share/keyrings/proxmox-archive-keyring.gpg
> EOF
Remove the old /etc/apt/sources.list.d/pve-enterprise.list.
# rm /etc/apt/sources.list.d/pve-enterprise.list

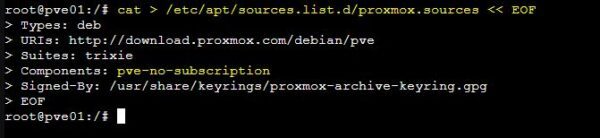
If you are using the no-subscription repository instead, run this command:
# cat > /etc/apt/sources.list.d/proxmox.sources << EOF
> Types: deb
> URIs: http://download.proxmox.com/debian/pve
> Suites: trixie
> Components: pve-no-subscription
> Signed-By: /usr/share/keyrings/proxmox-archive-keyring.gpg
> EOF
Ensure that there are no remaining Debian Bookworm specific repositories left.
# rm /etc/apt/sources.list

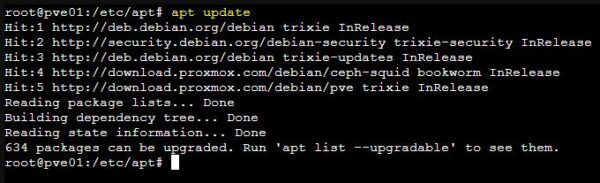
Verify that the apt update command gets the correct updates.
# apt update
Upgrade the Ceph cluster
If you are using Ceph in your Proxmox infrastructure, ensure you have Ceph 19.2 Squid installed. If you are running an older Ceph cluster, you must upgrade it first before upgrading to Proxmox VE 9.
Update the Ceph Package Repository
Depending on your subscription, you need to modify the repository on each node.
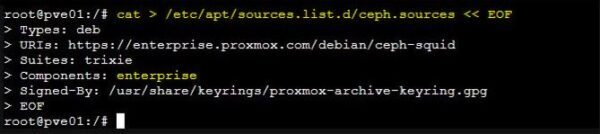
Enterprise repository
# cat > /etc/apt/sources.list.d/ceph.sources << EOF
> Types: deb
> URIs: https://enterprise.proxmox.com/debian/ceph-squid
> Suites: trixie
> Components: enterprise
> Signed-By: /usr/share/keyrings/proxmox-archive-keyring.gpg
> EOF
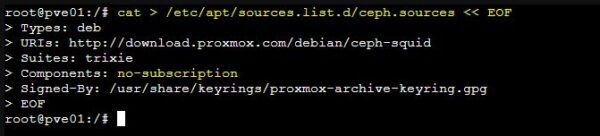
No-subscription repository
# cat > /etc/apt/sources.list.d/ceph.sources << EOF
> Types: deb
> URIs: http://download.proxmox.com/debian/ceph-squid
> Suites: trixie
> Components: no-subscription
> Signed-By: /usr/share/keyrings/proxmox-archive-keyring.gpg
> EOF
Ensure that there are no remaining Ceph Bookworm specific repositories left.
# rm /etc/apt/sources.list.d/ceph.list

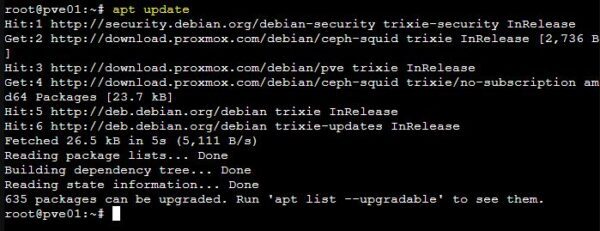
When the repository entries have been updated, refresh the repositories package.
# apt update
Proxmox VE 8 to 9 upgrade
Once all prerequisites have been met, you can proceed with upgrading the first node. Upgrade one node at a time.
Verify you have the following files in the folder /etc/apt/sources.list.d/. In this example the pve-enterprise.sources file is not displayed because the no-subscription repository is used.
# ls /etc/apt/sources.list.d

Before starting, ensure that no VMs or containers are running on the node you are processing and the node is in Maintenance Mode.
Upgrade the node.
# apt dist-upgrade
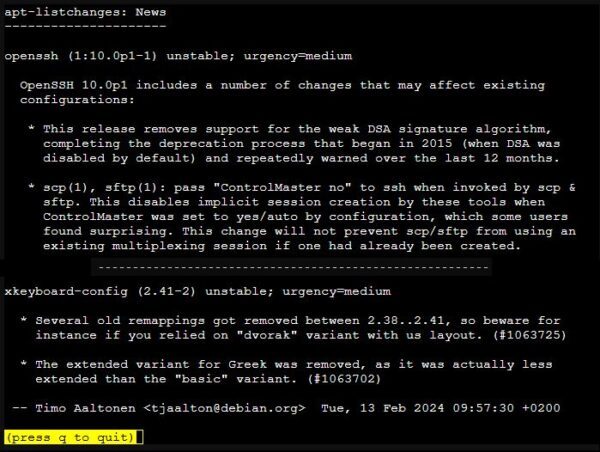
When the apt-listchanges: News page is displayed, scroll till the end and press q to quit.
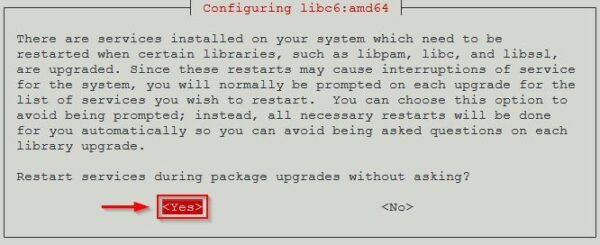
During the Proxmox VE 8 to 9 upgrade, you will be prompted to confirm file changes.
- /etc/issue – choose No (keep the currently installed version).

- Click Yes to restart services automatically.
- /etc/lvm/lvm.conf – recommended Yes (install maintainer’s version).

You may also be prompted to confirm additional file changes.
- /etc/ssh/sshd_config – if no changes were made, choose Yes.
- /etc/default/grub – normally only asked for if you changed it manually, recommended No if unsure.
- /etc/chrony/chrony.conf – if no extra changes were made, choose Yes (install the package maintainer’s version).
When the upgrade is complete, reboot the node.
# reboot

After the node upgrade
After rebooting the node, check the installed Proxmox version.
# pveversion

Exit the node from Maintenance Mode.
# ha-manager crm-command node-maintenance disable pve01

Unset the noout flag if the Ceph cluster is in use.
# ceph osd unset noout

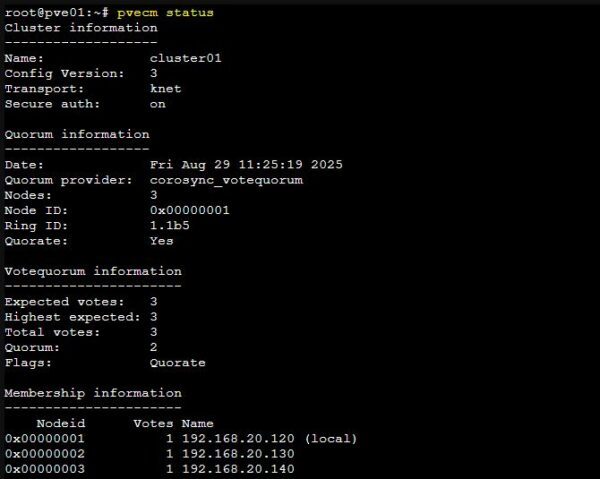
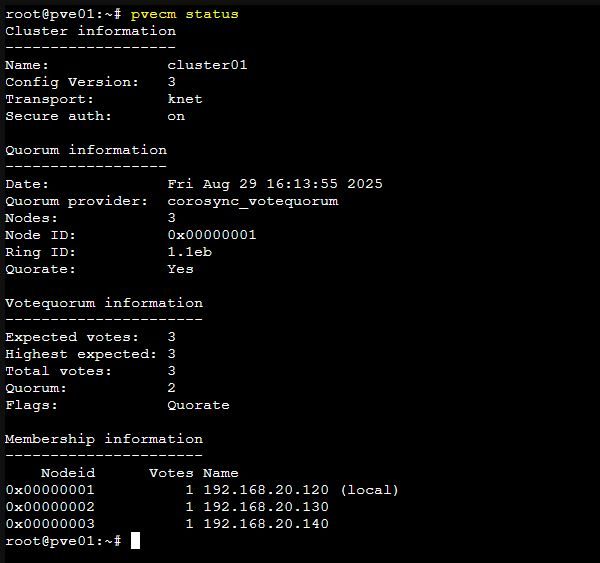
Check the Proxmox cluster status.
# pvecm status
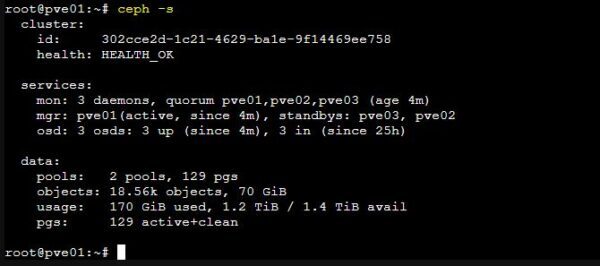
If you are using Ceph in your Proxmox infrastructure, verify the Ceph cluster is in a healthy state.
# ceph -s
If everything is fine, proceed with the next node member of the cluster.
After the cluster upgrade
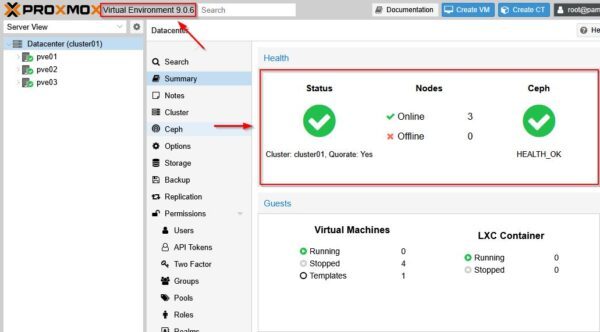
After the Proxmox VE 8 to 9 upgrade, you should check if the all nodes are up and running and the infrastructure is working as expected.
Check again the Proxmox cluster status.
# pvecm status
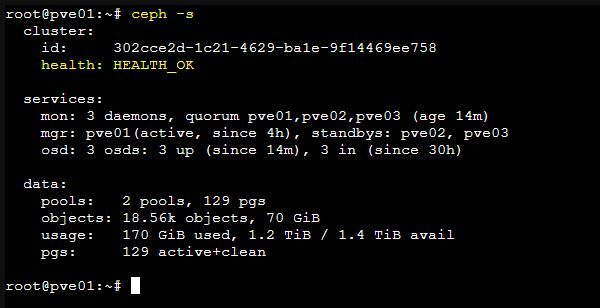
Check if the Ceph cluster is in a healthy state.
# ceph -s
If you are using HA and HA groups, HA groups will be automatically migrated to HA rules once all cluster nodes have been upgraded to Proxmox VE 9.
Proxmox is now running version 9.
Wrap up
Proxmox 9 introduces new features and enhancements, primarily focused on storage, networking, and high-availability management. Careful planning will ensure a smooth upgrade from Proxmox VE 8 to 9.
Before you begin, make sure you have working backups of your VMs and containers in case something goes wrong.
