StarWind Virtual SAN Compute and Storage Separated 2 nodes with Scale-Out File Servers
INTRODUCTION
StarWind Virtual SAN® is a native Windows hypervisor-centric hardware-less VM storage solution. It creates a fully fault tolerant and high performing storage pool purpose built for the virtualization workloads by mirroring existing server’s storage and RAM between the participating storage cluster nodes. The mirrored storage resource is then connected to all cluster nodes treated just as local storage by both hypervisors and clustered applications. Fault tolerance is achieved by providing multipathed access to all storage nodes. StarWind Virtual SAN delivers supreme performance compared to any dedicated SAN solution since it runs locally on the hypervisor and all IO is processed by local RAM, SSD cache, and disks and never bottlenecked by storage fabric.
This document was written for experienced Windows Server users or system administrators. It describes the basic configuration steps of StarWind solution to run the fault tolerant shared storage. Additionally, the manual describes how to configure the shared storage which will be used as the backbone of the highly available File Server (NFS NAS). It assumes configuring the StarWind and HA File Share in the Compute and Storage Separated architecture. Typical use cases are shared storage for huge clustered SQL Server, Oracle deployments and an inexpensive block back-end for Scale-Out File Servers. While running StarWind in Compute and Storage separated architecture, it is possible to scale compute and storage resources independently, with different leverages regardless from each other. As a result, the system better fits the task while CapEx and OpEx go through the floor, since there is no need to purchase hardware that will be essentially wasted. Thus the system can be created specifically for a particular task.
A full set of up-to-date technical documentation can always be found here, or by pressing the Help button in the StarWind Management Console.
For any technical inquiries please visit our online community, Frequently Asked Questions page, or use the support form to contact our technical support department.
Pre-Configuring the Servers
Here is a reference network diagram of the configuration described in this guide.

Additional network connections may be necessary depending on cluster setup and applications its running.
This document assumes that you have a domain controller and you have added the servers to the domain. It also assumes that you have installed the Server for NFS role and next features: Failover Clustering, Multipath I/O, on both compute nodes. These actions can be performed using Server Manager (the Add Roles and Features menu item).
NOTE: You can use ISCSi connections only between two nodes If you use free license.
In order to allow StarWind Virtual SAN to use the Loopback accelerator driver and access the local copy of the data faster, you have to add a minor modification to the StarWind configuration file. Locate the configuration and open it using Notepad. The default path is: C:\Program Files\StarWind Software\StarWind\StarWind.cfg
Find the string «<!–<iScsiDiscoveryListInterfaces value=»1»/> –>» and uncomment it (should look as follows: <iScsiDiscoveryListInterfaces value=»1»/>). Save the changes and exit Notepad. Should there be any issues saving the document, launch Notepad with Administrator rights and then load the starwind.cfg file to do the modifications.
Restart the StarWind Service and repeat the same procedure on the second StarWind node.
Enabling Multipath Support
1. Open the MPIO manager: Start->Administrative Tools->MPIO.
2. Go to the Discover Multi-Paths tab.
3. Tick the Add support for iSCSI devices checkbox.
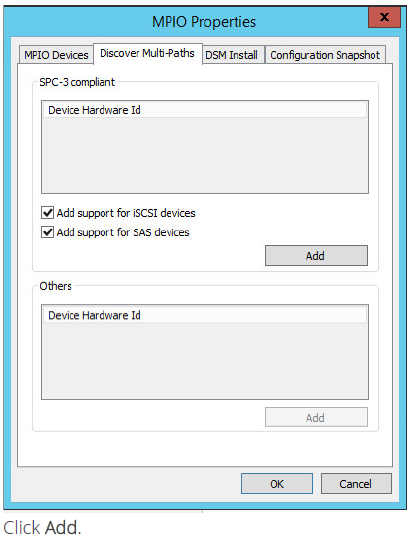
4.When prompted to restart the server, click Yes to proceed.
NOTE: Repeat procedures on the second server.
Installing File Server Role
1. Open Server Manager: Start -> Server Manager.
2. Select: Manage -> Add Roles and Features
3. Follow the Wizard’s steps to install the selected roles.
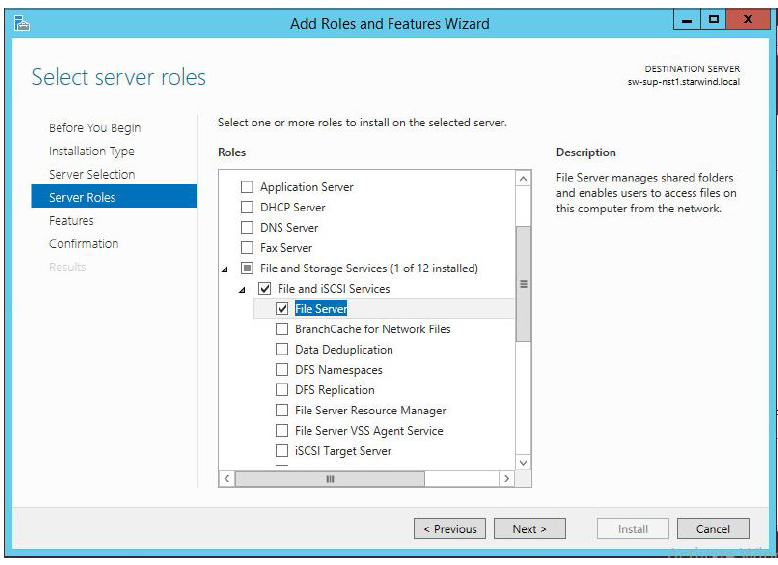
NOTE: Restart the server after installation is completed.
Configuring Shared Storage
1. Launch the StarWind Management Console: double-click the StarWind tray icon.
NOTE: StarWind Management Console cannot be installed on an operating system without a GUI. You can install it on any of the GUI-enabled Windows Editions including the desktop versions of Windows.
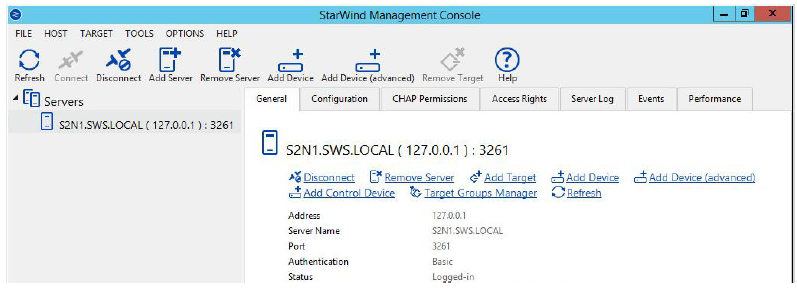
If StarWind Service and Management Console are installed on the same server, the Management Console will automatically add the local StarWind instance to the console tree after the first launch. In future, the Management Console will automatically connect to it using the default credentials.
StarWind Management console will ask you to specify the default storage pool on the server you’re connecting to for the first time. Please configure the storage pool to use the one of the volumes you’ve prepared earlier. All the devices created through the Add Device wizard will be stored on it. Should you decide to use an alternative storage path for your StarWind virtual disks, please use the Add Device (advanced) menu item.
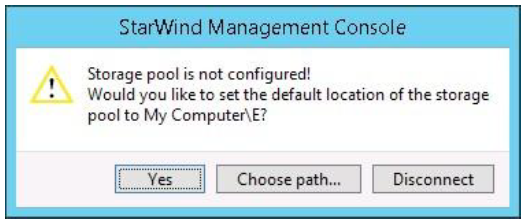
Press Yes button to configure the storage pool. Should you require to change the storage pool destination, press Choose path… and point the browser to the necessary disk.
NOTE: Each of the arrays to be used by StarWind Virtual SAN to store virtual disk images, has to meet the following requirements:
• Initialized as GPT
• Have a single NTFS-formatted partition
• Have a drive letter assigned
2. Select the StarWind server where you wish to create the device.
3. Press the Add Device (advanced) button on the toolbar.
4. Add Device Wizard will appear. Select Hard disk device and click Next.
5. Select Virtual disk and click Next.
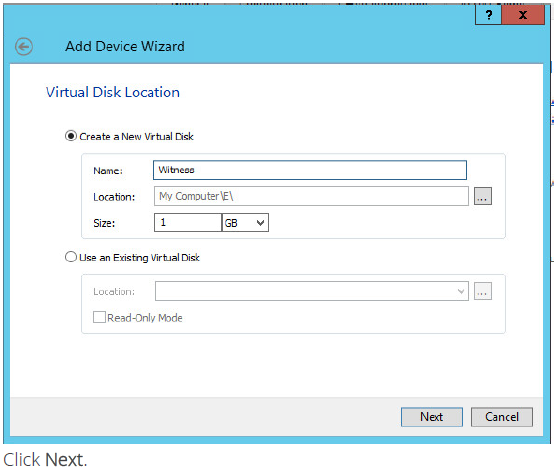
6. Specify the virtual disk location and size.
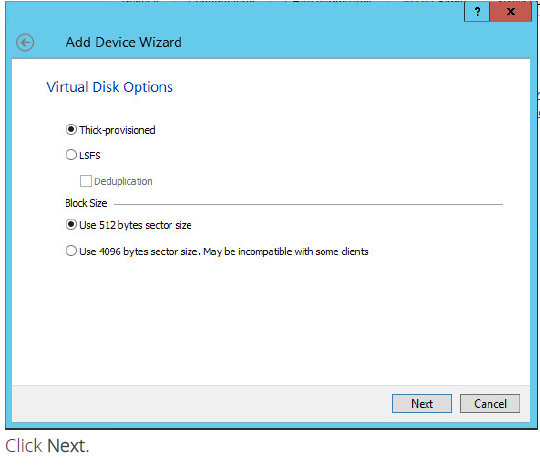
7. Specify virtual disk options.
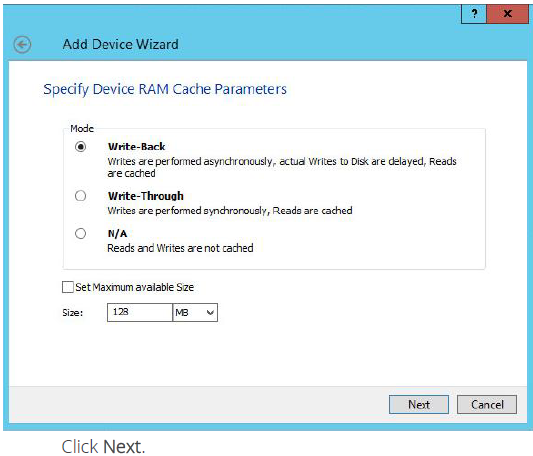
8.Define the caching policy and specify the cache size (in MB).
9. Define the Flash Cache Parameters policy and size if necessary.
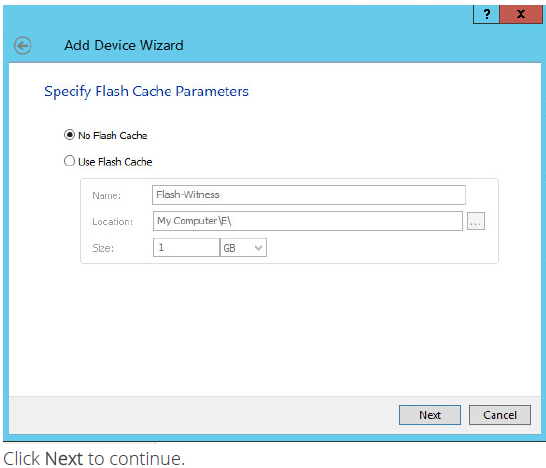
NOTE: It is strongly recommended to use SSD-based storage for “Flash Cache” caching.
Specify target parameters.
10. Select the Target Name checkbox to enter a custom name of a target.
11. Otherwise, the name will be generated automatically based on the target alias.

12. Click Create to add a new device and attach it to the target. Then click Close to close the wizard.
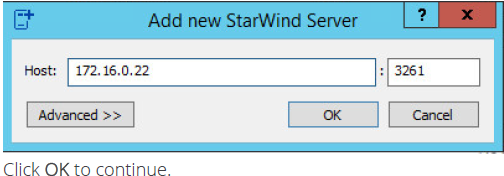
13. Right-click on the servers field and select Add Server. Add new StarWind Server, which will be used as second HA node.
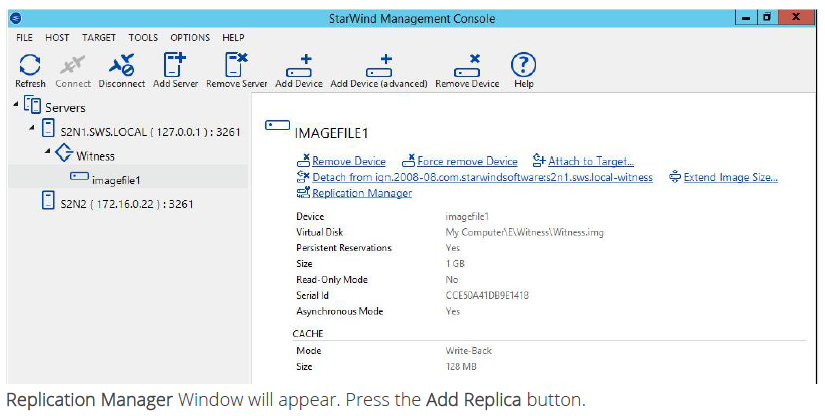
14. Right-click on the device you just created and select Replication Manager.
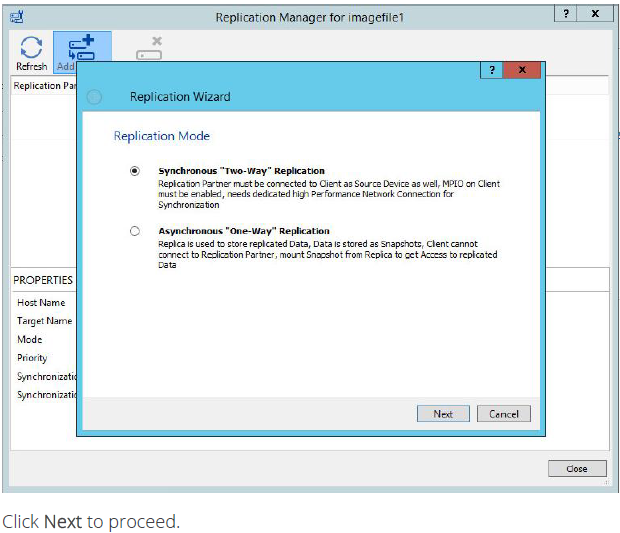
15. Select Synchronous two-way replication.
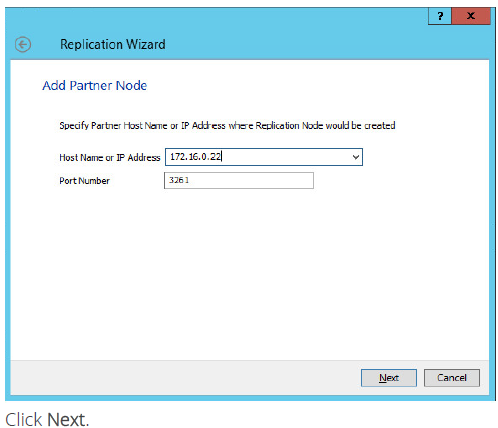
16. Specify the partner server IP address.
Default StarWind management port is 3261. If you have configured a different port, please type it in the Port number field.
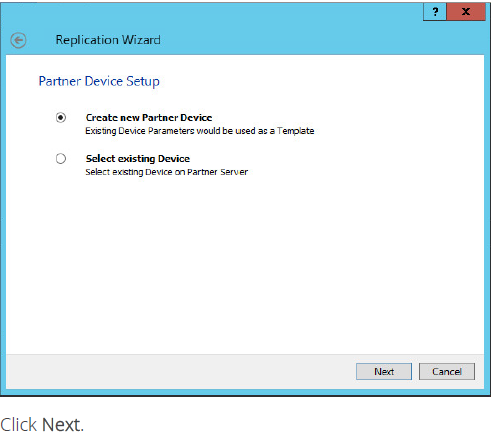
17. Choose Create new Partner Device
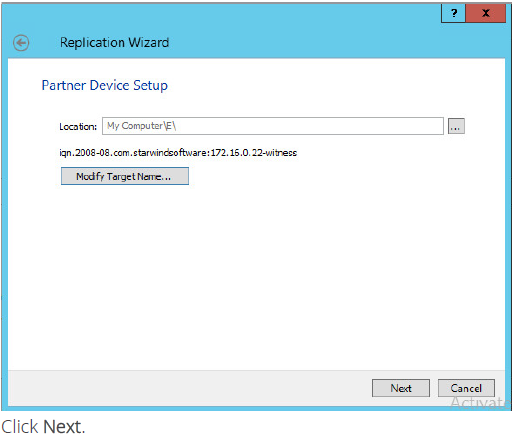
18. Specify partner device location if necessary. You can also modify the target name of the device.
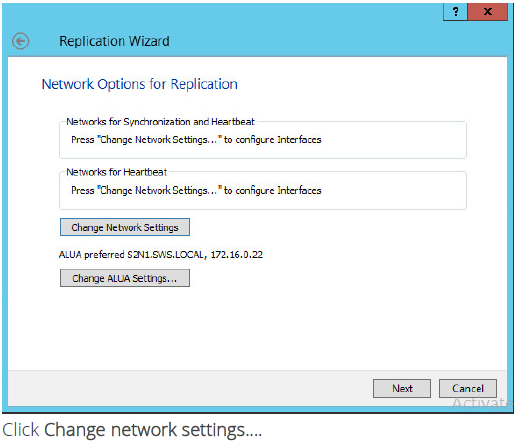
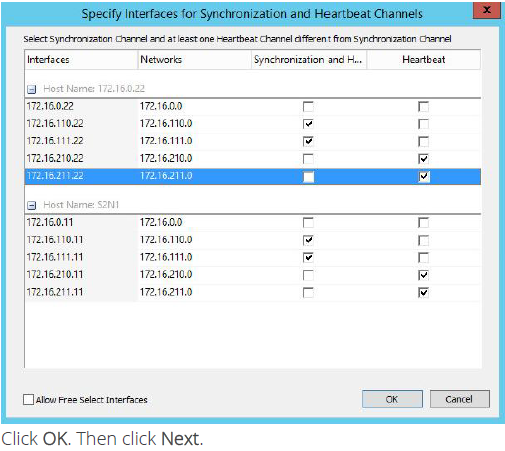
19. On this screen you can select the synchronization and heartbeat channels for the HA device. You can also modify the ALUA settings.
20. Specify the interfaces for synchronization and Heartbeat.
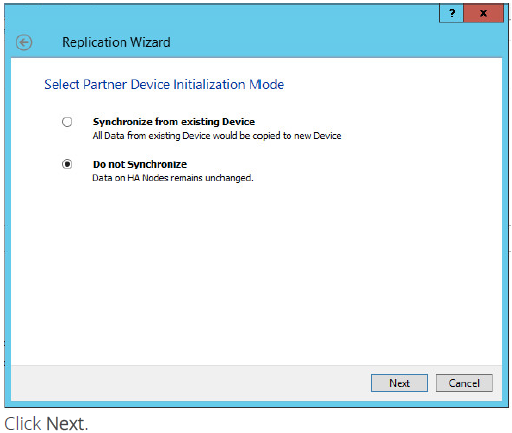
21. Select partner device initialization mode Do not Syncronize.
NOTE: Use this type of synchronization for adding partner to the device which doesn’t contain any data only.
22. Press the Create Replica button. Then click Close to close the wizard.
23. The added device will appear in the StarWind Management Console.

24. Repeat the steps 3 – 23 for the remaining virtual disk that will be used for File Share.
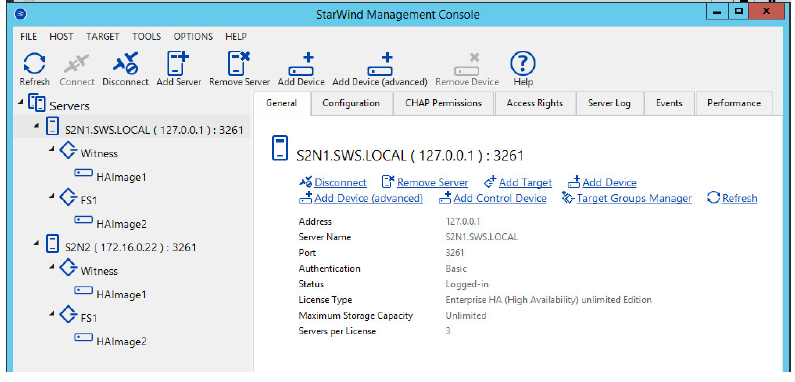
25. Once all devices are created, the Management console should look as follows:
Discovering Target Portals
In this chapter we will connect the previously created disks to the servers that will be added to the cluster:
1. Launch Microsoft iSCSI Initiator: Start > Administrative Tools > iSCSI Initiator or iscsicpl from the command line interface. The iSCSI Initiator Properties window appears.
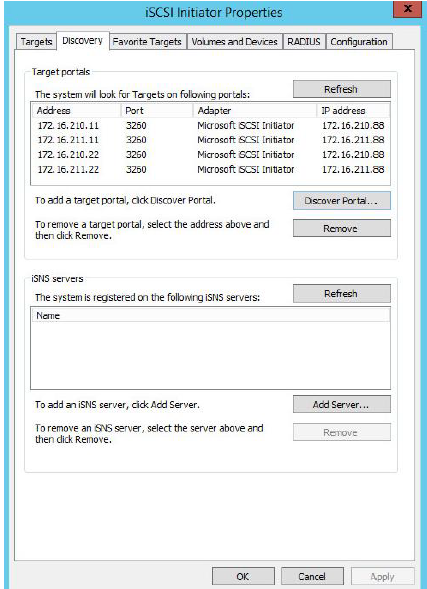
2. Navigate to the Discovery tab.
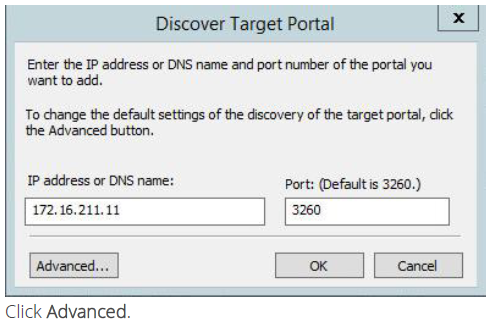
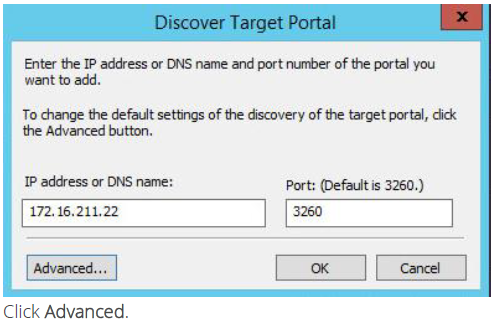
3. Click the Discover Portal button. Discover Target Portal dialog appears. Type in the first IP address of the first node you will use to connect the mirrors of the HA devices.
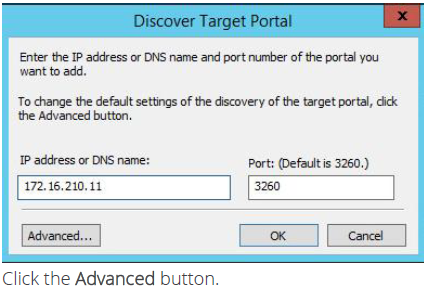
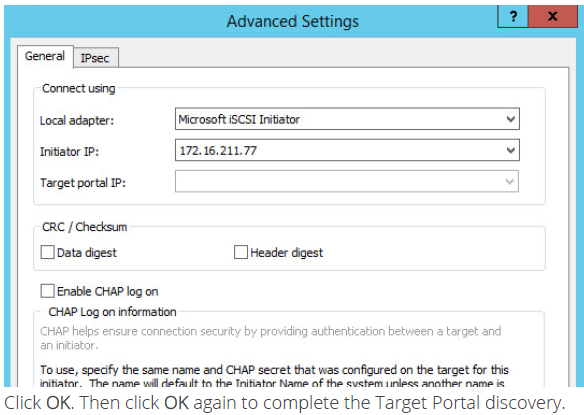
4. Select Microsoft ISCSI Initiator as your Local adapter and select Initiator IP in the same subnet as the IP address on the partner server from the previous step.
Click OK. Then click OK again to complete the Target Portal discovery.
5. Click the Discover Portal… button again.
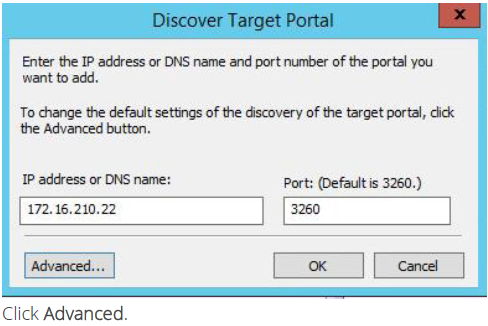
6. Discover Target Portal dialog appears. Type in the second IP address of the first node you will use to connect the mirrors of the HA devices.
7.Select Microsoft ISCSI Initiator as your Local adapter, select the Initiator IP in the same subnet as the IP address on the partner server from the previous step.
Click OK. Then click OK again to complete the Target Portal discovery.
8. Click the Discover Portal… button again.
9. Discover Target Portal dialog appears. Type in the first IP address of the second node you will use to connect the mirrors of the HA devices.
10. Select Microsoft ISCSI Initiator as your Local adapter, select the Initiator IP in the same subnet as the IP address on the partner server from the previous step.
Click OK. Then click OK again to complete the Target Portal discovery.
11. Click the Discover Portal… button again.
12. Discover Target Portal dialog appears. Type in the second IP address of the second node you will use to connect the mirrors of the HA devices.
13. Select Microsoft ISCSI Initiator as your Local adapter, select the Initiator IP in the same subnet as the IP address on the partner server from the previous step.
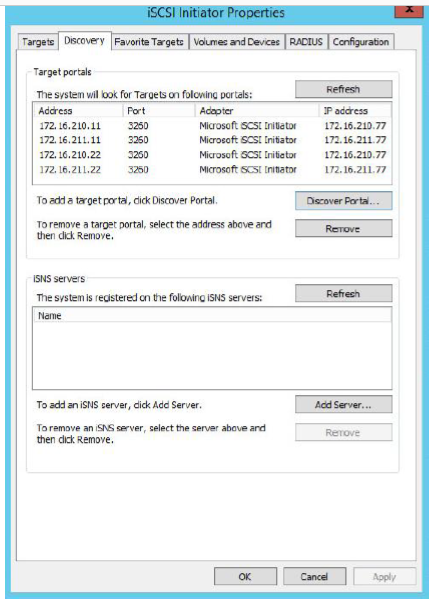
14. All target portals added on the first node.
15. Complete the same steps for the second node.
16. All target portals added on the second node.
Connecting Targets
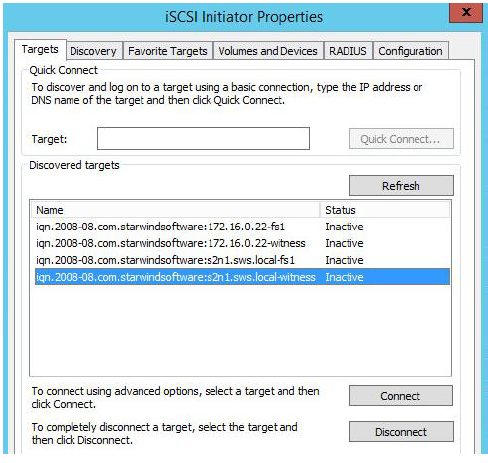
1. Click the Targets tab. The previously created targets are listed in the Discovered Targets section.
NOTE: If the created targets are not listed, check the firewall settings of the StarWind Server as well as the list of networks served by the StarWind Server (go to StarWind Management Console -> Configuration -> Network).
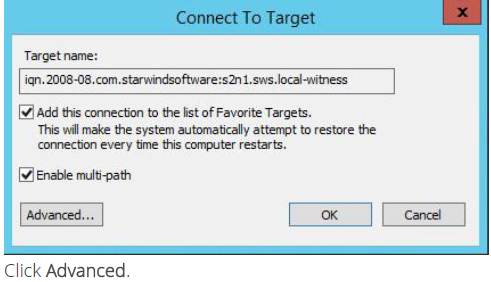
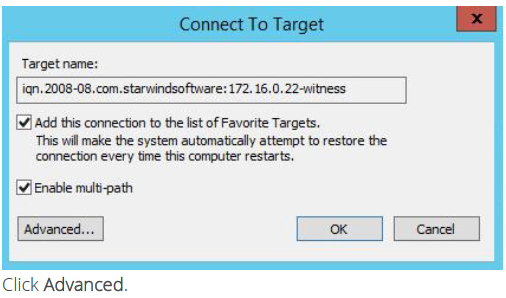
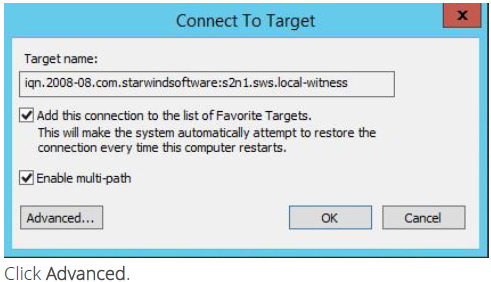
2. Select a target of witness located on the first server and click Connect.
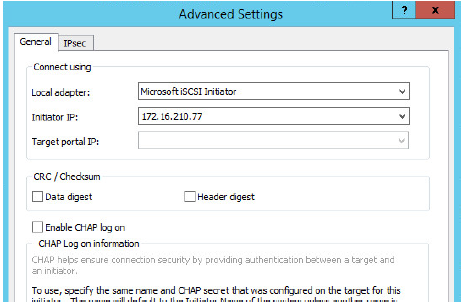
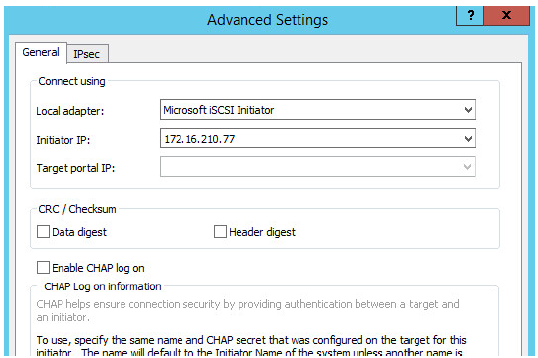
3. Enable checkbox as the image below.
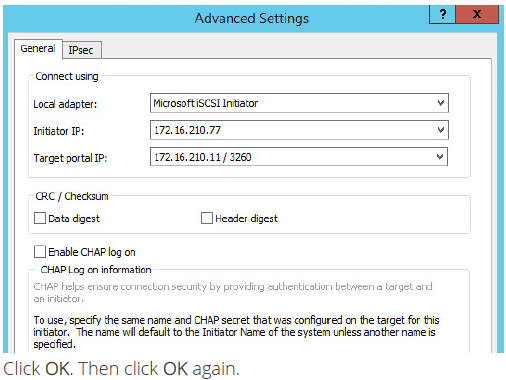
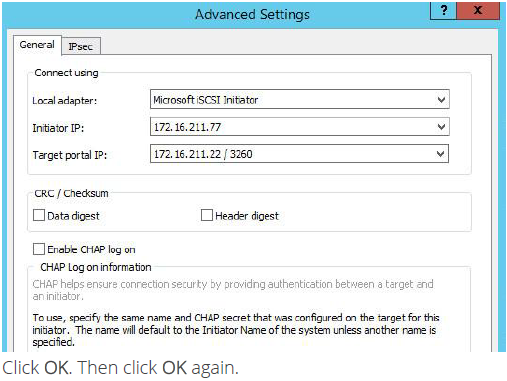
4. Select Microsoft iSCSI Initiator in the Local adapter text field. In the Initiator IP field select the IP address. In the Target portal IP select the corresponding portal IP from the same subnet.
5. Select the partner-target from other StarWind node and click Connect.
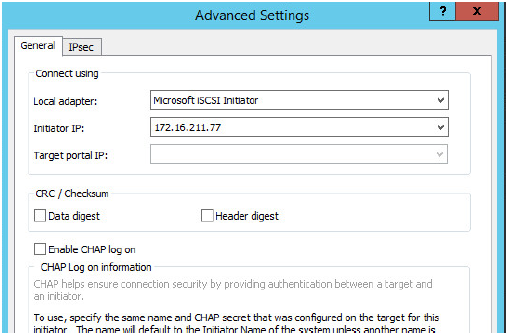
6. Enable checkbox as the image below.
7. Select Microsoft iSCSI Initiator in the Local adapter text field. In the Initiator IP field select the IP address. In the Target portal IP select the corresponding portal IP from the same subnet.
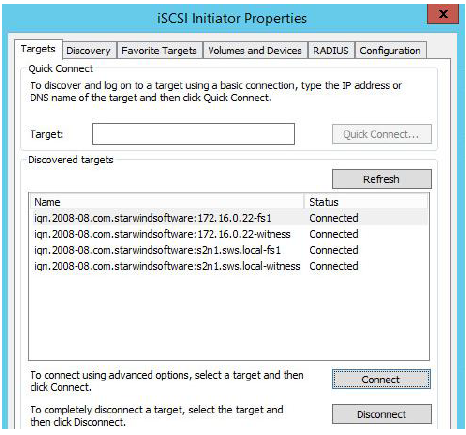
8. The result should look like the screenshot below.
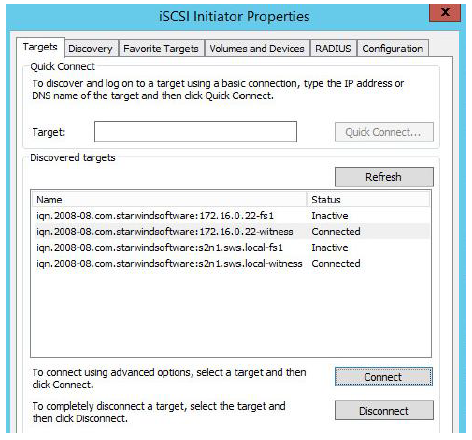
9. Click the Targets tab. The previously created targets are listed in the Discovered Targets section.
Select a target of witness located on the first server and click Connect again.
10. Enable checkbox as the image below.
11. Select Microsoft iSCSI Initiator in the Local adapter text field. In the Initiator IP field select the IP address from 211 subnet. In the Target portal IP select the corresponding portal IP from the same subnet.

12. Select the partner-target from other StarWind node and click Connect.
Enable checkbox as the image below.

13. Select Microsoft iSCSI Initiator in the Local adapter text field. In the Initiator IP field select the IP address from 211 subnets. In the Target portal IP select the corresponding portal IP from the same subnet.

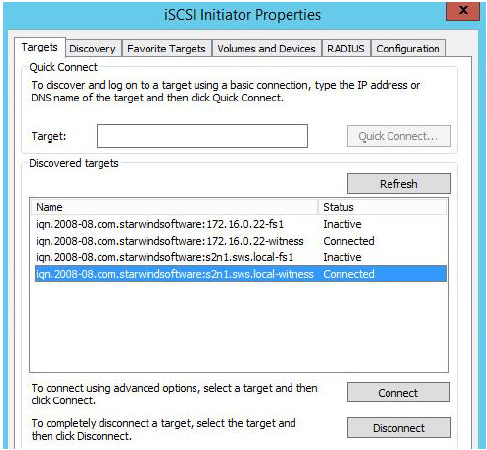
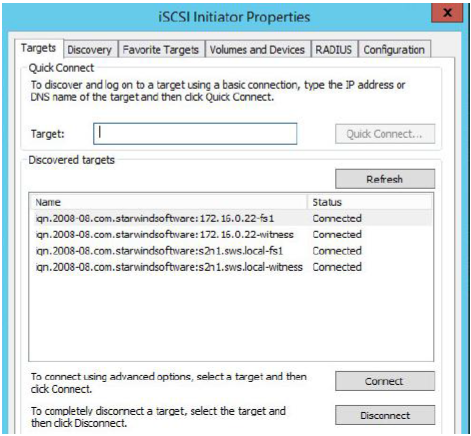
14. The result should look like the screenshot below.

15. Repeat actions described in the steps above for other HA device (FS1).-
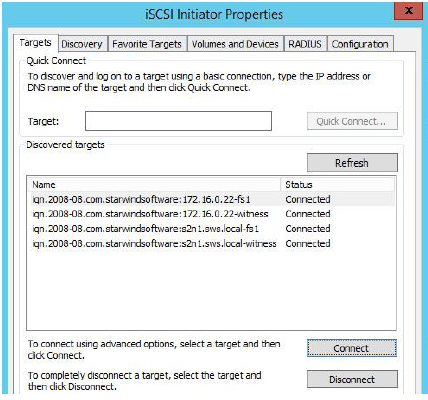
16. The result should look like the screenshot below.
17. Repeat steps 1- 16 of this section on the second StarWind node, specifying corresponding local and data channel IP addresses. The result should look like the screenshot below.
Multipath Configuration
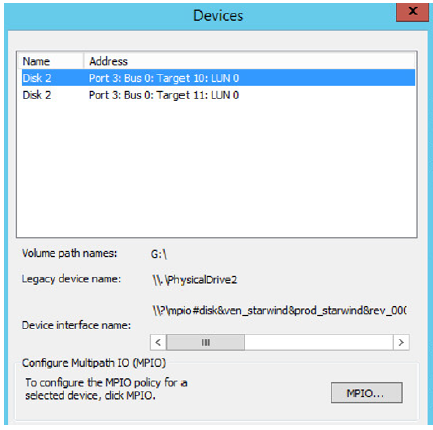
1. According to best practice configure the MPIO policy for each device as a load balance policy Round Robin. For do this select a target of witness located on the local server and click Devices.
2. Devices dialog appears. Click MPIO.
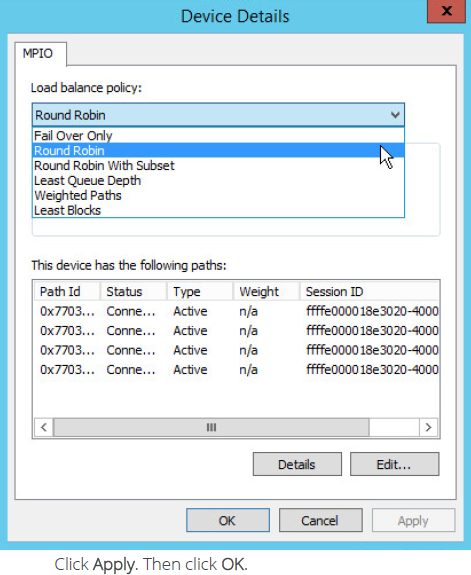
3. Select Round Robin load balance policy. A brief description of the selected policy is provided beneath the Load balance policy box.
4. Repeat steps 1-3 of this section for the all discovered targets.
5. Repeat steps 1-4 on the second StarWind node.
6. Initialize the disks and create partitions on them using the computer management snap-in. It is required that the disk devices are visible on both nodes to create the cluster.
NOTE: it is recommended to initialize the disks as GPT.
Creating a Cluster
1. Open Server Manager. Select the Failover Cluster Manager item from the Tools menu.
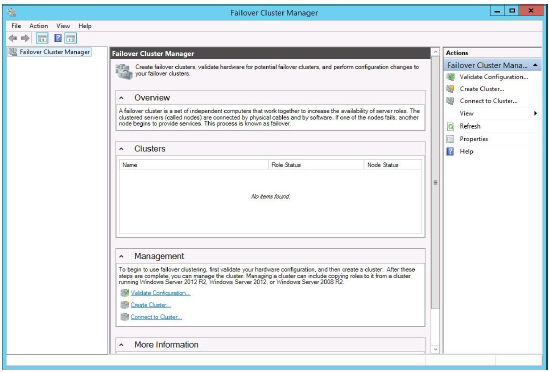
2. Click the Create Cluster link in the Actions section of the Failover Cluster Manger.
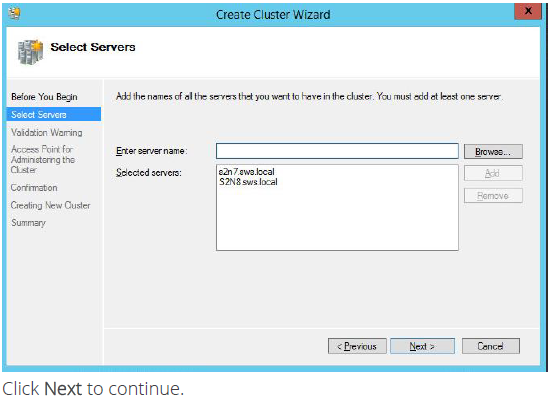
3. Specify the servers to be added to the cluster.
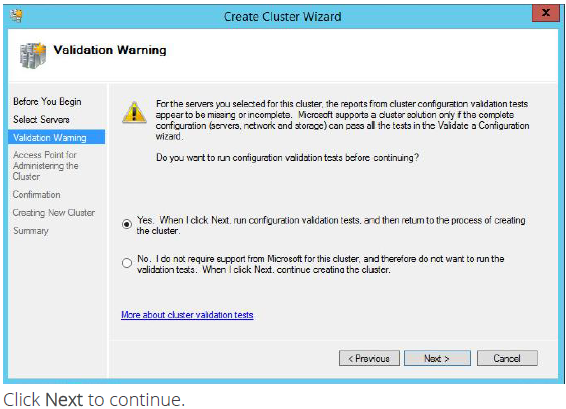
4. Validate the configuration by passing the cluster validation tests: select “Yes…”
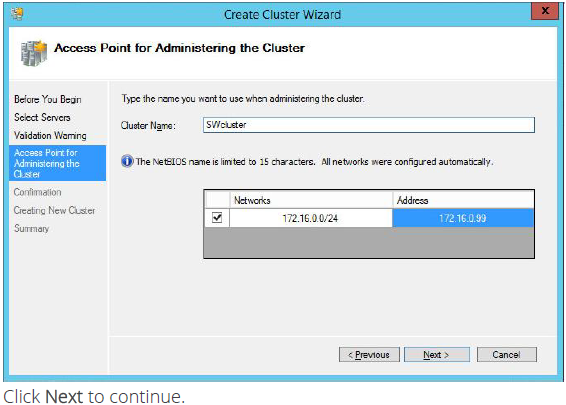
5. Specify a cluster name.
NOTE: If the cluster servers get IP addresses over DHCP, the cluster also gets its IP address over DHCP.
If the IP addresses are static, you have provide the cluster IP address manually.
6. Make sure that all of the settings are correct. Click Previous to make any changes.
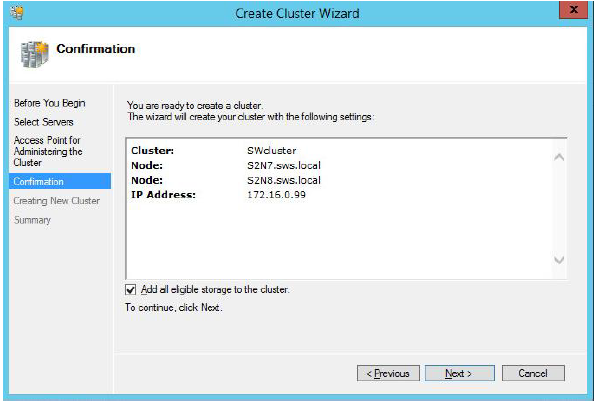
NOTE: If checkbox “Add all eligible storage to the cluster” is selected, the wizard will try to add all StarWind devices to the cluster automatically. Smallest device will be assigned as Witness.
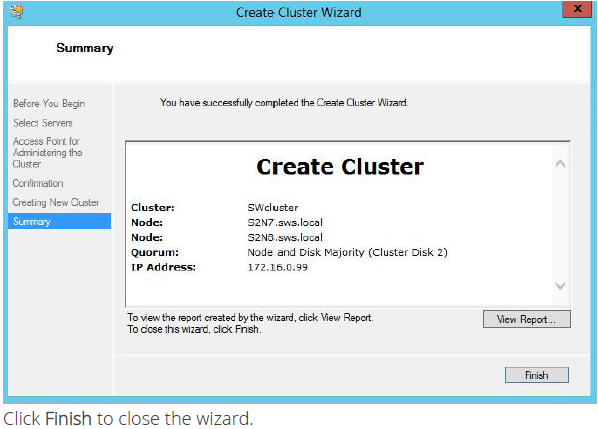
7. The process of cluster creation starts. After it is completed, the system displays a report with detailed information.
Configuring and Managing Scale-Out File Server
To make the Scale-Out File Server Highly Available you must have at least one accessible storage configured in the form of a CSV-volume.
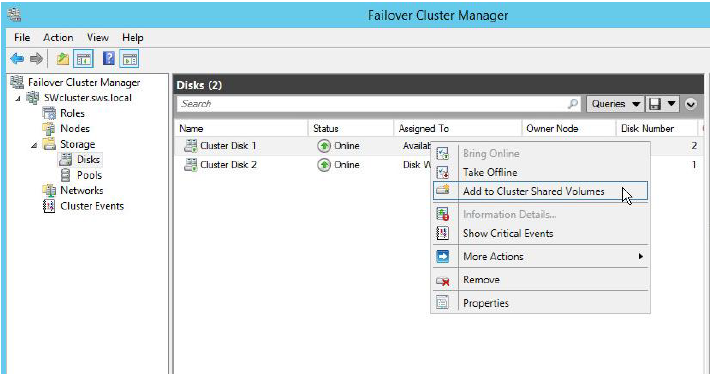
1. Right-click the disk assigned to Available Storage (see the Assigned To column), and click Add to Cluster Shared Volumes.
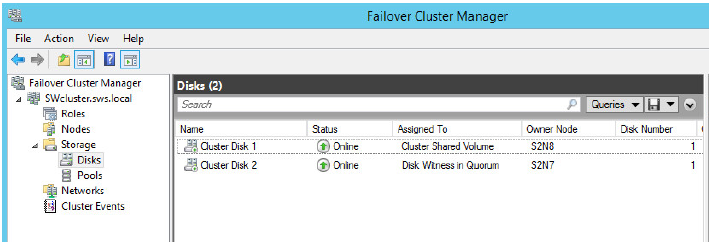
2. The disk will be displayed as a CSV at the Failover Cluster Manager window as shown in the screenshot below.
NOTE: to avoid unnecessary CSV overhead configure each CSV to be owned by one cluster node. This node should also be the preferred owner of the VMs running on that node.
Configuring the Scale-Out File Server Role
To make the File Server Highly Available:
1. Open Cluster Manager.
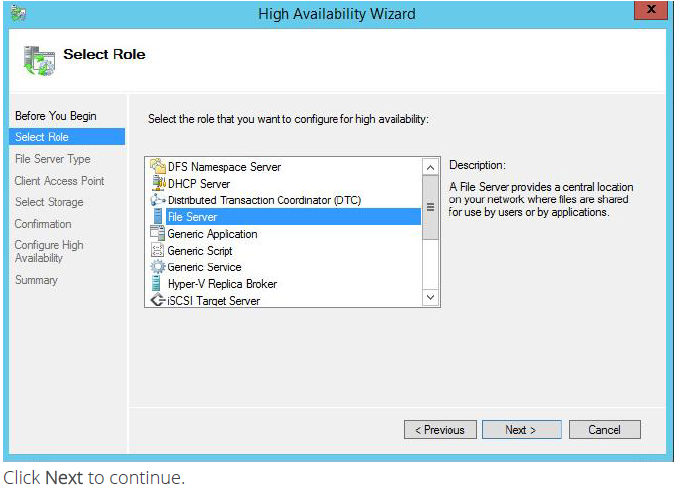
2. Expand the Features item on the Console tree and select Configure Role it starts High Availability Wizard. Click Next to continue.
3. Select the File Server item from the list in High Availability Wizard.
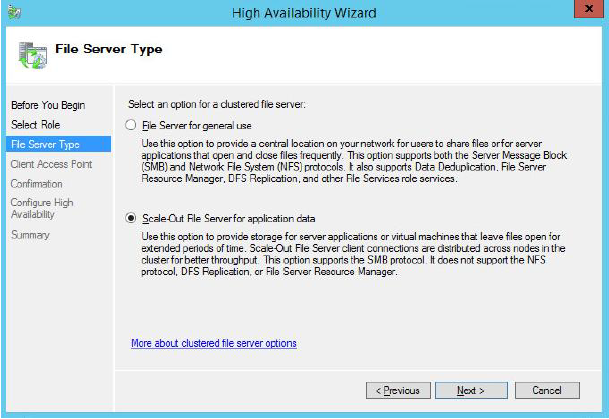
4. Select Scale-Out File Server for application data and click Next.
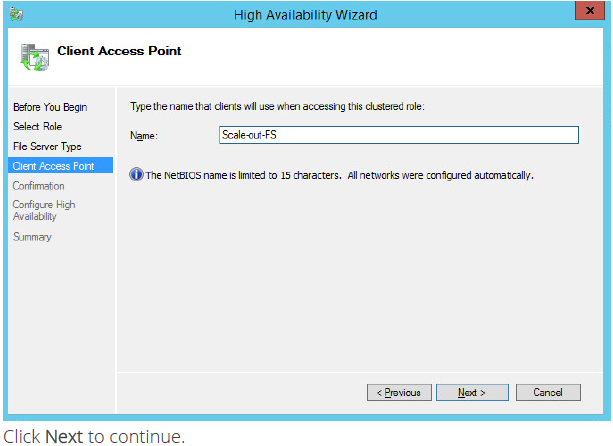
5. On the Client Access Point page, in the Name text filed type a NETBIOS name that will be used to access a Scale-Out File Server.
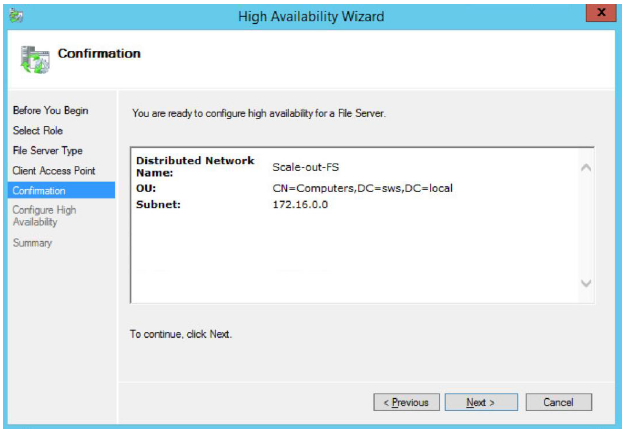
6. Check whether specified information is correct. Click Next to proceed or Previous to make any changes.
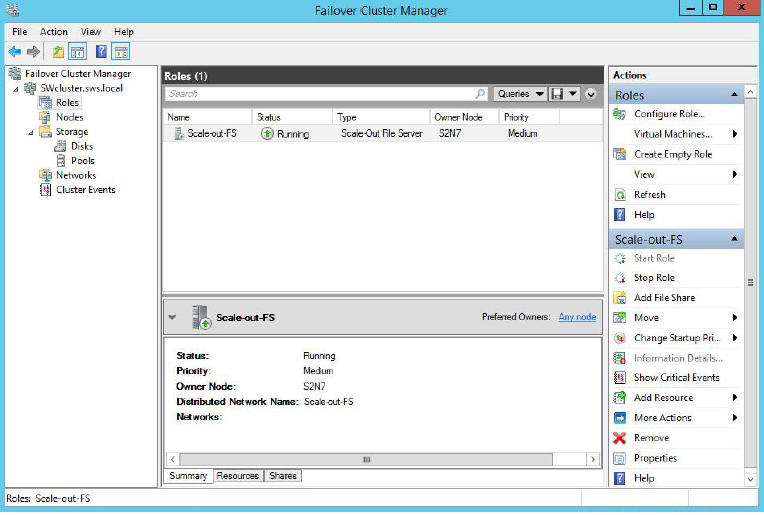
7. When finished successfully, the Wizard should look as shown in the screenshot below.
Click Finish to close the Wizard.

8. When you are finished, High Availability Wizard should look as shown in the screenshot below.
Creating A File Share On a Cluster Shared Volume
1. Open Cluster Manager.
2. Expand the Features item on the Console tree and select Configure Role
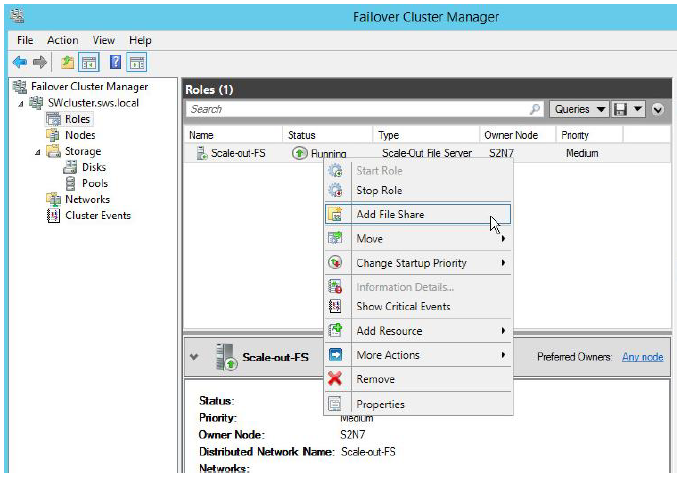
3. You can either click Add a File Share in the left pane, or right click under the configured service, and select Add a File Share from the shortcut menu.
NOTE: if you see Client Access Point alert.Open command promt and run the command “ipconfig /flushdns”
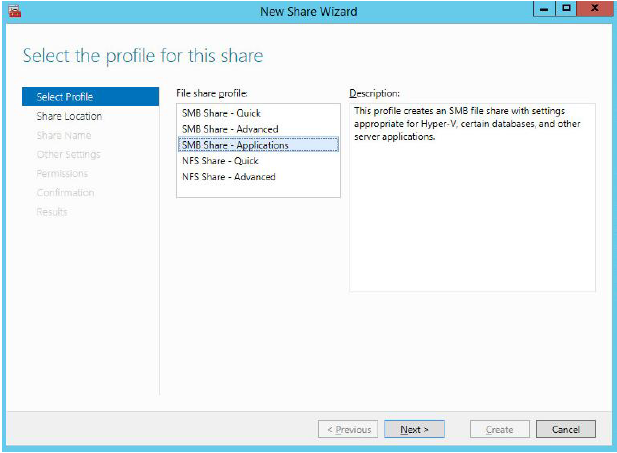
4. Select SMB Share – Applications from the list of profiles. Click Next to proceed.
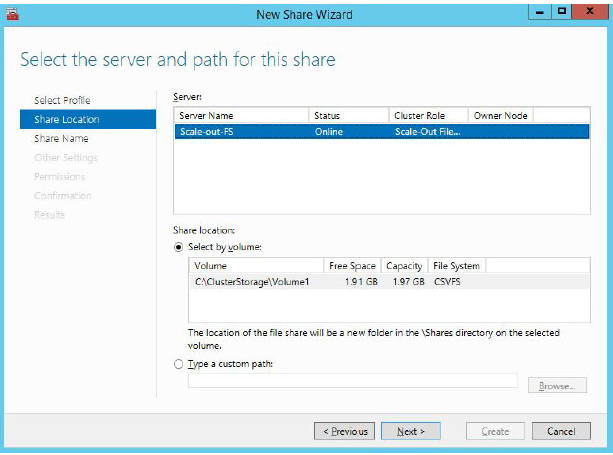
5. Select a CSV to host the share. Click Next to proceed.
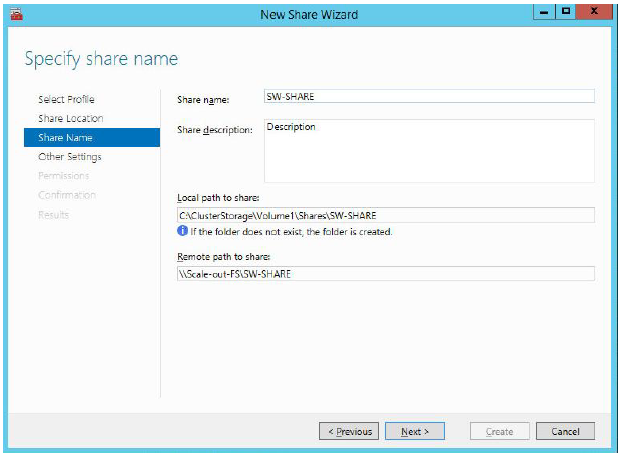
6. Specify name and description for your file share. Click Next to proceed.
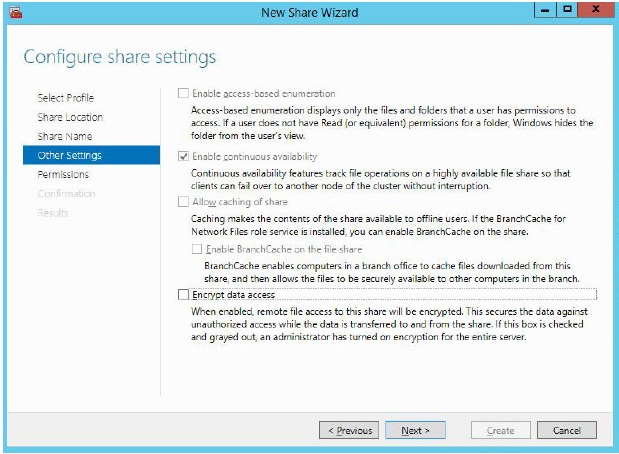
7. Ensure the Enable Continuous Availability checkbox is selected. Click Next to proceed.
8. Specify access permissions for your file share.
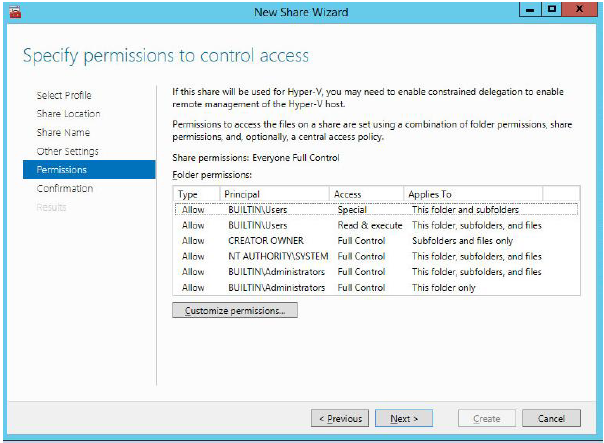
NOTE: If you are using Scale-Out File Server for Hyper-V, all Hyper-V computer accounts, the SYSTEM account, and all Hyper-V administrators must be granted full control on the share and file system.
If you are using Scale-Out File Server on Microsoft SQL Server, the SQL Server service account must be granted full control on the share the file system.
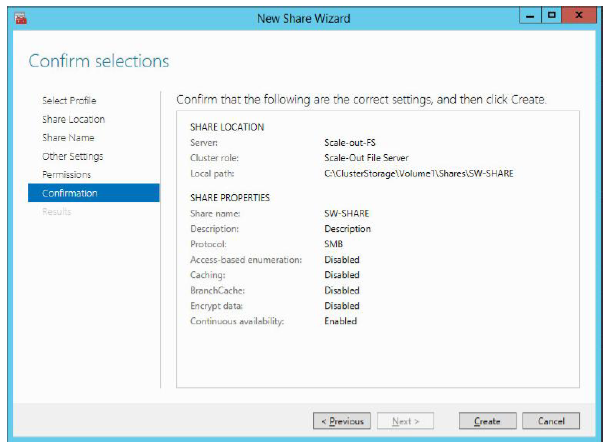
9. Check whether specified settings are correct. Click Previous to make any changes or click Create to proceed the creation of a shared folder.
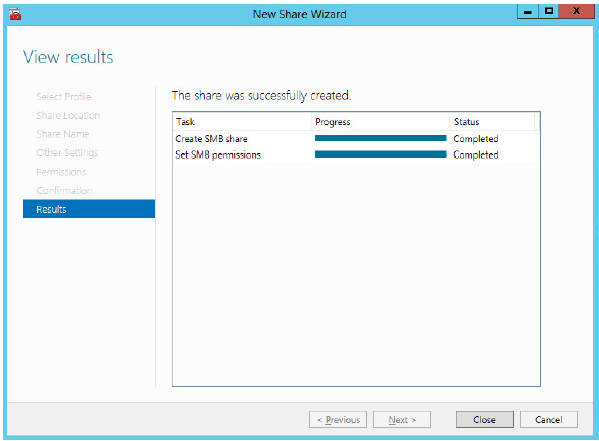
10. Check a summary, and click Close to close the Wizard.
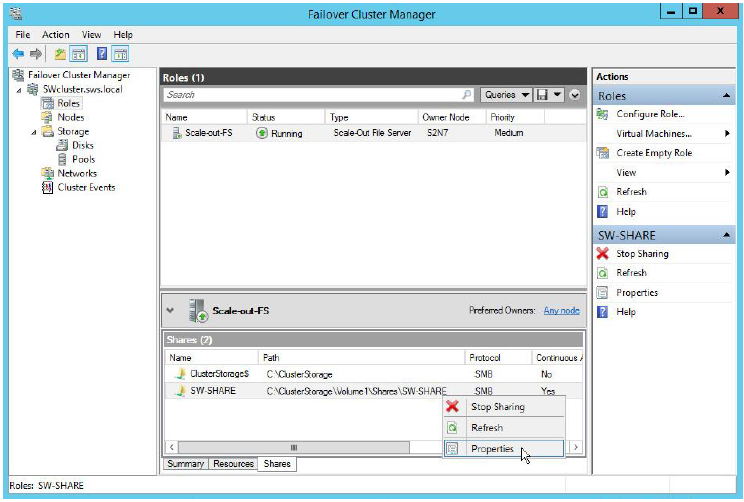
To manage created shares:
1. Start Server Manager.
2. Go to Tools->Failover Cluster Manager->”Cluster_name.domain”->Roles.
Select “Shares” tab, right click the just created file share and select Properties.