

Introduction
So we all want our IT infrastructure to be available at hand and manage it from any remote location. Nowadays, it’s nothing special, it’s just a “must-have”. For real, the days of managing your IT environment only from a directly connected device are long gone. IT administrators need flexibility and the ability to access their infrastructure 24/7 no matter where they are. Installing dedicated software every time you need to make some minor changes or just to monitor your environment’s stats is also a no go. Moreover, such software may not be supported on mobile devices.
To jump over these barriers, StarWind adds the Web-based management functionality which allows administrating the VSAN from StarWind infrastructure from any point of the world using any device (PC or mobile, it doesn’t really matter) with an HTML5-capable web browser.
Currently, there are two ways to operate StarWind infrastructure via a web browser:
StarWind Gateway VM.
StarWind VSAN.
Both options provide you with a remote access to your StarWind environment along with all the capabilities of the regular StarWind Management Console. However, there are certain differences between these two. In this part, I will cover the Gateway VM approach and show you how to configure Gateway VM for Microsoft Hyper-V.
OK, let’s get down to this.
Deploying StarWind Gateway VM
The Gateway VM approach allows deploying a Linux-based virtual machine from a template, which you can find on StarWind website, and further use the VM as HTTP > RDP “proxy”. After configuring the VM and a target host, the user automatically gets directed into the RDP session on the target StarWind host when entering a Gateway VM IP in a web browser.
The Management Console is basically a graphical user interface controlling storage-related operations (such as creating devices on the available target servers). After the installation, StarWind Management Console connects remotely to StarWind Service.
The “thin” client allows the user to manage the StarWind-based infrastructure by connecting to the Management Console from any HTML5-capable web browser on PC or Android, iOS or Windows mobile device.
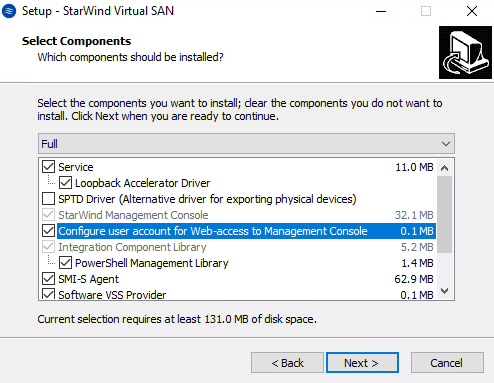
In order to configure the remote access, you first need to install the StarWind Web Console feature (if you haven’t done this yet). Install the StarWind Web Console feature using VSAN from StarWind Installer Wizard. The Web Console feature must be deployed on each server with StarWind Management console.
Let’s start configuring StarWind Gateway VM for Hyper-V, shall we?
PS. To enable Hyper-V on your PC, use the following guide:
https://docs.microsoft.com/en-us/virtualization/hyper-v-on-windows/quick-start/enable-hyper-v
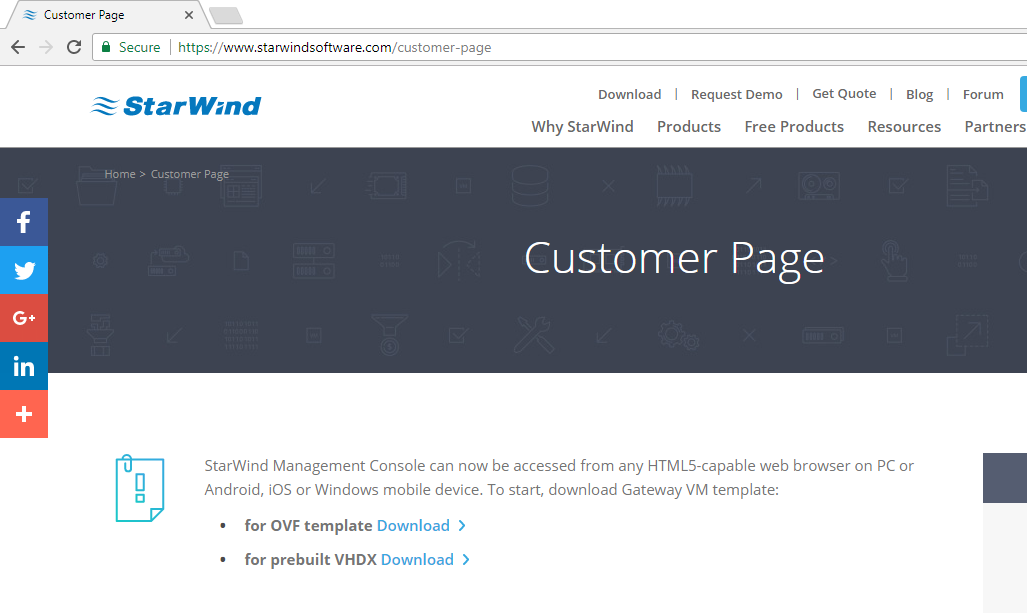
The first thing you need to do is download a Gateway VM template. For Hyper-V, download the VHDX image. Gateway VM templates can be downloaded from the personal account on the StarWind web site: https://www.starwindsoftware.com/customer-page
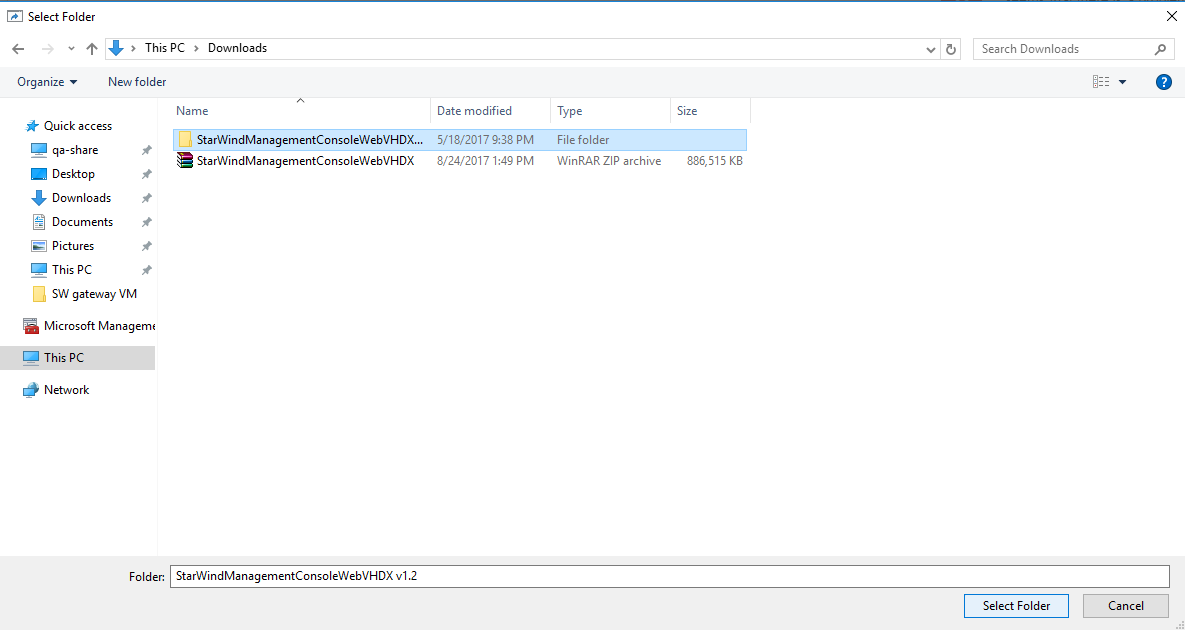
Now, you have to select the folder and extract the downloaded image into it.
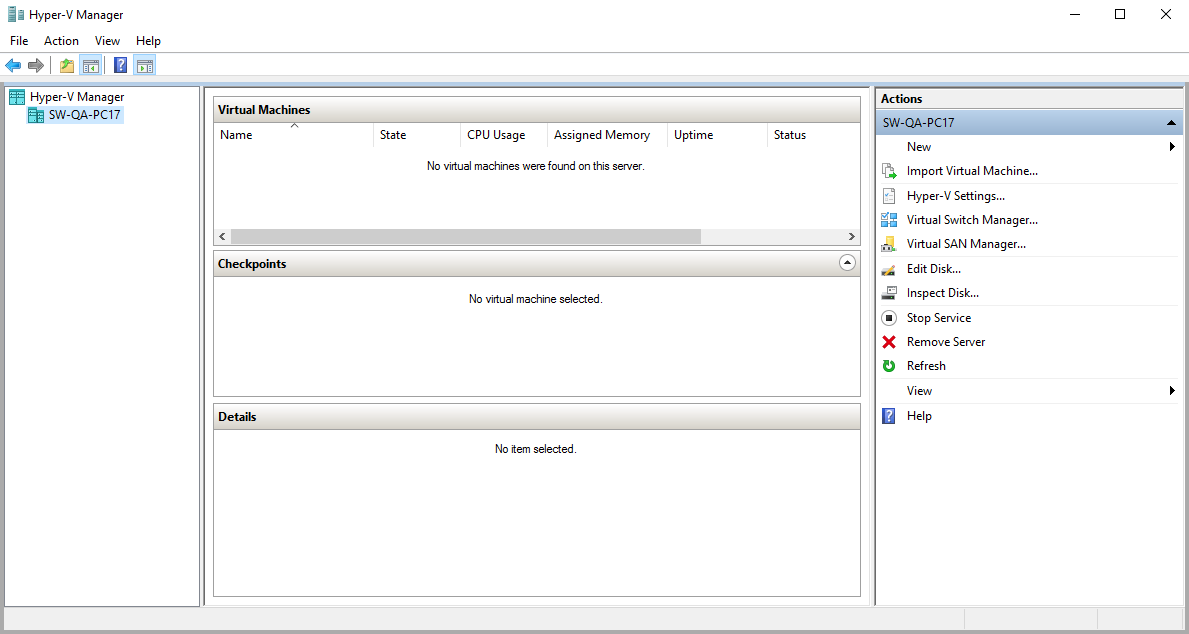
Let’s launch Hyper-V Manager and import the StarWind Gateway VM image:
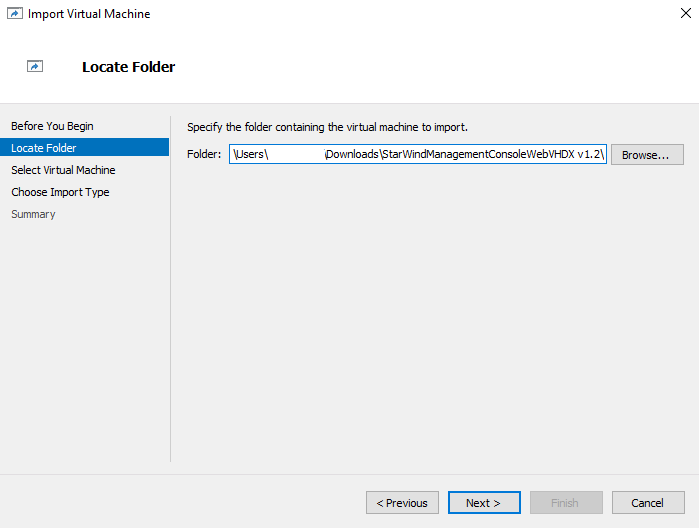
The first window is Locate Folder, so you have to choose the folder with the extracted StarWind Gateway VM image.
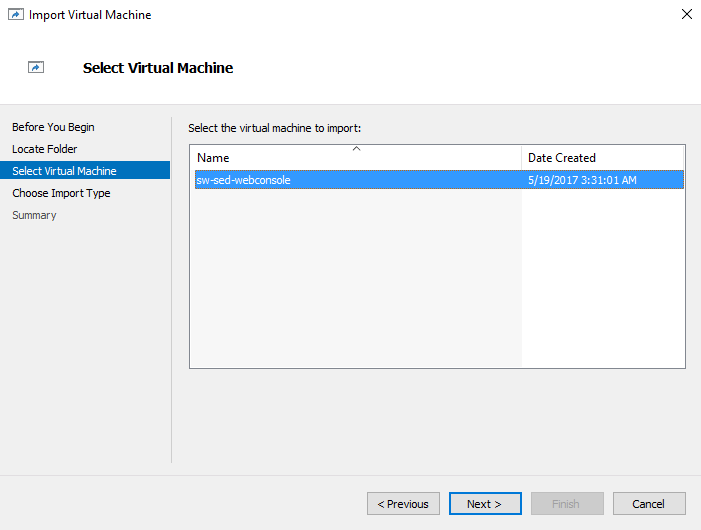
In the Select Virtual Machine tab, you should choose the extracted StarWind Gateway VM image.
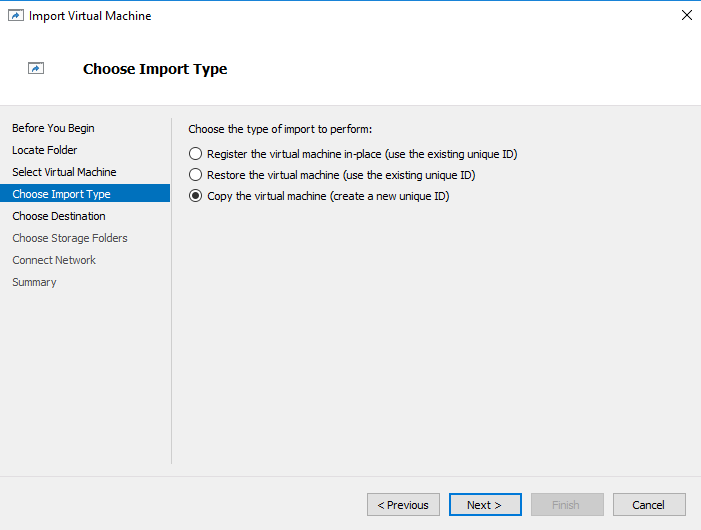
Choose Import Type window appears where you need to select the required type of import to perform.
The next tab is Choose Destination where you can select folders to store the VM file and data.
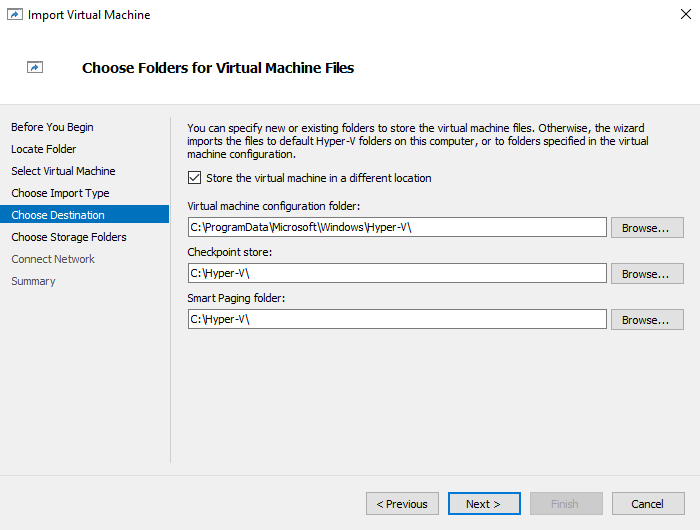
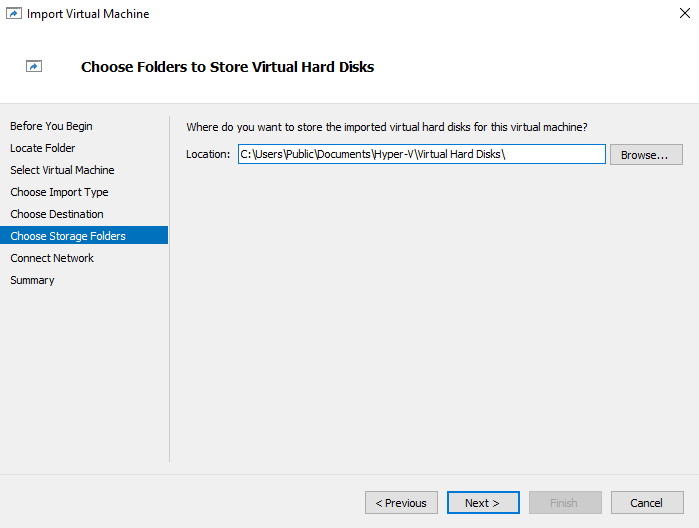
After that, you’ll see the Choose Storage Folders window. Here, you need to select a folder to store the VM hard disk.
In the Connect Network tab, select the network to which StarWind Gateway VM will be connected. In case you’ve just deployed Hyper-V, it’s most likely that a virtual network switch for VMs won’t be created. If so, select the Not Connected option. Also, you can change network settings later and connect the network to your virtual machine.
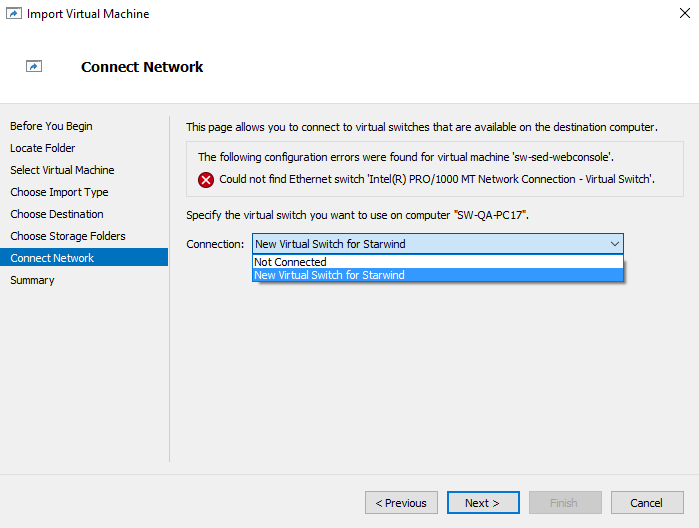
Also, the instruction for configuring the network in Hyper-V might come in handy:
https://docs.microsoft.com/en-us/windows-server/virtualization/hyper-v/get-started/create-a-virtual-switch-for-hyper-v-virtual-machines
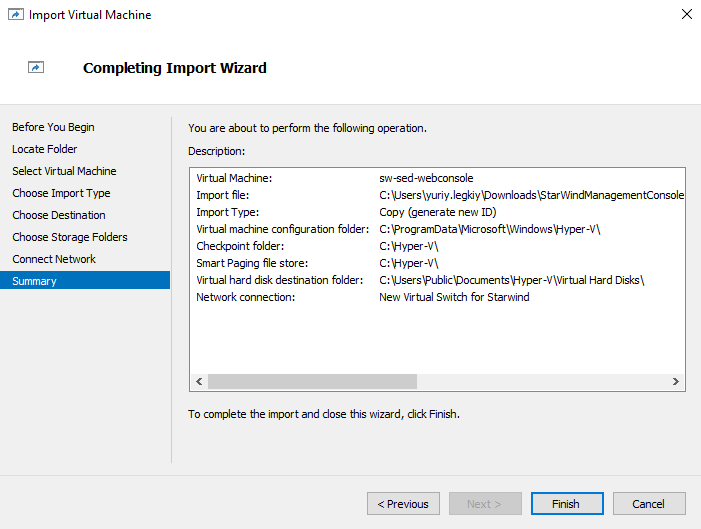
Finally, check if all the settings are correct. You can click Finish now.
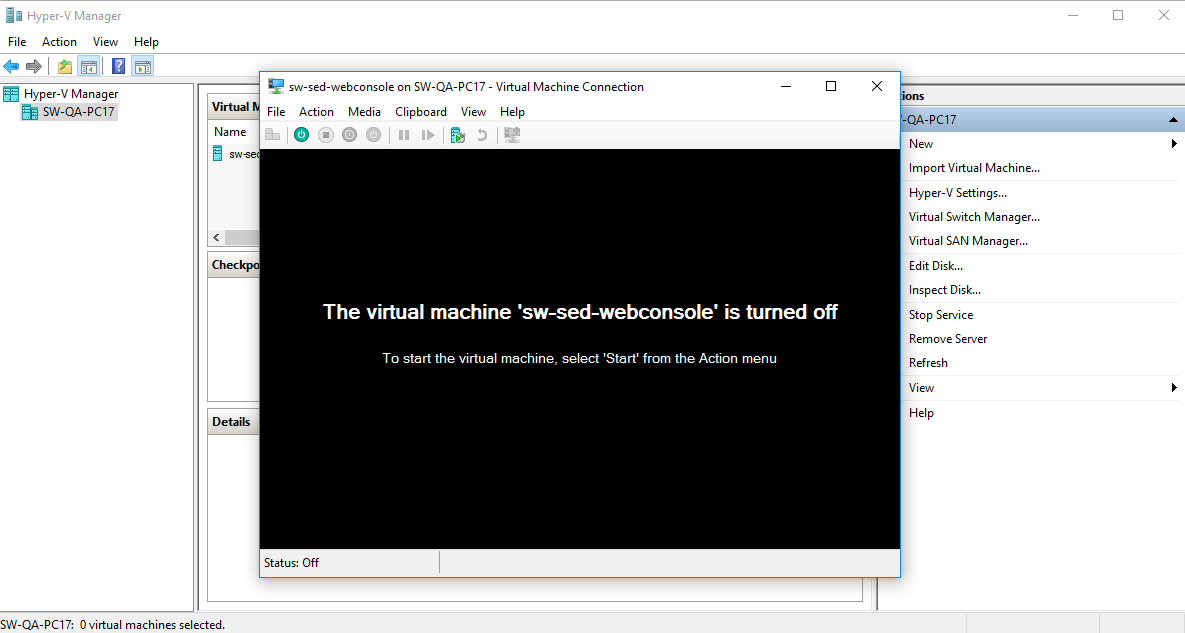
The installation process is completed and you can start working with StarWind Gateway VM, but first, you have to connect to it.
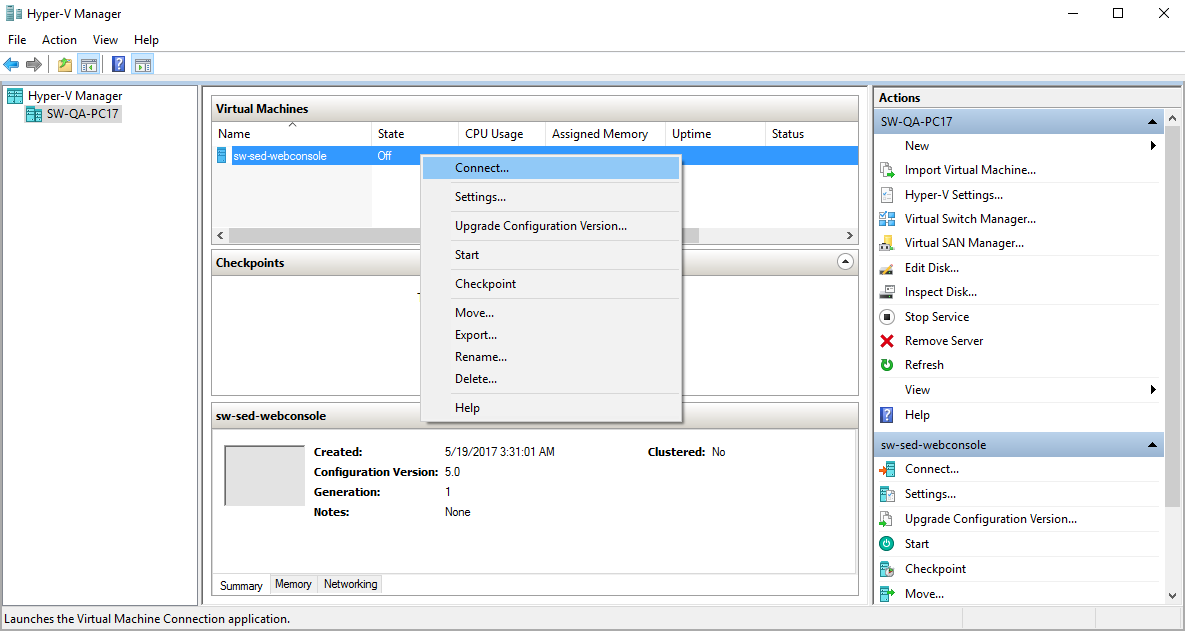
Now, start the virtual machine.
After launching StarWind Gateway VM, you have to get its IP address.
By default, StarWind Gateway VM will receive automatic IP address via DHCP. To get your VM’s IP, you need to log in to the DHCP server and look which IP was assigned to StarWind Gateway VM when it was launched. Please note that StarWind Gateway VM has no domain name.
I also recommend creating a DHCP reservation, configure DNS resolving, and set a static IP address for this VM.
You can now open a web browser and enter the IP address.
The following window will pop up:
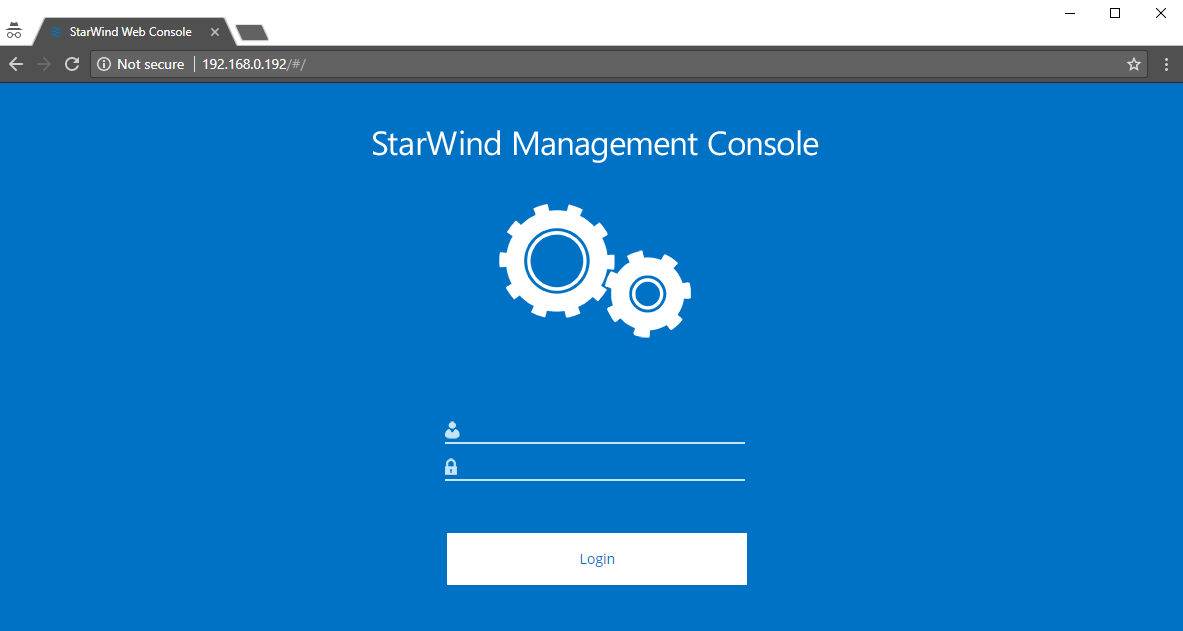
Nothing special here, just enter the authorization credentials.
Login: starwind
Password: starwind
After the authorization, you should open the settings window. To do this, use the following combination in the web browser: Shift+Ctrl+Alt and select the Settings menu.
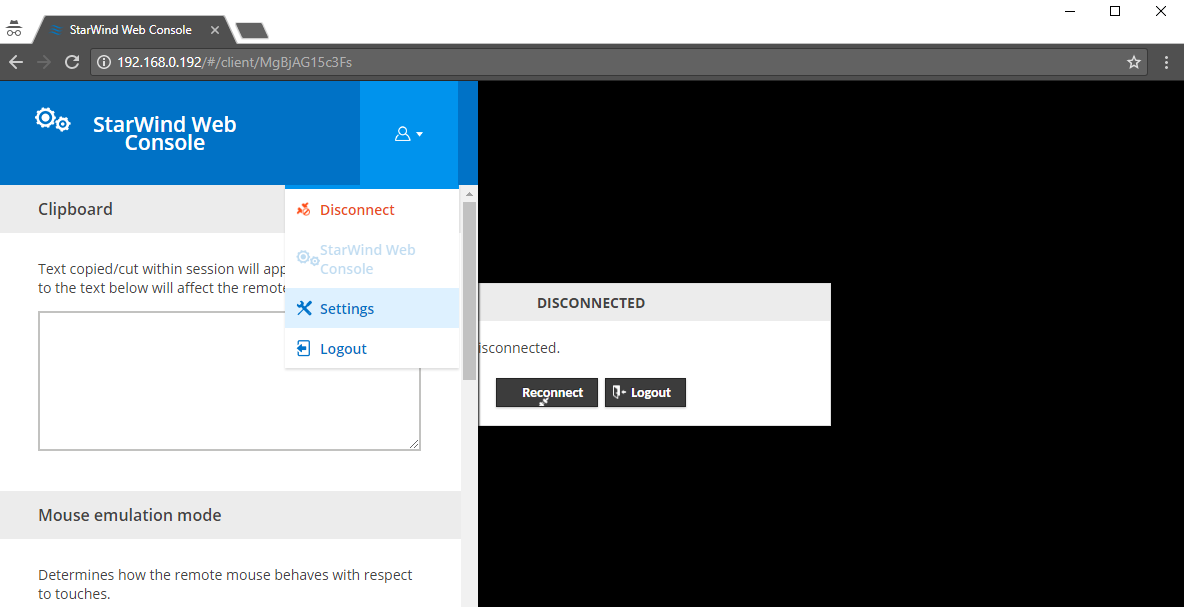
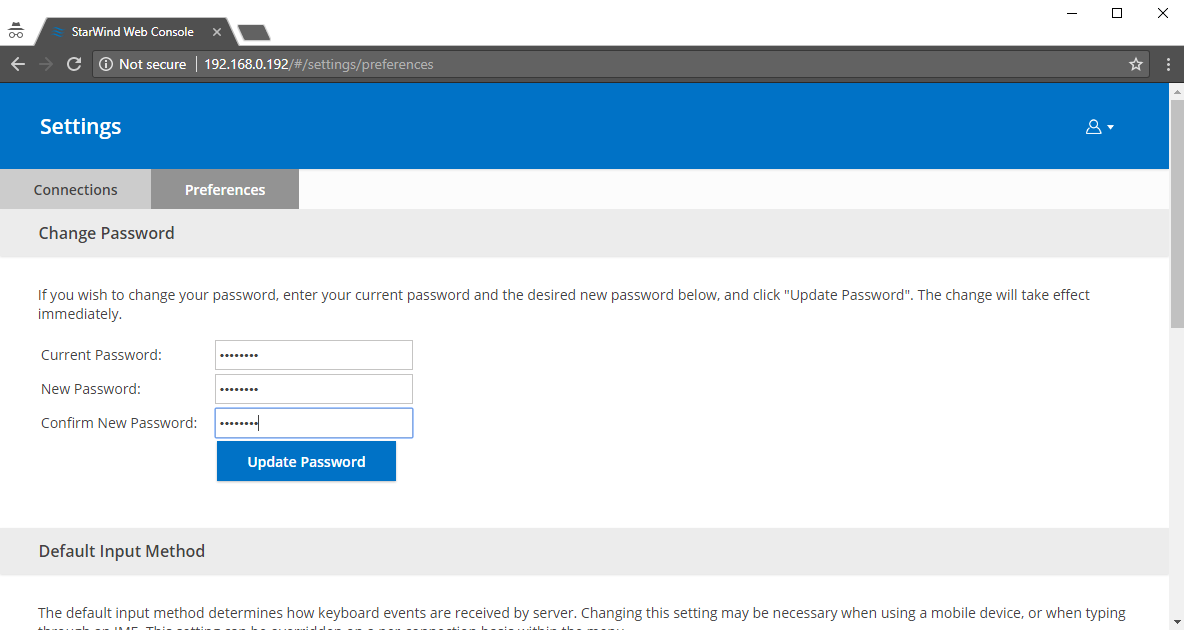
You can change your authorization password if you want in the Preferences tab.
In order to connect to the remote server, enter the server authorization credentials.
Now, open the Connections tab and change StarWind Web Console parameters.

Here, you should enter the target server IP address and leave the Port field empty. In case you’ve configured your own RDP port on the target server, enter it in the Port field and don’t forget to save the changes.
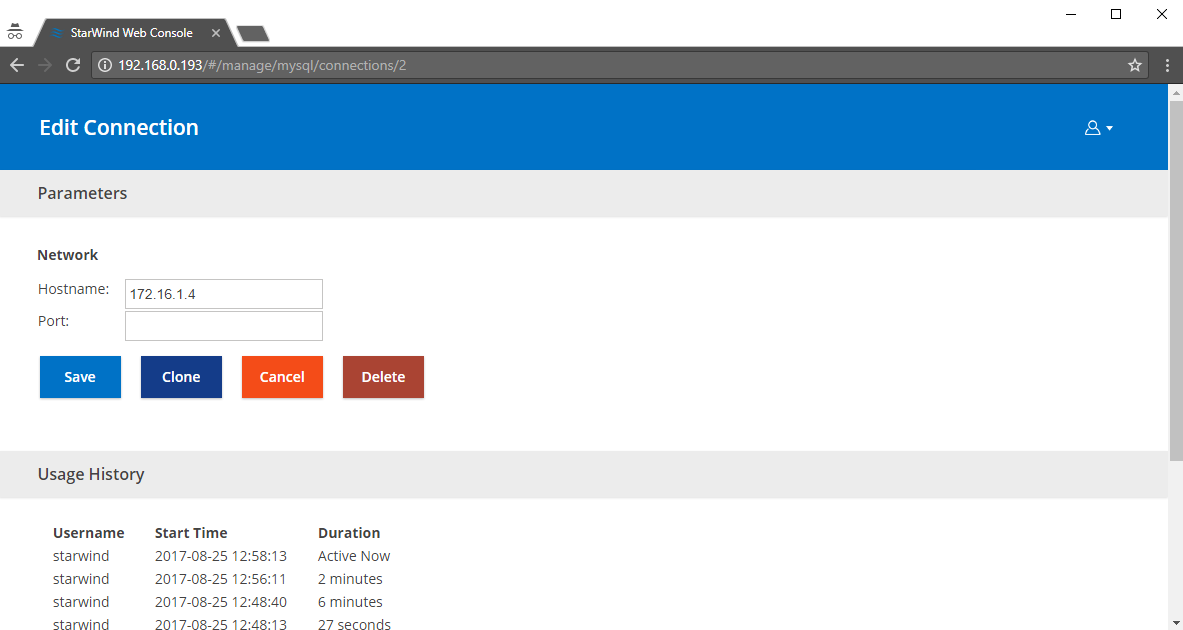
P.S. Be careful, do not press the Delete button! If you delete the current settings, you won’t be able to restore them and you’ll have to import StarWind Gateway VM all over again.
Now, you can connect to StarWind Management Console remotely via a web browser.
Conclusion
We have successfully imported StarWind Gateway virtual machine, configured it, and connected to our target server. As you can see, by following these simple steps, you can set the Gateway VM to manage your StarWind infrastructure remotely. Ultimately, what you get is a full control over the storage-related operations – all you need to do is enter the VM IP address in any web browser and you’re good to go. In the second part, I will show you how to use StarWind Virtual Storage Appliance as an alternative option for a remote management of your StarWind infrastructure.
- Managing VSAN from StarWind infrastructure in a web browser. Part 2: StarWind VSA
- StarWind Web-based Management Overview
- StarWind Manager Installation and Configuration Guidance
