

Introduction
SMI-S or ‘Storage Management Initiative – Specification’ is a standard of a storage management (surprise!) which gives you a chance to administrate the storage layer using ‘Common Information Model’ and Web-Based Enterprise Management technologies and logic. The main point of SMI-S is to provide a single standard to manage various storage systems from different vendors pretty much in the same way. In this article we will show you how to manage your storage using SCVMM 2016 (Server Center Virtual Machine Manager) through SMI-S, and how this whole thing works in general. We’ll use VSAN from StarWind as a reference distributed storage platform, but the primary scope of this document is to cover the subject in general, so any SMI-S compatible storage will work.
Environment
My lab environment is built on two nodes in total. One of them is Windows Server 2016 with Hyper-V role installed and StarWind VSAN as a storage provider. The second node has SCVMM 2016 on its board along with MS SQL 2016 which is required for SCVMM Server. SCVMM is a part of Microsoft System Centre which has been designed to simplify management of large numbers of virtual machines based on Hyper-V. Through SCVMM, we can create/manage VMs in several Hyper-V hosts. Starting from SCVMM 2012, Microsoft has added SMI-S support which allows you creating and configuring storage from different hardware vendors if they support such a standard. So my goal is to remotely setup the storage using SMI-S within a single console.
Configuring SMI-S agent in StarWind VSAN
First of all, we need to install the SMI-S and configure it on the node with StarWind VSAN. In StarWind VSAN installation wizard, we must check the “SMI-S Agent” option or choose “StarWind SMI-S Agent” in the dropdown menu.

After the installation, the wizard will ask you to configure the SMI-S Agent, and if you incidentally clicked “No”, you can always configure SMI-S through StarWind SMI-S Configurator.

In the Configuration wizard, we need to specify the paths for StarWind devices, Sync and HB channels in case you are planning to setup the HA storage for Hyper-V Failover Cluster. That’s how my configuration looks like.

You can find more detailed guidance for configuring StarWind SMI-S agent as well as preconfiguring SCVMM 2016 in our technical paper: https://www.starwindsoftware.com/resource-library/starwind-virtual-san-automating-management-with-smi-s-in-system-center-virtual-machine-manager-2016
How to manage StarWind VSAN storage from SCVMM using SMI-S
Let’s get started. I have preinstalled SCVMM 2016 on my server which will give me an option to create and manage StarWind storage through SMI-S which we have preconfigured on StarWind site earlier. First, we should connect to the SCVMM server. You can do it on the server where SCVMM is installed or from any PC with SCVMM management console. After connecting to the SCVMM console, we should navigate to the “Fabric” -> “Arrays” and click the “Add Resources” button. In the pop-up wizard, you need to choose the connection type (SAN, NAS via SMI-S) and specify the IP of the server where StarWind is installed and configured.

By clicking “Add Logical Unit” we can create a StarWind device. Specify the storage pool, name and size of future device.

In the Classifications and pools tab, we can see our newly created Logical Unit.

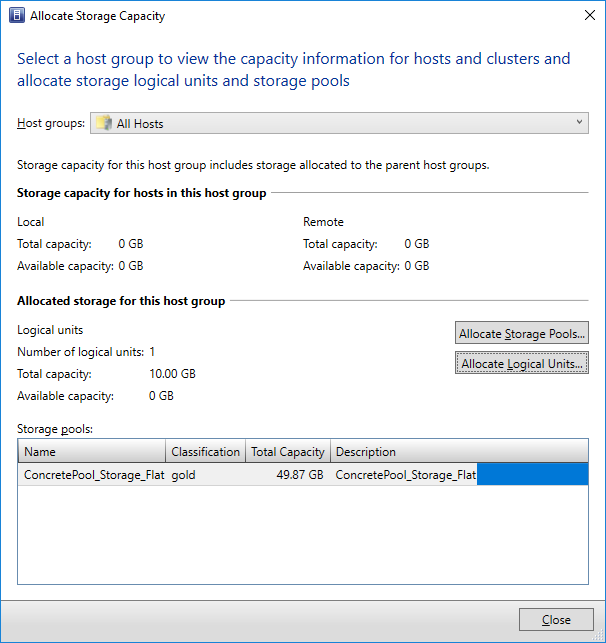
The next step is to allocate Storage Pools and Logical Units in “Allocate Storage Capacity” properties.
After allocating the required Storage Capacity, we need to configure iSCSI Array in managed host properties.


By clicking “Add” we can add iSCSI Array and new logical volume for our StarWind device. Creating new logical volume will connect StarWind device in iSCSI Initiator and initialize it in Disk Manager.
In total, we have an opportunity to fully setup and manage StarWind devices literally in 3 clicks, and you can deploy VMs on top of StarWind devices within a single console.
Conclusion
With SMI-S, you can avoid using many different GUI consoles such as iSCSI Initiator, Disk Manager, StarWind Management console, etc. because all the required operations can be done through SCVMM with the configured SMI-S layer as the storage manager.
