


Proxmox Backup Server (PBS) is designed specifically to work with Proxmox Virtual Environment (PVE). While PVE is responsible for running and managing virtual machines and containers, PBS handles their secure, efficient backup and restoration. Since PVE works directly with PBS, you can easily set up backups, manage storage, and restore full virtual machines right from the PVE web interface.
In this tutorial, you will get to know the process of backing up VMs on PBS along with its installation and configuration.
Installing Proxmox Backup Server
This section covers a step-by-step guide for installing PBS on your system via a bootable USB drive.
Step 1: Download Proxmox Backup Server
First of all, download the Proxmox Backup Server ISO file from the Proxmox official website:

Step 2: Create a Bootable USB
Next, create a bootable USB drive using software like Rufus and insert it into the target machine.
Step 3: Enter the BIOS Settings
Restart your machine, enter the BIOS settings, and set the USB drive as the primary boot device. Save the settings and reboot the machine to start the Proxmox backup server installer.
Step 4: Install Proxmox Backup Server
To install Proxmox Backup Server via GUI, hit the first option:

Then, click on “I agree” to accept the agreement:

Choose the hard disk where you want to install Proxmox Backup Server, then click “Next”:

Enter the required information:

Set a strong password and also provide an active email address:

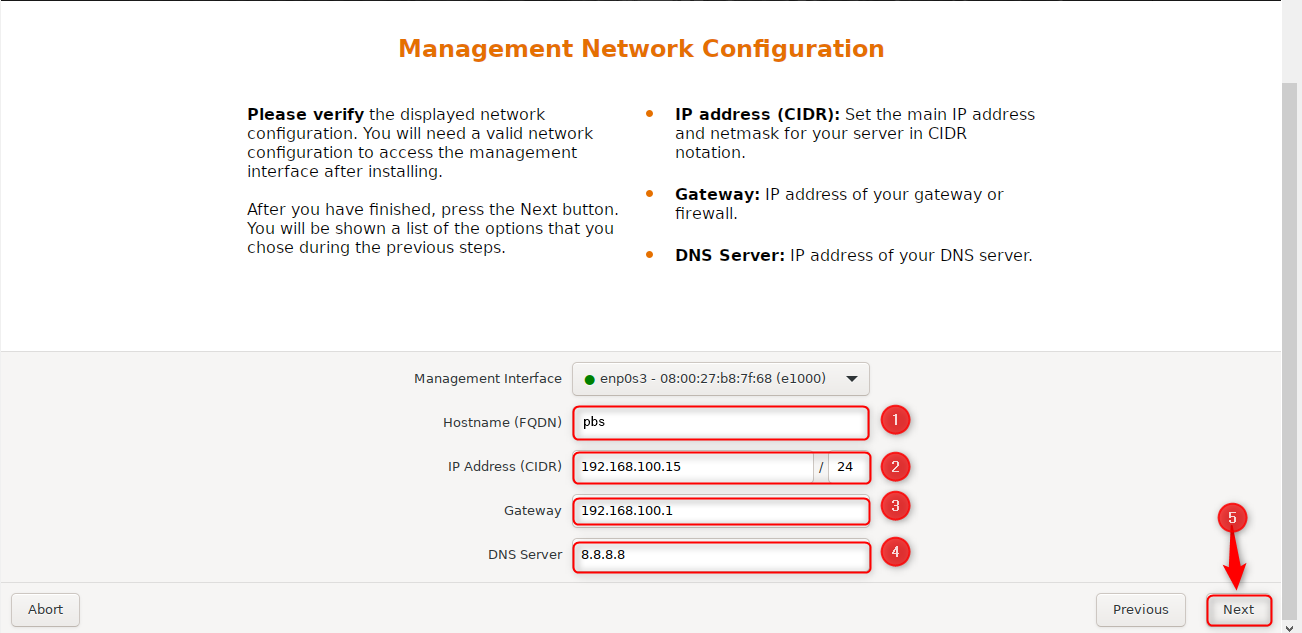
Configure hostname, static IP address, gateway, and DNS Server:
Review the information you entered and press the “Install” button:

Proxmox backup server has been installed successfully:

Configuring Proxmox Backup Server (PBS)
After installation, Proxmox Backup Server requires a few essential configurations to be fully functional. Follow the steps below to make sure that your PBS instance is up-to-date, stable, and prepared to handle backup tasks.
Step 1: Access PBS
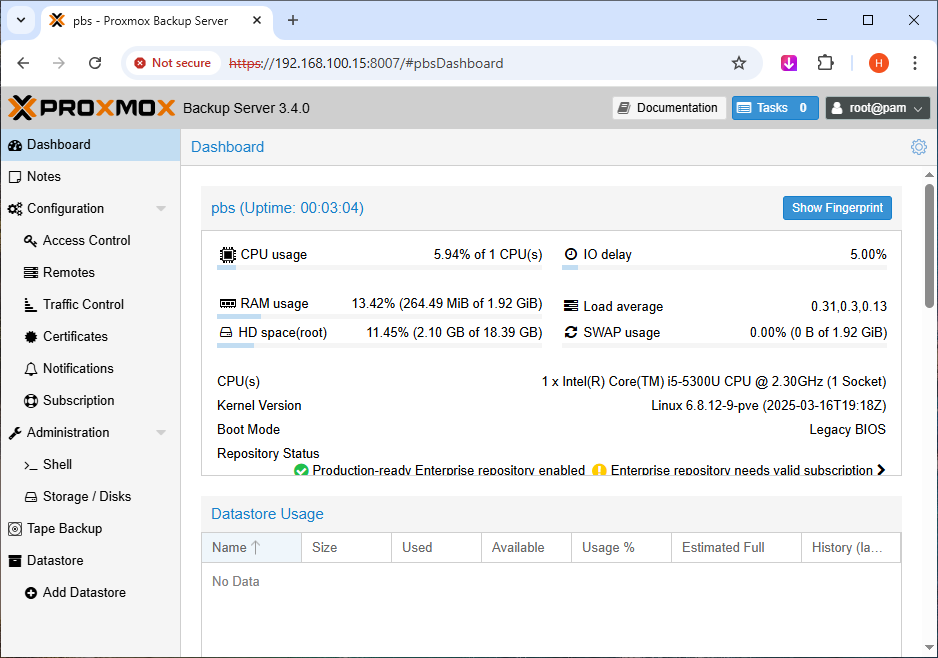
To access PBS, open a browser and go to “https://<your-ip>:8007”.
Note: Replace “<your-ip>” with the IP address you mentioned while installing Proxmox Backup Server:

Next, click on the “Proceed” button:

Type “root” in the username field and the password you set earlier:

We have successfully logged in to the PBS web interface:
Step 2: Disable the Enterprise Repository
Stop the system from using paid or subscription-only repositories to save the update by disabling the Enterprise repository:

Step 3: Create a No-Subscription Repository
Go to the “Administration” tab, hit “Repositories,” then on “Add”:

Select “No-Subscription” and press “Add”:

No-Subscription repository has been added successfully:

Step 4: Upgrade the System
Firstly, we need to check for the available updates:

After that, click on “Upgrade”:

Type “y” and press Enter to confirm upgrading the system:

Reboot the system once this process gets completed:

All updates have been installed successfully:

Step 5: Create a ZFS Storage
Navigate to the “Storage/Disks” tab, then to “ZFS”. Hit the “Create: ZFS” button and fill in the required data:

This will be required later while backing up VMs:

Backing Up VMs on Proxmox Backup Server
Once Proxmox Backup Server is configured, you can begin backing up your virtual machines from a Proxmox VE node. Follow the mentioned procedure to successfully backup your VMs and protect them against data loss.
Step 1: Create a Storage for the Proxmox Backup Server
Go to the Proxmox Backup Server dashboard and copy the fingerprint:

As the next step, log in to your Proxmox server and create a storage for PBS:

Enter the respective information and hit “Add”:

Step 2: Start the Virtual Machine
Next, power on the virtual machine that you want to back up:

Make sure that VM starts without any errors:

Now, click on the VM under the respective node and create its backup:

Debian 12 VM has been backed up successfully:

This VM can be restored when required:

Conclusion
To backup VMs on Proxmox Backup Server, first install it on your system. Then, access it via the PBS web interface and create a no-subscription repository. Upgrade the system and create a ZFS storage. After that, copy the PBS fingerprint and log in to your Proxmox server.
Next, create a storage for PBS and start the VM you want to backup. Lastly, select the VM and click on “Backup Now” under the Backup tab. This is how you can protect your VMs like a Pro using Proxmox Backup Server.
