


MSI package are useful to be deployed in centralized management environment of Microsoft Active Directory. Unfortunately to deploy a software you need a MSI package. Microsoft do not support deploying EXE applications via GPOs.
So if your organization has some of those EXE applications and want do manage the deployment via Group policy, it’s necessary to repackage the EXE and create an MSI package.
The process of repackaging is not easy, but It’s easy when you know which software to use and how. In this post I’ll walk you through to perform such an operation with MSI Package Builder from EMCO, but this Is not the only software company which sells such a tool.
What do I need?
- EXE application – this as I sais can be exe application which isn’t available as MSI and you have to repackage
- EMCO’s MSI Package Builder – (note that they offer 30 days trial which allows testing the product and deploy MSI packages during limited 30 days period only)
- A clean system – this can be Windows client OS (W7, W8.x or W10). It’s up to you. I recommend to do the installation in clean VM as you can take a snapshot after installing the EMCO’s software.
- Few min of your time..
What are the steps?
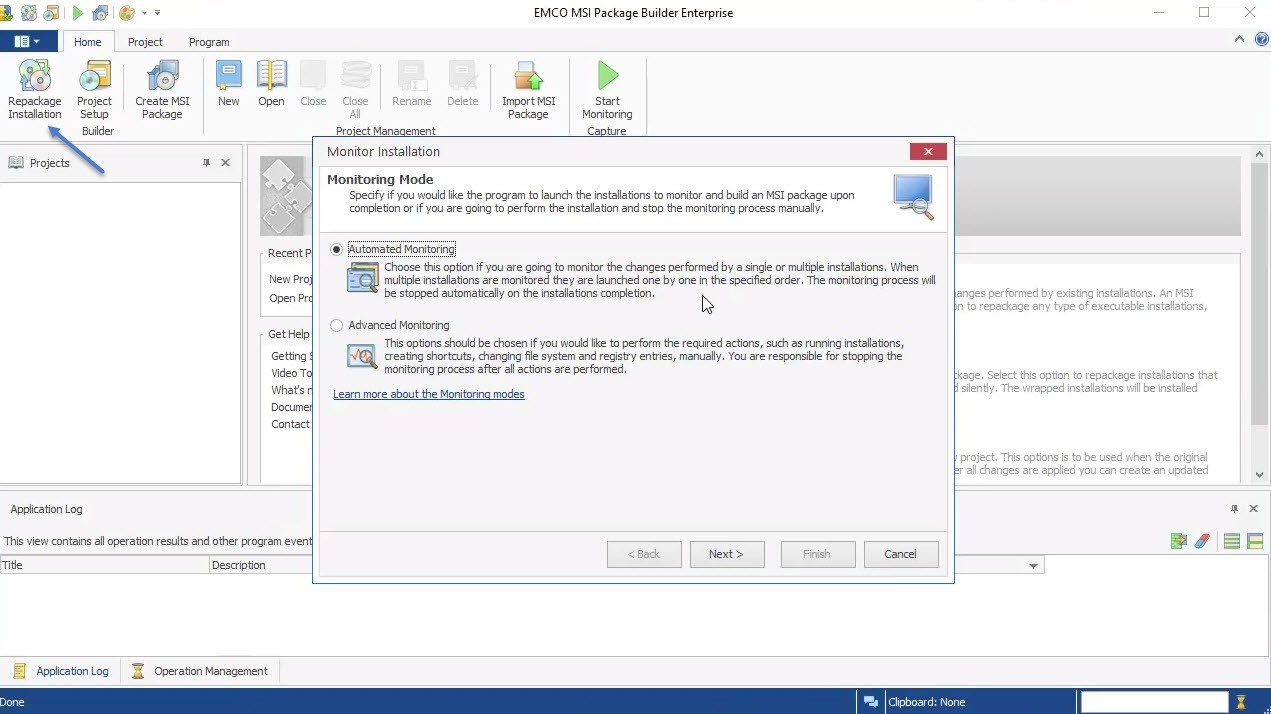
Step 1 – Install EMCO’s MSI package builder – I have a clean Windows 10 VM (in my case I’m just using VMware Workstation). Let’s install EMCO’s MSI Package builder. The installation is simple, just follow the defaults. After installation you’ll have the assistant window like this.
Step 2 (Optional) – Create a snapshot of your VM. I recommend creating a snapshot of your VM because once your package created and placed on network share you can revert back and have clean system, ready for another conversion.
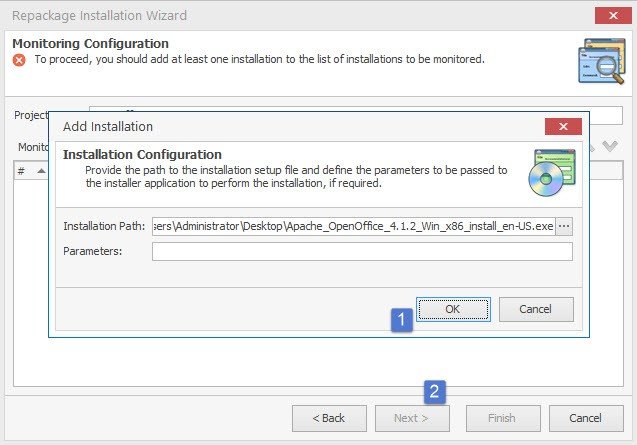
Step 3 – Pick the EXE application you want to “transform” into MSI. In my case I went for Open Office, which is available only as EXE (as far as I know). I know it’s fairly popular as an app between admins so hence the choice.
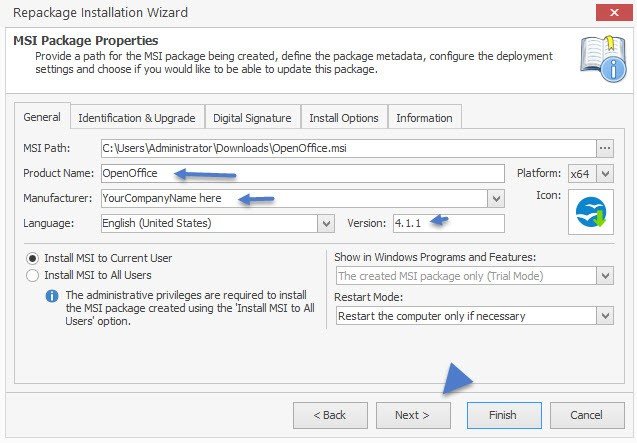
Step 4 – Enter some parameters. Those parameters will give the package a “soul” as you put there your company details, version of the package and product name. It’s completely up to you how you personalize. You still have to precise where you want to store the MSI package after its creation! In my case is my “download” folder, but you can pick your desktop or the root of the C: drive…..
Step 5 – Start the actual installation of an OpenOffice – In this step we’ll actually install the OpenOffice EXE package so EMCO software can monitor what’s happening to our system under cover. There is a lot of happening to the Registry, folder structure etc…
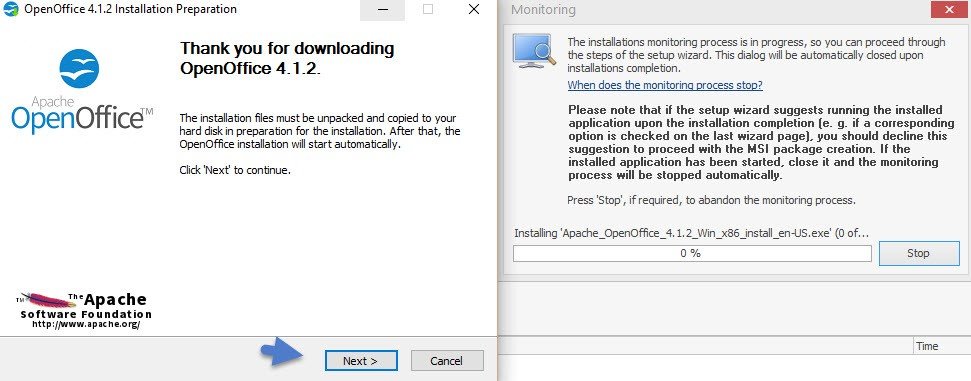
The installation wizard of OpenOffice asks you which installation you would like to do. In my case I just stick to defaults (Typical), but in some situations you just want to deploy Writer, or Calc, but not all components of OpenOffice. If such a case is in your organization, just select custom installation.
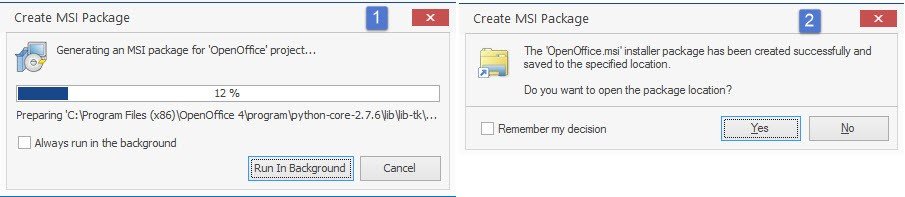
Step 6 – There is no steps six. There is a screen which will show after hitting the Next button. This small windows informing you about the progress. You can click on the Run In background if you like, but in my case the process took like 30 seconds only to finish. After you can open the directory which you specified for the MSI package to be generated. In my case I just selected the download folder. This is just the place where the final MSI package is stored.
You’ll certainly want to move this package to a network share so it can be used by your GPO for the deployment process (not covered in this post).
Having an MSI package which can be pushed to an endpoint is the way to go with central management with such simple utility. The tool itself isn’t the only one on the market, but I found its utilization particularly easy and helpful.
Wrap up:
The process is very straightforward, however the software is not free. But if you’re working for a company managing dozens, hundreds or thousands of desktops it’s certainly worthy to have such a tool. In our next post we’ll go and deploy this package via Group Policy in Active Directory as it’s the most used LDAP in the world. Again, not very difficult process and we’ll show you how. Stay tuned for more…
