One year ago, Microsoft released Azure Backup Center which is a great central console to perform all the backup related tasks. You can manage your recovery vaults and run backup/restore tasks very easily. The following article was published by Romain on StarWind blog to describe Azure Backup Center.
In this article, I will go deeper with Azure Backup Center in order to explain how to handle virtual appliance backups. Have you ever try to backup a Virtual Appliance (Firewall, Scanner, Network VM, …) with Azure Backup? You probably got a failed error message which is very normal because the agent can’ be installed on your appliance. To avoid this problematic, you had to use disk snapshot through Azure Runbook. It was not user friendly, but thanks to Azure Backup Center, you can now manage disk snapshots very easily.
Getting started
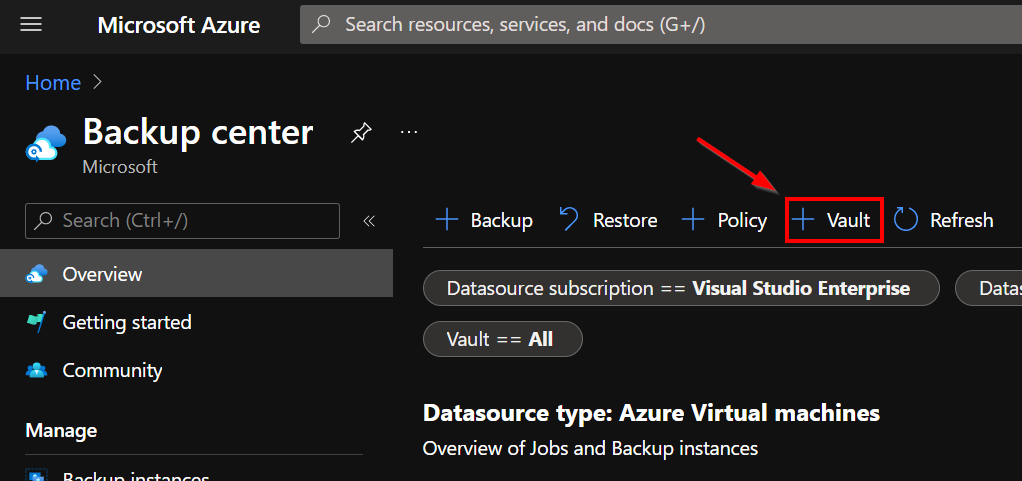
Open your Azure portal and go to Backup center. Click “Vault” in the overview section
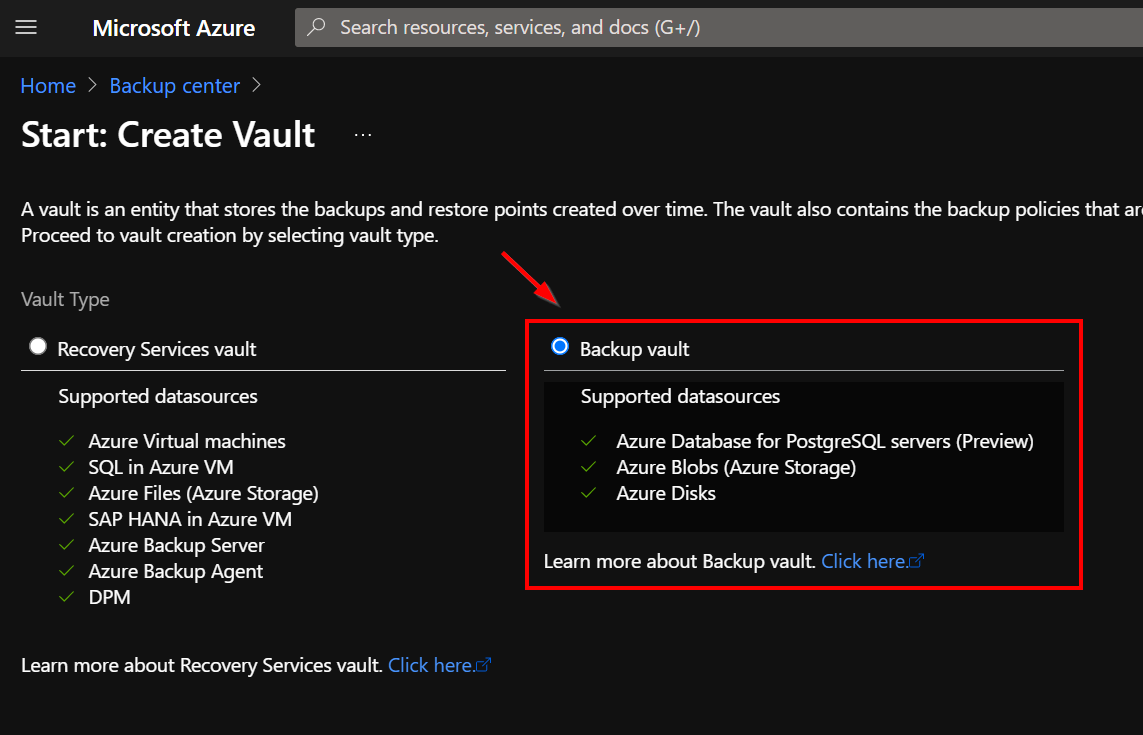
In the new window, select “backup vault”. Please note that it is important to select backup vault instead of recovery vault to manage disks snapshots.
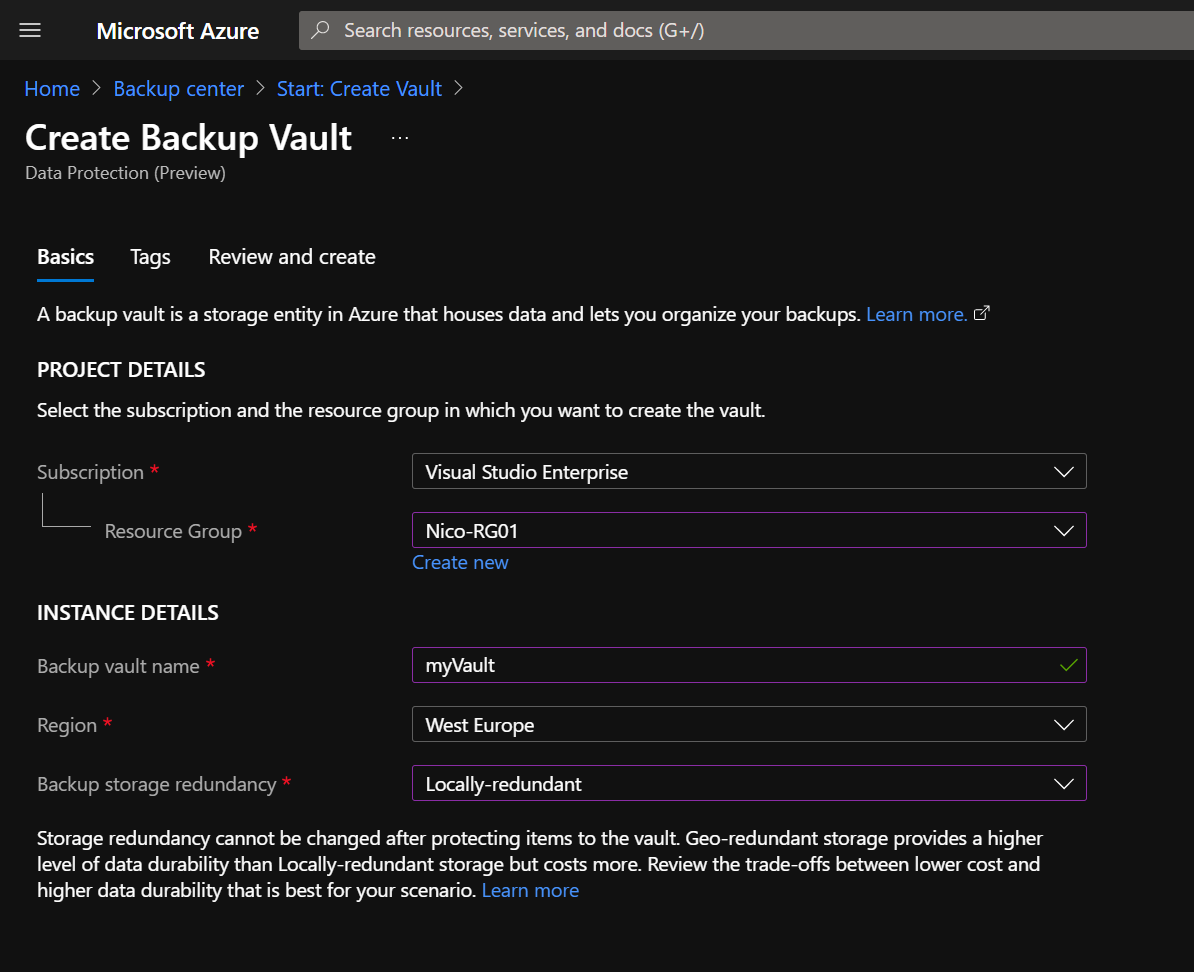
You can now create your backup vault. Very simple process:
- Select the subscription
- Select the resource group
- Enter the backup vault name
- Select the region
- And select the redundancy
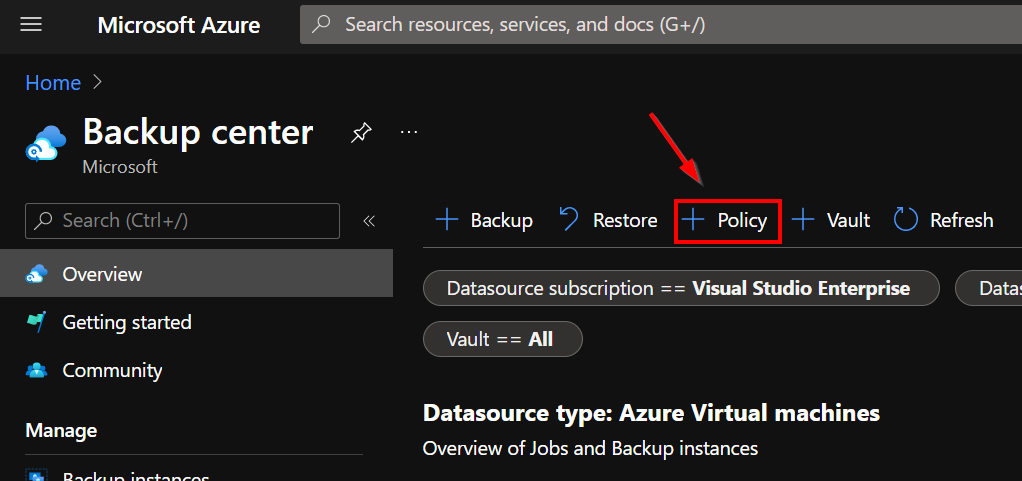
Now, click “Policy” to create the assigned policy
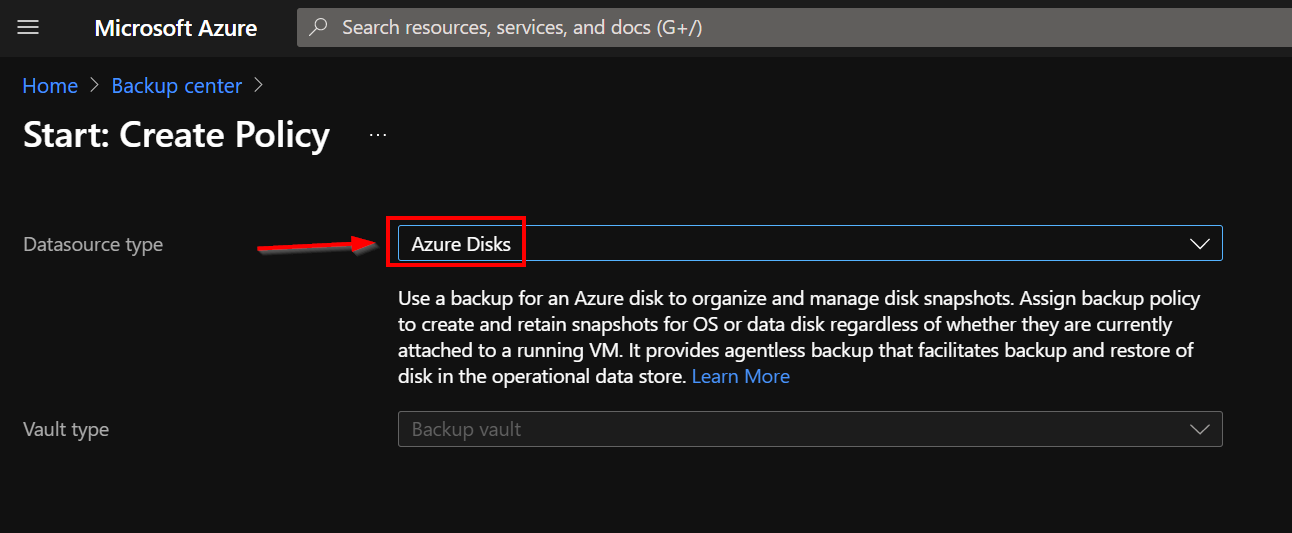
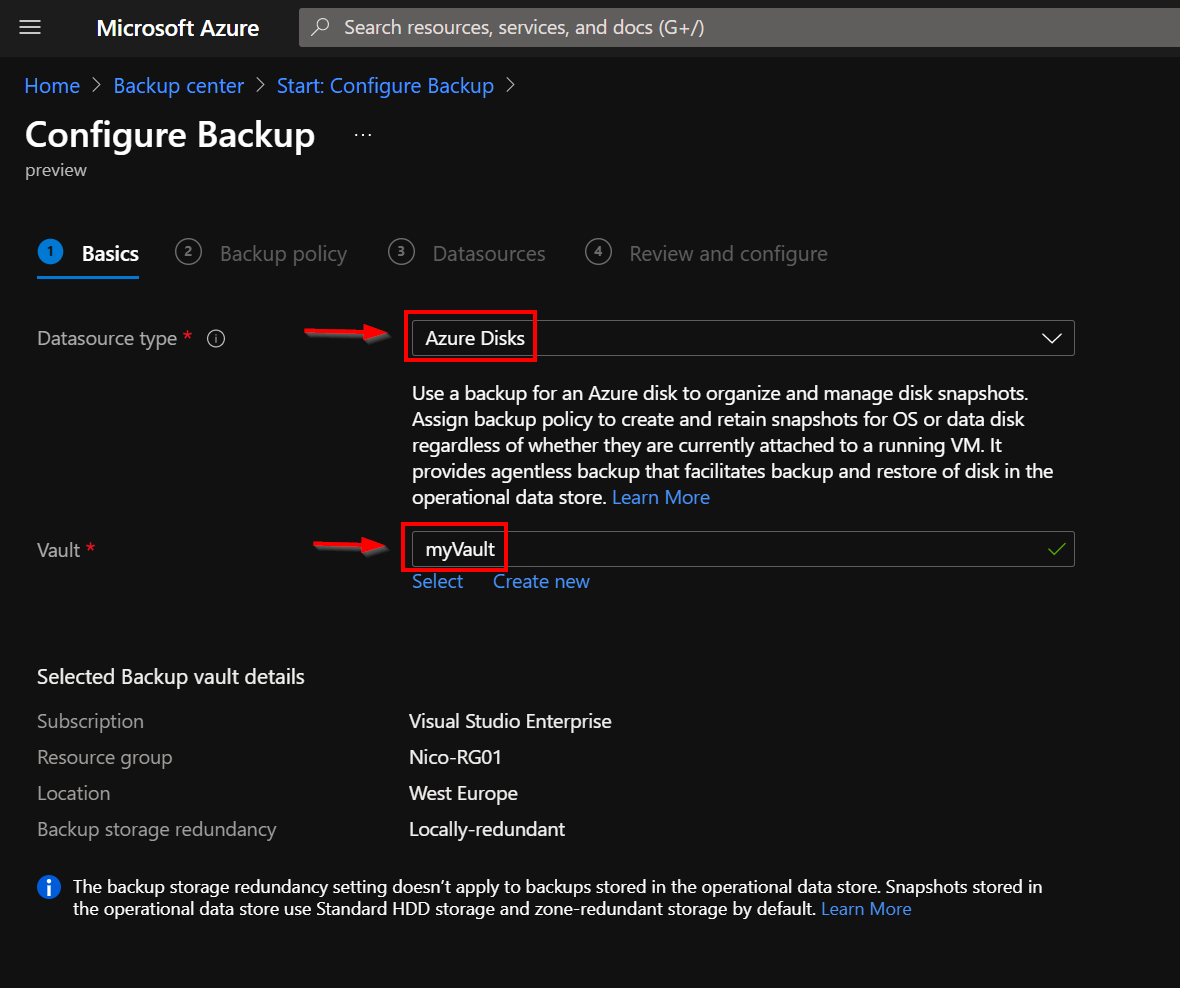
On the next page, you must select the “datasource type” which must be “Azure Disks”
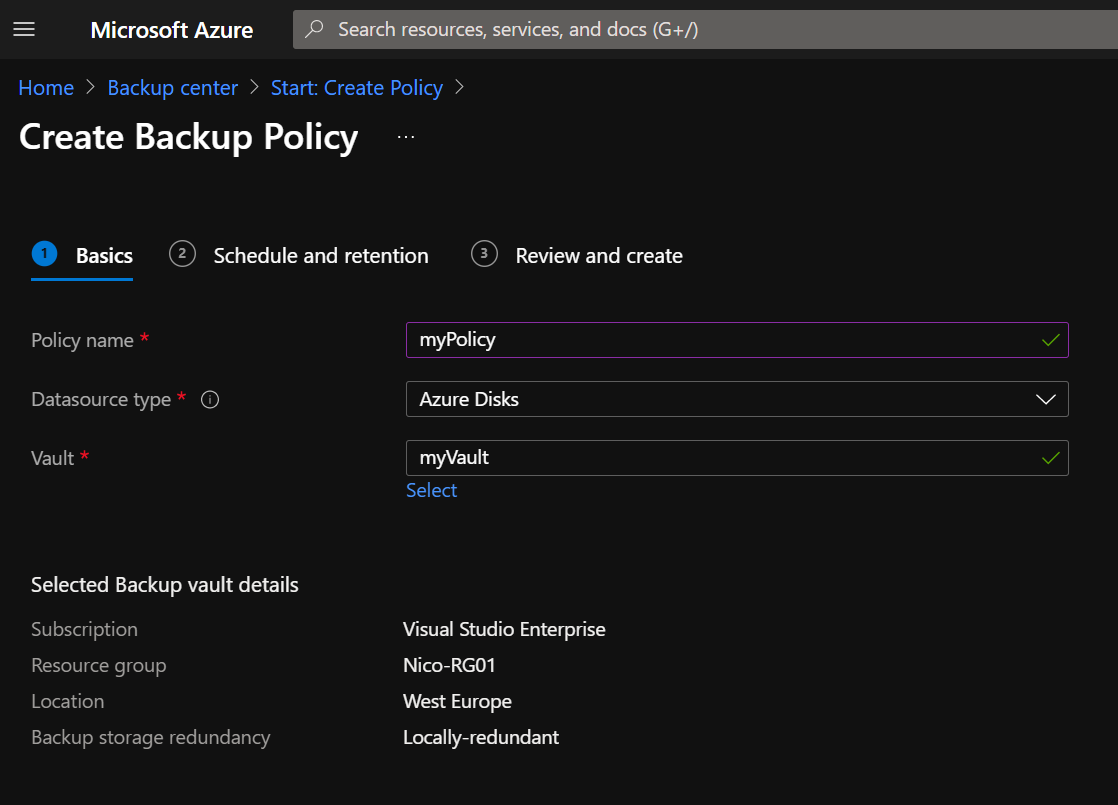
Then, enter the policy name and the vault name. On the next page, you can configure the retention. Then, validate the wizard.
Go to the disk you want to snapshot to add the rights permissions. In this example, I want to backup the disk named “Win10_disk1_xxxxxx”. Search the disk in your Azure portal and go to the “IAM” tab.
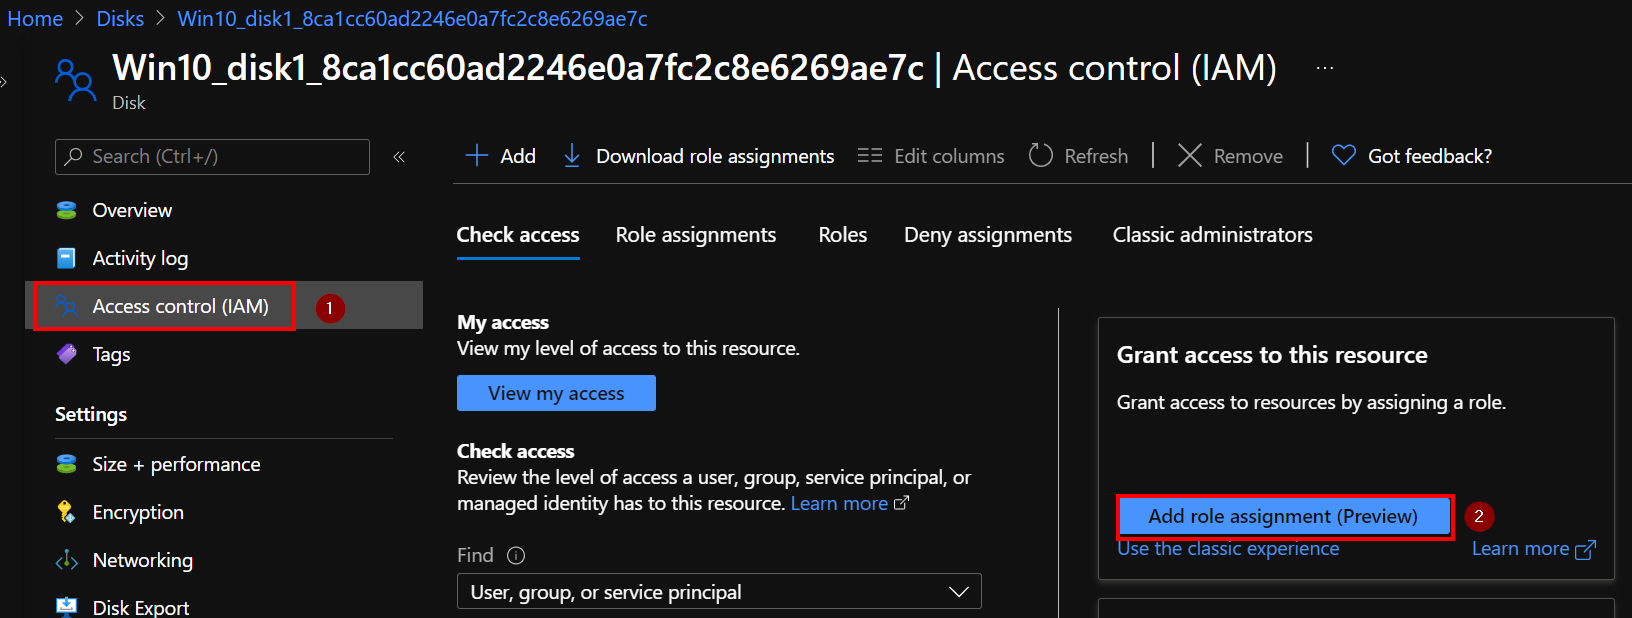
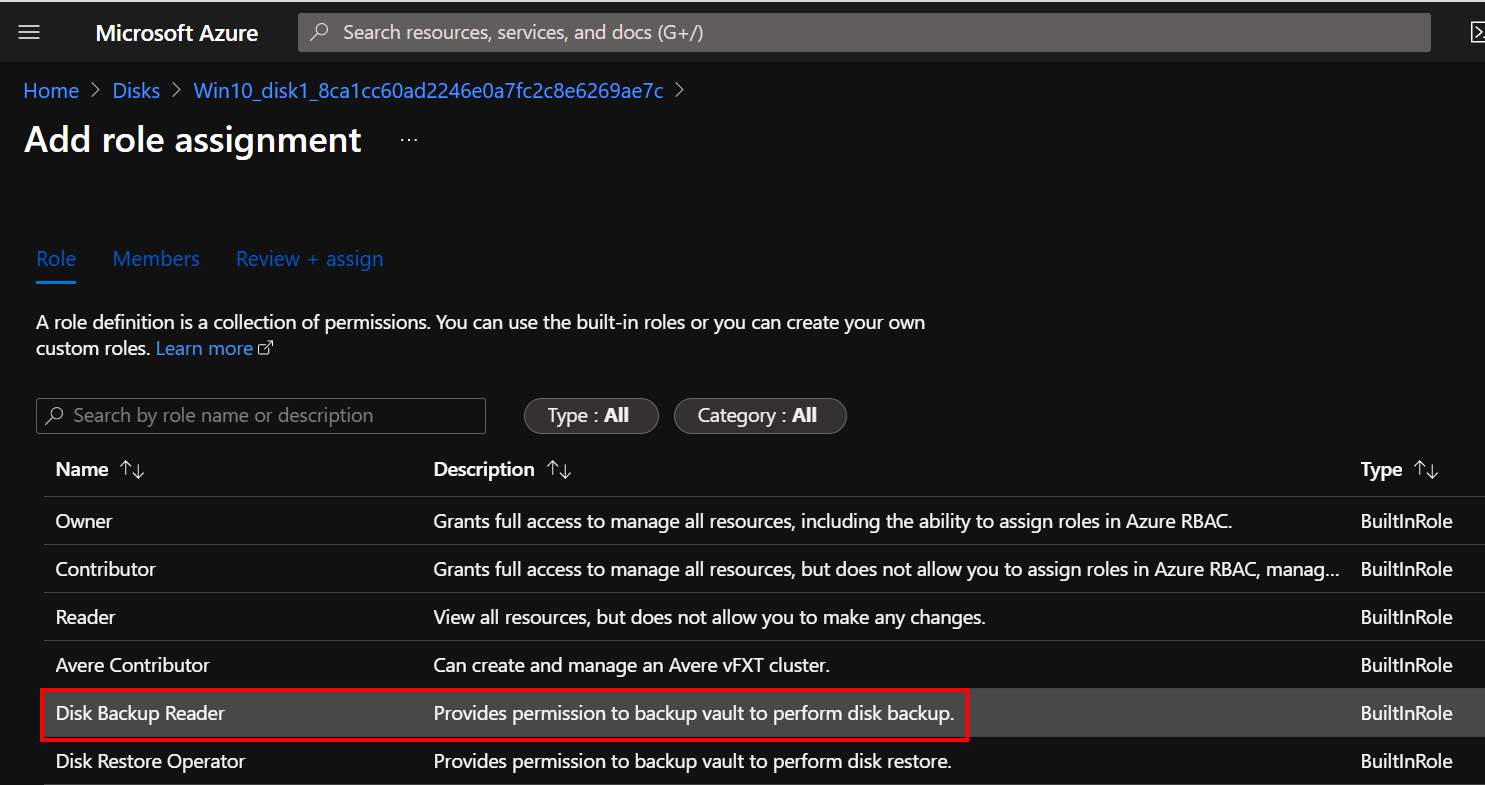
Click “Add role assignment” and select “disk backup reader” role.
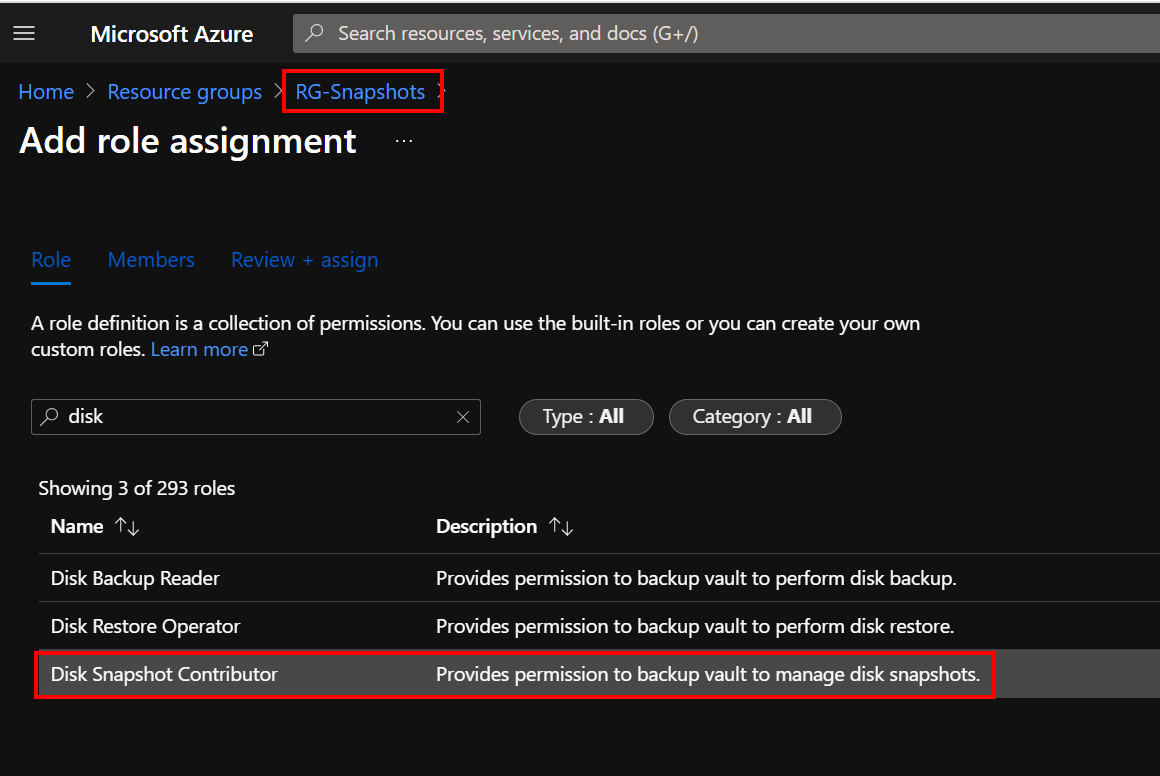
Then, I create a dedicated resource group named “RG-Snapshots” to store the disk snapshots in another Azure region. Add the “Disk snapshot contributor” role on this RG for your backup vault. Use the same steps: “IAM” -> “Add role assignments”
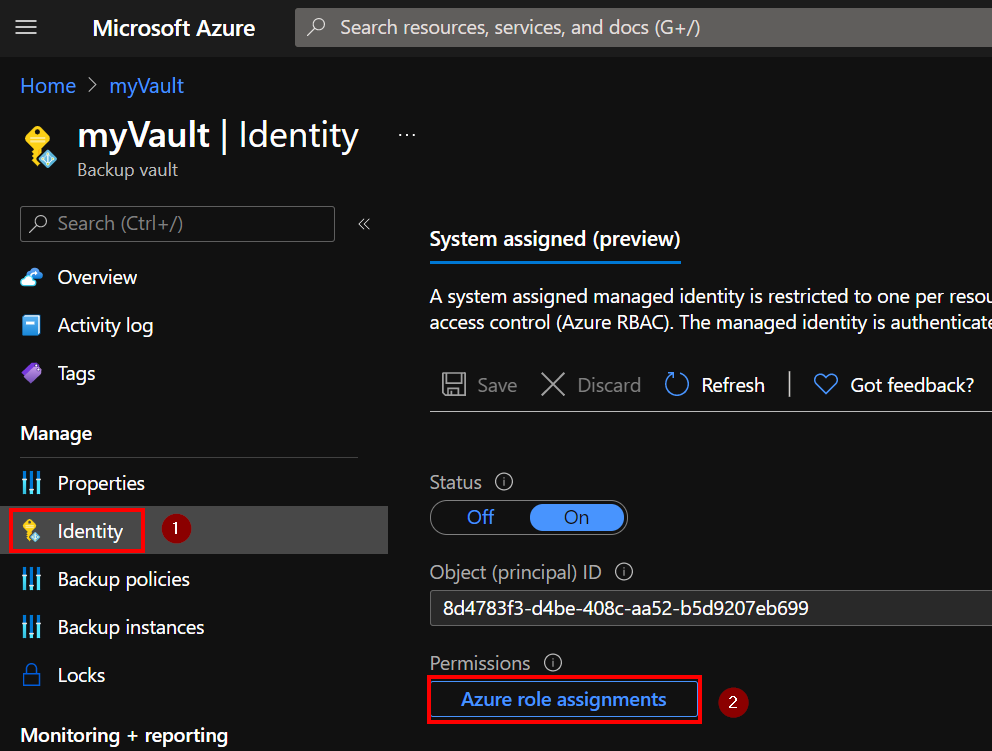
Once the assignment is done on the disk and the resource group, you can open the backup vault to confirm the permissions. Go to “Identity” and “Azure role assignments”
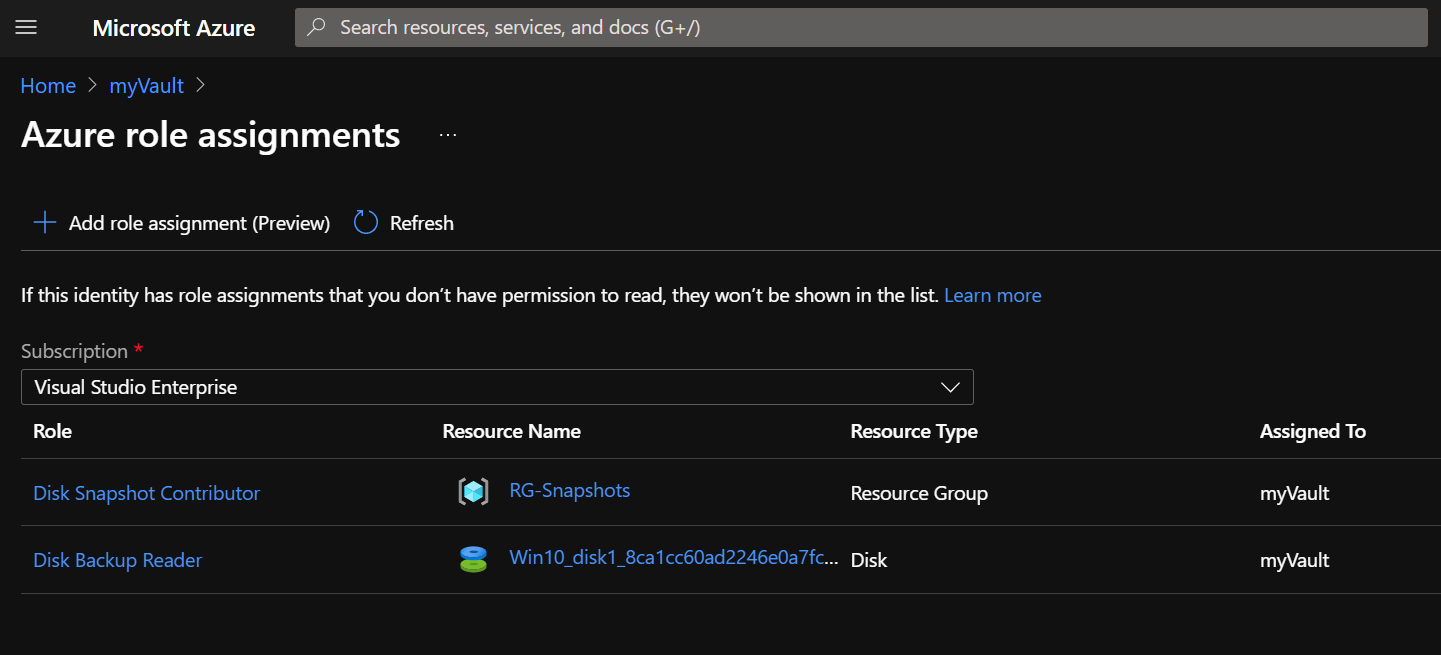
You should see something like the following:
- Disk Snapshot Contributor => Resource group
- Disk Backup Reader => Disk
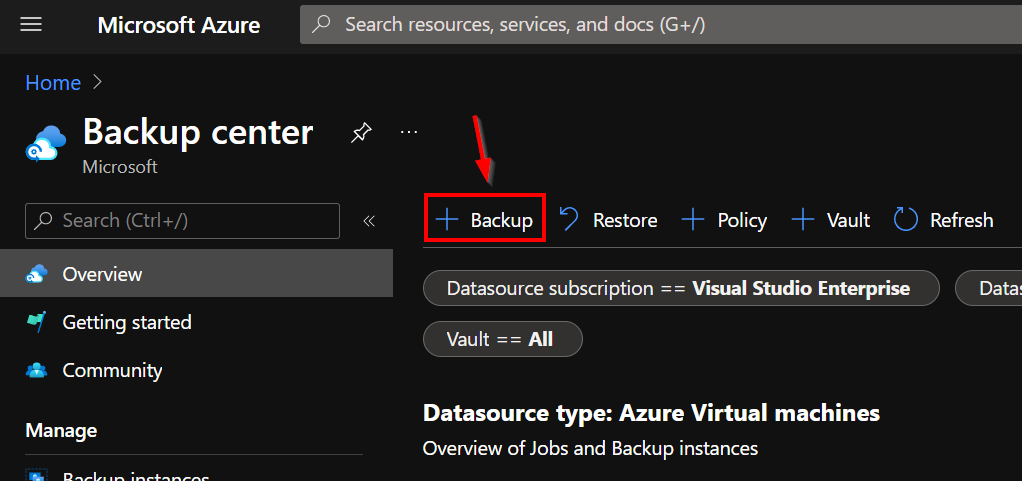
You are now ready to backup your disk. Click “Backup”
Select the datasource type and the backup vault
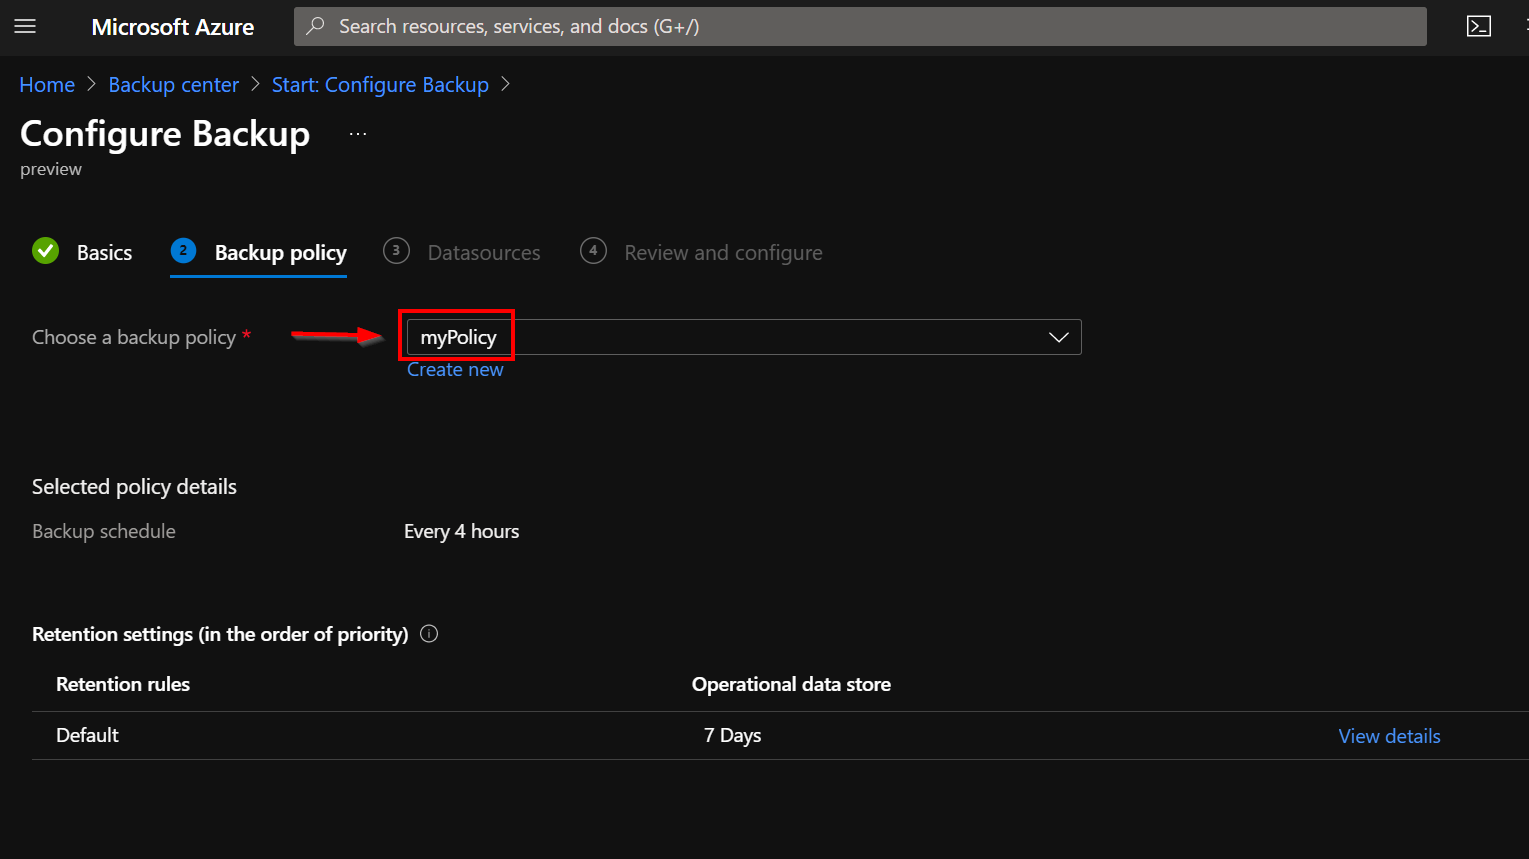
Then, select the policy previously created
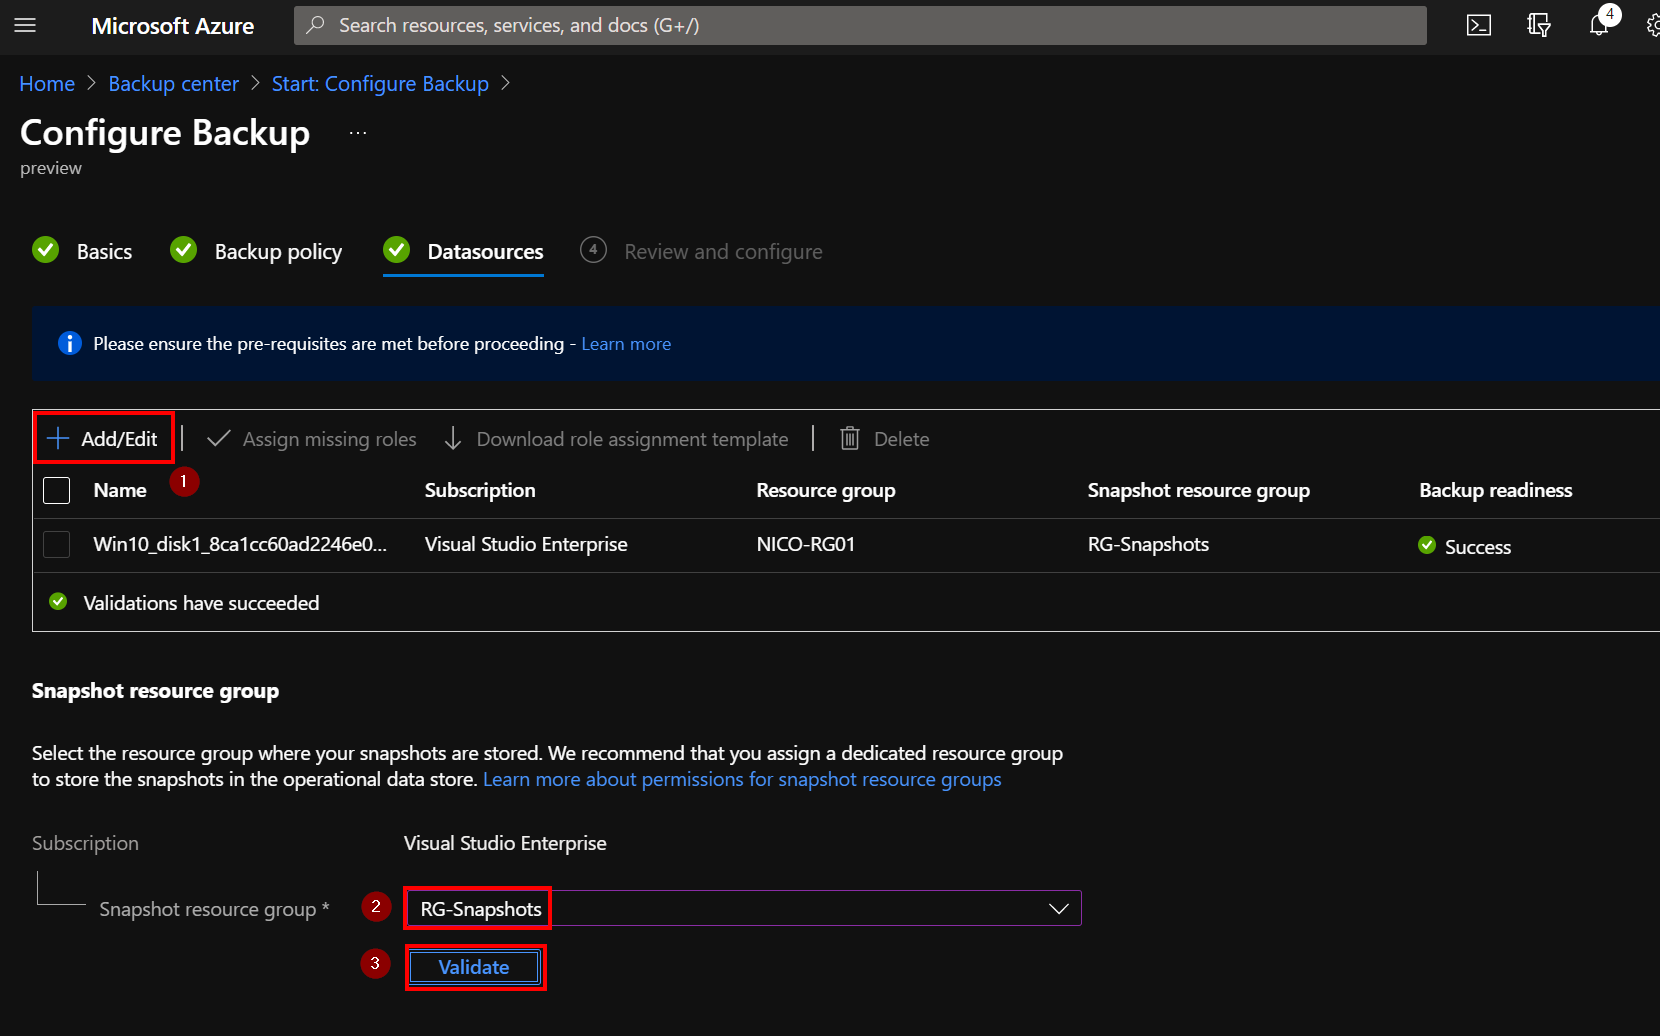
You can add the disk to backup in this section. Then, select the resource group that will store the snapshot (in my case, it is named “RG-Snapshots”) and click “Validate” to confirm the permissions are ok. Validations must be in “success”.
If you have an issue with the permissions, you will have the following message

When the validation is done, you can start a backup job:
- Go to “Backup instances”
- Update the filter “Datasource type == Azure Disks”
- You should see your disk, click on the right and select “Backup now”
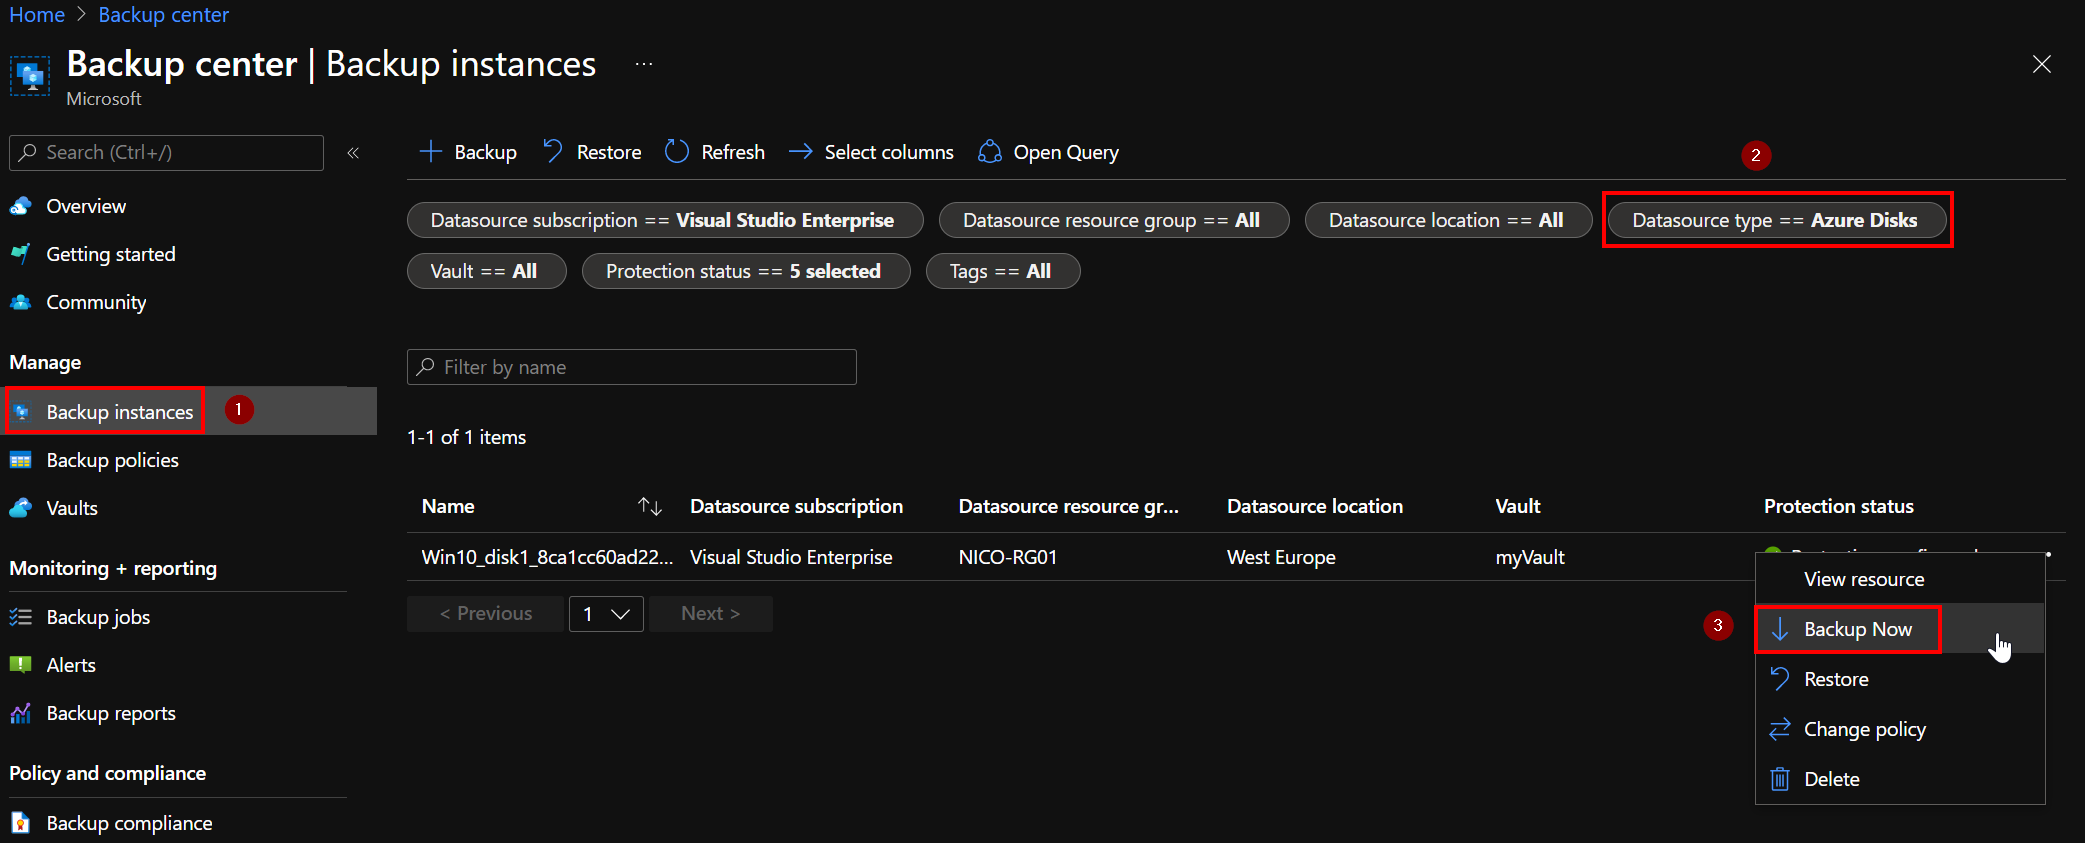
You can check the job status. Once the backup is done, the status will be “completed”.

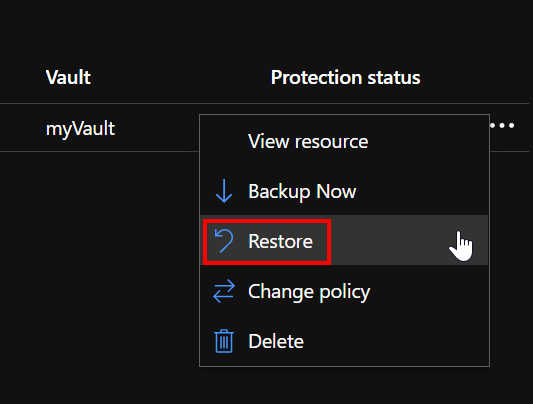
Now, you can start a restore job in the same section, just click “Restore” instead of “Backup now”
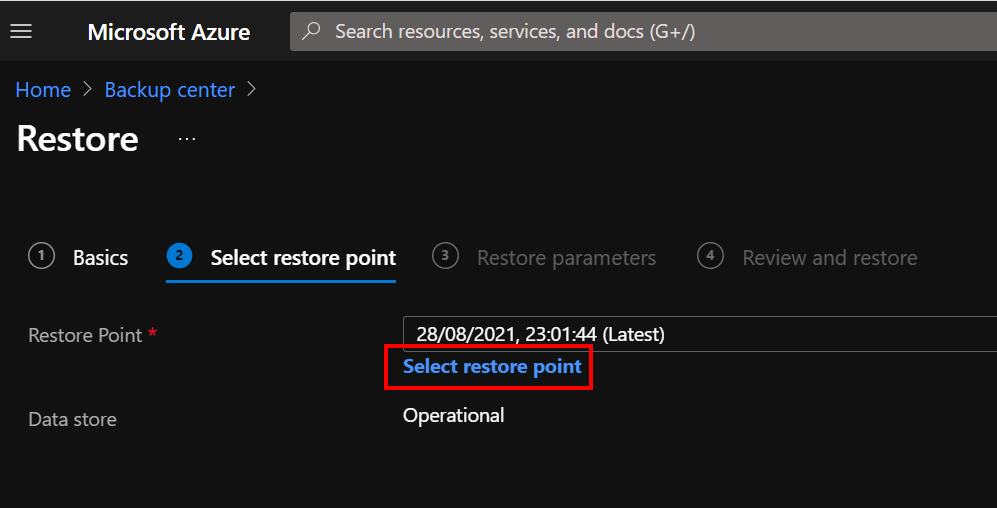
A new window appears, you must select the restore point depending on your retention policy.
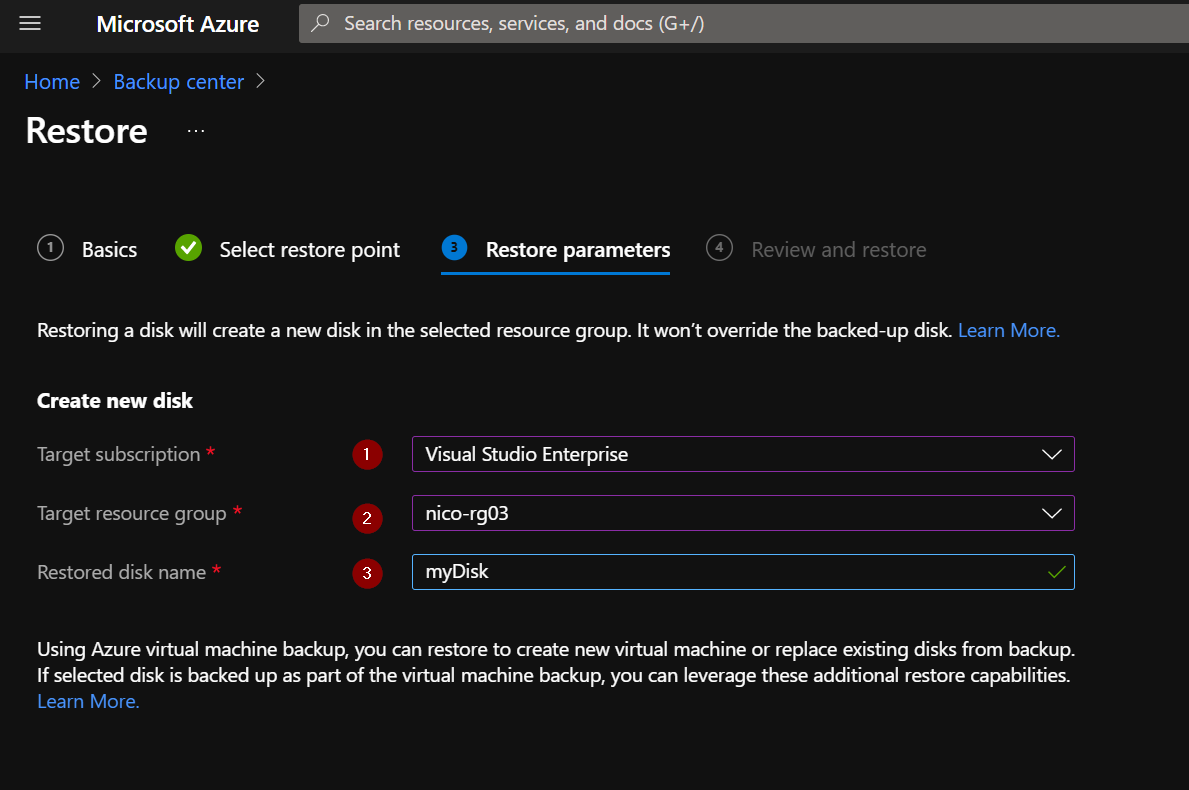
Then, select the targets (subscription and resource group) and of course, enter the restored disk name.
Once the restore is done, go to the resource group and attach the disk to your virtual machine.


