
Organizations generate and store more data every year. Conventional storage systems cannot always deliver the scalability, fault tolerance, and flexibility that cloud-native applications, virtualization platforms, and enterprise workloads need. This pressure has driven the adoption of software-defined storage (SDS) solutions like Ceph.
Ceph is an open-source, scalable distributed storage system that provides object, block, and file storage in one platform. Ceph runs on commodity servers and uses intelligent software to support petabyte-scale workloads, unlike traditional storage systems that depend on specialized hardware.
This guide walks you through preparing the nodes, bootstrapping the cluster, deploying OSDs, verifying cluster health, and applying best practices for managing storage with Ceph.
What Is Ceph?
Ceph is an open-source distributed storage system that provides high availability and fault tolerance by distributing data across multiple servers. The platform eliminates single points of failure and automatically replicates data across the cluster.
Ceph supports three major storage interfaces:
- Object Storage (S3 and Swift compatible)
- Block Storage (RBD)
- File Storage (CephFS)
Ceph is popular in private clouds, virtualization and container platforms, and enterprise data centers thanks to its scalability and reliability.
Why Use Ceph for Software-Defined Storage?
Organizations choose Ceph because it combines scalability, resilience, and flexibility in a single platform.
Key benefits include:
- Horizontal scalability
- Self-healing architecture
- Automatic data replication
- No single point of failure
- Commodity hardware support
- Unified storage platform
- Open-source licensing
- Kubernetes and OpenStack integration
Ceph can scale from a few terabytes to multiple petabytes without sacrificing performance or availability.
Ceph Cluster Architecture Overview
Before deployment, it is important to understand Ceph’s key components.
Monitors (MON)
Monitors maintain the cluster maps and quorum information. They keep the cluster state consistent and coordinate communication between nodes.
Object Storage Daemons (OSDs)
OSDs store the actual data and handle replication, recovery, and rebalancing across the cluster.
Managers (MGR)
Managers provide cluster administration features, including monitoring, metrics collection, and the web dashboard.
Metadata Servers (MDS)
Metadata Servers are required for CephFS and handle file system metadata operations.
Clients
Clients access storage through CephFS, RBD, or the Ceph Object Gateway (RGW).
System Requirements and Prerequisites
For this tutorial, we will use a small three-node Ceph cluster. The commands in this guide are written for Ubuntu and Debian (apt); on Rocky Linux, use dnf instead.
| Component | Requirement |
|---|---|
| Linux Distribution | Ubuntu 24.04+, Debian 12+, Rocky Linux 9+ |
| Nodes | Minimum 3 |
| CPU | 4 Cores per node |
| Memory | 8 GB RAM minimum |
| Storage | Dedicated disks for OSDs |
| Network | 1 GbE minimum (10 GbE or faster recommended for production) |
Example cluster layout:
| Hostname | Role | IP Address |
|---|---|---|
| ceph-node1 | MON, MGR, OSD | 192.168.1.101 |
| ceph-node2 | MON, OSD | 192.168.1.102 |
| ceph-node3 | MON, OSD | 192.168.1.103 |
Each node runs OSDs because, by default, Ceph keeps three copies of data on three different hosts. With fewer OSD hosts, the cluster cannot place all replicas and stays in HEALTH_WARN. All nodes must also be able to communicate over the network and resolve each other’s hostnames.
How to Set Up a Software-Defined Storage Cluster with Ceph on Linux
The recommended way to deploy Ceph is cephadm. After you run a simple bootstrap on the first node, cephadm installs and configures containerized Ceph daemons (Monitors, Managers, and OSDs) and turns your disks into a unified, resilient software-defined storage pool.
Step 1: Prepare Linux Nodes
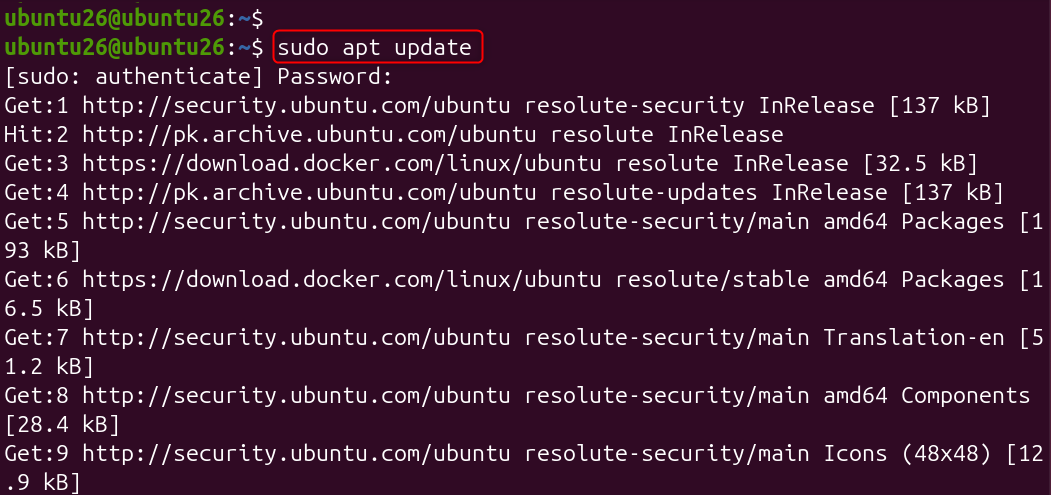
First, update all cluster nodes and install the packages cephadm depends on: Podman (container runtime), LVM2, chrony (time synchronization), and Python 3. Keeping all nodes up to date ensures that Ceph packages are compatible with the operating system. Run on each node:
sudo apt update && sudo apt upgrade -y
sudo apt install -y podman lvm2 chrony python3
Configure Hostnames
Set a unique hostname on each node by running the matching command on each server:
sudo hostnamectl set-hostname ceph-node1

sudo hostnamectl set-hostname ceph-node2

sudo hostnamectl set-hostname ceph-node3

Consistent hostnames make cluster administration and troubleshooting easier.
Configure Hosts File
On each node, edit /etc/hosts:
192.168.1.101 ceph-node1

192.168.1.102 ceph-node2

192.168.1.103 ceph-node3
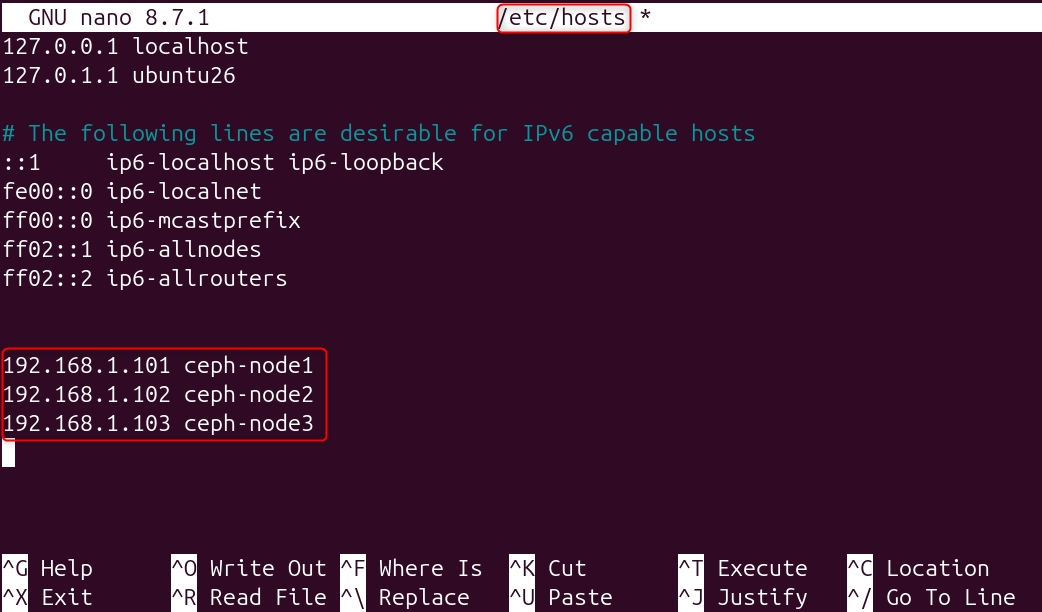
This configuration lets nodes resolve each other without relying on DNS.
Step 2: Install Ceph Packages
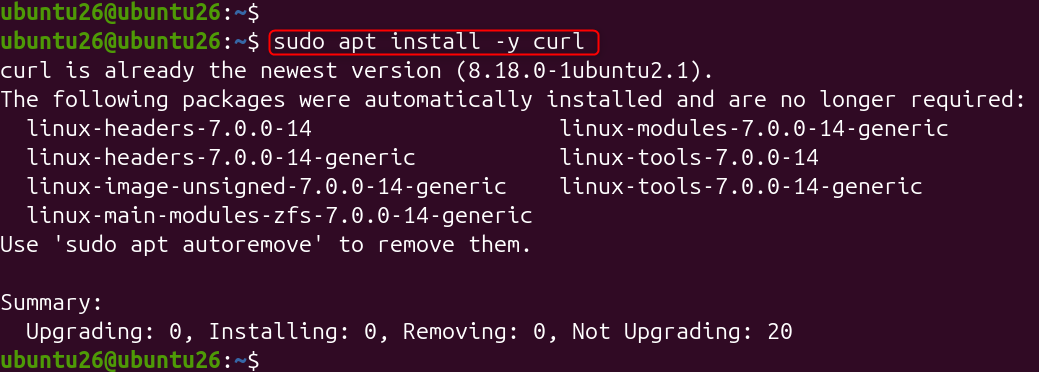
Install curl on the bootstrap node (ceph-node1). You will use it to download cephadm.
sudo apt install -y curl
Install Cephadm
Download the standalone cephadm script for the current stable release (Tentacle):
curl --silent --remote-name --location \
https://download.ceph.com/rpm-tentacle/el9/noarch/cephadm

Make the file executable:
chmod +x cephadm

Move it into the system path:
sudo mv cephadm /usr/local/bin/

Cephadm automates orchestration, which simplifies cluster deployment and management.
Install the Ceph command-line tools so you can run ceph commands directly on the host:
sudo cephadm add-repo --release tentacle
sudo cephadm install ceph-common
Step 3: Bootstrap the Ceph Cluster
Bootstrap the cluster from the first node:
sudo cephadm bootstrap \

--mon-ip 192.168.1.101
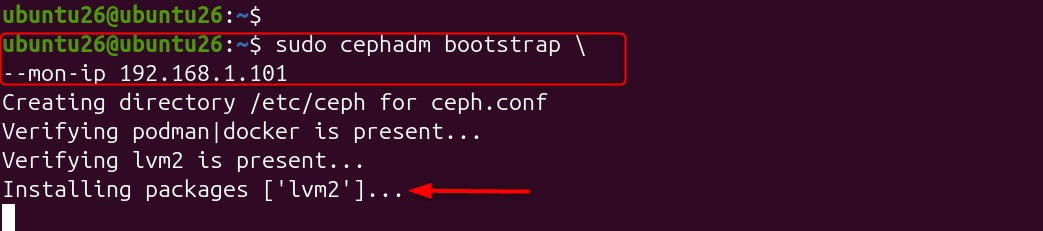
This command deploys the first set of cluster services: a monitor, a manager daemon, and the Ceph Dashboard. When it finishes, it prints the dashboard URL and the initial admin credentials, so save them.
Depending on hardware and network performance, this may take a few minutes.
Verify Cluster Status
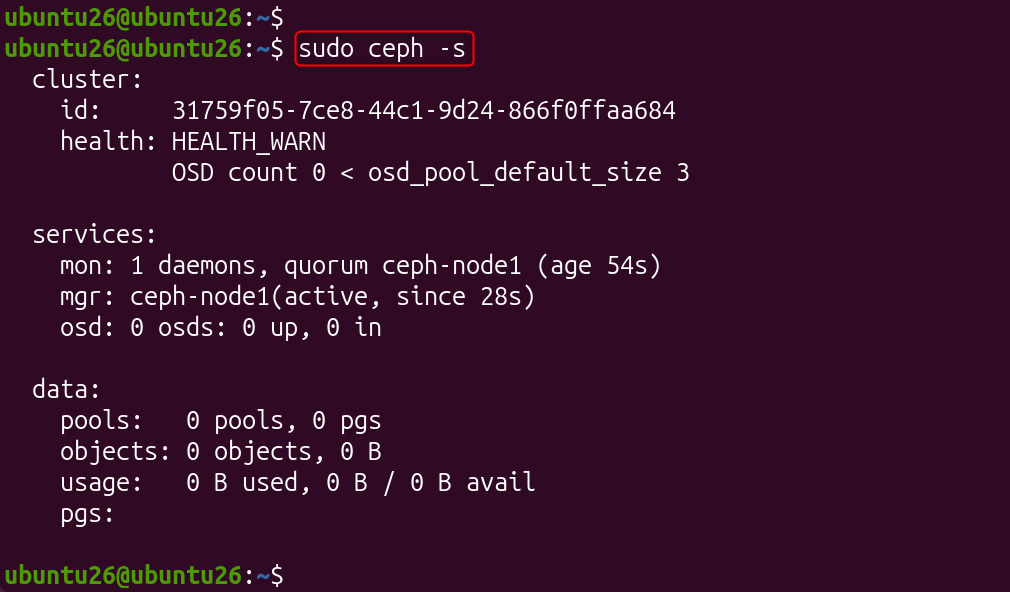
Run the following command to see cluster health, monitor status, storage usage, and active daemons:
sudo ceph -s
Step 4: Add Additional Cluster Hosts
Export the cluster’s public SSH key:
sudo ceph cephadm get-pub-key > ceph.pub

Copy the key to the other nodes:
ssh-copy-id -f -i ceph.pub root@ceph-node2

ssh-copy-id -f -i ceph.pub root@ceph-node3

Passwordless SSH lets cephadm deploy and manage services on cluster hosts. This example uses the root account, so root SSH login must be allowed on the target nodes.
Add Nodes to the Cluster
Add the other hosts to the cluster orchestrator:
sudo ceph orch host add ceph-node2 192.168.1.102

sudo ceph orch host add ceph-node3 192.168.1.103

Step 5: Deploy OSD Storage Devices
List the available storage devices:
sudo ceph orch device ls

This command shows which disks are available for OSD deployment. A disk is eligible only if it has no partitions, file systems, or LVM volumes.
Deploy OSDs Automatically
Tell Ceph to create OSDs on every available, unused device:
sudo ceph orch apply osd --all-available-devices

Deployment may take several minutes, depending on the number and size of the devices.
Verify OSD Status
The output should list all active OSDs in the cluster:
sudo ceph osd tree

Step 6: Verify Cluster Health
Check the overall cluster health:
sudo ceph health

A healthy cluster returns HEALTH_OK.
Display detailed cluster information:
sudo ceph -s
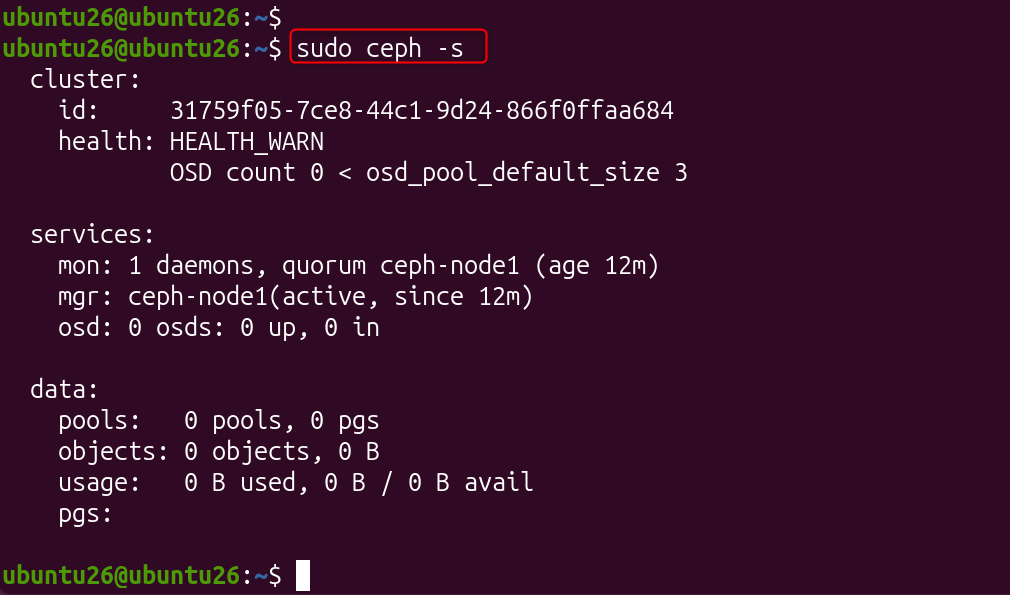
Review the cluster health, OSD availability, data usage, and monitor count.
Step 7: Create a Storage Pool
Storage pools are logical partitions for storing objects in the cluster.
Create a new pool:
sudo ceph osd pool create data-pool 128

This creates a pool named data-pool with 128 placement groups. On recent Ceph releases, the PG autoscaler adjusts this number automatically.
Tag the pool with the application that will use it (for example, RBD). Otherwise, Ceph reports a HEALTH_WARN:
sudo ceph osd pool application enable data-pool rbd
To list all pools on the cluster:
sudo ceph osd pool ls

The new pool should appear in the output.
Step 8: Configure CephFS
Deploy the metadata servers:
sudo ceph orch apply mds cephfs

CephFS needs metadata servers to handle file system operations.
Create CephFS
Create the file system. This command also creates the required data and metadata pools:
sudo ceph fs volume create cephfs

Verify file system status:
sudo ceph fs status
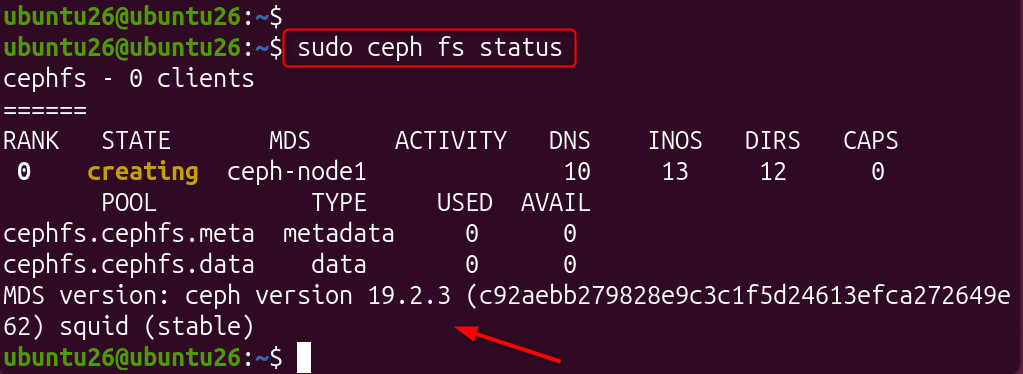
The output should show an active metadata server and the assigned pools.
Step 9: Monitor Cluster Performance
Check how much storage the pools and OSDs consume:
sudo ceph df
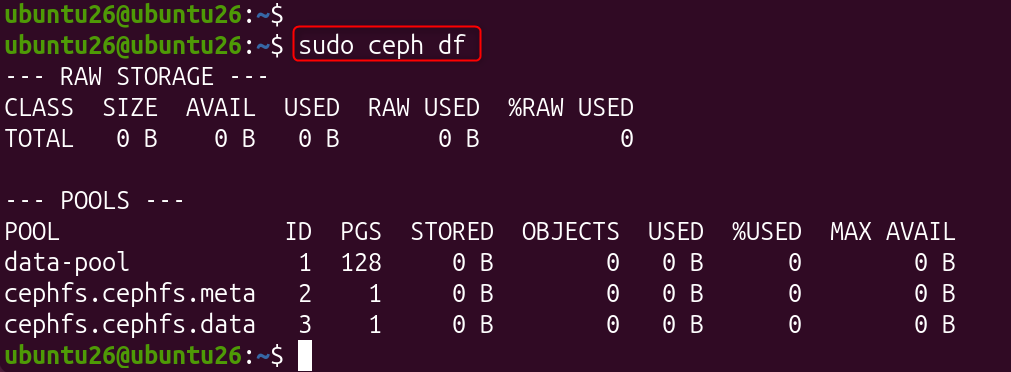
This command shows raw and per-pool storage usage.
Monitor Real-Time Activity
To watch cluster activity in real time, including recovery events and health changes, run:
sudo ceph -w
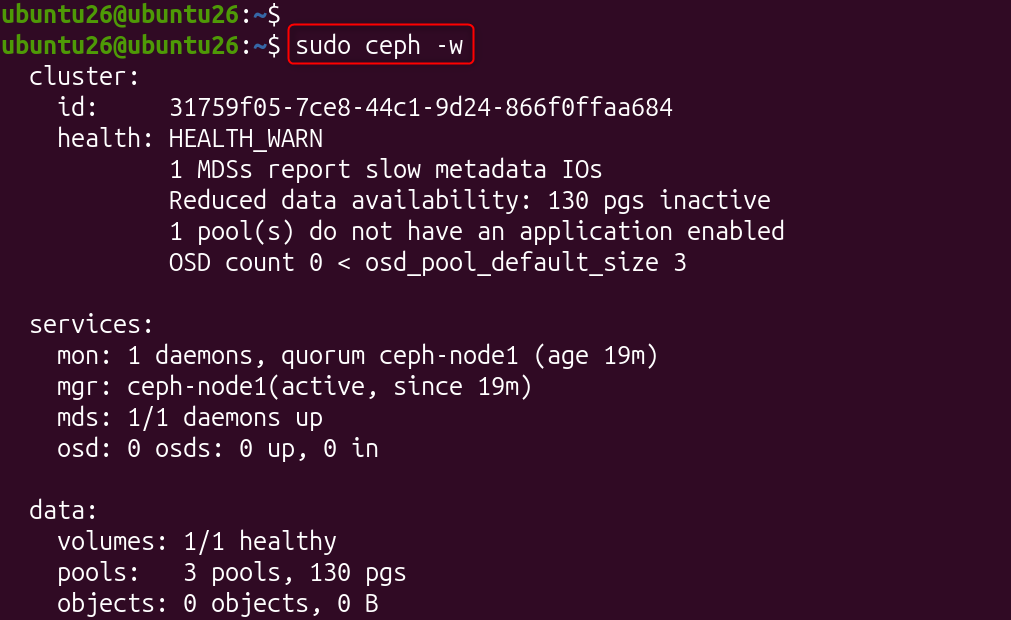
Continuous monitoring helps identify performance bottlenecks before they impact workloads.
Ceph Security Best Practices
A secure Ceph deployment is essential for protecting enterprise data.
Enable Firewall Rules
Restrict cluster communication to trusted networks and required ports only.
Use Dedicated Cluster Networks
Separate client traffic (public network) from replication traffic (cluster network) whenever possible.
Enable Authentication
Keep Ceph’s built-in authentication (CephX) enabled in all production environments.
Encrypt Data
Consider encrypting OSDs (for example, with dmcrypt) for sensitive workloads.
Monitor Access Logs
Regularly review cluster logs and audit events to identify suspicious activity.
Troubleshooting: Cluster Reports HEALTH_WARN
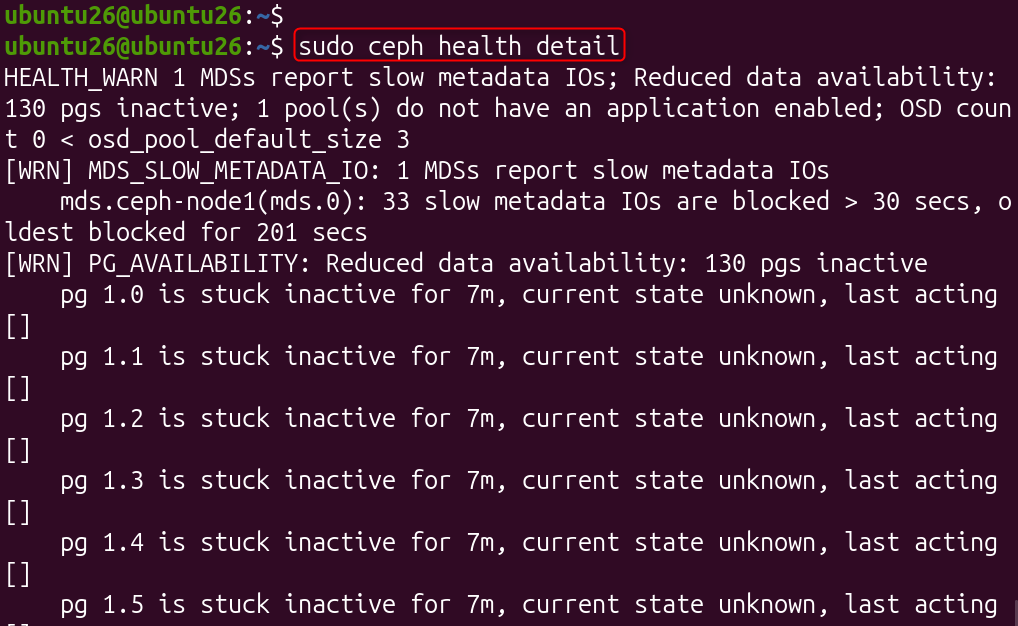
If the cluster reports HEALTH_WARN, run the following command to see detailed warnings and recommended corrective actions:
sudo ceph health detail
Conclusion
Ceph has become one of the most powerful software-defined storage platforms available for Linux environments. By combining distributed architecture, automatic replication, self-healing capabilities, and flexible storage interfaces, Ceph enables organizations to build highly available and scalable storage clusters using commodity hardware.
By following this guide, you can deploy a working Ceph cluster, manage storage resources efficiently, and build a resilient foundation for cloud infrastructure, virtualization environments, container platforms, and enterprise workloads. Before moving to production, plan for dedicated networks, sufficient hardware, and continuous monitoring.
FAQ
How many nodes do I need for a Ceph cluster?
For production, plan for at least three nodes. Three monitors keep quorum if one node fails, and Ceph’s default replication stores three copies of data on three different hosts. A single-node cluster works for testing, but it offers no real fault tolerance.
What is the difference between RBD, CephFS, and Ceph object storage?
RBD provides block devices, typically used as virtual machine disks or Kubernetes persistent volumes. CephFS is a POSIX-compliant shared file system that many clients can mount at the same time. The Ceph Object Gateway (RGW) exposes S3- and Swift-compatible object storage for backups, media, and cloud-native applications. All three run on the same cluster.
Is Ceph a good fit for small environments?
It depends. Ceph shines at scale, but it needs at least three nodes, fast networking, and ongoing operational expertise. For two-node or small edge deployments, lighter software-defined storage solutions are often simpler and more cost-effective.