

StarWind Virtual SAN SQL Server HADR using Availability Groups and Failover Cluster Instance
- June 12, 2017
- 22 min read
INTRODUCTION
This technical paper describes how to configure High Availability Disaster Recovery (HADR) using Availability Groups and Failover Cluster Instance. Availability groups were introduced in SQL Server 2012 and serve as a big paradigm shift in HA and DR technology provided by Microsoft. An availability group supports a replicated environment for a discrete set of user databases
known as availability databases.
An HA availability group is a group of atabases that fail over together. An availability group supports one set of primary databases and one to eight sets of corresponding secondary databases. This guide is intended for experienced Windows system administrators and IT professionals who would like to set up an SQL Server Failover Cluster Instance (FCI). The document provides a step-by-step guidance on how to deploy the SQL Server FCI, add node to the Windows Server Failover Clustering (WSFC), as well as enable and configure Availability Group in a 3-node Disaster Recovery scenario.
A full set of up-to-date technical documentation can always be found here, or by pressing the Help button in the StarWind Management Console.
For any technical inquiries, please visit our online community, Frequently Asked Questions page, or use the support form to contact our technical support department.
Prerequisites for FCI Availability Group
This guide assumes that Windows Server Failover Cluster (WSFC) is configured and nodes S1 and S2 are added to a Windows Cluster. Thus, SQL Server Failover Cluster is ready for the deployment while the S3 node will be added to WSFC after the installation of SQL Server on the stand-alone S3 node.
NOTE: DO not add node S3 or the stand-alone node into the cluster before installing SQL Server on it. This will create problems with DISK availability.
Prerequisites for FCI Availability Group are listed below:
1. All the nodes must belong to the same Windows Server Failover Cluster.
2. All the nodes must be running the same version of SQL Server and Enterprise edition. (Developer edition can be used for testing)
3. The data and log file paths for user databases of SQL Server should be same on both FCI and stand-alone machine. As a best practice, it is advised to keep disk structure same for all nodes participating in Availability Group FCI.
In this guide, a 2-node WSFC will be built and SQL Server FCI configured on top of it. The configuration is shown on the diagram below:
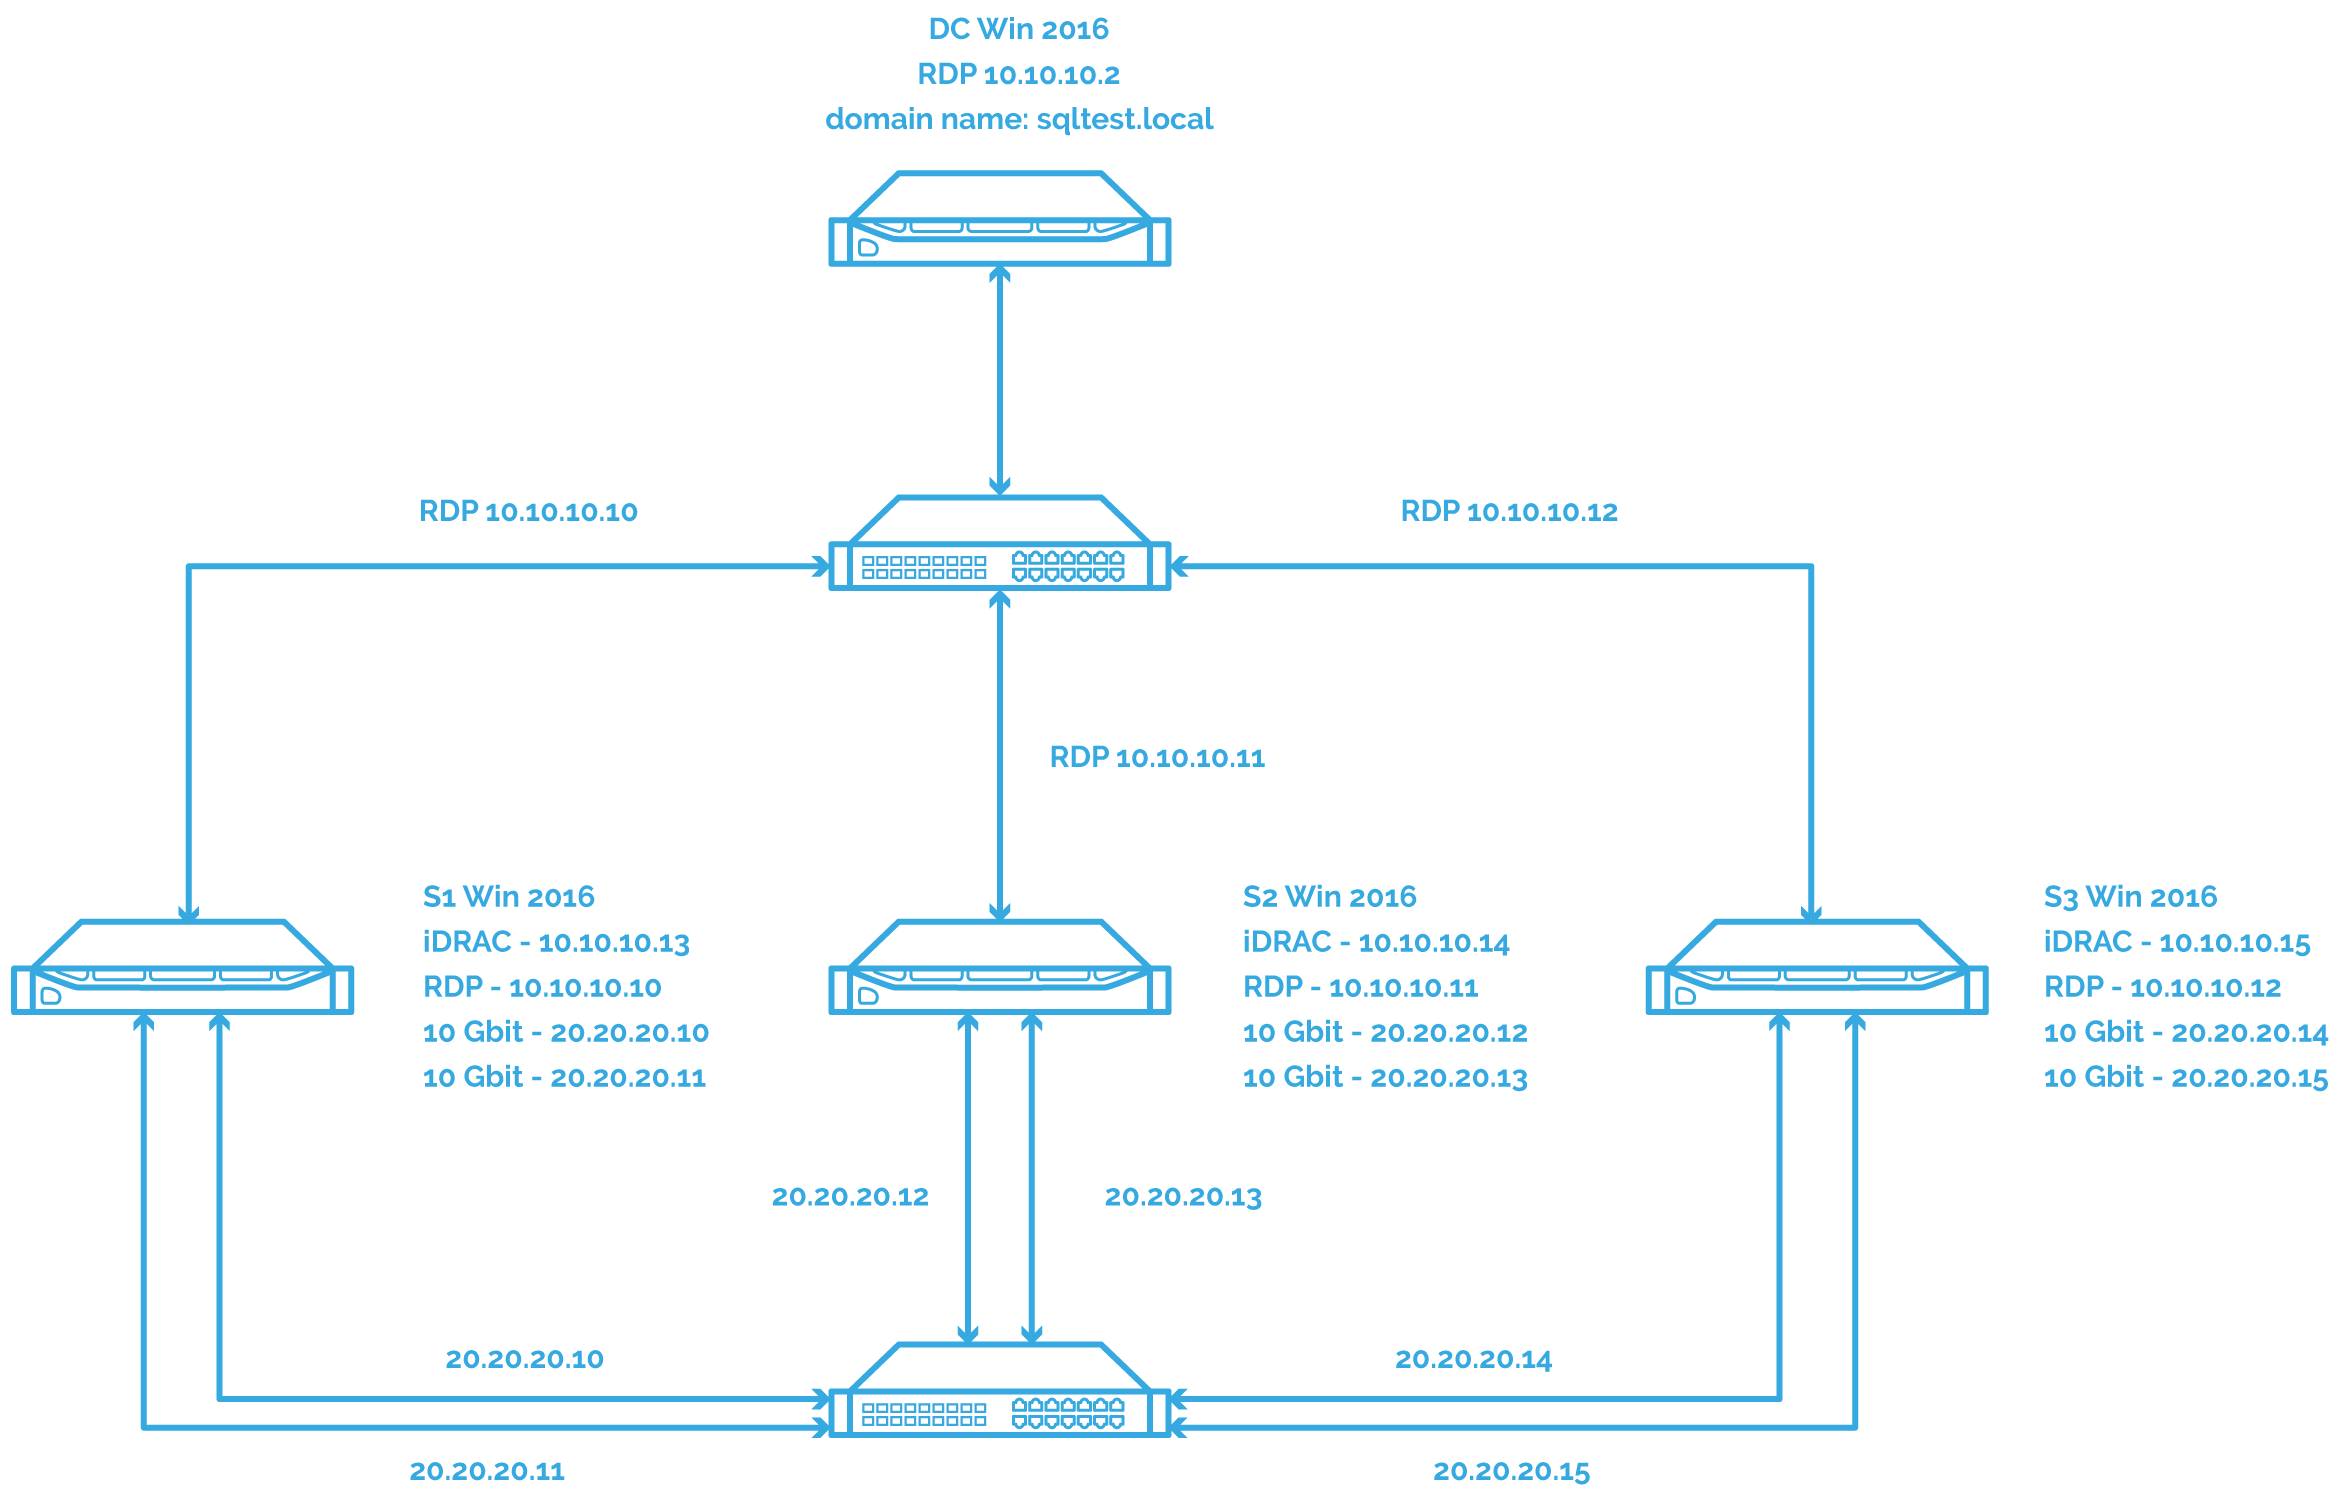
The setup consists of a domain controller and three servers: S1, S2 and S3. S1 and S2 will be a part of SQL Server FCI holding the primary replica of Availability Group, and S3 will be a standalone server holding the secondary replica of Availability Group. S1, S2, and S3 will be a part of the same WSFC.
Creating SQL Server FCI
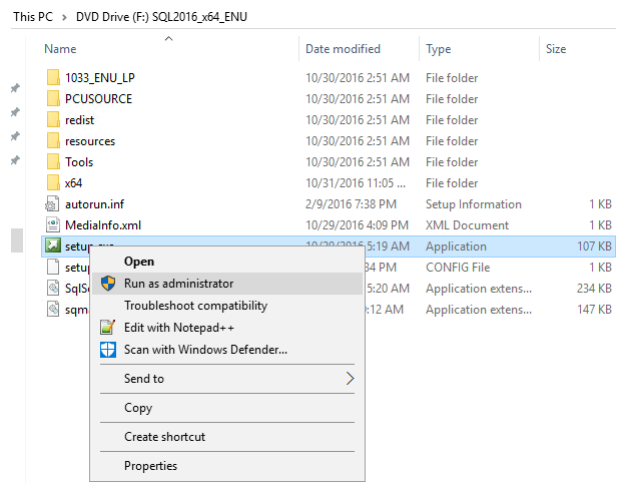
1. Create SQL Server FCI on S1 and S2. Log in to one of the servers. S1 locates the SQL Server executable: right-click on it and select “run as administrator”.
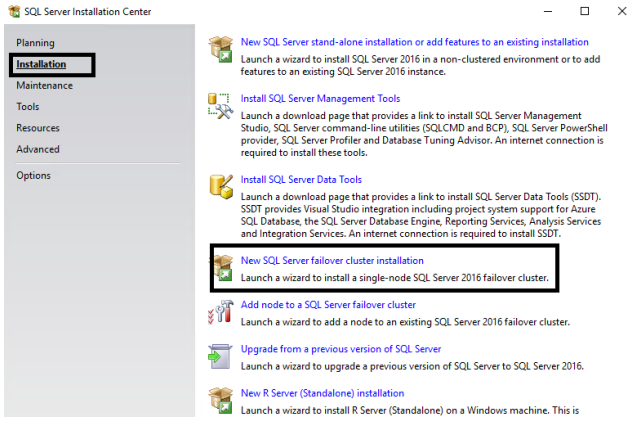
2. Select installation, then, on the right side, select New SQL Server Failover Cluster Installation.
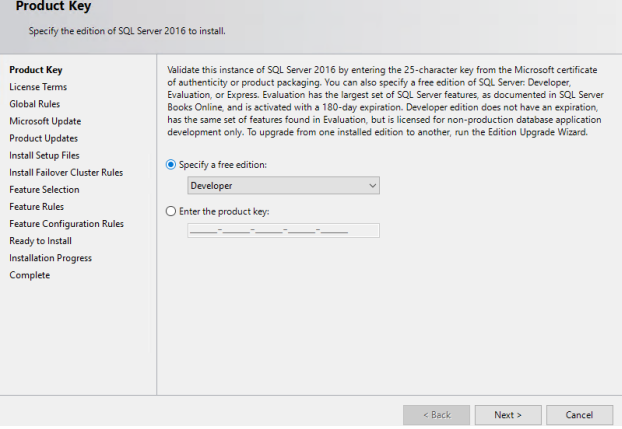
3. On the page that will appear, enter the product key and click NEXT. Product keys are usually embedded in the installation provided. If you don’t have a product key, please contact an MS licensing specialist of your region.
4. In this guide, the developer edition is used, and a product key is not required. Please note that the developer edition can be used only for testing and is not allowed for production.
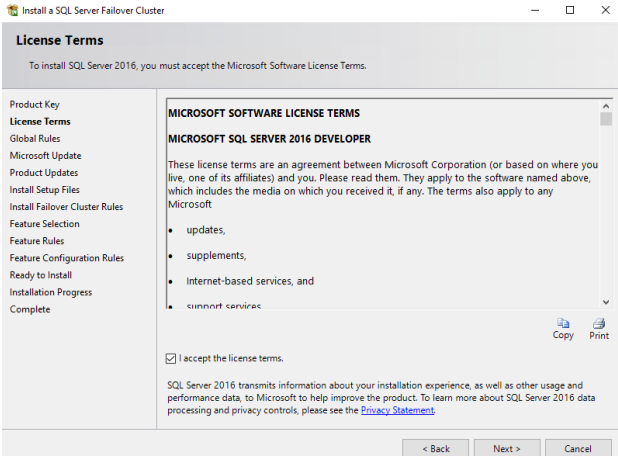
5. Go through the MS licensing, accept the Licensing Terms, and click NEXT.
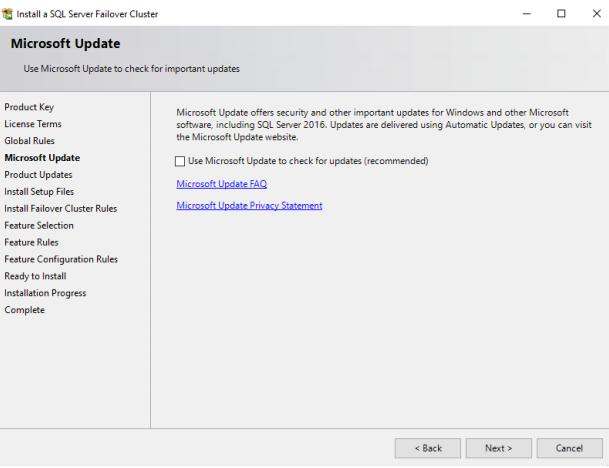
6. On the page that appears, you can select the checkbox “Use Microsoft Update to Check for Updates”. This will force installation to download the latest security patches, but since the developer edition with Sp1 built-in is used, it is not required. You can skip it and click NEXT.
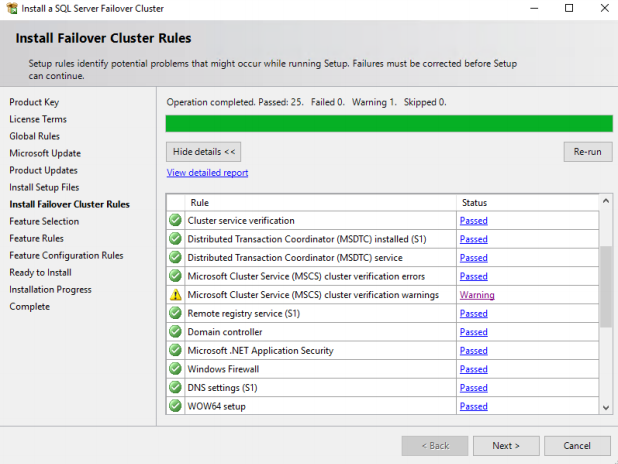
7. The page shows various tests SQL Server Failover Cluster installation does to check the consistency. Also, note the MSFC warning: if you click on it, you will see that there was a warning when Windows Cluster was installed. It may be ignored, but before proceeding, it is advised to contact the Windows specialist who configured Windows Cluster for you. Click NEXT.
8. Select the features you want to install on the feature selection page. Make sure you do not select C drive for system files in a cluster as it is recommended to install system databases on a local Drive, in our case it is D drive. Click NEXT.
NOTE: This is SQL Server 2016, and there is no option to select SSMS for installation. Starting from SQL Server 2016 and onward, SSMS comes as a separate download.
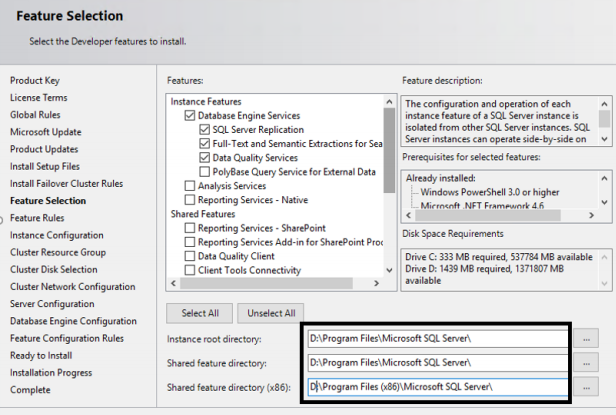
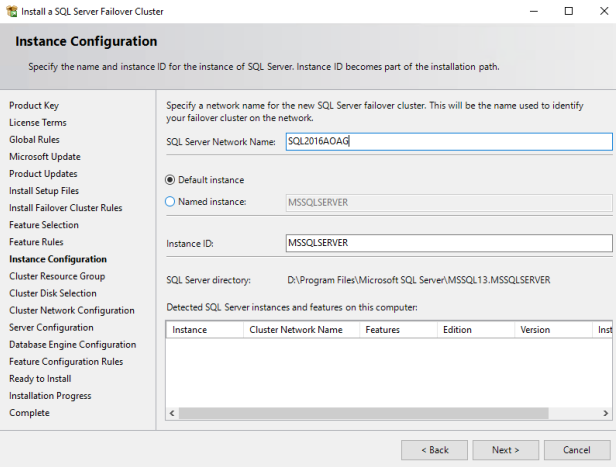
9. On the instance configuration page, enter a unique SQL Server network name as SQL Server Network Name. Select Default instance. If choosing “Named instance”, the instance name must be specified. Click NEXT.
Also note that the SQL Server directory where system databases will be installed is D:\Program Files\… drive.
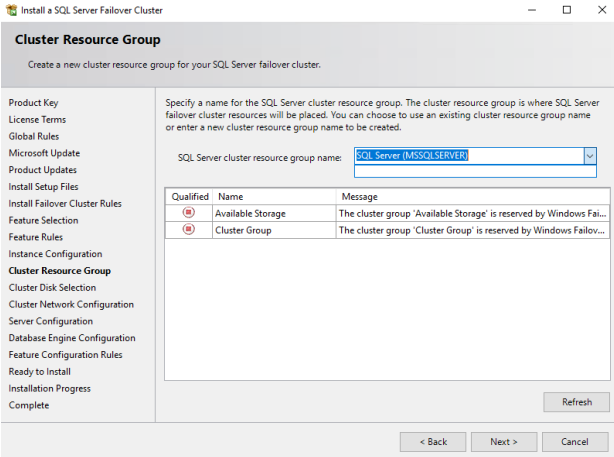
10. On the next page, leave the SQL Server resource group name by default. If you have an available storage that is not added as a shared storage, it will appear in the section “Available storage”. Click NEXT:
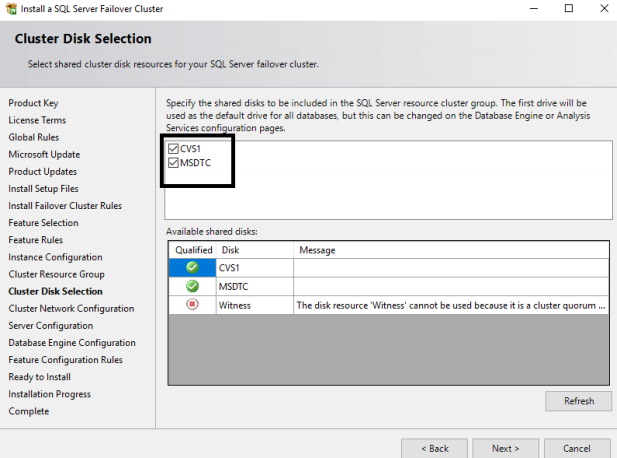
11. On the “Cluster Disk Selection” page, select the disks to add into the cluster as a shared storage. One shared drive is CSV1 and another one is MSDTC. Select both.
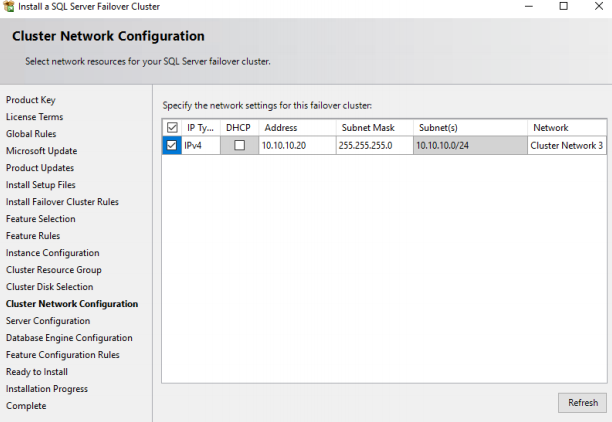
12. On the “Cluster Network Configuration” page, select the top check box which will enable the option below and then add a static IP address to which the SQL Server network name will listen. This IP should be a free one. DHCP is not recommended. Also note that Network 3 will be used by the cluster for communication. Click NEXT.
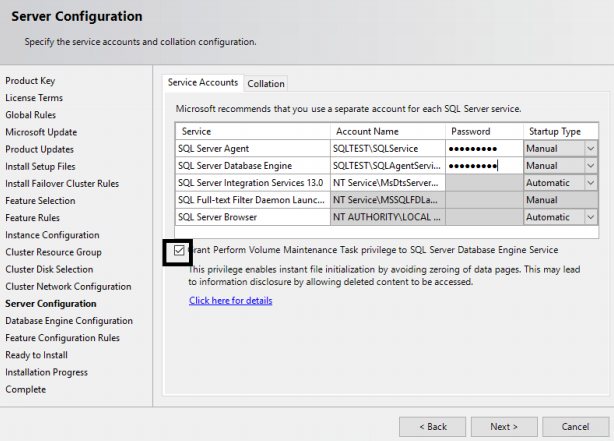
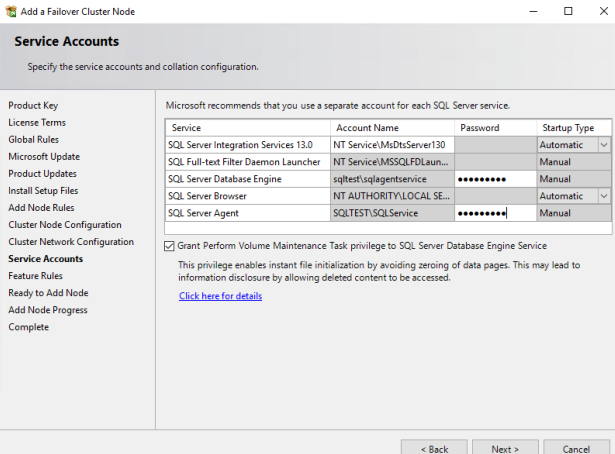
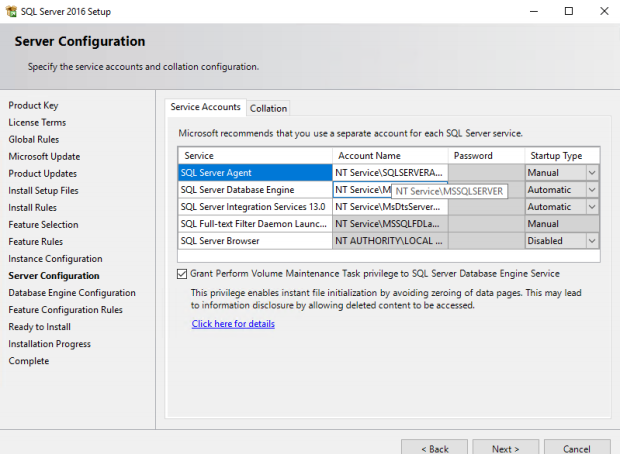
13. Select the Service Account you want to run the SQL Server and Agent Account Name and enter the password. Check the Grant Perform Volume Maintenance Task to SQL Server box. This will ensure the Instance file initialization for SQL Server and that it can perform restoring and outgrowth faster.
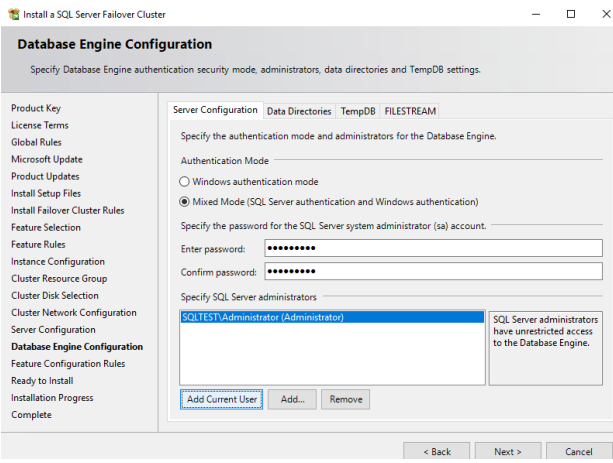
14. On the Database Engine Configuration page, under Server Configuration Tab, select Mixed Mode authentication and give a strong password for SA account. Also click on Add Current User to add the current Windows login into SQL Server as administrator. Adding current account is optional, and you can omit it. DO NOT CLICK NEXT.
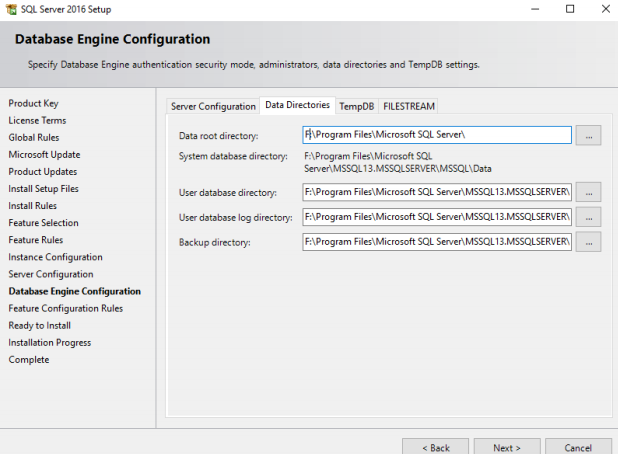
15. On the same Database Engine Configuration window, select Data Directory tab and specify the drive where you want to keep data, log, and Tempdb. Both can be allocated on the same or different drives. As for MS best practice, they should be on different drives, but since this is for testing, they will be kept on the same drive.
16. Also note that F:\ is the same CSV1 drive which we added as a shared storage. Do not click NEXT.

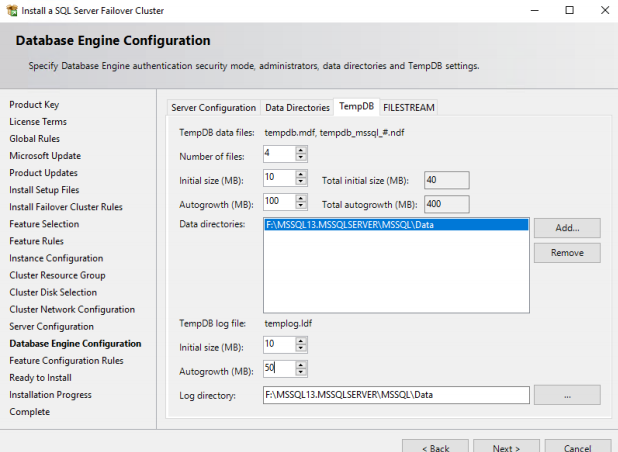
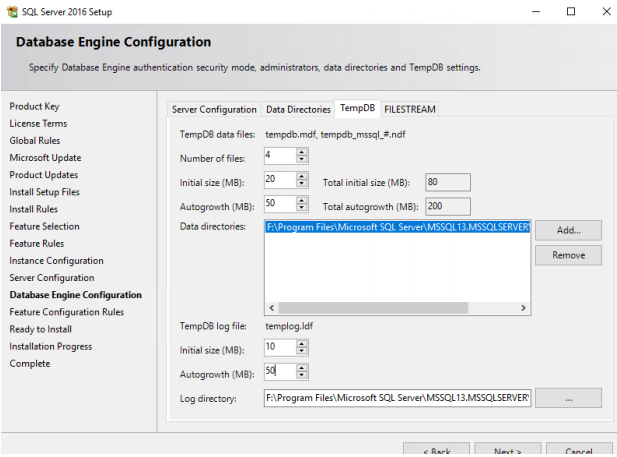
16. Click Tempdb tab and configure Tempdb as it is shown on the picture below. The configuration can vary as per logical cores present in the system. To configure Tempdb, please refer to How to correctly Add Files to Tempdb. Now you can click NEXT.
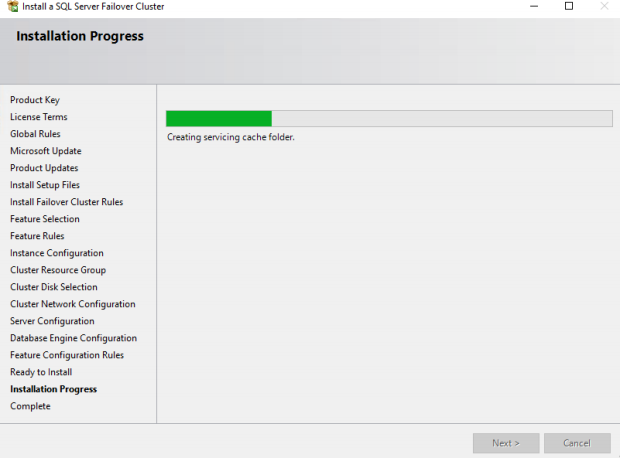
18. After that, the install screen will appear, showing the parameters you have selected and which you can check. Click NEXT to start the installation, and after a few minutes, you will see the installation progress.
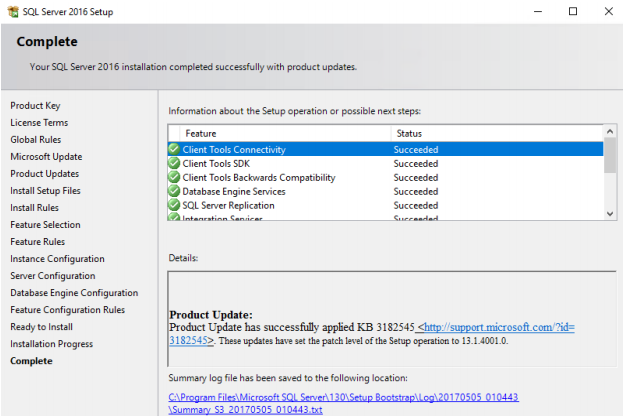
19. When the installation is finished, everything will appear green, and then you can click ‘Close’. This means the installation is completed successfully. If it fails, you will see a red cross on the features you are trying to install.
Adding node 2 to the SQL Server FC
SQL Server is successfully installed on S1 which is the node 1 of the cluster. Now, the second node S2 must be added to the cluster. The process is described below.
The steps are similar to the installation procedure on the node 1.
20. Right-click on the SQL Server installation file setup.exe and select run as administrator and select Add Node to SQL Server Failover Cluster as it’s shown below.

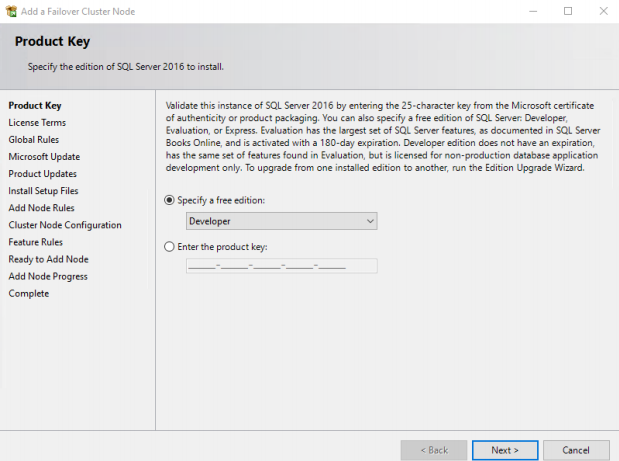
21. Enter the product key. In case “Developer edition” is used, it is not required.
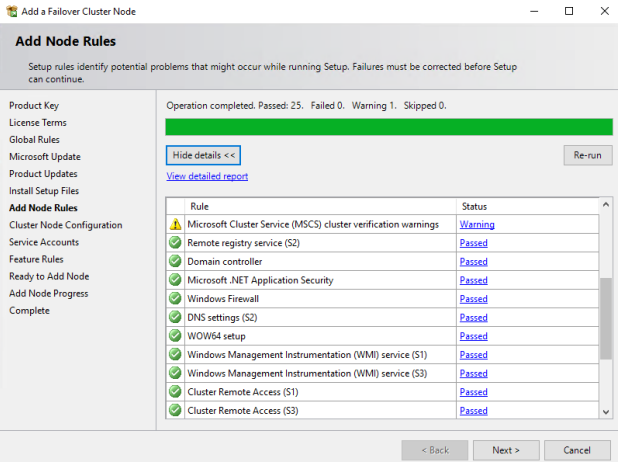
22. Click NEXT and the installation will check the prerequisites. If there are no failed checks, click NEXT.
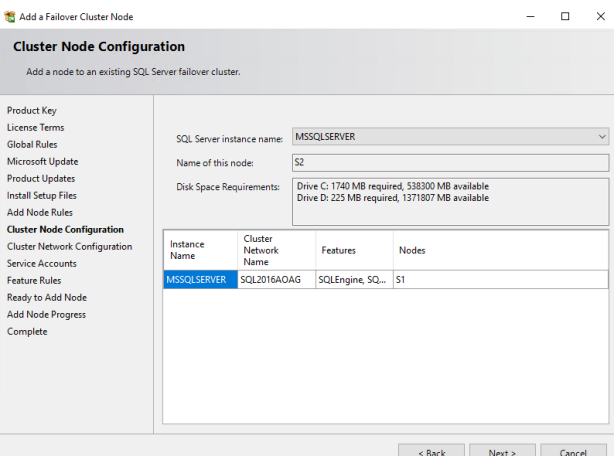
23. On the “Cluster Node Configuration” page, you will see:
• The Instance name of SQL Server specified during SQL Server installation on the node 1. Since the default instance has been selected, MSSQLSERVER name will appear.
• Name of the Node you are adding to the cluster.
• Information about the Node you are adding at the bottom.
Click NEXT.
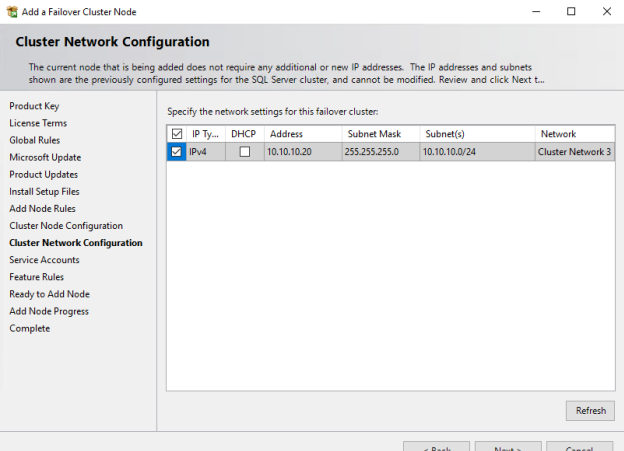
24. On the Cluster Network Configuration page, the options are greyed out. This is mostly the information showing that you are adding a node to the cluster with certain details.
Mark the check box and click NEXT.
25. On the next window, add the password for SQL Server and Agent service account and select check box Grant Perform Volume Maintenance Task. Click NEXT.
26. On the “Complete” page, you can see the features update status. When the check is complete, click NEXT and then, after few more NEXT clicks, the installation will start.
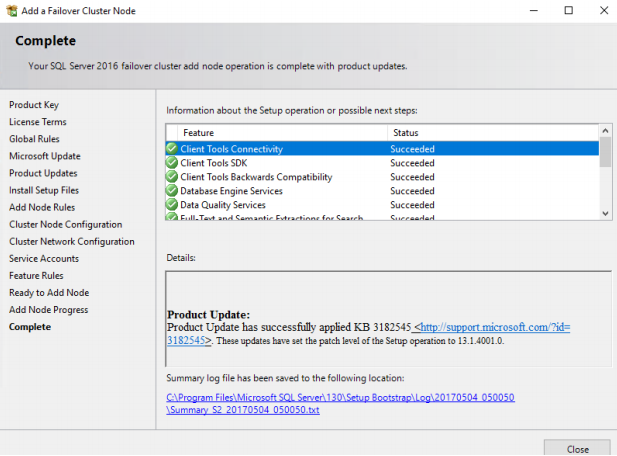
The node has been added successfully. SQL Server FCI is configured completely.
Installing the SQL Server stand-alone instance
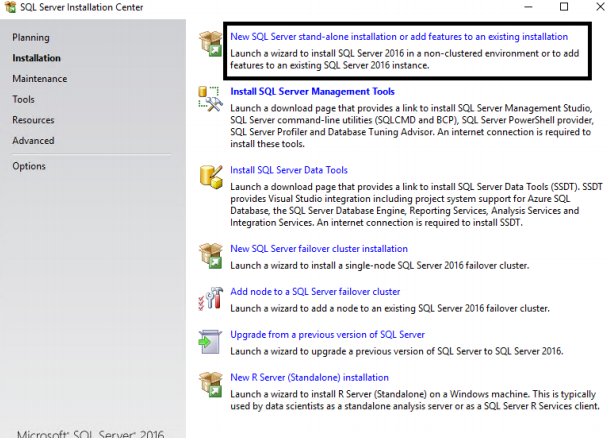
27. To install the SQL Server as stand-alone on Node S3, which will be later added into the Windows Cluster, log onto S3 server, right-click on setup.exe and select ‘run as administrator’. Select “New SQL Server stand-alone Installation or Add feature to Already existing installation”.
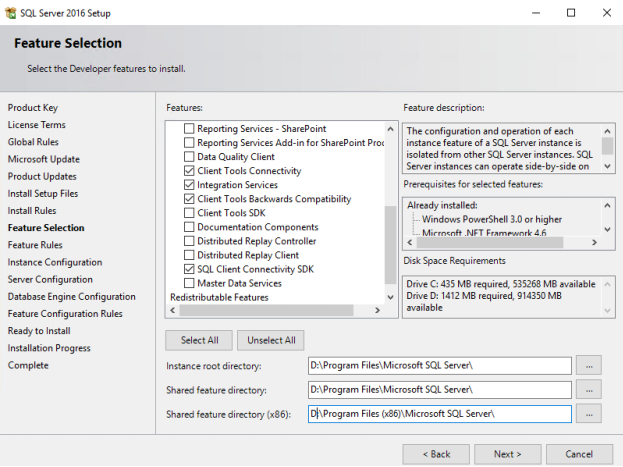
28. Now, on the “Feature Selection” page, select the same features which you have specified for SQL Server FCI. Select D drive for system databases and files. Click NEXT.
NOTE: The drive letter and location, where SQL Server data, log, and Tempdb will reside, should be the same for the FCI and stand-alone database, otherwise the failover will not work.
29. On the “Server Configuration” page, enter the same service accounts which you specified for SQL Server and agent in FCI. Don’t forget to select check box to Perform Volume maintenance task. Click Next.
30. On the “Database Engine Configuration” page, in the Server Configuration tab, select mixed mode authentication and provide password. On the Data Directories tab, select F drive as location for data, log, and Tempdb.
31. Select the same drive for Tempdb Configuration:
32. Click NEXT to start the installation process.
After the SQL Server Cluster is installed on all the 3 nodes, the node S3 must be added into the Windows Cluster.
Adding node S3 to a WSFC cluster
Windows Server configuration.
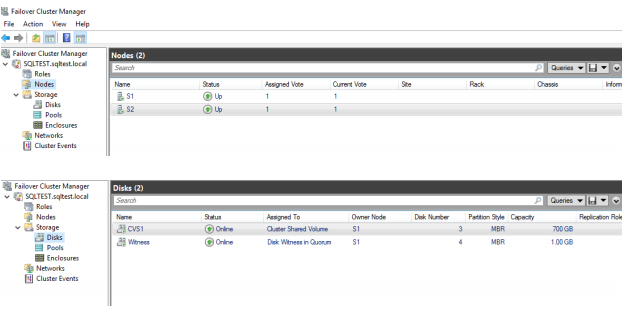
Current WSFC configuration has two nodes: S1 and S2, as it is shown on the screenshot below:
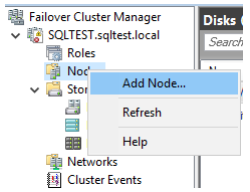
33. Now, add the node to the cluster, which will act as the secondary replica. Right-click and select Add Node.
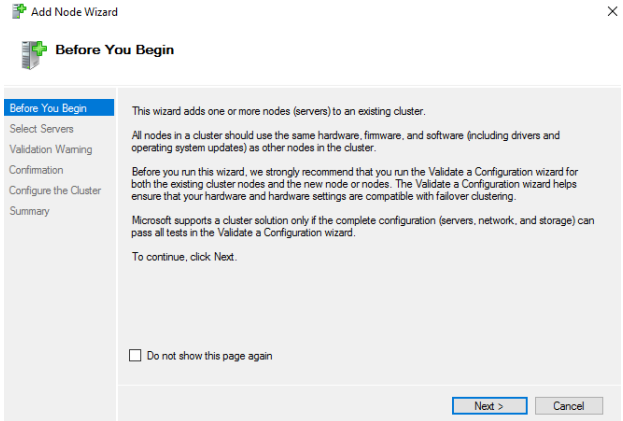
34. Check the information on the new window and click NEXT.
35. Enter the name of the Server which you want to add as the secondary replica, and click Add.

36. Select the first option as it’s shown below and click NEXT.
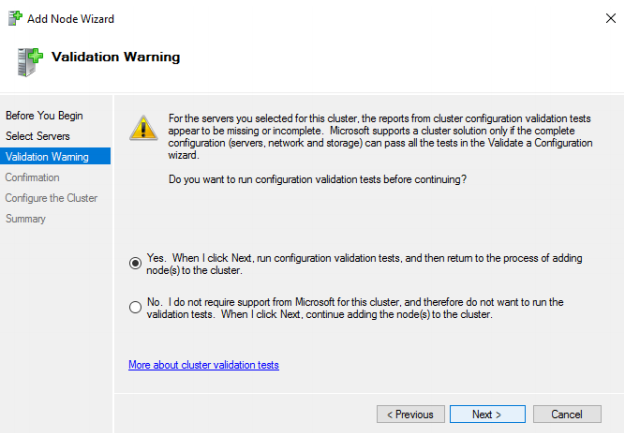
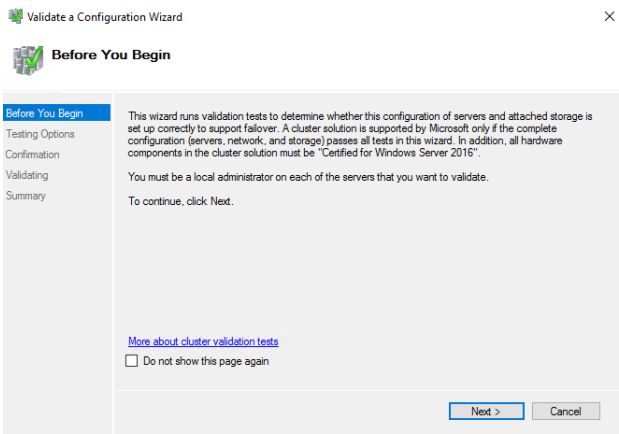
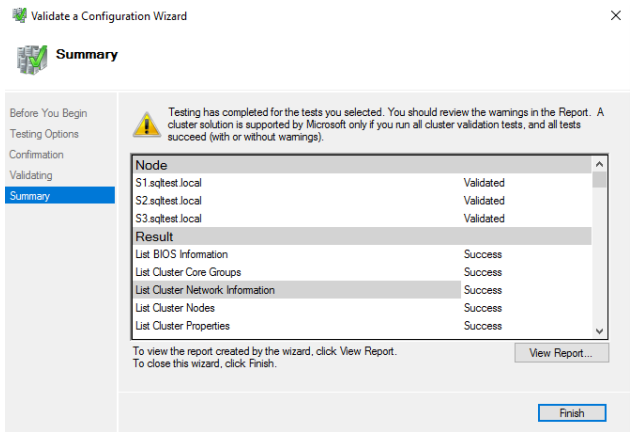
37. The Wizard will run few mandatory cluster configuration tests. The validation tests must be run in order to pass the MS verification. To run it, click NEXT.
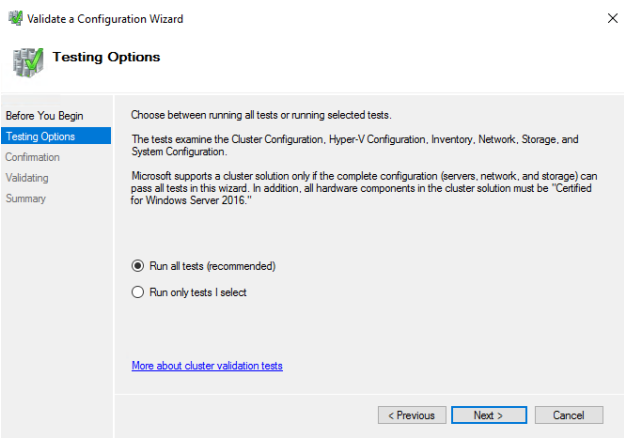
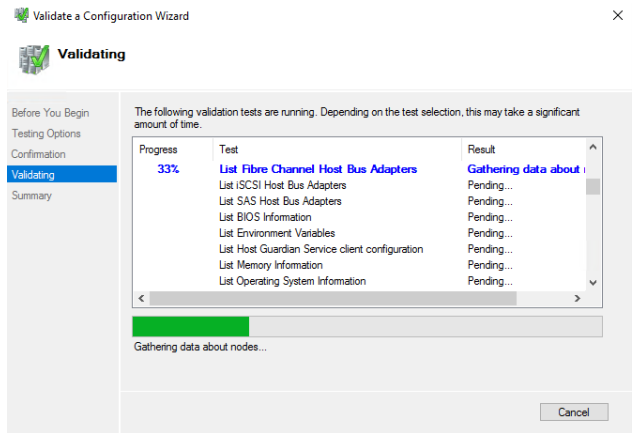
38. Select the first option. All the tests must be run. Click NEXT to start the validation process.
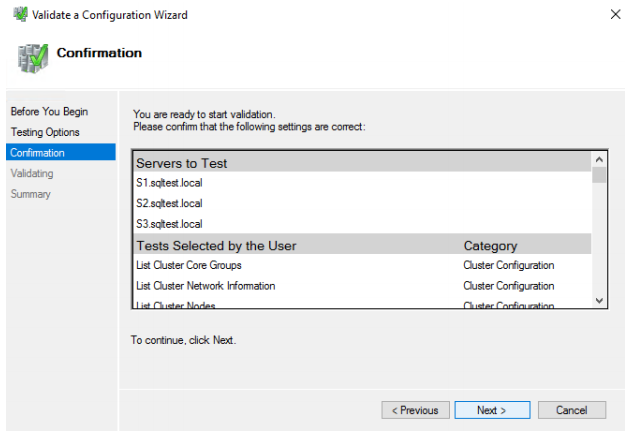
39. Before proceeding, it is recommended to VIEW REPORT.
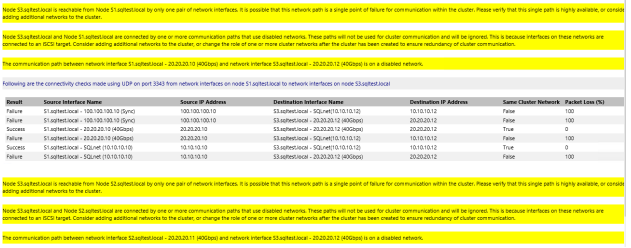
40. The text with yellow exclamation mark states that the secondary replica S3 is reachable only by one pair of networks and could be a single point of failure. Since this is testing, there is one network for replication between the replicas and cluster communication. In the production environments, one NIC card can be used for the cluster communication and another one for the replication between Availability Group replicas. As for now, you can ignore the warnings.
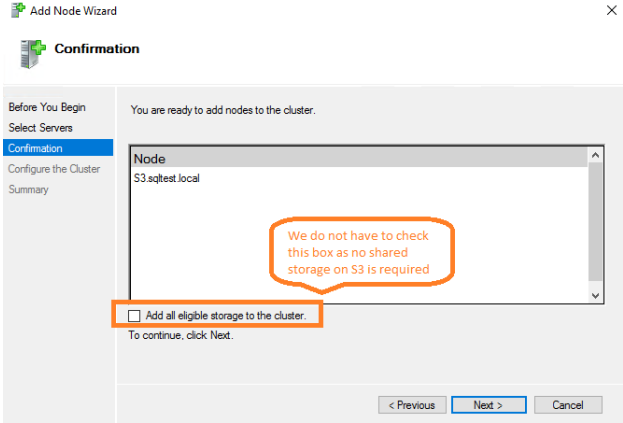
41. Click Finish. Do not select Add All Eligible Storage to the cluster. Click NEXT.
42. Click Finish. The node has been added to WSFC.
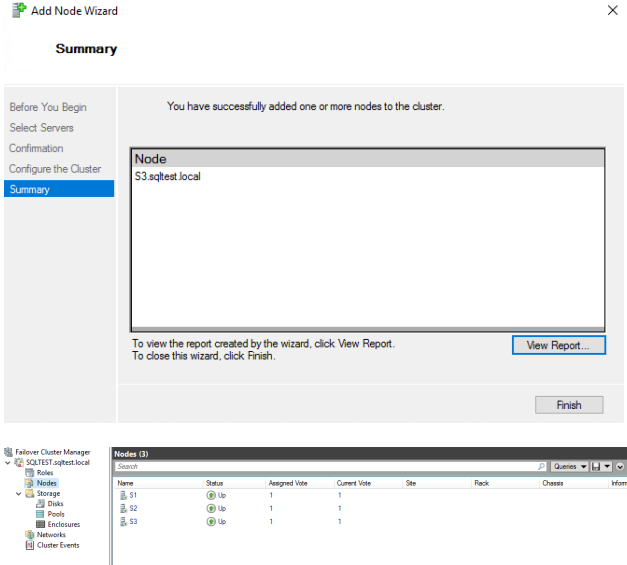
As a result, all 3 nodes are joined to WSFC and 2 nodes are acting as SQL Server FCI with node S3 as stand-alone.
Configuring Availability Group on SQL Server FCI and node S3
Now, Availability Group must be configured and enabled on SQL Server FCI and S3 node.
Before proceeding, please download SSMS 17 and install it on all 3 nodes. Right-click and select “run as administrator”. Click NEXT to install the SSMS.
43. Log onto S1 node, which is the owner of SQLFCI, and open SQL Server Configuration Manager. Right-click on the SQL Server services and select Properties.
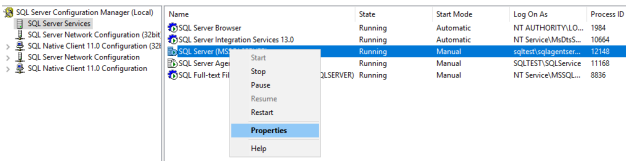
44. Select AlwaysOn High Availability tab, and you will see the Windows Failover Cluster name (SQLTEST). Check the box “Enable AlwaysOn Availability Groups” for all the servers (S1, S2 and S3).
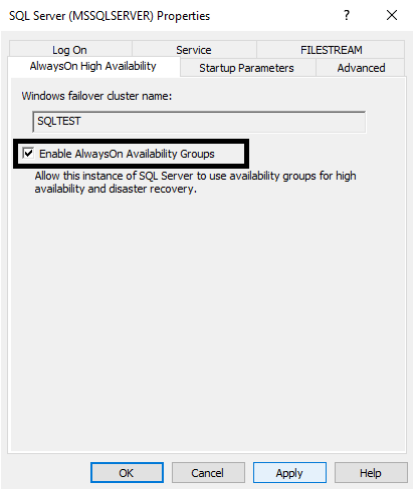
Now, when Always On Availability Group is enabled on all the nodes, the next step is configuring Availability Group between SQL Server FCI and the node S3.
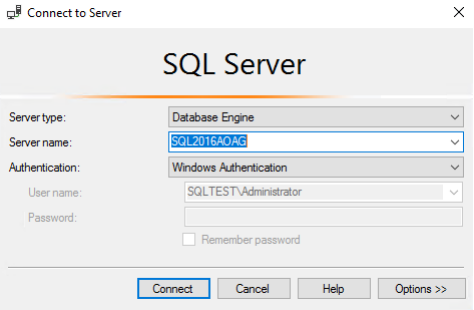
46. Log in to the Node S1 and open the SSMS (you can find it in the installed programs). Log in to the server using the SSMS. Use SQL 2016 Availability Group to connect to the SQL Server Cluster. This is the cluster where 2 nodes are combined virtually to form one machine, where the Virtual name is used for connection.
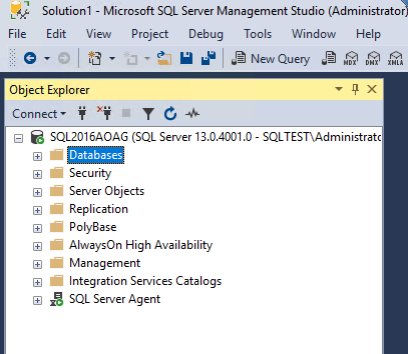
47. After the successful connection, you will see the following window:
48. Download the Adventureworks.Bak file from the Codeplex Website and restore the .bak file to create a database.
49. Click on the New Query above the Object Explorer and run the following query to create the database. Make sure the file location is:
‘C:\Install\SQL Server 2016 Developer Edition\Adventure Works 2014 Full Database Backup\AdventureWorks2014.bak’
Or change the script accordingly:
restore DATABASE [AdventureWorks2014]
from disk=’C:\Install\SQL Server 2016 Developer Edition\Adventure Works 2014 Full Database Backup\AdventureWorks2014.bak’
with MOVE
‘AdventureWorks2014_Data’ to F:\SQLDATA\Adventureworks2016_data.mdf’,
move
‘AdventureWorks2014_Log’ to ‘F:\SQLLOG\AdventureWorks2016_log.ldf’, recovery go
ALTER DATABASE [AdventureWorks2014] SET COMPATIBILITY_LEVEL = 120
GO
50. After restoring, expand the Databases and you will see the AdventureWorks2014 database.
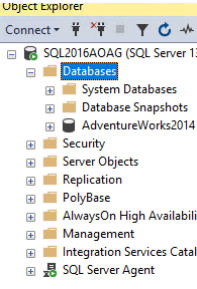
51. After the database is restored, make sure that:
• Database is in the full recovery model. To do this, run “Alter database adventureworks2014 set recovery full” in the SSMS query window.
• Take full and log backup of the database to take it out of Pseudo Simple recovery model.
Backup database adventureworks2014 to disk=’backup location’
Go
Backup log adventureworks2014 to disk=’backup location’
You can specify any backup location.
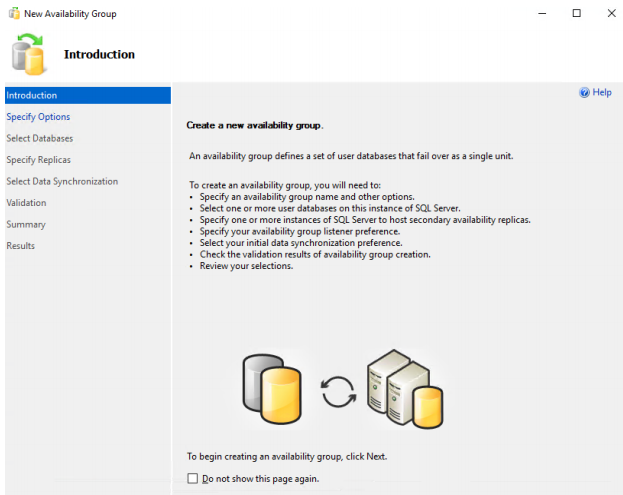
52. After this, right-click on AlwaysOn High Availability.

53. Click NEXT on the following page.
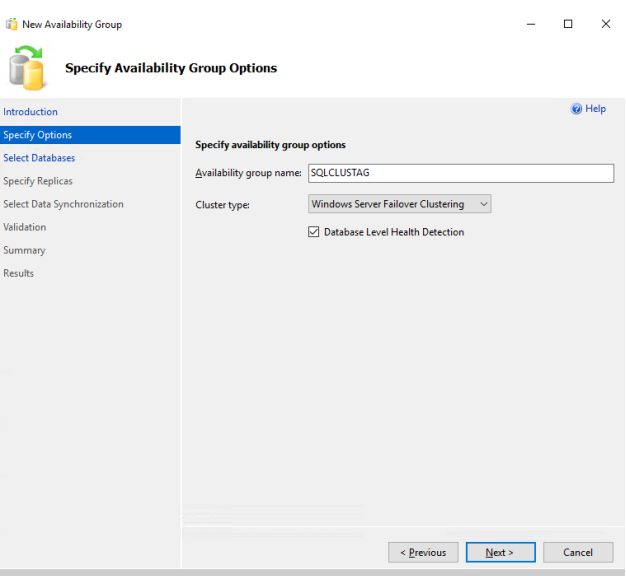
51. In the Availability group name, enter a unique name for your Availability Group, for example, SQLCLUST. Check the box “Database Level Health Detection”. This will force SQL Server to run health checkup for Availability Group internally.
Click NEXT.
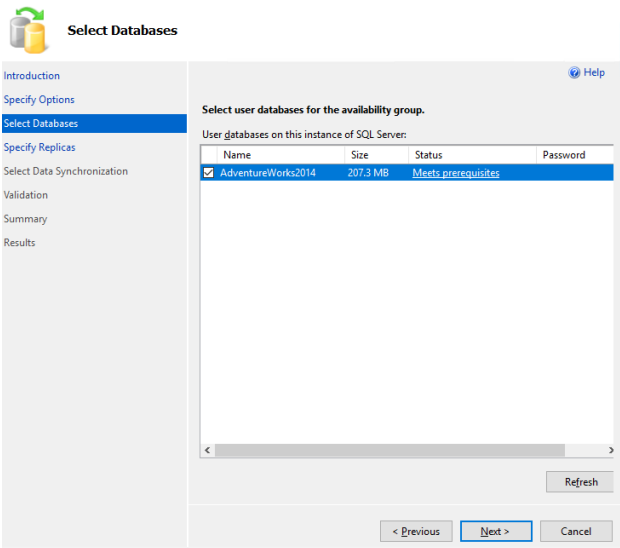
55. The “Select Databases” tab allows you selecting the databases which you want to put under this Availability group. You will see “MEETS PREREQUISITES” in the Status tab, In case you don’t make full and log backup and database recovery model is not full, you will see “Does not meet the prerequisites”. Click NEXT.
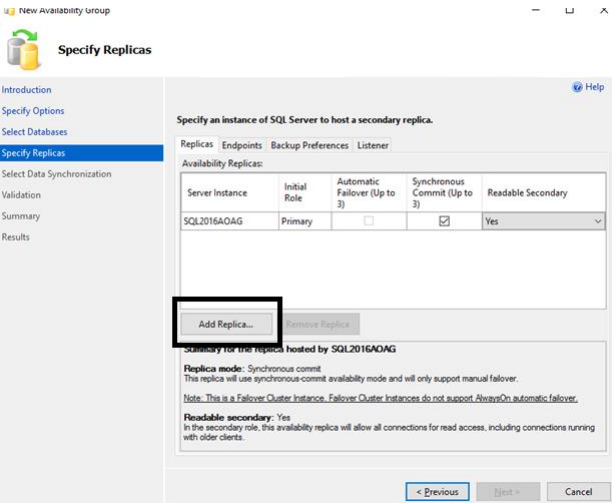
The “Specify replica” page allows you:
• Selecting the Synchronous or Asynchronous Commit.
• Specifying when the Secondary database should be readable.
• Adding the secondary replica.
56. Check the Synchronous Commit and select YES for the Readable Secondary. Click Add Replica.
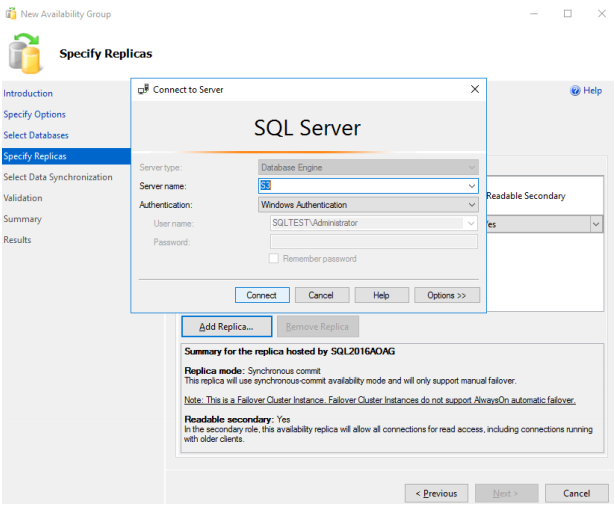
57. Enter the server name of the secondary replica in the SSMS box.
Specify S3 as the Server name and click Connect.
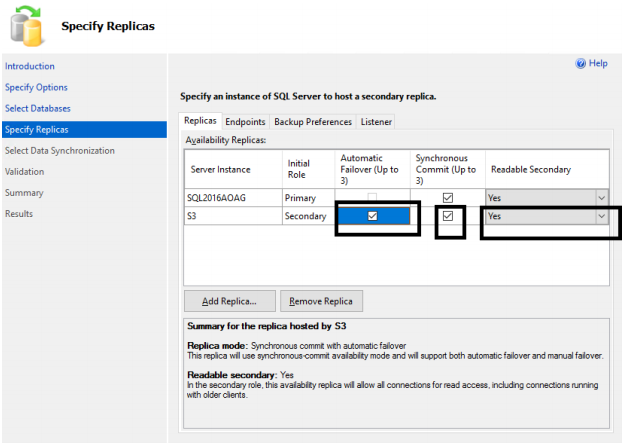
58. You will be redirected to the “Specify replica” page with the S3 replica added. Select Synchronous Commit and Yes for the Readable Secondary.
NOTE: the Availability Group FCI automatic failover is not possible. It is intended to avoid Split Brain Scenario and Race conditions.
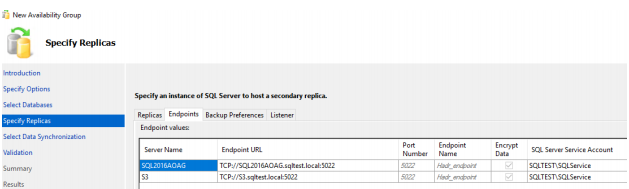
59. Click on the Endpoints tab and note the endpoints for Availability Group communication.
Note that 5022 is the default communication port number.
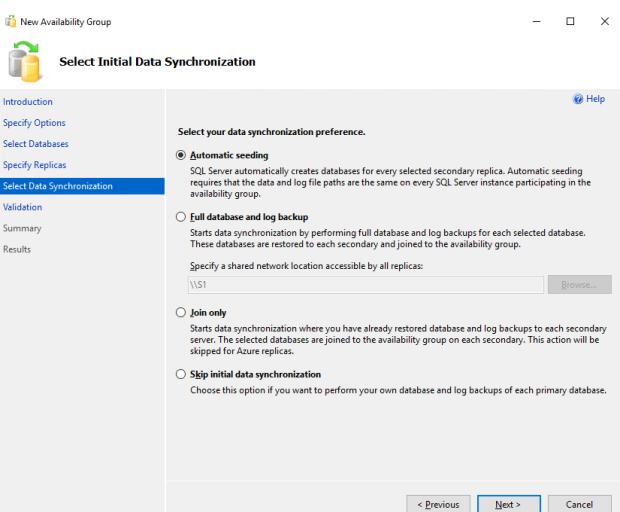
On the Select Initial Data Sync page, select Automatic Seeding. This option should be used for the small databases (3 MB to 5 GB) and will automatically create a database on the secondary replica.
60. In case of selecting other options, full and log backup with NO RECOVERY on S3 secondary replica should be restored beforehand. Click NEXT.
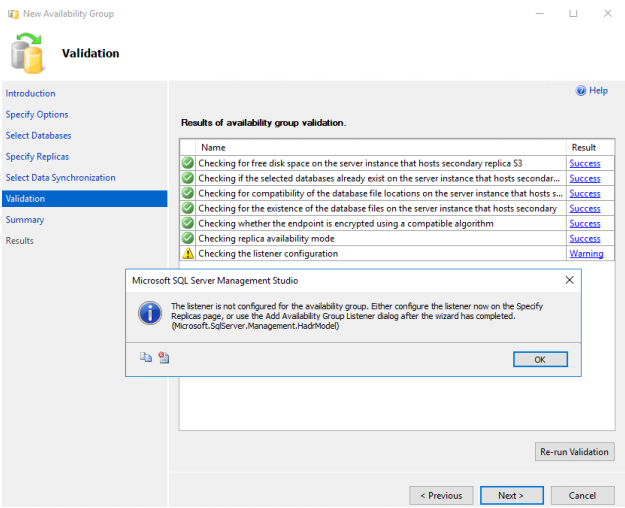
61. The Listener should be setup after configuring the Availability Group. Otherwise, you will see the warning message on the Validation page.
Click NEXT.
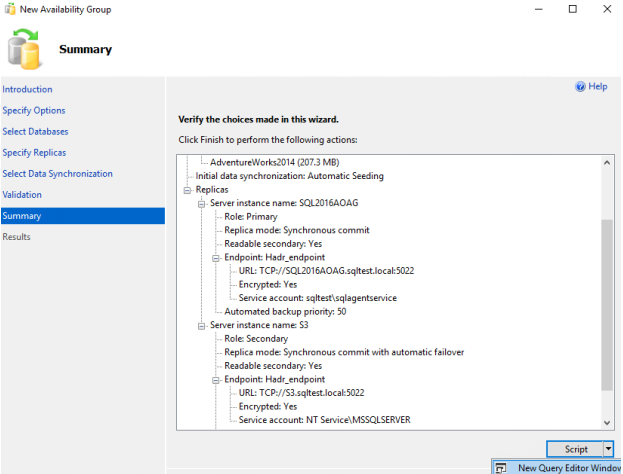
62. On the Summary page, you will see all the options you have selected. There is an option to script out all the configuration in the form of TSQL. If you want to use TSQL to configure Availability Group, run the script. In this case, you can cancel the wizard.
63. The wizard is completed successfully.
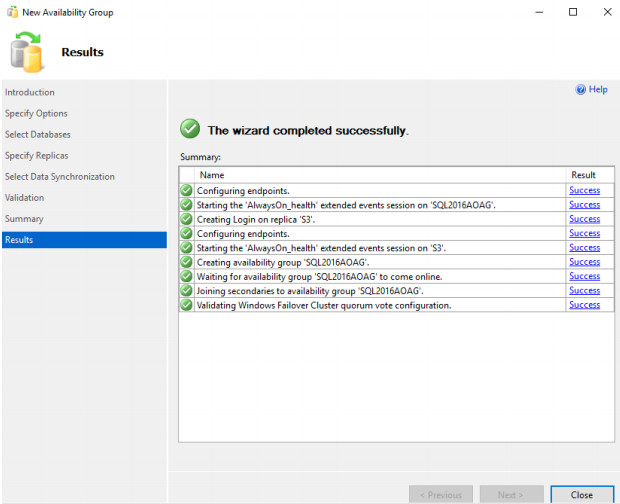
Now, the Availability Group FCI with the node S3 as the secondary replica is configured.
Configuring the Listener
Next, the Listener must be configured. Independent of the primary replica node, the Listener is a name used to connect to it.
It is also recommended for an application to be connected using the Listener Name/IP.
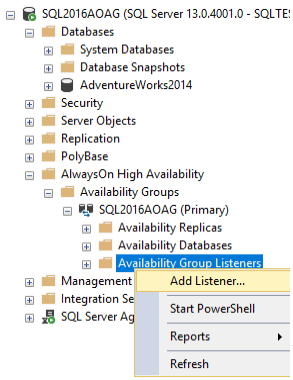
64. To add the Listener to the Availability Group FCI, expand the AlwaysOn High Availability, right-click the Availability Group Listeners, and select Add Listener.
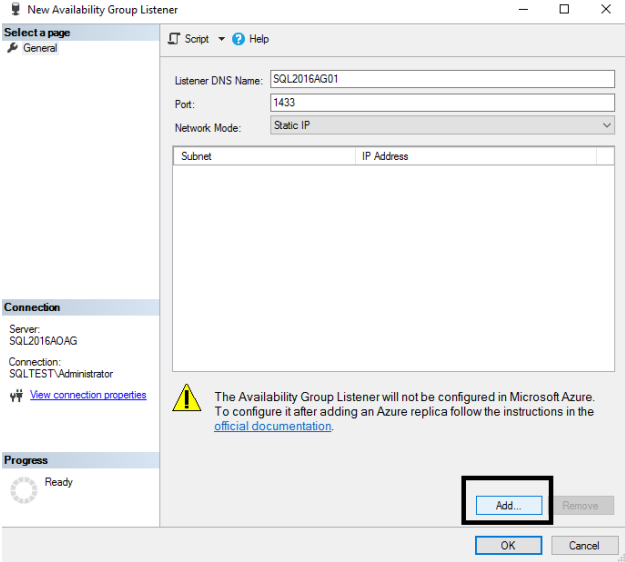
65. Specify the Unique Listener DNS Name, which is basically the Listener name. You can select 1433 port or any free one. Click Add.
NOTE: According to the MS documentation:
“If one of the instances of SQL Server is already listening on TCP port 1433 via the instance listener and there are no other services (including additional instances of SQL Server) on the computer listening on port 1433, this will not cause a port conflict with the availability group listener. This is because the availability group listener can share the same TCP port inside the same service process. However, multiple instances of SQL Server (side-by-side) should not be configured to listen on the same port.”
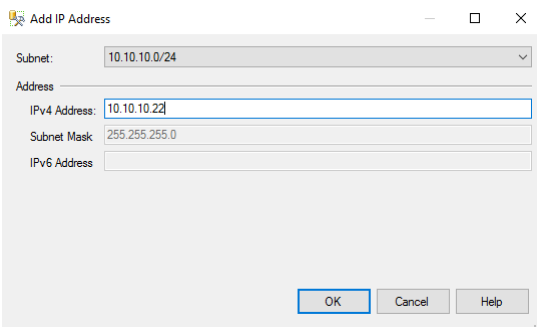
66. Add the IP address of the Listener. This IP should be a free one. Click OK.
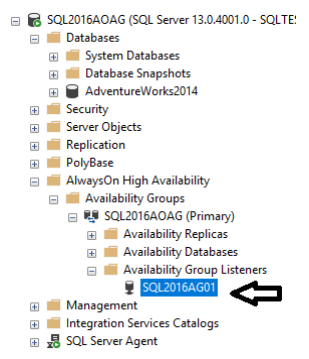
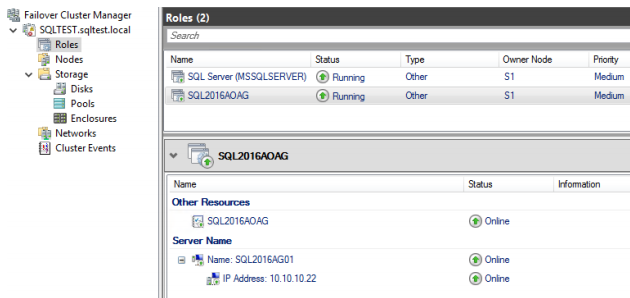
67. To check that the Listener is added, expand the Availability Group Listeners tab.
CONCLUSION
SQL Server Failover Cluster Instance is a part of the SQL Server Always On offering, which leverages Windows Server Failover Clustering functionality to provide local high availability through redundancy at the server-instance level. On the other hand, the Always On Availability Group is a group of one or more databases configured on a primary replica (or SQL Server instance) for high availability. As a result, the combination of Failover Cluster Instance and Availability Groups provides a comprehensive high availability and disaster recovery solution in a 3-node scenario, where S1 and S2 nodes create the Failover Cluster with node S3 serving as a Secondary Database for the Availability Group.
