

StarWind Virtual SAN: Feature Configuration Guide for Set Up Challenge-Handshake Authentication Protocol (CHAP)
- August 06, 2018
- 6 min read
- Download as PDF
Annotation
Relevant Products
StarWind Virtual SAN (VSAN)
Purpose
This document outlines the implementation and configuration of the Challenge-Handshake Authentication Protocol (CHAP) authentication within StarWind Virtual SAN targets.
Audience
This document is intended for IT professionals, system administrators, and network administrators who are responsible for configuring and managing storage solutions within StarWind Virtual SAN.
Expected Result
The expected result is the successful configuration of CHAP settings in StarWind Virtual SAN. Users should be able to implement CHAP for initiator authentication, ensuring secure access to their storage targets. The document also provides guidance on setting global and individual permissions.
Configuring CHAP Settings in StarWind Management Console
StarWind enables global and individual access CHAP restrictions to targets. Challenge-Handshake Authentication Protocol (CHAP) authenticates a user or network host to an authenticating entity. CHAP provides protection against replay attacks by the peer through the use of an incrementally changing identifier and a variable challenge value. CHAP requires that both client and server know the plain text of the secret, although it is never sent over the network.
NOTE: More information about CHAP can be found here.
Setting global permissions
1. Select one of the hosts in the StarWind Management Console tree.
2. Click the CHAP Permissions tab. Right-click the main tab area and select Add Permission from the shortcut menu.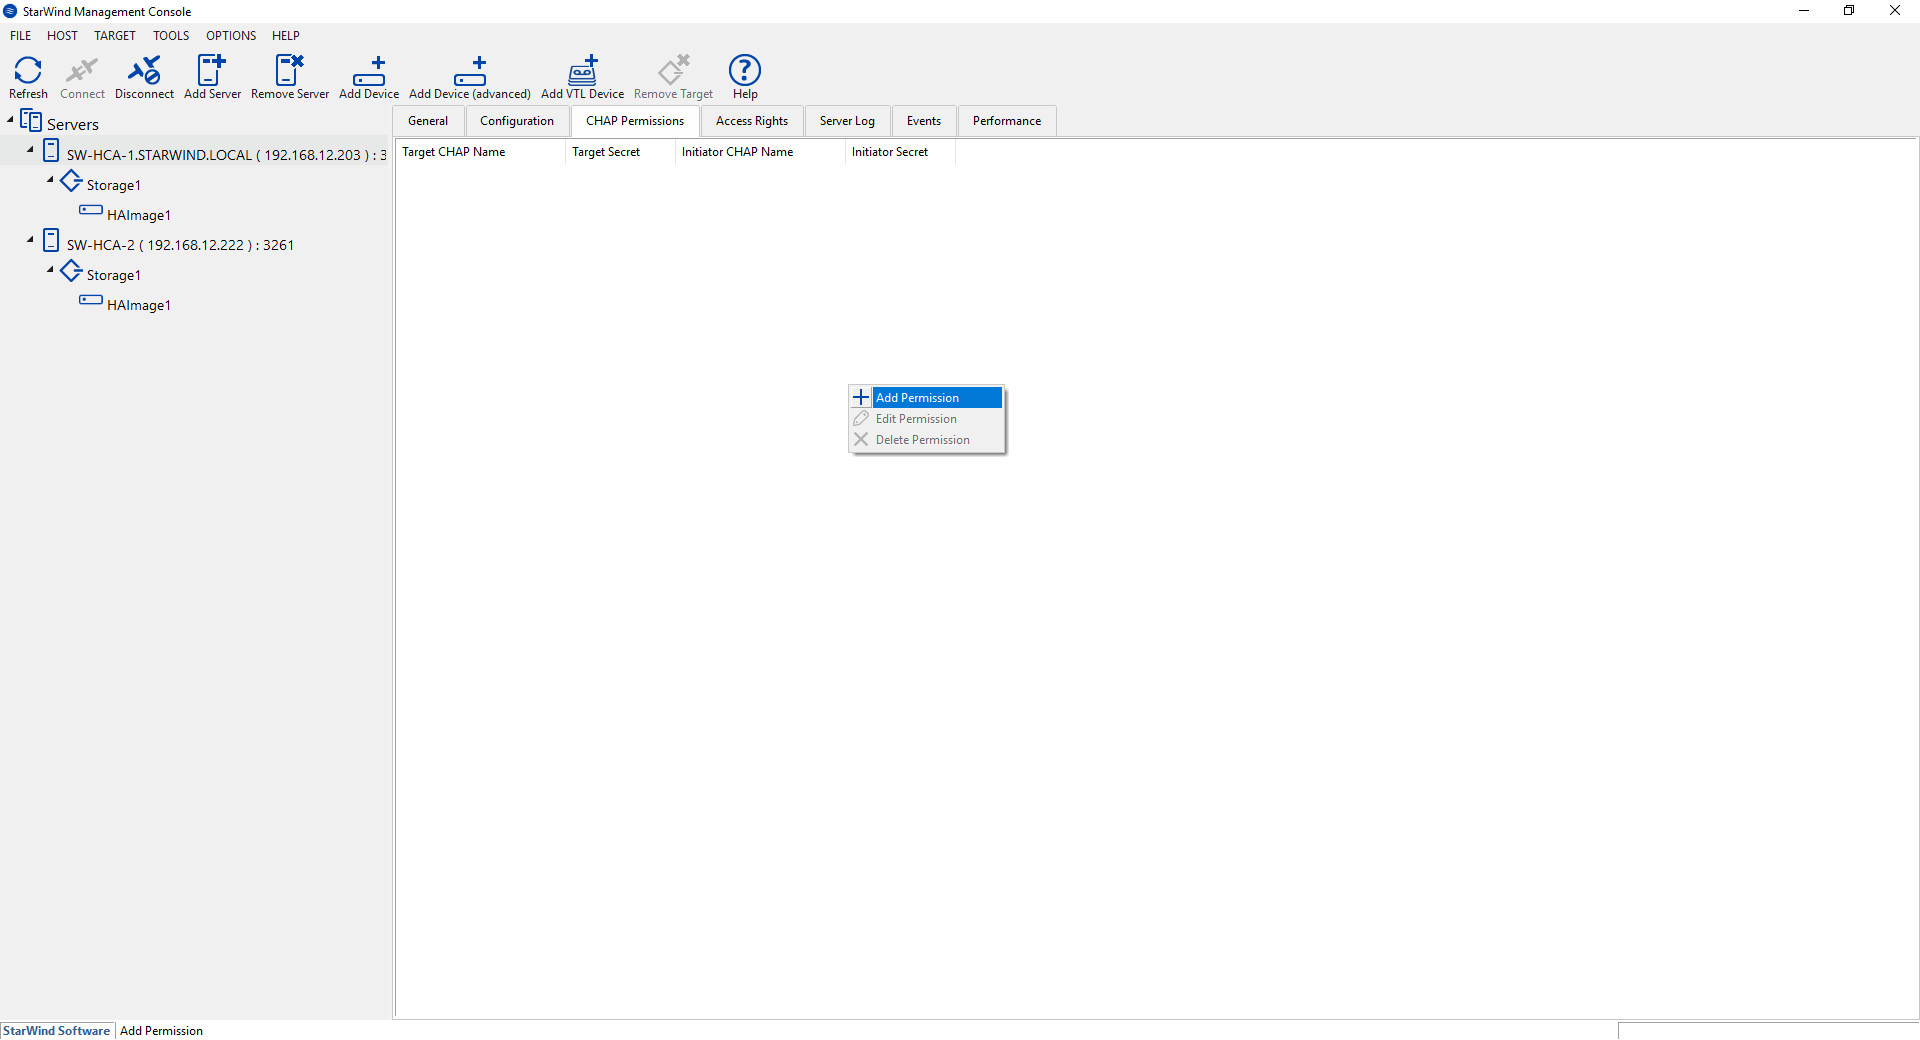 3. In New Permission Item, specify the required settings:
- Target CHAP name: is a name used by CHAP for initiator authentication.
- Target secret: is a secret that is used by CHAP for initiator authentication.
- Initiator CHAP name: is a name for the CHAP mutual authentication.
- Initiator secret: is a secret for the CHAP mutual authentication.
 Click OK.
4. Check the new CHAP Permission tab.

NOTE: Repeat this step to add as many permissions as needed. Now all clients need to provide CHAP settings to access any target on this server.
NOTE: If the partner authentication settings are not changed, StarWind will not be able to synchronize HA devices to the partner node after the service restart.
Setting individual target permissions
1. Select the required target in the StarWind Management Console tree.
2. Click Add Permission in the CHAP Permissions area.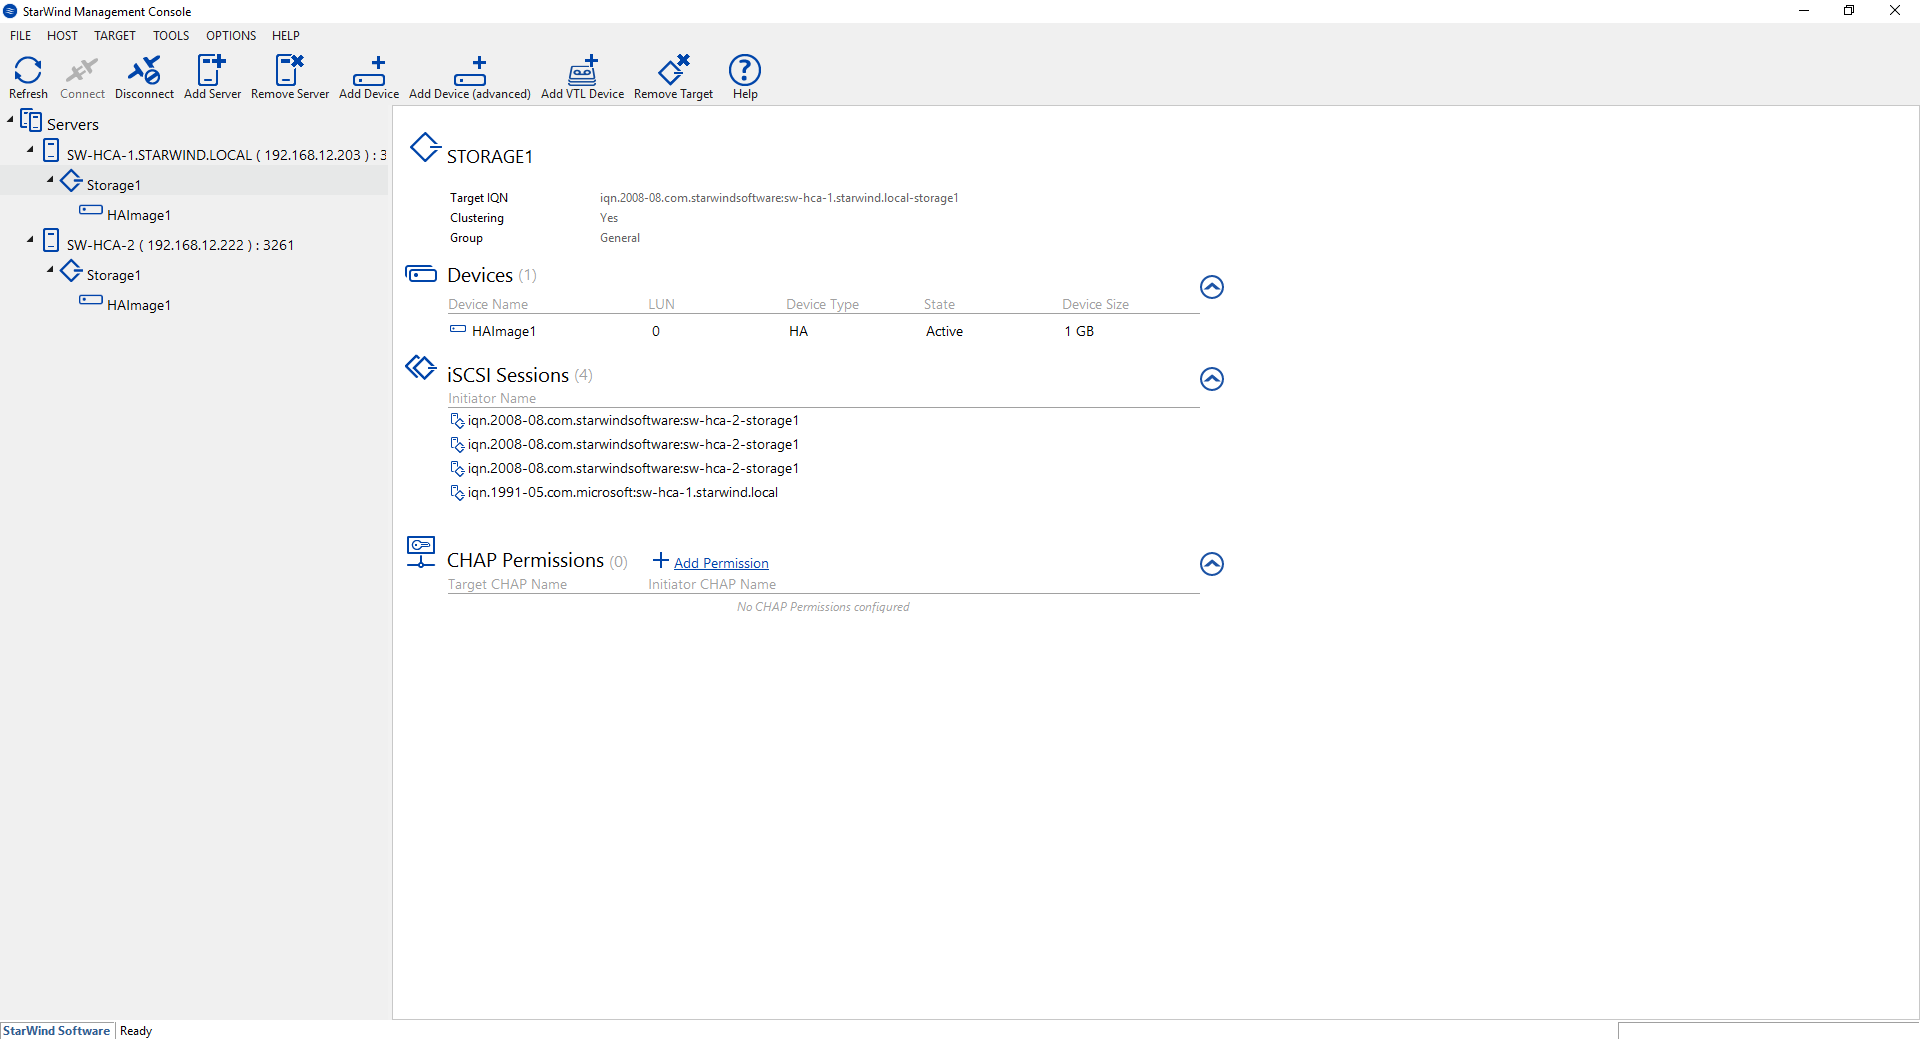 3. In the New Permission Item window, specify the required settings:
- Target CHAP name: is a name used by CHAP for initiator authentication.
- Target secret: is a secret that is used by CHAP for initiator authentication.
- Initiator CHAP name: is a name for the CHAP mutual authentication.
- Initiator secret: is a secret for the CHAP mutual authentication.

Click OK.
NOTE: Repeat this step to add as many permissions as needed. Now all clients need to provide CHAP settings to access target on this server.

NOTE: If the partner authentication settings are not changed, StarWind will not be able to synchronize HA devices to the partner node after the service restart.
Setting permissions for HA target
1. Open StarWind Management Console.
2. Choose partner device. Click Change Partner Authentication Settings or right-click the device and select Change Partner Authentication Settings from the shortcut menu.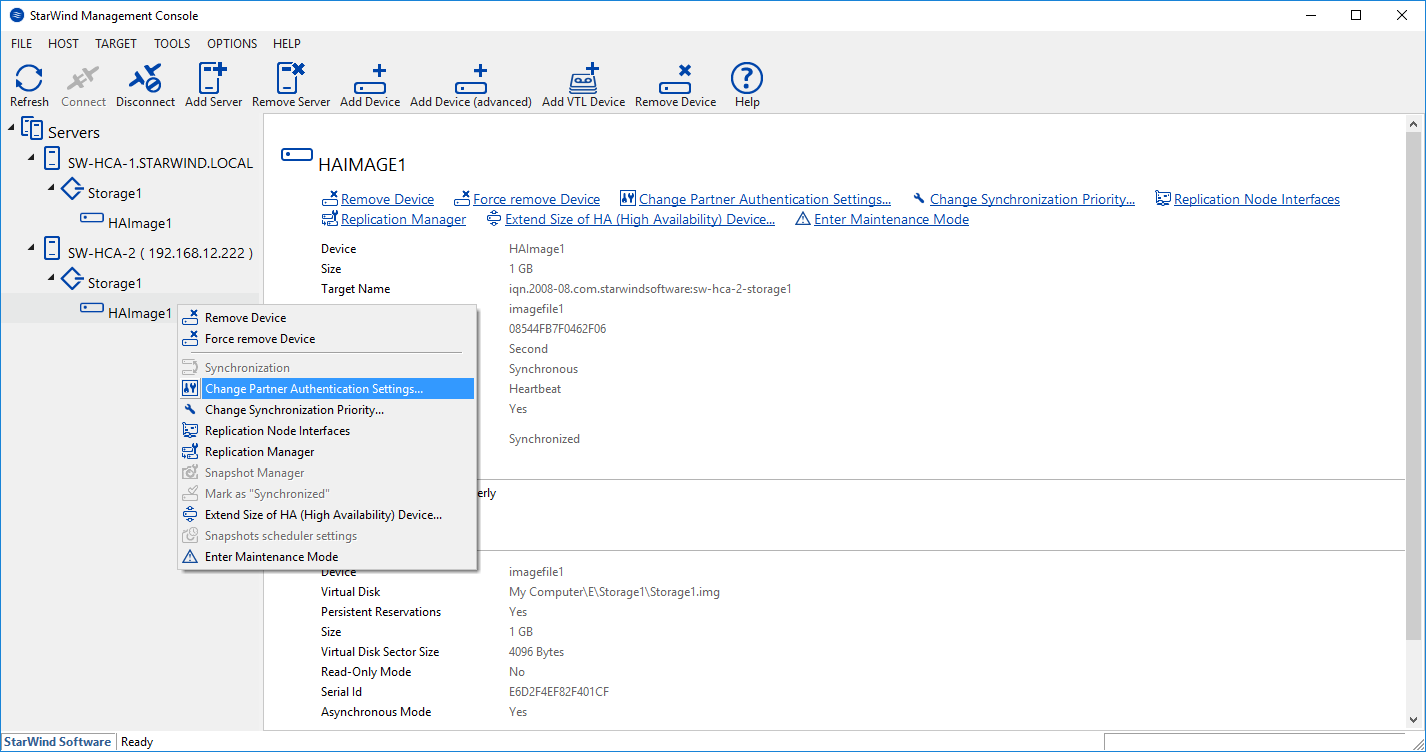 3. Select CHAP in Authentication Type.
 4. Indicate Local Name and Local Secret. Click OK.
Selecting the Hypervisor
Please select the required option:
Configuring CHAP Settings on Hyper-V
Setting target permissions
1. Open iSCSI Initiator.
2. Select Target in the Discovered targets area. Click Connect.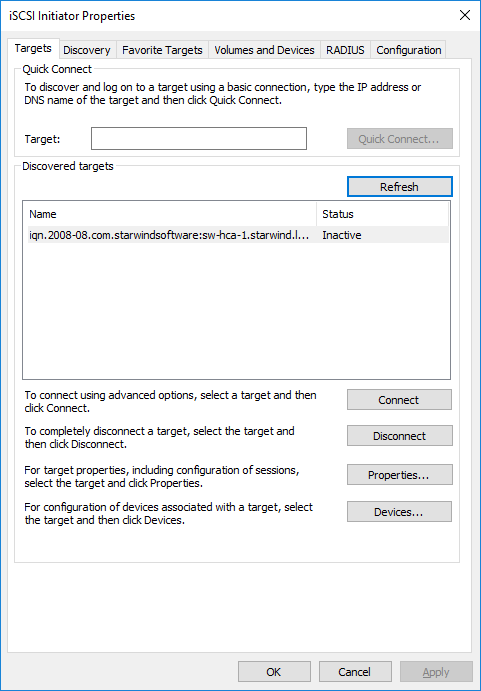 3. Click Advanced…
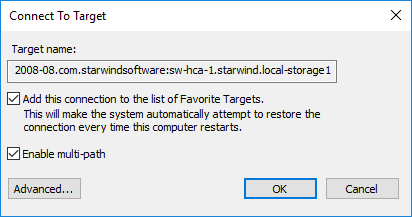 4. To enable CHAP, select the Enable CHAP log on checkbox.
5. Indicate Name and Target secret. Click OK.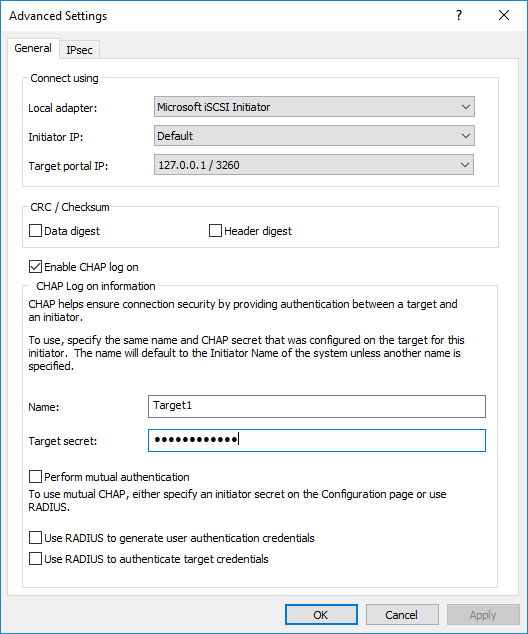 6. Open Properties… in the iSCSI Initiator and check Authentication of the connected session.
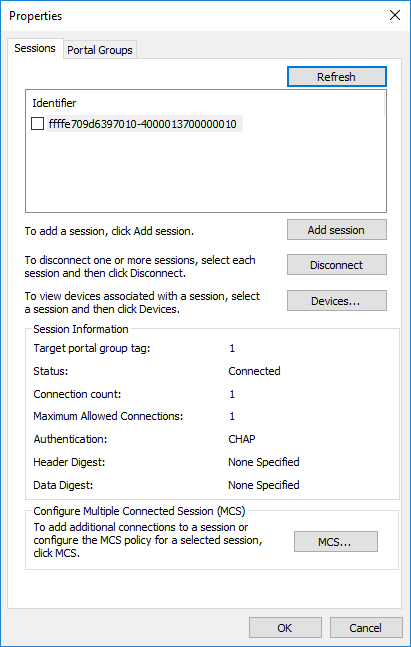 7. Check Favorite Target Details.
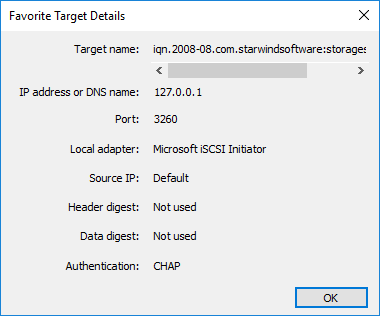
NOTE: Target will not be reconnected after the service restart in case it does not have CHAP Authentication.
Changing CHAP initiator configuration
1. Open iSCSI initiator and click Configuration.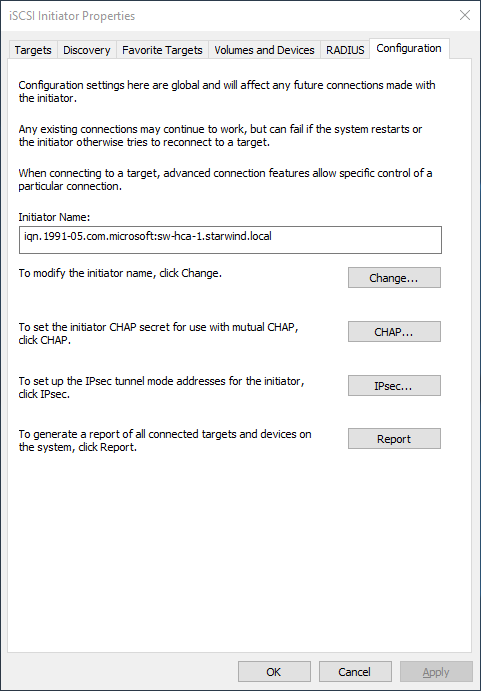 NOTE: Click Change… to modify the initiator name. Click CHAP… to set the initiator CHAP secret.
Configuring CHAP Settings on ESXi
1. Click Add dynamic target in Dynamic Targets. Click Edit Settings.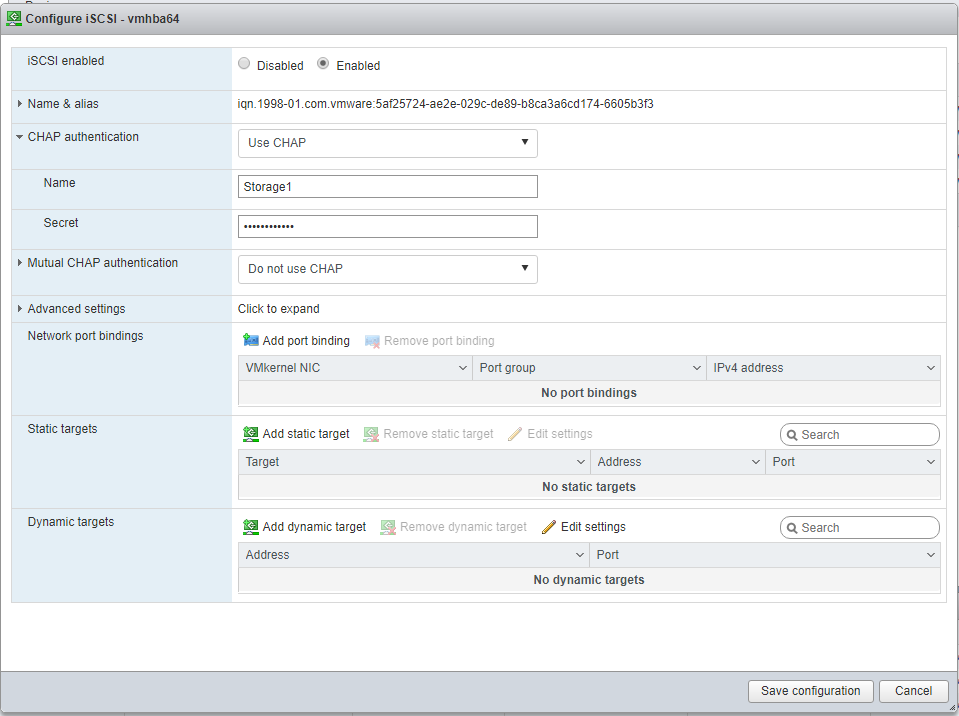 2. Uncheck Inherit from parent.
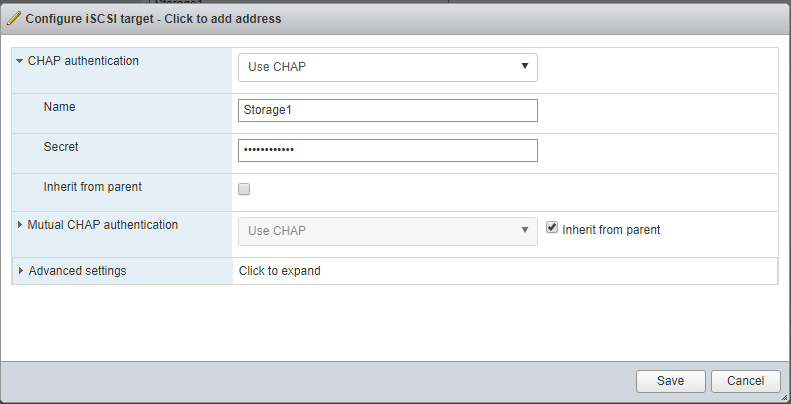 3. Write Name and Secret in the corresponding fields. Click Save.
4. Click the Save configuration button.
NOTE: Target will not be reconnected after the service restart if it does not have CHAP Authentication.
Configuring CHAP Settings on XEN
1. Open XenCenter and click on the Server tab. Then select Storage tab and click New SR… . 2. Select iSCSI as Virtual disk storage and click Next.
 3. Indicate Name in New Storage Repository. Click Next to proceed.
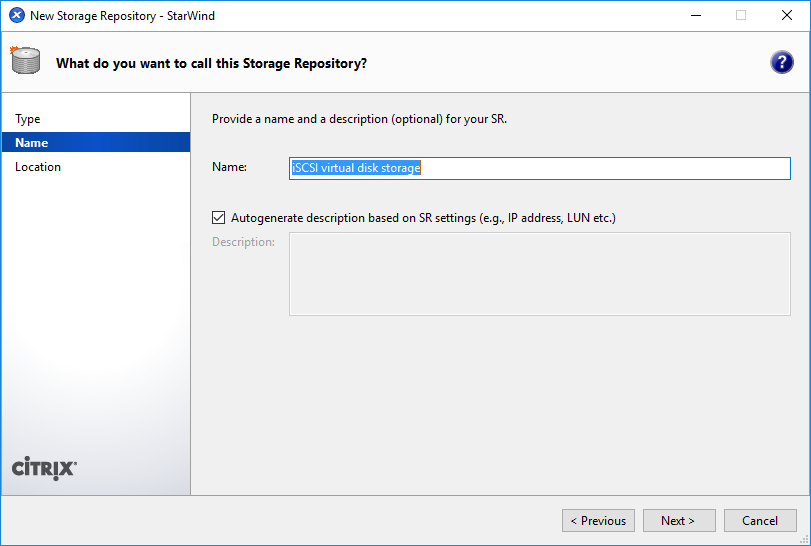 4. Indicate Target host name/IP address and check Use CHAP. Type username and password. Click Finish.
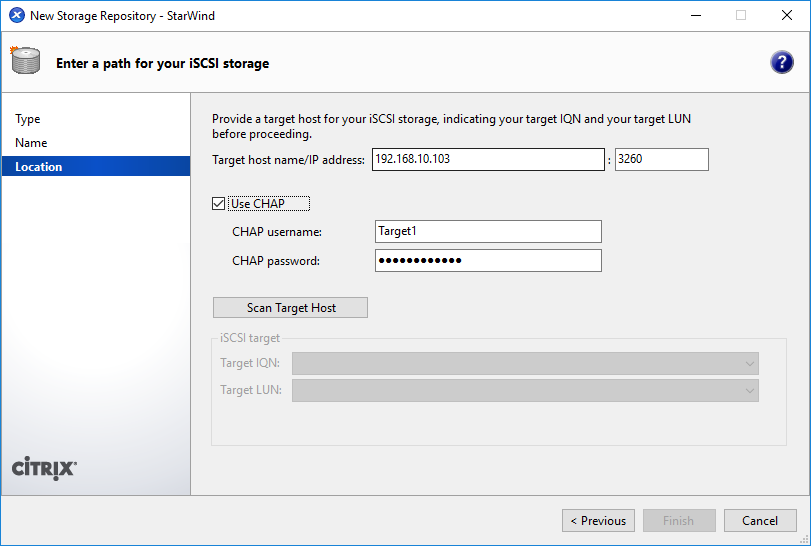
Conclusion
By implementing CHAP, users can enhance the security of their storage solution by authenticating users or network hosts and protecting against replay attacks. The document covers both global and individual access CHAP restrictions, ensuring that users have the flexibility to configure authentication settings as needed.
