StarWind V2V Converter allows for converting a virtual machine running on premises or its virtual disk image to a Microsoft Azure instance and vice versa. Conversion is done by creating a new virtual machine in the destination location that has the same parameters (i.e., the number of vCPUs, amount of RAM, etc) as the original instance.
Before converting a virtual machine or an image file, check whether the following prerequisites are met
- Network adapters are enabled on system boot
- Network adapters have IP addresses assigned over DHCP
- RDP or SSH are enabled
- Firewall is set to allow for remote connections over RDP or SSH
Before converting a virtual machine, virtual machine disk, or a local file to Microsoft Azure, StarWind V2V Converter users are to
- create and subscribe a Microsoft Azure application to a plan
- create a Microsoft Azure resource group
create a Microsoft Azure storage account
Preconfiguring Microsoft Azure Account for VM conversion with StarWind V2V Converter
Symptoms and Concerns
- It is unclear how to acquire the credentials from Microsoft Azure.
- Get Subscription button does not return the Microsoft Azure subscription after the Azure connection parameters are specified.
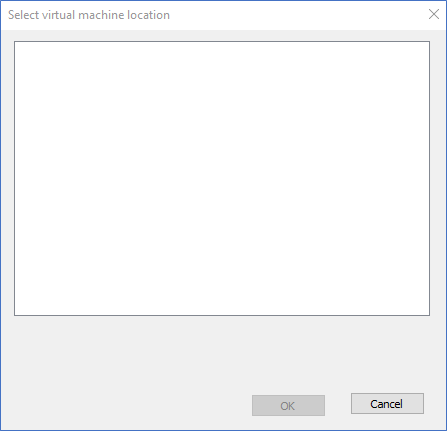
- Select virtual machine location area is empty.
Explanation
Before converting a virtual machine, virtual machine disk, or a local file to Microsoft Azure, StarWind V2V Converter users are to
- create and subscribe a Microsoft Azure application to a plan
- create a Microsoft Azure resource group
- create a Microsoft Azure storage account
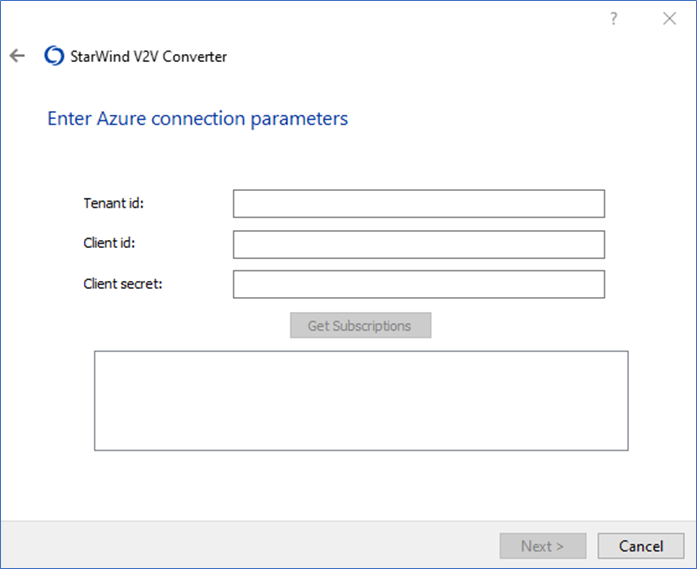
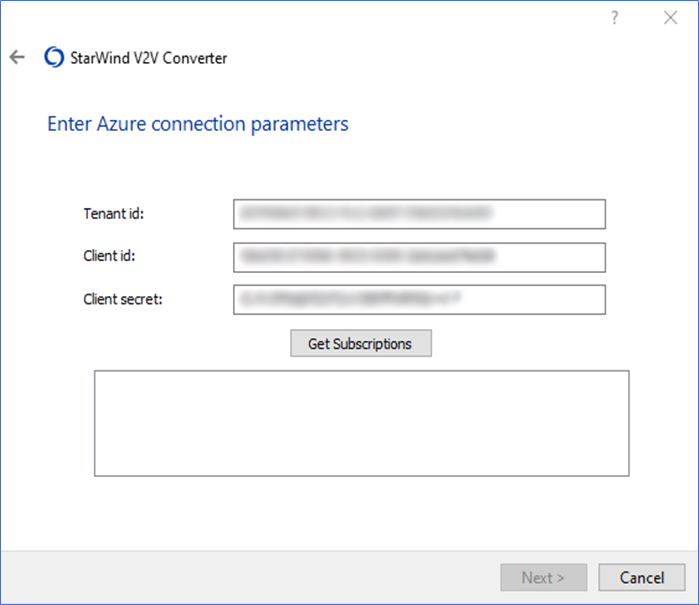
While going through the conversion wizard, StarWind V2V Converter users need to specify the credentials from a Microsoft Azure application (i.e., Azure Active Directory ID (Tenant ID), Client ID (Application ID), and Client Secret); otherwise, neither file nor virtual machine conversion to Microsoft Azure or from it is possible.
If the Microsoft Azure application is unsubscribed, users will not be able to use the credentials from it and continue the conversion process; even though the Get Subscriptions button is clickable.
Going through the wizard, users are asked to specify the virtual machine location (i.e., the desired Microsoft Azure resource group and storage account). It is possible to neither convert a virtual machine to or from Microsoft Azure nor create one there without a Microsoft Azure resource group.
Resolution
How to Create an Application in Microsoft Azure & Acquiring Its Credentials
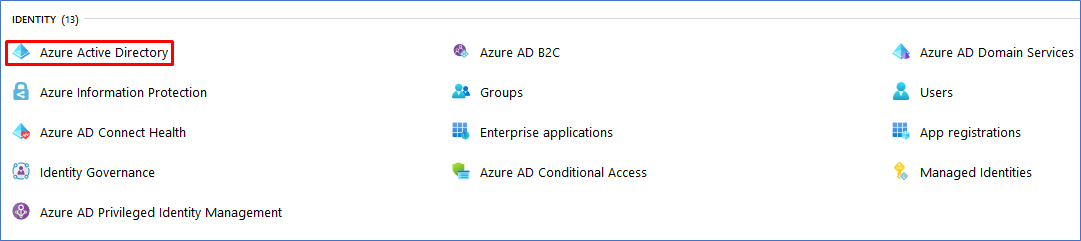
- Select Azure Active Directory from the FAVORITES section of the dropdown menu on the left.
NOTE: If there is no Azure Active Directory in the FAVORITES section, go to the All services menu.

2. Select Azure Active Directory from the IDENTITY AREA. Alternatively, type “Azure Active Directory” in the search box at the top of the page.
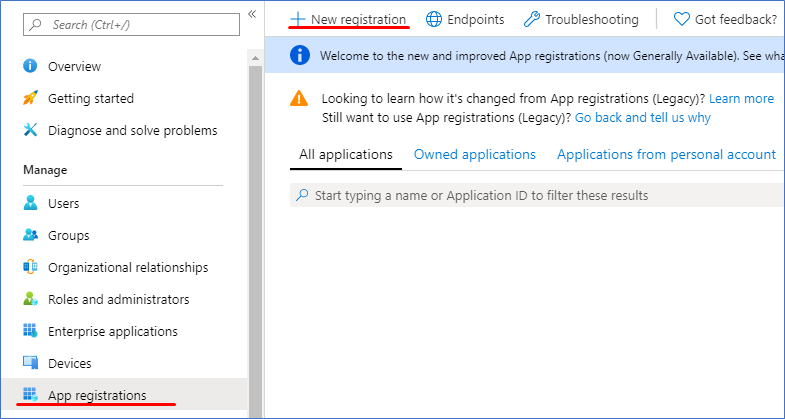
3. Press App registrations. Click New registration next
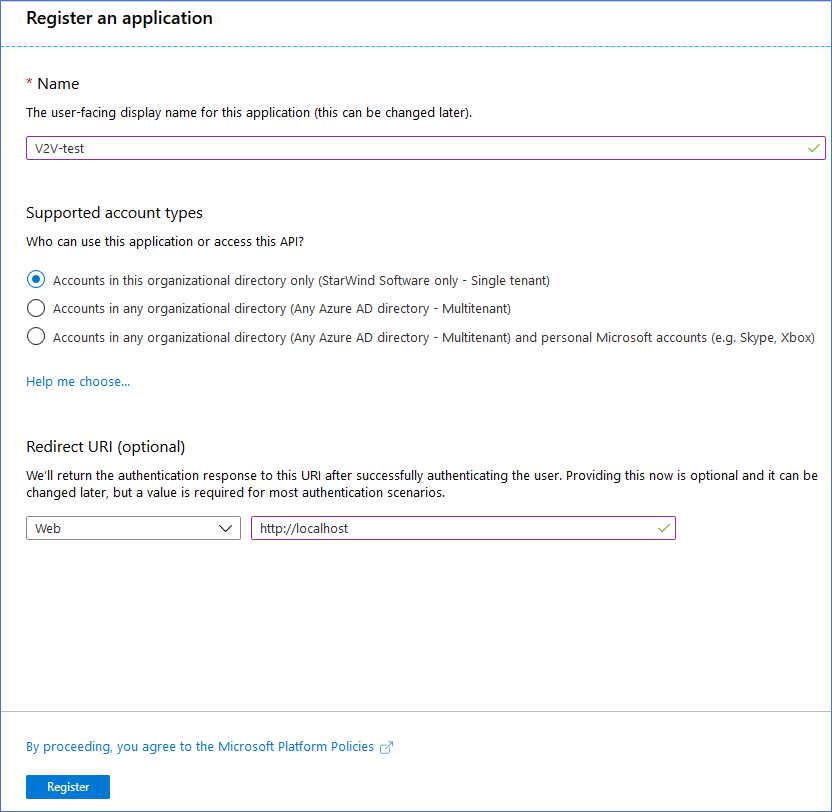
4. Specify the application name in the Register an application window. Supported account type can be left at the default settings (i.e., Single tenant). Type http://localhost in the Redirect URI area. Press Register to register the application.
5. Application details are opened automatically. Save Application (client) ID. Directory (tenant) ID matches the Azure Active Directory ID which can be acquired in Azure Active Directory -> Properties.

6. Generate the client secret by pressing the New client secret button.
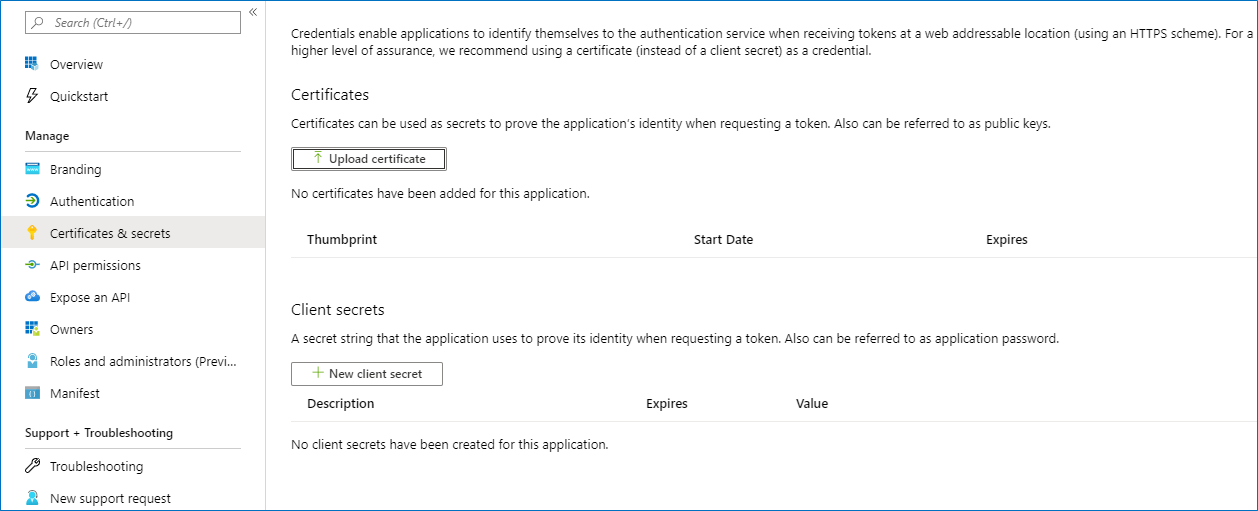
7. Enter the client secret description and expiration period.
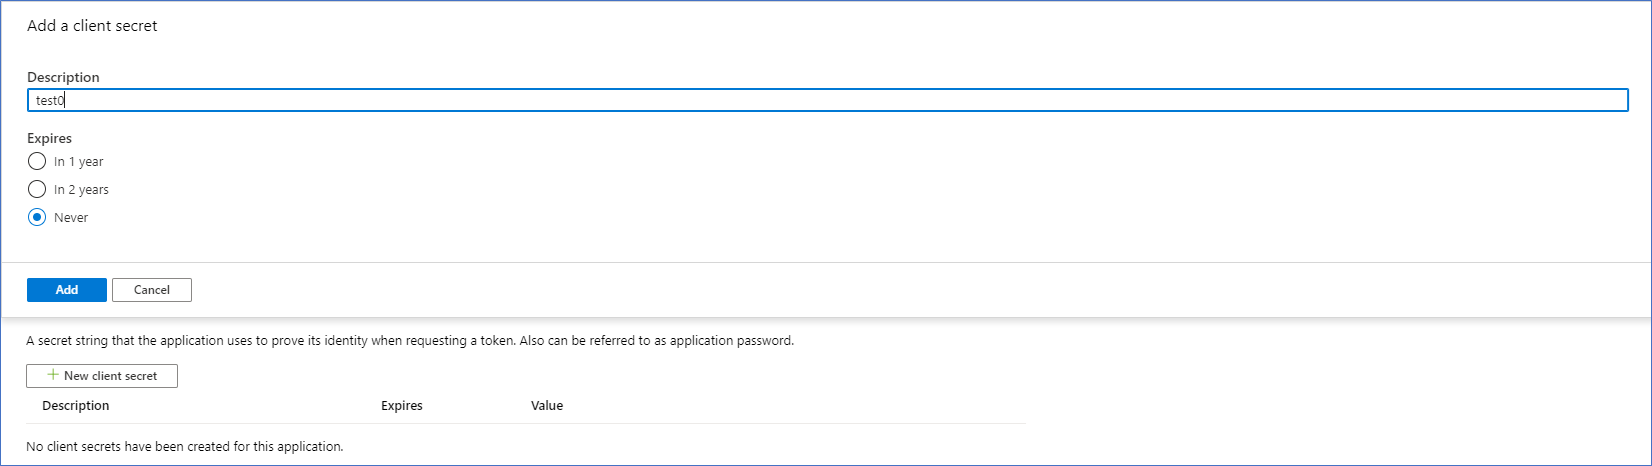
8. See the client secret in the Value area.

NOTE: Copy the client secret right after it is generated as its value becomes inaccessible once the New client secret page is closed.
How to Subscribe Microsoft Azure
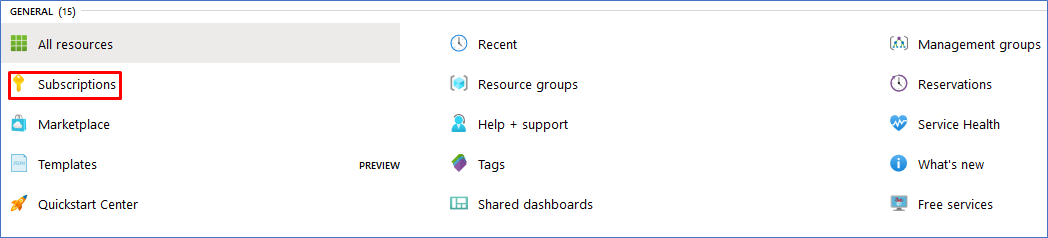
- Press Home in the dropdown menu on the left.

2. In the GENERAL area, select Subscriptions. Alternatively, type Subscriptions in the search box at the top of the page.
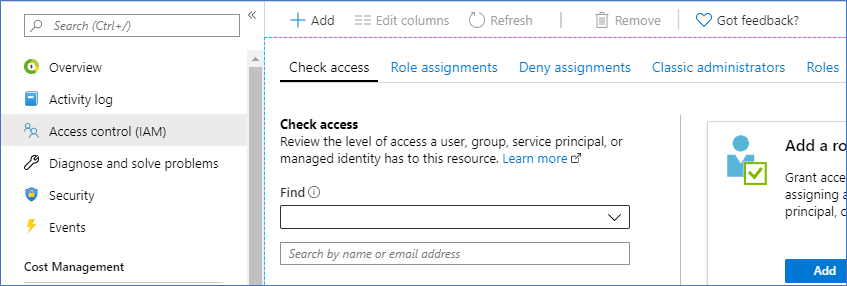
3. Press Access control (IAM) and click Add in the window which emerges right.
4. Go to subscriptions.

5. Create a new subscription, storage account, and resource group.
6. Press Add role assignment.

7. Type Reader

8. Add V2V as the member.

How to Create a Storage Account in Microsoft Azure
- Press Home in the dropdown menu on the left.
2. Click Storage accounts under the Storage section. Alternatively, type Storage accounts in the search box at the top of the page.

3. Click Add.

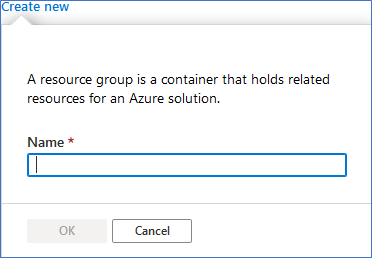
4. Select the resource group from the Resource group dropdown menu or create a new one.
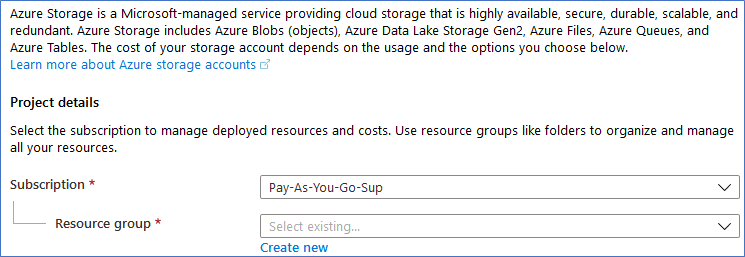
5. To create a new Microsoft Azure resource group, type its name and click OK.