StarWind V2V Converter allows for converting a virtual machine running on-premises or its virtual disk image to an Amazon Web Services virtual machine and vice versa. Conversion is done by creating a new virtual machine in the destination location that has the same parameters (i.e., the number of vCPUs, amount of RAM, etc.) as the original virtual machine.
Before converting a virtual machine or an image file, check whether the following prerequisites are met:
- Network adapters are enabled on system boot;
- Network adapters have IP addresses assigned over DHCP;
- RDP or SSH are enabled;
- Firewall is set to allow for remote connections over RDP or SSH;
- The VM that is to be converted is powered off.
Before converting a virtual machine, virtual machine disk, or a local file to Amazon Web Services, StarWind V2V Converter users are to
- create an Amazon Web Services Account;
- create a key pair for each region where the virtual machines are running;
- create firewall rules at security group;
- generate an access key ID and secret access key.
Preconfiguring Amazon Web Services for VM Conversion with StarWind V2V Converter
- Sign in to Amazon Web Services Console as the root user.
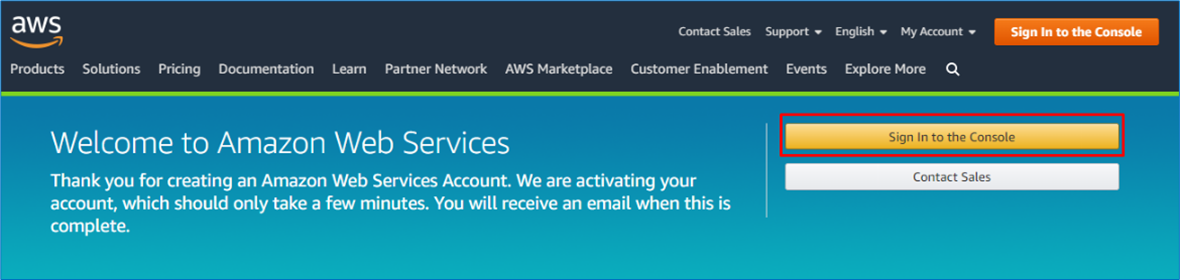
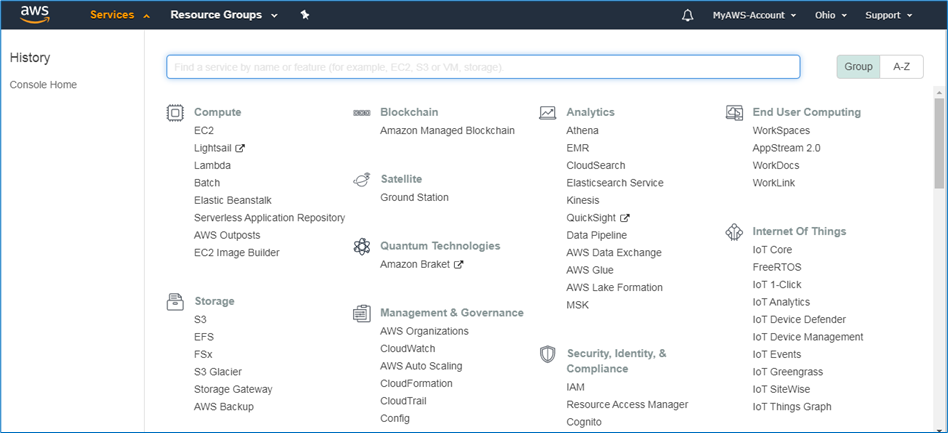
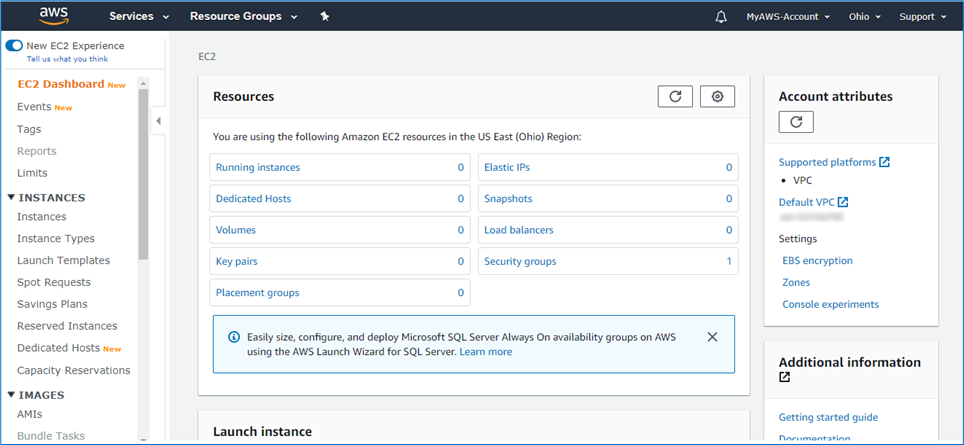
NOTE: Please make sure to sign in to the Console as root. - See the services available. Select EC2.
NOTE: It is always possible to change the region. Click the corresponding button on the top of the page and select the region from the dropdown menu.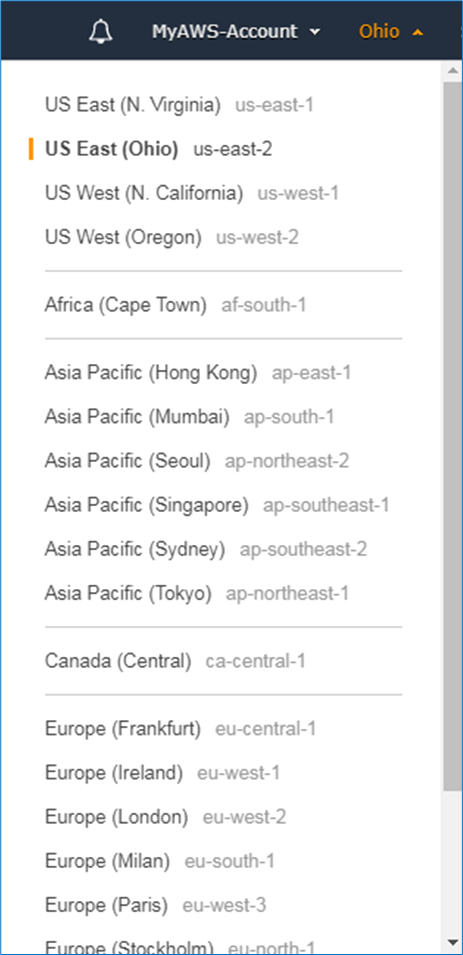
- Press Key pairs in order to see the list of existing key pairs. Key pair enables to access AWS instances and allows StarWind V2V Converter to convert VMs to AWS.
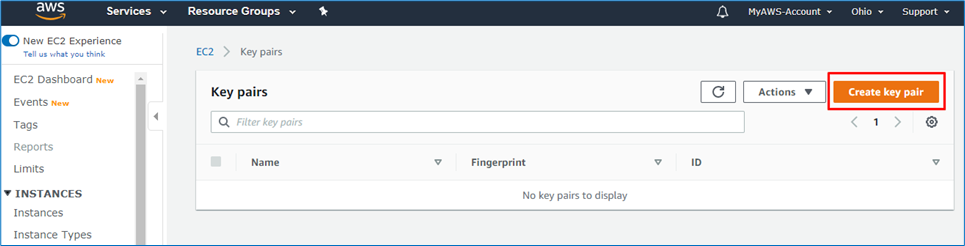
- Press Create key pair.
- Type the key pair name and press Create key pair.
NOTE: The key pair can be downloaded only once. Please, make sure to save it locally.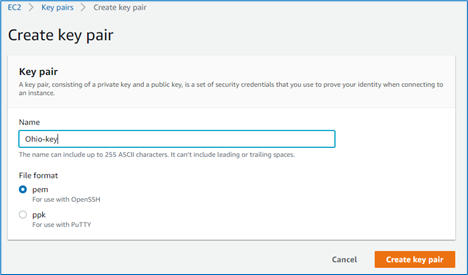
- Go back to the EC2 Dashboard and select Security groups. There is one security group available from the very beginning.
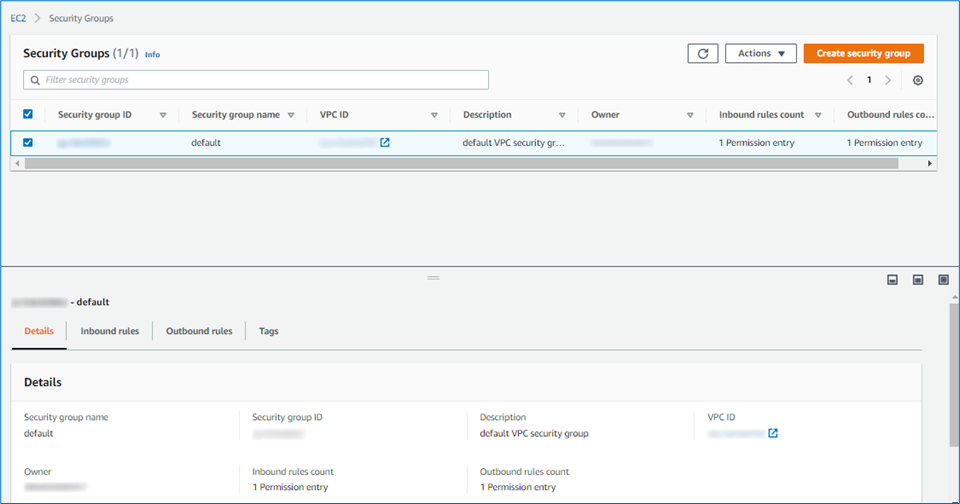
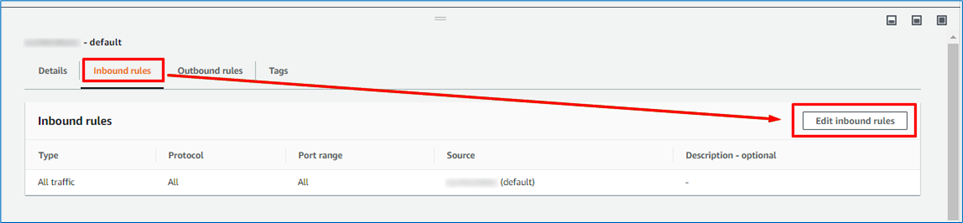
- Navigate to the Inbound rules tab and press Edit inbound rules in order to enable access to the virtual machines over IPv4 or IPv6.
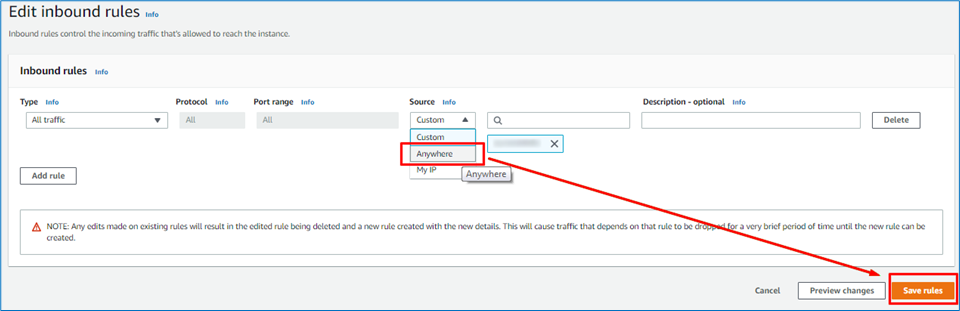
- Select Anywhere from the Source dropdown menu. Press Save rules.
- Navigate to the Outbound rules tab and select Anywhere from the Source dropdown menu there. Press Save rules.
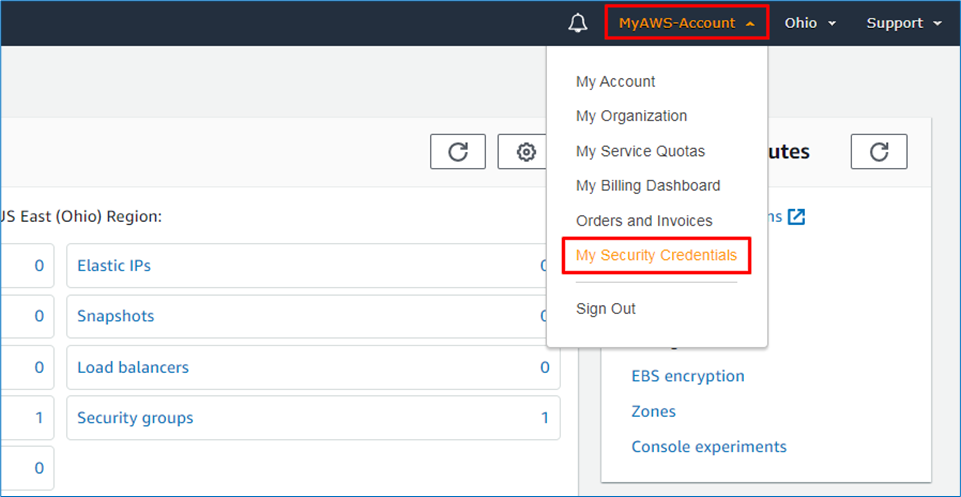
- Generate the security credentials next. Select My Security Credentials from the dropdown list.
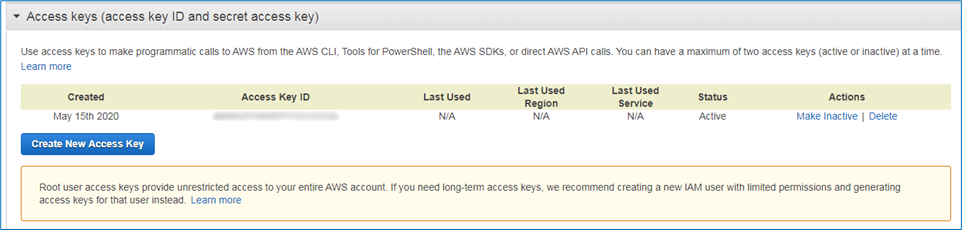
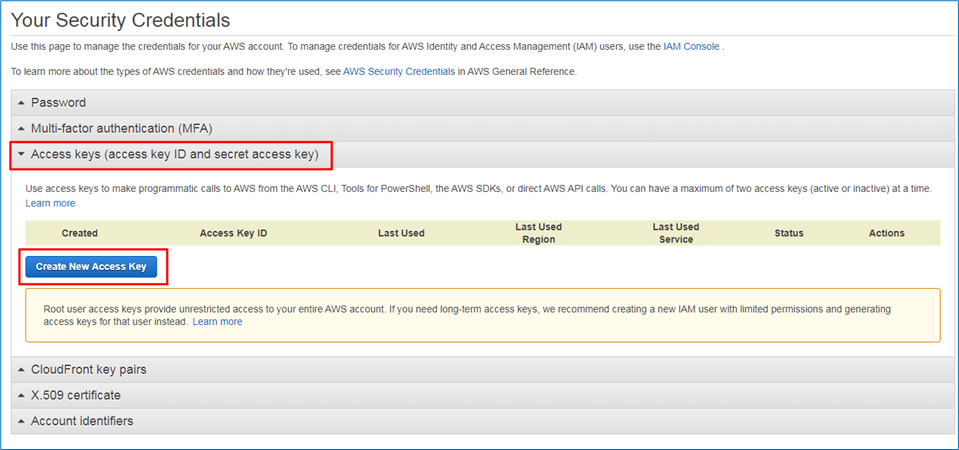
- Expand the Access keys (access key ID and secret access key) option and click Create New Access Key.
- Press Download Key file to save the key.
NOTE: It is possible to save the key only once.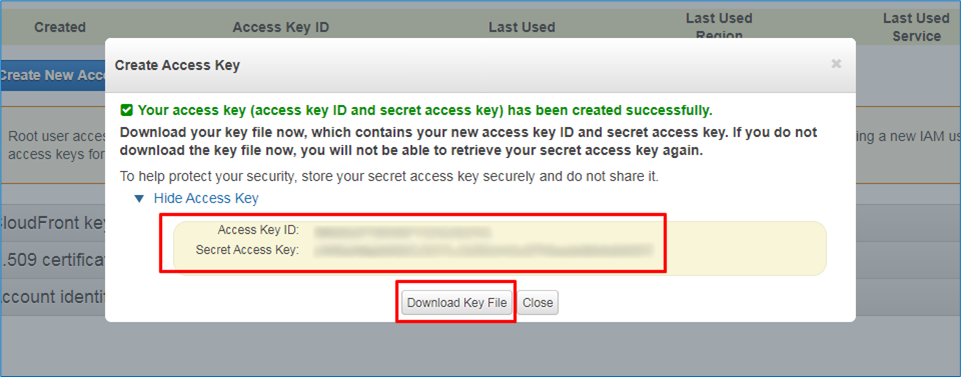
- It is always possible to generate a new key or remove an old one in the Access keys (access key ID and secret access key).