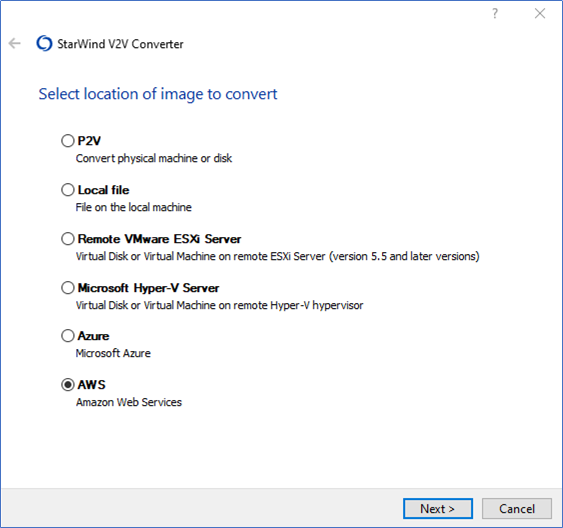
- Select AWS as the location of image to convert.
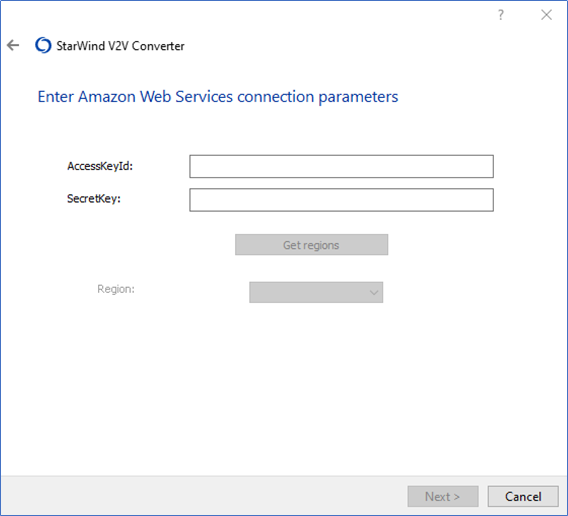
- Enter the AccessKeyId and SecretKey. Click Get regions. Select the destination region.
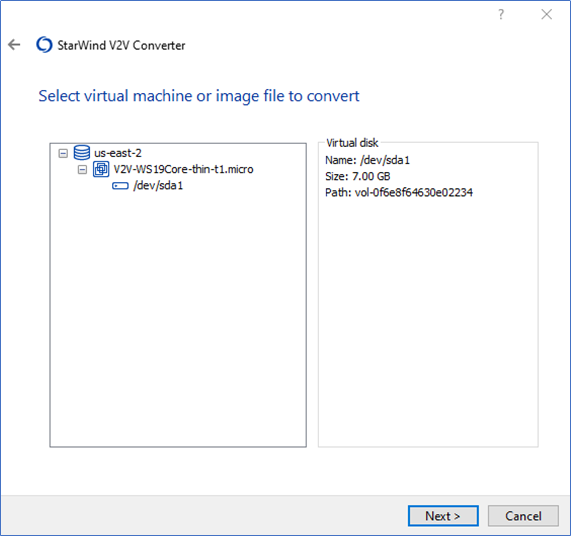
- Select the virtual disk to convert.
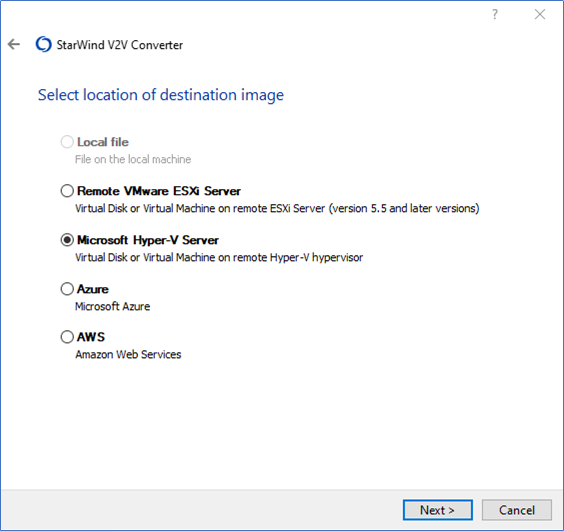
- Select Microsoft Hyper-V Server as the location of destination image. Press Next.
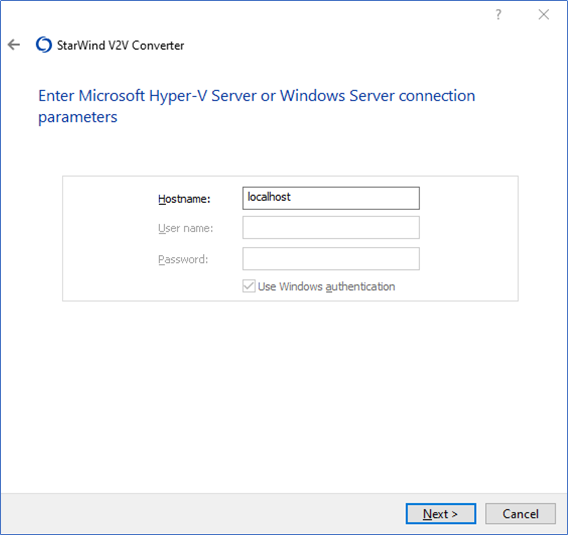
- Type the hostname or IP address of the destination Microsoft Hyper-V or Windows server.
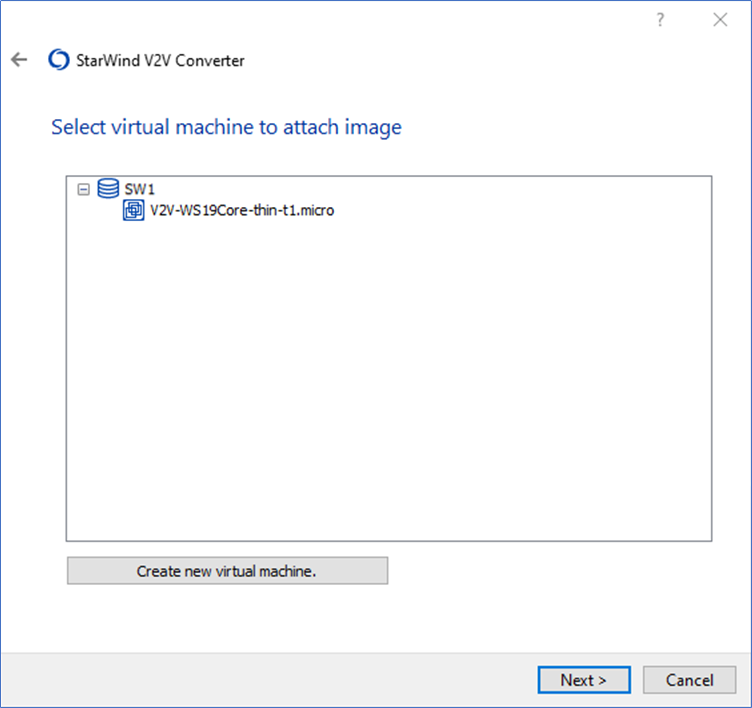
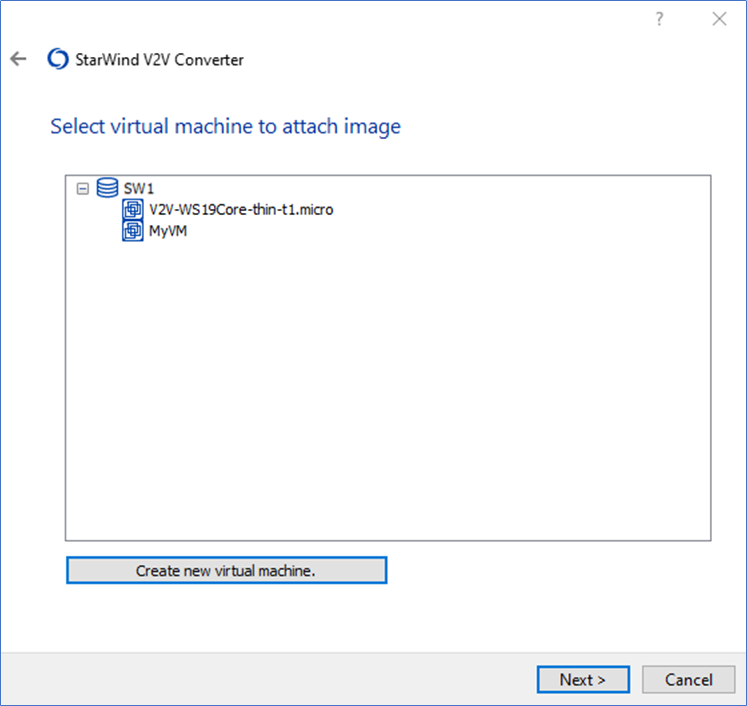
- Select a virtual machine to attach the image or create a new VM by pressing Create new virtual machine.
- It is possible to modify the new VM settings if needed. Press … to select the location of a new instance and its properties.
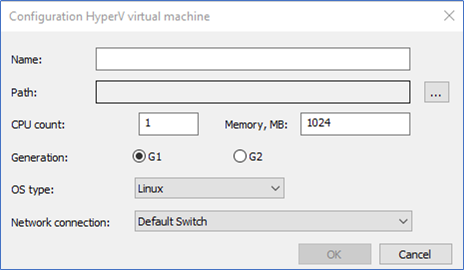
- Select the new virtual machine location and press OKto confirm the choice.

NOTE: Steps 6-8 are skipped if the image file is connected to an existing virtual machine. - Once created, the new virtual machine is displayed in the Select Virtual Machine to attach image area.
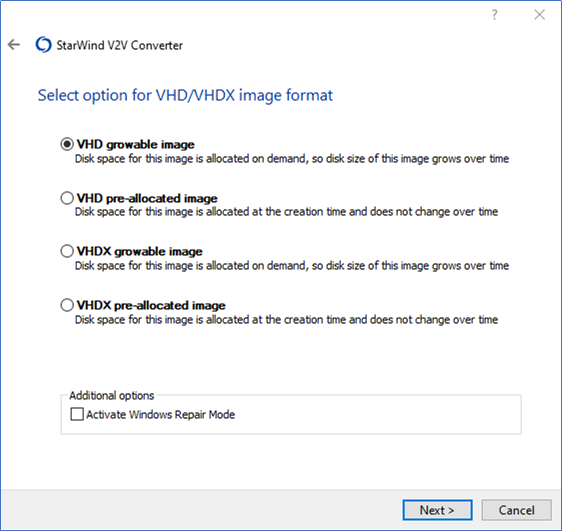
- Select the new image format.
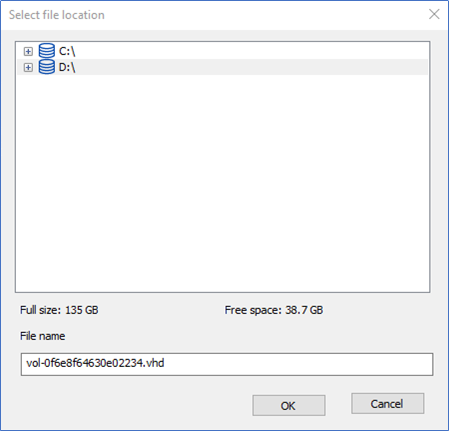
- Press …to specify the destination file location.

- Select the file location. It is possible to modify the file name in this step.
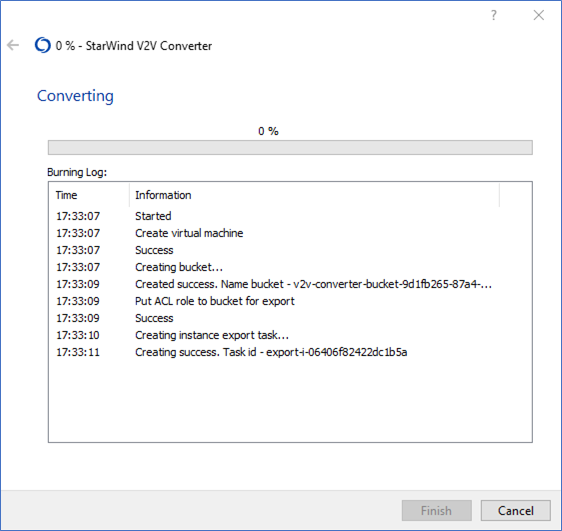
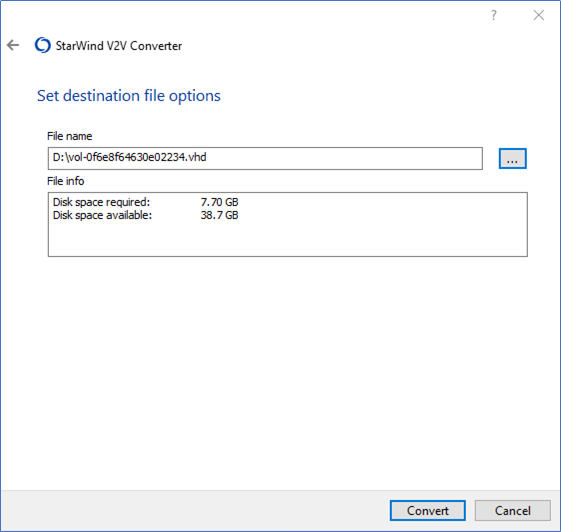
- Press Convert to initiate the file conversion process.
- Wait until the conversion process is over and press Finish to complete the wizard or Convert another image if more VMs or images are to be converted.