StarWind Virtual Storage Appliance Installation Guide with KVM
The Hyper-V and KVM hypervisors are no longer supported in StarWind Virtual Storage Appliance.
To view the guide on installing StarWind VSA with VMware vSphere, please open the following link
Introduction
This document describes the deployment and configuration process of the StarWind Virtual Storage Appliance with KVM.
StarWind Linux-based VSA is a good opportunity for users who don’t want to change their current infrastructure, but rather quickly deploy StarWind and test its features and functionality. Right now we are releasing the new Linux version, compatible with all industry-standard hypervisors: Microsoft Hyper-V, VMware ESXi, Xen and KVM. It includes Web Management Console, so you can use any convenient HTML5-capable browser to check and configure your infrastructure.
Additionally, StarWind Virtual Storage Appliance incorporates StarWind vCenter plugin in order to make it even more convenient for VMware users. StarWind VSA is easy to deploy and manage – a typical Linux administrator will install and maintain it without difficulty.
A full set of up-to-date technical documentation can always be found here, or by pressing the Help button in the StarWind Management Console.
For any technical inquiries please visit our online community, Frequently Asked Questions page, or use the support form to contact our technical support department.
Components
- StarWind Virtual Storage Appliance
- Linux virtual machine with StarWind Virtual SAN installed
Virtual Machine requirements
StarWind Virtual Storage Appliance VM requires having at least 4 virtual processors with 2 GHz reserved, at least 4 GB of RAM, 3 NIC ports dedicated as separate vSwitches for management, StarWind synchronization and iSCSI traffic to ensure the proper functioning of the VSA.
NOTE: When using StarWind with synchronous replication feature inside of a Virtual Machine, it is recommended not to make backups and snapshots of the Virtual Machine with StarWind Service which could pause the StarWind Virtual Machine.
Pausing the Virtual Machines while StarWind service under load may lead to split-brain issues in devices with synchronous replication and data corruption.
Deployment quick steps
1. Download zip archieve that contains StarWind Virtual Storage Appliance for KVM.
2. Let’s configure Hypervisor first. We are going to configure CentOS 7.2 with KVM to work with StarWind VSA.
3. Install CentOS 7.2 minimal (first entry point in the list).
4. When the installation is complete, log in to your server with the credentials you have assigned to it.
5. Install X Window using the following code:
|
1 |
yum groupinstall "X Window System</code>" |
6. Add Gnome Shell desktop with the following code:
|
1 |
yum install gnome-classic-session gnome-terminal nautilus-open-terminal control-center liberation-mono-fonts |
7. Run the following code to unlink the current launch target:
|
1 |
unlink /etc/systemd/system/default.target |
8. Link in the graphical system running the following code:
|
1 |
ln -sf /lib/systemd/system/graphical.target /etc/systemd/system/default.target |
9. Install Virtualization packages and Virtual Machine Manager:
|
1 |
yum groupinstall "Virtualization Host" -y; yum install virt-manager -y |
10. Reboot the host.
11. Extract virtual machine files on the KVM host.
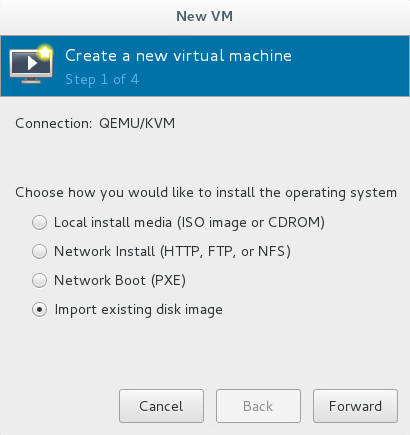
12. Create a new VM using Virtual Machine Manager.
13. Choose Import existing disk image option and click Forward.
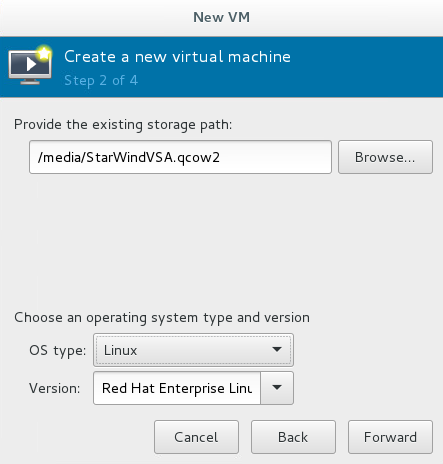
14. Provide the existing storage path of the virtual disk. Choose Linux OS with Red Hat Enterptise Linux 7.3 Version. Click Forward.
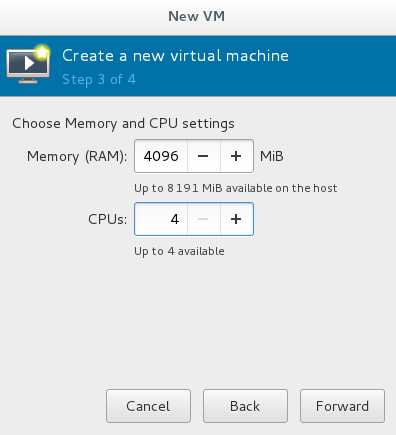
15. Choose Memory and CPU settings.
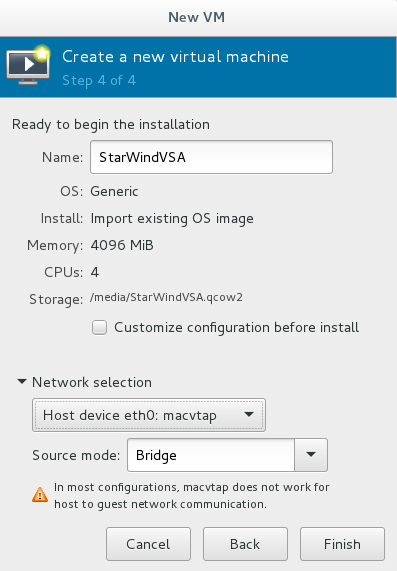
16. Specify the VM name. Choose Network Selection and the interface for management. Configure it in Bridge mode and click Finish.
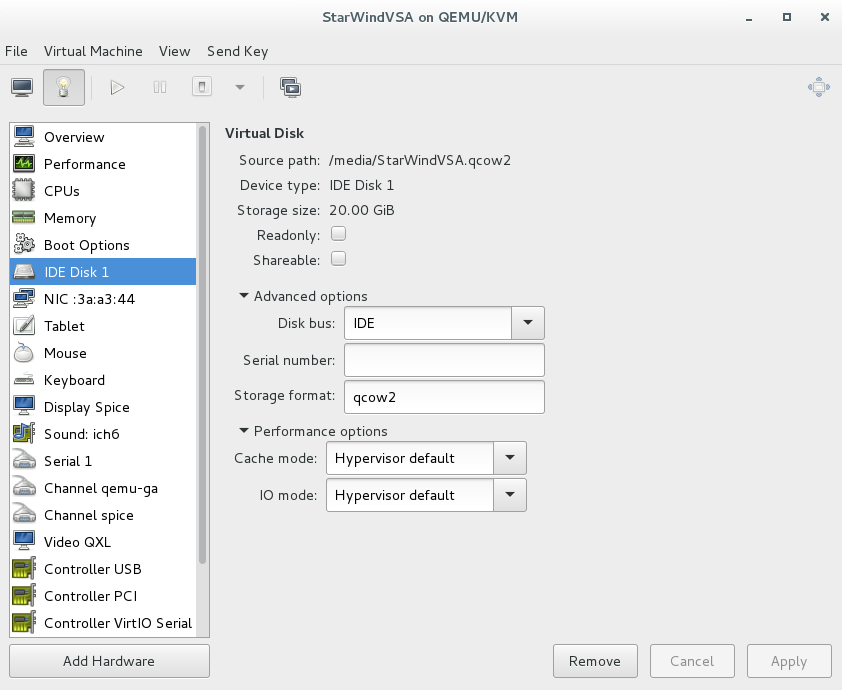
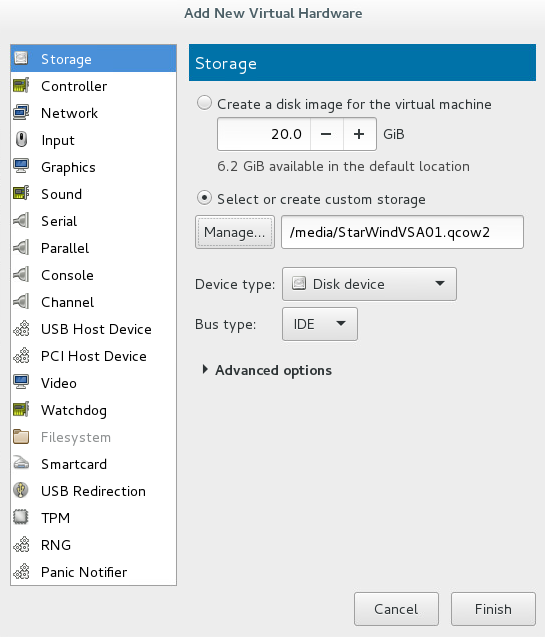
17. Click Show virtual hardware details. Choose Virtual Disk and change Disk bus type to IDE.
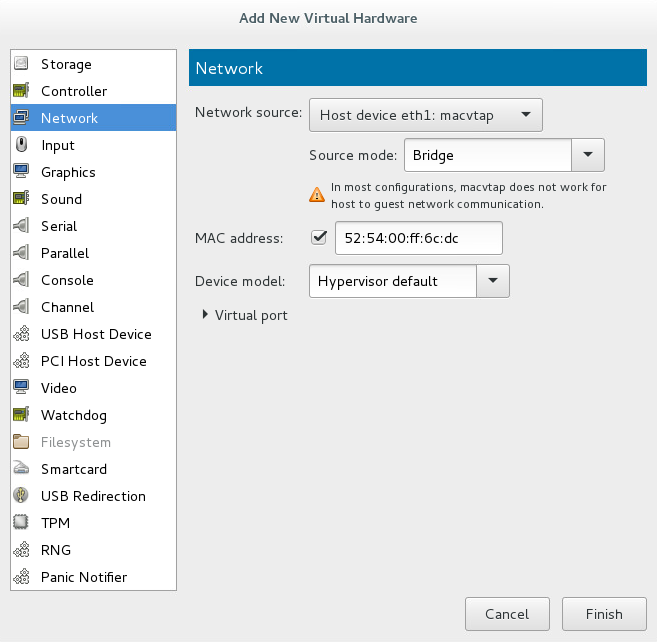
18. Click Add Hardware on the Virtual hardware details page. Add networks for iSCSI and Synchronization traffic in Bridge mode.

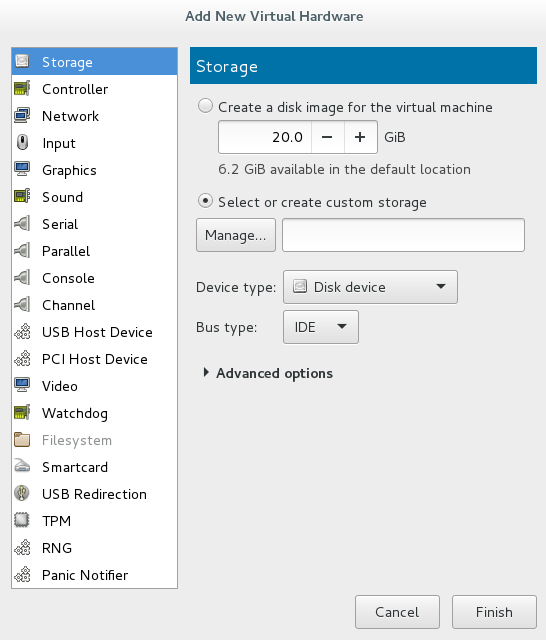
19. On the Virtual hardware details page click Add Hardware again. Click Storage, choose IDE bus type and Select or create custom storage. Click Manage.
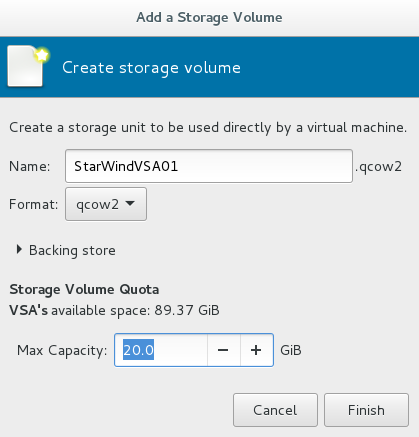
20. Choose Storage pool and click “+” to add a new volume.
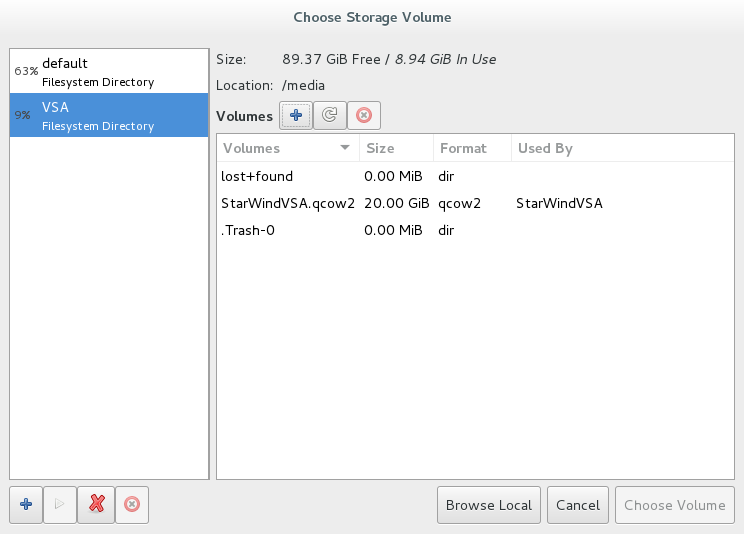
21. Specify the Volume name and choose the capacity.
22. Click on the newly created Volume and click the Choose Volume button.
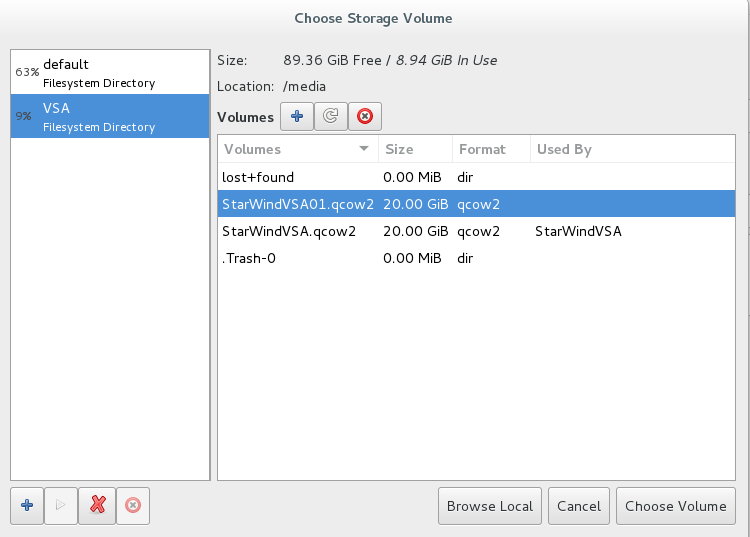
23. Click Finish.
24. Start StarWind VSA Virtual Machine.
25. By default, StarWind VSA virtual machine obtains an IP address automatically via DHCP. It is recommended to create a DHCP reservation and set a static IP address for this VM. In order to access StarWind VSA from the local network, the virtual machine must have access to the network. In case you do not have a DHCP server, you can connect to the VM using KVM Virtual Machine Manager console and configure the static IP address manually.
26. Now open a web browser and enter the IP address of the VM.

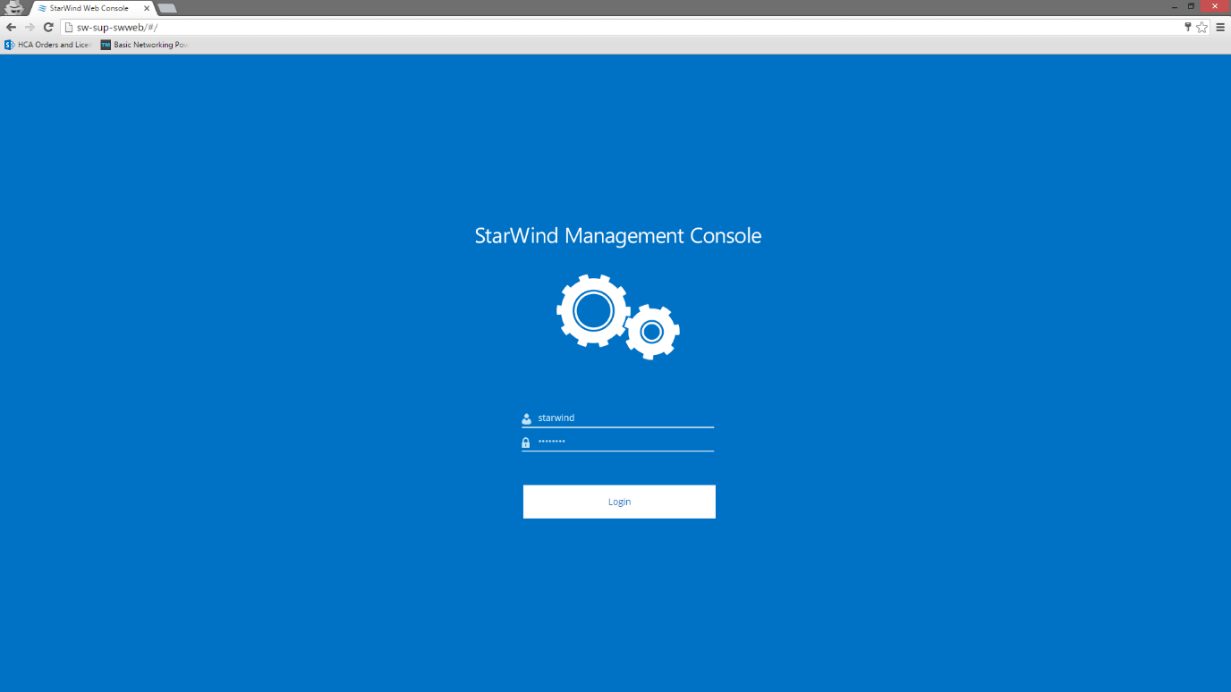
27. Log in to the StarWind Virtual Storage Appliance using default credentials:
Username: starwind
Password: starwind
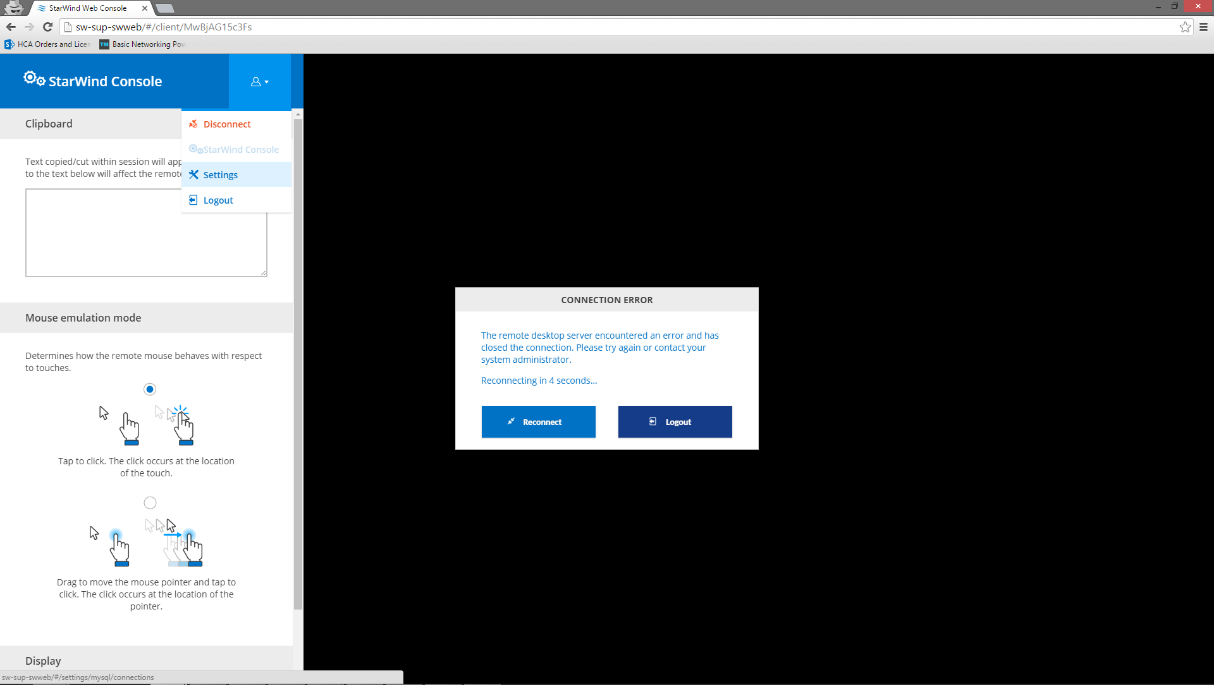
28. After the successful login, press ALT+CTRL+SHIFT combination.
29. Navigate to Settings menu using pop-up sidebar:
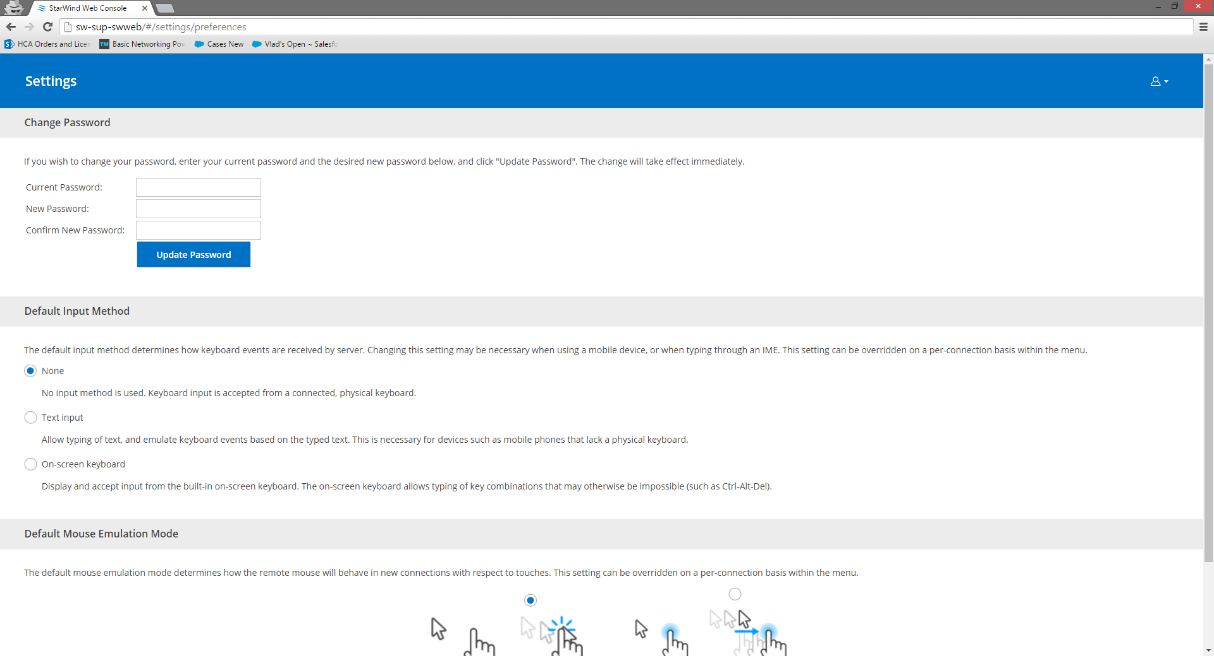
30. For security reasons, please, change the default password using the corresponding option and press the Update Password button:
31. Connect to the StarWind VSA via IP assigned to the VM by DHCP.
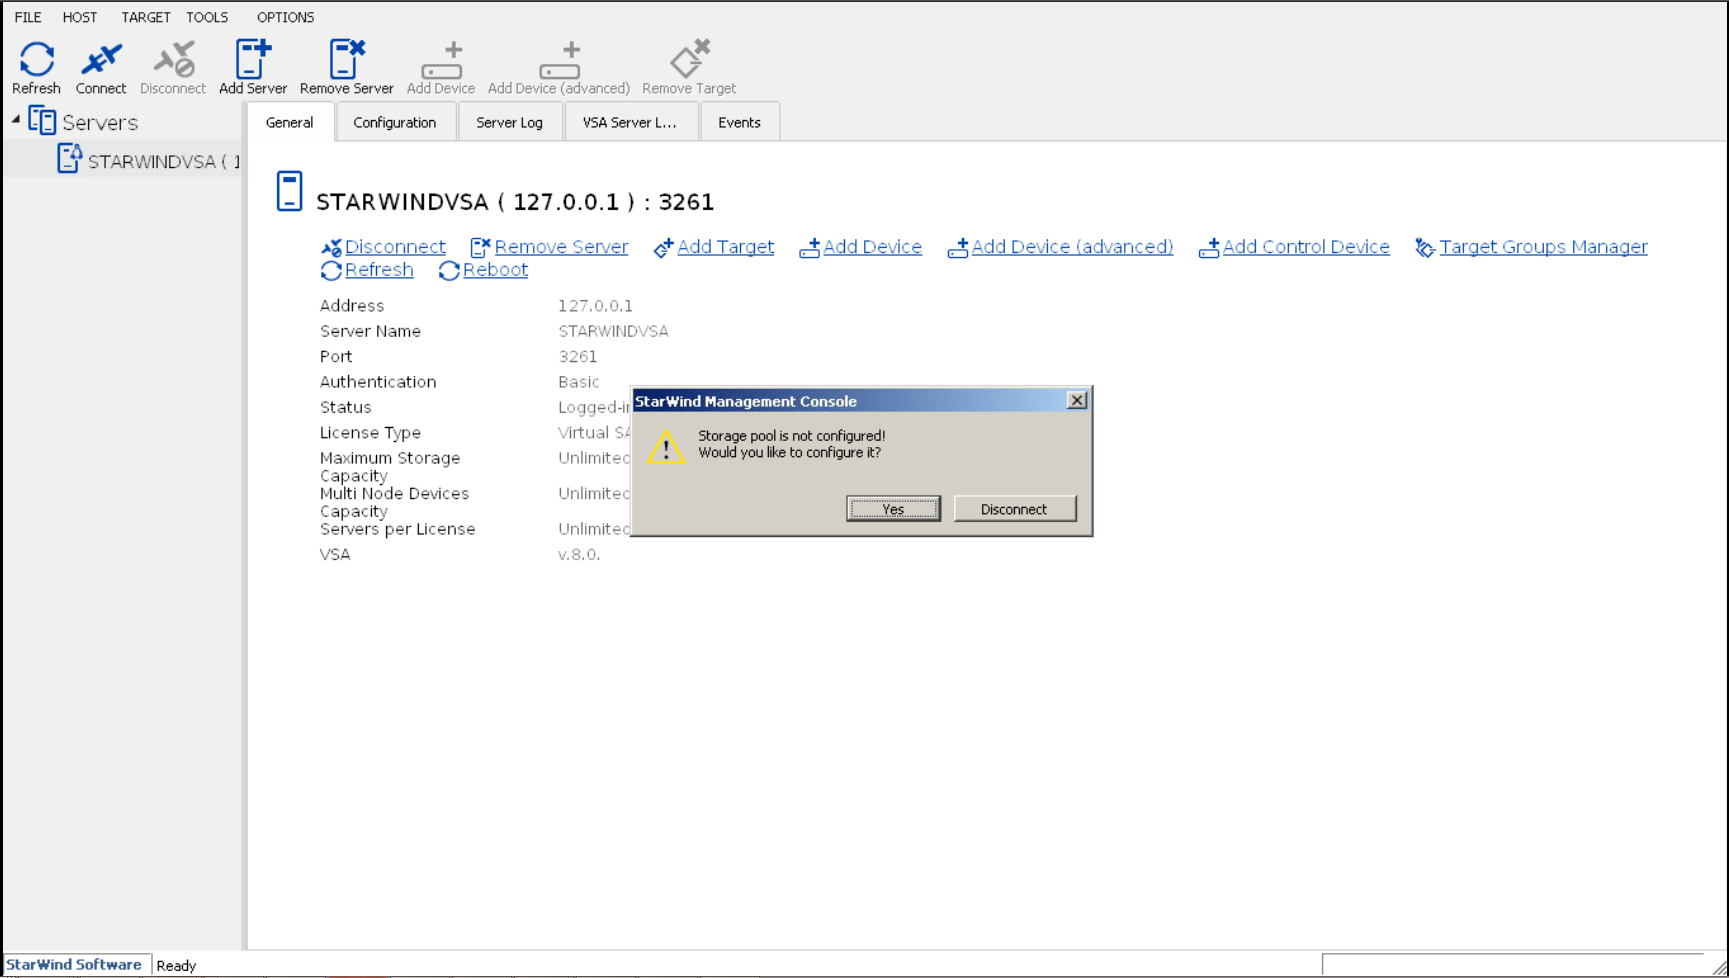
32. Press X in the opened window.
33. Browse to the Configuration tab and click VSA Storage.
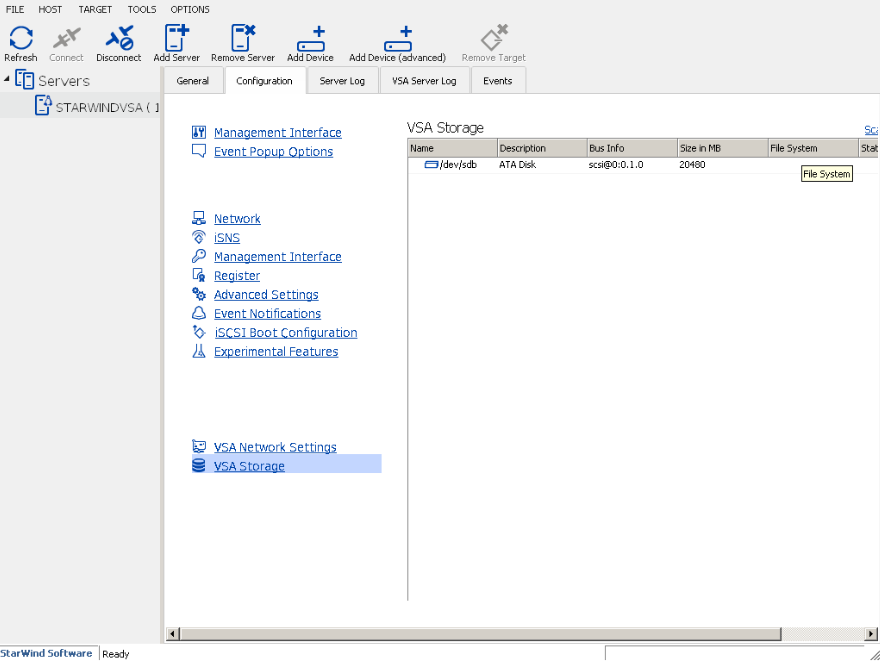
34. Click Scan Storages to see the recently attached Virtual Disk. Click Create Volume.
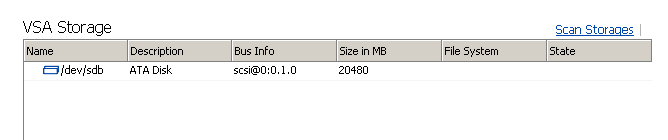
35. Once the process is finished, you will see the created volume.

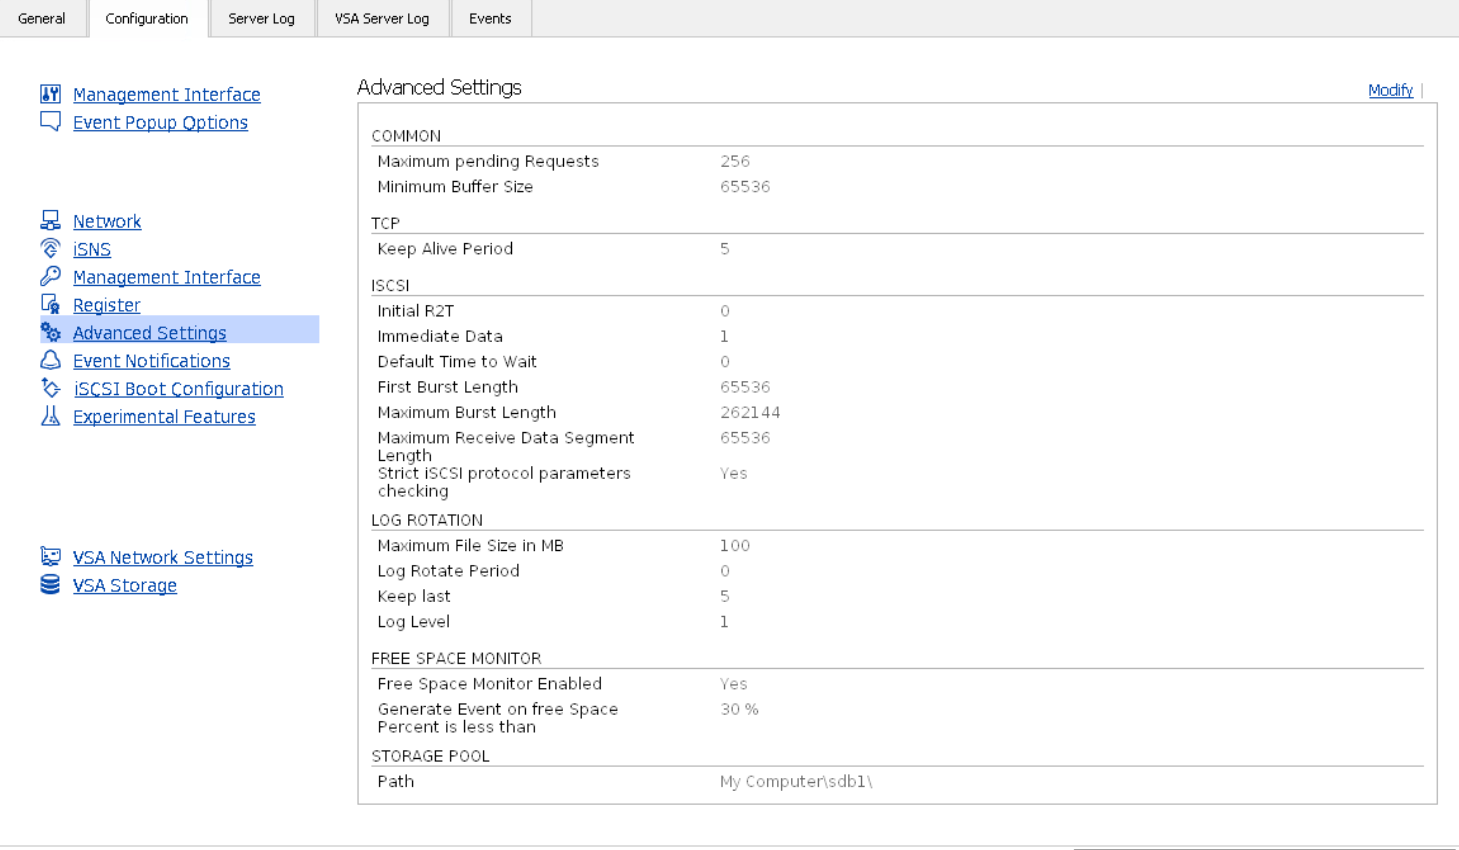
36. The Default storage pool will be selected automatically. Click Advanced settings.
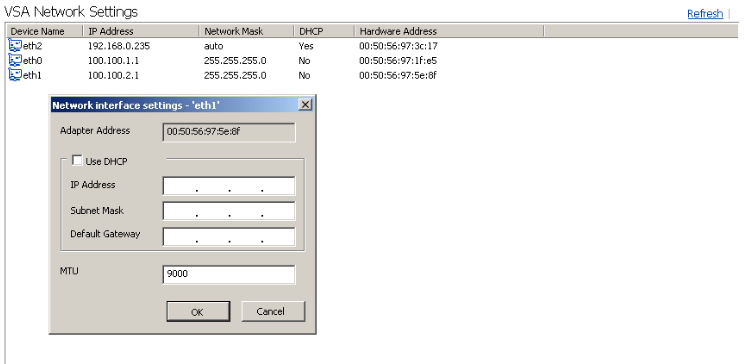
37. Click VSA Network Settings. Configure NICs for Management, iSCSI and Synchronization purposes.
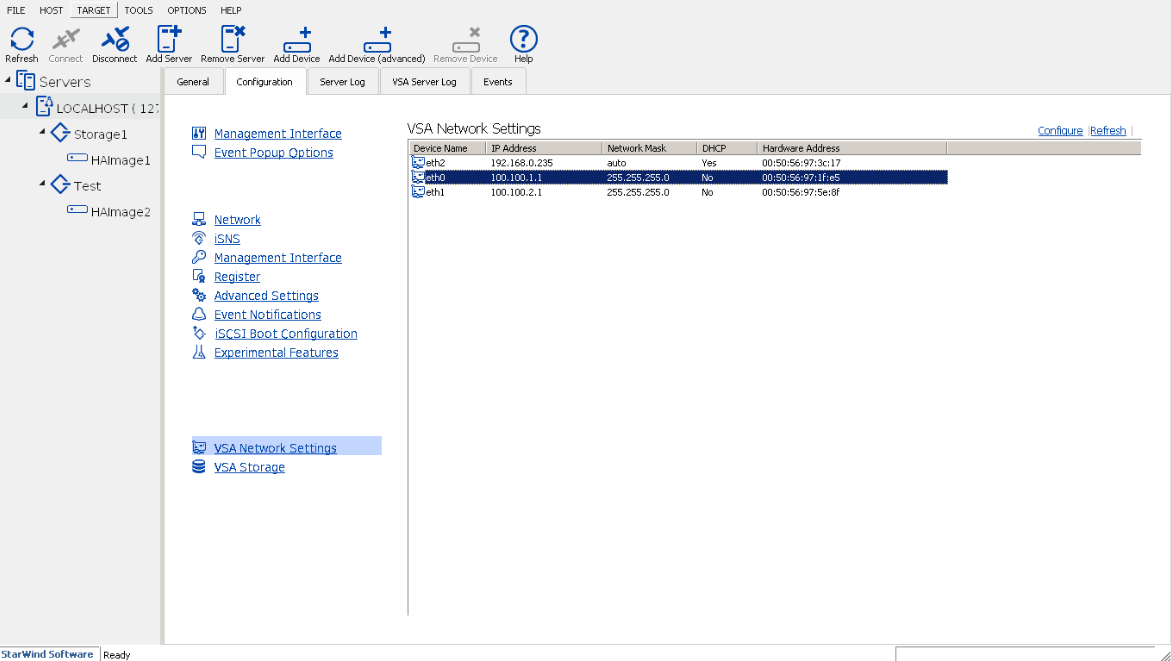
38. Click Configure and assign the configuration needed for each NIC.
39. Preconfiguration process finished. Now you can create StarWind devices and work with them.
For more information on how to work with StarWind devices, follow the link below:
https://www.starwindsoftware.com/resource-library?type=tp
You can find more information about deploying StarWind HyperConverged scenarios here:
https://www.starwindsoftware.com/starwind-virtual-san-hyper-converged-2-node-cluster-vmware-vsphere
