
Introduction
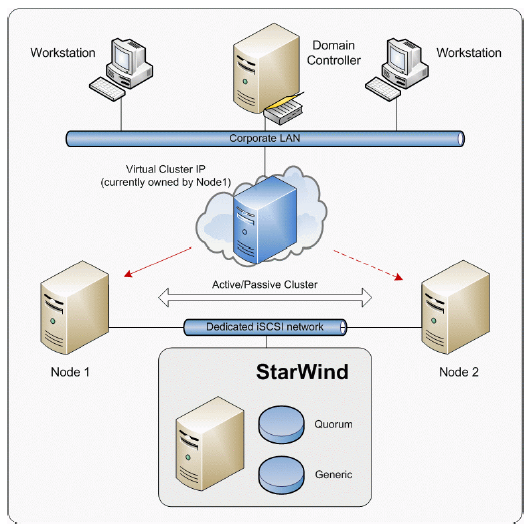
Software clustering technology enables you to make several servers to work as a unit. Various cluster configurations can be implemented. One of the most frequently used configurations is the failover cluster. This configuration assumes that if one of the cluster nodes fails, the reserved node automatically brings online, serving the applications. With that the workflow remains uninterrupted and secured.
Failover cluster configuration includes two (or more) server nodes that share an external storage. Based on the iSCSI technology, StarWind Softwafe Inc. StarWind enables to create an external storage in Windows environment without implementation of expensive FC or external SCSI solutions. With StarWind you can create a shared disk array on a host running Microsoft Windows.
This document gives you detailed step-by-step instructions on StarWind configuring for failover clusters.
Configuring StarWind Server
Preparing Quorum Volume
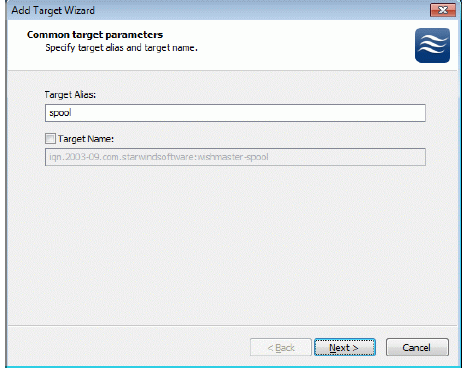
Launch the StarWind Management Console selecting Start -> All Programs ->StarWind Software -> StarWind -> StarWind. After the console is launched its icon appears in the system tray. Double click the icon with the left mousebutton or single click it with the right and select Start Management pop-up menu item. From the StarWind Servers tree please select the computer you wish to connect to. Press the right mouse button over the desired host (computer) and select the Connect menu item. You will be prompted to enter the login and password. Default ones are: root, starwind. You can always change them later. After you have successfully connected to the StarWind Service, please click the right mouse button over the desired host (computer) and select Add Target pop-up menu item. In the wizard that appears, select a target name. The name must be a unique name by which the device will be declared to the iSCSI initiators connecting to StarWind over an IP network.
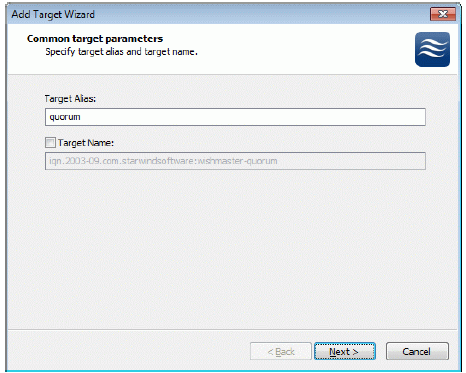
Press the Next button to continue.
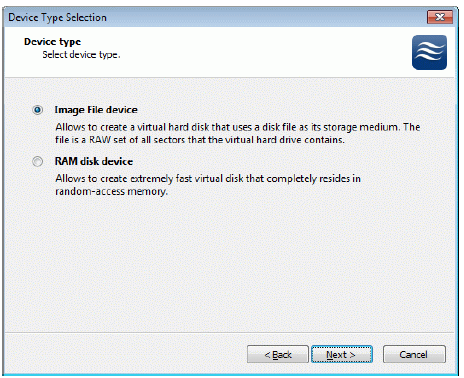
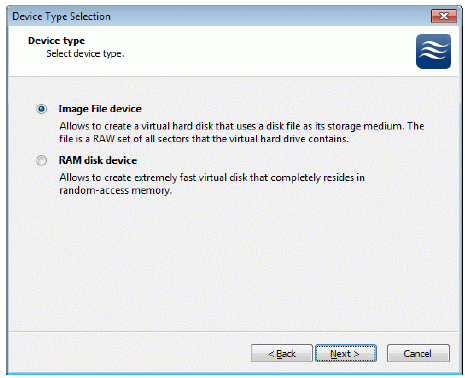
Select Image File device.

Press the Next button to continue.
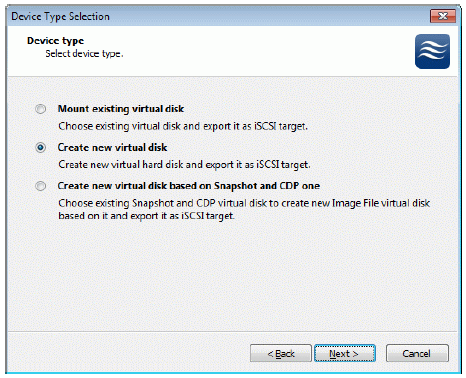
Select Create new virtual disk to create a new virtual hard disk or Mount
existing virtual disk to mount an existing virtual disk that you’ve prepared
before.

Press the Next button to continue.
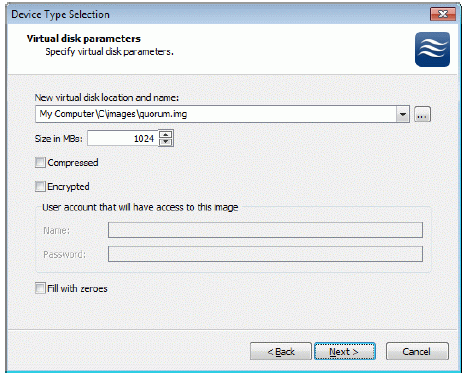
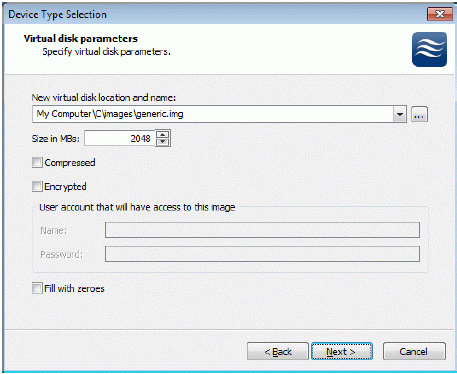
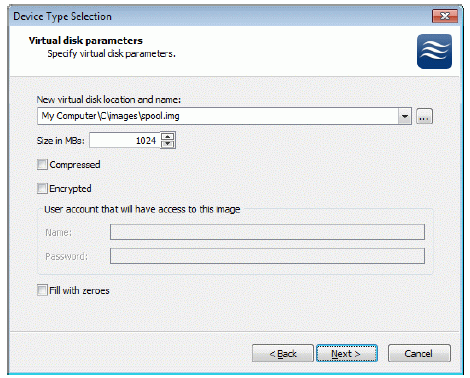
If you have decided to create a new virtual disk please specify the location and
the name of the virtual disk you wish to be created. Also you have to provide
the virtual disk size in megabytes. Check any additional parameters of the
virtual disk you wish to create. Please refer to the online help for details
regarding those additional parameters (Compressed and Encrypted).
Press the Next button to continue.
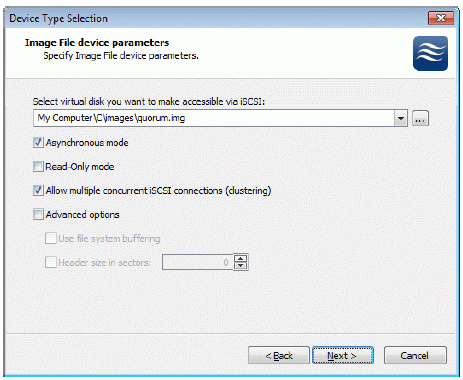
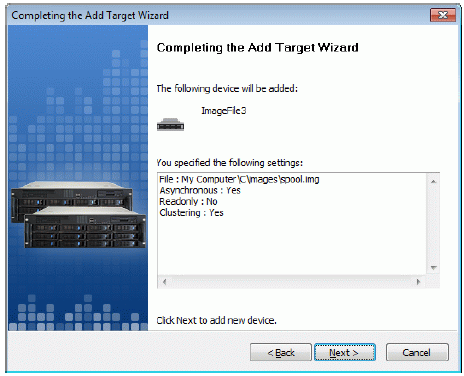
Image File device has some extra parameters. Check Allow multiple
concurrent iSCSI connections (clustering) checkbox. Please refer to the online help for details regarding those additional parameters (Asynchronous mode, Allow multiple connections (clustering), Read-only mode and Specify advanced options).
Press the Next button to continue.
Check the device parameters are correct. Press the Back button should any
changes be required.

Press the Next button to continue.
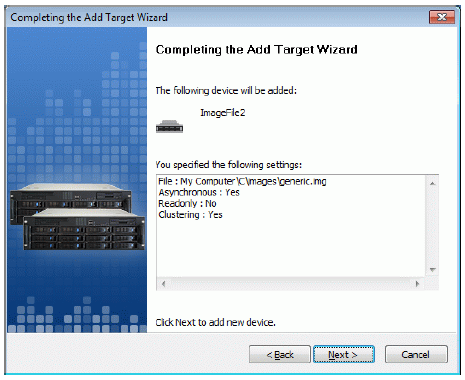
A summary of the created device is displayed on the last wizard page (see
image below).

Press the Finish button to close the wizard.
Preparing Generic Volume
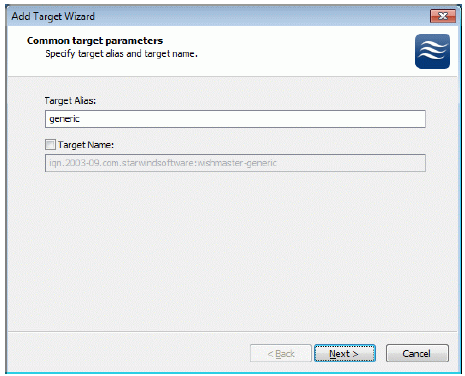
Click the right mouse button over the host and select Add Target pop-up menu item.
In the wizard that appears, select a target name. The name must be a unique
name by which the device will be declared to the iSCSI initiators connecting to
StarWind over an IP network.
Press the Next button to continue.
Select Image File device.
Press the Next button to continue.
Select Create new virtual disk to create a new virtual hard disk or Mount
existing virtual disk to mount an existing virtual disk that you’ve prepared
before.

Press the Next button to continue.
If you have decided to create a new virtual disk please specify the location and
the name of the virtual disk you wish to be created. Also you have to provide
the virtual disk size in megabytes. Check any additional parameters of the
virtual disk you wish to create. Please refer to the online help for details
regarding those additional parameters (Compressed and Encrypted).
Press the Next button to continue.
Image File device has some extra parameters. Check Allow multiple
concurrent iSCSI connections (clustering) checkbox. Please refer to the online help for details regarding those additional parameters (Asynchronous mode, Allow multiple connections (clustering), Read-only mode and Specify advanced options).

Press the Next button to continue.
Check the device parameters are correct. Press the Back button should any
changes be required.
Press the Next button to continue.
A summary of the created device is displayed on the last wizard page (see
image below).
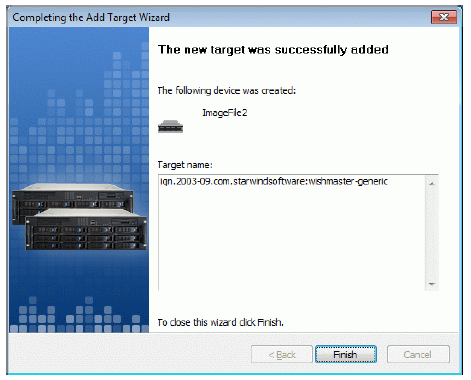
Press the Finish button to close the wizard.
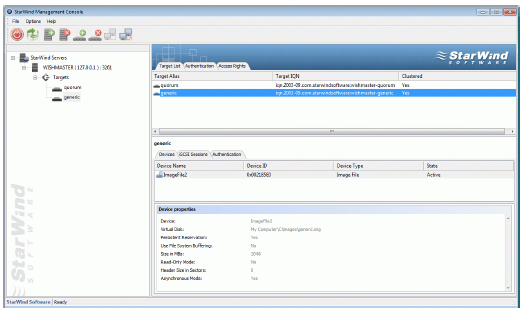
If successful, the StarWind Console should look like the sample image
provided below.
Preparing Cluster Nodes
Node 1
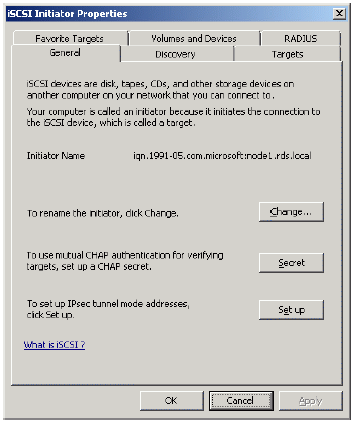
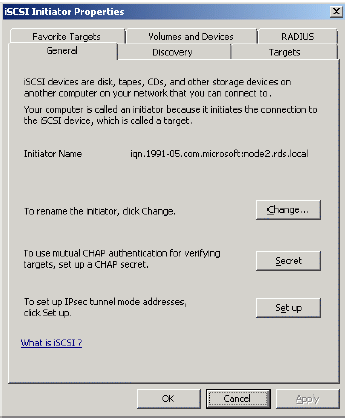
Configuring iSCSI initiator
Launch the Microsoft iSCSI Software Initiator application Administrative Tools-> iSCSI Initiator
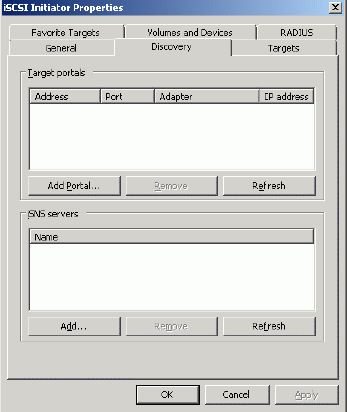
Select the Discovery Tab.
In the Target Portals group, click the Add Portal… button.
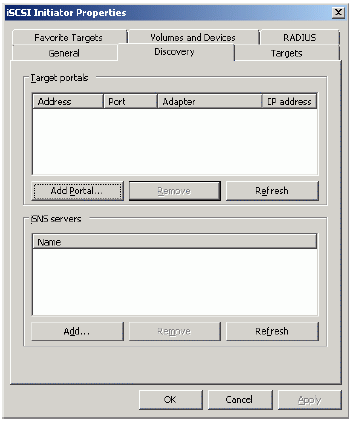
Press the Add Portal… button.
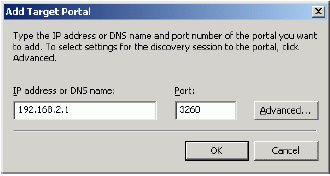
In the Add Target Portal dialog enter IP address or DNS name of the StarWind target server.
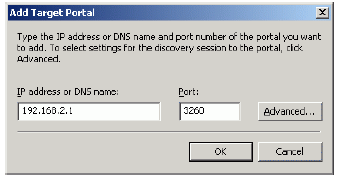
Press the OK button to continue.
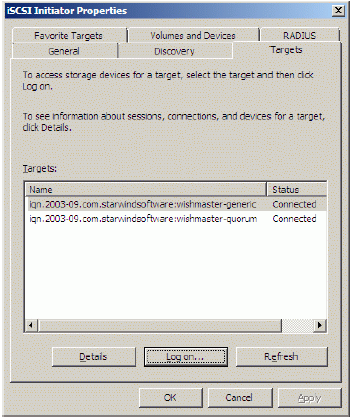
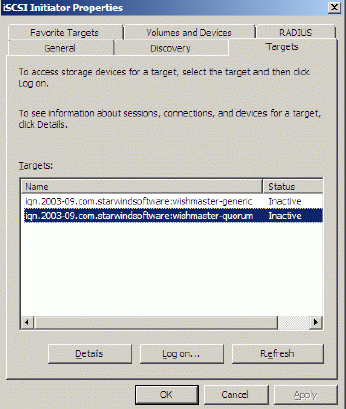
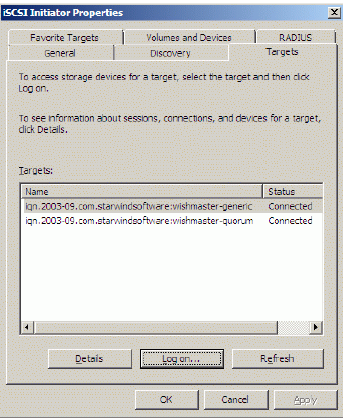
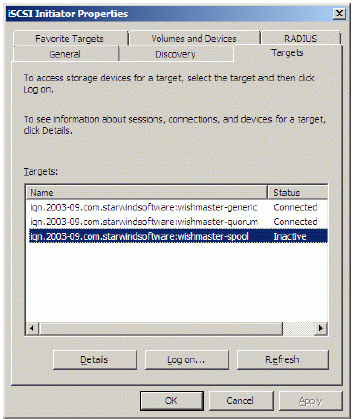
Click on the Targets tab. Select the IQN of the target just added.
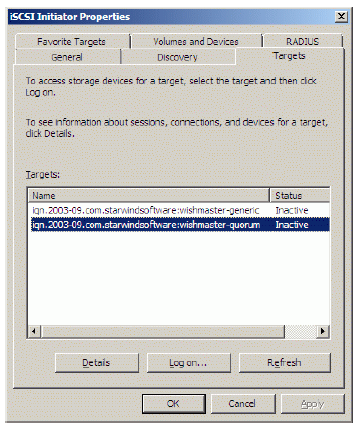
Press the Log On… button.
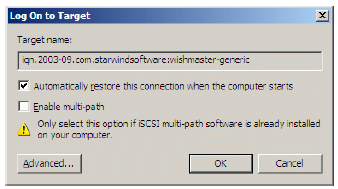
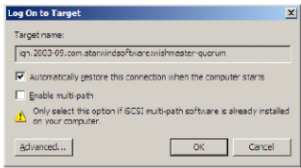
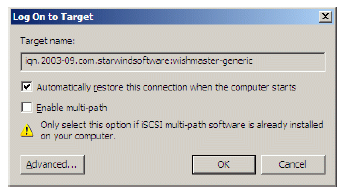
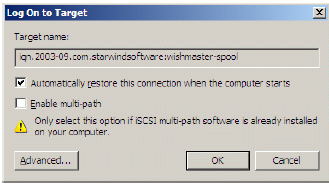
The Log On to Target dialog now appears. In this dialog click on the checkbox
Automatically restore this connection when the system boots to make this
connection persistent.

Press the OK button to continue.
Press the OK button to continue.
If successful, the initiator is now logged on to StarWind.
Initializing, formatting and creating partitions
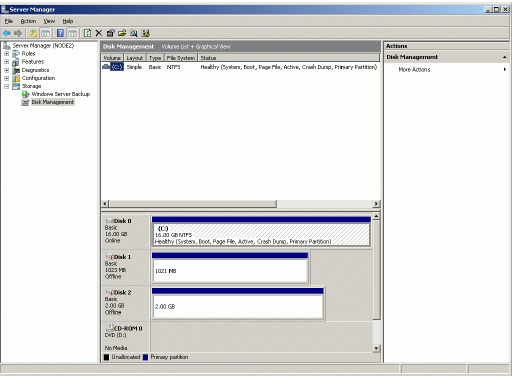
When the StarWind Disks are connected, they show up on the initiator
machine as new disk devices. Before these devices can be used as cluster
disks, they have to be initialized and formatted. Launch the Computer
Management console.
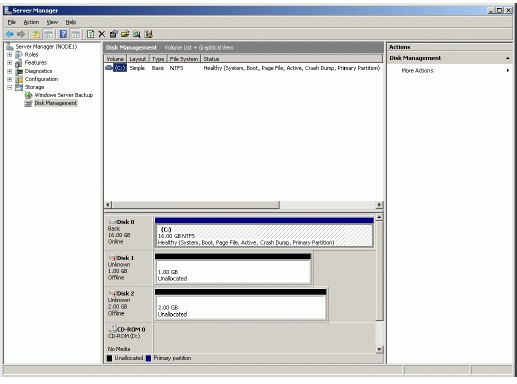
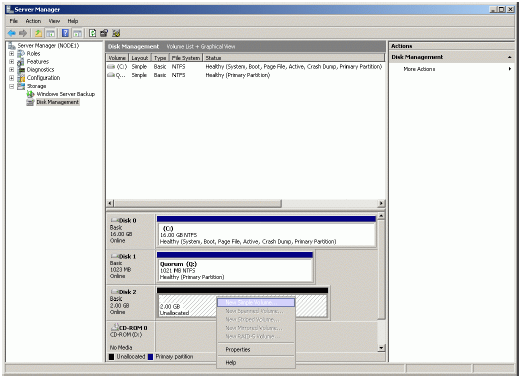
Select Disk Management.
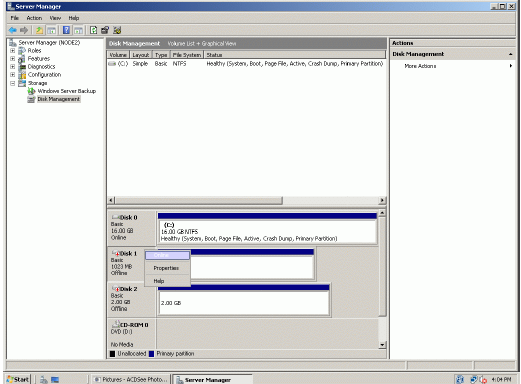
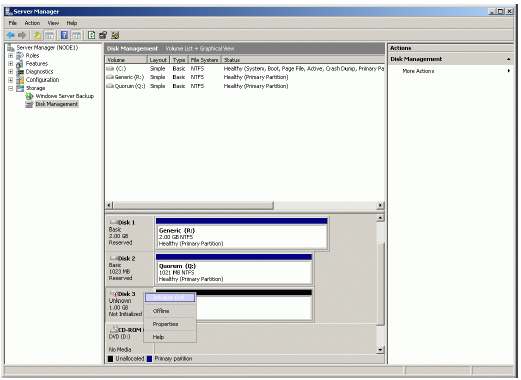
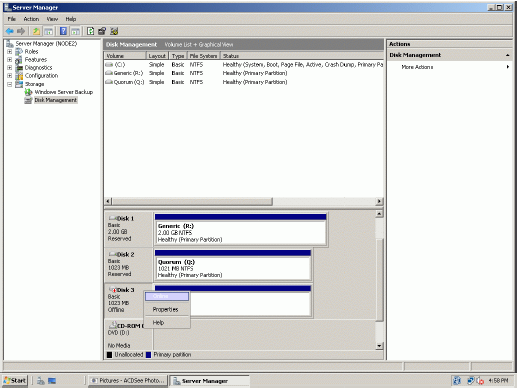
Bring disks online. Press the right mouse button over the disk and select
Online.
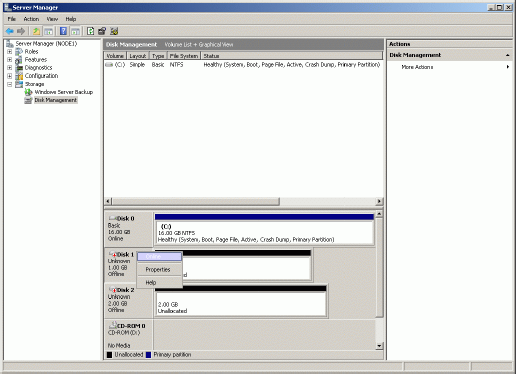
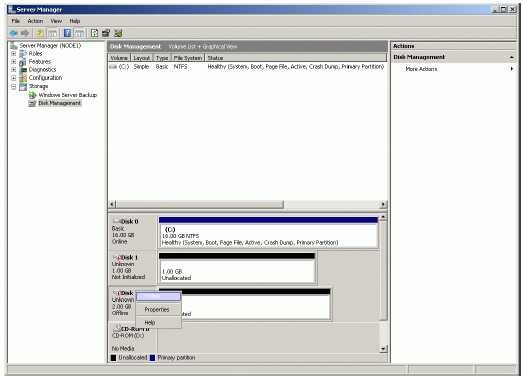
Initialize the Disks. Press the right mouse button over the Disk and select
Initialize Disk. Follow the wizard to initialize the new disks.

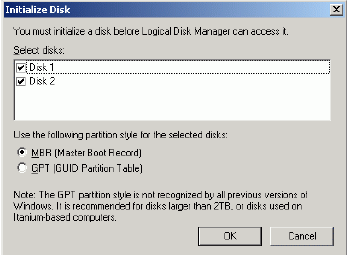
Press the OK button to continue.
Both disks have now been initialized.
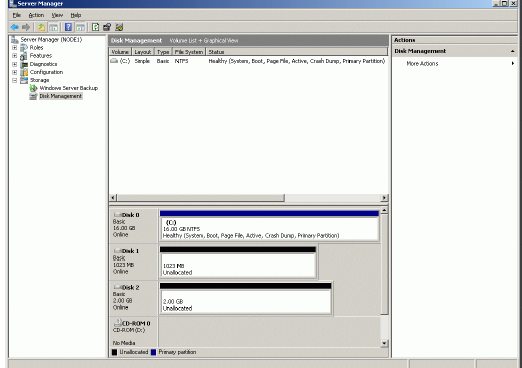
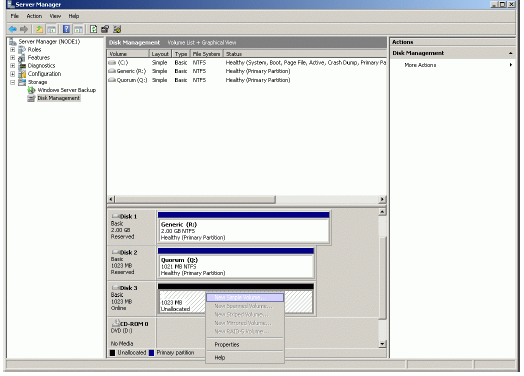
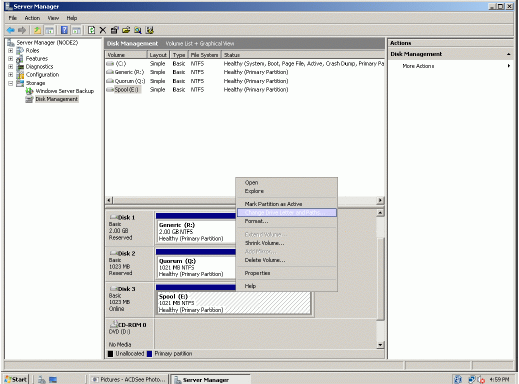
Right-click over the unallocated space and select New Simple Volume. Follow
the instructions in the wizard to create an NTFS partition for use as the
quorum disk.
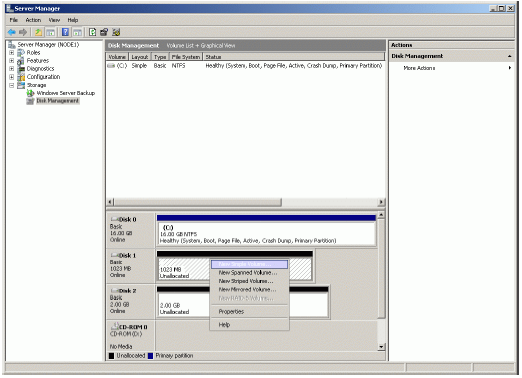
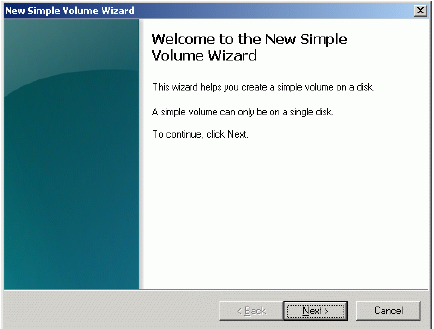
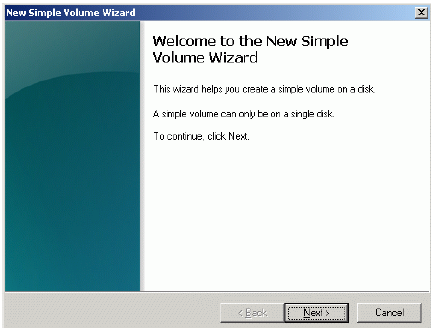
New Simple Volume Wizard appears.
Press the Next button to continue.
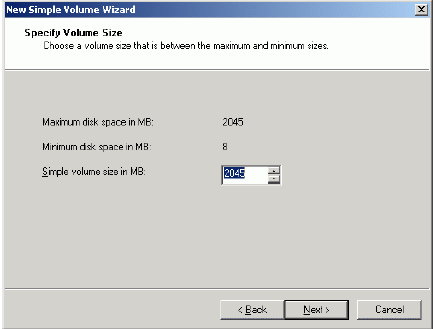
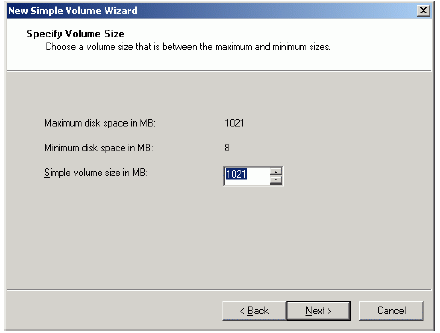
Specify new volume size in megabytes.
Press the Next button to continue.
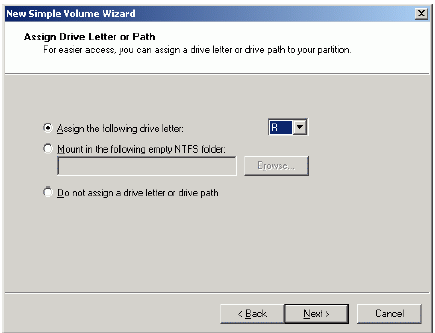
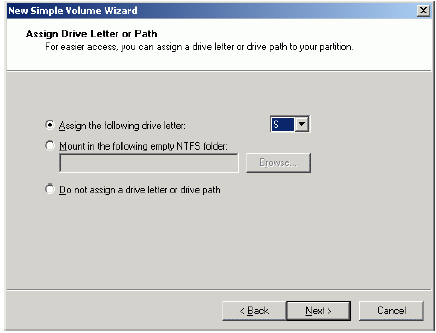
Choose the Drive Letter to assign.
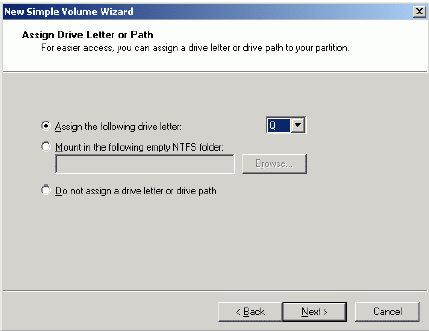
Press the Next button to continue.
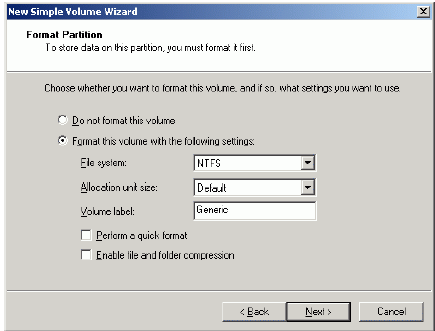
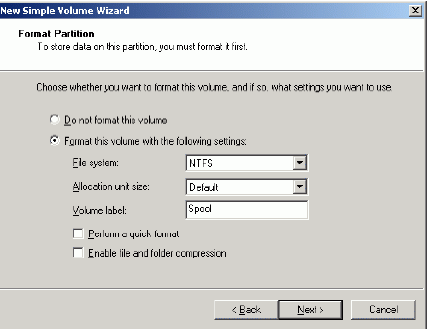
Specify format options. Provide the Volume Label.
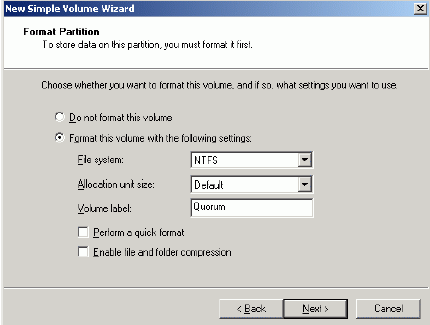
Press the Next button to continue.
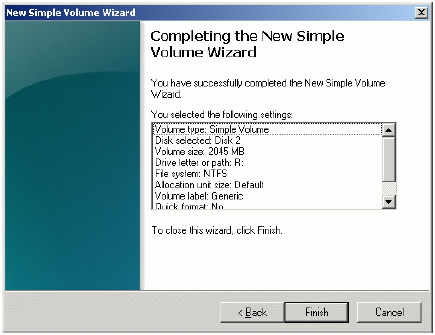
Check the settings are correct. Press the Back button should any changes be
required.
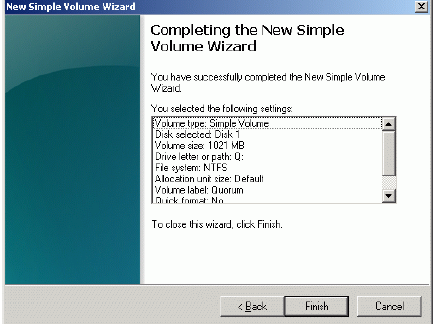
Press the Finish button to close the wizard.
If successful, a new volume will be created as shown in the example image
below. Repeat the same steps to create the second volume.
Right-click over the unallocated space and select New Simple Volume. Follow
the instructions in the wizard to create an NTFS partition for use as the generic disk.
New Partition Wizard appears.
Press the Next button to continue.
Specify new volume size in megabytes.
Press the Next button to continue.
Choose the Drive Letter to assign.
Press the Next button to continue.
Specify format options. Provide the Volume Label.
Press the Next button to continue.
Check the settings are correct. Press the Back button should any changes be
required.
Press the Finish button to close the wizard.
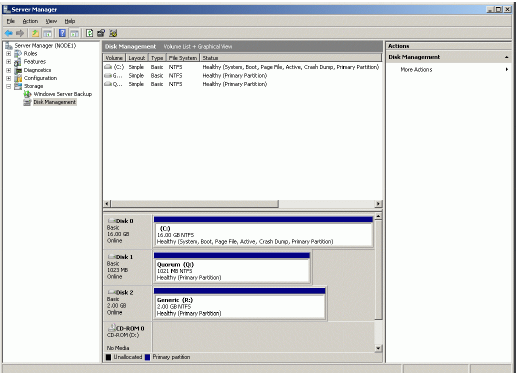
If successful, both of the disks are now formatted as shown in the example
image below.
Installing Failover Clustering Feature
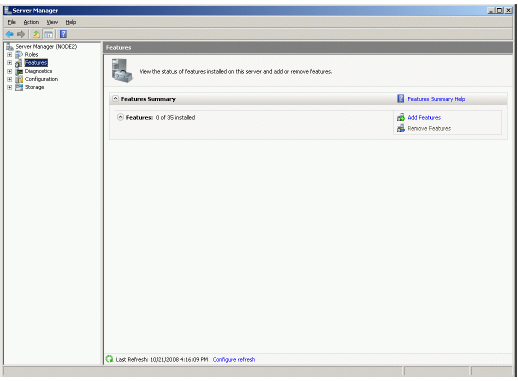
Launch the Computer Management console. Select Features node from the
list.
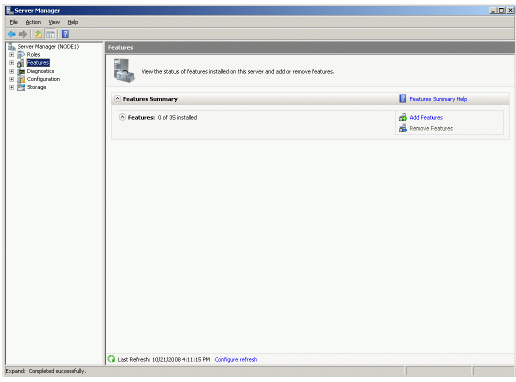
Click the Add Features to continue.
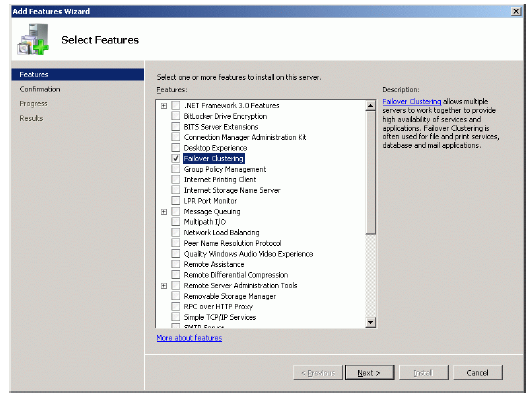
Add Features Wizard appears. Check the Failover Clustering feature.
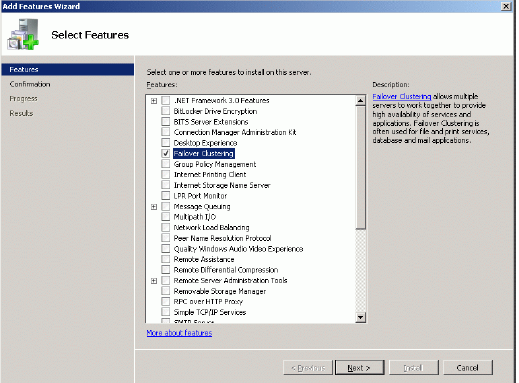
Press the Next button to continue.
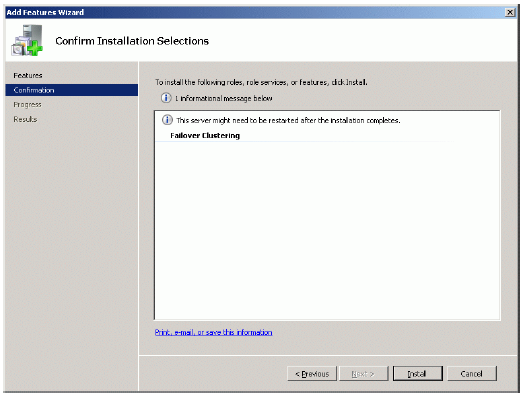
Check that the parameters are correct. Press the Previous button should any
changes be required.
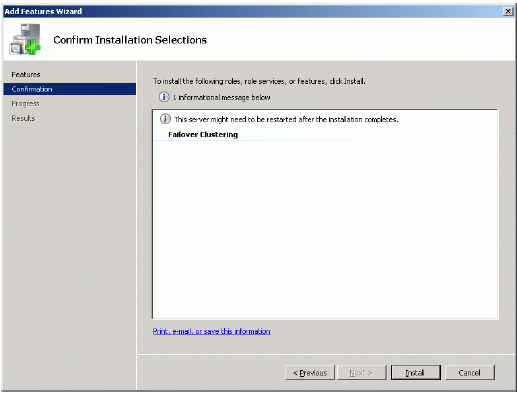
Complete the installation of the Failover Clustering Feature by pressing the
Install button.
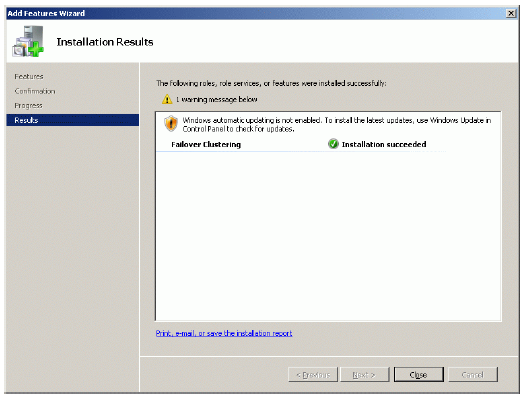
If the feature is successfully installed, the wizard should look similar to the
example image below.
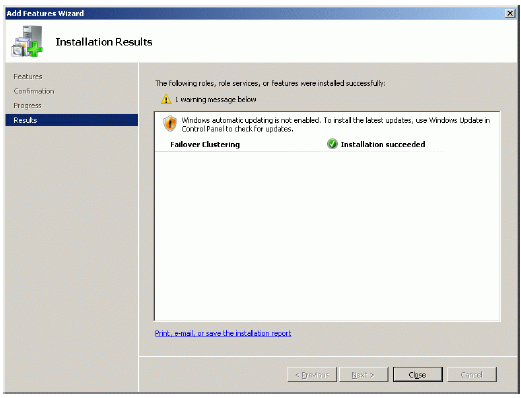
Press the Close button.
Shut down the server.
Node 2
Configuring iSCSI initiator
Launch the Microsoft iSCSI Software Initiator application Administrative Tools-> iSCSI Initiator
Select the Discovery Tab.
In the Target Portals group, click the Add Portal… button.
Press the Add Portal… button.
In the Add Target Portal dialog enter IP address or DNS name of the StarWind target server.
Press the OK button to continue.
Click on the Targets tab. Select the IQN of the target just added.
Press the Log On… button.
The Log On to Target dialog now appears. In this dialog click on the checkbox
Automatically restore this connection when the system boots to make this
connection persistent.
Press the OK button to continue.
Press the OK button to continue.
If successful, the initiator is now logged on to StarWind.
Assigning drive letters
When the StarWind Disks are connected, they show up on the initiator
machine as new disk devices. Before these devices can be used as cluster
disks, they have to be mounted. Launch the Computer Management console.
Select Disk Management.
Bring disks online. Press the right mouse button over the disk and select
Online.
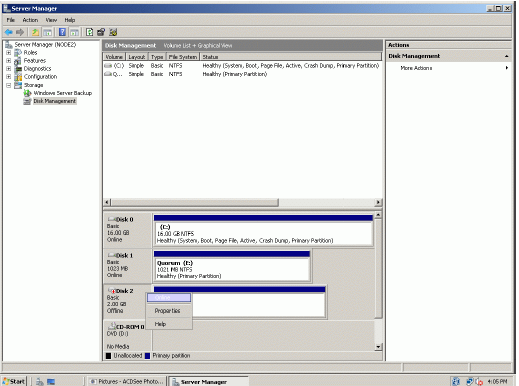
The picture below shows that Windows has automatically assigned Drive
Letters to the mounted volumes. As these are local drive letters they may not
be the same as we have assigned to these volumes on the first node. However,
as all volumes of a cluster must be assigned the same drive letters, any
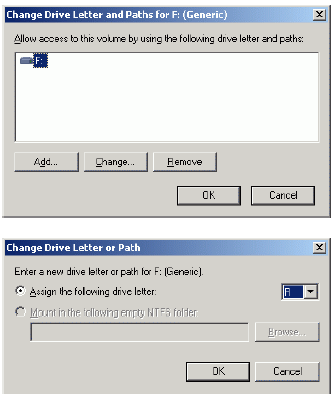
differences must be manually changed. Press the right mouse button over the
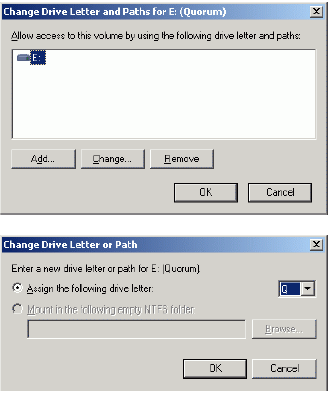
Quorum volume.
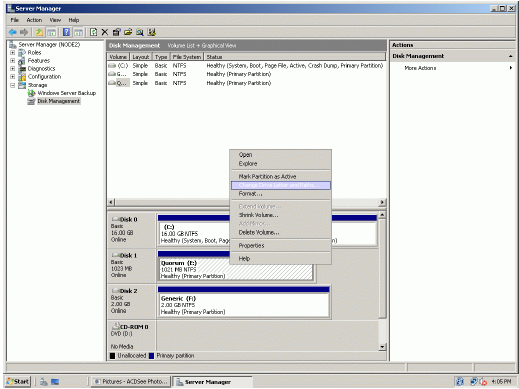
Select Change Drive Letter and Paths…
Change the Drive Latter for the Quorum to Q.
Press the right mouse button over the Generic volume.
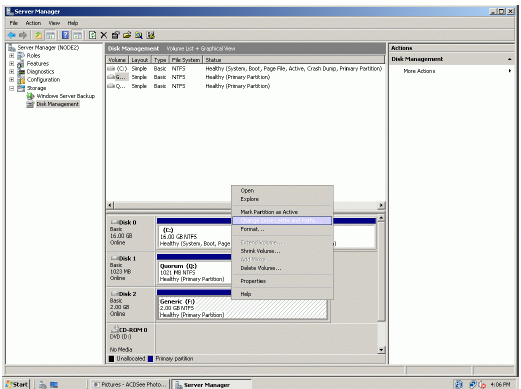
Select Change Drive Letter and Paths…
Change the Drive Latter for the Generic to R.
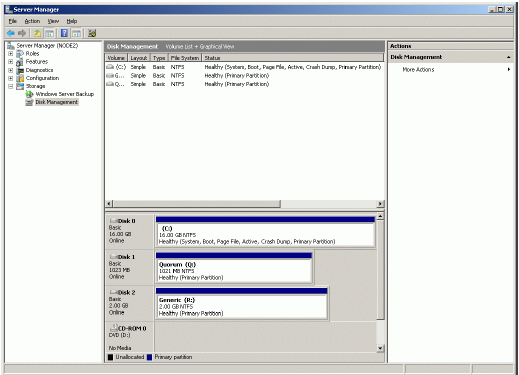
If successful, the Computer Management console should look like the sample
image provided below.
Installing Failover Clustering Feature
Launch the Computer Management console. Select Features node from the
list.
Click the Add Features to continue.
Add Features Wizard appears. Check the Failover Clustering feature.
Press the Next button to continue.
Check that the parameters are correct. Press the Previous button should any
changes be required.
Complete the installation of the Failover Clustering Feature by pressing the
Install button.
If the feature is successfully installed, the wizard should look similar to the
example image below.
Press the Close button.
Shut down the server.
Configuring Microsoft Cluster Service
Validate a Configuration
Start both Cluster Node 1 Server and Cluster Node 2 Server. Launch the
Failover Cluster Management console selecting Administrative Tools-
>Failover Cluster Management.
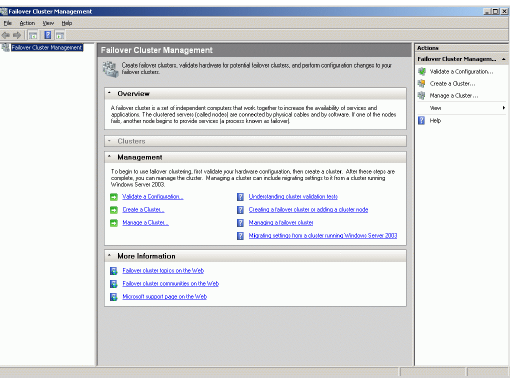
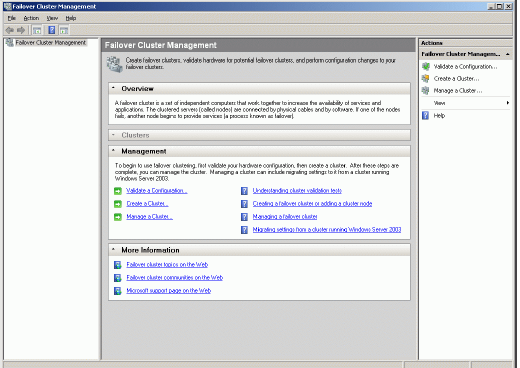
After the management console is launched please click Validate a
Configuration… item to ensure that the configuration is suitable for failover
clustering.
Validate a Configuration Wizard appears.
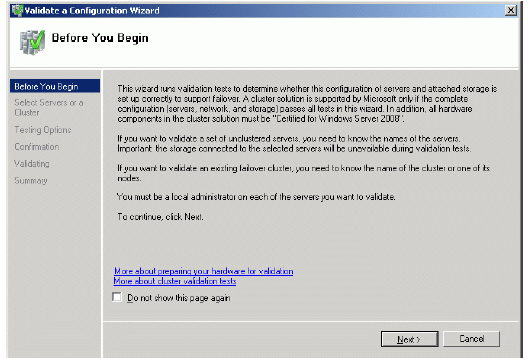
Press the Next button to continue.
Add the names of servers you wish to use as cluster nodes.
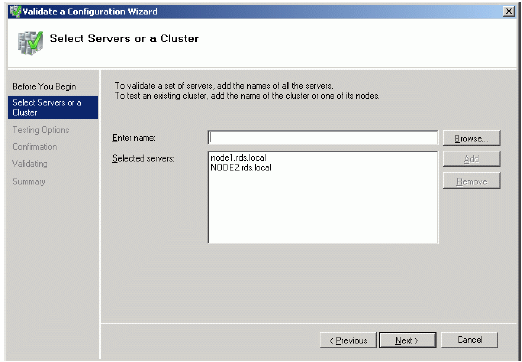
Press the Next button to continue.
Select Run all tests (recommended) for testing the complete configuration.
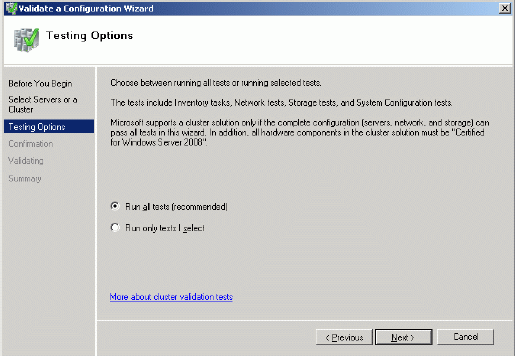
Press the Next button to continue.
Check the parameters are correct. Press the Previous button should any
changes be required.
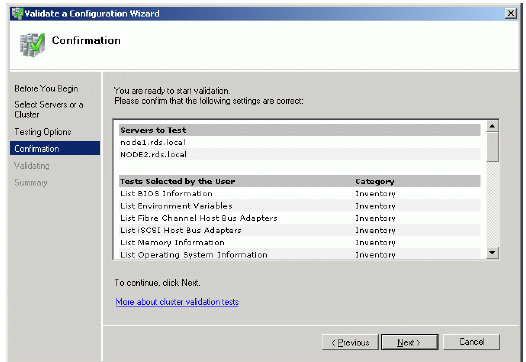
Press the Next button to continue.
If all of the tests are successful, the wizard should look similar to the example
image below.
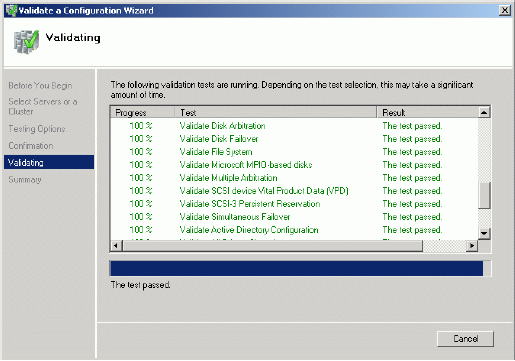
If successful, the wizard should look like the example picture provided below.
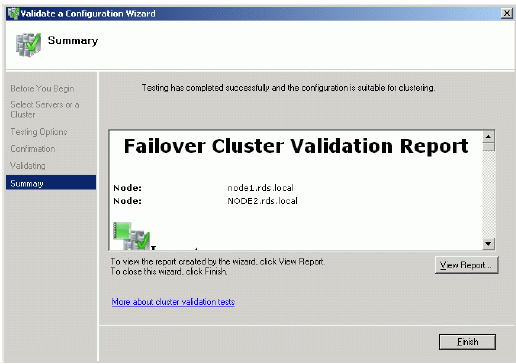
Press the Finish button.
Create a Cluster
It is now time to create the cluster. Click Create a Cluster item from the
Actions panel shown on the right.
Create a Cluster Wizard appears.
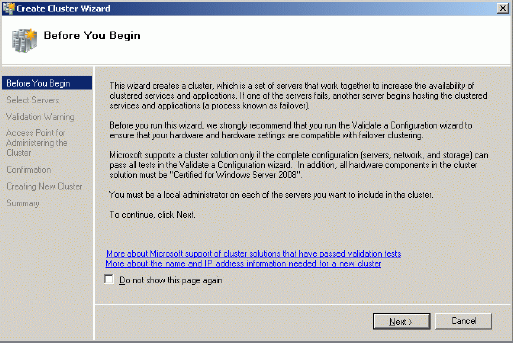
Press the Next button to continue.
Add the names of servers you wish to use as cluster nodes.
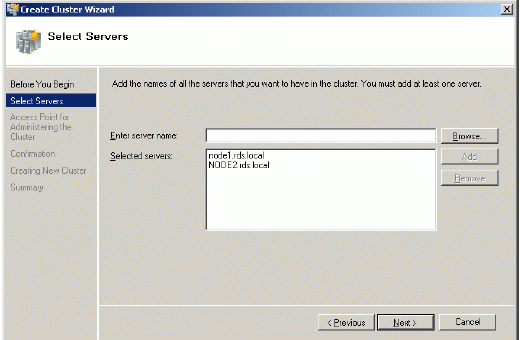
Press the Next button to continue.
Specify Cluster Name and Cluster IP address.
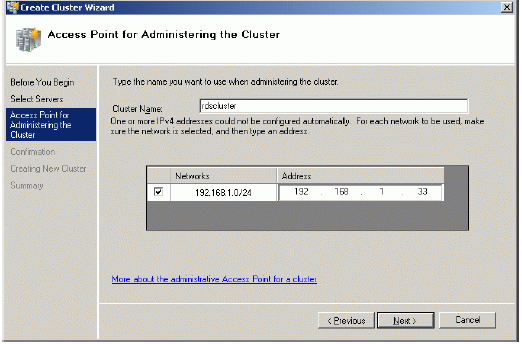
Press the Next button to continue.
Check the parameters are correct. Press the Previous button should any
changes be required.
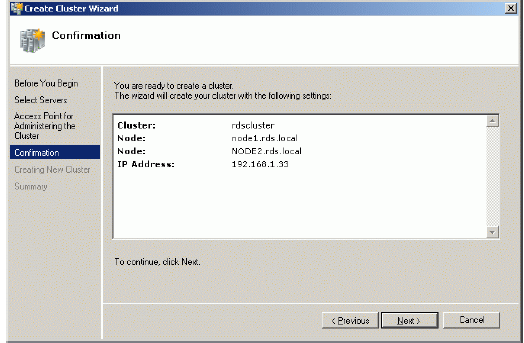
Press the Next button to continue.
If successful, the wizard should look like the example picture provided below.
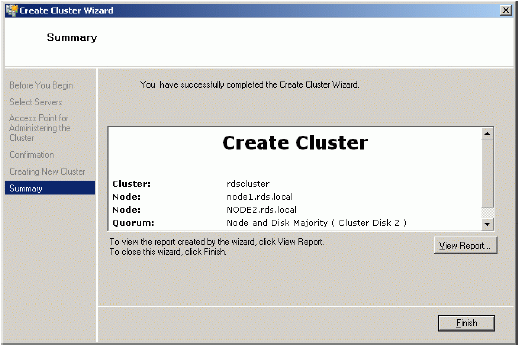
Press the Finish button.
Now that the creation of the cluster is complete it will be shown in the panel on the left.
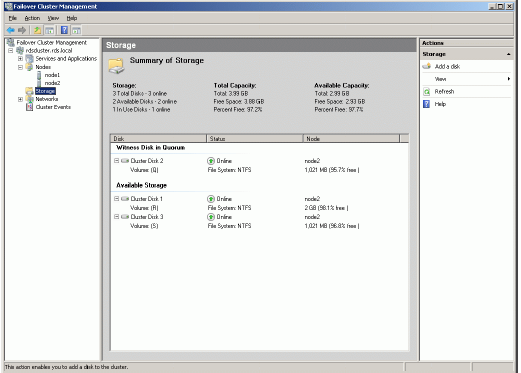
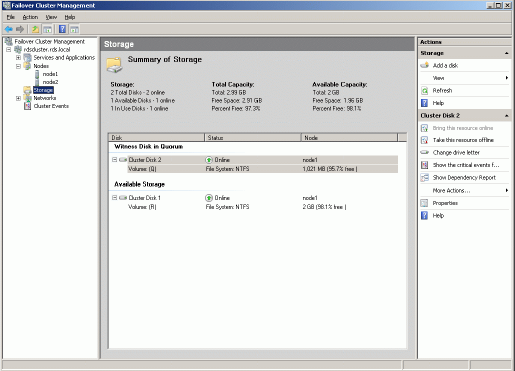
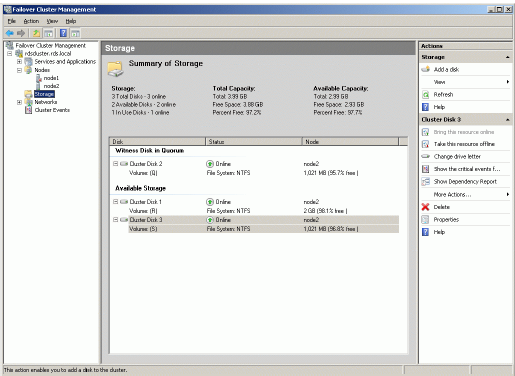
Expand the cluster by clicking on the ‘+’ symbol next to the cluster, then click
on Storage. The Failover Cluster Management console should look like the
example picture provided below. Both cluster disk resources will be shown as
online.
Adding New Shared Disk Resource
StarWind Target
Click the right mouse button over the host and select Add Target pop-up menu item.
In the wizard that appears, select a target name. The name must be a unique
name by which the device will be declared to the iSCSI initiators connecting to
StarWind over an IP network.
 Press the Next button to continue.
Select Image File device.
Press the Next button to continue.
Select Create new virtual disk to create a new virtual hard disk or Mount
existing virtual disk to mount an existing virtual disk that you’ve prepared
before.
Press the Next button to continue.
If you have decided to create a new virtual disk please specify the location and
the name of the virtual disk you wish to be created. Also you have to provide
the virtual disk size in megabytes. Check any additional parameters of the
virtual dsik you wish to create. Please refer to the online help for details
regarding those additional parameters (Compressed and Encrypted).
Press the Next button to continue.
Image File device has some extra parameters. Check Allow multiple
concurrent iSCSI connections (clustering) checkbox. Please refer to the online help for details regarding those additional parameters (Asynchronous mode, Allow multiple connections (clustering), Read-only mode and Specify advanced options).

Press the Next button to continue.
Check the device parameters are correct. Press the Back button should any
changes be required.
Press the Next button to continue.
A summary of the created device is displayed on the last wizard page (see
image below).
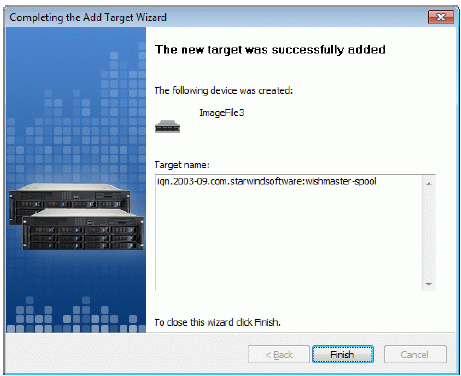
Press the Finish button to close the wizard.
Node 1
Launch the Microsoft iSCSI Software Initiator application Administrative Tools-> iSCSI Initiator. Click on the Targets tab. Select the IQN of the target just added.
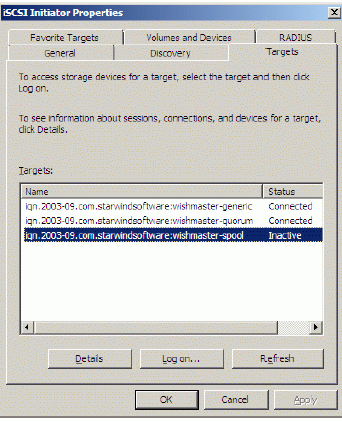
Press the Log On… button.
The Log On to Target dialog now appears. In this dialog click on the checkbox
Automatically restore this connection when the system boots to make this
connection persistent.
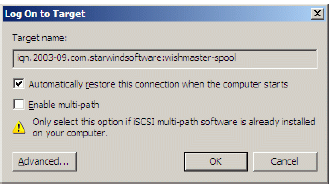
Press the OK button to continue.
When the StarWind Disks are connected, they show up on the initiator
machine as new disk devices. Before these devices can be used as cluster
disks, they have to be initialized and formatted. Launch the Computer
Management console. Select Disk Management.

Bring disk online. Press the right mouse button over the disk and select Online
Initialize the Disk. Press the right mouse button over the Disk and select
Initialize Disk. Follow the wizard to initialize the new disk.

Press the OK button to continue.
The disk has now been initialized. Right-click over the unallocated space and
select New Simple Volume. Follow the instructions in the wizard to create an
NTFS partition for use as the spool disk.
New Simple Volume Wizard appears.
Press the Next button to continue.
Specify new volume size in megabytes.
Press the Next button to continue.
Choose the Drive Letter to assign.
Press the Next button to continue.
Specify format options. Provide the Volume Label.
Press the Next button to continue.
Check the settings are correct. Press the Back button should any changes be
required.
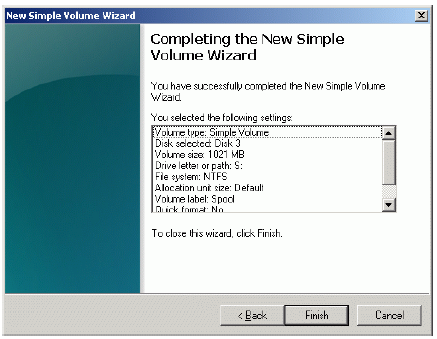
Press the Finish button to close the wizard.
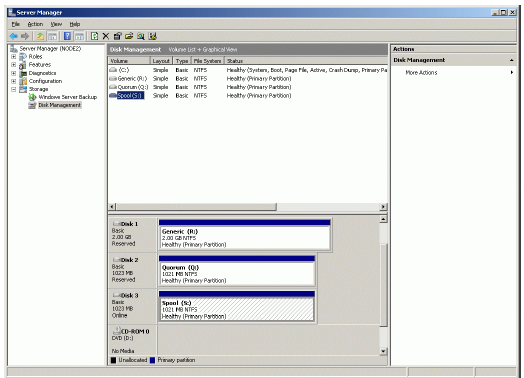
If successful, the disk is now formatted as shown in the example image below.
Shut down the node.
Node 2
Launch the Microsoft iSCSI Software Initiator application Administrative Tools-> iSCSI Initiator. Click on the Targets tab. Select the IQN of the target just added.
Press the Log On… button.
The Log On to Target dialog now appears. In this dialog click on the checkbox
Automatically restore this connection when the system boots to make this
connection persistent.
Press the OK button to continue.
When the StarWind Disks are connected, they show up on the initiator
machine as new disk devices. Before these devices can be used as cluster
disks, they have to be mounted. Launch the Computer Management console.
Select Disk Management.
Bring disks online. Press the right mouse button over the disk and select
Online.
The picture below shows that Windows has automatically assigned Drive
Letters to the mounted volumes. As these are local drive letters they may not
be the same as we have assigned to these volumes on the first node. However,
as all volumes of a cluster must be assigned the same drive letters, any
differences must be manually changed. Press the right mouse button over the
Spool volume.
Select Change Drive Letter and Paths…
Change the Drive Latter for the Spool to S.
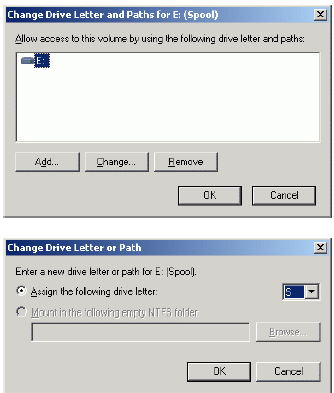
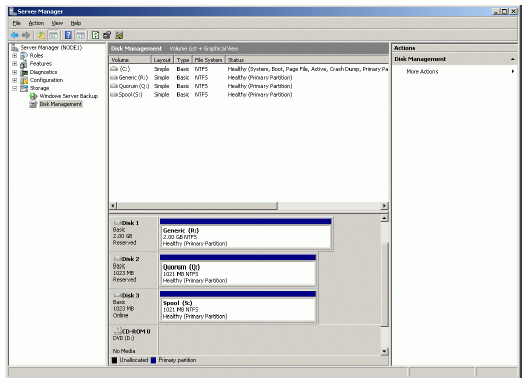
If successful, the Computer Management console should look like the sample
image provided below.
Launch the Failover Cluster Management console. Click on Storage node.
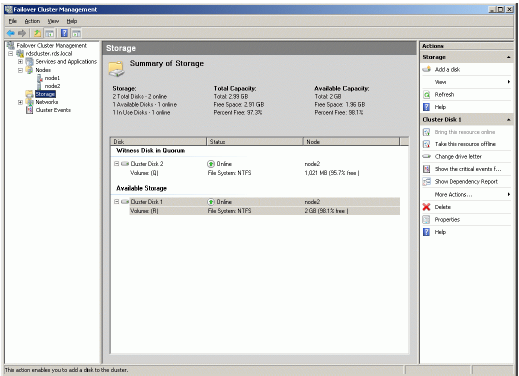
Click Add a Disk item from the Actions panel shown on the right.
Add Disks to a Cluster dialog appears. Select the disk to add.
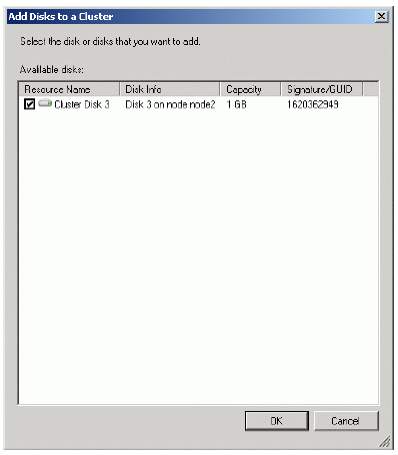
Press the OK button to continue.
When completed, the disk is now a cluster disk.
Start the other servers in the cluster.