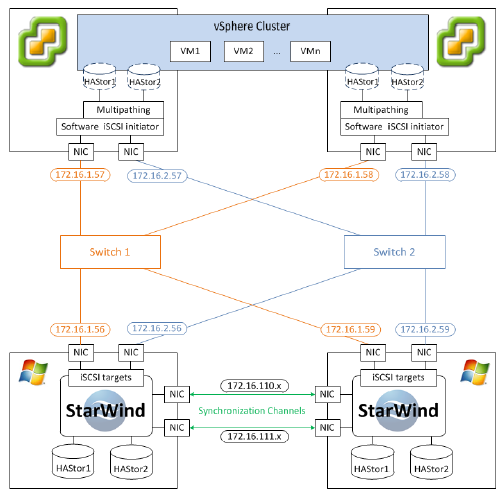
StarWind iSCSI SAN & NAS: Providing HA Shared Storage for vSphere
This document refers to the previous StarWind Virtual SAN version. To view the document for the current version, please follow this link
INTRODUCTION
CREATING AN HA DEVICE
1. Launch StarWind Management Console: Start -> All Programs -> StarWind Software -> StarWind.
Note: The StarWind Console icon appears in the system tray, when the Console is running. To open StarWind Management Console, double-click the icon or right-click it and select Start Management Console from the shortcut menu.
2. Select the server you want to provide with the iSCSI target device from the Console tree.
3. Double-click the host to connect.
4. Click Add Device to create devices and targets on the server.
5. Add Device Wizard appears. Please, follow the wizard’s steps to complete creation of a new HA device.
6. Go to High Availability Device to select an HA device type.
7. Click Add to add a new host. Enter authentication and host information in the Specify Host dialog.
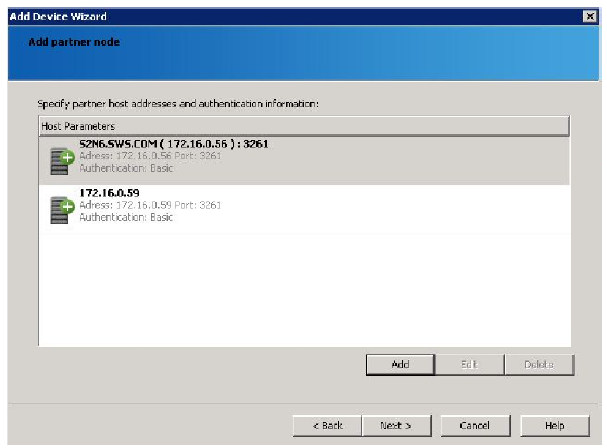
8. Click Next to continue.
9. Specify corresponding information in the Target Alias and Target Name text fields.
Note: The name must be unique. Under this name the device is declared to the iSCSI initiators connecting to the StarWind Service over an IP network.
10. Click to specify name and location of an HA virtual disk on the server. If you want to create new virtual disks, select the Create New checkbox.

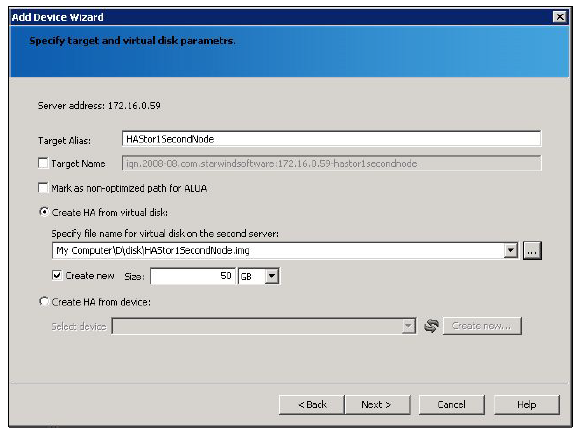
11. Click Next to continue.
12. Configure data synchronization and heartbeat channel parameters.
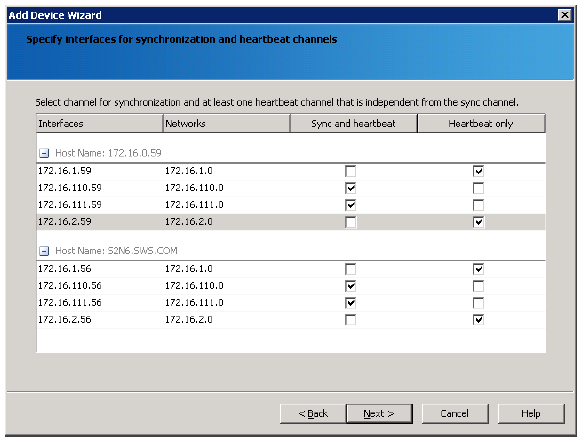
13. Click Next to continue.
14. Specify cache parameters of the HA device.
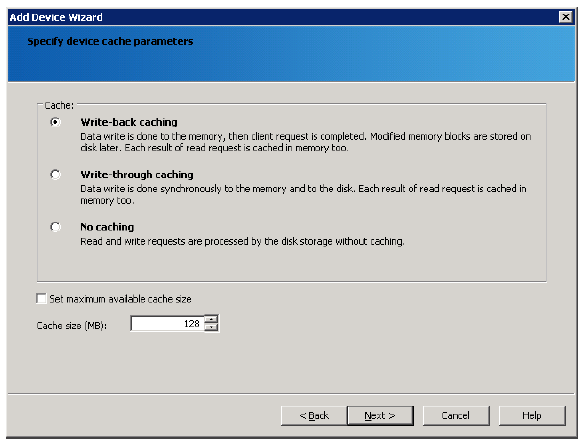
15. Click Next to continue.
16. Select an initialization method of the HA device.
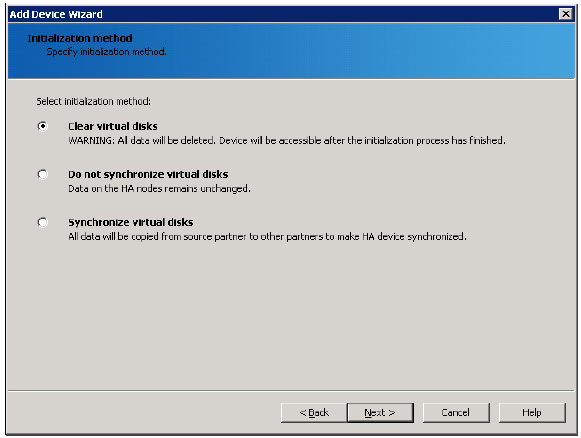
17. Click Next to continue.
18. Check whether device parameters are correct. Click Back to make any changes.
19. Click Next to continue.
20. Click Finish to close the wizard.
CONFIGURING ESX SEVERS
1. Launch VMware vSphere Client: Start -> All Programs -> VMware -> VMware vSphere Client.
2. Specify IP address of a VMware vCenter Server, enter your login and password.

3. Click Login to enter.
4. Click the Hosts and Clusters icon from the Inventory panel of the vSphere Client window.
5. Right-click an existing data center and select New Cluster. If needed, click New Datacenter to create a new data center previously.
6. New Cluster Wizard appears. Specify a name of the cluster.
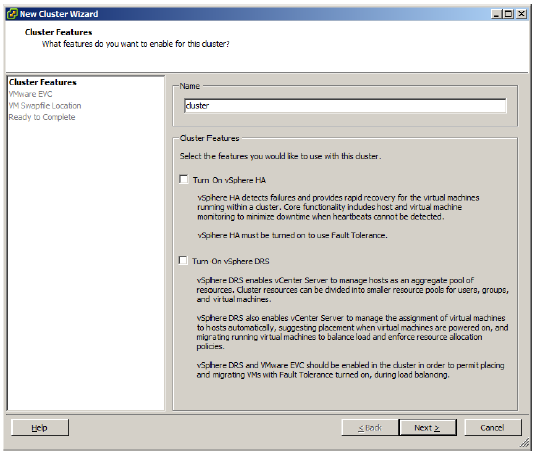
7. Continue to click Next until the wizard can be closed.
8. Right-click the cluster to add a host. Select the Add Host.
9. Add Host Wizard appears. Specify a host name or IP address, enter username and password.
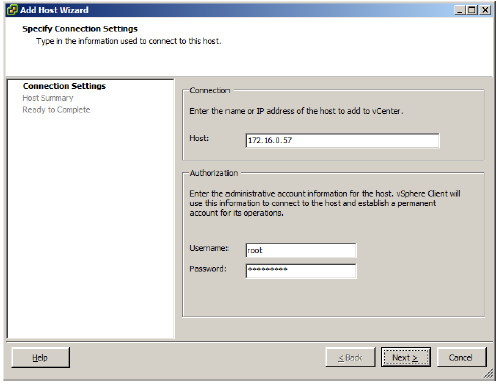
10. Click Next to continue.
11. Check whether everything is correct, and click Next to continue.
12. Assign the license key to the host.
13. Click Next to continue.
14. Click Finish to close the wizard.
15. Follow the same procedure for another host.
16. Select a host.
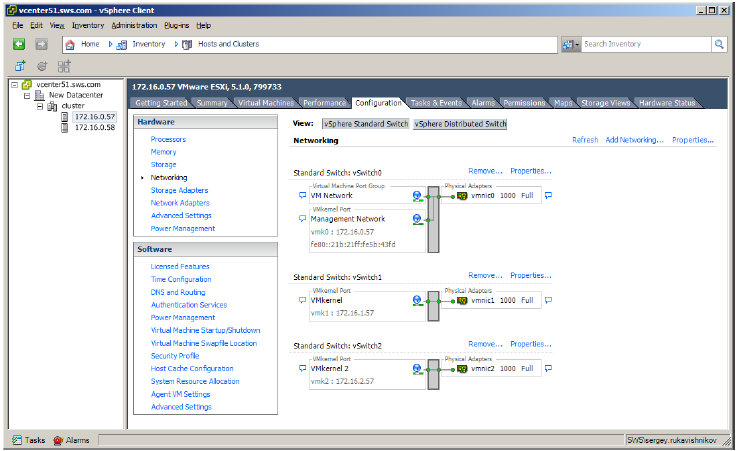
17. Select the Configuration tab and choose the Networking item from the Hardware pane.
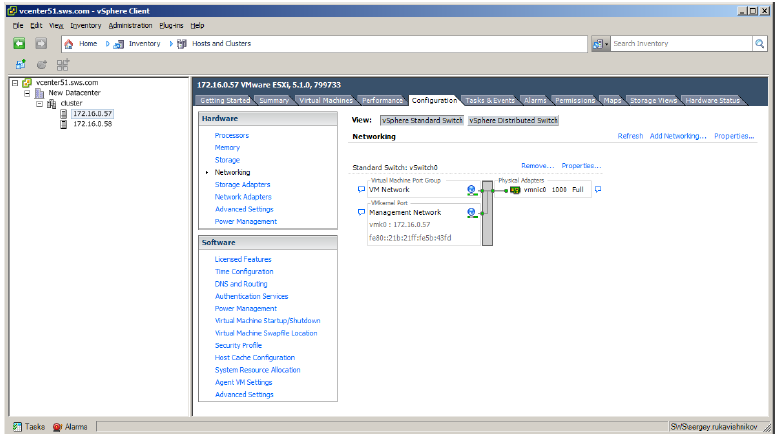
18. Click Add Networking.
19. Add Network Wizard appears. Select the VMkernel option.
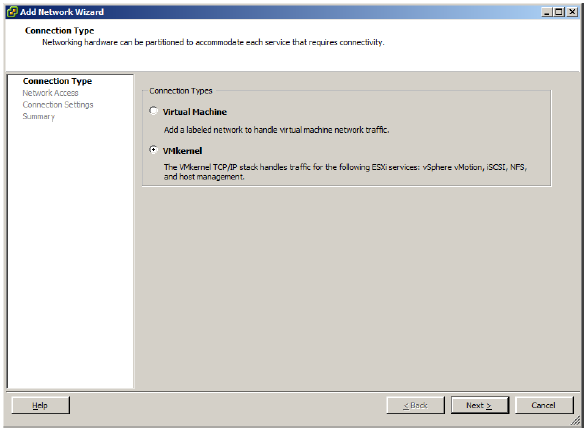
20. Click Next to continue.
21. Select Create a vSphere standard switch, and select the appropriate network card checkbox.
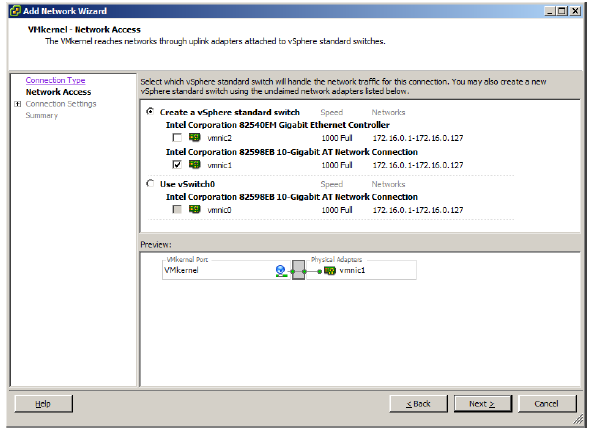
22. Click Next to continue.
23. Select the Use this port group for vMotion and Use this port group for management traffic options.
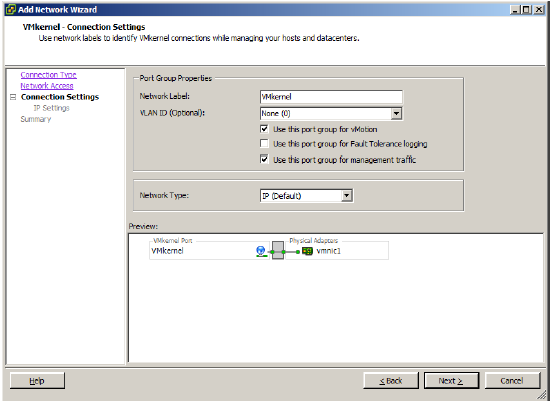
24. Click Next to continue.
25. Specify IP settings in the relative text fields.
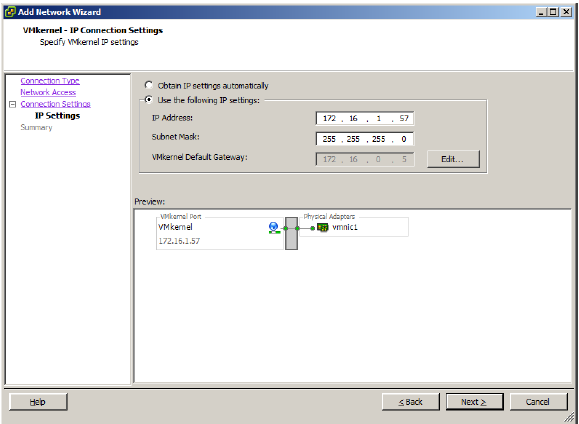
26. Click Next.
27. Click Finish to close the wizard.
28. Follow the same procedure to create the second VMkernel of the third vSwitch.
29. Follow the same procedure for another host in the cluster.

Configuring the iSCSI Initiator
1. Select a host.
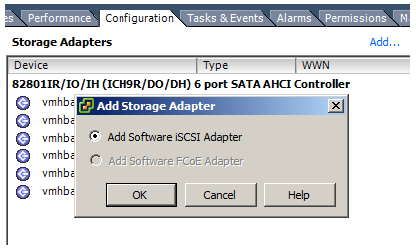
2. Click the Configuration tab and select the Storage Adapters item from the Hardware pane.
3. Click Add and select Add software iSCSI Adapter. Click OK.
4. The list of the available storage adapters appears. Select iSCSI Software Adapter.
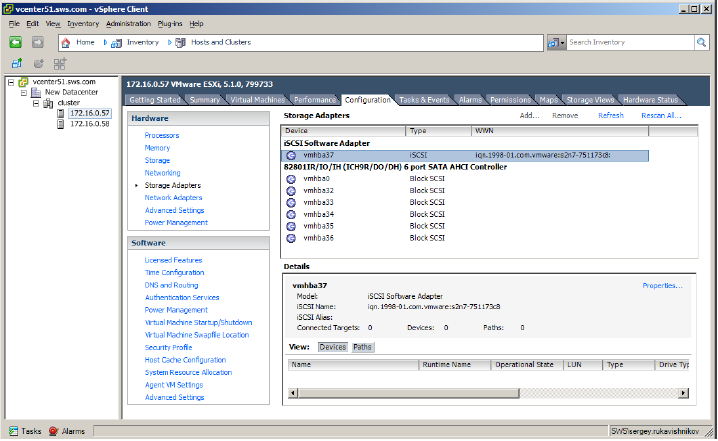
5. Click the Properties link.
6. Switch to the Dynamic Discovery tab.
7. Add each of the StarWind servers by clicking Add and specifying server IP address.
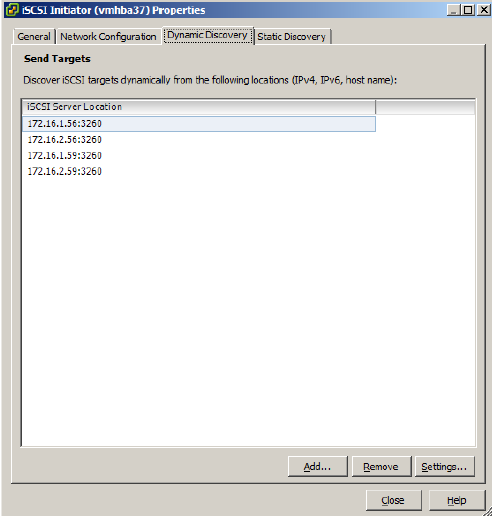
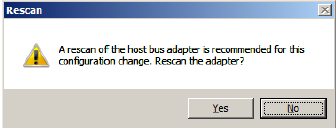
8. Click Close. When prompted to rescan for new iSCSI LUNs, click Yes.
9. Follow the same procedure for another cluster host.
Setting Up a Datastore
1. Select a host from the Console tree.
2. Click the Configuration tab and select the Storage item from the Hardware pane.
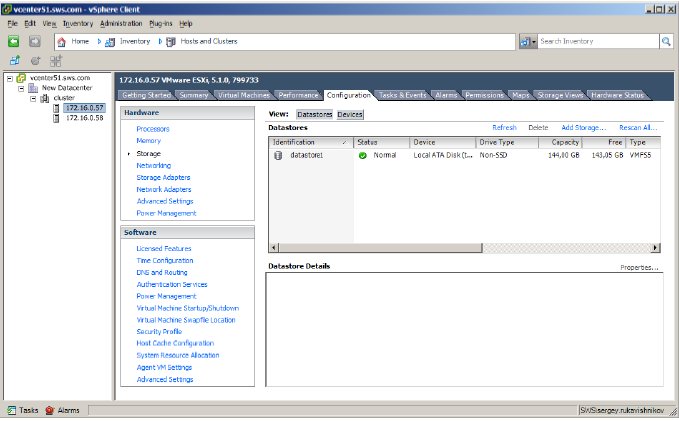
3. Click Add Storage.
4. The Add Storage window appears. Select Disk/LUN storage type.
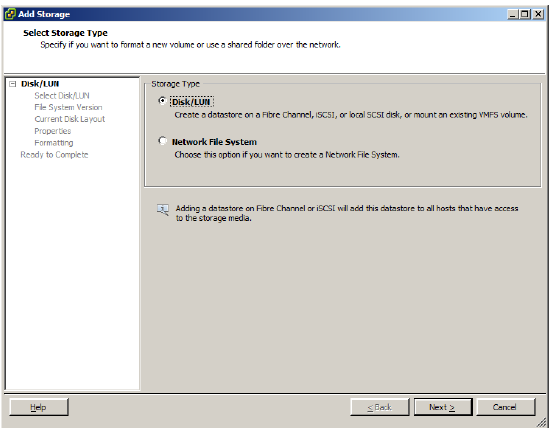
5. Click Next to continue.
6. Select the device.
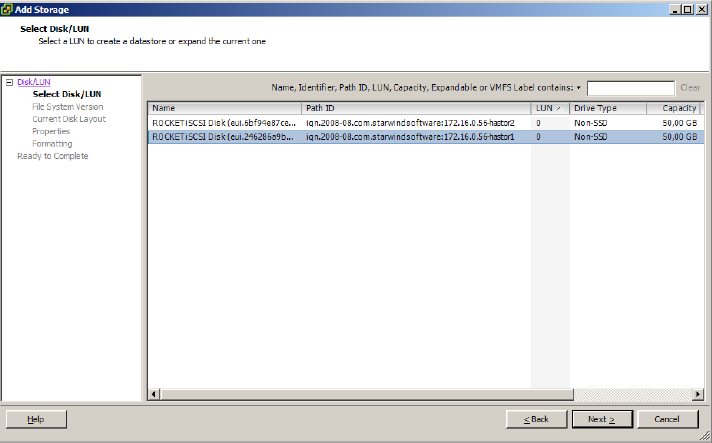
7. Click Next to continue.
8. Review the current disk layout.
9. Click Next to continue.
10. Enter a datastore name in the appropriate text field.
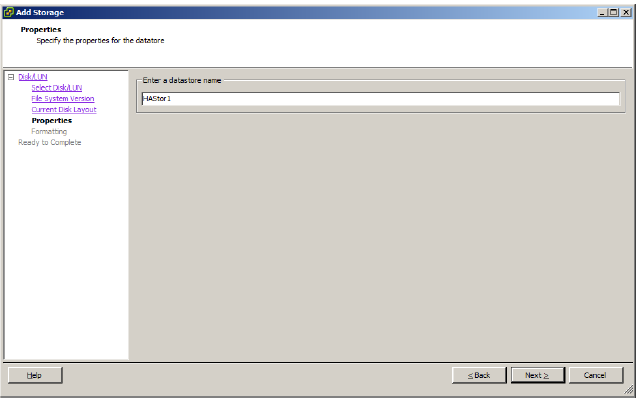
12. Click Next to continue.
13. Set the Disk/LUN formatting options.
14. Click Next to continue.
15. Check whether the device parameters are correct and click Back to make any changes.
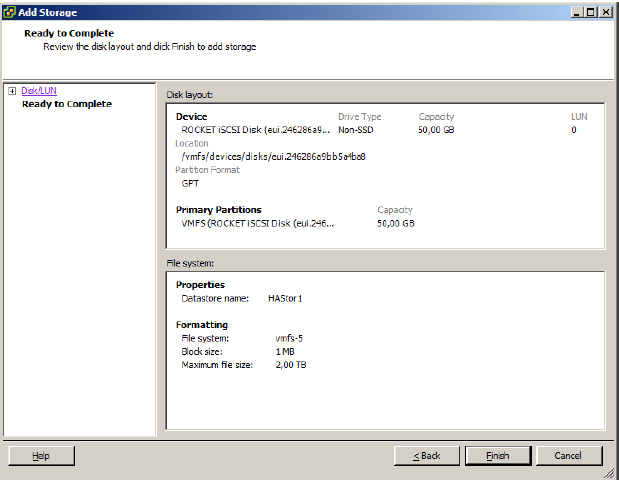
16. Click Finish to close the wizard.
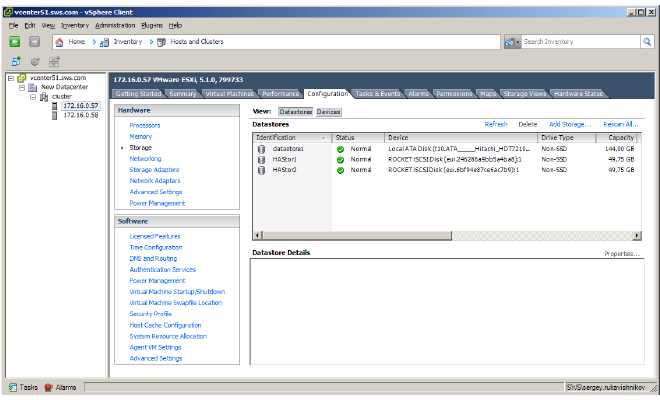
17. If everything has been done correctly, a new datastore appears.
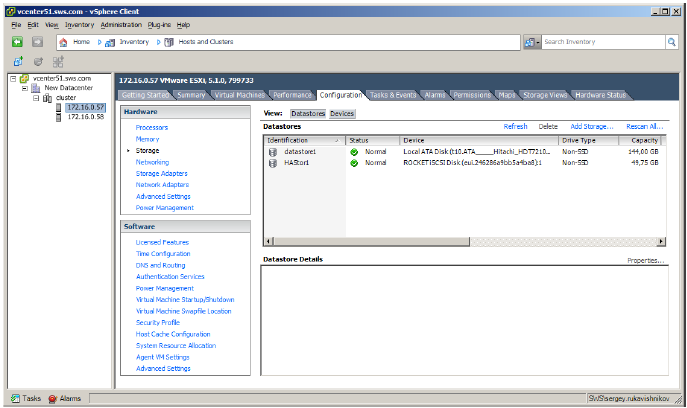
18. Check another host for a new datastore. If a new datastore is not displayed in a datastore list, click Rescan All.
19. Follow the same procedure for another storage device.
If everything has been done correctly, a new datastore appears.
20. To add HA feature right-click the cluster and select Edit Settings.
21. In the Cluster Settings window select the Turn on vSphere HA checkbox.
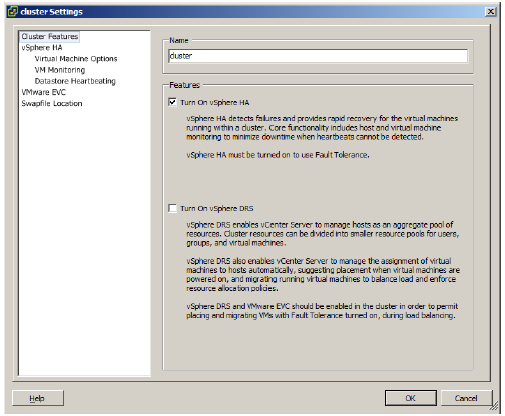
22. Click OK.
