
ABOUT THIS GUIDE
The guide is intended for experienced Window system administrators who are going to enhance Veeam Backup & Replication 6.0 with Global Deduplication technology from StarWind.
INTRODUCTION
You can use one physical server for StarWind and Veeam Backup & Replication software, if you have enough resources (including RAM). Otherwise, it is strongly recommended to install each solution on a separated physical server.
The sequence of software installation makes no difference.
Note: If you first set up Veeam Backup & Replication server, you will have to connect it to StarWind deduplicated storage later and reconfigure backup jobs.
SYSTEM REQUIREMENTS OF VEEAM BACKUP AND REPLICATION V6
Hardware CPU: modern x86/x64 processor (minimum four cores recommended)
Memory: 2048MB RAM
Hard Disk Space: 200 MB for product installation. A 100 GB per VM for guest file system catalog folder. Sufficient free space for Instant VM Recovery cache (non-persistent data, at least 10GB recommended)
Network: 1Gbit/sec recommended due to backup performance considerations.
OS (Both 32-bit and 64-bit):
• Microsoft Windows 2008 R2
• Microsoft Windows 7
Software
• Microsoft SQL Server 2005 or 2008 (SQL 2005 Express is included in the setup)
• Microsoft. NET Framework 2.0 SP1 (included in the setup)
• Microsoft PowerShell 2.0 or later
INSTALLING VEEAM BACKUP AND REPLICATION SERVER
1. Run previously downloaded Veeam Backup and Replication setup file. The setup wizard appears.
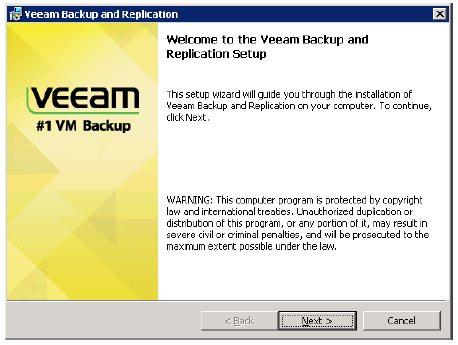
2. Click Next to continue.
3. Read and accept the License Agreement.
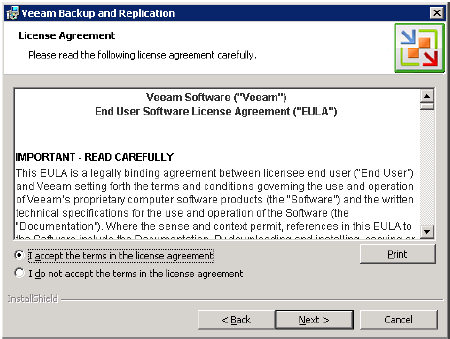
4. Click Next to continue.
5. To apply the license file, click Browse… and select it from your file list.
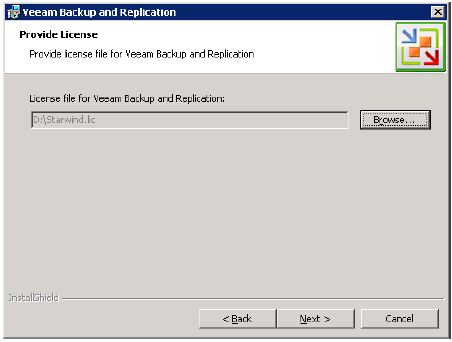
6. Click Next to continue.
7. Specify the installation folder for each Veeam component.
Note: At least 256 MB is required to install Veeam Backup & Replication 6.0, at least 51 MB to install Veeam Backup Catalog, and at least 916 Kb to install Veeam Backup PowerShell snap-in.
Use Space to estimate how much free space is available on your local drives.
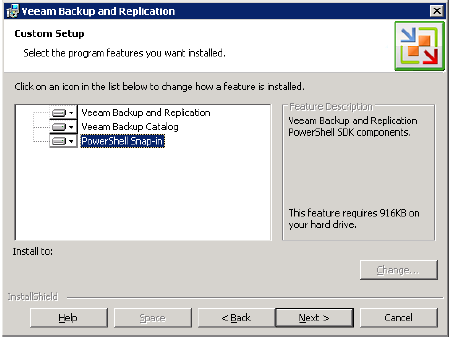
8. Click Next to continue.
9. Select an SQL Server instance where Veeam Backup database should be created, or install a new SQL Server instance. To use an existing instance of SQL Server, select the appropriate option. If the SQL Server is not installed, select the Install new instance of SQL Server option.
Note: The user account under which the installation is being performed should have sufficient rights to log on to the selected SQL Server instance and create a database.
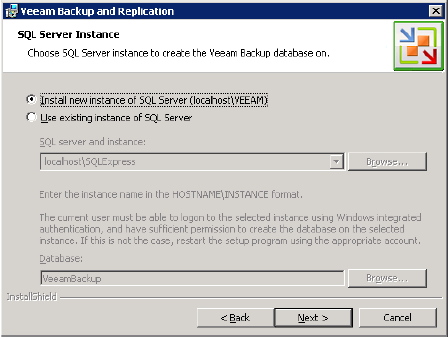
10. Click Next to continue.
11. Enter the administrative credentials of the account under which you want to run the Veeam Backup Service. The user name should be specified in the DOMAIN\USERNAME format. If necessary, change the number of TCP port. By default, Veeam Backup & Replication services use port 9392.
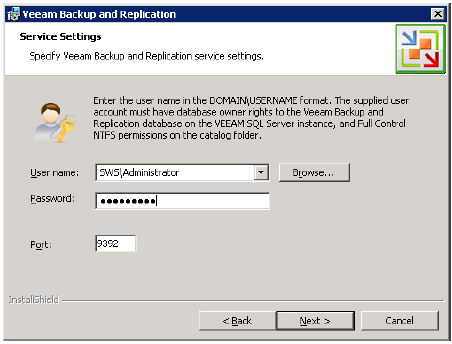
12. Click Next to continue.
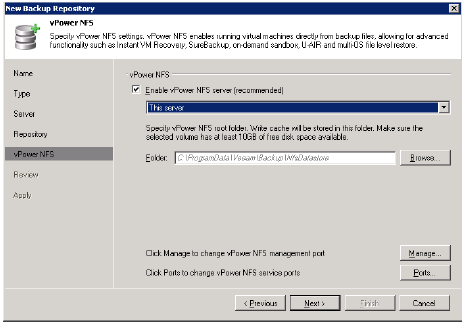
13. Specify the name and destination for catalog folder where index files should be stored. If necessary, change the number of port to be used by Veeam Backup Catalog components. By default, port 9393 is used. In the vPower NFS section, specify the folder where instant VM recovery write cache will be stored. Please note that the selected volume should have at least 100 Gb of free disk space.
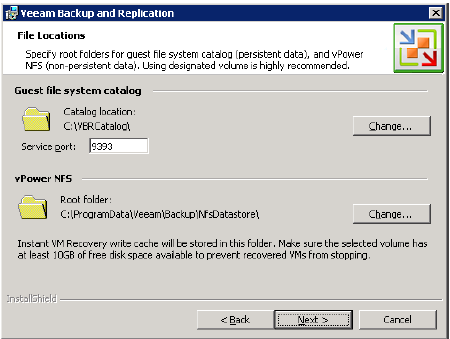
14. Click Next to continue.
15. Click Install to start the installation.
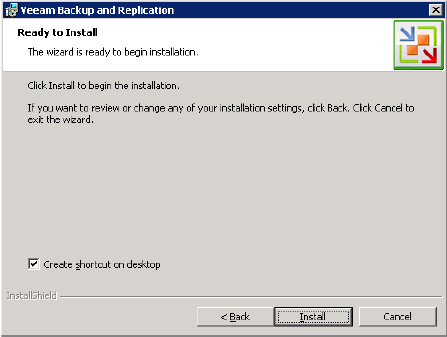
16. Once the installation is complete click Finish to close the wizard. To launch Veeam Backup & Replication click the relevant icon on your desktop.
CONNECTING STORAGE
1. Open Microsoft iSCSI Initiator: Start -> Administrative Tools -> iSCSI Initiator.
2. Go to the Discovery tab.
3. To add the StarWind server, click Discover Portal … and specify server IP address.
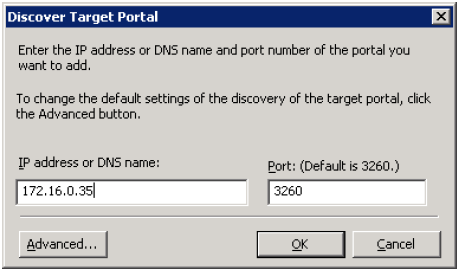
4. Click OK.
5. Switch to the Targets tab.
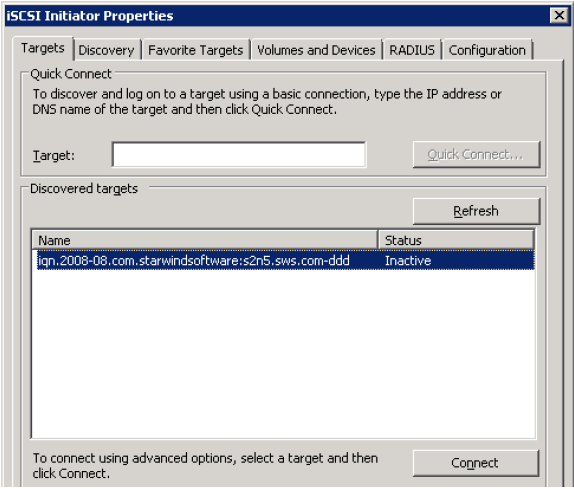
6. Clicking Connect to connect the targets.
7. Select the Add this connection to the list of Favorite Targets checkbox in the dialog window.
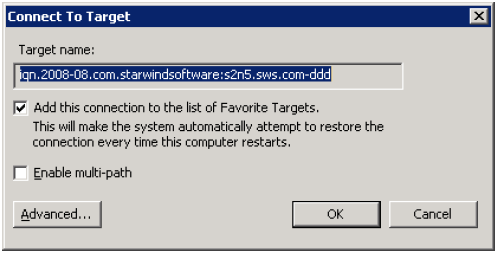
8. Click OK.
9. Once you have connected storage, start Server Manager to initialize and format it. Switch to the Storage->Disk Management, and find your disk in the volume list and right click it.
10. Select New Simple Volume… from shortcut menu and follow the instructions.
Note: It is recommended to format connected storage with the same block size as it was specified during deduplicated device creation.
Do not enable file and folder compression!
CREATING AND EXECUTING A BACKUP JOB
Adding a ESX/ESXi Server
1. Enter a full DNS name or IP address of the server and select the server type: ESX or ESXi host.
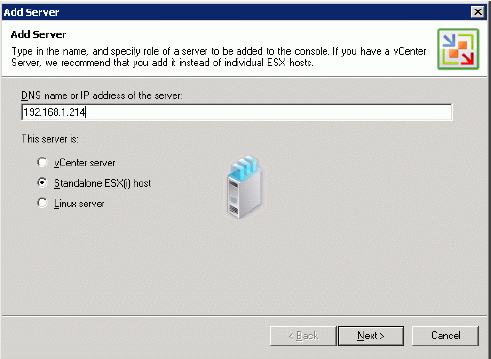
2. Click Next to continue.
3. Provide server administrator’s credentials (typically, default ESX host administrator name is “root”). If required, specify additional connection settings including web-service port number. Select Save password, if needed.
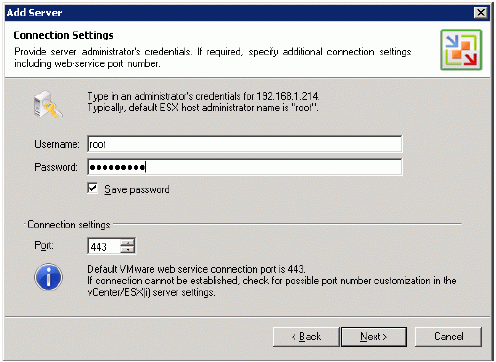
4. Click Next to continue.
5. Specify service console connection settings and adjust SSH port number if necessary. If you do not want to use the service console, clear the Use service console connection to this server checkbox and click Next. In this case, Veeam Backup & Replication will work in the agentless mode.
Note: The agentless mode may be activated in ESX server 3.5 and later versions. However, it is recommended to use the service console.
If you choose to use a non-root account that does not have sudo permissions on the ESX server, you can use the Non-root account options section to grant sudo rights to this account. Select the Elevate account to root checkbox to provide a non-root user with access to the added server. You can add the account to sudoers file automatically by selecting the Add account to the sudoers file automatically checkbox.
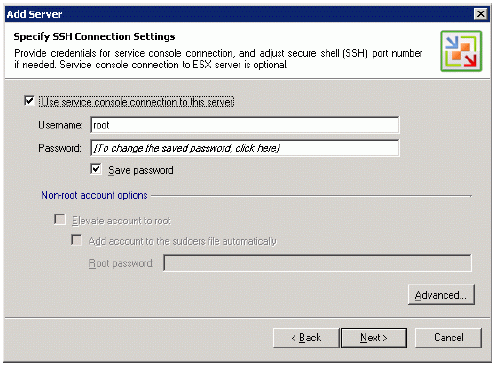
6. Click Next to continue.
7. To connect to the added ESX server after the wizard is closed select Connect when I click Finish.
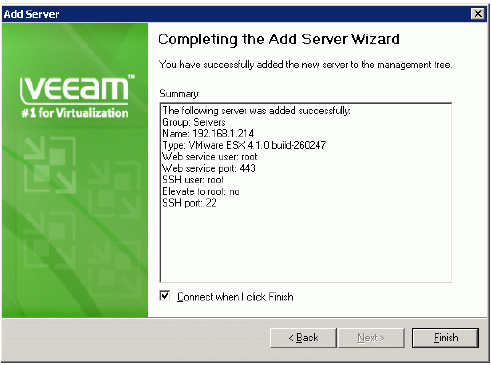
8. Click Finish to close the wizard.
Creating a New Repository
1. Open Veeam Backup & Replication window.
2. Right click the Backup Infrastructure item and click Add Backup Repository…
3. Specify the repository name and description.
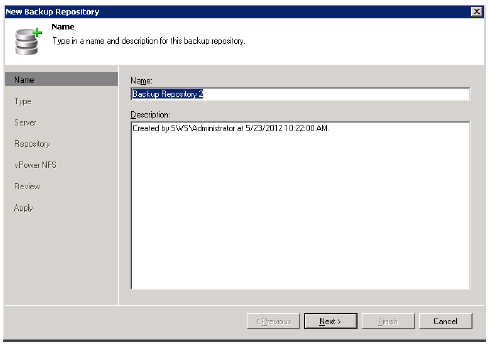
4. Click Next to continue.
5. Select Microsoft Windows server as a backup repository type.
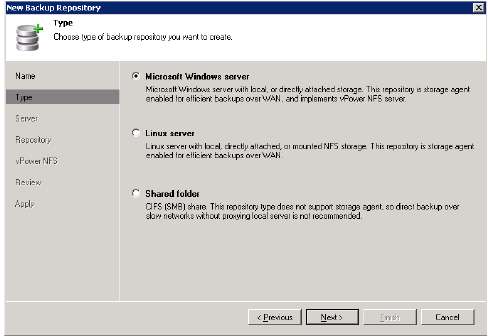
6. Click Next to continue.
7. Select a repository server or add new one.
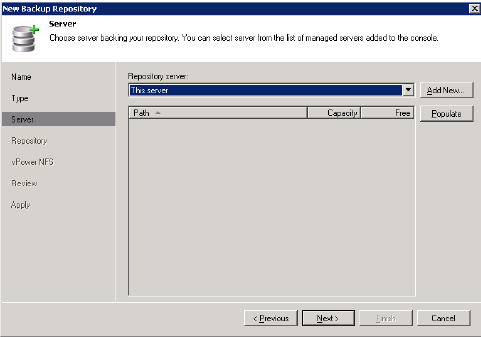
8. Click Next to continue.
9. Specify the path to the directory where backup files should be stored. Optionally, modify the Load control settings.
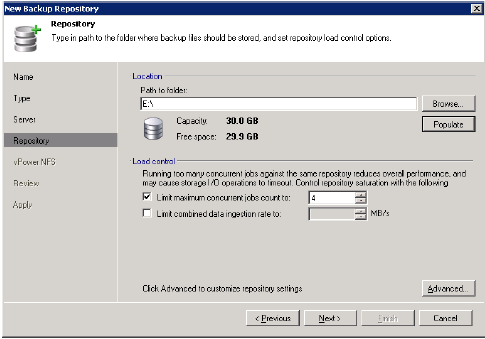
10. Click Next to continue.
11. Specify vPower NFS settings.
12. Click Next to continue.
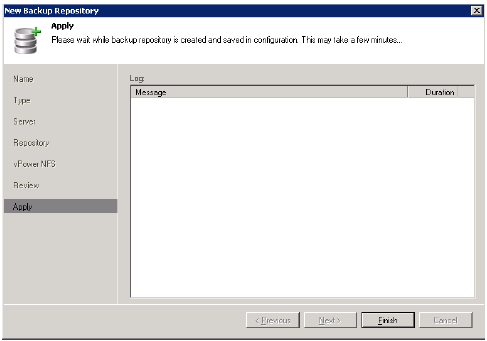
13. Review the selected settings.

14. Click Next to continue.
15. Click Finish.
Creating a Backup Job
1. To run the New Backup Job wizard take one of the following action:
• Click Backup on Veeam Backup and Replication toolbar.
• Select Backup -> Backup… from the main menu.
• Click the Jobs item in the management tree, right click anywhere on the blank area of the right pane and select Backup….
• Right-click the Backups item in the management tree and select Backup… from the shortcut menu.
2. Enter a name and description of the created job in the wizard window.

3. Click Next to continue.
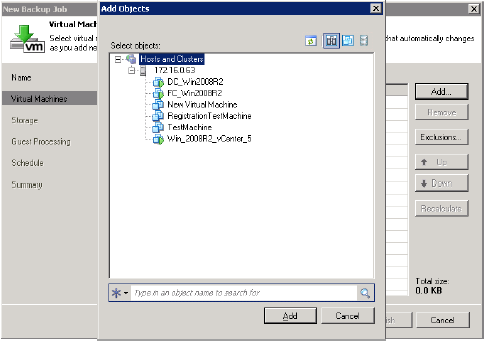
4. Select an individual VM or a VM container you want to back up. Click Add… to browse to needed VMs and VM containers.
5. Select the VMs and click Add.
6. Specify storage for the backup files produced by this job, and additional job settings. From the Backup repository list, select a backup repository where created backups should be stored.

7. Click Advanced… to specify advanced options for a created backup job.
8. In Backup settings select the Incremental method.

9. Switch to the Storage tab. Select Local target.
10. Clear the Enable inline deduplication checkbox to disable de-duplication.
11. Select None in the Compression section.
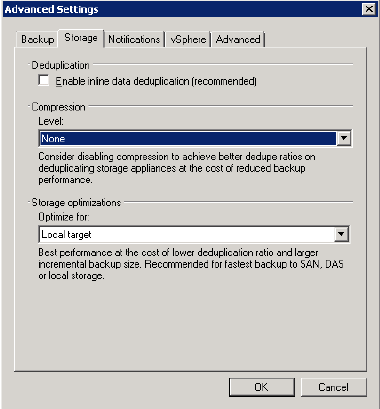
12. Click OK to close Advanced settings.
13. Click Next to continue.
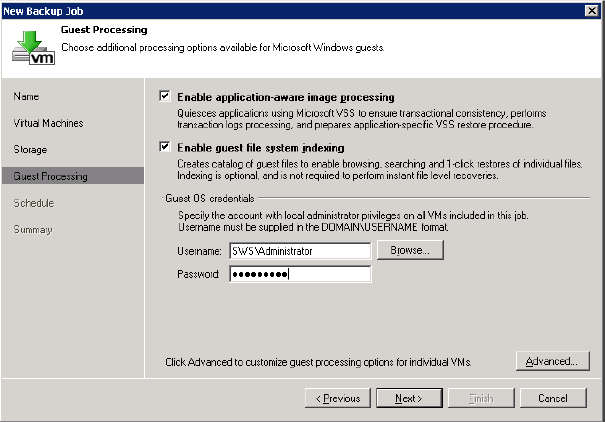
14. To create a transactionally consistent backup ensuring successful recovery of VMs, select Enable application-aware image processing (recommended). To index guest files in a backed up VM, select Enable guest file system indexing. In the Guest OS credentials section, specify guest operating system credentials for a target VM that are required to deploy the agent. Please note that the user name must be supplied in the DOMAIN\USERNAME format.
15. Click Next to continue.
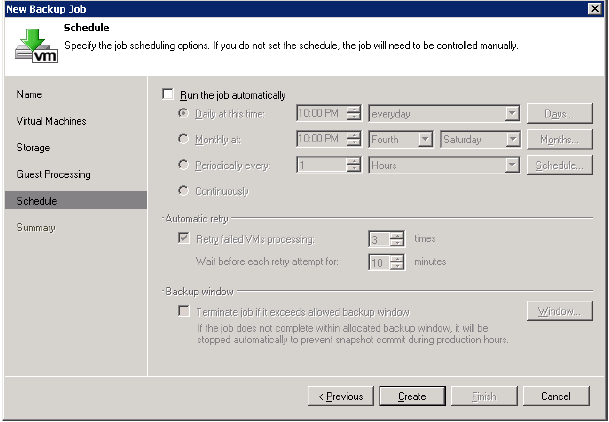
16. To specify the job schedule, either select Run the job automatically, or perform backup jobs manually, when needed. For automatic backup jobs specify time and periodicity.
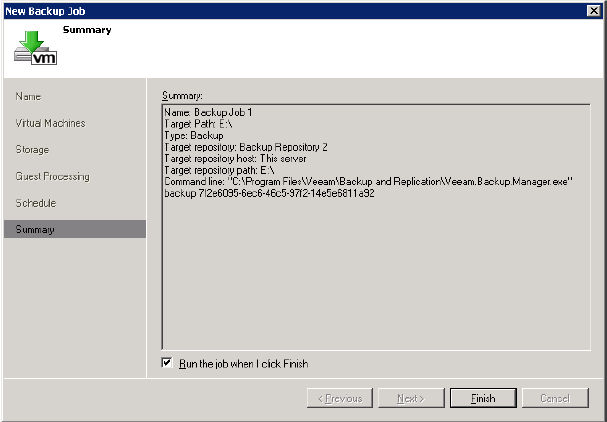
17. After you have specified schedule settings, click Create.
18. Select Run the job when I click Finish to start the created job right after you complete working with the wizard. Click Finish.
Executing a Backup Job
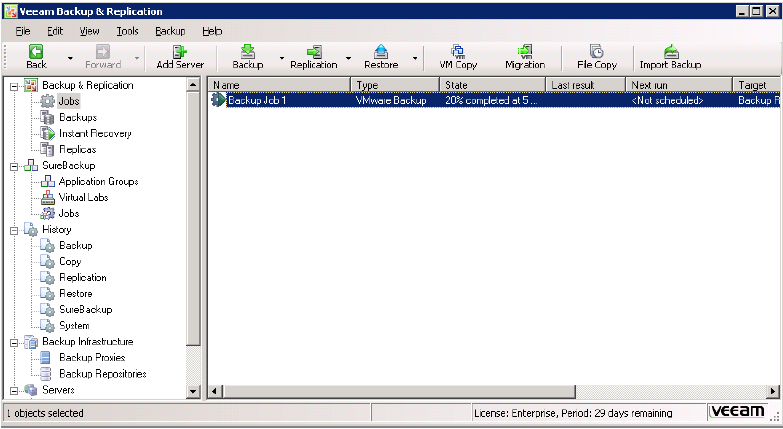
1. To run previously created backup job manually right click it and select Start Job.

2. If successful you will see the backup job progress.
CONCLUSION
Implementation of StarWind Global Deduplication significantly reduces storage space requirements of Veeam backup files. In this particular case, the backup job must have occupied 22.2 GB (see the left screenshot). Since, these files were backed up for the first time, the full backup was performed. Nevertheless, owing to Deduplication, storage space consumption was reduced by 30 % (see the right screenshot).
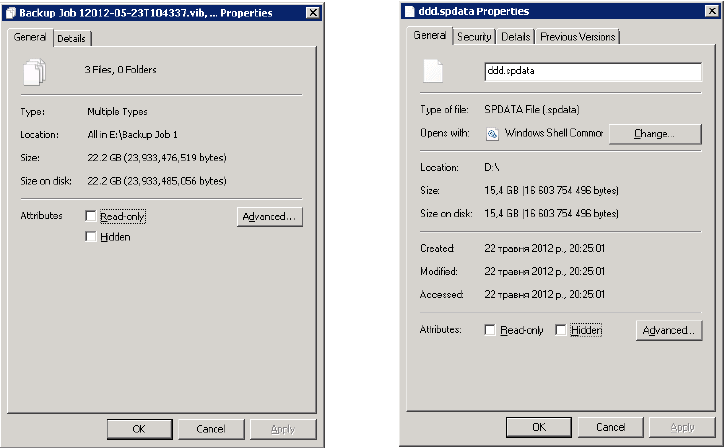
Note: StarWind Global Deduplication efficiency grows with the number of backups and increments performed and has a potential to save up to 90% of disk space.