
Introduction
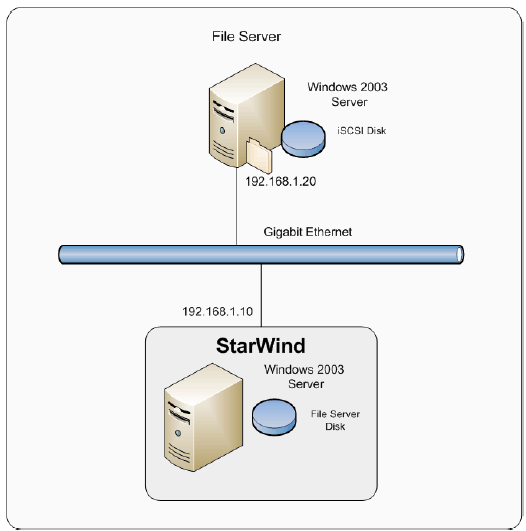
This document will help you to configure the IP security policy on Windows 2003 Server for achieving secure connection between Target and Initiator sides. The diagram below illustrates the reference configuration used throughout this document.
Configuring iSCSI Storage
Launch the StarWind console selecting Start -> All Programs -> StarWind Software -> Starwind. After the console is launched its icon appears in the system tray. Double click the icon with the left mouse button or single click it with the right mouse button and select Start Management menu item from the pop-up menu. From the StarWind Servers tree please select the server you want to connect to. Press Connect button to continue. You will be prompted to enter the login and password. Default ones are: root, starwind. You can always change them later.
After you have successfully connected to the StarWind service press the Add Target button to continue.
In the wizard that appears please specify target name. Under this target name, the device will be declared to the iSCSI initiators connecting to the StarWind over an IP network.
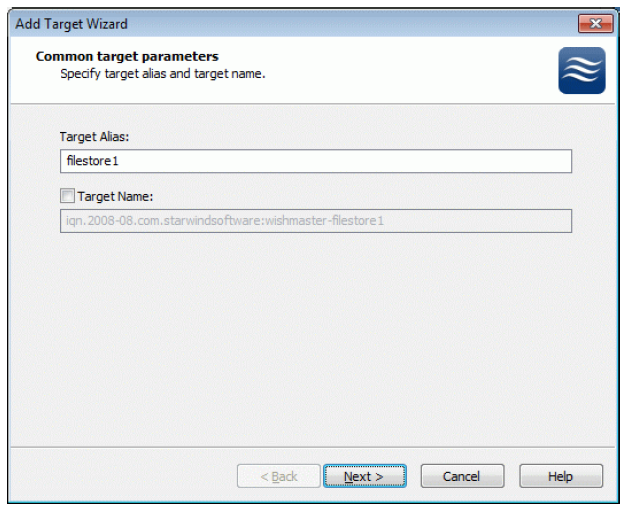
Press the Next button to continue.
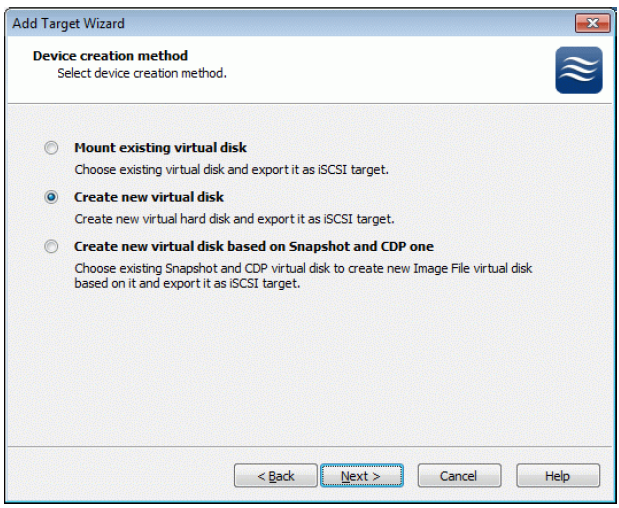
Select Image File device.
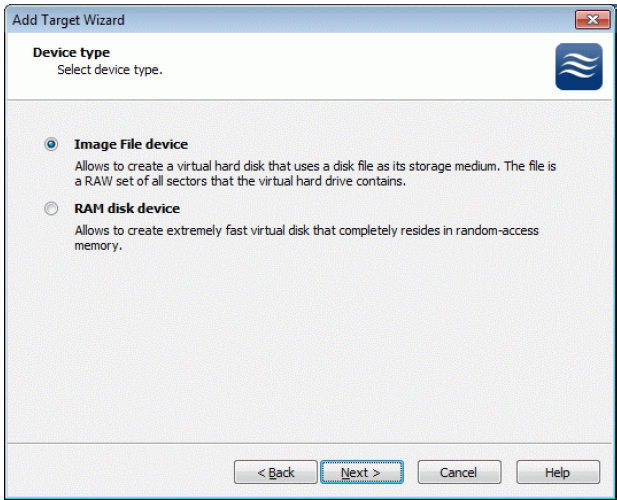
Press the Next button to continue.
Select Create new virtual disk to create a new hard disk image or Mount existing virtual disk to mount an existing image that you’ve prepared before.
Press the Next button to continue.
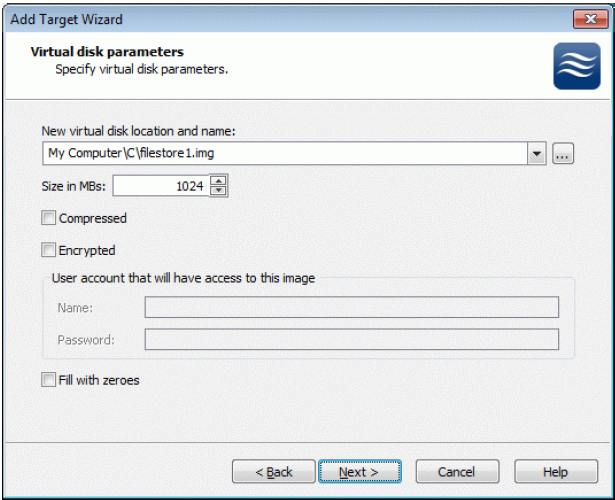
If you have decided to create a new virtual disk, specify the location and the name of the virtual disj you wish to be created. The virtual disk size is specified in megabytes. Refer to the online help for details regarding additional parameters (Fill with zeroes, Compressed and Encrypted).
Press the Next button to continue.
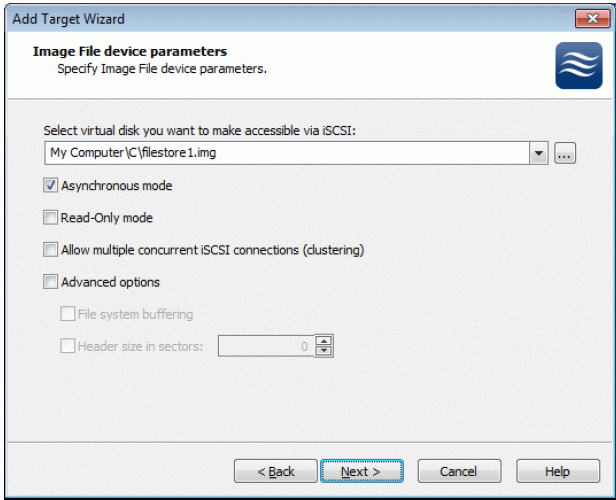
An Image File device can have additional parameters. Refer to the online help for details regarding the additional parameters (Asynchronous mode, Allow multiple connections (clustering), Read-Only mode and Advanced options).
Press the Next button to continue.
Check if all of the device parameters are correct. Press the Back button if any changes are required.
Press the Next button to continue.
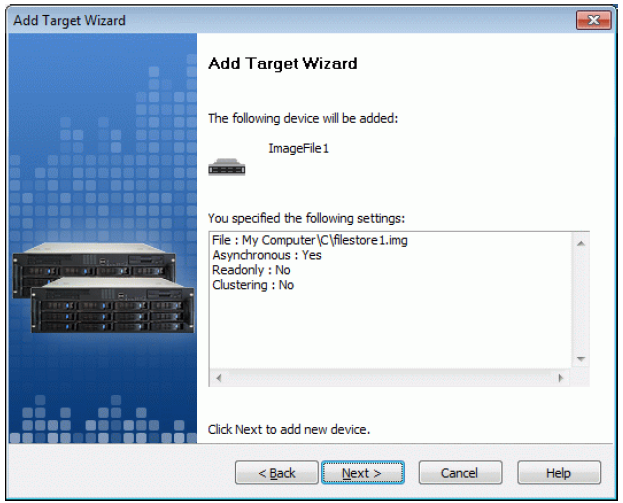
The information about the recently created device is displayed on the last wizard page (see image below).

Press the Finish button to close the wizard.
Server-Side Configuration, Creating New Ip Security Policy
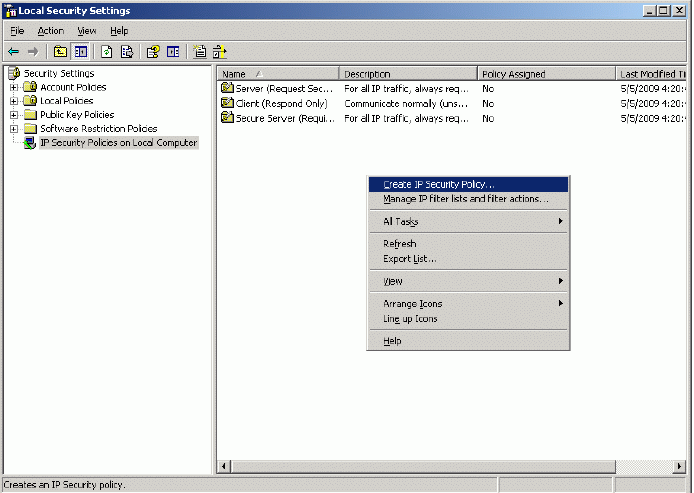
Launch the Local Security Settings management console selecting Start -> Control Panel -> Administrative tools -> Local Security Policy. Local Security Settings management console appears. Switch to the IP Security Policies on Local Computer tree item.
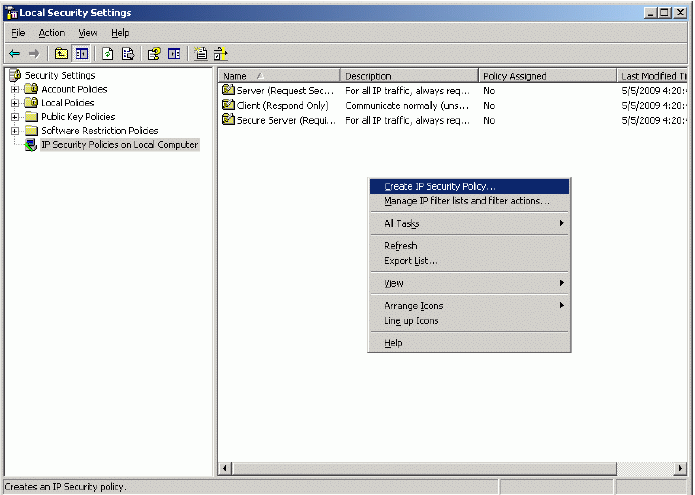
Click the right mouse button and select Create IP Security Policy option.
IP Security Policy Wizard appears.
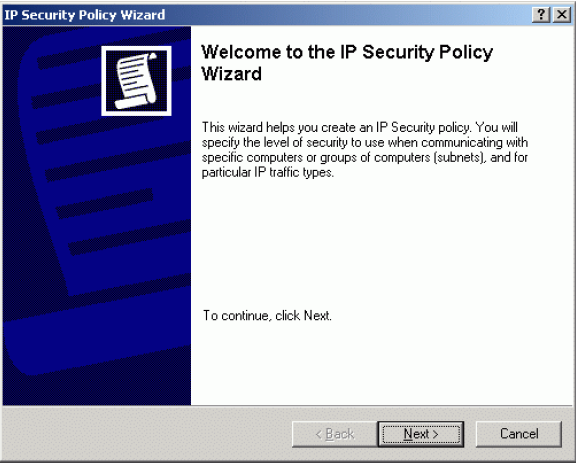
Press the Next button to continue.
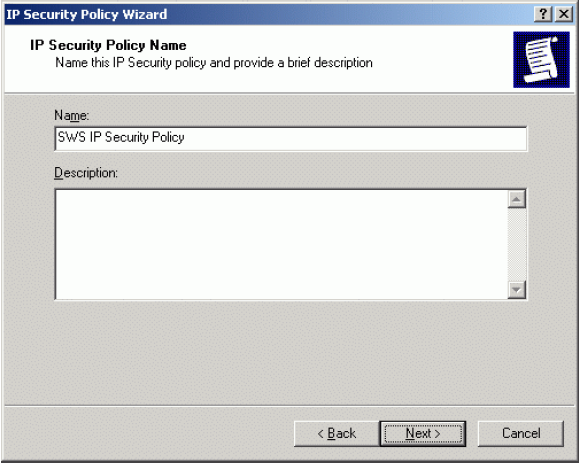
Specify the Name of the new IP Security Policy and optionally provide a brief description of it.
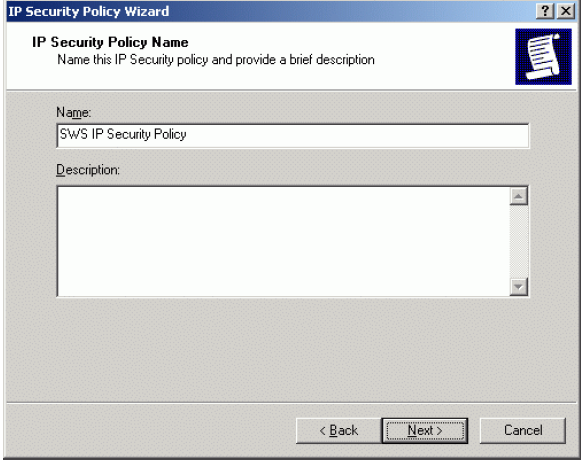
Press the Next button to continue.
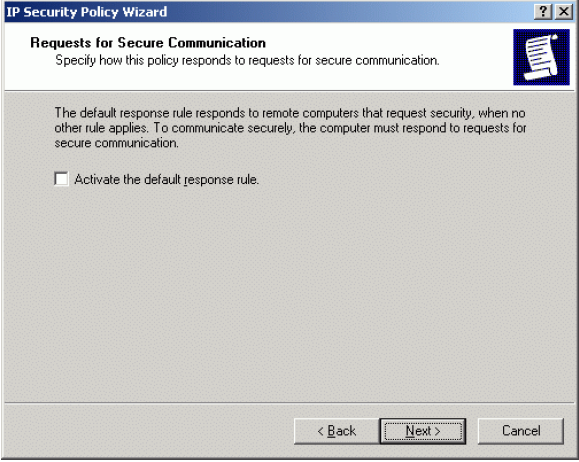
Uncheck the Activate the default response rule option.
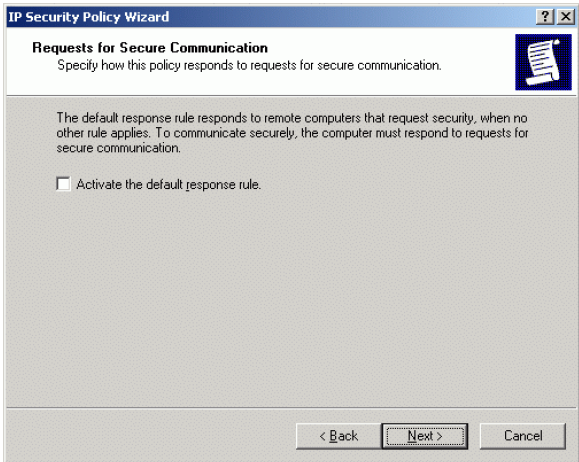
Press the Next button to continue.
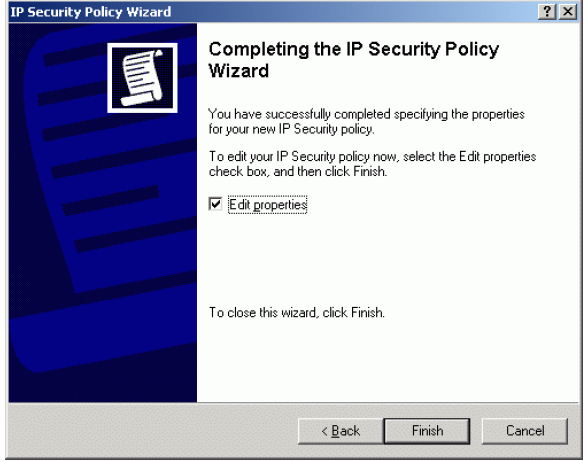
Set the Edit properties option.
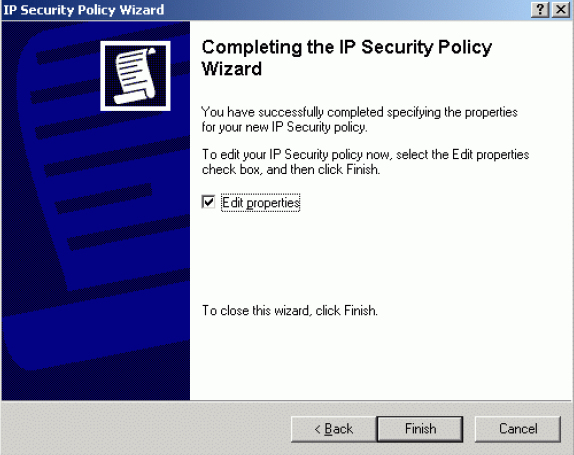
Press the Finish button.
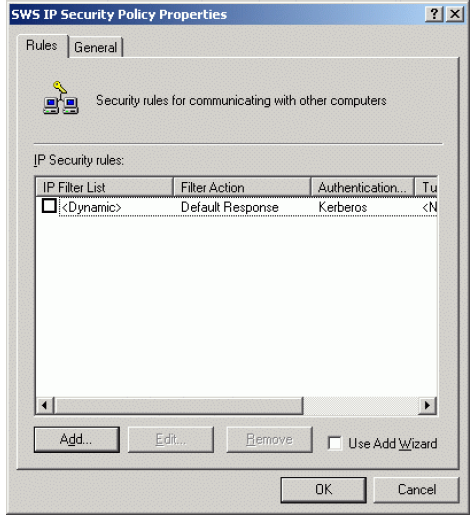
On the SWS IP Security Policy Properties window that appears uncheck the Use Add Wizard option.
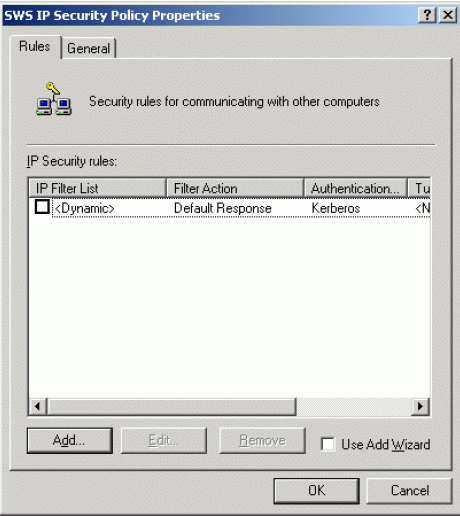
Press the Add button on the Rules tab.
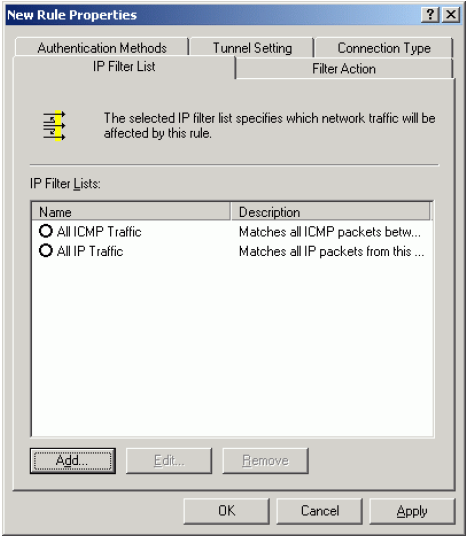
New Rules Properties window appears.
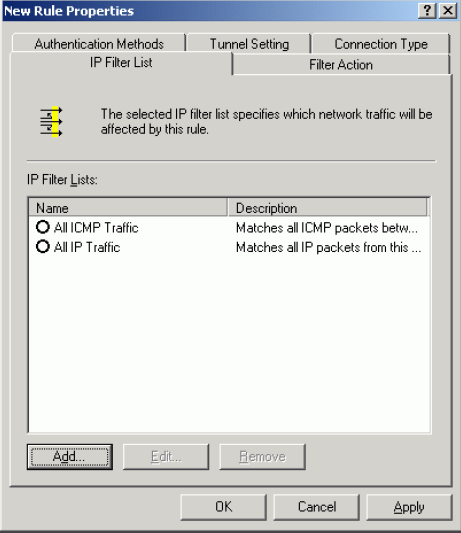
Press the Add button on the IP Filter List tab.
IP Filter List window appears. Uncheck the Use Add Wizard option.
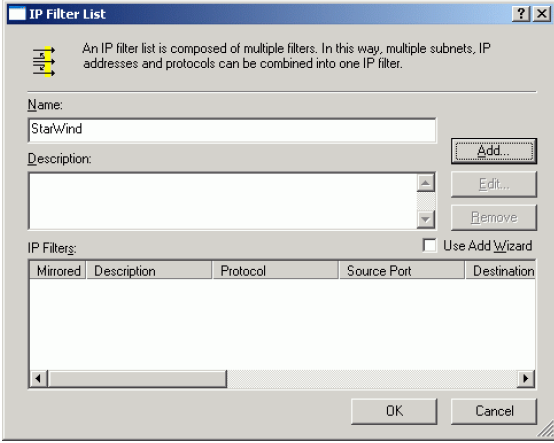
Specify the Name of IP Filter and optionally a brief description and press Add button.
Filter Properties window appears.
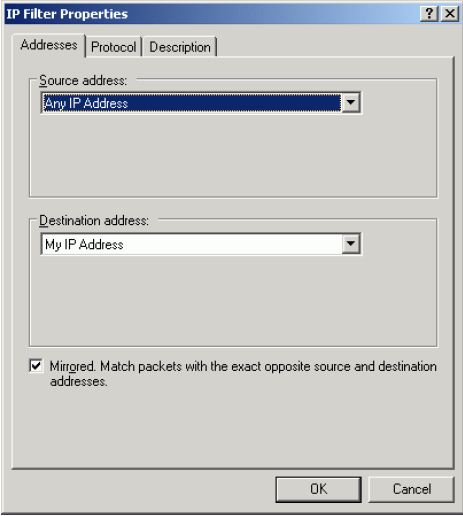
Specify Source address and Destination address. To delimit allow connections more strictly in the Source address field you can specify IP address of the separate host or subnet.
Switch to the Protocol tab.

Specify protocol (TCP in our case) and port number (3261) and press OK. This
filter is for StarWind management console connections.
New rule appears in the list.
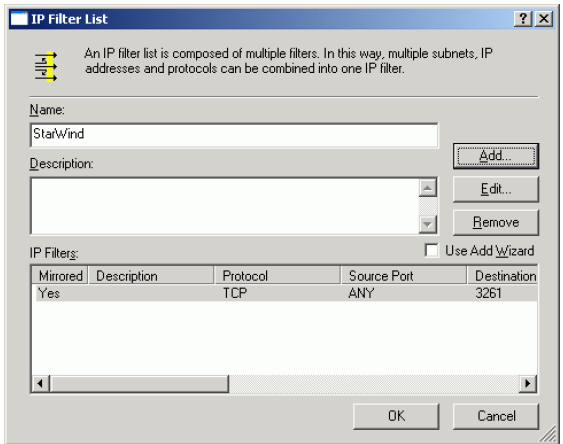
Click the Add button again.
Filter Properties window appears.
Specify Source address and Destination address.
Switch to the Protocol tab.

Specify protocol (TCP in our case) and port number (3260) and press OK. This filter is for StarWind service connections (iSCSI traffic itself).
One more new rule appears in the list.
Press the OK button to continue.
We return to the IP Filter List tab again.
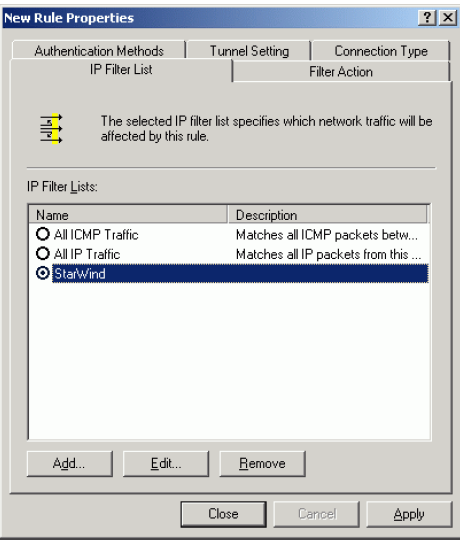
Select newly created filter StarWind from the list and switch to the Filter Action tab.
On the Filter Action tab select Require Security option from the list.
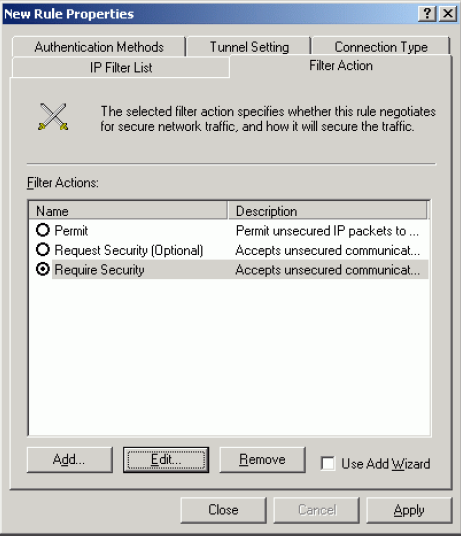
Press the Edit button to continue.
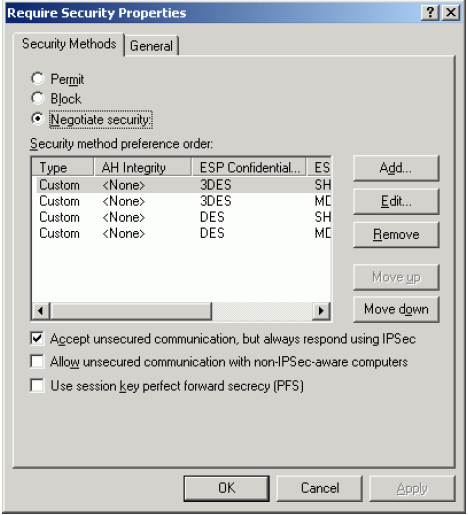
Require Security Properties window appears. Select Negotiate security, specify Security method preference order and set Accept unsecured communication, but always respond using IPSec option.
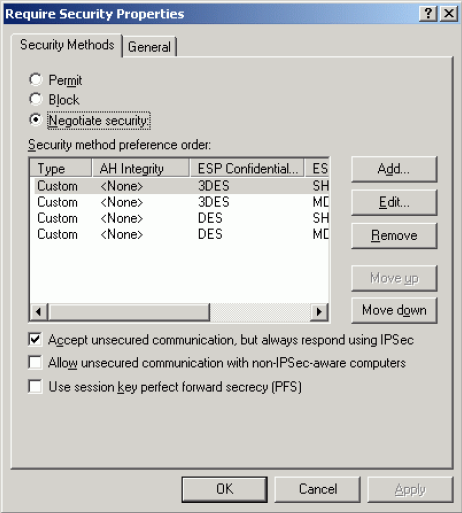
Press the OK button to continue.
Switch to the Connection Type tab.
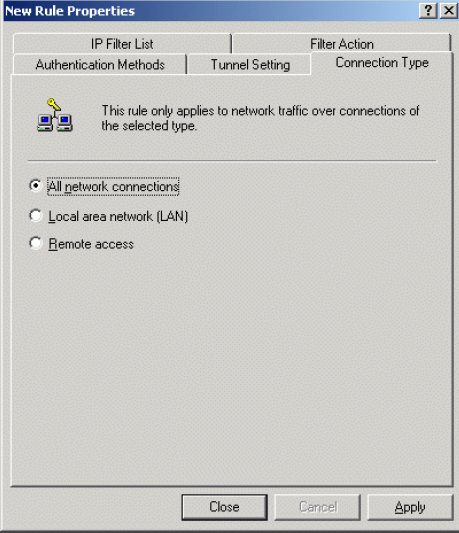
Select All network connections.
Switch to the Tunnel Setting tab.
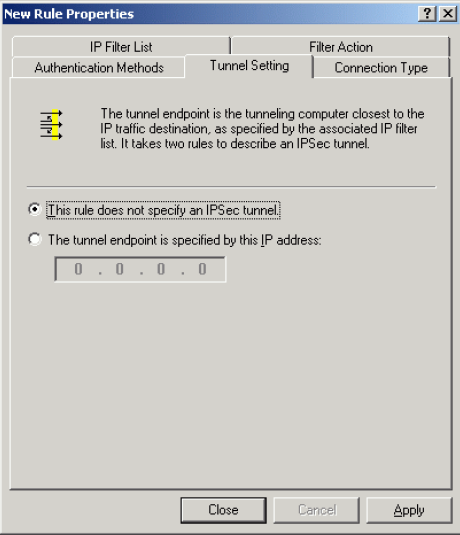
Select This rule does not specify an IPSec tunnel.
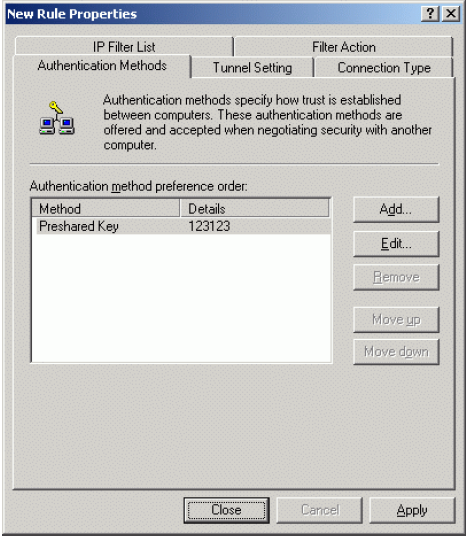
Switch to the Authentication Methods tab.
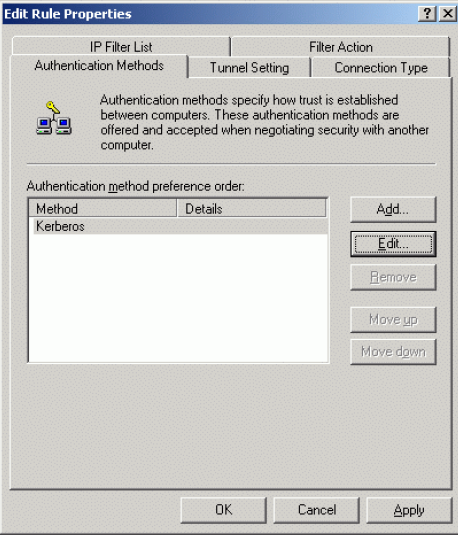
Press the Edit button to continue.
Edit Authentication Method Properties window appears. Select Use this string (preshared key) option and type in the preshared key in the field.
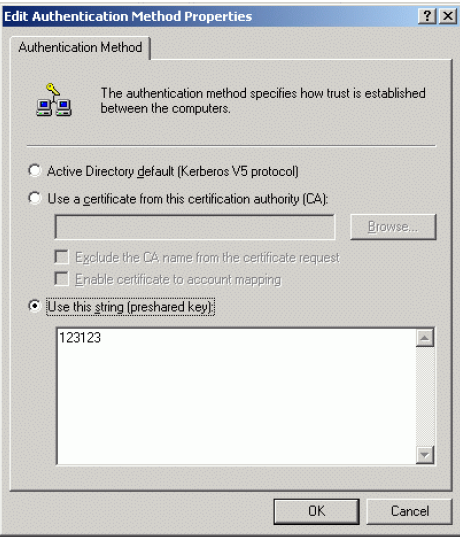
Press the OK button to continue.
We return to the Authentication Methods tab.
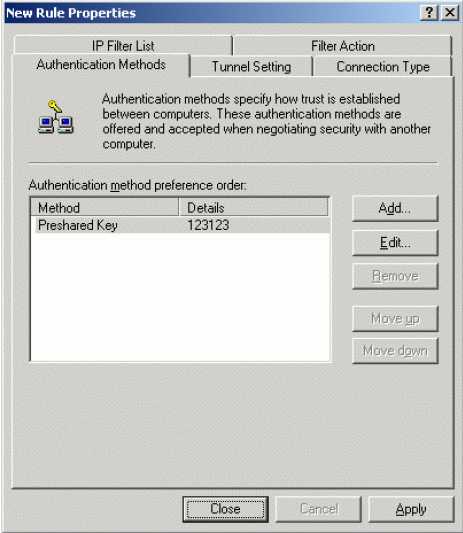
Press the Close button to continue.
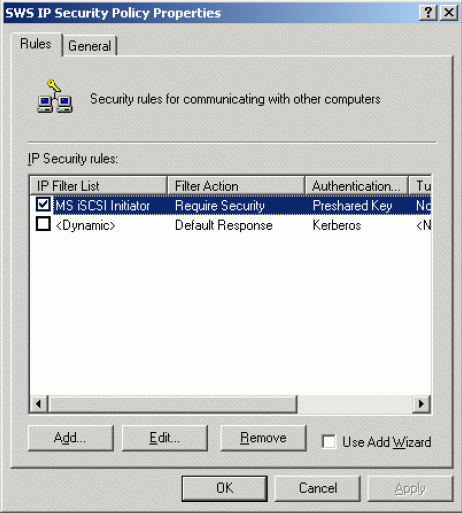
Select StarWind from the list of available IP Security rules.
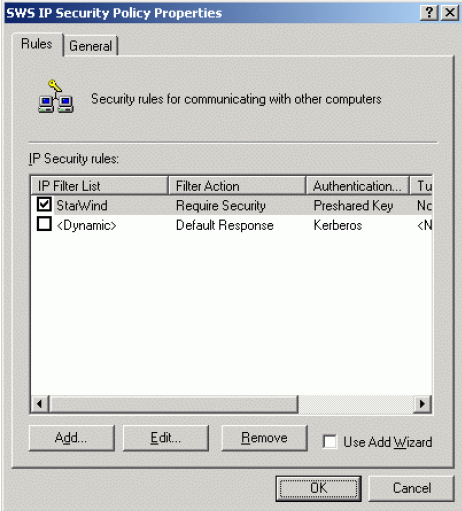
Press the Close button.
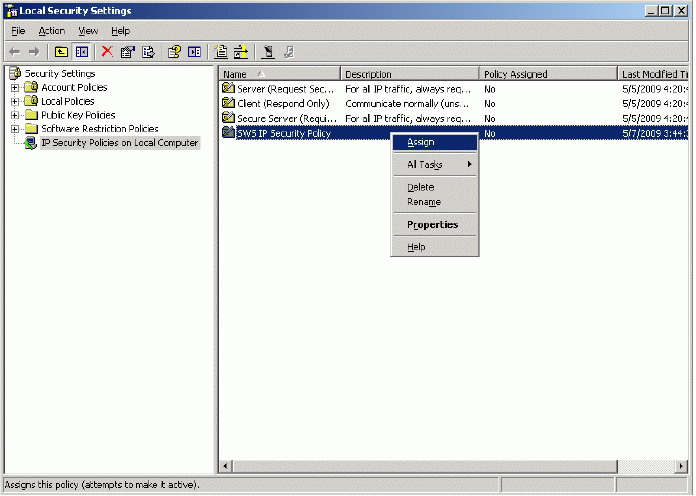
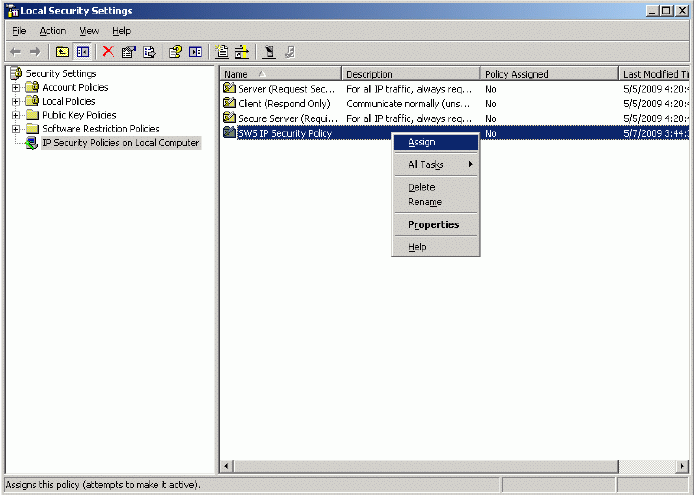
Assign recently created policy by pressing right mouse button and selecting Assign option.
Client-Side Configuration, Creatng New Ip Security Policy
Launch the Local Security Settings management console selecting Start -> Control Panel -> Administrative tools -> Local Security Policy. Local Security Settings management console appears. Switch to the IP Security Policies on Local Computer.
Click the right mouse button and select Create IP Security Policy option.
IP Security Policy Wizard appears.

Press the Next button to continue.
Specify the Name of the new IP Security policy and optionally provide a brief
description.
Press the Next button to continue.
Uncheck the Activate the default response rule option.
Press the Next button to continue.
Set the Edit properties option.
Press the Finish button.
On the SWS IP Security Policy Properties window that appears uncheck the Use Add Wizard option.
Press the Add button on the Rules tab.
New Rules Properties window appears.
Press the Add button on the IP Filter List tab.
IP Filter List window appears. Uncheck the Use Add Wizard option.
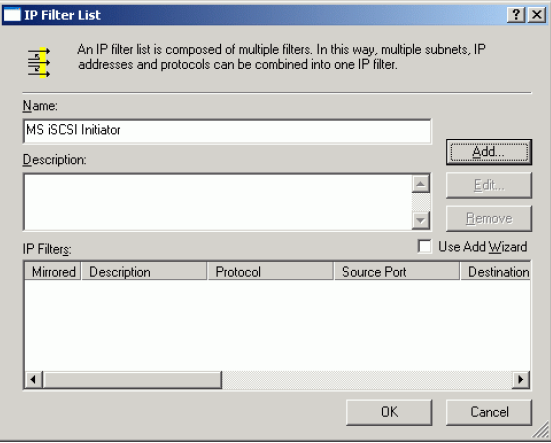
Specify the Name of IP Filter and optionally a brief description and press Add
button.
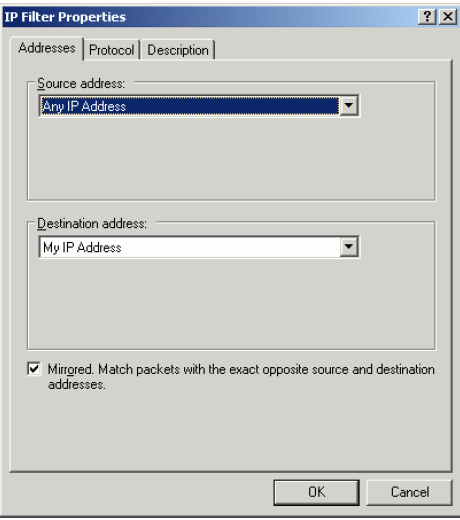
IP Filter Properties window appears.
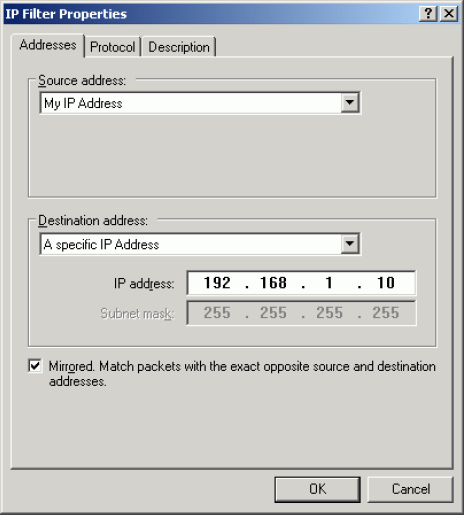
Specify Source address and Destination address. Destination address is the IP address of the StarWind server you wish to connect to.
Switch to the Protocol tab.
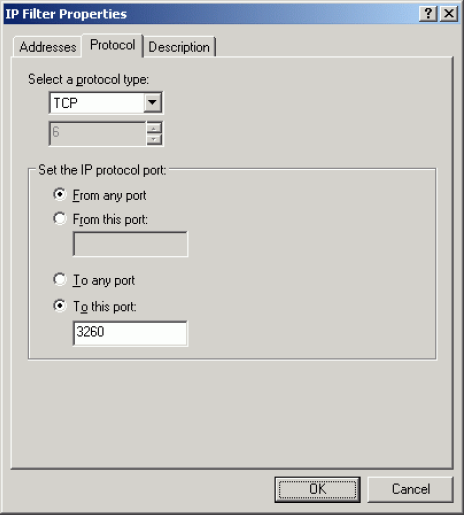
Specify protocol (TCP in our case) and port number (3260) and press OK. This filter is for StarWind service connections (iSCSI traffic itself).
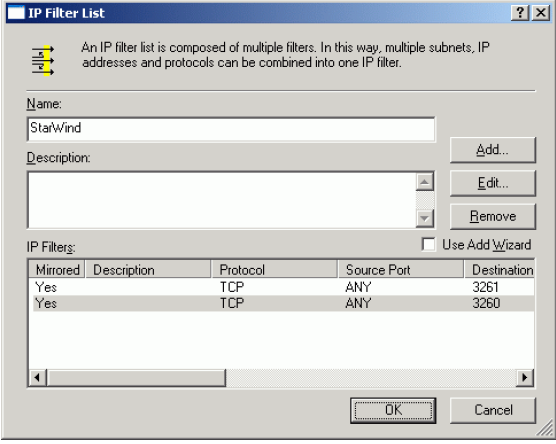
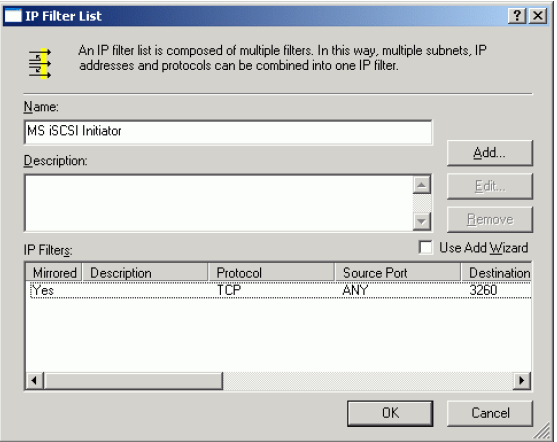
New rule appears in the list.
Press the OK button.
We return to the IP Filter List tab again.
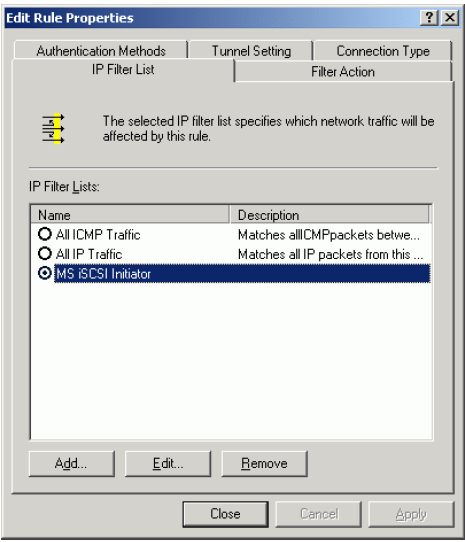
Select newly created filter MS iSCSI Initiator from the list and switch to the Filter Action tab.
On the Filter Action tab select Require Security option from the list.

Press the Edit button to continue.
Require Security Properties window appears. Select Negotiate security, specify Security method preference order and set Accept unsecured communication, but always respond using IPSec option.
Press the OK button to continue.
Switch to the Connection Type tab.

Select All network connections.
Switch to the Tunnel Setting tab.
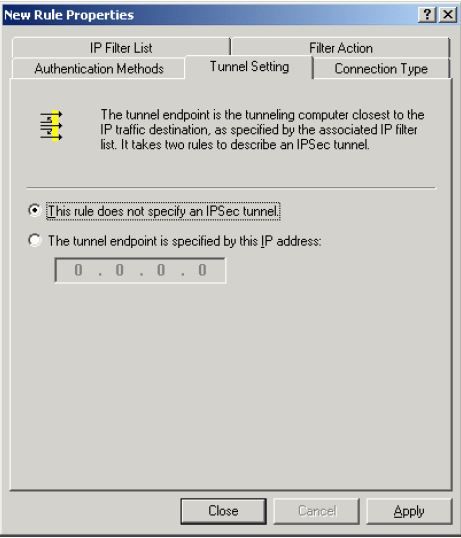
Select This rule does not specify an IPSec tunnel.
Switch to the Authentication Methods tab.
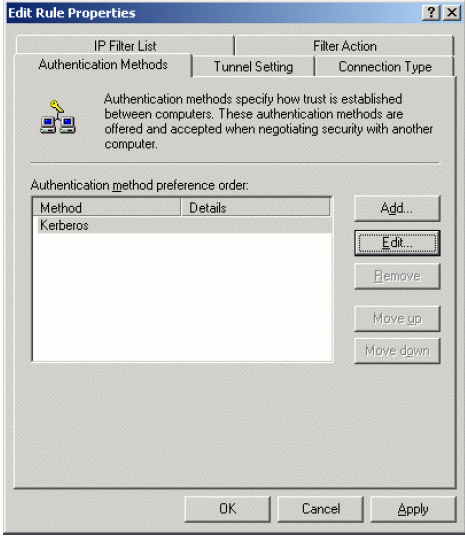
Press the Edit button to continue.
Edit Authentication Method Properties window appears. Select Use this string (preshared key) option and type in the preshared key in the field (the same one as in StarWind IPSec policy).
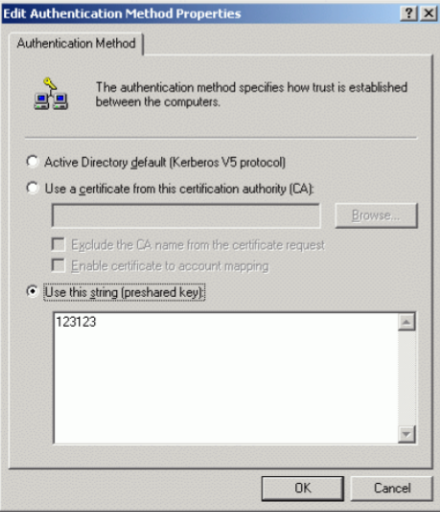
Press the OK button to continue.
We return to the Authentication Methods tab.
Press the Close button to continue.
Select MS iSCSI Initiator from the list of available IP Security rules.
Press the OK button.
Assign recently created policy by pressing right mouse button and selecting Assign option.
Connecting to the Target Using MS iSCSI Initiator
Launch the MS iSCSI Initiator by selecting Start -> All Programs -> Microsoft iSCSI Initiator -> Microsoft iSCSI Initiator. Switch to the Discovery tab. Here you can specify the computer with the StarWind installed or iSNS server.
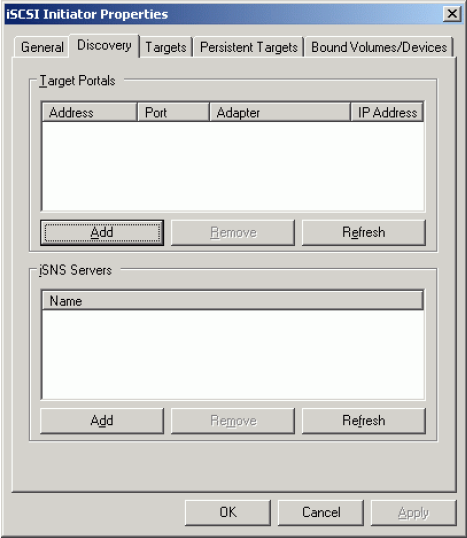
Press the Add button to continue.
In the appearing dialog type in the IP address of the computer with StarWind installed and port of that machine
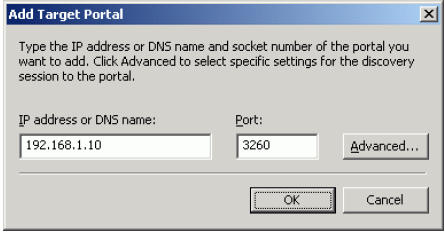
Press the OK button to continue.
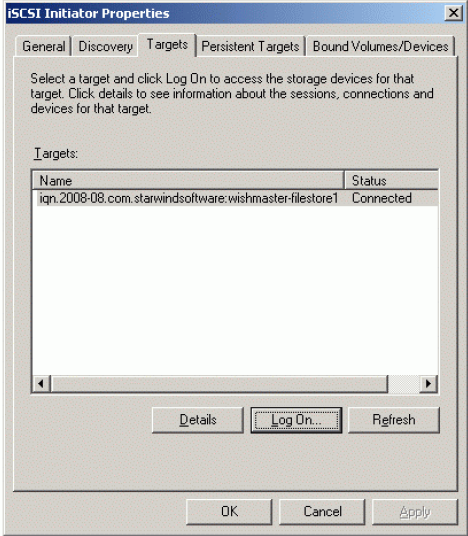
Switch to the Targets tab.
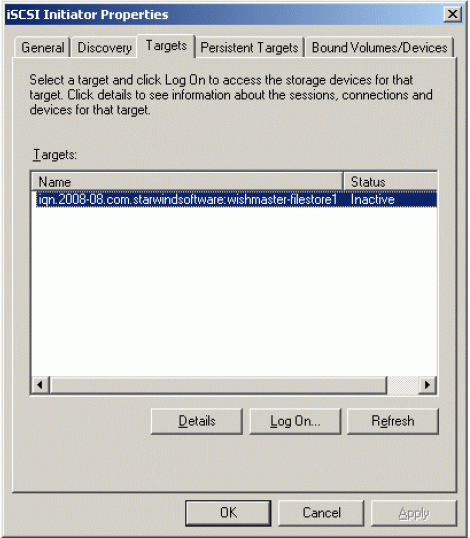
Select the device you have recently shared and press Log On to continue.
Log On to Target dialog appears.
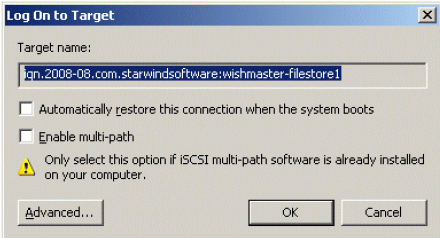
Check any additional parameters of the target you wish to connect. For example Automatically restore this connection when the system boots checkbox.
Press the OK button to logon to the StarWind.
The information about the connection status is displayed on the Targets tab (see the image below). If the logon is successful the new iSCSI device will appear in the system after a few seconds.
Press the OK button to exit initiator management console.